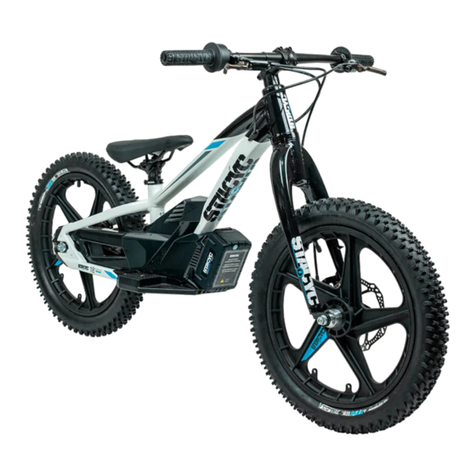
STACYC 16EDRIVE User manual

ORIGINAL
INSTRUCTIONS
STACYC, INC.
6795 CORPORATION PKWY
SUITE 200
FORT WORTH, TX 76126 Part No. 94000762
Revision 2021-01
STACYC model 16EDRIVE
STACYC model 12EDRIVE

P a g e | 2P a g e |
Introduction ....................................................................................................................
Warnings/Cautions/Notes/Intended Use ...............................................................
Specication Drawings
Bike Specications ..........................................................................................
Battery Specications .....................................................................................
Throttle Components & Features .............................................................................
LED Information Chart .................................................................................................
Pre Ride Inspection & Checklist ..................................................................................
Battery & Charger
Charging The Battery ......................................................................................
Battery Installation ...........................................................................................
Battery Removal ..............................................................................................
Throttle & Power Modes
Throttle Oporation ..........................................................................................
Changing Power Modes ................................................................................
Programming Mode Activation .....................................................................
The Starting Process .....................................................................................................
Approaching / Remounting ...........................................................................
Loading / Unloading .......................................................................................
Repair & Maintenance ..................................................................................................
Error Codes ....................................................................................................................
Throuble Shooting Guide ............................................................................................
Warranty ..........................................................................................................................
Declaration of Conformity Copy
12 EDRIVE ........................................................................................................
16 EDRIVE ........................................................................................................
3
4
7
8
9
10
11
12
13
13
14
15
17
18
19
19
20
24
24
26
27
28
TABLE OF CONTENTS:

P a g e | 3
INTRODUCTION:
Congratulaons on your purchase and welcome to the Pit Crew. A STACYC™ is the
world’s rst patented Electric Powered Balance Bike. A STACYC™ was designed to be a
non-inmidang way for young children to learn and enjoy riding on two wheels. And,
while it is meant to be a condence-inspiring developmental tool, it is a serious piece
of machinery and must be used per the guidance in this manual and the on-product
labels to maximize user safety. As the purchaser of this machinery, you are responsi-
ble to make sure it is operated in the intended environment, under the supervision
and control of an adult that is familiar with the design, the operaon, and this manu-
al. Reminder: Always ensure riders are wearing a helmet and proper footwear.
The STACYC™ was designed to allow children to gain the skills of riding two-wheeled
vehicles at an earlier stage than previously available to them. STACYC™ will assist
them through the awkward ages and phases of physical development where the
design of a regular, pedal-operated bicycle does not allow for a low seat height that
their leg to torso rao requires. The design of a STACYC™, combined with the duraon
and distance it allows, provides children with thousands of hours of seat me, during
their formave years that would be otherwise unaainable with a regular “kids” sized
cycle. Thus, eecvely bridging the gap between learning to walk and becoming a
two-wheeled cycle operator. While all children will learn at dierent rates and have
dierent capabilies, a STACYC™ can aid in their development. There are essenally
two developmental phases your child will experience on a STACYC™: push bike mode
and powered mode. If your child can walk, they can begin to ride in the non-pow-
ered, push-bike mode. This allows them to get acquainted with the controls and body
posioning. It is the responsibility of the parent/owner to assess the familiarity and
ability of each child as they progress through the process. And, please remember it is
not a compeon. The process is about development and enjoyment. Once your child
is procient in coasng and braking, and comprehends the throle funcon, they
can begin the powered modes of the process. The ability of the powered modes to
prolong the enjoyment, connue the development, and extend the ride, will inspire
condence for a child who has only been walking for only a short me.
STACYC™ will take your child and you to places you did not imagine were possible.
However, before you and your child depart, please be sure to check and obey all local
laws. STACYC™ balance bikes are designed for o-road use and are meant to be ridden
where all pertaining laws are followed, and permissions are given.
Ride Sooner, Ride STACYC.

P a g e | 4P a g e |
PLEASE READ MANUAL CAREFULLY BEFORE OPERATING
We care about the safety and comfort of our customers.
This manual will guide you through the proper techniques in operang your cycle.
For any addional informaon, please visit:www.STACYC.com
Harley-Davidson® Iron e12 and Iron e16
STACYC™ model 12EDRIVE and 16EDRIVE
Read and understand this enre manual before allowing a child to use this product.
NOTE: Manual illustraons are for demonstraon purposes only. Illustraons may
not reect exact appearance of actual product. Specicaons are subject to change
without noce. Please have your product Serial Number (S/N) and a copy of your
receipt before requesng warranty assistance or replacement parts.
Keep these operang instrucons in safe place for future reference and rereading.
CAUTION:
Read and understand this enre manual before allowing a child to use this product
WARNING: Improper operaon of cycle could lead to loss of control which can result in death
or serious injury. Riding a cycle does present potenal risks and cauon is required.
Like any riding product, a cycle has inherent hazards associated with its use (for exam-
ple, falling o or riding it into a hazardous situaon). Like any riding product, cycles
can and are intended to move therefore it is possible to lose control or otherwise get
into dangerous situaons. Both children and the adults responsible for supervising
them, must recognize that if such hazards occur, a rider can be seriously injured or die
even when using safety equipment and other precauons. RIDE AT YOUR OWN RISK
AND USE COMMON SENSE.
WARNING: PARENTAL AND ADULT RESPONSIBILITY AND SUPERVISION REQUIRED:
To reduce the risk of injury, adult supervision is required. This manual contains im-
portant safety informaon. Read the owner’s manual prior to use. It is your responsi-
bility to review this informaon and make sure that all riders understand all warnings,
cauons, instrucons and safety topics, and assure that young riders are able to safely
and responsibly use these products. It is recommended that you periodically review
and reinforce the informaon in this manual with younger riders, and that you inspect
and maintain your children’s product to ensure their safety. If you delegate this task to
another adult, it is YOUR RESPONSIBILITY to pass this owner’s manual and all relevant
informaon to whomever will take on this role, and ensure without queson that the
rider is supervised, controlled and taught in a safe manner.
WARNING: CHILDREN UNDER 8 YEARS OF AGE SHOULD NOT BE PERMITTED TO USE
CHARGER UNDER ANY CIRCUMSTANCES

P a g e | 5
WARNING: THESE MODELS ARE NOT FOR CHILDREN UNDER AGE 3 OR
HEAVIER THAN 75 LB (34 KG)
Children under 8 years of age should not use charger. No children should ride any
cycle if they cannot sit on the seat and touch both feet at on the ground at the same
me. Because products, like cycles, can and do present potenal hazards plainly asso-
ciated with their use, it is well recognized THE NEED FOR EXERCISE OF PARENTAL RE-
SPONSIBILITY IN SELECTING RIDING PRODUCTS APPROPRIATE TO THE AGE, SIZE AND
DEVELOPMENTAL PROGRESS OF A CHILD, OR PARENTAL SUPERVISION IN SITUATIONS
IN WHICH CHILDREN OF VARIOUS AGES MAY HAVE ACCESS TO THE SAME RIDING
PRODUCTS, IS IMPORTANT. It is recommended that children under the age of 3 not be
permied to use the cycle. This recommendaon is based not just on age or weight
or height – it reects consideraon of coordinaon and skills as well as physical size.
The recommended minimum rider age of 3 years or older is an esmate and can be
aected by the rider’s size, weight or skills – not every child 3 years old will be suited
to the cycle. Certainly, any rider unable to t comfortably on the cycle should not
aempt to ride it, but a parent’s decision to allow his or her child to ride these prod-
ucts should be based on the child’s maturity, skill, and ability to follow direcons and
rules. Adults are strongly advised not to disregard the manufacturer’s recommenda-
ons or permit younger children, or children 3 years or older if not deemed suitable,
to ride the cycle. These products are intended for use only by children who are, at a
minimum, completely comfortable and competent while operang these products in
conjuncon with parental assistance. Children with any mental or physical condions
that may make them suscepble to injury, or impair their physical dexterity or mental
capabilies to recognize, understand, and follow safety instrucons and to be able to
understand the hazards inherent in a product’s use, should not use or be permied to
use this product if determined inappropriate for their abilies. Children or adults with
heart condions, head, back or neck ailments (or prior surgeries to these areas of the
body), or pregnant women; should not to operate or provide supervision to these
products. Not every product is appropriate for every age or size of child, and dierent
age recommendaons are found within this category of product which is intended to
reect the nature of the hazards and the expected mental or physical ability, or both,
of a rider to cope with the hazards.
WARNING: DO NOT USE ON PUBLIC ROADS
Do not use on public roadways. Intended for use on public pathways, in accordance
with local rules and regulaons, and on private pathways and land.
WARNING:
The transmied vibraon of this machine does not exceed the threshold of 2.5m/s^2
for Hand Arm Vibraon (HAV) or 0.5m/s^2 for Whole Body Vibraon (WBV).
Emission sound pressure level is less than 70 dB(A)
Riding Pracces and Condions:
To reduce risk of injury, never use near motor vehicles, at night or when visibility is
limited, or on or near steep inclines or steps. Do not ride in wet condions or ex-
pose to water. Single rider only; do not permit passengers. Never use cycle to pull
any person or item or allow cycle to be towed.

P a g e | 6P a g e |
Keep safely away from cars and motor vehicle trac, swimming pools, or other
bodies of water, and only use where allowed with cauon. Always check and obey
any local laws or regulaons, which may aect the locaons where the cycle may be
used.
Do not acvate the speed control on the hand grip unless you are sing on the bike
with both hands gripping the handlebar, both feet at on the ground, and ready
to ride. The maximum speed of the cycle is limited by the selected power mode
(See Throle Operaon secon below). Maintain a grip on the handlebars with
both hands at all mes. Do not touch the brake or motor on your cycle when in use
or immediately aer riding, as these parts can become very hot. Ride defensively.
Watch out for potenal obstacles that could catch your wheel or force you to swerve
suddenly or lose control. Be careful to avoid pedestrians, skaters, skateboards, scoot-
ers, bikes, children or animals who may enter your path, and respect the rights and
property of others. Wet, slick, bumpy, uneven or rough surfaces may impair tracon
and contribute to possible accidents. Do not ride your cycle through mud, over ice,
through puddles, in wet or icy weather and never immerse or wash the cycle with
water, as the electrical and drive components could be damaged. Never use near
steps or swimming pools. Racing, stunt riding, or other maneuvers can lead to loss
of control, which may result in death or serious injury, or equipment damage. Never
allow more than one person at a me to ride the cycle. Do not ride at night or when
visibility is limited. Never use headphones, a cell phone or text when riding. Never
risk damaging surfaces, such as carpet or ooring, by use of a cycle indoors. Never
tow anything or anyone with or allow your cycle to be towed by any other person or
vehicle, motorized or not.
WARNING: POWERED & ROTATING PARTS
KEEP AWAY FROM MOVING PARTS TO AVOID INJURY. DO NOT OPERATE WITHOUT
GUARDS. Never operate the cycle without the side panels and chain guard properly
installed. Do not allow hands, feet, hair, body parts, clothing, or similar arcles to
come in contact with any rotang or moving parts, wheels, or drive train components
and chain while the motor is running or while the wheels and res are rotang.
WARNING: RISK OF ELECTRIC SHOCK OR FIRE
Do not expose to water. Keep away from re. Use only Li-ion baery and charger
specied by the manufacturer. Do not disassemble baery or insert in charger if
baery is cracked or damaged.
WARNING: PROPER RIDING ATTIRE REQUIRED
TO REDUCE RISK OF INJURY, ALWAYS WEAR A HELMET AND SHOES. Always wear
proper protecve equipment, such as an approved and properly ed safety helmet
(with chin strap securely buckled) and shoes (with enclosed toe and heel that cover
the enre foot). Keep shoelaces ed and out of the way of the wheels, motor and
drive system. Never ride barefooted or in sandals. Long-sleeved shirt, long pants,
gloves, elbow pads, kneepads, and eye protecon are recommended. Furthermore,
a helmet may be required by local law or regulaon in your area. Your child’s brain is
their most valuable asset, MAKE THEM WEAR AN APPROVED, PROPERLY FITTED AND
BUCKLED HELMET.

P a g e | 7
1. Handlebar: Aluminum bicycle handlebar
2. Handlebar Grip: Le side handlebar grip
3. Brake Lever: Adjustable rear brake lever
4. Throle: Twist type throle with Baery Level indicator lights
5. Front fork: BMX-style steel front fork
6. Stem: Aluminum bicycle stem, aaching the front fork to the handlebar
7. Front wheel: Composite front wheel assembly with pneumac re and
inner tube
8. Foot rest: Plasc injecon molded, atraumac designed footrest
9. Front axle nuts: Front axle nut and washer to fasten front wheel to forks
10. Headset: Front bicycle style headset for 1-1/8” (28.6mm) steering system
11. Side panels: Plasc injecon molded side panels to hold and protect
electronic motor and controls
12. Chain Guard: Plasc injecon molded chain guard
13. Chain: Bicycle chain
14. Seat: Bicycle seat/saddle
15. Seat clamp: Bicycle seat clamp to fasten seat posion
16. Frame: Heat treated aluminum frame
17. Baery: 18Vnom/20Vmax baery pack
18. Rear Axle Nuts: Rear axle nut and washer to fasten rear wheel to frame
19. Chain Tensioner: Bicycle chain tensioner to set chain tension and wheel
posion
20. Drum Brake assembly: Rear bicycle band brake assembly
21. Rear Wheel: Composite rear wheel with pneumac re and inner tube
3
4
5
7
8
9
10
6
11
12
14
15
16
17
18
19
20
21
12

P a g e | 8P a g e |
22. Drive sprocket: Proprietary steel drive sprocket
23. Drive motor: 18V electric motor
24. Electric Speed Controller (ESC): 18V, Electric Speed
Controller
25. Fuse: **if equipped. 40A Slow Blow fuse (*inside frame)
13 23
22
24
25*

P a g e | 9
THROTTLE COMPONENTS/FEATURES:
LED
Throle gauge
“zero” posion
Throle gauge
“full” posion
Rotaon
Throle grip
Power Switch
◀
◀
◀
◀
◀
◀
◀
◀
◀
◀
Power Switch
(shown in “OFF” Posion)
LED → GREEN
LED → YELLOW
LED → RED
Power Switch
(shown in “ON” Posion)

P a g e | 10P a g e |
LED INFORMATION
POWER
SWITCH
THROTTLE
POSITION SITUATION/ REACTION
LED
ON
ON
ON
ON
ON
ON
ON
ON
ON
ON
ZERO
ZERO
ZERO
ZERO
5-10%
5-10%
5-10%
10%-FULL
10%-FULL
10%-FULL
NONE
RED
YELLOW
GREEN
G,Y,R
Y, R
R
G,Y,R
Y, R
R
cycle could be in program mode (exercise cauon with
the throle)
cycle powered on and in “TRAINING/LOW”
power mode
cycle powered on and in “NORMAL/MED”
power mode
cycle powered on and in “ADVANCED/FAST”
power mode
cycle powered on and showing FULL
baery charge
cycle powered on and showing MEDIUM
baery charge
cycle powered on and showing LOW
baery charge
Motor will engage & drive bike at selected power mode,
FULL baery charge
Motor will engage & drive bike at selected power mode,
MED baery charge
Motor will engage & drive bike at selected power mode,
LOW baery charge

P a g e | 11
PRE-RIDE INSPECTION & CHECKLIST:
Never ride your cycle on public streets, roads, highways, at night or when visibility
is limited. Inspect cycle for damage. Do not ride a damaged cycle.
Power Switch: Ensure the Power switch is in the “OFF” posion during the Pre-Ride
Inspecon and remains “OFF” unl the rider is sing on the saddle, both hands grip-
ping the handle bars, both feet at on the ground.
Throle: Ensure the baery is removed and the power switch is in the “OFF” posi-
on. Ensure there are no cracks or visible damage. Check that the throle rotates
freely and the return spring returns the throle back to the “ZERO” posion from the
“FULL”. If the throle does not rotate freely and automacally return back to “ZERO”
when released, contact an authorized repair center before using the cycle.
Brake: Check brake for proper funcon. When you squeeze lever, brake should
provide posive braking acon. Make sure that brake is not rubbing when lever is
released. Adjust as required prior to use. See “Brake Adjustment” below.
Side Panels and Chain Guard: Verify side panels and chain guard are properly in-
stalled.
Tires: Periodically inspect res for excess wear and aging. Regularly check re pres-
sure and inate as per re sidewall.
Frame, Fork, Stem and Handlebars: Check for cracks and loose hardware. Broken
components are rare, however it is possible for a reckless rider to run into a curb or
object and cause damage. Get into the regular habit of inspecng your cycle every
me you ride it!
Hardware/Loose Parts: Check all hardware, such as nuts, bolts, cables, fasteners, etc.
to ensure they are secure. There should not be any unusual rales or sounds from
loose parts or broken components. If the unit is damaged, do not ride it. Safety Gear:
Check that proper protecve gear, such as an approved and properly ed safety
helmet, eye-wear, athlec shoes (closed toe shoes with rubber soles), elbow pads,
kneepads, etc., are in place prior to riding. Keep shoelaces ed and out of the way of
the wheels, motor and drive system. NEVER RIDE BAREFOOTED OR IN SANDALS.
Laws and Regulaons: Check and obey any local laws or regulaons prior to riding.
Insurance: Verify with your insurance company that your exisng insurance policies
provide necessary coverage for cycle use.

P a g e | 12P a g e |
Charger Status
Lights
◀
◀
◀
Baery Informaon
Label
◀
◀
◀
Baery Terminal
Locaon
Baery Release
Buon/Latch
CHARGING THE BATTERY:
Remove the baery from the cycle. Plug the charger into an outlet and slide the
baery into place on charger.
New baeries can take longer to charge. Allow the baery to charge unl the green
LED is solid before removing the baery from the charger. A ashing green status
LED indicates the baery is in the nal stage of charging which includes cell balanc-
ing, which is very important to the life of the baery. If both the red and green LEDs
are ashing there is a problem with the baery or charger. Remove the baery and
unplug the charger, and repeat the charging process. Remove the baery from the
charger when charging is complete.
BATTERY CHARGER:
Without Baery Installed:
• Flashing green LED = power from outlet present
With Baery Installed:
• Solid green LED = charging complete
• Flashing green LED = charging in process;
more than 80% charged
• Solid red LED = charging in process; less than 80% charged
• Flashing red LED = baery too hot to charge
• Flashing red and green LED = error detected;
remove and reinstall baery

P a g e | 13
◀
◀
◀
◀
◀
◀
◀
◀
◀
Baery Release
Buon/Latch
◀
◀
BATTERY INSTALLATION:
Note: The cycle should be turned OFF and the baery
removed when unit is not in use. If the power switch is
le on, the baery loses its charge.
1. Locate baery and orient as shown, it is easier if you
turn the handlebars le or right 45 degrees.
2. Slide baery into slot on the front of the down tube
of the cycle.
3. There is a point where the baery release latch/buon provides some resistance.
Push the baery past this point. You should hear a click, and this gap should be
closed.
BATTERY REMOVAL:
1. Turn the handlebar 45 degrees from straight.
2. Depress the baery release latch/buon and slide baery out of slot in the
direcon shown.

P a g e | 14P a g e |
RED LED illuminated
(default)
Low-Speed/Power
YELLOW LED illuminated
Medium-Speed/Power
GREEN LED illuminated
Fast-Speed/Power
THROTTLE OPERATION:
(Conrm Speed Mode & Check Baery Level)
Operaon of throle is only for those supervised by an adult. In no circumstances
should a child be allowed to operate the cycle without proper training and super-
vision. If the child cannot walk, run, coast and brake, they are surely not ready for
throle control.
1. Ensure power switch is in “OFF” posion, throle in “zero” posion.
2. Install Baery.
3. Power on bike. (Power Switch to “ON” posion)
a. Audible Beep.
b. Followed by a light indicator.
c. Light indicates the power mode that is currently selected.
i. RED-Low Speed/Power *factory default
• (training mode)
ii. YELLOW-Medium Speed/Power
• (standard mode)
iii. GREEN-Fast Speed/Power
• (advanced mode)
4. While sing on the bike, both hands gripping the handlebar, both
feet at on the ground and ready to ride, turn the throle slightly, the
lights will show the baery level (twist slowly and a very lile amount,
careful to not acvate motor!)
a. Green, Yellow, Red lights→indicate full charge
b. Yellow, Red lights→indicate medium-low baery level
c. Red light→low baery level and baery needs to be changed.
◀
◀
◀

P a g e | 15
Power→”ON”
Throle→5%-10% rotaon
LED→Green, Yellow, Red
(Full Baery Charge)
Power→”ON”
Throle→5%-10% rotaon
LED→Red
(Low Baery Charge)
Power→”ON”
Throle→5%-10% rotaon
LED→Yellow and Red
(Med-Low Baery Charge)
5. If you connue to twist the throle (10%+), the motor will be
acvated. The more the throle is twisted, the more power is
delivered to the motor, based on the power program selected.
6. Exercise cauon around moving parts and wheels.
7. Contact customer service or go visit:
www.STACYC.com if unsure about any operaonal
procedure.
CHANGING POWER MODES (TO BE PERFORMED BY ADULTS ONLY)
Your cycle is equipped with 3 power modes for dierent skill levels. Training Mode,
Standard Mode and Advanced Modes. We do not advise showing children how to
adjust the modes. Each child should have the mode set by an adult who will be close-
ly supervising the child. DO NOT put your child on the “Advanced” mode without
working through the process of learning the Training and Standard Modes.
Acvate Program Selecon:
1. Ensure power switch is in “OFF” posion.
2. Install Baery.
3. Ensure bike power switch is “OFF” and no LED lights are on, or no
beeps were heard.
o If any LED light is on, turn bike Power Switch to “OFF”
o If you heard a beep, turn bike Power Switch to “OFF”
4. Turn throle gently and hold throle in “FULL” posion. Do
not release.
5. Turn power switch to “ON” posion , do not let throle move from
“FULL” posion.
o The yellow LED light will ash 5 mes, then all the LED lights
will ash and beep 5 mes, all LEDs will remain lit. Wait 1 sec,
then release throle. All LED lights should be o.
o If LED lights are on, repeat from step 3, and be sure not to
twist the throle quickly as it is not in Program Mode.

P a g e | 16P a g e |
Power Switch→”OFF”
Throle→”FULL” posion
HOLD THROTTLE IN FULL
POSITION
Power Switch→”ON”
Throle→”FULL” posion
LED→ashing YELLOW
5 yellow ashes
Selecon MODE:
Throle→”LOW” posion
LED→solid RED
(training mode)
Selecon MODE:
Throle→”MID” posion
LED→solid YELLOW
(standard mode)
Selecon MODE:
Throle→”FULL” posion
LED→solid GREEN
(advanced mode)
Power Switch→”ON”
Throle→”FULL” posion
LED→ashing GREEN, YELLOW
AND RED
5 Green/Yellow/Red ashes with
5 beeps, all LEDS stay lit, release
throle, all LED lights o, ready
to choose power model
Select Program:
6. Turn throle, and as the throle moves through the range of power
modes, the Red, Yellow, or Green LED light will illuminate.
7. Hold Throle at the power mode (LED posion) desired
approximately 5 seconds unl “2 short beeps” are heard.
o Red→training mode (slow)
o Yellow→standard mode (medium)
o Green→advanced mode (fast)
Exit Program Selecon:
8. Release throle.
9. All LED lights ash together 1 me with “1 long beep”.
10. LED Light indicang selected power mode will now be illuminated.
o Operaon of cycle will be with the illuminated power
mode. Cycle will stay in this power seng unless changed
as per steps above:
o Red→training mode (slow)
o Yellow→standard mode (medium)
o Green→advanced mode (fast)

P a g e | 17
PROGRAMMING MODE ACTIVATION: only to be activated by an adult
POWER
SWITCH
THROTTLE
POSITION NOTES:
LED
ILLUMINATION
OFF
ON
ON
ON
ON
ON
ON
ON
Hold at
FULL
Hold at
FULL
Hold at
FULL
Hold at
FULL +1sec
Release
to ZERO
Release
to ZERO
ZERO
Turn throle
-lights will light up as throle moves
from ZERO to FULL
NONE
YELLOW
ashing (5xs)
G,Y,R Flashing +
Beeping (5xs)
NONE
NONE
Select power level and hold
throle unl you hear 2 short
beeps
R, Y, G lights ash and 1 long
beep is heard
“SELECTED POWER MODE, LED
WILL ILLUMINATE”
IF ANY LIGHTS REMAIN ILLUMINATED WHEN THROTTLE IS
RETURNED TO ZERO, PROGRAM MODE IS NOT ACTIVATED
AND BIKE WILL MOVE WHEN TURNING THE THROTTLE.
EXERCISE CAUTION.
GREEN=ADVANCED/HIGH POWER
YELLOW=STANDARD/MEDIUM POWER
RED=TRAINING/LOW POWER
Cycle is turned OFF

P a g e | 18P a g e |
THE STARTING PROCESS: SIT, PUSH, COAST, BRAKE, PRACTICE
(Perform under adult supervision, wearing protecve equipment, in an open and
safe area)
Non-powered training: (Turn Power Switch to the “OFF” posion and remove baery)
1. Sit on bike with feet on ground. Familiarize rider with seat, foot plaorm,
brake(s), handlebars , throle and their funcon.
2. Push bike around with feet on ground learning balance and condence.
3. Coast and pracce controlled turning with feet on plaorm.
4. Brake to a safe stop using hand brake while maintaining control.
5. Pracce standing and stopping while maintaining control without falling.
Powered Mode Qualifying Checklist:
Can rider push and coast safely with feet on plaorm?
Can rider maintain control while standing on plaorm?
Can rider control bike from start to stop?
Can rider use hand brake to stop on command?
Can rider coast and turn while navigang mild hills and obstacles?
Has rider demonstrated enough control to move to powered riding
without being a risk to themselves and others?
If so move to Powered Mode training!
Power Mode :
• Training Mode - For use with all new riders.
1. Turn Power Switch to the “OFF” posion.
2. Install Baery.
3. Turn Power Switch to the “ON” posion.
4. Ensure RED LED is lit, indicang “Training Mode” selected. If
not see Throle operaon and Changing Power Mode
secons in this manual.
5. Have child carefully push cycle forward and pracce slightly
twisng throle learning to feel the cycle beginning to
move forward under power.
6. With feet on ground have child progressively increase throle
use unl moving forward balancing on their own.
7. Have child pracce rolling throle on and o as well as safe
stops with hand brake.
8. As child gains balance and demonstrates throle and brake
skills, advance to riding with feet on the plaorm.
9. Coach child to maintain a safe distance from obstacles and
other riders.
• Standard Mode - The majority of users will nd this speed to be adequate
for signicant skill building and lots of fun.
1. Turn Power Switch to the “OFF” posion.
2. Install Baery.

P a g e | 19
3. Turn Power Switch to the “ON” posion.
4. Ensure YELLOW LED is lit, indicang “Standard Mode”
selected. If not, see Throle operaon and Changing Power
Mode secons in this manual.
5. Adult should supervise child as the top speed and
acceleraon have both increased in this mode.
6. The child must demonstrate the ability to roll o throle and
use the brake to slow to a stop, and maintain a safe distance
for obstacles and other riders.
• Advanced Mode - This mode is for advanced and older riders only.
1. Turn Power Switch to the “OFF” posion.
2. Install Baery.
3. Turn Power Switch to the “ON” posion.
4. Ensure GREEN LED is lit, indicang “Advanced Mode”
selected. If not, see Throle operaon and Changing Power
Mode secons in this manual.
5. Adult should supervise child as the top speed and
acceleraon are at their maximum in this mode.
6. The child must demonstrate the ability to roll o throle and
use the brake to slow to a stop, and maintain a safe distance
for obstacles and other riders.
SAFELY APPROACHING OR RE-MOUNTING THE CYCLE:
During adult supervision, always teach children to approach the cycle with cau-
on before use, while standing back up if knocked over, or aer a spill.
1. Carefully place the Power Switch into the “OFF” posion.
2. Ensure all wheels/res and drive train components have stopped
rotang or moving.
3. Perform a “Pre-Ride Inspecon” (below)
4. Have rider mount the cycle, gripping the handlebars with both hands,
sing on the saddle with both feet at on the ground.
5. Place the power switch into the “ON” posion.
6. Finally: carefully resume riding your cycle.
LOADING AND UNLOADING A CYCLE INTO A VEHICLE:
1. Place the Power Switch into the “OFF” posion.
2. Remove baery.
3. Load into vehicle for transport.
4. Aer unloading, ensure Power Switch is in “OFF” posion.
5. Install baery.
6. Perform Pre-Ride Inspecon.
FAILURE TO USE COMMON SENSE AND HEED THE ABOVE WARNINGS
INCREASES RISK OF SERIOUS INJURY. USE WITH APPROPRIATE CAUTION AND
SERIOUS ATTENTION TO SAFE OPERATION.

P a g e | 20P a g e |
CHECK AND MAINTAIN CYCLE:
Before use, check to conrm that the cycle is in proper working order. The cycle
should be maintained and repaired in accordance with the manufacturer’s specica-
ons, using only the manufacturer’s authorized replacement parts, and should not be
modied from the manufacturer’s original design and conguraon
REPAIR AND MAINTENANCE:
Tools Required:
• 2.5, 4, 5, 6 mm Allen Wrench
• 8, 10, 15 mm socket or open end/box end wrench
• #2 Phillips screw driver or T-10 Torx driver
Turn power switch to “OFF” posion, remove baery, allow cycle to cool before
beginning repair or maintenance:
• Read instrucons.
• Ensure the power switch is “OFF”.
• Ensure the baery is removed and cycle has had adequate me to cool. (up to 30
minutes)
• Secure the cycle for repair or maintenance.
• Exercise cauon around exposed parts.
• Contact customer service if unsure about any repair or maintenance.
Replacement Parts:
For the complete selecon of replacement parts visit www.STACYC.com.
Repair Centers:
For a list of authorized service centers visit www.STACYC.com.
Test Brake:
1. Squeeze brake lever and hold.
2. Push cycle forward. The rear wheel should not spin if brake is adjusted properly.
3. If rear wheel spins when pushed forward or brake lever engages prematurely,
refer to “Adjust Brake”.
Brake Lever barrel adjuster
Brake Hub barrel adjuster
◀
◀
This manual suits for next models
6
Table of contents
Other STACYC Scooter manuals
