Standen SP Series User manual


Other manuals for SP Series
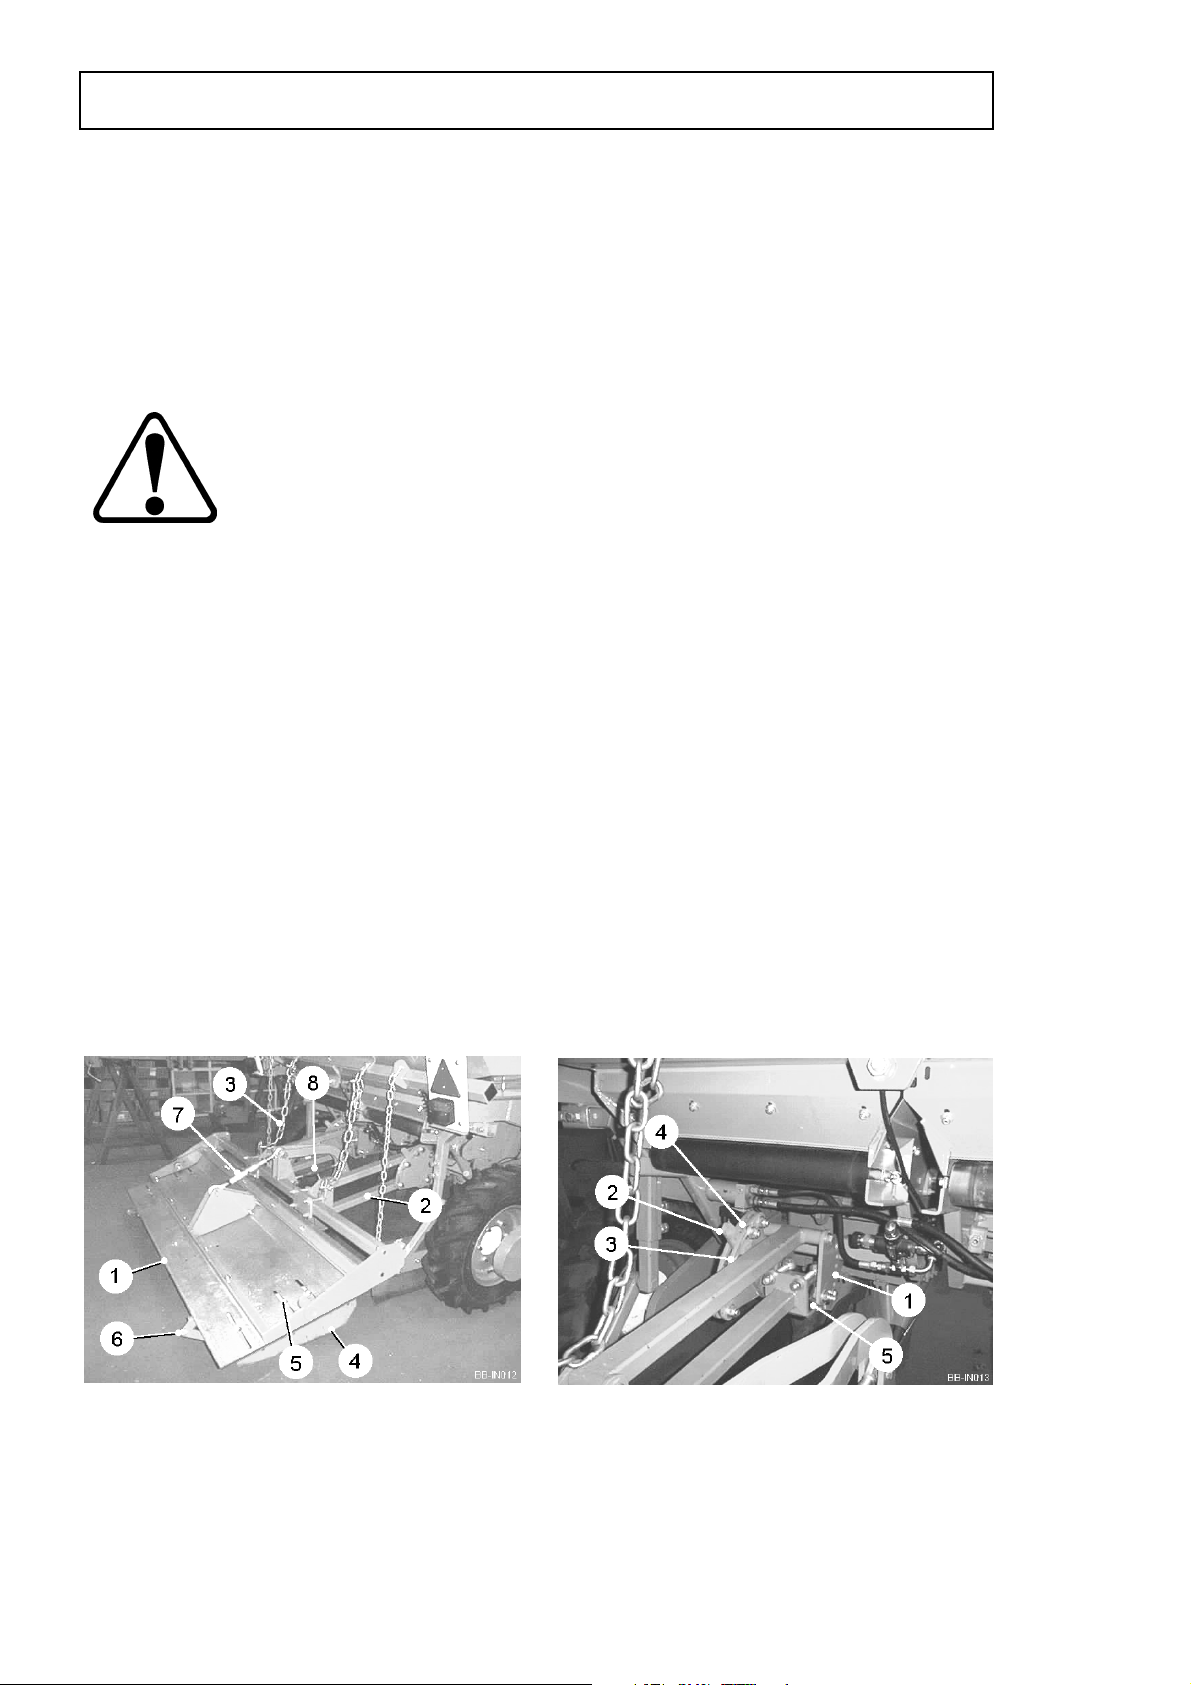
3
Table of contents
Other Standen Farm Equipment manuals

Standen
Standen T2 Service manual

Standen
Standen BX Series User manual

Standen
Standen T2 User manual

Standen
Standen POWAVATOR 150 User manual

Standen
Standen ZENO Series User manual

Standen
Standen SP Series User manual

Standen
Standen SP Series User manual

Standen
Standen POWAVATOR 400 User manual

Standen
Standen POWAVATOR 400 Service manual

Standen
Standen T2 Service manual


Popular Farm Equipment manuals by other brands


GREAT PLAINS
GREAT PLAINS Terra Max HT1100-20 Operator's manual

WAM
WAM WATERMIZER 3335 owner's manual

Land Pride
Land Pride DH1048 Operator's manual

breviglieri
breviglieri MEKFARMER 150 Operating and maintenance manual

Land Pride
Land Pride SGC0548 Operator's manual

Ferrari
Ferrari FUTURA Operating and service manual

AMAZONEN-Werke
AMAZONEN-Werke Catros 5501-T Quick manual

AM Machinery
AM Machinery TAC-14 Operator's manual

Headsight
Headsight TRUESIGHT 2 Installation & operation manual

Yetter
Yetter 5000 SERIES owner's manual

Frisian Motors
Frisian Motors Leffert FM-50 Owner's instruction manual

Tarter
Tarter VALUE 90 SWEEP TUB 90ST Setup instructions