manuals.online logo
Brands
  1. Home
  2. •
  3. Brands
  4. •
  5. GREAT PLAINS
  6. •
  7. Farm Equipment
  8. •
  9. GREAT PLAINS Terra Max HT1100-20 User manual

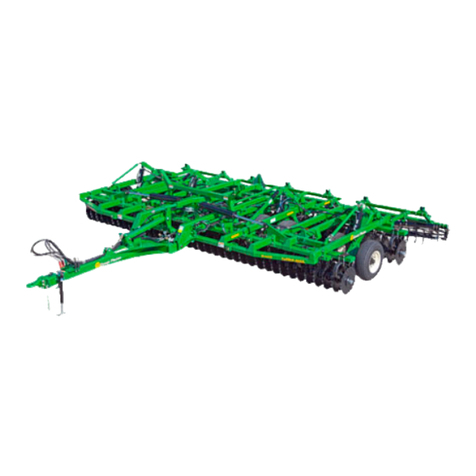
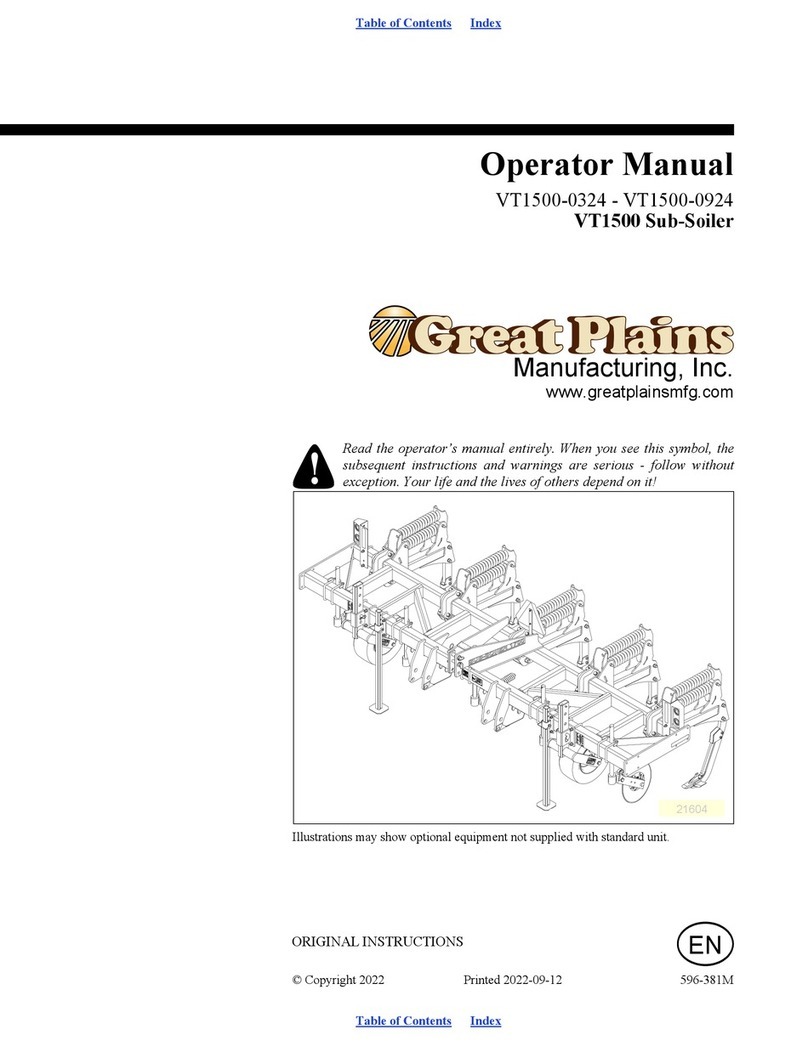
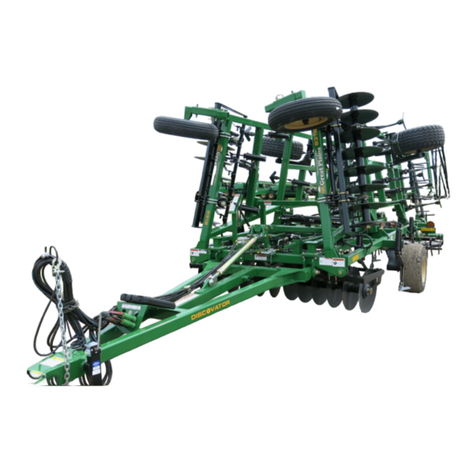
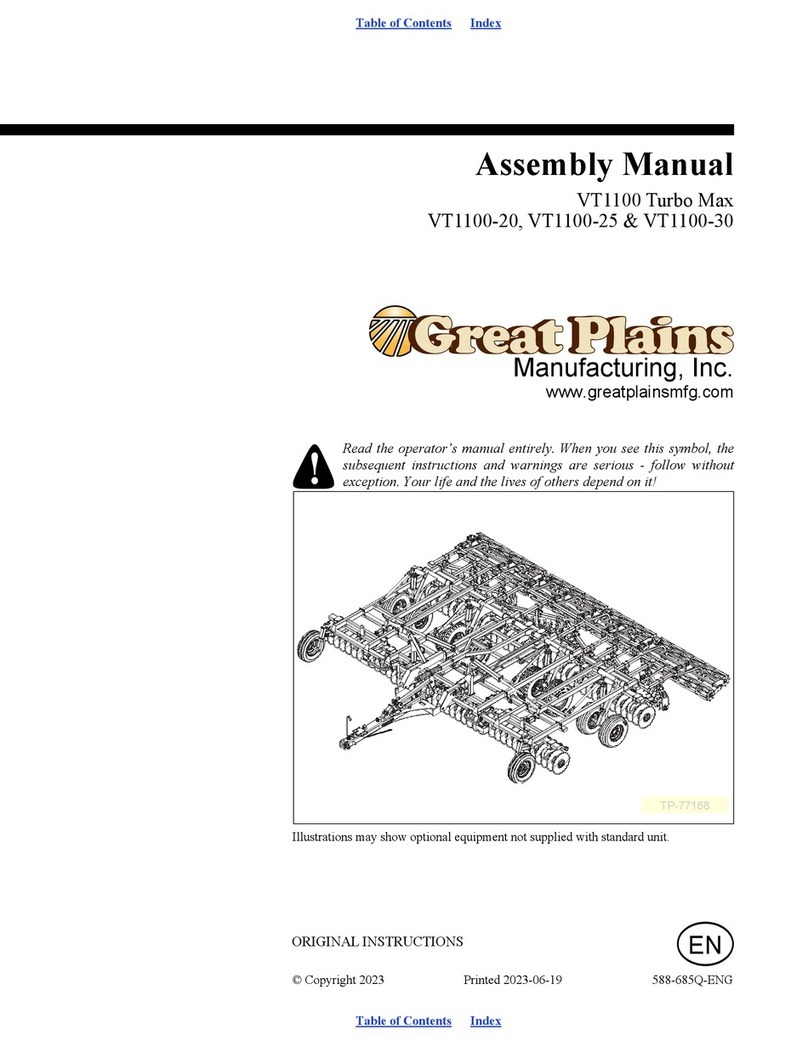
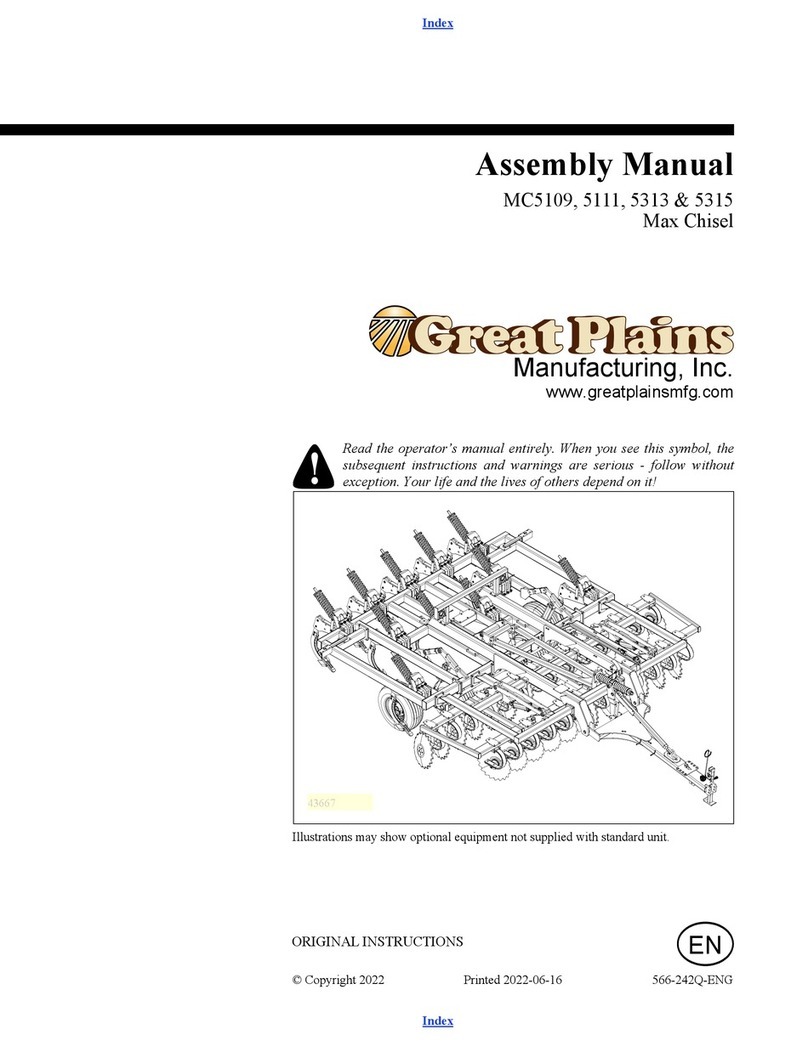
GREAT PLAINS Terra Max HT1100-20 User manual

Manufacturing, Inc.
www.greatplainsmfg.com
© Copyright 2020 Printed 2020-07-29 586-831M
EN
Table of Contents Index
ORIGINAL INSTRUCTIONS
Operator Manual
Terra Max
HT1100-20, HT1100-25, & HT1100-30
Read the operator’s manual entirely. When you see this symbol, the
subsequent instructions and warnings are serious - follow without
exception. Your life and the lives of others depend on it!
Illustrations may show optional equipment not supplied with standard unit.
TP-69605
Machine Identification
Record your machine details in the log below. If you replace this manual, be sure to transfer this information to the new
manual.
If you or the dealer have added options not originally ordered with the machine, or removed options that were
originally ordered, the weights and measurements are no longer accurate for your machine. Update the record by
adding the machine weight and measurements with the option(s) weight and measurements.
Dealer Contact Information
Model Number
Serial Number
Machine Height
Machine Length
Machine Width
Machine Weight
Year of Construction
Delivery Date
First Operation
Accessories
Name:
Street:
City/State:
Telephone:
Email:
Dealer’s Customer No.:
WARNING: Cancer and Reproductive Harm - www.P65Warnings.ca.gov
HT1100-20 - HT1100-30 Cover Index Table of Contents
Great Plains | 586-831M | 2020-07-29 Cover Index 1
© Copyright 2020 All rights Reserved
Great Plains Manufacturing, Inc. provides this publication “as is” without warranty of any kind, either expressed or implied. While every precaution has been
taken in the preparation of this manual, Great Plains Manufacturing, Inc. assumes no responsibility for errors or omissions. Neither is any liability assumed
for damages resulting from the use of the information contained herein. Great Plains Manufacturing, Inc. reserves the right to revise and improve its products
as it sees fit. This publication describes the state of this product at the time of its publication, and may not reflect the product in the future.
Trademarks of Great Plains Manufacturing, Inc. include: AccuShot, Max-Chisel, Row-Pro,
Singulator Plus, Short Disk, Swath Command, Terra-Tine, Ultra-Chisel, and X-Press.
Registered Trademarks of Great Plains Manufacturing, Inc. include: Air-Pro, Clear-Shot, Discovator, Great Plains, Land Pride, MeterCone,
Nutri-Pro, Seed-Lok, Solid Stand, Terra-Guard, Turbo-Chisel, Turbo-Chopper, Turbo-Max, Turbo-Till, Ultra-Till, Whirlfilter, and Yield-Pro.
Brand and Product Names that appear and are owned by others are trademarks of their respective owners.
Printed in the United States of America
Table of Contents
Important Safety Information.................................................1
Safety Decals ....................................................................4
Introduction...........................................................................10
Models Covered ..............................................................10
Description of Unit ...........................................................10
Document Family.............................................................10
Using This Manual....................................................10
Definitions.................................................................10
Owner Assistance............................................................11
Further Assistance...........................................................11
Preparation and Setup .........................................................12
Prior to Going to the Field Checklist................................12
Hitching Terra Max to Tractor..........................................13
Electrical Hookup .....................................................14
Hydraulic Hose Hookup............................................14
Clevis Hitch ..............................................................15
Category III Hitch......................................................15
Transport Locks........................................................16
Wing Fold .................................................................16
Pre-Leveling of Machine...........................................17
Front to Rear Leveling..............................................17
Wing Adjustment ......................................................18
Wing Turnbuckle 586-295S......................................18
Wing Fold Assist HT1100-30....................................19
Proximity Sensor ......................................................19
Proximity Sensor Adjustment ...................................19
Hydraulic Down Pressure.........................................20
Weight Package Assembly (Optional)......................21
Operating Instructions .........................................................22
Pre-Start Checklist...........................................................22
Transport .........................................................................23
Transport Steps........................................................23
Field Operation ................................................................24
Field Set-Up Checklists ...................................................24
Mechanical Checklist (Tractor Hitching)...................24
Electrical Checklist ...................................................24
Hydraulic System Checklist......................................24
Operations Checklists......................................................24
First Pass Operation Checklist.................................24
Sharp Field Turns.....................................................24
End Field Work.........................................................24
Prior to Operating the Turbo Max ....................................25
First Time Field Adjustments ...........................................26
Gang Angle ..............................................................26
Depth........................................................................27
Wing Down Pressure................................................27
Fore/Aft Leveling ......................................................28
Fore/Aft Adjustment .................................................28
Finish Reel (Single or Double) .................................29
Gauge Wheel Adjustment ........................................30
Setting the Rolling Harrow and Reel ........................30
Operating Speeds ....................................................30
Summary of First Time Field Settings .............................30
Parking ............................................................................31
Unfolded Storage .....................................................31
Storage............................................................................31
Maintenance and Lubrication..............................................32
Maintenance....................................................................32
Gang Angle Adjustment ...........................................33
Lubrication.......................................................................35
Appendix ...............................................................................36
Terra Max Specifications and Capacities........................36
Tire Inflation Chart...........................................................36
Hydraulic Connectors and Torque...................................37
Torque Values Chart .......................................................38
Great Plains | 586-831M | 2020-07-29 Table of Contents Index 2
HT1100-20 - HT1100-30 Table of Contents Index
HT1100-20 - HT1100-30 Table of Contents Index Important Safety Information
Great Plains | 586-831M | 07/29/2020 Table of Contents Index 1
Important Safety Information
Look for Safety Symbol
The SAFETY ALERT SYMBOL indicates there is a potential
hazard to personal safety involved and extra safety precaution
must be taken. When you see this symbol, be alert and
carefully read the message that follows it. In addition to design
and configuration of equipment, hazard control and accident
prevention are dependent upon the awareness, concern,
prudence and proper training of personnel involved in the
operation, transport, maintenance and storage of equipment.
Be Aware of Signal Words
Signal words designate a degree or level of hazard seriousness.
DANGER indicates an imminently hazardous situation which,
if not avoided, will result in death or serious injury. This signal
word is limited to the most extreme situations, typically for
machine components that, for functional purposes, cannot be
guarded.
WARNING indicates a potentially hazardous situation which,
if not avoided, could result in death or serious injury, and
includes hazards that are exposed when guards are removed. It
may also be used to alert against unsafe practices.
CAUTION indicates a potentially hazardous situation which,
if not avoided, may result in minor or moderate injury. It may
also be used to alert against unsafe practices.
Prepare for Emergencies
Be prepared if a fire starts.
Keep a first aid kit and fire extinguisher handy.
Keep emergency numbers for doctor, ambulance, hospital
and fire department near phone.
Be Familiar with Safety Decals
Read and understand “Safety Decals” on page 4,
thoroughly.
Read all instructions noted on the decals.
Keep decals clean. Replace damaged, faded and illegible
decals.
Use Safety Chains
Use safety chains to help control drawn machinery should
it separate from tractor draw-bar or trailing nurse tank
hitch.
Use chain with a strength rating equal to or greater than
the gross weight of towed machinery.
Attach implement chain to tractor draw-bar support or
specified anchor location. Allow only enough slack in
chain for turns.
Replace chain if any links or end fittings are broken,
stretched or damaged.
Do not use safety chain for towing.
Great Plains | 586-831M | 07/29/2020 Table of Contents Index 2
HT1100-20 - HT1100-30 Table of Contents Index Important Safety Information
Avoid High Pressure Fluids
Escaping fluid under pressure can penetrate the skin, causing
serious injury. This Terra Max requires a Power-Beyond port,
which is always under pressure when the tractor is running.
Avoid the hazard by relieving pressure at other remote,
and shutting down tractor before connecting,
disconnecting or inspecting hydraulic lines.
Use a piece of paper or cardboard, NOT BODY PARTS, to
check for suspected leaks.
Wear protective gloves and safety glasses or goggles when
working with hydraulic systems.
If an accident occurs, seek immediate medical assistance
from a physician familiar with this type of injury.
Keep Riders Off Machinery
Riders obstruct the operator’s view. Riders could be struck by
foreign objects or thrown from the machine.
Never allow children to operate equipment.
Keep all bystanders away from machine during operation.
Use Safety Lights and Devices
Slow-moving tractors and towed implements can create a
hazard when driven on public roads. They are difficult to see,
especially at night.
Use flashing warning lights and turn signals whenever
driving on public roads.
Use lights and devices provided with implement.
Transport Machinery Safely
Maximum transport speed for implement is 20 mph (32 kph),
13 mph (22 kph) in turns. Some rough terrains require a slower
speed. Sudden braking can cause a towed load to swerve and
upset.
Do not tow an implement or nurse tank that weighs more
than 1.5 times the weight of towing vehicle.
Carry reflectors or flags to mark Terra Max in case of
breakdown on the road.
Keep clear of overhead power lines and other
obstructions when transporting. Refer to transport
dimensions under “Terra Max Specifications and
Capacities” on page 36.
Do not exceed 20 mph. Never travel at a speed which does
not allow adequate control of steering and stopping.
Reduce speed if towed load is not equipped with brakes.
Reduce speed on rough roads.
Comply with national, regional and local laws.
Do not fold or unfold the Terra Max while the tractor is
moving.
HT1100-20 - HT1100-30 Table of Contents Index Important Safety Information
Great Plains | 586-831M | 07/29/2020 Table of Contents Index 3
Shutdown and Storage
Lower Terra Max, put tractor in park, turn off engine, and
remove the key.
Secure Terra Max using parking jack provided.
Detach and store Terra Max in an area where children
normally do not play.
Tire Safety
Tire changing can be dangerous. Employ trained personnel
using correct tools and equipment.
When inflating tires, use a clip-on chuck and extension
hose long enough for you to stand to one side–not in front
of or over tire assembly. Use a safety cage if available.
When removing and installing wheels, use wheel-handling
equipment adequate for weight involved.
Practice Safe Maintenance
Understand procedure before doing work. Use proper
tools and equipment. Refer to this manual for additional
information.
Work in a clean, dry area.
Lower implement, put tractor in park, turn off engine,
and remove key before performing maintenance.
Make sure all moving parts have stopped and all system
pressure is relieved.
Disconnect battery ground cable (-) before servicing or
adjusting electrical systems or before welding on Terra
Max.
Inspect all parts. Make sure parts are in good condition
and installed properly.
Remove buildup of grease, oil or debris.
Remove all tools and unused parts from implement
before operation.
Great Plains | 586-831M | 07/29/2020 Table of Contents Index 4
HT1100-20 - HT1100-30 Table of Contents Index Important Safety Information
Safety At All Times
Thoroughly read and understand the instructions in this
manual before operation. Read all instructions noted on the
safety decals.
Be familiar with all Terra Max functions.
Operate machinery from the driver’s seat only.
Do not leave Terra Max unattended with tractor engine
running.
Do not stand between tractor and implement, or
implement and nurse tank, during hitching.
Keep hands, feet and clothing away from power-driven
parts.
Wear snug-fitting clothing to avoid entanglement with
moving parts.
Watch out for wires, trees, etc., when folding and raising
Terra Max. Make sure all persons are clear of working
area.
Safety Decals
Safety Reflectors and Decals
Your implement comes equipped with all lights, safety
reflectors and decals in place. They were designed to help you
safely operate your implement.
Read and follow decal directions.
Keep lights in operating condition.
Keep all safety decals clean and legible.
Replace all damaged or missing decals. Order new decals
from your Great Plains dealer. Refer to this section for
proper decal placement.
When ordering new parts or components, also request
corresponding safety decals.
To install new decals:
1. Clean the area on which the decal is to be placed.
2. Peel backing from decal. Press firmly on surface, being
careful not to cause air bubbles under decal.
HT1100-20 - HT1100-30 Table of Contents Index Important Safety Information
Great Plains | 586-831M | 07/29/2020 Table of Contents Index 5
818-055C
Slow Moving Vehicle Reflector
On the back of smv bracket, rear tube of
center frame;
1 total
838-615C
Amber Reflectors
Two on front of light brackets. Two on outside of
center brace bar. Two on side of center frame. Two on
rear of finishing attachment (not shown), visible from
side while folded for transport;
8 total
42239
43093
838-614C
Red Reflectors
On rear of light brackets (top);.
2 total
43094
Great Plains | 586-831M | 07/29/2020 Table of Contents Index 6
HT1100-20 - HT1100-30 Table of Contents Index Important Safety Information
838-603C
Orange Reflectors
On rear of light brackets (bottom);
2 total
43094
838-598C
Caution: Read Operator’s Manual
On middle of hitch;
1 total
42243
858-967C
Caution: Pin Wings
On middle of operators side center brace bar;
1 total
43083
HT1100-20 - HT1100-30 Table of Contents Index Important Safety Information
Great Plains | 586-831M | 07/29/2020 Table of Contents Index 7
838-599C
Danger: Electrocution Hazard
On middle of hitch;
1 total
42243
838-600C
Danger: Crushing Hazard
On Front of hitch;
1 total
42243
818-046C
Danger: Overhead Crushing Hazard
Outside, center of center frame (both sides);
2 total
43093
Great Plains | 586-831M | 07/29/2020 Table of Contents Index 8
HT1100-20 - HT1100-30 Table of Contents Index Important Safety Information
838-606C
Warning: Tongue Rising
On front of hitch;
1 total
838-606C
To prevent serious injury or death:
Tongue rises rapidly when
unhitched from tractor.
Lower implement to ground
before unhitching.
WARNING
42243
838-094C
Warning: High Pressure Fluid
On rear of hitch;
1 total
42243
838-611C
Warning: Hand Crushing
Front side of center brace bar (right);
1 total
42261
HT1100-20 - HT1100-30 Table of Contents Index Important Safety Information
Great Plains | 586-831M | 07/29/2020 Table of Contents Index 9
838-612C
Warning: Wings Could Fall
Front side of wing stops (both sides);
2 total
43093
838-613C
Notice: Transport Lock
Outside of lift straps (both sides);
2 total
43093
848-271C
Danger: Cutting Of Foot
Outside of wing cylinder mount plates (both sides);
2 total
42242
Great Plains | 586-831M | 07/29/2020 Table of Contents Index 10
HT1100-20 - HT1100-30 Table of Contents Index Introduction
Introduction
Great Plains welcomes you to our growing family of new
product owners. The Terra Max HT1100-20 - HT1100-30 has
been designed with care and built by skilled workers using
quality materials. Proper setup, maintenance, and safe
operating practices will help you get years of satisfactory use
from the machine.
Models Covered
Description of Unit
The Terra Max HT1100-20 - HT1100-30 is a three section
“hybrid” tillage tool. Working width ranges from 20 to 35 feet.
The implement is designed to cut and size residue, till soil for
faster seedbed warming, break up soil crust on hard dried
fields while eliminating compaction layers.The front and rear
gangs may be adjusted from 0-8 degree angle, depending on
the aggressiveness desired. Various finishing attachments are
also available to further smooth, redistribute residue, kill
weeds, and break clods.
Document Family
Using This Manual
This manual will familiarize you with
safety, assembly, operation,
adjustments, troubleshooting, and
maintenance. Read this manual and
follow the recommendations to help
ensure safe and efficient operation.
The information in this manual is current at printing. Some
parts may change to assure top performance.
Definitions
The following terms are used throughout this manual.
A crucial point of information related to the preceding topic.
Read and follow the directions to remain safe, avoid serious
damage to equipment and ensure desired field results.
Useful information related to the preceding topic.
Right-hand and left-hand as used in
this manual are determined by
facing the direction the machine
will travel while in use unless
otherwise stated. An orientation
rose in some line art illustrations
shows the directions of: Up, Back,
Left, Down, Front, Right.
HT1100-20 20’ (7.5in) spacing
HT1100-25 25’ (7.5in) spacing
HT1100-30 30’ (7.5in) spacing
Figure 1
Terra Max
TP-69605
L
R
U
D
F
B
L
R
586-831Q-ENG Assembly Manual
586-831Q Pre-Delivery Manual
586-831M Operator Manual (this document)
586-831P Parts Manual
U
D
F
B
L
R
HT1100-20 - HT1100-30 Table of Contents Index Introduction
Great Plains | 586-831M | 07/29/2020 Table of Contents Index 11
Owner Assistance
If you need customer service or repair parts, contact a Great
Plains dealer. They have trained personnel, repair parts and
equipment specially designed for Great Plains products.
Refer to Figure 2
Your machine’s parts were specially designed and should only
be replaced with Great Plains parts. Always use the serial and
model number when ordering parts from your Great Plains
dealer. The serial-number plate is located on the front of the
left truss.
Record your Terra Max model and serial number here for
quick reference:
Model Number:__________________________
Serial Number: __________________________
Your Great Plains dealer wants you to be satisfied with your
new machine. If you do not understand any part of this manual
or are not satisfied with the service received, please take the
following actions.
1. Discuss the matter with your dealership service manager.
Make sure they are aware of any problems so they can
assist you.
2. If you are still unsatisfied, seek out the owner or general
manager of the dealership.
Further Assistance
Great Plains Manufacturing, Inc. wants you to be satisfied
with your new Terra Max. If for any reason you so not
understand any part of this manual or are otherwise
dissatisfied with the product please contact:
Great Plains Service Department
1525 E. North St.
P.O. Box 5060
Salina, KS 67402-5060
Or go to www.greatplainsag.com and follow the contact
information at the bottom of your screen for our service
department.
Figure 2
Serial Number Plate
42238
Great Plains | 586-831M | 07/29/2020 Table of Contents Index 12
HT1100-20 - HT1100-30 Table of Contents Index Preparation and Setup
Preparation and Setup
This section helps you prepare your tractor and Terra Max for
use, and covers tasks that need to be done seasonally, or when
the tractor/Terra Max configuration changes.
Before using the Terra Max in the field, you must hitch it to a
suitable tractor, inspect systems and level the Terra Max.
Before using the Terra Max for the first time, and periodically
thereafter, certain adjustments and calibrations are required.
Prior to Going to the Field Checklist
Complete this checklist before routine setup:
Read and understand “Important Safety Information”
on page 1.
Check that all working parts are moving freely, bolts are
tight, and cotter pins are spread.
Make sure your tractor horsepower matches the
implement you are pulling. This is important so the
implement can do the best possible job.
Clean all hydraulic couplings and connect to tractor, see
“Hydraulic Hose Hookup” on page 14.
If machine is folded, remove the transport pins from wing
stops and open wing lock valve. (DO NOT remove pins if
the wing is leaning against the pins or putting pressure on
the pins. Use the hydraulics to pull the wings in
completely before unpinning them.) Once the pins are
removed, slowly unfold the unit. Make sure no one is
under the wings during the unfolding process.
Check again for hydraulic leaks and watch that hoses do
not get pinched in hinges, wing stops, etc.
After the machine is completely unfolded, raise and lower
the Terra Max several times to purge air from the
hydraulic system. Again check for hydraulic leaks and
tighten or replace if necessary.
Check safety chain hookup. Make sure all warning lights
are hooked up and functioning correctly.
The hubs will come pre-greased and will not need greased
at this time. See “Lubrication” on page 35.
Check that all safety decals and reflectors are correctly
located and legible. Replace if damaged. See “Safety
Decals” on page 4.
Inflate tires to pressure recommended and tighten wheel
bolts as specified. See “Tire Inflation Chart” on page 36.
Put transport locks in place, and refold the machine
slowly. Put wing stop pins in place and close wing lock
valve. Always use the transport pins when moving from
field to field. You are now ready to go to the field.
HT1100-20 - HT1100-30 Table of Contents Index Preparation and Setup
Great Plains | 586-831M | 07/29/2020 Table of Contents Index 13
Hitching Terra Max to Tractor
Hitch to a tractor for highway transport or field operations.
Hitch to a leading implement only for field operations. Do not
transport behind another implement.
Before hitching, check the compatibility and capability of the
towing tractor or implement:
•The HT1100-20 - HT1100-30 Terra Max is a pull-type
implement equipped with a standard Category IV single
tang hitch. It may be converted to a Category III or clevis
hitch using supplied accessory parts, see “Clevis Hitch”
on page 15.
To prevent soil compaction on rows, set tractor wheels
between rows. For hillsides and steep slopes, set tractor wheels
as wide as possible for maximum stability.
1. Raise tractor three-point arms (if equipped) clear up to
clear Terra Max.
2. For TWO-WHEEL DRIVE and MFWD tractors, pin
drawbar in fixed center position for field and transport.
For FOUR-WHEEL DRIVE and TRAC-DRIVE tractors,
leave one hole clearance on each side of drawbar for field
position, hitch damage may occur if pinned solid. Pin in
center position for transport to maintain maximum
steering control.
Refer to Figure 3
3. Use jack (1) to raise and lower Terra Max tongue.
4. Back tractor draw bar into alignment with hitch (2).
5. Secure with a locking hitch pin.
6. Secure safety chain (3) to an anchor on the tractor.
Negative Tongue Weight Hazard:
Make certain that Terra Max is securely hitched to the tractor
or leading implement before unfolding. An unhitched
Terra Max can tip over backwards during folding and
unfolding
if the tongue is not secured.
Refer to Figure 4
7. Retract jack foot. Re-orient jack to storage position.
8. After hitching tractor to Terra Max, store jack on storage
stob (4) on Terra Max tongue.
1
2
3
Figure 3
Jack & Hitch Clevis
42244
Crushing Hazard:
Do not stand or place any body part between Terra Max and
moving tractor. You may be severely injured or killed by being
crushed between the tractor and Terra Max. Stop tractor
engine and set parking brake before attaching cables and
hoses.
4
Figure 4
Jack in Storage
42262
Great Plains | 586-831M | 07/29/2020 Table of Contents Index 14
HT1100-20 - HT1100-30 Table of Contents Index Preparation and Setup
Electrical Hookup
Refer to Figure 5
Your Terra Max is equipped with North American Lights.
Plug the lighting connector into the tractor outlet.
Test the lights and signaling prior to highway movement.
Hydraulic Hose Hookup
Great Plains hydraulic hoses are color coded to help you
hookup hoses to your tractor outlets. Hoses that go to the same
remote valve are marked with the same color.
High Pressure Fluid Hazard:
Shut down tractor before making hydraulic connections.
Only trained personnel should work with system hydraulics.
Escaping fluid under pressure can have sufficient pressure to
penetrate the skin causing serious injury. If an accident
occurs, seek immediate medical assistance from a physician
familiar with this type of injury.
Use paper or cardboard, NOT BODY PARTS, to check for
leaks. Wear protective gloves and safety glasses or goggles
when working with hydraulic systems.
Refer to Figure 6
To distinguish hoses on the same hydraulic circuit, refer to
hose label.
•The hose with an extended-cylinder symbol feeds a
cylinder base end.
•The hose with a retracted-cylinder symbol feeds a
cylinder rod end.
Secure hoses and cables so that they have sufficient slack for
hitch movements, but cannot get caught between moving parts
of tractor, Terra Max or hitch. Failure to safely route and
secure hoses and cables could result in damage requiring
component repair/replacement, and lost field time.
Clean all hydraulic couplings and hook hoses to tractor.
Color Hydraulic Function
Black Lift (2 hoses)
Green Fold (2 hoses)
Red Gang Adjustment & Leveling (2 hoses)
Yellow Hydraulic Reel Att. (3 hoses, one for case drain)
(Optional)
Figure 5
North American Connector
36051
Figure 6
Hose Handles
31733
HT1100-20 - HT1100-30 Table of Contents Index Preparation and Setup
Great Plains | 586-831M | 07/29/2020 Table of Contents Index 15
Clevis Hitch
Refer to Figure 7
The base hitch must be upright (with the recessed notch on the
bottom) for this configuration. This places the tongue weight
on the base hitch, and not the clevis.
1. Select one each:
(82) 890-798C HITCH CLEVIS
(48) 802-487C HHCS 3/4-10X6 GR8
(62) 803-367C NUT HEX TOP LOCK 3/4-10 PLT
2. With the square-shouldered end of the clevis (82) up,
fully seat the clevis in the upright base hitch (83). Insert
the Grade 8 bolt (48) from below. Secure with lock
nut (62).
Hitch Failure Hazard:
Install the hitch base and assemble the clevis parts as shown.
Incorrect installation or assembly may result in failure of the
clevis bolt, leading to hitch failure. This could result in a
serious highway accident or severe machine damage.
Category III Hitch
The base hitch must be inverted (with the recessed notch on
the top) for this configuration. Set the V-block (87) to allow
some vertical articulation of the draw bar pin. Always use at
least one cushion (88).
1. Select one each:
(89) PPI-302V TOP PLATE - CAT 3
(87) PPI-203VR V-BLOCK
(47) 802-383C HHCS 3/4-10X3 GR5
and two:
(88) PPI-205H CUSHION
2. Set the cushions (88) inside the hitch recess, just forward
of the vertical bolt hole. Position the V-block (87) forward
of the cushions and check the size of the resulting pinning
hole. Remove a cushion if needed.
3. Add the top plate (89). Secure from below with Grade 5
bolt (47).
Figure 7
Configure Hitch
31740
42245
31741
83
47
48
89
88
87
82
62
Great Plains | 586-831M | 07/29/2020 Table of Contents Index 16
HT1100-20 - HT1100-30 Table of Contents Index Preparation and Setup
Transport Locks
Refer to Figure 8
4. Once the cylinders are connected, raise the unit
completely. If the transport locks (1) are in place on
cylinders (2), remove them at this time.
5. Store the transport locks (1) in hole of the lift mechanism
link (3).
Always use transport locks and wing fold pins when
transporting.
Wing Fold
Refer to Figure 9
6. If wing stop pins (4) are installed, remove pins from wing
stop clevis (5).
7. Install pin in storage tube (6) on wing stop.
Refer to Figure 10
The wing locking valve (7) is located on the center
brace bar close to the by pass valve to prevent wing
movement during transport and maintenance. The
valve is shown with the handle (8) in the open
position. To close the locking valve (7), turn handle (8)
90 degrees, to keep wings from un-folding.
Lock valve may be used for transport and temporary
storage.
8. Once the transport locks, wing stop pins are removed and
wing fold valve is in the open position (as shown), unfold
the wings (if folding unit).
Make sure no one is under the wings during the
unfolding process. Watch for leaks and make sure
hoses do not get pinched during the initial unfolding
process.
9. Once the machine is unfolded, raise and lower the
machine several times to purge air from the lift system.
Again, watch for any leaks and tighten if necessary.
2
Figure 8
Transport Locks
42066
3
1
4
5
6
Figure 9
Wing Fold Pins
42249
7
8
Figure 10
Wing Lock Valve
TP-69629

Other manuals for Terra Max HT1100-20

3

This manual suits for next models

2

Other GREAT PLAINS Farm Equipment manuals

GREAT PLAINS SPARTAN II NTA607-2-3275 User manual

GREAT PLAINS

GREAT PLAINS SPARTAN II NTA607-2-3275 User manual

GREAT PLAINS YP-625 User manual

GREAT PLAINS

GREAT PLAINS YP-625 User manual

GREAT PLAINS Turbo Max 3500TM User manual

GREAT PLAINS

GREAT PLAINS Turbo Max 3500TM User manual

GREAT PLAINS PL5700 User manual

GREAT PLAINS

GREAT PLAINS PL5700 User manual

GREAT PLAINS SPARTAN II User manual

GREAT PLAINS

GREAT PLAINS SPARTAN II User manual

GREAT PLAINS PH-15 User manual

GREAT PLAINS

GREAT PLAINS PH-15 User manual

GREAT PLAINS 706NT User manual

GREAT PLAINS

GREAT PLAINS 706NT User manual

GREAT PLAINS Turbo Max 1200TM User manual

GREAT PLAINS

GREAT PLAINS Turbo Max 1200TM User manual

GREAT PLAINS TCN5107 User manual

GREAT PLAINS

GREAT PLAINS TCN5107 User manual

GREAT PLAINS 3S-4000HD User manual

GREAT PLAINS

GREAT PLAINS 3S-4000HD User manual

GREAT PLAINS BD7600 User manual

GREAT PLAINS

GREAT PLAINS BD7600 User manual

GREAT PLAINS 2N-2410 User manual

GREAT PLAINS

GREAT PLAINS 2N-2410 User manual

GREAT PLAINS 1510HDP User manual

GREAT PLAINS

GREAT PLAINS 1510HDP User manual

GREAT PLAINS Turbo Max 1800TM User manual

GREAT PLAINS

GREAT PLAINS Turbo Max 1800TM User manual

GREAT PLAINS HT1100-35 User manual

GREAT PLAINS

GREAT PLAINS HT1100-35 User manual

GREAT PLAINS CT8300 User manual

GREAT PLAINS

GREAT PLAINS CT8300 User manual

GREAT PLAINS BD7600 Guide

GREAT PLAINS

GREAT PLAINS BD7600 Guide

GREAT PLAINS Turbo Max 1800TM User manual

GREAT PLAINS

GREAT PLAINS Turbo Max 1800TM User manual

GREAT PLAINS VT1500 Series User manual

GREAT PLAINS

GREAT PLAINS VT1500 Series User manual

GREAT PLAINS VT1510 User manual

GREAT PLAINS

GREAT PLAINS VT1510 User manual

GREAT PLAINS Yield-Pro 3P3025AH User manual

GREAT PLAINS

GREAT PLAINS Yield-Pro 3P3025AH User manual

GREAT PLAINS Qualidisc User manual

GREAT PLAINS

GREAT PLAINS Qualidisc User manual

GREAT PLAINS Turbo Max VT1110-7.5M User manual

GREAT PLAINS

GREAT PLAINS Turbo Max VT1110-7.5M User manual

GREAT PLAINS TURBO-TILL II Series User manual

GREAT PLAINS

GREAT PLAINS TURBO-TILL II Series User manual

Popular Farm Equipment manuals by other brands

New Holland F106.6 Service manual

New Holland

New Holland F106.6 Service manual

Case IH AXIAL-FLOW 7230 Service manual

Case IH

Case IH AXIAL-FLOW 7230 Service manual

Poettinger EUROTOP 851 A multitast Operator's manual

Poettinger

Poettinger EUROTOP 851 A multitast Operator's manual

New Holland TH Telehandler Quick operation guide

New Holland

New Holland TH Telehandler Quick operation guide

HE-VA Tip-Roller operating instructions

HE-VA

HE-VA Tip-Roller operating instructions

HMF LEOFANT 24 ABB2471 instruction manual

HMF

HMF LEOFANT 24 ABB2471 instruction manual

Toro Sand Pro 5040 Operator's manual

Toro

Toro Sand Pro 5040 Operator's manual

Pottinger TOP 420 N Operator's manual

Pottinger

Pottinger TOP 420 N Operator's manual

Bam Fiber Works Busy Butler manual

Bam Fiber Works

Bam Fiber Works Busy Butler manual

Gregoire Besson SP9 COMPACT Instruction of Utilization and Maintenance

Gregoire Besson

Gregoire Besson SP9 COMPACT Instruction of Utilization and Maintenance

Hurricane 3-PT-Swinger manual

Hurricane

Hurricane 3-PT-Swinger manual

MECTOOL TP3 Installation & service manual

MECTOOL

MECTOOL TP3 Installation & service manual

Farmet DISKOMAT 5 PS operating manual

Farmet

Farmet DISKOMAT 5 PS operating manual

Dohrmann Enterprises DE-1008.5 owner's manual

Dohrmann Enterprises

Dohrmann Enterprises DE-1008.5 owner's manual

JF 1300 S2 Operation & technical manual

JF

JF 1300 S2 Operation & technical manual

Agrisem DSF1600 user manual

Agrisem

Agrisem DSF1600 user manual

Claas QUADRANT 5300 manual

Claas

Claas QUADRANT 5300 manual

Sulky Burel DPX Expert Series manual

Sulky Burel

Sulky Burel DPX Expert Series manual

manuals.online logo
manuals.online logoBrands
  • About & Mission
  • Contact us
  • Privacy Policy
  • Terms and Conditions

Copyright 2025 Manuals.Online. All Rights Reserved.