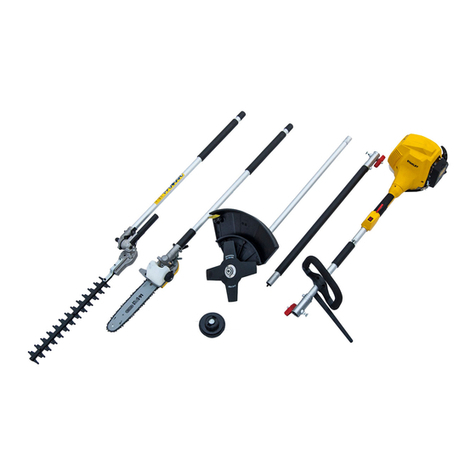
Stanley FATMAX SFMSTB930 User manual

www.stanley.eu SFMSTB930
13
12
1
8
9
11
5
4
6
7
3
10
2
0000 00-00
18

23
English (original instructions) 6
Deutsch (übersetzt von den originalanweisungen) 17
Français (traduction de la notice d’instructions originale) 31
Italiano (tradotto dalle istruzioni originali) 45
Nederlands (vertaald vanuit de originele instructies) 58
Español (traducido de las instrucciones originales) 71
Português (traduzido das instruções originais) 85
Svenska (översatt från de ursprungliga instruktionerna) 98
Norsk (oversatt fra de originale instruksjonene) 109
Dansk (oversat fra original brugsvejledning) 121
Suomi (käännetty alkuperäisestä käyttöohjeesta) 132
Ελληνικά (μετάφραση από τις πρωτότυπες οδηγίες) 144

23
12
12a
12c
12b
A
12 12d
B
9 8
1514
C
11
18
17
1610 20
20
167
D
19
10
11
20 99
88
E
8
6 19
18
F

45
12
1321
G
214
3
H
6
22
5
I J
22
23
24
10
610mm
K L

45
24 25
26
M
25
28 N
25
Q
25
P
29
27
O
30
R

6
ENGLISH (Original instructions)
Intended use
Your STANLEY FATMAX SFMSTB930 String trimmer has
been designed for trimming grass. This appliance is intended
for professional and private, non-professional use only.
Safety instructions
General safety warnings
@Warning! Read all safety
warnings and all instructions.
Failure to follow the warnings and
instructions may result in electric shock,
re and/or serious injury.
Save all warnings and
instructions for future reference.
The term "power tool" in all of the
warnings listed below refers to your
mains operated (corded) power tool or
battery operated (cordless) power tool.
1. Work area safety
a. Keep work area clean and well lit.
Cluttered or dark areas invite
accidents.
b. Do not operate power tools in
explosive atmospheres, such as in
the presence of ammable liquids,
gases or dust. Power tools create
sparks which may ignite the dust or
fumes.
c. Keep children and bystanders away
while operating a power tool.
Distractions can cause you to lose
control.
2. Electrical safety
a. Power tool plugs must match the
outlet. Never modify the plug in any
way.
Do not use any adapter plugs with
earthed (grounded) power tools.
Unmodied plugs and matching outlets
will reduce risk of electric shock.
b. Avoid body contact with earthed or
grounded surfaces such as pipes,
radiators, ranges and refrigerators.
There is an increased risk of electric
shock if your body is earthed or
grounded.
c. Do not expose power tools to rain
or wet conditions.
Water entering a power tool will
increase the risk of electric shock.
d. Do not abuse the cord. Never use
the cord for carrying, pulling or
unplugging the power tool. Keep
cord away from heat, oil, sharp
edges or moving parts. Damaged or
entangled cords increase the risk of
electric shock.
e. When operating a power tool
outdoors, use an extension cord
suitable for outdoor use. Use of a
cord suitable for outdoor use reduces
the risk of electric shock.
f. If operating a power tool in a damp
location is unavoidable, use a
residual current device (RCD)
protected supply. Use of an RCD
reduces the risk of electric shock.
3. Personal safety
a. Stay alert, watch what you are doing
and use common sense when
operating a power tool.

7
ENGLISH
(Original instructions)
Do not use a power tool while you
are tired or under the inuence of
drugs, alcohol or medication. A
moment of inattention while operating
power tools may result in serious
personal injury.
b. Use personal protective equipment.
Always wear eye protection.
Protective equipment such as dust
mask, non-skid safety shoes, hard hat,
or hearing protection used for
appropriate conditions will reduce
personal injuries.
c. Prevent unintentional starting.
Ensure the switch is in the off-
position before connecting to power
source and/or battery pack, picking
up or carrying the tool. Carrying
power tools with your nger on the
switch or energising power tools that
have the switch on invites accidents.
d. Remove any adjusting key or
wrench before turning the power
tool on.
A wrench or a key left attached to a
rotating part of the power tool may
result in personal injury.
e. Do not overreach. Keep proper
footing and balance at all times.
This enables better control of the
power tool in unexpected situations.
f. Dress properly. Do not wear loose
clothing or jewellery. Keep your
hair, clothing and gloves away from
moving parts. Loose clothes,
jewellery or long hair can be caught in
moving parts.
g. If devices are provided for the
connection of dust extraction and
collection facilities, ensure these
are connected and properly used.
Use of dust collection can reduce
dust-related hazards.
h. Do not let familiarity gained from
frequent use of tools allow you to
become complacent and ignore tool
safety principles. A careless action
can cause severe injury within a
fraction of a second.
4. Power tool use and care
a. Do not force the power tool.
Use the correct power tool for your
application. The correct power tool
will do the job better and safer at the
rate for which it was designed.
b. Do not use the power tool if the
switch does not turn it on and off.
Any power tool that cannot be
controlled with the switch is dangerous
and must be repaired.
c. Disconnect the plug from the power
source and/or the battery pack from
the power tool before making any
adjustments, changing accessories,
or storing power tools.
Such preventive safety measures
reduce the risk of starting the power
tool accidentally.
d. Store idle power tools out of the
reach of children and do not allow
persons unfamiliar with the power
tool or these instructions to operate
the power tool.

8
ENGLISH (Original instructions)
Use of any other battery packs may
create a risk of injury and re.
c. When battery pack is not in use,
keep it away from other metal
objects, like paper clips, coins,
keys, nails, screws, or other small
metal objects, that can make a
connection from one terminal to
another. Shorting the battery terminals
together may cause burns or a re.
d. Under abusive conditions, liquid
may be ejected from the battery;
avoid contact. If contact
accidentally occurs, ush with
water.
If liquid contacts eyes, additionally
seek medical help. Liquid ejected
from the battery may cause irritation or
burns.
e. Do not use a battery pack or tool
that is damaged or modied.
Damaged or modied batteries may
exhibit unpredictable behaviour
resulting in re, explosion or risk of
injury.
f. Do not expose a battery pack or tool
to re or excessive temperature.
Exposure to re or temperature above
130 °C may cause explosion.
g. Follow all charging instructions and
do not charge the battery pack or
tool outside the temperature range
specied in the instructions.
Charging improperly or at
temperatures outside the specied
range may damage the battery and
increase the risk of re.
Power tools are dangerous in the
hands of untrained users.
e. Maintain power tools. Check for
misalignment or binding of moving
parts, breakage of parts and any
other condition that may affect the
power tools operation. If damaged,
have the power tool repaired before
use. Many accidents are caused by
poorly maintained power tools.
f. Keep cutting tools sharp and clean.
Properly maintained cutting tools with
sharp cutting edges are less likely to
bind and are easier to control.
g. Use the power tool, accessories and
tool bits etc. in accordance with
these instructions, taking into
account the working conditions and
the work to be performed. Use of the
power tool for operations different from
those intended could result in a
hazardous situation.
h. Keep handles and grasping
surfaces dry, clean and free from oil
and grease. Slippery handles and
grasping surfaces do not allow for safe
handling and control of the tool in
unexpected situations.
5. Battery tool use and care
a. Recharge only with the charger
specied by the manufacturer. A
charger that is suitable for one type of
battery pack may create a risk of re
when used with another battery pack.
b. Use power tools only with
specically designated battery
packs.

9
ENGLISH
(Original instructions)
6. Service
a. Have your power tool serviced by a
qualied repair person using only
identical replacement parts. This will
ensure that the safety of the power tool
is maintained.
b. Never service damaged battery
packs. Service of battery packs should
only be performed by the manufacturer
or authorized service providers.
Additional power tool safety
warnings
@Warning! Additional safety
warnings for string trimmers.
The intended use is described in this
manual. The use of any accessory or
attachment or performance of any
operation with this appliance other than
those recommended in this instruction
manual can present a risk of personal
injury and/or damage to property.
uTo protect your feet and legs while
operating the appliance, always wear
heavy duty footwear and long trousers.
uAlways remove the battery from the
appliance whenever the appliance is
unattended, before clearing a
blockage, before cleaning and
maintenance, after striking a foreign
object or whenever the appliance
starts vibrating abnormally.
uDo not use in the rain or leave
outdoors while it is raining.
uDo not cross gravel paths or roads
whilst your product is switched on.
Walk, never run.
uDo not place your unit down on gravel
while it is switched on.
uAlways be sure of your footing,
particularly on slopes. Do not
overreach and keep your balance at
all times.
uDo not place any objects into the
openings. Never use if the openings
are blocked.
uKeep free of hair, lint, dust and
anything that may reduce the airow.
Warning! Always use your product in the
manner outlined in this manual. Your
product is designed to be used in an
upright mode and if it is used in any other
way it may result in injury. Never run your
product whilst lying on it’s side or
upside down.
uThe operator or user is responsible for
accidents or hazards occurring to other
people or their property.
uDo not use solvents or cleaning uids
to clean your product. Use a blunt
scraper to remove grass and dirt.
uReplacement fans are available from a
STANLEY FATMAX service agent. Use
on STANLEY FATMAX recommended
spare parts and accessories.
uKeep all nuts bolts and screws tight to
make sure that the appliance is in a
safe working condition.
uWear ear protectors. Exposure to
noise can cause hearing loss.
uAvoid using the maching in bad
weather conditions especially when
there is a risk of lightning.

10
ENGLISH (Original instructions)
Vibration
The declared vibration emission values
stated in the technical data and the
declaration of conformity have been
measured in accordance with a standard
test method provided by EN60335 and
may be used for comparing one tool with
another.
The declared vibration emission value
may also be used in a preliminary
assessment of exposure.
Warning! The vibration emission value
during actual use of the power tool can
differ from the declared value depending
on the ways in which the tool is used.
The vibration level may increase above
the level stated.
When assessing vibration exposure to
determine safety measures required by
2002/44/EC to protect persons regularly
using power tools in employment, an
estimation of vibration exposure should
consider, the actual conditions of use and
the way the tool is used, including taking
account of all parts of the operating cycle
such as the times when the tool is
switched off and when it is running idle in
addition to the trigger time.
Safety of Others
The appliance is only to be used with the
power supply unit recommended for this
appliance.
uThis appliance is not intended for use
by persons (including children) with
reduced physical, sensory or mental
capabilities, or lack of experience and
knowledge, unless they have been
given supervision or instruction
concerning use of the appliance by a
person responsible for their safety.
uDo not use when people, especially
children or pets are nearby.
Children should be supervised to ensure
that they do not play with the appliance.
Residual risks
Additional residual risks may arise when
using the tool which may not be included
in the enclosed safety warnings. These
risks can arise from misuse, prolonged
use etc.
Even with the application of the relevant
safety regulations and the
implementation of safety devices, certain
residual risks can not be avoided. These
include:
uInjuries caused by touching any
rotating/moving parts.
uInjuries caused when changing any
parts, blades or accessories.
uInjuries caused by prolonged use of a
tool. When using any tool for
prolonged periods ensure you take
regular breaks.
uImpairment of hearing.
uHealth hazards caused by breathing
dust developed when using your tool
(example:- working with wood,
especially oak, beech and MDF.)

11
ENGLISH
(Original instructions)
Markings on tool
The following pictograms are shown on
the tool along with the date code (18):
Read instruction manual
before use.
Wear ear protection.
Wear eye protection.
Do not expose the tool to
rain or high
humidity or leave
outdoors while it is raining.
Switch the tool off. Before
performing any maintenance
on the tool, remove the battery
from the tool.
Keep bystanders away.
96
Directive 2000/14/EC
guaranteed sound power.
Direction of rotation.
Additional safety instructions for
batteries and chargers
Batteries
uNever attempt to open for any reason.
uDo not expose the battery to water.
uDo not store in locations where the
temperature may exceed 40 °C.
uCharge only at ambient temperatures
between 10 °C and 40 °C.
uCharge only using the charger
provided with the tool.
uWhen disposing of batteries, follow the
instructions given in the section
"Protecting the environment".
pDo not attempt to charge
damaged batteries.
Chargers
uUse your STANLEY FATMAX charger
only to charge the battery in the tool
with which it was supplied.
Other batteries could burst, causing
personal injury and damage.
uNever attempt to charge non-
rechargeable batteries.
uHave defective cords replaced
immediately.
uDo not expose the charger to water.
uDo not open the charger.
uDo not probe the charger.
$The charger is intended for
indoor use only.
+Read the instruction manual
before use.
Electrical safety
#Your STANLEY FATMAX
charger is double insulated;
therefore no earth wire is
required. Always check that the
mains voltage corresponds to
the voltage on the rating plate.
Never attempt to replace the
charger unit with a regular mains
plug.

12
ENGLISH (Original instructions)
uIf the supply cord is damaged, it must
be replaced by the manufacturer or an
authorised STANLEY FATMAX Service
Centre in order to avoid a hazard.
Description
This tool includes some or all of the following features.
1. Trigger
2. Lock-off button
3. Speed control switch
4. Line feed button
5. Main handle
6. Auxiliary handle
7. Motor housing
8. Upper trimmer pole
9. Lower trimmer pole
10. Spool housing
11. Guard
12. Battery pack
13. Battery release button
Use
Warning! Let the tool work at its own pace. Do not overload.
Charging the battery (Fig. A)
The battery needs to be charged before rst use and
whenever it fails to produce sufcient power on jobs that were
easily done before.
The battery may become warm while charging; this is normal
and does not indicate a problem.
Warning! Do not charge the battery at ambient temperatures
below 10 °C or above 40 °C. Recommended charging
temperature: approx. 24 °C.
Note: The charger will not charge a battery if the cell
temperature is below approximately 10 °C or above 40 °C.
The battery should be left in the charger and the charger will
begin to charge automatically when the cell temperature
warms up or cools down.
Note: To ensure maximum performance and life of lithium-ion
battery packs, charge the battery pack fully before rst use.
uPlug the charger (12a) into an appropriate outlet before
inserting battery pack (12).
uThe green charging light (12b) will blink continuously
indicating that the charging process has started.
uThe completion of charge will be indicated by the green
charging light (12b) remaining ON continuously. The
battery pack (12) is fully charged and may be removed
and used at this time or left in the charger (12a).
uCharge discharged batteries within 1 week. Battery life will
be greatly diminished if stored in a discharged state.
Charger LED Modes
Charging:
Green LED Intermittent
Fully Charged:
Green LED Solid
Hot/Cold Pack Delay:
Green LED Intermittent
Red LED Solid
Note: The compatible charger(s) will not charge a faulty
battery pack. The charger will indicate a faulty battery pack by
refusing to light.
Note: This could also mean a problem with a charger. If the
charger indicates a problem, take the charger and battery
pack to be tested at an authorized service centre.
Leaving the battery in the charger
The charger and battery pack can be left connected with the
LED glowing indenitely. The charger will keep the battery
pack fresh and fully charged.
Hot/Cold Pack Delay
When the charger detects a battery that is too hot or too cold,
it automatically starts a Hot/Cold Pack Delay, the green LED
(12b) will ash intermittently, while the red LED (12c) will
remain on continuously, suspending charging until the battery
has reached an appropriate temperature. The charger then
automatically switches to the pack charging mode. This
feature ensures maximum battery life.
Battery state of charge indicator (Fig. B)
The battery includes a state of charge indicator to quickly
determine the extent of battery life as shown in Fig. B. By
pressing the state of charge button (12d) you can easily view
the charge remaining in the battery as illustrated in Fig. B.
Inserting and removing the battery pack from
the tool (Fig. G)
Note: Make sure your battery pack (12) is fully charged.
To install the battery pack into the tool
uAlign the battery pack (12) with the rails inside the
tool (Fig. G).
uSlide it into the tool until the battery pack is firmly seated
and ensure that you hear the lock snap into place.

13
ENGLISH
(Original instructions)
To remove the battery pack from the tool
uPress the release button (13) and firmly pull the battery
pack out of the tool handle (Fig. G).
uInsert battery pack into the charger as described in the
charger section of this manual.
Assembling the pole (Fig. C)
uWhen installing the lower pole (9) into the upper pole (8) ,
align the detent lock (14) with the detent slot (15) as
shown in Fig. C.
uPress the two poles together so the detent lock (14)
engages the detent slot (15).
Warning! Always check to make sure that the detent lock is
completely secured in place. If the detent lock is not
completely secured it could result in the assemblys becoming
disconnected creating a hazardous condition. Periodically
check the connections to insure that the detent lock is
completely secured in place.
Installing the guard (Fig. D, E)
Warning! Never remove the guard. Damage or personal injury
could result.
Warning! NEVER OPERATE appliance WITHOUT GUARD
FIRMLY IN PLACE. The guard must always be properly
attached on the appliance to protect the user.
uRemove the guard screw (19).
uSlide the guard (11) fully onto the motor housing (7). Make
sure the tabs (20) on the guard engage the ribs (16) on
the trimmer head.
uContinue to slide the guard on until it “snaps” into place.
The locking tab (18) should snap into the housing slot
(17).
uUsing a crosshead screwdriver, insert the guard
screw (19) and tighten securely.
uOnce the guard is installed, remove the covering from the
line cut-off blade, located on the edge of the guard.
Adjusting the cutting swath size (Fig. E)
This guard allows for two swath sizes, 280 mm or 330 mm.
u To adjust the position of the cutting line blade (88), remove
the screws (99) securing the cutting line blade (88) in
place.
uPosition the cutting line blade (88) to the second position
on the guard and secure it with the screws (99).
Note: Moving the cutting line blade (88) closer to the spool
housing will decrease cutting swath size.
Attaching the auxiliary handle (Fig. F)
uRemove handle knob (18) and handle bolt (19) from the
auxiliary handle (6).
uPush the auxiliary handle (6) onto the top of the upper
trimmer pole (8) as shown in Fig. F.
uThread the handle bolt (19) through the mounting hole on
the auxiliary handle (6).
uThread the handle knob (18) onto the handle bolt (19) and
firmly tighten. Ensure the handle is secured in position
before using.
uTo adjust the position of the auxiliary handle, loosen the
handle knob (18) and slide the auxiliary handle (6) up or
down the pole until it is in the desired location. Tighten the
handle knob (18) to secure the auxiliary handle (6)
in position.
Releasing the cutting line
In transit, the cutting line is taped to the spool housing (10).
uRemove the tape holding the cutting line to the
spool housing.
Operation
Instructions for use
Warning! Always observe the safety instructions and
applicable regulations.
Warning! To reduce the risk of serious personal injury, turn
tool off and disconnect battery pack before making any
adjustments or removing/installing attachments or
accessories. An accidental start-up can cause injury.
Proper hand position (Fig. I)
Warning! To reduce the risk of serious personal injury, Always
use proper hand position as shown.
Warning! To reduce the risk of serious personal injury, always
hold securely in anticipation of a sudden reaction.
Proper hand position requires one hand on the main
handle (5) and one hand on the auxiliary handle (6).
Switching trimmer on and off
Warning! Never attempt to lock the trigger in the on position.
uTo turn the appliance on, press the lock-off button (2) and
then squeeze the trigger (1). Once the unit is running, you
may release the lock-off button.
uTo turn the appliance off, release the trigger.
Speed control switch (Fig. H)
This string trimmer gives you the choice to operate at a more
efcient speed to extend the runtime for larger jobs, or
accelerate the trimmer speed for high-performance cutting.
uTo accelerate the trimmer, push the speed control
switch (3) forward toward the auxillary handle (6) into the
"HI" position. This mode is best to cut through heavier
growth and for applications that need higher RPM.
uTo extend runtime, pull the speed control switch back
toward the battery housing (21) into the "LO" position. This
mode is best for larger projects that require more time
to complete.
Note: When in "HI" mode, runtime will be decreased as
compared to when trimmer is in "LO" mode.

14
ENGLISH (Original instructions)
Line feed button (Fig. H)
The line feed feature allows you to advance the length of
cutting line available while trimming.
uTo extend the cutting line, fully depress the line feed
button (4) while trimming and then release.
Note: The trimmer will stop cutting when the line feed button
is pressed and will resume cutting when released.
Note: For maximum line length, press the button multiple
times until you hear the cutting line hitting the guard. Do not
continue to press the line feed button once the maximum
length is reached. This will result in overfeeding and will
consume string quickly.
Trimming (Fig. I - K)
Warning! Keep the rotating string roughly parallel with the
ground (tilted no more than 30 degrees). This trimmer is not
an edger. DO NOT TILT the trimmer so that the string is
spinning near a right angle to the ground. Flying debris can
cause serious injury.
Caution: Ensure that other persons and pets are at least 30
m away. Flying debris can cause serious injury.
uChargeWith the trimmer on, angle it and swing side to side
as shown in Fig. J.
uMaintain a cutting angle of 5 ° to 10 °. Do not exceed
10 °. Cut with the tip of the line.
Helpful cutting tips (Fig. K)
uUse the tip of the string to do the cutting; do not force
string head into uncut grass. Use edge guide along such
things as fences, houses and ower beds for
best practices.
uWire and picket fences cause extra string wear, even
breakage. Stone and brick walls, curbs, and wood may
wear string rapidly.
uDo not allow spool cap (22) to drag on ground or
other surfaces.
uIn long growth, cut from the top down and do not exceed
330mm high.
uKeep trimmer tilted toward the area being cut; this is the
best cutting area.
uThe trimmer cuts when passing the unit from the left to
right. This will avoid throwing debris at the operator.
uAvoid trees and shrubs. Tree bark, wood moldings, siding,
and fence posts can easily be damaged by the string.
uMaintain a minimum distance of 610 mm between the
guard and your feet as shown in Fig. K.
Cutting line / line feeding
Your trimmer uses 2 mm diameter, twist nylon line. During
use, the tips of the nylon lines will become frayed and worn.
Cutting line will wear faster and require more feeding if the
cutting is done along sidewalks or other abrasive surfaces or
heavier weeds are being cut.
Clearing jams and tangled line (Fig. L)
Warning! Remove the battery from the trimmer before making
any assembly, adjustments or changing accessories. Such
preventive safety measures reduce the risk of starting the
appliance accidentally.
From time to time, especially when cutting thick or stalky
weeds, the line feeding hub may become clogged with sap or
other material and the line will become jammed as a result. To
clear the jam, follow the steps listed below.
Caution: To avoid appliance damage, if the cutting line
protrudes beyond the trimming blade, cut it off so that it just
reaches the blade.
uRemove battery from appliance.
uPress the release tabs (23) on the spool cap (22), and
remove the spool cap from the spool housing (10).
uPull the nylon line spool out and clear any broken line or
cutting debris from the spool area.
uFit the spool onto the appliance as described in Replacing
Spool Assembly.
Replacing spool assembly (Fig. L, M)
Warning! The use of any accessory not recommended by
STANLEY FATMAX for use with this appliance could
be hazardous.
Warning! Do not use any blades, or any accessory or
attachment other than those recommended by STANLEY
FATMAX on this trimmer/edger. Serious injury or product
damage may result.
Reload nylon line (either bulk or prewound replacement spool)
as shown in this manual.
USE ONLY 2 mm DIAMETER TWISTED NYLON
MONOFILAMENT LINE. Do not use serrated or heavier gauge
line, as they will overload the motor and cause overheating.
This line is available at your local dealer or authorized
service center.
uRemove battery from appliance.
uPress the release tabs (25) on the spool cap (22), and
remove the spool cap from the spool housing (10).
uFor best results, replace spool with STANLEY FATMAX
Model # STZST1426-XJ.
uIf lever in base of housing becomes dislodged, replace in
correct position before inserting new spool into housing.
uRemove any dirt and grass from the spool cap and spool
housing.
uUnfasten the end of the cutting line and guide the line into
the eyelet.
uTake the new spool and push it onto the boss (26) in the
housing. Rotate the spool slightly until it is seated.

15
ENGLISH
(Original instructions)
uThe line should protrude approximately 136 mm from
the housing.
uAlign the release tabs on the spool cap with the slots in
the spool housing.
uSnap the spool cap back on by depressing release tabs
and pressing into spool housing.
uPush the cap onto the housing until it snaps securely
into place.
Note: Make sure that cover is fully positioned, listen for two
audible clicks to ensure both release tabs are correctly
located. Power the appliance on. In a few seconds or less
you’ll hear the nylon line being cut automatically to the
proper length.
Note: Other replacement parts (guards, spool caps, etc.) are
available through authorised service centres.
Rewinding spool from bulk line (Fig. N - Q)
Use Only 2 mm TWISTED Diameter Line
Bulk line is also available for purchase from your local retailer.
Note: Hand wound spools from bulk line are likely to become
tangled more frequently than STANLEY FATMAX factory
wound spools. For best results, factory wound spools
are recommended.
uRemove battery from appliance.
uRemove the empty spool from the appliance as described
in Replacing Spool Assembly.
uRemove any remaining cutting line from the spool.
uMake a fold at the end of the cutting line at about
19 mm (25). Feed the cutting line into one of the line
anchoring slots (28).
uInsert the 19 mm end of the bulk line into the hole (27) in
the spool adjacent to the slot. Make sure the line is pulled
tight against the spool.
uWind the cutting line onto the spool in the direction of the
arrow on the spool. Make sure to wind the line on neatly
and in layers. Do not crisscross.
uWhen the wound cutting line reaches the recesses (29),
cut the line.
uFit the spool onto the appliance as described in Replacing
Spool Assembly.
Weather Guard
This product (not including the battery pack or charger) has
some level of protection from liquids (light splashing) during
normal and reasonable use.
Warning! The battery and charger do not have Weather
Guard protection.
Warning! NEVER submerge the product, battery or charger in
liquid or use in the rain.
Maintenance
Your STANLEY FATMAX power tool has been designed to
operate over a long period of time with a minimum of
maintenance. Continuous satisfactory operation depends
upon proper tool care and regular cleaning.
Warning! To reduce the risk of serious personal injury, turn
tool off and disconnect battery pack before making any
adjustments or removing/installing attachments or
accessories. An accidental start-up can cause injury.
Your charger does not require any maintenance apart from
regular cleaning.
Warning! Before performing any maintenance on the tool,
remove the battery from the tool. Unplug the charger before
cleaning it.
uRegularly clean the ventilation slots in your tool and
charger using a soft brush or dry cloth.
uRegularly clean the motor housing using a damp cloth.
uDo not use any abrasive or solvent-based cleaner.
Lubrication
Your power tool requires no additional lubrication.
Cleaning
Warning! Blow dirt and dust out of the main housing with dry
air as often as dirt is seen collecting in and around the air
vents. Wear approved eye protection and approved dust mask
when performing this procedure.
Warning! Never use solvents or other harsh chemicals for
cleaning the non-metallic parts of the tool. These chemicals
may weaken the materials used in these parts. Use a cloth
dampened only with water and mild soap. Never let any liquid
get inside the tool; never immerse any part of the tool into
a liquid.
Replacement Accessories
Warning! To reduce the risk of serious personal injury, turn
appliance off and remove battery before making any
adjustments or removing/installing attachments
or accessories.
Warning! The use of any accessory not recommended by
Stanley Fatmax for use with this appliance could
be hazardous.
Warning! Do not use any blades, or any accessory or
attachment other than those recommended by Stanley Fatmax
on this trimmer. Serious injury or product damage may result.
When replacing the line, use 2 mm diameter line.

16
ENGLISH (Original instructions)
Use Stanley Fatmax replacement line Model No. STZST1426-
XJ. Other sizes may degrade performance or cause damage
to the trimmer.
Optional Accessories
Warning! Since accessories, other than those offered by
STANLEY FATMAX , have not been tested with this product,
use of such accessories with this tool could be hazardous. To
reduce the risk of injury, only STANLEY FATMAX
recommended accessories should be used with this product.
Consult your dealer for further information on the
appropriate accessories.
Protecting the environment
ZSeparate collection. Products and batteries marked
with this symbol must not be disposed of with
normal household waste.
Products and batteries contain materials that can be
recovered or recycled reducing the demand for raw materials.
Please recycle electrical products and batteries according to
local provisions. Further information is available at
www.2helpU.com
Technical data
SFMSTB930
Voltage Vdc 18
Type 1
RPM /min 0~5500 - 0~7200
Cutting Swath Size mm 280 or 330
Weight (without battery pack) kg 2.5
Charger SFMCB11 SFMCB12 SFMCB14
Input Voltage VAC 230 230 230
Output Voltage VDC 18 18 18
Current A 1.25 2 4
Battery SFMCB201 SFMCB202 SFMCB204 SFMCB206
Voltage VDC 18 18 18 18
Capacity Ah 1.5 2.0 4.0 6.0
Type Li-Ion Li-Ion Li-Ion Li-Ion
Warning! Your STANLEY FATMAX charger can only be used
to charge STANLEY FATMAX, Li-Ion batteries.
Approx. Charge time in minutes
Battery Pack SFMCB11 SFMCB12 SFMCB14
SFMCB201 72 45 22
SFMCB202 96 60 30
SFMCB204 192 120 60
SFMCB206 288 180 90
Noise values and vibration values (triax vector sum). Grass Trimmer
mode according to EN50636-2-91
Sound pressure (LpA) at work station 81 dB(A), uncertainty (K) 3 dB(A)
Sound power (LWA) 91.0 dB(A), uncertainty (K) 2 dB(A)
Vibration total values (triax vector sum) Grass Trimmer mode according
to EN50636-2-91
Vibration emission value ah:< 2.5 m/s2, uncertainty (K) 1.5 m/s2
The vibration emission level given in this information sheet
has been measured in accordance with a standardised test
given in EN50636 and may be used to compare one tool with
another. It may be used for a preliminary assessment
of exposure.
EC-Declaration of Conformity
Machinery Directive
Brushless Grass Trimmer SFMSTB930
STANLEY FATMAX declares that these products described
under Technical Data are in compliance with:
2006/42/EC, EN 60335-1:2012+A11:2014+A13:2017 +A1:201
9+A14:2019+A2:2019+A15:2021, EN50636-2-91:2014.
2000/14/EC, Lawn Timmer, L < 50cm, Annex VI
DEKRA Testing and Certification GmbH,
Handwerkstraße 15, 70565 Stuttgart
Location Certification Body,
Dinnendahlstr. 9, 44809 Bochum Germany
Notified Body number: 0158
LWA (measured sound power level) 91 dB(A),
Uncertainty (K) = 2.0 dB(A),
LWA (guaranteed sound power) 96 dB(A).
These products also comply with Directive 2014/30/EU and
2011/65/EU.
For more information, please contact STANLEY FATMAX at
the following address or refer to the back of the manual.
The undersigned is responsible for compilation of the
technical file and makes this declaration on behalf
of STANLEY FATMAX.
Patrick Diepenbach
General Manager, Benelux
STANLEY FATMAX Europe, Egide Walschaertsstraat14-18,
2800 Mechelen, Belgium
2022-08-20

17
(Übersetzung der ursprünglichen
Anweisungen) DEUTSCH
ENGLISH (Original instructions)
(Übersetzung der ursprünglichen
Anweisungen) DEUTSCH
DECLARATION OF CONFORMITY
THE SUPPLY OF MACHINERY (SAFETY)
REGULATIONS 2008
Brushless Grass Trimmer SFMSTB930
STANLEY FATMAX declares that these products described
under “technical data” are in compliance with:
The Supply of Machinery (Safety) Regulations, 2008, S.I.
2008/1597 (as amended),
EN 60335-1:2012+A11:2014+A13:2017 +A1:2019+A14:2019+
A2:2019+A15:2021, EN50636-2-91:2014.
The Noise Emission in the Environment by Equipment for use
Outdoors Regulations 2001, S.I. 2001/1701 (as amended),
Schedule 9.
Intertek Testing & Certification Ltd
Academy Place, 1-9 Brook Street, Brentwood, Essex,
CM145NQ United Kingdom
Approved Body Number: 0359
LWA (measured sound power level) 91 dB(A),
Uncertainty (K) = 2.0 dB(A),
LWA (guaranteed sound power) 96 dB(A).
These products also conform to the following UK Regulations:
Electromagnetic Compatibility Regulations, 2016,
S.I.2016/1091 (as amended).
The Restriction of the Use of Certain Hazardous Substances
in Electrical and Electronic Equipment Regulations 2012, S.I.
2012/3032 (as amended).
For more information, please contact STANLEY FATMAX at
the following address or refer to the back of the manual.
The undersigned is responsible for compilation of the
technical file and makes this declaration on behalf of
STANLEY FATMAX.
Paul Featherstone
Product Director - Outdoor Products Group
Stanley UK,
270 Bath Road, Slough
Berkshire SL1 4DX
England
2022-08-20
Guarantee
STANLEY FATMAX is confident of the quality of its products
and offers consumers a 12 month guarantee from the date
of purchase. This guarantee is in addition to and in no way
prejudices your statutory rights. The guarantee is valid within
the territories of the Member States of the European Union,
European Free Trade area and the United Kingdom.
To claim on the guarantee, the claim must be in accordance
with STANLEY FATMAX Terms and Conditions and you will
need to submit proof of purchase to the seller or an authorised
repair agent.
Terms and conditions of the STANLEY FATMAX 1 year
guarantee and the location of your nearest authorised repair
agent can be obtained on the Internet at www.2helpU.com, or
by contacting your local STANLEY FATMAX office at the
address indicated in this manual.
Please visit our website www.stanley.eu/3 to register
your new STANLEY FATMAX product and receive updates on
new products and special offers.
Verwendungszweck
Ihr STANLEY FATMAX SFMSTB930 Fadentrimmer wurde für
das Trimmen von Gras entwickelt. Dieses Gerät ist zum
gewerblichen und privaten Einsatz vorgesehen.
Sicherheitshinweise
Allgemeine
Sicherheitswarnungen
@
Warnung! Lesen Sie alle
Sicherheitswarnhinweise und
alle Anweisungen. Das
Nichtbeachten von Warnhinweisen
und Anweisungen kann zu
elektrischem Schlag, Brand und/
oder schweren Verletzungen
führen.

18
(Übersetzung der ursprünglichen Anweisungen)
DEUTSCH
Bewahren Sie alle Warnhinweise
und alle Anweisungen auf.Der
Begriff „Elektrowerkzeug“ in den
Warnhinweisen bezieht sich auf Ihr
netzbetriebenes Elektrowerkzeug (mit
Kabel) oder auf Ihr akkubetriebenes
(kabelloses) Elektrowerkzeug.
1. Sicherheit im Arbeitsbereich
a. Halten Sie Ihren Arbeitsbereich
sauber und gut ausgeleuchtet.
Unaufgeräumte oder dunkle Bereiche
begünstigen Unfälle.
b. Betreiben Sie das Gerät nicht in
Umgebungen, in denen
Explosionsgefahr z. B. aufgrund
von brennbaren Flüssigkeiten,
Gasen oder Staub besteht.
Elektrowerkzeuge erzeugen Funken,
die den Staub oder die Dämpfe
entzünden können.
c. Halten Sie Kinder und andere
Personen während der Benutzung
eines Geräts fern. Ablenkung kann
dazu führen, dass Sie die Kontrolle
über das Gerät verlieren.
2. Elektrische Sicherheit
a. Der Netzstecker des Geräts muss in
die Steckdose passen. Ändern Sie
niemals den Stecker in irgendeiner
Form. Verwenden Sie keinerlei
Adapterstecker an geerdeten
Elektrogeräten. Unveränderte Stecker
und passende Steckdosen mindern die
Gefahr eines elektrischen Schlages.
b. Vermeiden Sie Körperkontakt mit
geerdeten Oberächen von Rohren,
Heizungen, Herden und
Kühlschränken. Es besteht eine
erhöhte Gefahr für einen elektrischen
Schlag, wenn Ihr Körper geerdet ist.
c. Halten Sie Geräte von Regen und
Nässe fern. Wenn Wasser in das
Elektrogerät eindringt, erhöht sich die
Gefahr eines elektrischen Schlages.
d. Verwenden Sie das Kabel
ordnungsgemäß. Verwenden Sie
niemals das Kabel, um das
Elektrogerät zu tragen oder durch
Ziehen vom Netz zu trennen. Halten
Sie das Kabel fern von Hitze, Öl,
scharfen Kanten oder beweglichen
Teilen. Beschädigte oder verhedderte
Kabel erhöhen die Gefahr eines
elektrischen Schlages.
e. Verwenden Sie nur für den
Außenbereich zugelassene
Verlängerungskabel, wenn Sie mit
dem Gerät im Freien arbeiten. Die
Verwendung von für den Außeneinsatz
geeigneten Kabeln mindert die Gefahr
eines elektrischen Schlages.
f. Wenn das Gerät in einer feuchten
Umgebung verwendet werden
muss, schließen Sie es unbedingt
an eine Steckdose mit
Fehlerstromschutzschalter (FI-
Schalter) an. Der Einsatz eines
Fehlerstromschutzschalters mindert
die Gefahr eines elektrischen
Schlages.

19
(Übersetzung der ursprünglichen Anweisungen) DEUTSCH
Werkzeuge oder Schlüssel, die an
rotierenden Teilen des Elektrogerätes
angebracht sind, können zu
Verletzungen führen.
e. Beugen Sie sich nicht zu weit nach
vorne. Sorgen Sie für einen
sicheren Stand und halten Sie
jederzeit das Gleichgewicht.
Dadurch können Sie das
Elektrowerkzeug in unerwarteten
Situationen besser kontrollieren.
f. Tragen Sie geeignete Kleidung.
Tragen Sie keine weite Kleidung
und keinen Schmuck. Halten Sie
Ihre Haare, Kleidung und
Handschuhe von beweglichen
Teilen fern. Lose sitzende Kleidung,
Schmuck oder lange Haare können
sich in den beweglichen Teilen
verfangen.
g. Falls Vorrichtungen zum Absaugen
oder Auffangen von Staub
vorhanden sind, vergewissern Sie
sich, dass diese angeschlossen
sind und richtig verwendet werden.
Der Einsatz von Staubsammlern kann
staubbedingte Gefahren mindern.
h. Vermeiden Sie, durch die häuge
Nutzung des Werkzeugs in einen
Trott zu verfallen und Prinzipien für
die Werkzeugsicherheit zu
ignorieren. Eine unachtsame Aktion
kann im Bruchteil einer Sekunde zu
schweren Verletzungen führen.
4. Gebrauch und Pege von
Elektrowerkzeugen
a. Überlasten Sie das Gerät nicht.
3. Persönliche Sicherheit
a. Seien Sie aufmerksam, achten Sie
darauf, was Sie tun, und gehen Sie
sachgerecht mit einem Gerät um.
Benutzen Sie kein Elektrowerkzeug,
wenn Sie müde sind oder unter dem
Einuss von Drogen, Alkohol oder
Medikamenten stehen. Ein Moment
der Unachtsamkeit beim Betrieb eines
Elektrogerätes kann zu schweren
Verletzungen führen.
b. Verwenden Sie eine geeignete
Schutzausrüstung. Tragen Sie
immer einen Augenschutz. Das
Tragen persönlicher
Schutzausrüstung, wie Staubmaske,
rutschfeste Sicherheitsschuhe,
Schutzhelm oder Gehörschutz, je nach
Art und Einsatz des Elektrowerkzeugs,
verringert das Risiko von
Verletzungen.
c. Vermeiden Sie eine unbeabsichtigte
Inbetriebnahme. Vergewissern Sie
sich, dass der Schalter in der
AUS-Position ist, bevor Sie das
Gerät an die Stromversorgung und/
oder an den Akku anschließen oder
wenn Sie das Gerät aufnehmen oder
tragen. Wenn Sie beim Tragen des
Elektrowerkzeugs den Finger am
Schalter haben oder das Gerät
eingeschaltet an die Stromversorgung
anschließen, kann dies zu Unfällen
führen.
d. Entfernen Sie Einstell- oder
Schraubenschlüssel, bevor Sie das
Gerät einschalten.

20
(Übersetzung der ursprünglichen Anweisungen)
DEUTSCH
Verwenden Sie das für Ihre Arbeit
passende Elektrogerät. Das richtige
Gerät wird die Aufgabe besser und
sicherer erledigen, wenn es
bestimmungsgemäß verwendet wird.
b. Verwenden Sie das Gerät nicht,
wenn der Ein-/Ausschalter nicht
funktioniert. Ein Elektrowerkzeug,
das sich nicht mehr ein- oder
ausschalten lässt, ist gefährlich und
muss repariert werden.
c. Ziehen Sie den Stecker aus der
Steckdose, oder trennen Sie das
Gerät vom Akku, bevor Sie
Einstellungen vornehmen,
Zubehörteile wechseln oder das
Gerät lagern. Diese
Vorbeugemaßnahmen mindern die
Gefahr, dass das Elektrogerät
unbeabsichtigt startet.
d. Bewahren Sie unbenutzte Geräte
außerhalb der Reichweite von
Kindern auf. Lassen Sie Geräte
nicht von Personen benutzen, die
damit nicht vertraut sind oder diese
Anweisungen nicht gelesen haben.
Elektrogeräte sind in den Händen nicht
geschulter Personen gefährlich.
e. Halten Sie das Gerät in einem
einwandfreien Zustand. Prüfen Sie,
ob bewegliche Teile verzogen oder
ausgeschlagen, ob Teile gebrochen
oder in einem Zustand sind, der den
Betrieb des Elektrogerätes
beeinträchtigen kann. Bei
Beschädigungen lassen Sie das
Elektrogerät reparieren, bevor Sie
es verwenden.
Viele Unfälle entstehen wegen
mangelnder Wartung der
Elektrogeräte.
f. Halten Sie Schneidgeräte scharf
und sauber. Richtig gewartete
Schneidwerkzeuge mit scharfen
Klingen blockieren seltener und sind
leichter unter Kontrolle zu halten.
g. Verwenden Sie Gerät, Zubehör,
Einsatz-Bits usw. entsprechend
diesen Anweisungen und
berücksichtigen Sie dabei die
Arbeitsbedingungen und die
auszuführende Arbeit. Wenn Sie das
Elektrogerät für Aufgaben verwenden,
die nicht bestimmungsgemäß sind,
kann dies zu gefährlichen Situationen
führen.
h. Halten Sie die Griffe trocken, sauber
und frei von Öl und Fett. Rutschige
Griffe und Oberächen unterbinden die
sichere Bedienbarkeit und Kontrolle
über das Werkzeug in unerwarteten
Situationen.
5. Gebrauch und Pege von
Akkuwerkzeugen
a. Laden Sie den Akku nur mit dem
vom Hersteller vorgesehenen
Ladegerät auf. Für ein Ladegerät, das
nur für eine bestimmte Akkuart
geeignet ist, besteht Brandgefahr,
wenn es mit anderen Akkus verwendet
wird.
b. Verwenden Sie nur die für das
jeweilige Gerät vorgesehenen
Akkus.
This manual suits for next models
2
Table of contents
Languages:
Other Stanley Lawn And Garden Equipment manuals
Popular Lawn And Garden Equipment manuals by other brands

Ruris
Ruris RXE888 manual

SCM
SCM SC 10 manual

Scheppach
Scheppach EB2000 Translation of original instruction manual

Volpi
Volpi PV400 Translation from the original instructions

CMC
CMC CM300 Instruction and maintenance handbook

DuraTech Industries
DuraTech Industries Haybuster 572 Operating Instructions and Parts Reference