IBM Document: STAR 06/97 Doc # STAR001
Page 2of 2Copyright International Business Machines, 1997
All rights reserved
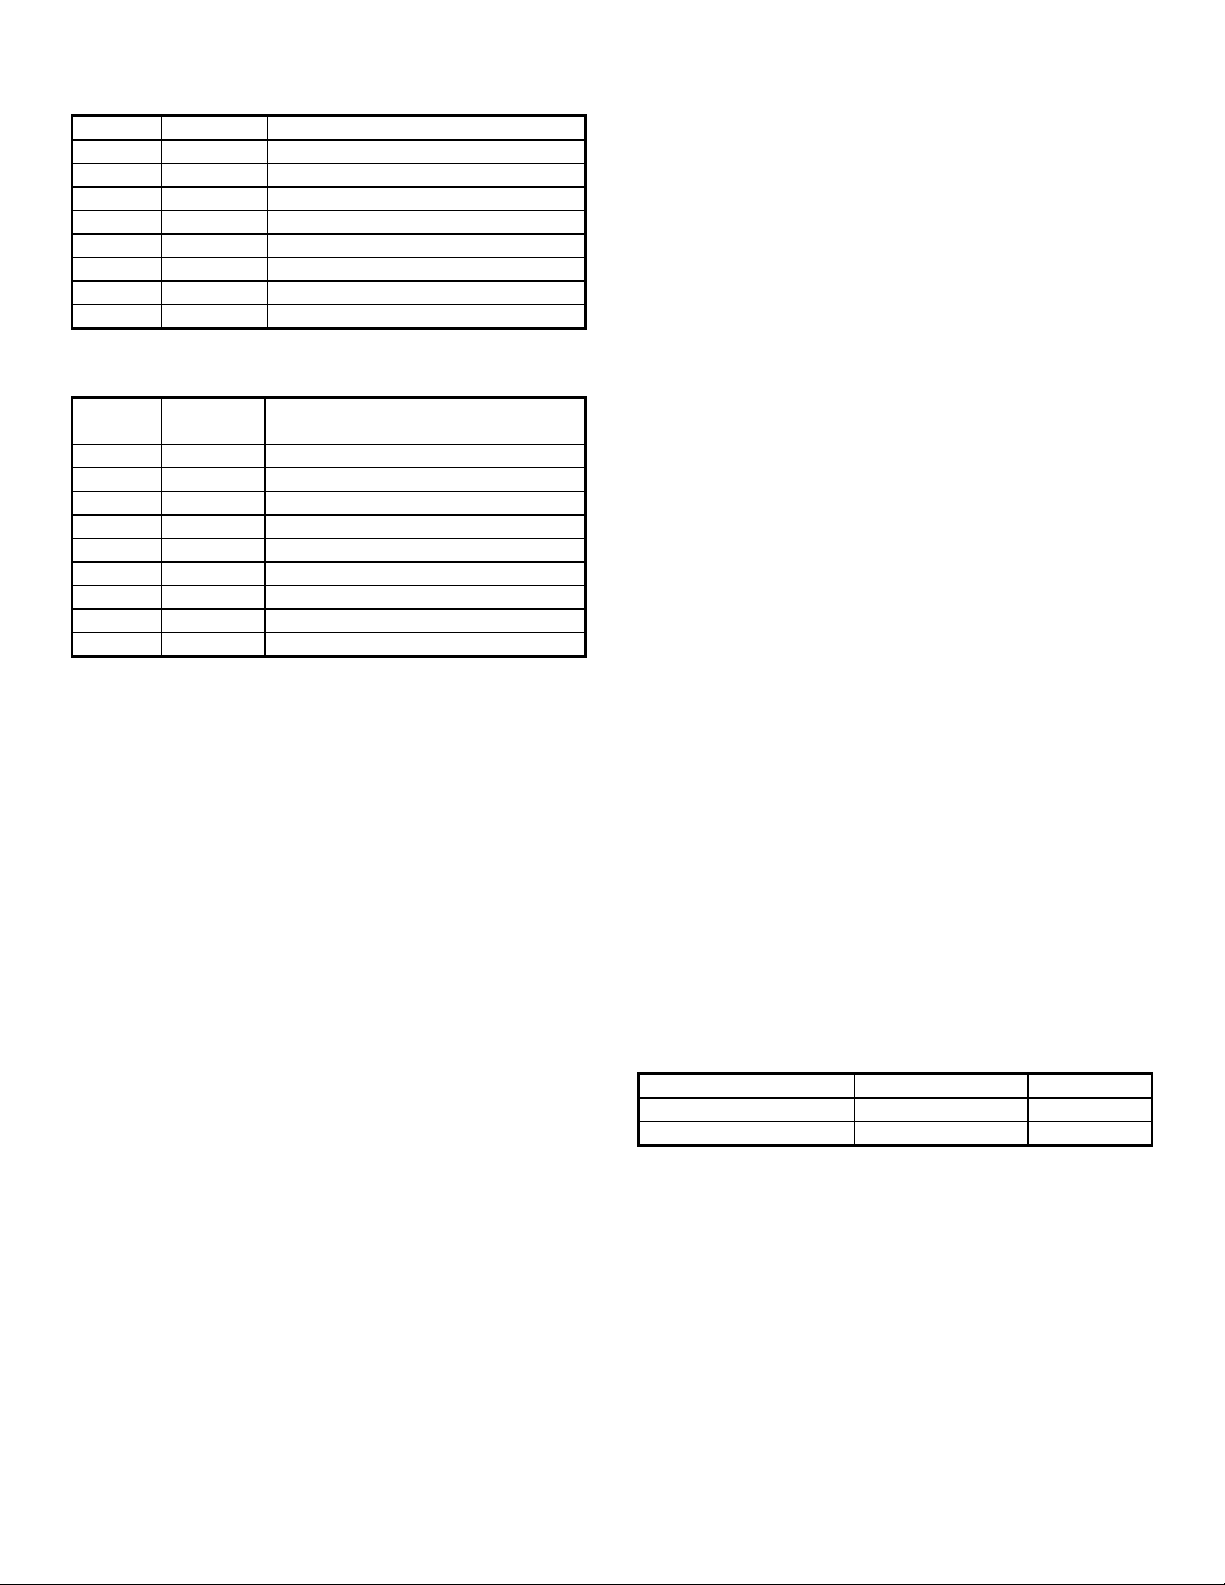
Modular Jack Connector Layout
Pin # Direction Signal Name or Function
1----- GND or Shield Ground
2----- GND or Frame Ground
3Output Carries data from the printer
4Input Carries data to the printer
5Output SPACE if printer is turned ON
6Output Printer sets MARK if error occurs
7----- GND or Signal Ground
8Output Print sets SPACE if ready to Recv.
Terminal Board Color Layout Chart
Symbol Lead
Color Connected Parts
WH White Clutch Solenoid
YE Yellow Ribbon Shift Solenoid
RE Red Motor Governor Board (+)
BL Black Motor Governor Board (GND)
OR Orange CAM Board (5 VDC)
GR Grey CAM Board (GND)
PI Pink CAM Board (output)
VI Violet Reset Board
BR Brown Motor Governor Board (Brake)
Special Notices
• The maximum size paper roll allowed on paper source
spool is 3-1/8”in diameter
• Do not use ketone, thinner or trichlene cleaners because
this could deform plastic parts of printer.
• Check ribbon for fraying or excessive use. Replace
ribbon with an approved ribbon or print-head’s life will be
shortened
• Use vacuum or air to remove any lint, paper shreds from
printer so printer may function properly.
• Never print without paper or ribbon installed, this will
shorten the print-head’s life.
• Dip switches SW1 & SW2 are located on the exterior of
the back-left side of the printer.
Tool Requirements
• Flatblade Screwdriver
• Phillips Head Screwdriver (M2-M4)
• Vacuum Cleaner
• Compress Air
• Tweezers
• Thickness Gauge (0.15 mm -0.70 mm)
Adjustments
Print-Head Clearance
• Open ribbon access cover on rear of printer
• Remove any paper in printer
• Remove ink ribbons (See Procedures)
• Locate and loosen two screws on top of print-head
• Adjust clearance between the platen and print-head to
.475”±.025”using appropriate thickness guide.
• To stop print-head from sliding tighten the screws.
• Replace Ink Ribbon (See Procedures)
• Add paper and close rear cover.
Procedures
Print Test
• Recycle power to printer and depress FEED button.
• Printer begins to print some test patterns and inf.
• To end the Print Test recycle power to printer.
Removal Of Ink Ribbon Spools
• Open cover on rear of printer if not already done.
• Locate the circular ribbon spools.
• Pop-Up any ribbon spool, but do not remove, by
grabbing the sides of spools and lifting up while pressing
down on the ribbon center post.
• Pop-Up the other ribbon spool the same way.
• Remove both ribbon spools and try to keep spools in the
same L/R positions they were on the printer.
Replacement Of Ink Ribbon Spools
• Take printer OFF-line and open rear cover.
• Position ribbon spools next to printer so they are side by
side with ribbon facing to rear of printer and the red
portion of ribbon is on the bottom.
• While keeping same spool positions place spools on the
L/R ribbon center posts and turn briefly to align keyed
position in ribbon spool to match post.
• While pressing down on spools make sure ribbon
passes between the print-head and the paper.
• Verify that ribbon moves freely and is not caught.
• Close cover and return printer ON-line
Field Replaceable Units
Description OEM Part IBM Part
DP-8340 Printer DP8340FM-120T 06J8792
Power Supply AD8340 90G6384


