CERTAIN SURFACES ARE EXTREMELY HOT
DURING OPERATION AND CARE SHOULD
BE TAKEN WHILE USING THIS UNIT.
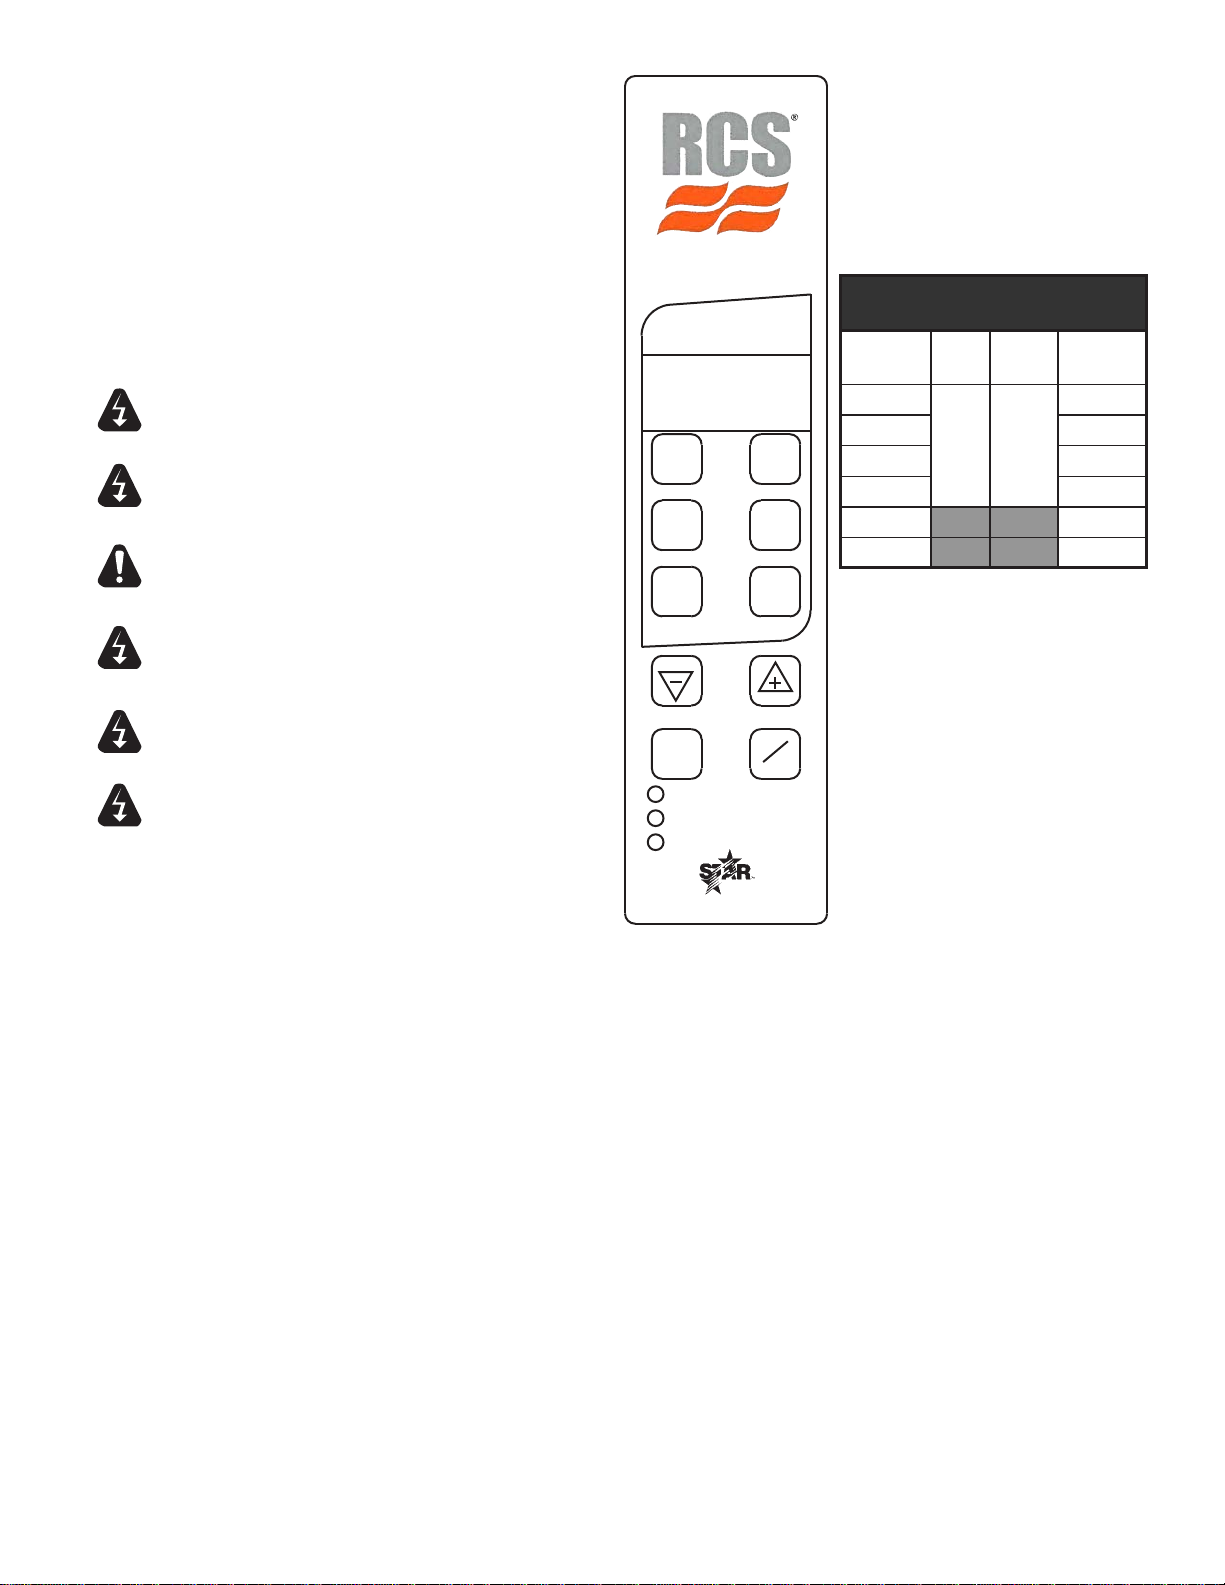
START UP
When the toaster has been plugged into a suitable outlet and power
supply, the word OFF will be displayed on the L.E.D. read out.
A. Press the ON/OFF button once to turn on the toaster. The
toaster will now enter into pre-heat and “PREHT” will be
displayed (the elements will begin to glow but the conveyor
and fan motor will not turn on).
B. After one minute, the fan motor will turn on and the conveyor
will begin turning at the previously saved setting (for initial
start up, the drive motor will operate at the factory default
setting).
C. Afterfourminutes,thedisplaywillshowthelastusedprogram
selection i.e. (for initial startup, CROIS, MUFFIN, PASTRY,
OTHER, will be the last program selected).
DAILY OPERATION
Check the power cord to insure that it is plugged into a proper
outlet.
Press the ON/OFF button once to turn the toaster on.
Press the button a second time to turn the toaster off.
NOTE: When the toaster is turned off, the fan and conveyor motors
will continue to run for ve minutes. The words COOLandDOWNwill
be alternately displayed during that time. After ve minutes, the word
OFF will be displayed until the ON/OFF button is pressed again.
Once the toaster has been pre-heated, the menu buttons can be
pressed to change to CROIS, MUFFIN, PASTRY, OTHER.
OPERATING HINTS AND SAFETY
Disconnect power to the unit with the ON/OFF button at the end of
each day of operation.
Do not leave the unit in operation without an attendant.
Do not leave the unit at high temperature when not in use or during
idle periods. This will cause food particles and grease lm to
carbonize.
CAUTION
PROGRAMMING
A. CONVEYOR SPEED (temporary setting)
The conveyor speed is programmable with a range from 0 to 99 with
0 being the slowest and 99 being the fastest. Each menu item can
have independent conveyor speed settings.
B. PROGRAMMING VALUES FOR MENU ITEMS
Tomakeaprogramchangetothetop&bottomelements,orconveyor
speed, you must rst be in the menu item you want changed.
Example:tochangetheprogrammedconveyorspeedforcroissants,
the display must read CROIS. To change the programmed conveyor
speed for MUFFIN, the display must read MUFFIN and so on for
each menu item.
1) Select the menu item you want to change i.e. CROIS,MUFFIN,
PASTRY, OTHER.
2) Press and hold both ( + ) AND ( - ) buttons for 3 seconds until
the display goes blank, release the buttons and the display
will show three characters for the menu item elected and the
last two characters for the current value setting, i.e. CROIS,
MUFFIN, PASTRY, OTHER. The red L.E.D. light for upper
front element at the bottom of the label will ash.
3) Press the ( + ) or ( - ) buttons to increase or decrease the
setting for the upper front element.
4) Press the button for the menu button again and the red L.E.D.
for the upper rear and lower element will ash.
5) Press the ( + ) or ( - ) buttons to increase or decrease the
setting for the upper rear and lower element.
6) Press the button for the menu button again and the red L.E.D.
for the conveyor speed will ash.
7) Press the ( + ) or ( - ) buttons to increase or decrease the
setting for the conveyor speed.
8) To skip one feature setting with out making any changes,
press the menu item button one time and the red L.E.D. light
for the next item will now ash.
9) To change the POWER SAVER values press the SAVER
button or to save your new setting(s), and exit the program
mode press the menu button.
10) The last two characters in the display will show MN for
minutes.
11) The rst three characters will be numerical to represent the
time setting.
12) When set to “OFF” the Saver button will be disabled during
operation. The PowerSaver can be set to “OFF” or using the
( + ) or ( - ) set the time from 15 to 480 minutes.
13) Press the SAVER button to change the power reduction using
the ( + ) or ( - ) buttons to increase or decrease the setting.
14) Press the POWER SAVER button to save changes and to
exit.