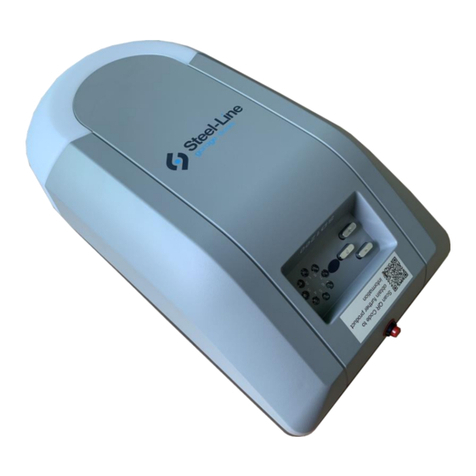
Steel-Line Powermesh User manual

Powermesh
Garage Door Controller
User Manual
Call 1300 427 243
Visit steel-line.com.au
Zimi requires a compatible (Android, iOS) mobile device. Availability and performance of certain features are service, device and network-dependent and may
not be available in all areas; subscription(s) may be required, and additional terms, conditions and/or charges may apply. All features, functionality and other
product specifications are subject to change without notice or obligation. Powermesh products are optimised for the use with the Zimi App. The Simply
Safer and Steel-Line Garage Doors logos are registered trademarks of Steel-Line Garage Doors Pty. Ltd. The Bluetooth word mark and logos are registered
trademarks owned by the Bluetooth SIG, Inc. IOS is a trademark or registered trademark of Cisco Inc. Zimi and Powermesh and their respective logos are
registered trademarks of GSM Innovations Pty Ltd. Google Play and the Google Play logo are trademarks of Google Inc. Google Home requires Wi-Fi, Google
account and compatible device. Google, Google Home, Google Home Mini and Google Home Max are trademarks of Google LLC. Apple, the Apple logo,
Apple Watch and iPhone are trademarks of Apple Inc., registered in the U.S. and other countries. App Store is a service mark of Apple Inc., registered in the U.S.
and other countries. © Copyright 2019 GSM Innovations Pty. Ltd. All rights reserved.

Control your door
like never before.
Congratulations on your purchase of your
Steel-Line Powermesh Garage Door Controller.
With a reputation built on reliability, safety and security,
we present the latest innovation in garage door technology.
Section Topic
1 Introduction
2 Safety Instructions
3 What’s in the box
4 Installation steps and video
5 Garage Door Controller
6 Door Sensor
7 Door types and mounting locations
8 Quick Connector wiring
9 Steel-Line Openers
10 Marantec Openers
11 Merlin & (Chamberlain) Openers
12 Using the Zimi app
13 Zimi Cloud Connect
14 Voice Control
15 Troubleshooting
16 Warranty and Terms
Contents
Clickable Menu
Click section tabs
to return to this page.

Introduction
Welcome to your new Steel-Line Powermesh Garage
Door Controller you can use with touch, tap and talk.
Enjoy the convenience of controlling your door with your
phone or with the optional Zimi Cloud Connect,
and go hands-free with voice control.
Voice
Control
Existing Remotes
& Switches
Garage Controller
and Door Sensor
Touch Tap Talk
Zimi Cloud Connect
Access anywhere in the
world and enable voice
control of all your devices.
Zimi App
Control
A garage door is the largest automated moving object in most homes.
Please ensure that all safety recommendations and regulations are
considered and adhered to.
This device allows for operation of the garage door
when the door or opener is not in direct line of site.
As the door may operate unexpectedly you must ensure that there is no object near
the path of the door. When the door is operating people must be kept away until
the door has come to a complete stop. Contact with a moving door may result in
serious injury, death or damage to property.
Safety beams must be installed in accordance with AS/NZ 60335-2-95:2012.
Correctly installed safety beams will prevent the door from closing if a person or
object is located within the door area.
It is highly recommended that safety beams
are fitted with all installations.
In addition, monthly safety reverse tests and regular professional maintenance must
be carried out as detailed in your opener’s Installation and Operating Manual.
This product, or any internet device that has the Zimi app installed, is not intended
for use by children or persons with reduced physical, sensory or mental capabilities.
The door sensor has an IP66 (waterproof) rating however the controller should not
be installed in a wet or damp space exposed to weather.
Do not attempt to disassemble, repair or modify the product in any way.
This will void the product warranty.
Safety Instructions
Please read these important safety
instructions prior to installation.

What’s in the box
Installation
Instructions
Please identify all the contents before
proceeding with the installation.
1. Garage Controller
3. Battery
2. Door Sensor
7. Sensor Mount
4. Quick Connector
5. Power Plug Pack
6. Motor Wire
8. Quick Install Guide 9. Warranty & Terms Booklet
POWERMESH GARAGE DOOR
CONTROLLER & SENSOR
POWERMESH GARAGE DOOR
CONTROLLER & SENSOR
Installation steps
1
4
2
5
3
6
Installation video
Insert the battery
into the Sensor.
Mount the Sensor
to your garage door.
Connect the wiring to
the garage door motor.
Mount the Controller
next to the motor.
Pair and setup
with the Zimi app.
Setup the optional
Zimi Cloud Connect.
Click or scan the QR code below to watch the step by step video.
Watch it on the Steel-line YouTube channel:
‘How to install the Powermesh Garage Controller’.
Setup is easy, just follow these steps and
refer to this manual for detailed information.
Point your smartphone
camera at the code to
scan and open.

Garage Controller
The controller wires to your garage door motor.
It can control up to 2 door motors.
Powermesh Indicator Status
Blue Device is operational and ready to be set up on a network.
Use ‘add device’ in Zimi to finish setting it up.
White Device has been set up on a network and is operational.
To set up on a dierent network, simply RESET the device.
Red Device has a critical fault, try updating the firmware.
If unsuccessful, the unit will have to be replaced.
Door Position Light Ring
The light ring changes
when the door is moving.
Quick Connector
Allows for easy wiring
and simply plugs in.
See Wiring in Section 8.
Reset Button
Press and hold to
reset the device.
Temperature &
Humidity Sensor
Do not cover the
sensor holes.
Specifications
Communication: Bluetooth ®.
Power: 24VDC <500mA.
Outputs: 2 x dry connect relays for
motor bell press connection.
Inputs: 2 x Photo Eye Beams (PEB)
Refer to the compatibility list.
Door Sensor
2. Make sure the O-ring
seal is in place.
3. Insert battery with
+ symbol as shown.
1. Remove screws to take
o the back cover.
The LED light will
flash to show the
Battery Power. Once the LED light
flashes rapidly,
release to reset.
Insert the battery
Battery test.
Press once.
Reset the Sensor.
Press and hold
for 6 seconds.
The door sensor tracks the door position.
Each door requires a sensor.
Push button LED light
1 2 3 4 FullLow
Specifications
Communication: Bluetooth ®.
IP rating: IP66.
Battery: CR2450.

Door Type & Mounting Locations
Roller Door.
Mounting the
Controller and Sensor.
Please identify your garage door type, then follow the
mounting details as shown for the Controller and Sensor.
Clean the wall/ceiling surface,
peel o the adhesive backing,
press firmly onto the surface.
A
Controller
Door Sensor
Motor
Stick the sensor on to the drum wheel
spoke at the end without the motor.
Stick the controller on the wall or
ceiling close to the garage door motor.
Sectional Door. Tilt Door.
BC
Controller Controller
Door Sensor Door Sensor
Motor Motor
Stick the sensor to the sensor mount.
Push firmly onto the door shaft.
Stick the sensor to the inside,
middle, bottom of the door.
Stick the controller on the ceiling
close to the garage door motor. Stick the controller on the ceiling
close to the garage door motor.

Power Input
Plug the Power
Plug Pack into a
power point.
Optional:
If your motor has
24V terminals they
can be used instead
if necessary.
Quick Connector wiring
Photo Eye Beams PEB1 / PEB2
It is recommended that PE Beams
are used for safety.
Note: Only wire to the garage
controller if your motor does not
have PEB terminals. Otherwise it is
recommended that the PE Beams
remain connected to your motor.
PEB 1
PEB 2
Motor 1
Power
Door 1 Door 2
Motor 2
Quick Connector
Garage Controller
The quick connector plugs into the
controller to make wiring easier.
Door Motor 1 / Motor 2
The M1 wires should be connected to the Push Button
(Bell Press) terminals of the Garage Door Motor.
M2 wires are for Garage Door Motor 2.
Note: Please refer to your garage door motor manual or
the following pages for some common motor types.
Garage Controller can control
up to two doors motors.
An additional Sensor is
required for the second door.
Example shown with roller doors.
Typical 2 door garage.
Motor 1 Motor 2
Sensor 1
PEB 1 PEB 2
Sensor 2
Door 1 Door 2

Steel-Line Openers
Push Button ( Bell Press ) terminal locations.
Please check your garage door opener manual for more information.
Push Button ( Bell Press ) terminal locations.
Please check your garage door opener manual for more information.
RD800 / RD1200 / SPRINT800RD
SPRINT1200RD
Bell/Push button terminals
Bell/Push button terminals
RD9 / BRD9 / RD11 / BRD11
May be branded Boss or Guardian.
RD1A / BRD1A
OL4/BOL4
May be branded Boss or Guardian.
Forza 1200 / OL1200
Steel-Line SD800
Bell/Push button
terminals
Bell/Push
button
terminals
Bell/Push button terminals
Bell/Push button terminals
Marantec Openers
Bell/Push button terminals
OL6.5 / BOL6.5
May be branded Boss or Guardian.
Marantec Comfort
260 / 270 / 280 / 380
Marantec Comfort
220 /250 / 252 / 257
Marantec Comfort
800 / 1000
OL6 / BOL6
May be branded Boss or Guardian.
Bell/Push button terminals
Bell/Push button terminals
Bell/Push button terminals
Bell/Push
button
terminals
The following setting must
be done to work with the
Powermesh Controller.
1. Access the Motor Menu.
2. Select Level 5 :Special functions.
3. Select Menu 1 : Programmable input.4.
Change to option 7.

MR650/MR850
MR1000 / M430R / MT230 / MT230T
MR650EVO QuietDrive
MR850EVO SilentDrive / MR850BBU
MRC950EVO OverDrive
MR60 / SR60 Roller Ace
MR600 / MR800
MR550EVO WeatherDrive
Merlin (Chamberlain) Openers
Push Button ( Bell Press ) terminal locations.
Please check your garage door opener manual for more information.
MR655EVO QuietDrive Pro
MR855EVO SilentDrive Pro
MR655MYQ SilentDrive Essential
MR855MYQ SilentDrive Elite
Bell/Push button terminals
Bell/Push button terminals
Bell/Push button terminals
Bell/Push button terminals
Bell/Push button terminals
Bell/Push button terminals
MS65MYQ Commander Essential
MS105MYQ Commander Elite
MS125MYQ Commander Extreme
MJ3800 / MJ3800R
MT3850 / MT3850EVO
MT5580 / MT5580P
MJ3800MYQ Commander Ultimate
MT600 / MT800 / MT1000
MT60 / MT60P
MT60EVO PowerAce, MT100EVO
TiltMaster, MT120EVO CyclonePro
MT110MYQ Commander MYQ MT50EVO EntryLift / ST50EVO
Bell/Push button terminals
Bell/Push button terminals
Bell/Push button terminals
Bell/Push button terminals
Bell/Push button terminals
Bell/Push button terminals
Bell/Push button
terminals
Bell/Push button
terminals

Using Zimi
Zimi provides control of your garage door on your
phone and works with all Powermesh products.
Download
the Zimi App.
Create a new Account
and Log in.
Scan the QR code to
download the app.
Manage Networks screen.
Click menu, click Manage
Click to ‘Add a device’
Follow the on screen instructions
and setup the garage controller.
Zimi requires at least
Apple iPhone iOS 12
or Android version 8
1 2
Network name.
Add a device.
Add a new user.
Zimi Cloud
Connect status
if setup.
Control screen.
Open
door.
Current room.
Touch to change
rooms.
Control. Settings (see next page).
View the history of
the garage door.
Temperature &
Humidity inside
your garage.
Door Sensor
battery level.
Close
door.
Open to
a height.
Rapidly pressing the controller is not
recommended, as the door motor
cannot change directions quickly.
Control will display the devices
in the current room. If you
cannot see the Controller,
select the room ‘Garage’.
Control heights
are approx every
10% which varies
depending on
your motor.
3
4
Single press mode is
shown when the door
sensor is not connected.

Settings screen.
4
Change the room.
Turn the logo o.
Current firmware.
Delete the controller.
Make discoverable
with Google Assistant.
Ask before closing.
Security code.
Restart ‘Flight Path’.
Delete Sensor 1.
Update Sensor 1
firmware.
Button press
length setting.
Door Motor 2
and Sensor 2
when added.
Connect anywhere and anytime with Zimi Cloud Connect.
Add Powermesh devices to control lighting, fans and more in your home.
Visit www.zimi.life to explore the Powermesh range.
Place in a room near the garage,
on a table or shelf, where there is
strong Wi-Fi signal.
Do not place in the garage,
directly next to your Wi-Fi router
or on any metal surface.
Zimi Cloud
Connect
Bluetooth mesh
Wi-Fi
Garage Controller
& Sensor
Zimi Zimi
app
Powermesh connected
devices
Control away from home
Control in the home
Wi-Fi
Router
Via the Internet
Zimi Cloud Connect
Optional Zimi Cloud Connect enables
voice control and remote access for
all your Powermesh products from
anywhere in the world.
1 2 3
Setup the Zimi Cloud Connect. Pair with
the Zimi App.
Link Zimi with the
Google Assistant.
Control anytime and
anywhere in the world.

1 Open the Google Home App.
2 Tap the Plus icon
in the top right corner.
3 Tap ‘Set up device’ then
‘Have something already setup?’
4 Type ‘Zimi’ in search bar at
top of screen and select Zimi.
5 Enter Zimi account details
when prompted and then
select log in.
6 Tap on ‘Authorise’ button
to finalise.
Once setup is complete,
tap the ‘microphone’ to
make voice commands.
Link Zimi with the
Google Home App.
Using the Google Assistant
with ‘Hey Google’.
‘Hey Google’
Voice Control
Enjoy hands-free control of your Garage Door
with Apple, Android and Google devices.
Google AssistantGoogle Home
Log in
Authorise
Once Zimi is linked with
the Google Home app, tap
the ‘microphone’ to
make voice commands.
Open/Close the Garage Door?
Is the Garage Door open/closed?
Open the Garage Door 50%.
80% open.
50% open.
20% open.
A B
Once you link your Zimi account all
your devices will be displayed in the
Google Home app.
Control heights are approx
every 10% which varies
depending on your motor.
Using Siri Shortcuts.
1 Open the Shortcuts App.
2Tap on the Plus icon in
the top right corner,
then ‘Add Action.’
3 Scroll down and select the
Hey Google command you
want to use.
4 Select “Next” in top
right corner.
5Type in the ‘Shortcut Name’
and click ‘Done’ in top right
corner.
Shocuts
Next
Done
Add Action
Setting up to use a Siri shortcut.
Open the Google Assistant App and
speak the garage door commands
you would like to use in Siri
shortcuts.
Then proceed with Step 1.
Using a Hey Siri shortcut.
Siri will open the Google Assistant
and show the command being run.
This will show any confirmations if
you asked a question.
Get creative with shortcut names.
You can name your shortcut
anything you like, for example
‘Coming home’ and it will perform
the garage door shortcuts.
Siri Shortcuts works with the Apple iOS.
Once setup, you can tap a shortcut or use
“Hey Siri” to activate any of the commands
for the garage door.
C

SETTING UP WITH ZIMI
Controller not found
when adding device.
• Make sure Bluetooth is enabled on your
phone.
• Stand within 2 metres of the controller.
• The controller LED indicator must be
BLUE. (section 5).
Door did not move.
Check the wiring with your motor push
button terminals. (sections 8-11).
Sensor not found.
Test the Sensor battery and then reset
before trying again. (section 6).
Need help installing?
Watch the installation video by searching
YouTube ‘How to install the Powermesh
Garage Controller’.
Scan the QR code with your smart phone or
tablet. (section 4).
Section topics.
Refer to the relevant Section
topic shown in this manual.
Troubleshooting
If you are having any issue,
please do the following
before proceeding.
Need more help?
Contact Steel-Line Garage Doors.
1. Update the operating
system OS on your phone.
2. Download the latest version
of the Zimi App.
3. Restart your phone by
turning it o and back on.
Call : 1300 427 243
Visit : www.steel-line.com.au
USING THE CONTROLLER
Yellow warning symbol.
This shows a connection error, please make
sure your phone is within Bluetooth range
of the controller.
If you have a Zimi Cloud Connect setup
you can control via Wi-Fi & Internet when
out of range. (section 13).
Press to operate.
This screen is shown when
the sensor is disconnected.
It allows door operation
without showing the door
position.
If you already have setup the
sensor, check the battery
(section 6).
Door position shown wrong.
Motor start speeds that vary and abrupt
door motion can aect accuracy. If the
problem persists, try disabling the ‘high
sensitivity’ in the settings menu.
(section 11-4)
Using Zimi / settings screen.
VOICE CONTROL
The Zimi Cloud Connect is required to be
setup and online, before using the Google
Assistant with the Garage Controller.
‘Sorry, that device is not setup yet’.
• Make sure you have linked Zimi with
Google Home. (section 13-A).
• The garage door must be ‘assigned to a
room’ to work.
• Make sure you are saying the ‘door name’
as shown in Zimi.
‘Sorry, Zimi could not be reached’.
• Check your home Internet is working.
• Check the Zimi Cloud Connect status
indicator is white and not flashing.
• Try unlinking & relinking Zimi with
Google Home. (section 13-A).
Can the PIN and close confirmations
be changed?
These options can be changed in Zimi
settings. (section 11-4).
Using Zimi / settings screen.
Using voice without unlocking
Android phones.
‘Trusted locations & devices’ in your phone
settings can allow complete hands-free
control using only your voice.
A
A
4
4

Warranty and Terms
Statutory Rights.
Our goods come with guarantees that cannot be
excluded under the Australian Consumer Law. You
are entitled to a replacement or refund for a major
failure and compensation for any other reasonably
foreseeable loss or damage. You are also entitled to
have the goods repaired or replaced if the goods fail
to be of acceptable quality and the failure does not
amount to a major failure.
Warranty.
BX Bunka Australia Pty Ltd, ABN: 74 124 163 793,
trading as Steel-Line Garage Doors (the manufacturer
or we, us, our) provides this defects warranty
(Warranty) in addition to the other rights and remedies
available to you under a law in relation to the
Products. Nothing in this Warranty limits your rights
and remedies under the Australian Consumer Law.
In particular, any warranty periods in this Warranty
do not vary or limit the period of time in which you
may be entitled to remedies under the Australian
Consumer Law if the Products are supplied in
breach of consumer guarantees under the Australian
Consumer Law.
What is covered under this Warranty?
1Subject to the terms of this Warranty, if there is a
defect in components or workmanship of a Products
within a period of one (1) year from the original date
of purchase, the manufacturer will repair or replace
the Product free of charge or refund you the cost of
the Product. No additional warranty period will apply
for Products repaired or replaced by the manufacturer
free of charge beyond this one (1) year warranty
period. 2If a defect is not covered by this Warranty
and we repair or replace a Product and charge you
for this work, and there is a defect in components
or workmanship within a period of three (3) months
from the date the work is carried out, subject to the
terms of this Warranty, the manufacturer will repair or
replace the work carried out free of charge or refund
you the cost of the repair or replacement. 3Goods
presented for repair may be replaced by refurbished
goods of the same type rather than being repaired.
Refurbished parts may be used to repair the goods.
Warranty Conditions.
1This Warranty only applies to the original purchaser
of the Products purchased in Australia. This warranty
cannot be transferred to a new owner.
2The Products are designed only for use in a single-
family dwelling. This Warranty does not apply if you
use the Product in other residential premises or
commercial or industrial premises.
3It is a condition of this Warranty that the Products
must be installed and maintained in accordance with
the instructions supplied with the Products.
4If the Product is purchased online from an online
reseller, the manufacturer accepts no responsibility
for determining the suitability of the Product for
your intended use and accepts no responsibility for
unauthorised installation.
Making a claim under this Warranty and expenses
for making a claim.
You must comply with all the following steps to
make a claim under this Warranty. If you suspect a
Product may be defective, and you wish to make a
claim under this Warranty, during the warranty period
you must contact the retailer that you purchased the
Product from or contact our technical support team
(on the contact details below) and they will work to
diagnose the issue and arrange for your defects claim
to be assessed. You must provide a sales docket or
invoice or other proof of purchase to demonstrate
the original date of purchase, or where relevant, to
demonstrate the date of repair or replacement, and
provide details of the model and serial number. You
must return the Product to us in original or suitably
secure packaging. We do not cover the cost of on-
site attendance to inspect or de-install the Product
or to re-install the Product. You will be responsible
for transportation costs associated with returning
the Product to us, unless we have agreed alternative
arrangements with you. We will be responsible for
transportation costs associated with sending you
the repaired or replacement Products, unless your
claim is invalid. If there is no defect in the Product or
you claim is otherwise invalid, the following applies.
We may charge you a fee for the assessment of the
Product, and where relevant, a fee for attending
your premises to inspect the Product and the cost of
transporting the Product back to you. If your claim
is invalid and there is a failure in the Product, we will
also tell you the cost of any recommended repairs or
replacement and ask you whether you would like us
to repair or replace the Product at that price.
What is not cover under this Warranty?
This Warranty does not cover batteries, fuses,
transmitter and receiver range, labour and travel
for attendance at your premises. This Warranty
will not cover any Product failure or defect to the
extent it has been caused by any of the following:
1non-conformity with the instructions concerning
installation, maintenance, operation and testing of
the Product; 2modification, adjustment or repairs
of the Products by anyone other than authorised
persons; 3problems relating to the garage door
opener or garage door hardware or other goods with
which the Product is intended to be used including
springs, rollers, hinges, door alignment or other issues
associated with lack of proper maintenance of garage
door opener or hardware by a professional garage
door technician; 4normal wear and tear; 5corrosion
or electrical malfunction caused by exposure to water
damage or condensation in excess of the Products’
water resistance rating; 6corrosion or problems
due to installation within 800m of the sea or body
of water of equivalent or greater salt concentration;
7electrical storms, power strikes, power surges,
incorrect power current, fire, excess water exposure,
flood, rain or other acts of God; 8 problems caused
by blown fuses or replacement of batteries; 9damage
caused by insects or pests; 10 damage caused by
malware or viruses; 11 radio or electrical interference;
12 and misuse, tampering, neglect, abuse, accidents
or damage beyond the manufacturer’s reasonable
control. The garage door hardware, opener and
other goods, with which the Products are intended
to be used must be properly installed, operational
and serviced so that they operate properly with the
Products. The garage door may not open, close and
stop in accordance with the expected transmissions
of messages. Where such issues occur, because of
problems with the garage door hardware, opener
or other goods, this is not a Product defect but a
problem with the garage door hardware, opener or
other goods.
Our Liability.
To the maximum extent permitted by law, we exclude
all warranties, conditions and guarantees relating to
the Products and our repair services in connection
with the Products, which are not provided under
Australian Consumer Law (or under any other law
or regulation in Australia, which cannot be excluded
by law) or which are not set out in this Warranty or
any other terms and conditions between you and
the manufacturer. Without limiting our liability under
Australian Consumer Law or any other liability which
cannot be excluded or limited under any other law or
regulation in Australia, our liability in connection with
the Products and our repair services in connection
with the Products is limited to the remedies set out
in this Warranty, and if we do not comply with these
remedies the price charged for the Product, or for a
repair or replacement the price charged for the repair
or replacement.
Privacy Statement.
The Products collect data associated with their
operation (including time of opening and closing of
the garage door with which they operate). This data
is collected and transmitted to the Zimi app, provided
by GSM Innovations Pty Ltd and any other electronic
device (if any) which you use to operate with the
Products. For further information about how GSM
Innovations Pty Ltd collects and handles data and
your personal information, see their privacy policy
available at: https://www.zimi.life/privacy-policy/.
Information you have shared with GSM Innovations
Pty Ltd in connection with your use of the Products
and the Zimi app is made available to us. Please refer
to our Privacy Policy for more information on how
we collect and handle your personal information at:
https://www.steel-line.com.au/privacy-policy/.
BX Bunka Australia Pty Ltd, ABN: 74 124 163 793,
trading as Steel-Line Garage Doors.
Steel-Line Garage Doors.
Phone: 1300 427 243
Address: 51 Perivale Street, Darra, QLD 4076
Web: steel-line.com.au
Email: [email protected]
Table of contents
Other Steel-Line Garage Door Opener manuals
Popular Garage Door Opener manuals by other brands
Nexx Garage
Nexx Garage NXG-100 installation guide

Chamberlain
Chamberlain PREMIUM series manual

Chamberlain
Chamberlain Merlin Professional MR1000 Installation and operating instructions
TELECO AUTOMATION
TELECO AUTOMATION TVPRP868N09 Installer instruction manual
Vimar
Vimar RS16.P Installer manual

SkyLink
SkyLink GT-100 user manual
Enjoy-Motors
Enjoy-Motors JE50R4SH Instructions for Use and Security for Installation

Erreka
Erreka RINO-I Quick installation and programming guide
BUTZBACH
BUTZBACH SPACELITE HT40 operating manual
Chamberlain
Chamberlain 8557 manual
SOMFY
SOMFY Dexxo Compact RTS user manual
Elsema
Elsema Intelligent Swing iS400 user manual
