Steel-Line SD800 User manual

SD800
Sectional Garage Door Opener
Installation and Operating Instructions
THIS MANUAL CONTAINS IMPORTANT SAFETY INFORMATION
DO NOT PROCEED WITH THE INSTALLATION BEFORE READING THIS MANUAL THOROUGHLY

SD800- Sectional Garage Door Opener
Page 1
Installation & Operating Instructions
User Information……………………………………………………………………………... 1
Important Safety Instructions……………………………………………………………. 2
Package Contents……………………………………………………………………………. 3
Rail Details………..……………………………………………………………………………. 3
Assembly & Installation……………………………………………………………………. 4-8
Interface………………………………………………………………………………………… 9
Programming Instructions………………………………………………………………… 10-13
Technical Specifications………………..…………………………………………………… 14
Troubleshooting………………………………………………………………………………. 15
Warranty……………………………………………………………………………………....... 16
User Information
Important Safety Notes:
A garage door is the largest automated moving object in most homes.
Care needs to be taken when using this system.
Like any other electrical appliance or machine it is important to familiarise yourself with the safety guidelines
which are applicable to automated garage doors. These are contained at the beginning and throughout this
booklet.
The following summary highlights some of these safety guidelines:
Only operate the garage door when in full view to ensure people, objects and pets remain away from the door
whilst it is moving.
Keep all controls away from children and do not allow them to play with the door.
Regularly check the door and have it maintained and serviced as per the manufacturers’ instructions.
Safety beams or an equivalent safety device are recommended for any automated door for additional safety.
Standard Operation of the Door:
When the programmed remote transmitter (handset) button is pressed it will start the door moving.
The next press of the button will stop the door.
The next press will start the door moving in the opposite direction.
Installation Details:
Installation Date:
Installed by:
Telephone Number:
Contents

SD800 – Sectional Garage Door Opener
Page 2
Installation & Operating Instructions
Important Safety Instructions
FAILURE TO COMPLY WITH THESE SAFETY RECOMMENDATIONS AND LOCAL
SAFETY REGULATIONS MAY RESULT IN SERIOUS INJURY, DEATH OR DAMAGE
TO PROPERTY.
PLEASE READ CAREFULLY AND ENSURE THAT ALL SAFETY RECOMMENDATIONS AND
REGULATIONS ARE CONSIDERED AND ADHERED TO.
This appliance is not intended for use by children or persons with reduced physical, sensory or mental
capabilities, or lack of experience and knowledge, unless they have been given supervision or instruction by a
person responsible for their safety.
Do not wear watches, rings or loose clothing while installing or servicing a garage door opener. Ensure that
gloves, safety goggles and suitable protective clothing is worn where appropriate.
The opener must not be installed in a wet or damp space exposed to weather.
Keep garage door balanced. Do not let the opener compensate for a binding or sticking garage door. Binding,
sticking or unbalanced doors must be repaired before installing this opener.
To avoid serious personal injury from entanglement, remove all ropes, chains and locks connected to the garage
door before installing the door opener.
Installation and wiring must be in accordance with your local building and electrical codes.
Install the wireless remote control (transmitter) in a location where the garage door is visible, at a height of no
less than 1.5m and out of reach of children. Do not allow children to operate push buttons or transmitters.
Serious personal injury from a closing garage door may result from misuse of the opener.
Permanently fasten the Warning Labels in prominent places, adjacent to wall controls and on manual release
cord as a reminder of safe operating procedures.
Use the manual release only for the separation of the carriage from the drive and, if possible, only when the
door is in the closed position. Do not use the release cord or carriage to push the door up or pull it down.
Operation of the manual release can lead to uncontrolled movements of the door if springs are weak or
damaged, or if the door is unbalanced. The release handle should be installed at a height less than 1.8m from
the floor.
Ensure that the safety reverse system is tested every month. The garage door must reverse on contact with a
50mm high object placed on the floor. Adjust if necessary and repeat test. Failure to adjust properly may result
in serious personal injury from a closing garage door.
Disconnect electric power to the door opener before making repairs.
If the supply cord is damaged, it must be replaced by the manufacturer, its service agent or similarly qualified
persons in order to avoid hazard.
Frequently examine the door installation paying particular attention to the cables, springs and mountings for
signs of wear, damage or imbalance. Springs and hardware are under extreme tension and a fault can cause
serious personal injury. Do not use if repair or adjustment is needed.
Ensure that the opener is operated only when door is in full view, free of obstructions and the opener is
properly adjusted. No one should enter or leave the garage while the door is in motion.
Do not allow children to play near the door, or with door controls. Keep remotes away from children.
The door may operate unexpectedly, therefore do not allow anything to stay in the path of the door.
SAVE THESE INSTRUCTIONS- it is important for the safety of persons to follow all instructions.

SD800- Sectional Garage Door Opener
Page 3
Installation & Operating Instructions
Package Contents
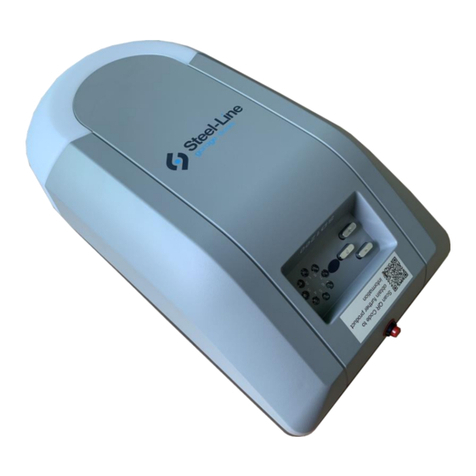
Garage Door Opener:
Rail Details
One Piece Belt Rail
DOOR HEIGHT RAIL LENGTH CEILING FIXING POINT OVERALL LENGTH
Up to 2500mm
3300mm
30
0
0mm
33
3
0mm
10
13
12
11
9
8
7
4
6
5
3
2
1
(1
) SD800 opener/powerhead
(2) Hand transmitter (3)
(3) Door bracket
(4) Lintel/Ceiling bracket
(5) Curved door arm
(6) Straight arm
(7) Fixing bracket
(8) Hanging bracket (2)
(9) Rail bracket (2)
(10) Hardware bag
(11) Door safety label
(12) Manual release instruction card
(13) Installation & product manual
(14) Rail trolley assembly
14

SD800 – Sectional Garage Door Opener
Page 4
Installation & Operating Instructions
Assembly & Installation
STEP 1. RAIL & TROLLEY ASSEMBLY
Remove packing materials from the rail and remove trolley assembly parts from the bag. Insert steel keeper with
spring into the trolley carriage.
Using the four screws provided fix the trolley to the section already installed in the rail.
Using the split pin connect the keeper to the engagement lever. Tie manual release cord/knob to the release
lever on the trolley, ensuring that the manual release instruction card is attached.

SD800- Sectional Garage Door Opener
Page 5
Installation & Operating Instructions
STEP 2.
Attach straight arm (6) to the trolley assembly with the clevis pin (10) and R-clip (10).
Slide fixing bracket onto rail at the drive end.
STEP 3.
Adjust the belt tension by adjusting the nut located at the end of the rail assembly. Always ensure that the trolley
mechanism is disengaged before adjusting the belt tension. Turn clockwise to tighten and counterclockwise to
loosen. Tighten until you remove all of the slack in the belt. Do not overtighten but ensure belt is firm.
STEP 4.
Insert drive cog (10) onto powerhead (1) shaft. Align rail and powerhead and slide rail over drive shaft. Secure the
rail over the opener using the two rail brackets (9) and the hex flange nuts.
STEP 5.
Install the lintel/ceiling bracket (4). You can attach the lintel bracket either to the lintel above the door (head) or
the ceiling. With the door closed, mark the centerline of the door extended onto lintel wall above door with a
vertical line. Open door to highest point and draw an intersecting horizontal line on lintel wall at least 50mm above
high point to allow for clearance for top edge of the door. Fix lintel bracket into position using the screws provided.
PARTS REQUIRED
(6)
(10)
(10)
PARTS REQUIRED
(
1)
(
9
)
(10)
PARTS REQUIRED
(4)

SD800 – Sectional Garage Door Opener
Page 6
Installation & Operating Instructions
STEP 6.
Attach the rail to the lintel bracket aligning the bracket holes and securing with the long clevis (10) pin and R-clip
(10). Use foam packaging as a protective base under the powerhead to prevent damage. You may require help with
this step if the door spring is in the way.
STEP 7.
Disengage the trolley mechanism and slide back towards the powerhead securing the straight arm up into the rail
assembly, using tape or rope, to avoid a hazard. Raise opener onto support, opening the door completely. Use a
50mm spacer between the door and the rail. The positioning of the rail should be centered over the door, parallel
to the horizontal door panels.
STEP 8.
Hang the opener. If mounting directly to ceiling, screw fixing bracket (7) directly into structural support, see Fig. 1.
If hanging the opener below the ceiling, bend the hanging brackets (8) provided and secure to both the ceiling and
the fixing bracket, see Fig 2. Remove spacer and assembly tools and manually operate door to check for
unrestricted operation. If necessary, adjust the manual release cord to no higher than 1.8m from the floor.
PARTS RE
QUIRED
(10)
(10)
PARTS REQUIRED
(7
)
(8)
Fig
. 1
Fig 2.

SD800- Sectional Garage Door Opener
Page 7
Installation & Operating Instructions
STEP 9.
Fasten door bracket (3) securely to frame or structural support. Bracket should be mounted along the centerline
at the top of the panel.
STEP 10.
With door fully closed insert the curved door arm (5) into the door bracket and secure with clevis pin (10) and R-
clip (10). With the trolley disengaged bring the straight arm and curved door arm together and secure using the
two bolts and nuts provided.
STEP 11.
Manually check that the door opens and closes completely and correctly.
Unit is now ready for programming (see page 10).
PARTS REQUIRED
(
3)
PARTS REQUIRED
(10)
(10)
(5)

SD800 – Sectional Garage Door Opener
Page 8
Installation & Operating Instructions
Safety Beam Installation (Optional Accessory)
Note: It is highly recommended that safety beams are included with all installations. Correctly installed safety
beams will prevent the door from closing if a person or object is located within the door area. If the beam is
broken during the door’s downward travel it will reverse back to the open position. If the beam is broken during
the door’s upward travel it will stop.
STEP 1.
Install sensor brackets on each side of door (behind tracks), ensuring they do not obstruct the door movement,
see Fig 1. Ensure that the lenses are aligned. One sensor is a sending sensor and one sensor is a receiving sensor.
Avoid positioning the sensors in direct sunlight as this could interfere with the operation of the safety beams.
STEP 2.
Note: Ensure power is disconnected from opener before continuing.
Run the wire from both sensors back to the opener ensuring that they are well supported and ensuring they
don’t interfere with the movement of the door. Cut wires to correct length and strip back approximately 10mm.
Twist both white wires together and insert into one of the Safety (PE) Beam terminals. Twist both red wires
together and insert into the other Safety (PE) Beam terminal. Place the mini jumper on the jumper terminal, see
Fig 2. If sensors are correctly aligned both red and green light will be lit and the safety beam installation is now
complete.
Fig 1. Fig 2.
PARTS INCLUDED WITH SAFETY BEAM KIT
Motion
Sensors
Hardware
Sensor
Bracket
s
J
u
mper

SD800- Sectional Garage Door Opener
Page 9
Installation & Operating Instructions
Interface
Pushbuttons
“P” Button (Programming)
Initiates programming modes & saves the settings
“+” Button (Up/Open)
Opens the door
Increases settings in programming mode
“–” Button (Down/Close)
Closes the door
Decreases settings in programming mode
LED Indicator Lights
Provides visual feedback during programming
Shows that power is applied to the unit
Shows the unit is in operating mode

SD800 – Sectional Garage Door Opener
Page 10
Installation & Operating Instructions
Programming Instructions
Travel Limit Adjustments
Travel limits regulate the points at which the door will stop when moving UP or DOWN.
Make sure the trolley is engaged before proceeding and the door is in the closed position
STEP 1.
Turn the power on (LED 3 turns on)
STEP 2.
Hold down “P” button for 6 seconds to initiate programming (LED 2 will begin flashing)
STEP 3.
Press and hold the “+” button to bring the door to the desired open position
At this point you can make slight adjustments up “+” and down “-“ until the door is in the desired position
IMPORTANT
-
Before programming the door disengage the trolley and run the door up and
down manually to ensure that it runs smoothly and is correctly balanced.
Do not adjust force to compensate for an incorrectly balanced, binding or sticking door.
Do not increase force beyond minimum force required for closing door. Too much force will
cause improper operation of the safety reversal mechanism.

SD800- Sectional Garage Door Opener
Page 11
Installation & Operating Instructions
STEP 4.
Press the “P” button once to save the open position (LED 4 will begin flashing)
The open position is now programmed
STEP 5.
Press and hold the “-” button to bring the door to the desired closed position
At this point you can make slight adjustments up “+” and down “-“ until the door is in the desired position
STEP 6.
Press the “P” button once to save the closed position
Immediately after pressing the “P” button the door will travel up to the open position and then down
to the closed position to automatically set the operating force
The closed position is now programmed and LED 3 will remain on indicating that the opener is now in
normal operating mode.
TRAVEL
LIMITS AND FORC
E ARE NOW SET
The safety reversal system must now be tested by placing a 50mm high object on
the floor and ensuring the door reverses on contact. Repeat procedure if necessary.

SD800 – Sectional Garage Door Opener
Page 12
Installation & Operating Instructions
Programming Force Settings
STEP 1. ADJUSTING THE OPEN FORCE
Hold down “P” button for 6 seconds (LED 2 will begin flashing)
Press the “P” button twice (LED 6 will begin flashing)
Press and release the “+” button to increase the force or “-“ button to decrease the force to the desired
setting (the numbers 1 to 8 indicate lowest to highest force setting)
Press the “P” button once to save (LED 1 will begin flashing to indicate the open force is now programmed
and you are ready to adjust the close force)
STEP 2. ADJUSTING THE CLOSE FORCE
Press and release the “+” button to increase the force or “-“ button to decrease the force to the desired
setting (the numbers 1 to 8 indicate lowest to highest force setting)
Press the “P” button once to save (LED 3 will remain on indicating the close force is now programmed)
CAUTION
-
Force settings are
automatically
set during the programming phase, a
fter travel
limit adjustment procedure on pages 10-11.
Too much force will cause improper operation of the safety reversal mechanism and may
cause serious injury. The higher the force is set the less sensitive the opener is to detecting an
obstruction.
Force settings should only be adjusted by a suitable qualified technician if required.
OPENER
FORCE
IS
NOW SET
The safety reversal system must now be tested by placing a 50mm high object on
the floor and ensuring the door reverses on contact. Adjust force again if necessary.

SD800- Sectional Garage Door Opener
Page 13
Installation & Operating Instructions
Coding Remote Control Hand Transmitters
The three transmitters supplied with your opener are preprogrammed at the factory.
Note: A maximum of 6 codes can be learned by the opener. If you attempt to code more than 6 transmitters the
first code will be deleted.
1. Additional transmitters can be coded as follows:
Press and hold the “P” and “+” buttons until all lights turn on and LED 7 flashes
Press the “+” button once (all LED lights turn off except LED 7)
Quickly press and release the required push button on your remote twice (all LED lights turn on and LED 7
will begin flashing)
Press the “P” button once to save (LED 3 will switch on indicating that the remote has been successfully
programmed)
Repeat above procedure for all additional handsets.
2. Deleting transmitters:
Note: This procedure will clear all programmed remotes, wireless wall buttons and wireless keypads from the
opener.
Press and hold the “P” and “+” buttons until all lights turn on and LED 7 flashes
Press and hold the “-“ button until LED 7 turns off and begins flashing again
Press the “P” button once to save (LED 3 will switch on indicating that all codes have been deleted and that
the opener is now in normal operating mode)
Follow procedure 1. above to code new remote control hand transmitters.
IMPORTANT SAFETY NOTICE
After programming opener always conduct a safety check to test safety reversal system.
Activate the opener only when door is in full view and free of obstruction. No one
should enter or leave the garage while the door is in motion.

SD800 – Sectional Garage Door Opener
Page 14
Installation & Operating Instructions
Technical Specifications
Opener Specifications
Electric
al Input
240V, 50Hz
Standby Power
4W
Travel Time
120mm/s
Max Door Weight
11
0
kg
Spring Balanced Weight
3
5kg
Max Door Area
12
sqm
Motor
Type
24V DC Brush
Max Driving Force
800N
Dimensions
Length (overall
Inc.
rail)
333
0mm
Dimensions (Powerhead)
39cm (L) x 21
cm (W) x 12cm (H)
Weight (Powerhead)
4
kg
Safety
Personal
Push button stop in UP and DOWN direction.
Automatic safety reversal on closing and stop on opening
Electronic
Automatic force adjustment
Limit Adjustment
Electronic
Feature
Soft
start/stop
Courtesy Light
Light Bulb
LED
Lighting Time
6
minutes
Transmitter
Frequency
433.93Mhz
Coding Type
Rolling Code
Memory Register
6 handset codes
Operation Range
35m approx.
Battery
12V (A27)

SD800- Sectional Garage Door Opener
Page 15
Installation & Operating Instructions
Troubleshooting
The opener does not work from either door
control or remote hand transmitter.
Does the opener have electric power?
If there is no light, check the fuse box or circuit breaker.
Check plug and contact an electrician if the power point is
faulty.
Opener operates from door control but not
From remote hand transmitter.
If necessary, replace batteries in remote.
Follow procedure on page 13 to recode your hand transmitter.
Remote hand transmitter has short range. If necessary, replace batteries in remote.
Change location of remote control in the car.
A metal garage door, foil insulation or metal side walls will
reduce the transmitter range.
The door opens and closes by itself. Check to ensure that remote push button is not stuck on.
Delete all transmitter codes, see page 13.
Reprogram each remote to the opener, see page 13.
The opener runs, but the carriage does not
move.
Check the carriage is not disengaged from the opener.
Operate the opener to re-engage the trolley.
Door stops but does not close completely.
Repeat programming travel limits, see page 10.
Repeat safety reverse test.
Opener strains during operation. Door may be unbalanced or may have a broken spring.
Close door and disengage carriage to test operation manually.
A properly balanced door should remain at any point of travel,
being supported entirely by its springs. If it does not, call a
garage door professional to correct the problem.
Opener will not activate due to power
failure.
Pull manual release handle/rope down to disconnect trolley.
Operate door manually until power is restored.
When power is restored, re-engage the trolley.

Call 1300 007 081
steel-lineautomation.com.au
We will constantly review our warranty and return policy to improve or update new information. Any
changes to the policy will be updated in our website warranty page. We reserve the right to change our
warranty, terms and conditions at any time without notice.
Warranty
Steel-Line Automation hereafter referred to as the manufacturer hereby warrants:
1. Garage door openers (domestic/normal residential single dwelling purposes) to be free from defects in components and workmanship
for a period of five (5) years for motors and two (2) years for electronics & mechanics from date of original purchase from the
manufacturer, or from an authorised distributor, otherwise if installed by the purchaser one (1) year will apply.
2. Where the garage door opener has been installed by the manufacturer, the warranty on such installations shall be free from defect in
workmanship and material for a period of 12 months from date of installation. This warranty does not extend to installation by
approved or authorised distributors.
3. A return to base warranty applies unless the opener has been installed by the manufacturer. Return to base indicates that the opener
must be returned to the manufacturer for repairs or replacement.
4. Where a garage door opener has been returned to the manufacturer, all costs incurred in the return will be paid for by the purchaser. If
in the opinion of the manufacturer the product is found to be faulty, all defective parts will be replaced at no cost to the purchaser.
4.1. Where a defect is found in an opener which has been installed by the manufacturer, the purchaser shall notify the manufacturer
and the manufacturer shall make arrangements to inspect the said opener.
4.2. If the opener has been installed by an approved or authorised distributor it is their responsibility to inspect the said opener and
report to the manufacturer.
4.3. The manufacturer retains the option to repair or replace any opener found to be faulty.
4.4. If during an on-site inspection the fault is rectified by an adjustment that comes under the responsibility of the purchaser to have
the product serviced on a regular basis, a service fee will be charged.
4.5. Any costs incurred or associated for the repair or otherwise through a third party will be the sole responsibility of the purchaser.
5. Proof of purchase and/or proof of date of installation must be given to the manufacturer at time of warranty claim.
6. The manufacturer reserves the right to modify any existing or future products without incurring any obligation to incorporate such
modification to product already manufactured or to which this warranty may relate.
7. This warranty does not apply to any defect, loss or damage arising or caused directly or indirectly by or as a result of:
7.1. Any defect (including defects in component parts or accessories) arising from or attributable to the failure to carry out normal
preventive maintenance or adjustment as recommended by the manufacturer.
7.2. To any additional defect damage or deterioration arising from or attributable to the operation of the opener after it is known to
be defective.
8. Exclusions to warranty period:
8.1. Repair or warranty work - 3 months warranty and only applies to the work carried out.
9. Not included in warranty:
9.1. Batteries
9.2. Fuses
9.3. Globes
9.4. Sensitivity and Limit Switch adjustment
9.5. Transmitter and receiver range
9.6. Labour.
10. Note: All warranties will be voided subject to:
10.1. Water damage and condensation
10.2. Power supply black out or surge
10.3. Misuse of product
10.4. Any act beyond the manufacturer’s reasonable control
10.5. Modification or adjustment of the product and/or by an unauthorised person
10.6. Any interference from radio (including citizen band radios) or any other electronic device
10.7. Account not paid in full by the purchaser
10.8. No preventative maintenance and/or regular servicing has been undertaken as recommended by the manufacturer.
11. Subject only to the provisions of the Trade Practices Act and any legislation of the state or territory wherein the openers of the
company shall have been sold or installed (which may confer certain rights on consumers of goods and those rights by such legislation
may be rendered incapable of exclusion) this warranty supersedes and excludes all representations, warranties and conditions whether
expressed or implied by law and the company shall have no liability or otherwise that herein provided for any loss and damage
(including consequential loss and damage, loss of use or profits) by reasons of delay, defective or faulty materials or workmanship,
negligence or any act, matter or thing done permitted or omitted to be done by the company.
Table of contents
Other Steel-Line Garage Door Opener manuals
Popular Garage Door Opener manuals by other brands
Dea
Dea NET24N Operating instructions and warnings

Wayne-Dalton
Wayne-Dalton 9605 Installation instructions and owner's manual

Kogan
Kogan SMARTERHOME KASHWLGRGDA quick start guide

IDEAL
IDEAL Door MF brochure
Controll-A-Door
Controll-A-Door P Diamond instruction manual

Chamberlain
Chamberlain LM800A Instructions for intallation

