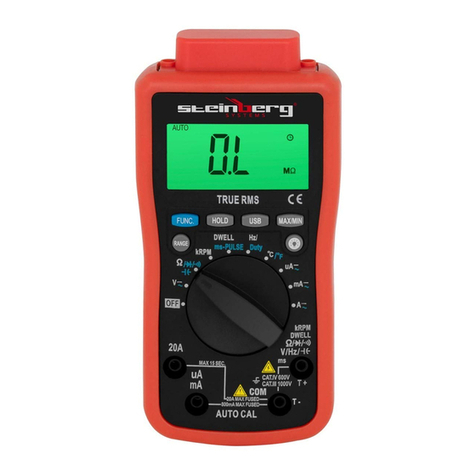
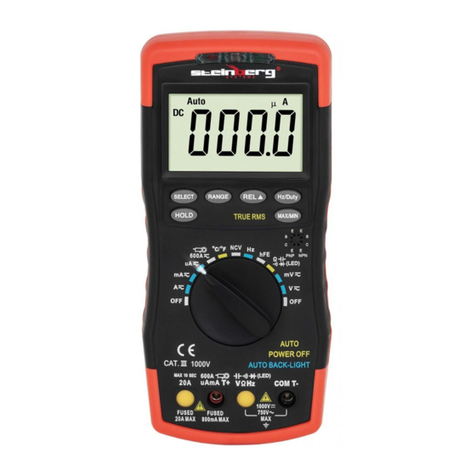
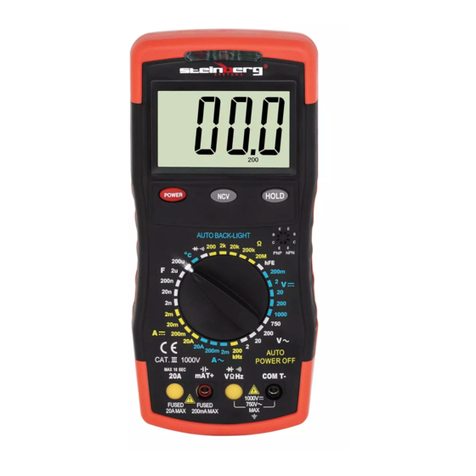
Steinberg Systems SBS-DM-1000 User manual

SBS-DM-1000
BEDIENUNGSANLEITUNG
MULTIMETER
USER MANUAL
MULTIMETER
INSTRUKCJA OBSŁUGI
MULTIMETR
NÁVOD K POUŽITÍ
MULTIMETR
MANUEL D´UTILISATION
MULTIMÈTRE
ISTRUZIONI PER L’USO
MULTIMETRO
MANUAL DE INSTRUCCIONES
MULTÍMETRO
DE | EN | PL | CZ | FR | IT | ES

3
09.07.2019
2
INHALT | CONTENT | TREŚĆ | OBSAH | CONTENU | CONTENUTO | CONTENIDO
Deutsch
English
Polski
Česky
Français
Italiano
Español
3
8
12
17
22
27
32
PRODUKTNAME MULTIMETER
PRODUCT NAME MULTIMETER
NAZWA PRODUKTU MULTIMETR
NÁZEV VÝROBKU MULTIMETR
NOM DU PRODUIT MULTIMÈTRE
NOME DEL PRODOTTO MULTIMETRO
NOMBRE DEL PRODUCTO MULTÍMETRO
MODELL
SBS-DM-1000
PRODUCT MODEL
MODEL PRODUKTU
MODEL VÝROBKU
MODÈLE
MODELLO
MODELO
IMPORTEUR
EXPONDO POLSKA SP. Z O.O. SP. K.
IMPORTER
IMPORTER
DOVOZCE
IMPORTATEUR
IMPORTATORE
IMPORTADOR
ADRESSE VON IMPORTEUR
UL. NOWY KISIELIN-INNOWACYJNA 7, 66-002 ZIELONA GÓRA | POLAND, EU
IMPORTER ADDRESS
ADRES IMPORTERA
ADRESA DOVOZCE
ADRESSE DE L'IMPORTATEUR
INDIRIZZO DELL'IMPORTATORE
DIRECCIÓN DEL IMPORTADOR
Parameter Werte
Produktname Multimeter
Modell SBS-DM-1000
Batterietyp 9V
Nennleistung [W] 3
Schutzart IP IP20
Schutz vor
Überspannungen
CATIII 1000V
Messbereich der Spannung
von Gleichstrom/
Wechselstrom
200mV~1000V/ 2V~700V
Messbereich der
Stromstärke von
Gleichstrom/Wechselstrom
2mA~20A/ 2mA~20A
Messbereich des
elektrischen Widerstands/
der elektrischen Kapazität
200Ω~20MΩ/
2nF~200µF
Messbereich der
Temperatur/der Häugkeit
-20~1000~/~200kHz
Betriebstemperatur für
höchste Messgenauigkeit
[°C]
23±5
Betriebstemperatur/
Relative Arbeitsfeuchtigkeit
[°C,°F/%RH]
0~40°C/≤75%
Lagertemperatur/Relative
Lagerfeuchtigkei
[°C,°F/%RH]
-20~60°C/≤80 %
Abmessungen [mm] 195x89x40
Gewicht [kg] 0,32
TECHNISCHE DATEN
Die Begrie "Gerät" oder "Produkt" in den Warnungen
und Beschreibung des Handbuchs beziehen sich auf
<Multimeter>. Benutzen Sie das Gerät nicht in Räumen mit
sehr hoher Luftfeuchtigkeit oder in unmittelbarer Nähe von
Wasserbehältern! Lassen Sie das Gerät nicht nass werden.
Gefahr eines elektrischen Schlags! Lufteingänge und
Luftausgänge nicht abdecken!
2.1. ELEKTRISCHE SICHERHEIT
a) Bei der Spannungsmessung muss sichergestellt
werden, dass der Regulator auf den entsprechenden
Frequenzbereich eingestellt ist.
b) Bei der Spannungsmessung von mehr als 50 V muss
besondere Vorsicht gewahrt werden.
c) Falls möglich, sollte vermieden werden, dass das
Gerät an „unter Spannung“ stehende Stromkreise
angeschlossen wird.
d) Vor Durchführung der Messungen: des Widerstandes,
des Dioden- oder Kontinuitätstests, des Kapazitäts-
oder Temperaturtests sollte sichergestellt werden,
dass der überprüfte Stromkreis nicht unter Spannung
steht.
e) Stellen Sie sicher, dass die richtige Funktion und der
richtige Messbereich ausgewählt sind, bevor Sie die
Messungen durchführen.
f) Bei Verwendung des Gerätes mit angeschlossenem
Stromwandler ist bei einem Stromausfall besondere
Vorsicht geboten.
g) Vor jedem Gebrauch sollte sichergestellt werden,
dass sich die Leitungen und Messungssensoren in
einem guten technischen Zustand benden, z. B.
ohne Beschädigungen des Isoliermaterials.
h) Bevor der Batteriedeckel abgenommen wird, müssen
die Leitungen und Messungssensoren vom Gerät
abgenommen und der Regulator auf „OFF“ gestellt
werden.
i) Halten Sie bei der Messung die Messleitungen
ausschließlich an den isolierten Teilen fest.
BEDIENUNGSANLEITUNG
1. ALLGEMEINE BESCHREIBUNG
Diese Anleitung ist als Hilfe für eine sichere und zuverlässige
Nutzung gedacht. Das Produkt wurde strikt nach den
technischen Vorgaben und unter Verwendung modernster
Technologien und Komponenten sowie unter Wahrung der
höchsten Qualitätsstandards entworfen und angefertigt.
VOR INBETRIEBNAHME MUSS DIE ANLEITUNG
GENAU DURCHGELESEN UND VERSTANDEN
WERDEN.
Für einen langen und zuverlässigen Betrieb des Geräts
muss auf die richtige Handhabung und Wartung
entsprechend den in dieser Anleitung angeführten
Vorgaben geachtet werden. Die in dieser Anleitung
angegebenen technischen Daten und die Spezikation sind
aktuell. Der Hersteller behält sich das Recht vor, im Rahmen
der Verbesserung der Qualität Änderungen vorzunehmen.
Unter Berücksichtigung des technischen Fortschritts und
der Geräuschreduzierung wurde das Gerät so entworfen
und produziert, dass das infolge der Geräuschemission
entstehende Risiko auf dem niedrigsten Niveau gehalten
wird.
2. NUTZUNGSSICHERHEIT
ACHTUNG! Lesen Sie alle Sicherheitshinweise und
alle Anweisungen durch. Die Nichtbeachtung der
Warnungen und Anweisungen kann zu elektrischen
Schlägen, Feuer und/oder schweren Verletzungen
bis hin zum Tod führen.
Die originale Anweisung ist die deutschsprachige Fassung.
Sonstige Sprachfassungen sind Übersetzungen aus der
deutschen Sprache.
HINWEIS! In der vorliegenden Anleitung sind
Beispielbilder vorhanden, die vom tatsächlichen
Aussehen das Produkt abweichen können.
DE
ERLÄUTERUNG DER SYMBOLE
Das Produkt erfüllt die geltenden
Sicherheitsnormen.
Gebrauchsanweisung beachten.
Recyclingprodukt.
ACHTUNG!, WARNUNG! oder HINWEIS!, um
auf bestimmte Umstände aufmerksam zu
machen (allgemeines Warnzeichen).
Das Produkt erfüllt die geltenden
Sicherheitsnormen.

4 5
09.07.2019
ACHTUNG! Obwohl das Gerät mit dem Gedanken an
die Sicherheit entworfen wurde, besitzt es bestimmte
Schutzmechanismen. Trotz der Verwendung
zusätzlicher Sicherheitselemente besteht bei der
Bedienung immer noch ein Verletzungsrisiko. Es wird
empfohlen, bei der Nutzung Vorsicht und Vernunft
walten zu lassen.
3. NUTZUNGSBEDINGUNGEN
Das Gerät dient zur Messung von elektrischen Werten
sowie der Temperatur von ausgewählten Geräten und
Stromkreisen.
Für alle Schäden bei nicht sachgemäßer Verwendung
haftet allein der Betreiber.
3.1. GERÄTEBESCHREIBUNG
2.4. SICHERE ANWENDUNG DES GERÄTS
a) Benutzen Sie das Gerät nicht, wenn der EIN-/AUS-
Schalter nicht ordnungsgemäß funktioniert. Geräte,
die per Schalter nicht gesteuert werden können sind
gefährlich und müssen repariert werden.
b) Nicht verwendete Werkzeuge sind außerhalb
der Reichweite von Kindern sowie von Personen
aufzubewahren, welche weder das Gerät selbst, noch
die entsprechende Anleitung kennen. In den Händen
unerfahrener Personen können derlei Geräte eine
Gefahr darstellen.
c) Halten Sie das Gerät im einwandfreien Zustand.
d) Halten Sie das Gerät außerhalb der Reichweite von
Kindern.
e) Reparatur und Wartung von Geräten dürfen nur
von qualiziertem Fachpersonal und mit Original-
Ersatzteilen durchgeführt werden. Dadurch wird die
Sicherheit bei der Nutzung gewährleistet.
f) Um die vorgesehene Betriebsintegrität des Gerätes
zu gewährleisten, dürfen die werksmäßig montierten
Abdeckungen oder Schrauben nicht entfernt werden.
g) Es ist verboten, das Gerät während der Arbeit zu
schieben, umzustellen oder umzudrehen.
h) Lassen Sie dieses Gerät nicht unbeaufsichtigt,
während es in Betrieb ist.
i) Das Gerät regelmäßig reinigen, damit sich kein
Schmutz auf Dauer festsetzen kann.
j) Das Gerät ist kein Spielzeug. Reinigung und Wartung
dürfen nicht von Kindern ausgeführt werden, wenn
diese nicht unter der Aufsicht von Erwachsenen
stehen.
k) Messen Sie niemals die Spannung, wenn die
Messleitungen an die Strommessbuchsen
angeschlossen sind.
l) Seien Sie vorsichtig, wenn Sie mit Spannungen über
DC 60 V oder AC 4 2V arbeiten.
m) Lassen Sie die Messleitungen oder Sonden während
der Messung hinter isolierten Teilen.
n) Wählen Sie die geeignete Funktion und den
geeigneten Messbereich für die Messung, um eine
Beschädigung des Messgeräts zu vermeiden.
o) Trennen Sie die Messleitungen von den Testpunkten,
bevor Sie zu einer anderen Funktion wechseln.
3.2. VORBEREITUNG ZUR VERWENDUNG
VerwendenSiedasGerätnichtbeiUmgebungstemperaturen
über 40 °C sein und einer relativen Luftfeuchtigkeit
über 80 %. Stellen Sie das Gerät so auf, dass eine gute
Luftzirkulation gewährleistet ist
Überlastschutz: 1000 V DC / 700 Vrms AC
Impedanz: 10 MΩ im gesamten Bereich.
Überlastschutz: 36V DC/36 Vrms AC
Überlastschutz: 250 V DC/250 Vrms AC
Überlastschutz: 1000 V DC/700 Vrms AC
Impedanz: 1 MΩ für den Bereich 2 V, 10 MΩ für die übrigen
Bereiche.
Frequenz: 40-400 Hz für den Bereich 2-20 V, 40-200 Hz für
700 V.
Überlastschutz: Sicherung 0,2 A/250 V, 20 A/250 V
(Sicherung 20 A bis 10 s).
Frequenz: 40-200 Hz
Überlastschutz: Sicherung 0,2 A/250 V, 20 A/250 V
(Sicherung 20 A bis 10 s).
Überlastschutz: 250 V DC/250 Vrms AC
ACHTUNG! Die Grenzwerte für den Überlastschutz dürfen
nicht überschritten werden.
Detaillierte (elektrische) Messparameter:
• Gleichspannung
• AC-Spannung (Durchschnittliche Erkennung:
kalibriert auf RMS (Eektivwert des Mittelwerts)
Sinuswelle.)
• Frequenz
• Temperatur (NiCr-NiSi-Sensor)
• HFe-Transistorprüfung
• Gleichstromintensität
• Wechselstromintensität (Durchschnittliche
Erkennung: kalibriert auf RMS (Eektivwert des
Mittelwerts) Sinuswelle.)
• Widerstand
• Elektrische Kapazität
ACHTUNG: Die Explosionszeichnungen von diesem
Produkt benden sich auf den letzten Seiten der
Bedienungsanleitung S. 37.
DE DE
Aufzeichnung der Genauigkeit: ± % des Messwertes
+ Anzahl der letzten Ziern (bei einer Temperatur
von: 23 (±5)°C, und Feuchtigkeit ≤ 75 % RH).
1. LCD Display
2. On/Off Taste
3. HOLD Taste zur Aufrechterhaltung des Ergebnisses
4. Ein- und Ausschalten der Beleuchtung des Displays
2.2. SICHERHEIT AM ARBEITSPLATZ
a) Halten Sie Ihren Arbeitsplatz sauber und gut
beleuchtet. Unordnung oder schlechte Beleuchtung
können zu Unfällen führen. Seien Sie voraussichtig,
beobachten Sie, was getan wird und bewahren
Sie Ihren gesunden Menschenverstand bei der
Verwendung des Gerätes.
b) BenutzenSiedasGerätnichtinexplosionsgefährdeten
Bereichen, zum Beispiel in Gegenwart von
brennbaren Flüssigkeiten, Gasen oder Staub. Geräte
können unter Umständen Funken erzeugen, welche
Staub oder Dämpfe entzünden können.
c) Im Falle eines Schadens oder einer Störung sollte
das Gerät sofort ausgeschaltet und dies einer
autorisierten Person gemeldet werden.
d) Wenn Sie nicht sicher sind, ob das Gerät
ordnungsgemäß funktioniert, wenden Sie sich an
den Service des Herstellers.
e) Reparaturen dürfen nur vom Service des Herstellers
durchgeführt werden. Führen Sie keine Reparaturen
auf eigene Faust durch!
f) Zum Löschen des Gerätes bei Brand oder Feuer, nur
Pulver-Feuerlöscher oder Kohlendioxidlöscher (CO2)
verwenden.
g) Kinder und Unbefugte dürfen am Arbeitsplatz nicht
anwesend sein. (Unachtsamkeit kann zum Verlust der
Kontrolle über das Gerät führen).
h) Überprüfen Sie regelmäßig den Zustand der
Sicherheitsinformationsaufkleber. Falls die Aufkleber
unleserlich sind, sollten sie ausgetauscht werden.
i) Bewahren Sie die Gebrauchsanleitung für den
weiteren Gebrauch auf. Sollte dieses Gerät
an Dritte weitergegeben werden, muss die
Gebrauchsanleitung mit ausgehändigt werden.
2.3. PERSÖNLICHE SICHERHEIT
a) Es ist nicht gestattet, das Gerät im Zustand der
Ermüdung, Krankheit, unter Einuss von Alkohol,
Drogen oder Medikamenten zu betreiben,
wenn diese die Fähigkeit das Gerät zu bedienen,
einschränken.
b) Das Gerät ist nicht dazu bestimmt, durch Personen
(darunter Kinder) mit eingeschränkten physischen,
sensorischen und geistigen Fähigkeiten bzw. durch
Personen ohne entsprechende Erfahrung und/oder
entsprechendes Wissen bedient zu werden, es sei
denn es gibt eine für ihre Aufsicht und Sicherheit
zuständige Person bzw. sie haben von dieser Person
entsprechende Hinweise in Bezug auf die Bedienung
das Gerät erhalten.
c) Seien Sie aufmerksam und verwenden Sie Ihren
gesunden Menschenverstand beim Betreiben
des Gerätes. Ein Moment der Unaufmerksamkeit
während der Arbeit kann zu schweren Verletzungen
führen.
d) Um eine versehentliche Inbetriebnahme zu
vermeiden, vergewissern Sie sich, dass der
Schalter vor dem Anschließen an eine Stromquelle
ausgeschaltet ist.
e) Das Gerät ist kein Spielzeug. Kinder sollten unter
Aufsicht stehen, damit sie nicht mit dem Gerät
spielen.
Reichweite Genauigkeit Auösung
200mV
±(0,5% +8)
100µV
2V 1mV
20V 10mV
200V 100mV
1000V ± (1,5% +8) 1V
Reichweite Genauigkeit Auösung
2V
±(1,5% +10 )
1mV
20V 10mV
200V 100mV
700V ±(2,5% +10) 1V
Bereich Genauigkeit Auösung
200kHz ±(3,0% +15) 100Hz
Bereich Genauigkeit Auösung
-20~150°C ±(3,0% +2) 1°C
150~300°C ±(3,0% +2) 1°C
300~1000°C ±(3,5% +10) 1°C
Zakres Opis Warunki testu
hFe Anzeige des hFe Wertes
0-1000) des getesteten
Transistors (NPN- und
PNP-Typ)
Gleichstrom
ca. 10 μA.
Gleichspannung ca.
3,0 V.
Reichweite Genauigkeit Auösung
2mA ±(0,8% +8) 1µA
20mA ±(0,8% +8) 10µA
200mA ±(1,2% +8) 100µA
20A ±(2,0% +10) 10mA
Bereich Genauigkeit Auösung
2mA ±(1,8% +8) 1µA
200mA ±(2,0% +8) 100µA
20A ±(3,0% +15) 10mA
Bereich Genauigkeit Auösung
200Ω ±(1,2% +15) 0,1Ω
2kΩ
±(0,8% +8)
1Ω
20kΩ 10Ω
200kΩ 100Ω
20MΩ ±(2,5% +15) 10kΩ
200 µF 0-100µF ±(2,5% +25) 100nF
100-200µF ±(6,0% +55) 100nF
Bereich Genauigkeit Auösung
2nF ±(2,5% +25) 1pF
20nF
±(2,5% +20)
10pF
200nF 100pF
2µF 1nF
j) Beachten Sie bei der Durchführung von Messungen
die allgemeinen Regeln und elektrotechnischen
Kenntnisse.
und der Dioden der momentan gewählten
Funktion.
5. Dioden zur Information über die momentan aktive
Funktion.
6. Eingangsbuchse: hFE
7. Drehknopf: Ausschalten des Geräts / Wahl der
Funktionen und des Messbereichs
8. Mechanische Buchsensperrung – Sicherung vor
einer nicht ordnungsgemäßen Nutzung
9. Eingangsbuchse:
a) 20A
b) mA
c) VΩHz , Volumen „+”, Temperatur „+”
d) COM, Volumen „-”, Temperatur „-”

6 7
09.07.2019
DE DE
3.3.1.2. WECHSELSPANNUNG
1) Stellen Sie den Regler (7) in den gewünschten
Bereich „V~”.
2) Verbinden Sie das schwarze Messkabel mit der
Buchse „COM“ und das rote mit der Buchse „VΩ“.
3) Schließen Sie die Messleitungen an die Last für die
Messung an.
Achtung: Es ist verboten, Spannungen über 700 Vrms
AC zu messen, die zu Schäden an dem Messgerät
führen können.
3.3.1.3. GLEICHSTROMINTENSITÄT
1) Stellen Sie den Regler (7) in den gewünschten
Bereich „A ”
2) Schließen Sie das schwarze Messkabel an die
Buchse „COM“ und das rote an die Buchse „mA“ (für
Minimum) oder „20 A“ (für Maximum) an.
3) Schließen Sie die Messleitungen in Reihe mit der Last
an, um die Messung durchzuführen.
Achtung: Der maximale Messstrom beträgt 200 mA
für die Buchse „mA“ oder 20 A für die Buchse „20
A“. Die Messung eines höheren Wertes führt zum
Durchbrennen der Sicherung.
3.3.1.4. WECHSELSTROMINTENSITÄT
1) Stellen Sie den Regler (7) in den gewünschten
Bereich „A~”
2) Schließen Sie das schwarze Messkabel an die
Buchse „COM“ und das rote an die Buchse „mA“ (für
Minimum) oder „20 A~“ (für Maximum) an.
Überlastschutz: 250 V DC/250 Vrms AC
3.3. ARBEIT MIT DEM GERÄT
3.3.1. MESSANLEITUNG
Schalten Sie das Gerät mit der On/O-Taste ein Hinweise:
1) Wenn der Bereich des Messwertes nicht im Voraus
bekannt ist, stellen Sie den Messbereich mit dem
Regler (7) auf den höchsten Wert ein und senken
Sie ihn allmählich.
2) Wenn auf der Anzeige „1“ erscheint, wird der
Bereich überschritten und muss erhöht werden.
3) Achten Sie bei der Messung von Hochspannungen
besonders auf die Vermeidung von Stromschlägen.
3.3.1.1. GLEICHSPANNUNG
1) Stellen Sie den Regler (7) in den gewünschten
Bereich „V ”.
2) Verbinden Sie das schwarze Messkabel mit der
Buchse „COM“ und das rote mit der Buchse „VΩ“.
3) Schließen Sie die Messleitungen an die Last für die
Messung an.
Achtung: Es ist verboten, Spannungen über 1000
VDC zu messen, die zu Schäden an dem Messgerät
führen können.
Bereich Beschreibung Testbedingungen
Anzeige der
ungefähren Spannung
der Diode.
Gleichstrom ca. 1,5
mA.
Gleichspannung ca.
3,0 V.
Der eingebaute
Summer gibt ein
Signal, wenn der
Widerstand unter 80
Ω liegt.
Spannung im
Leerlauf ca. 3,0 V
• Diodentest und Signal für unterbrochenen
Stromkreis 3) Schließen Sie die Messleitungen in Reihe mit der
Last an, um die Messung durchzuführen.
Achtung: Der maximale Messstrom beträgt 200 mA
für die Buchse „mA“ oder 20 A~ für die Buchse „20
A~“. Die Messung eines höheren Wertes führt zum
Durchbrennen der Sicherung.
3.3.1.5. WIDERSTAND
1) Stellen Sie den Regler (7) in den gewünschten
Bereich „Ω”.
2) Verbinden Sie das schwarze Messkabel mit der
Buchse „COM“ und das rote mit der Buchse „VΩ“.
3) Schließen Sie die Messleitungen an die Last für die
Messung an.
Achtung: Bei einem Widerstand von 1 M Ω und
höher kann die Stabilisierung der Messung sogar
mehrere Sekunden dauern.
Stellen Sie immer sicher, dass der geprüfte
Stromkreis vollständig von der Spannung getrennt
ist und dass alle Kondensatoren im geprüften
Stromkreis entladen sind.
3.3.1.6. ELEKTRISCHE KAPAZITÄT
1) Stellen Sie den Regler (7) in den gewünschten
Bereich „F”“.
2) Schließen Sie die Messleitungen an die Buchsen
„C-“ und „C+“ sowie an den Kondensator an.
Achtung: Der zu messende Kondensator sollte
entladen werden, bevor er an die Messbuchsen
angeschlossen wird.
Bei der Prüfung von Hochleistungskondensatoren
ist auf die Verzögerung vor der letzten Anzeige des
Messgeräts zu achten.
Es ist verboten, einen geladenen Kondensator an
die Messklemmen anzuschließen!
3.3.1.7. FREQUENZ
1) Stellen Sie den Regler (7) auf „200 kHz“.
2) Verbinden Sie das schwarze Messkabel mit der
Buchse „COM“ und das rote mit der Buchse „VΩHz“.
3) Schließen Sie die Messleitungen an die Last für die
Messung an.
3.3.1.8 TEMPERATUR
1) Stellen Sie den Regler (7) auf „C“.
2) Stecken Sie das schwarze Messkabel in die Buchse
„T-“ und das rote in die Buchse "T+".
3) Platzieren Sie die Sensorsonde in dem zu
messenden Temperaturfeld.
Achtung: Verwenden Sie für Temperaturmessungen
immer eine Spezialsonde.
3.3.1.9. DIODENMESSUNGUNDDURCHGANGSPRÜFUNG
1) Stellen Sie den Regler (7) auf den Messbereich
„ ”
2) Verbinden Sie das schwarze Messkabel mit der
Buchse „COM“ und das rote mit der Buchse „VΩHz
“.
3) Schließen Sie die schwarzen und roten
Messleitungen an die Kathode (-) und Anode
(+) der zu prüfenden Diode an, lesen Sie den
Spannungsabfallwert aus der Anzeige ab.
4) Schließen Sie die Messleitungen an die Schaltung
an, deren Durchgang geprüft werden soll. Das
akustische Signal ist kontinuierlich, wenn der
Widerstand kleiner als ca. 80 Ω ist.
3.3.1.10. TEST EINES HFE-TRANSISTORS
1) Regler (7) auf Messbereich „hFe“ einstellen.
2) Bestimmen Sie den Transistortyp und führen Sie
dann einen Transistortest durch, indem Sie die Kabel
in die hFe Buchse stecken.
3.3.2. GEBRAUCHSANWEISUNG
• Das Gerät schaltet sich nach 30 Minuten Inaktivität
automatisch aus.
• Wenn das Symbol „ ” erscheint, ersetzen Sie die
Batterie.
3.4. REINIGUNG UND WARTUNG
a) Verwenden Sie zur Reinigung der Oberäche
ausschließlich Mittel ohne ätzende Inhaltsstoe.
b) Lassen Sie nach jeder Reinigung alle Teile gut
trocknen, bevor das Gerät erneut verwendet wird.
c) Bewahren Sie das Gerät an einem trockenen, kühlen,
vor Feuchtigkeit und direkter Sonneneinstrahlung
geschütztem Ort auf.
d) Es ist verboten, das Gerät mit einem Wasserstrahl zu
besprühen oder in Wasser zu tauchen.
e) In Hinblick auf technische Ezienz und zur
Vorbeugung vor Schäden sollte das Gerät regelmäßig
überprüft werden.
f) Benutzen Sie einen weichen Lappen zur Reinigung.
g) Entfernen Sie die Batterie aus dem Gerät, wenn es
über einen längeren Zeitraum nicht genutzt wird.
h) Schützen Sie das Gerät vor Feuchtigkeit. Wenn es
nass wird, wischen Sie es sofort trocken. Flüssigkeiten
können Mineralien enthalten, die elektronische
Schaltungen angreifen können.
i) Verwenden und lagern Sie das Gerät unter normalen
Temperaturbedingungen. Extreme Temperaturen
können die Lebensdauer des Geräts verkürzen, die
Batterien beschädigen und Kunststoteile verformen
oder schmelzen.
j) Mit dem Gerät vorsichtig und feinfühlig umgehen.
Ein Herunterfallen des Gerätes kann die Leiterplatten
beschädigen und zu Fehlfunktionen des Gerätes
führen.
k) Das Gerät vor Staub und Schmutz schützen.
l) verwenden Sie nur neue Batterien der in den
technischen Daten angegebenen Größe und des
angegebenen Typs. Bevor die Batterien eingelegt
oder ausgetauscht werden, muss sichergestellt
werden, dass das Gerät an keinen externen
Stromkreis angeschlossen und dass der Regulator
auf „OFF“ gestellt ist und dass die Messleitungen von
den Klemmen getrennt sind
m) Vergewissern Sie sich, dass das Gerät nicht an einen
externen Stromkreis angeschlossen ist und dass es
ausgeschaltet ist, bevor Sie die Batterie installieren
oder austauschen.
SICHERE ENTSORGUNG VON AKKUMULATOREN UND
BATTERIEN
Verwenden Sie für das Gerät AAA Batterien mit 9V.
Um die Batterie einzubauen, muss man:
1. Den hinten am Gerät bendlichen Deckel der
Batterie mit einem Schraubenzieher önen.
2. Batterien mit entsprechenden technischen
Parametern hereinlegen.
3. Den Deckel der Batterie schließen und festschrauben.
Entnehmen Sie verbrauchte Batterien aus dem Gerät.
Führen Sie dazu die gleichen Schritte durch wie beim
Einsetzen der Batterien. Entsorgen Sie leere Batterien
bei den entsprechenden Abgabestellen.
ENTSORGUNG GEBRAUCHTER GERÄTE
Dieses Produkt darf nicht über den normalen Hausmüll
entsorgt werden. Geben Sie das Gerät bei entsprechenden
Sammel- und Recyclinghöfen für Elektro- und
Elektronikgeräte ab. Überprüfen Sie das Symbol auf dem
Produkt, der Bedienungsanleitung und der Verpackung.
Die bei der Konstruktion des Gerätes verwendeten
Kunststoe können entsprechend ihrer Kennzeichnung
recycelt werden. Mit der Entscheidung für das Recycling
leisten Sie einen wesentlichen Beitrag zum Schutz unserer
Umwelt. Wenden Sie sich an die örtlichen Behörden,
um Informationen über Ihre lokale Recyclinganlagen zu
erhalten.

8 9
09.07.2019
The product must be recycled.
Only use indoors
WARNING! or CAUTION! or REMEMBER!
Applicable to the given situation.
(general warning sign)
Parameter description Parameter value
Product name Multimeter
Model SBS-DM-1000
Battery type 9V
Rated power [W] 3
Protection rating IP IP20
Over Voltage Protection CATIII 1000V
Measuring range of direct/
alternating current voltage
200mV~1000V/ 2V~700V
Measuring range of
direct/alternating current
amperage
2mA~20A/ 2mA~20A
Measuring range of electri-
cal resistance/capacitance
200Ω~20MΩ/
2nF~200µF
Measuring range of
temperature/frequency
-20~1000~/~200kHz
Working temperature that
guarantees the highest
measurement accuracy
[° C]
23±5
Working temperature /
Relative working humidity
[°C, °F/%RH]
0~40°C/≤75%
Storage temperature/
Relative storage humidity
[°C, °F/%RH]
-20~60°C/≤80 %
Dimensions [mm] 195x89x40
Weight [kg] 0,32
TECHNICAL DATE
The terms "device" or "product" are used in the warnings
and instructions to refer to < Multimeter >.
Do not use in very humid environments or in the direct
vicinity of water tanks. Prevent the device from getting
wet. Risk of electric shock! Do not cover the ventilation
openings!
2.1. ELECTRICAL SAFETY
a) appropriate range.
b) Exercise caution when measuring voltage above 50V.
c) If possible, avoid connecting the device to live
circuits.
d) Before taking measurements of: resistance, diode or
continuity test, capacitance test or temperature test,
make sure that the tested circuit is not live.
e) Before taking the measurements, make sure that the
correct function and measuring range have been
selected.
f) Take special care in the event of a break in the circuit
when using the device in a system with an electric
current transformer connected to the terminals.
g) Before every use, make sure that the test leads and
probes are in good condition, e.g. the insulation is
undamaged.
h) Before disassembling the battery cover, disconnect
the test leads and probes from the device and set the
rotary switch to the "OFF" position.
i) When measuring, make sure that you are holding
the insulated parts of the test leads.
j) Please observe general electrotechnical principles
and guidelines when taking measurements.
USER MANUAL
1. GENERAL DESCRIPTION
The user manual is designed to assist in the safe and
trouble-free use of the device. The product is designed
and manufactured in accordance with strict technical
guidelines, using state-of-the-art technologies and
components. Additionally, it is produced in compliance
with the most stringent quality standards
DO NOT USE THE DEVICE UNLESS YOU HAVE
THOROUGHLY READ AND UNDERSTOOD THIS
USER MANUAL.
To increase the product life of the device and to ensure
trouble-free operation, use it in accordance with this user
manual and regularly perform maintenance tasks. The
technical data and specications in this user manual are
up to date. The manufacturer reserves the right to make
changes associated with quality improvement.
LEGEND
2. USAGE SAFETY
ATTENTION! Read all safety warnings and all
instructions. Failure to follow the warnings and
instructions may result in electric shock, re and/or
serious injury or even death.
The original operation manual is written in German. Other
language versions are translations from the German.
PLEASE NOTE! Drawings in this manual are for
illustration purposes only and in some details may
dier from the actual product.
EN
2.2. SAFETY IN THE WORKPLACE
a) Make sure the workplace is clean and well lit. A messy
or poorly lit workplace may lead to accidents. Try
to think ahead, observe what is going on and use
common sense when working with the device.
b) Do not use the device in a potentially explosive
environment, for example in the presence of
ammable liquids, gases or dust. The device
generates sparks which may ignite dust or fumes.
c) If you discover damage or irregular operation,
immediately switch the device o and report it to
a supervisor without delay.
d) If there are any doubts as to the correct operation
of the device, contact the manufacturer's support
service.
e) Only the manufacturer's service point may repair the
The product satises the relevant safety
standards.
Read instructions before use.
ATTENTION! Despite the safe design of the device
and its protective features, and despite the use of
additional elements protecting the operator, there is
still a slight risk of accident or injury when using the
device. Stay alert and use common sense when using
the device.
3. DEVICE DESCRIPTION
The device measures the electrical values and the
temperatures of selected devices and electrical circuits. The
user is liable for any damage resulting from unintended
use of the device.
3.1. DEVICE DESCRIPTION
3.2. PREPARING FOR USE
The temperature of environment must not be higher than
40°C and the relative humidity should be less than 80%.
Ensure good ventilation in the room in which the device
is being used.
Note! The overload protection limits must not be exceeded.
Detailed electrical measurement parameters:
• DC voltage
Overload protection: 1000V DC / 700V rms AC
Impedance: 10MΩ over the entire range.
ATTENTION! This product’s exploded view can be
found on the last pages of the operating instructions
(pp. 37).
EN
Accuracy formula: ±% of reading + number of last
digits (at temperature: 23 (± 5) °C and humidity ≤
75% RH).
1. LCD display
2. On/Off button
3. HOLD button/Backlight: Lock/unlock the displayed
value
4. Switching the display backlight and LED of a currently
selected function on/off.
5. Diodes that inform about a presently active function.
6. Input jack: hFE
7. Knob: selecting the function and measuring range.
8. Mechanical locking of the jacks – protection against
misuse.
9. Input jack:
a) 20A
b) mA
c) VΩHz , capacitance “+”, temperature “+”
d) COM, capacitance “-”, temperature “-”
device. Do not attempt any repairs independently!
f) In case of re, use a powder or carbon dioxide
(CO2) re extinguisher (one intended for use on live
electrical devices) to put it out.
g) Children or unauthorised persons are forbidden to
enter a work station. (A distraction may result in loss
of control over the device)
h) Regularly inspect the condition of the safety labels. If
the labels are illegible, they must be replaced.
i) Please keep this manual available for future
reference. If this device is passed on to a third party,
the manual must be passed on with it.
2.3. PERSONAL SAFETY
a) Do not use the device when tired, ill or under the
inuence of alcohol, narcotics or medication which
can signicantly impair the ability to operate the
device.
b) The device is not designed to be handled by persons
(including children) with limited mental and sensory
functions or persons lacking relevant experience
and/or knowledge unless they are supervised by
a person responsible for their safety or they have
received instruction on how to operate the device.
c) When working with the device, use common sense
and stay alert. Temporary loss of concentration while
using the device may lead to serious injuries.
d) To prevent the device from accidentally switching on,
make sure the switch is on the OFF position before
connecting to a power source.
e) The device is not a toy. Children must be supervised
to ensure that they do not play with the device.
2.4. SAFE DEVICE USE
a) Do not use the device if the ON/OFF switch does not
function properly (does not switch the device on and
o). Devices which cannot be switched on and o
using the ON/OFF switch are hazardous, should not
be operated and must be repaired.
b) When not in use, store in a safe place, away from
children and people not familiar with the device who
have not read the user manual. The device may pose
a hazard in the hands of inexperienced users.
c) Keep the device in perfect technical condition.
d) Keep the device out of the reach of children.
e) Device repair or maintenance should be carried out
by qualied persons, only using original spare parts.
This will ensure safe use.
f) To ensure the operational integrity of the device, do
not remove factory-tted guards and do not loosen
any screws.
g) Do not move, adjust or rotate the device in the
course of work.
h) Do not leave this appliance unattended while it is in
use.
i) Clean the device regularly to prevent stubborn grime
from accumulating.
j) The device is not a toy. Cleaning and maintenance
may not be carried out by children without
supervision by an adult person.
k) Never measure the voltage when the test leads are
connected to the amperage measurement sockets.
m) Exercise caution when working with voltages above
DC60V or AC42V.
n) During measurement, hold the test leads or probes
by the insulated parts.
n) Select the appropriate function and measurement
to avoid damage to the multimeter during the
measurement.
o) Disconnect the test leads from the test points before
switching to another function.
Range Accuracy Resolution
200mV
±(0,5% +8)
100µV
2V 1mV
20V 10mV
200V 100mV
1000V ± (1,5% +8) 1V

10 11
09.07.2019
EN
3) Connect the test leads in series to the load to be
measured.
Note: The maximum measured current is 200mA for
the "mA" jack or 20 A for the "20A" jack. Measuring
a larger value will cause the fuse to blow.
3.3.1.4. AMPERAGE
1) Set the dial (7) to the preferred "A~" range.
2) Connect the black test lead to the "COM" jack, and
the red one to the "mA" (minimum) or "20 A~" (max.)
jack.
3) Connect the test leads in series to the load to be
measured.
Note: The maximum measured current is 200mA
for the "mA" jack or 20 A~ for the "20 A~" jack.
Measuring a larger value will cause the fuse to blow.
3.3.1.5. RESISTANCE
1) 1) Set the dial (7) to the preferred range "Ω".
2) Connect the black test lead to the "COM" jack and
the red lead to the "VΩ" jack.
3) Connect the test leads to the load to be measured.
Note: For 1M Ω resistance and above, it may take
several seconds for the measurement to stabilize.
Always make sure that the circuit being tested is
completely voltage free and that all capacitors in the
system under test are discharged.
3.3.1.6. ELECTRIC CAPACITY
1) Set the dial (7) to the preferred "F" range.
2) Connect the test leads to the "C-" and "C +" jacks
and to the capacitor.
Note: The capacitor being measured should be
discharged before connecting to the measuring
jacks. When testing large capacity capacitors,
remember there is a delay before the nal reading
appears.
Do not connect a charged capacitor to the measuring
terminals!
3.3.1.7. FREQUENCY
1) Turn the dial (7) to "200kHz".
2) Connect the black test lead to the "COM" jack, and
the red one to the "VΩHz" jack.
3) Connect the test leads to the load to be measured.
3.3.1.8. TEMPERATURE
1) Turn the dial (7) to "C".
2) Connect the black test lead to the "T-" jack and the
red lead to the "T +" jack.
3) Place the sensor probe in the measured temperature
eld.
Note: Always use a special temperature probe.
3.3.1.9. DIODE MEASUREMENT AND ELECTRICAL
CONTINUITY TEST
1) Set the dial (7) to the„ ” measuring range.
2) Connect the black test lead to the "COM" jack and
the red lead to the "VΩHz " jack
3) Connect the black and red test leads to the cathode
(-) and anode (+) of the diode being tested. Read the
voltage drop from the display.
4) Connect the test leads to the circuit whose continuity
is to be tested. The beep will be continuous if the
resistance is less than about 80Ω.
3.3.1.10. HFE TRANSISTOR TEST
1) Set the dial (7) to the "hFe" measuring range
2) Determine the transistor type and perform the test
by connecting the leads to the hFe jack.
3.3.2. DIRECTIONS FOR USE
• The device turns o automatically after 30 minutes
of inactivity.
• When the " " symbol appears, replace the battery.
3.4. CLEANING AND MAINTENANCE
a) Use only non-corrosive cleaners to clean the surface.
b) After cleaning the device, all parts should be dried
completely before using it again.
c) Store the unit in a dry, cool place, free from moisture
and direct exposure to sunlight.
d) Do not spray the device with a water jet or submerge
it in water.
e) The device must be regularly inspected to check its
technical eciency and spot any damage.
f) Use a soft cloth for cleaning.
g) Do not leave the battery in the device if it will not be
used for a longer period of time.
h) Protect the device against moisture. If it is wet, wipe
it dry immediately. Liquids may contain minerals
which can corrode electronic circuits.
i) Use and store the device in standard temperature
conditions. Extreme temperatures can shorten the
life of the device, damage the batteries and deform
or melt plastic parts.
j) Handle the device with care. Dropping it may damage
printed circuit boards and cause malfunctioning.
k) Protect the device from dust and dirt.
l) Use only new batteries of the size and type indicated
in the technical specications.
Before installing or replacing the batteries, make
sure that the device is not connected to an external
circuit, that the control knob is set to "OFF", and that
the test leads are disconnected from the terminals.
m) Before installing or replacing the batteries, make
sure that the device is not connected to an external
circuit and that it is turned o.
SAFE REMOVAL OF BATTERIES AND RECHARGEABLE
BATTERIES
9V batteries are installed in the devices.
Inserting a battery:
1. Open the battery cover on the back of the device
with a screwdriver.
2. Insert the batteries that correspond to the technical
parameters.
3. Close and screw on the battery cover.
Remove used batteries from the device using the
same procedure by which you installed them.
Recycle batteries with the appropriate organisation
or company.
DISPOSING OF USED DEVICES
Do not dispose of this device in municipal waste systems.
Hand it over to an electric and electrical device recycling
and collection point. Check the symbol on the product,
instruction manual and packaging. The plastics used
to construct the device can be recycled in accordance
with their markings. By choosing to recycle you are
making a signicant contribution to the protection of our
environment.
Contact local authorities for information on your local
recycling facility.
Overload protection: 250V DC/250Vrms AC
Overload protection: 250V DC / 250Vrms AC
Overload protection: 1000V DC / 700V rms AC
Impedance: 1 MΩ for 2V, 10MΩ for other ranges.
Frequency: 40-400Hz for 2-20V range, 40-200Hz for 700V.
Overload protection: 0.2A / 250V, 20A / 250V fuse (20
A fuse up to 10 s)
Frequency: 40-200 Hz
Overload protection: 0.2A / 250V, 20A / 250V fuse (20
A fuse up to 10 s).
Overload protection: 250V DC / 250V rms AC
• AC voltage (average detection calibrated to RMS of
a sine wave.) • Frequency
• Temperature (NiCr-NiSi sensor)
• hFE transistor test
• Diode test and interrupted circuit signal
• DC amperage
• AC amperage (average detection calibrated to RMS
of a sine wave.)
• Resistance
• Electric capacity
EN
3.3. DEVICE USE
3.3.1.MEASURMENT INSTRUCTIONS
Switch the device on using the On / O button Comments:
1) If the range of the measured value is not known
before, set the measuring range by turning the dial
(7) to the highest position and gradually go down.
2) When the display shows"1", it means that the range
has been exceeded and must be increased.
3) Exercise caution to avoid electric shock when
measuring high voltages.
3.3.1.1. DC VOLTAGE
1) Set the dial (7) to the preferred range "V ".
2) Connect the black test lead to the "COM" jack and
the red lead to the "VΩ" jack.
3) Connect the test leads to the load to be measured.
Note: Do not measure voltages above 1000 VDC as
this may damage the internal meter system.
3.3.1.2. AC VOLTAGE
1) Set the dial (7) to the preferred range "V ~".
2) Connect the black test lead to the "COM" jack and
the red lead to the "VΩ" jack.
3) Connect the test leads to the load to be the
measured.
Note: Do not measure voltages above 700Vrms AC
as this may damage the internal meter system.
Range Accuracy Resolution
2V
±(1,5% +10 )
1mV
20V 10mV
200V 100mV
700V ±(2,5% +10) 1V
Range Accuracy Resolution
200kHz ±(3,0% +15) 100Hz
Range Accuracy Resolution
-20~150°C ±(3,0% +2) 1°C
150~300°C ±(3,0% +2) 1°C
300~1000°C ±(3,5% +10) 1°C
Range Description Test conditions
hFe Displaying the hFe
values (0-1000) of the
transistor being tested
(NPN and PNP types)
DC approx. 10 µA.
DC voltage approx.
3.0V.
Range Description Test conditions
Displaying the
approximate voltage
of the diode.
DC approx. 1.5 mA.
DC voltage approx.
3.0V.
The built-in buzzer
beeps when the
resistance is less than
80 Ω.
Open circuit voltage
approx. 3.0V.
Range Accuracy Resolution
2mA ±(0,8% +8) 1µA
20mA ±(0,8% +8) 10µA
200mA ±(1,2% +8) 100µA
20A ±(2,0% +10) 10mA
Range Accuracy Resolution
2mA ±(1,8% +8) 1µA
200mA ±(2,0% +8) 100µA
20A ±(3,0% +15) 10mA
Range Accuracy Resolution
200Ω ±(1,2% +15) 0,1Ω
2kΩ
±(0,8% +8)
1Ω
20kΩ 10Ω
200kΩ 100Ω
20MΩ ±(2,5% +15) 10kΩ
200 µF 0-100µF ±(2,5% +25) 100nF
100-200µF ±(6,0% +55) 100nF
Range Accuracy Resolution
2nF ±(2,5% +25) 1pF
20nF
±(2,5% +20)
10pF
200nF 100pF
2µF 1nF
Overload protection: 36V DC / 36Vrms AC
3.3.1.3. DC AMPERAGE
1) Set the dial (7) to the preferred "A " range.
2) Connect the black test lead to the "COM" jack, and
the red one to the "mA" (minimum) or "20A" (max.) jack.

12 13
09.07.2019
Produkt podlegający recyklingowi.
UWAGA! lub OSTRZEŻENIE! lub PAMIĘTAJ!
opisująca daną sytuację (ogólny znak
ostrzegawczy).
Do użytku tylko wewnątrz pomieszczeń.
Opis parametru Wartość parametru
Nazwa produktu Multimetr
Model SBS-DM-1000
Typ baterii 9V
Moc znamionowa [W] 3
Klasa ochrony IP IP20
Ochrona
przeciwprzepięciowa
CATIII 1000V
Zakres pomiaru napięcia
prądu stałego/
przemiennego
200mV~1000V/ 2V~700V
Zakres pomiaru
natężenia prądu stałego/
przemiennego
2mA~20A/ 2mA~20A
Zakres pomiaru oporności/
pojemności elektrycznej
200Ω~20MΩ/
2nF~200µF
Zakres pomiaru
temperatury/
częstotliwości
-20~1000~/~200kHz
Temperatura pracy
gwarantująca największą
dokładność pomiaru [°C]
23±5
Temperatura pracy/
Wilgotność względna
pracy [°C, %RH]
0~40°C/≤75%
Temperatura składowania/
Wilgotność względna
składowania [°C, °F/%RH]
-20~60°C/≤80%
Wymiary [mm] 195x89x40
Ciężar [kg] 0,32
DANE TECHNICZNE
Termin „urządzenie” lub „produkt” w ostrzeżeniach
i w opisie instrukcji odnosi się do <Multimetr>. Nie należy
używać urządzenia w pomieszczeniach o bardzo dużej
wilgotności / w bezpośrednim pobliżu zbiorników z wodą!
Nie wolno dopuszczać do zamoczenia urządzenia.
Ryzyko porażenia prądem! Nie wolno zasłaniać otworów
wentylacyjnych urządzenia!
2.1. BEZPIECZEŃSTWO ELEKTRYCZNE
a) Podczas pomiaru napięcia upewnić się, że pokrętło
jest ustawione na odpowiedni zakres.
b) Zachować szczególną ostrożność podczas pomiaru
napięcia powyżej 50V.
c) W miarę możliwości unikać podłączania urządzenia
do obwodów będących „pod napięciem”.
d) Przed wykonaniem pomiarów: rezystancji, testu
diod lub ciągłości, testu pojemności lub testu
temperatury, upewnić się, że testowany obwód nie
jest pod napięciem.
e) Przed wykonaniem pomiarów upewnić się, że
wybrano poprawną funkcję i zakres pomiaru.
f) Należy zachować szczególną ostrożność w przypadku
wystąpienia przerwy w obwodzie podczas korzystania
z urządzenia w układzie z przekładnikiem prądowym
podłączonym do zacisków.
g) Przed każdym użyciem należy upewnić się, że
przewody i sondy pomiarowe są w dobrym stanie
technicznym np. bez uszkodzenia izolacji.
h) Przed demontażem pokrywy baterii zawsze należy
wyłączyć urządzenie oraz odłączyć przewody i sondy
pomiarowe od urządzenia.
i) Podczas dokonywania pomiaru przewody
pomiarowe należy trzymać za izolowane części.
j) Podczas wykonywania pomiarów należy stosować się
do ogólnych zasad i wiedzy elektrotechnicznej.
INSTRUKCJA OBSŁUGI
1. OGÓLNY OPIS
Instrukcja przeznaczona jest do pomocy w bezpiecznym
i niezawodnym użytkowaniu. Produkt jest zaprojektowany
i wykonany ściśle według wskazań technicznych przy
użyciu najnowszych technologii i komponentów oraz przy
zachowaniu najwyższych standardów jakości.
PRZED PRZYSTĄPIENIEM DO PRACY NALEŻY
DOKŁADNIE PRZECZYTAĆ I ZROZUMIEĆ NINIEJSZĄ
INSTRUKCJĘ.
Dla zapewnienia długiej i niezawodnej pracy urządzenia
należy dbać o jego prawidłową obsługę oraz konserwację
zgodnie ze wskazówkami zawartymi w tej instrukcji. Dane
techniczne i specykacje zawarte w tej instrukcji obsługi są
aktualne. Producent zastrzega sobie prawo dokonywania
zmian związanych z podwyższeniem jakości.
2. BEZPIECZEŃSTWO UŻYTKOWANIA
UWAGA! Przeczytaj wszystkie ostrzeżenia
dotyczące bezpieczeństwa oraz wszystkie instrukcje.
Niezastosowanie się do ostrzeżeń i instrukcji może
spowodować porażenie prądem, pożar i/lub ciężkie
obrażenia ciała lub śmierć.
Instrukcją oryginalną jest niemiecka wersja instrukcji.
Pozostałe wersje językowe są tłumaczeniami z języka
niemieckiego.
UWAGA! Ilustracje w niniejszej instrukcji obsługi
mają charakter poglądowy i w niektórych szczegółach
mogą różnić się od rzeczywistego wyglądu produktu.
PL
OBJAŚNIENIE SYMBOLI
2.2. BEZPIECZEŃSTWO W MIEJSCU PRACY
a) Nie używać urządzenia w stree zagrożenia
wybuchem, na przykład w obecności łatwopalnych
cieczy, gazów lub pyłów.
b) W razie stwierdzenia uszkodzenia lub
nieprawidłowości w pracy urządzenia należy je
bezzwłocznie wyłączyć i zgłosić to do osoby
uprawnionej.
c) W razie wątpliwości czy urządzenia działa poprawnie,
należy skontaktować się z serwisem producenta.
Produkt spełnia wymagania odpowiednich
norm bezpieczeństwa.
Przed użyciem należy zapoznać się z instrukcją.
UWAGA! Pomimo iż urządzenie zostało
zaprojektowane tak aby było bezpieczne, posiadało
odpowiednie środki ochrony oraz pomimo użycia
dodatkowych elementów zabezpieczających
użytkownika, nadal istnieje niewielkie ryzyko
wypadku lub odniesienia obrażeń w trakcie pracy
z urządzeniem. Zaleca się zachowanie ostrożności
i rozsądku podczas jego użytkowania.
3. ZASADY UŻYTKOWANIA
Urządzenie jest przeznaczone do wykonywania pomiarów
odległości, powierzchni oraz kubatury.
Odpowiedzialność za wszelkie szkody powstałe
w wyniku użytkowania niezgodnego z przeznaczeniem
ponosi użytkownik.
3.1. OPIS URZĄDZENIA
3.2. PRZYGOTOWANIE DO PRACY
Temperatura otoczenia nie może przekraczać 40°C
a wilgotność względna nie powinna przekraczać 80%.
Należy pamiętać o tym, by zasilanie urządzenia energią
odpowiadało danym podanym na tabliczce znamionowej!
UWAGA! Nie wolno przekraczać wartości granicznych
ochrony przed przeciążeniem.
Szczegółowe parametry (elektryczne) pomiarów:
UWAGA! Rysunki produktu znajdują się na końcu
instrukcji na stronie 37.
PL
Zapis dokładności: ± % z odczytu + ilość ostatnich
cyfr (przy temperaturze: 23(±5)°C, oraz wilgotności
≤ 75% RH).
OPIS PANELU STEROWANIA
1. Wyświetlacz LCD.
2. Przycisk On/Off
3. Przycisk HOLD: Blokowanie/ odblokowywanie
wyświetlanej wartości.
4. Włączanie/wyłączanie podświetlenia ekranu i diody
aktualnie wybranej funkcji
5. Diody informujące o aktualnie aktywnej funkcji
6. Gniazdo wejściowe: hFE
7. Pokrętło: wybór funkcji i zakresu pomiaru
8. Mechaniczna blokada gniazd – zabezpieczenie przed
niewłaściwym użyciem
9. Gniazdo wejściowe:
a) 20A
b) mA
c) VΩHz , pojemność „+”, temperatura „+”
d) COM, pojemność „-„, temperatura „-„
d) Naprawy urządzenia może wykonać wyłącznie
serwis producenta. Nie wolno dokonywać napraw
samodzielnie!
e) W przypadku zaprószenia ognia lub pożaru, do
gaszenia urządzenia pod napięciem należy używać
wyłącznie gaśnic proszkowych lub śniegowych
(CO2).
f) Należy regularnie sprawdzać stan naklejek
z informacjami dotyczącymi bezpieczeństwa.
W przypadku gdy, naklejki są nieczytelne należy je
wymienić.
g) Zachować instrukcję użytkowania w celu jej
późniejszego użycia. W razie, gdyby urządzenie miało
zostać przekazane osobom trzecim, to wraz z nim
należy przekazać również instrukcję użytkowania.
h) Elementy opakowania oraz drobne elementy
montażowe należy przechowywać w miejscu
niedostępnym dla dzieci.
i) W trakcie użytkowania tego urządzenia wraz
z innymi urządzeniami należy zastosować się również
do pozostałych instrukcji użytkowania.
2.3. BEZPIECZEŃSTWO OSOBISTE
a) Niedozwolone jest obsługiwanie urządzenia
w stanie zmęczenia, choroby, pod wpływem
alkoholu, narkotyków lub leków, które ograniczają
w istotnym stopniu zdolności obsługi urządzenia.
b) Urządzenie nie jest przeznaczone do tego, by
było użytkowane przez osoby (w tym dzieci)
o ograniczonych funkcjach psychicznych,
sensorycznych i umysłowych lub nieposiadające
odpowiedniego doświadczenia i/lub wiedzy, chyba
że są one nadzorowane przez osobę odpowiedzialną
za ich bezpieczeństwo lub otrzymały od niej
wskazówki dotyczące tego, jak należy obsługiwać
urządzenie.
c) Podczas pracy z urządzeniem należy zachować
zdrowy rozsądek i zachować czujność. Chwilowa
utrata koncentracji podczas używania urządzenia
może prowadzić do poważnych obrażeń.
d) Aby zapobiec przypadkowemu włączeniu urządzenia,
upewnij się, że przełącznik jest w pozycji OFF przed
podłączeniem do źródła zasilania.
e) Urządzenie nie jest zabawką. Dzieci powinny być
pilnowane, aby nie bawiły się urządzeniem.
2.4. BEZPIECZNE STOSOWANIE URZĄDZENIA
a) Nie należy używać urządzenia, jeśli przełącznik ON/
OFF nie działa sprawnie (nie załącza i nie wyłącza
się). Urządzenia, które nie mogą być kontrolowane
za pomocą przełącznika są niebezpieczne, nie mogą
pracować i muszą zostać naprawione.
b) Nieużywane urządzenia należy przechowywać
w miejscu niedostępnym dla dzieci oraz osób
nieznających urządzenia lub tej instrukcji
obsługi. Urządzenia są niebezpieczne w rękach
niedoświadczonych użytkowników.
c) Utrzymywać urządzenie w dobrym stanie
technicznym.
d) Urządzenie należy chronić przed dziećmi.
e) Naprawa oraz konserwacja urządzeń powinna być
wykonywana przez wykwalikowane osoby przy
użyciu wyłącznie oryginalnych części zamiennych.
Zapewni to bezpieczeństwo użytkowania.
f) Aby zapewnić zaprojektowaną integralność
operacyjną urządzenia, nie należy usuwać
zainstalowanych fabrycznie osłon lub odkręcać śrub.
g) Zabrania się przesuwania, przestawiania i obracania
urządzenia będącego w trakcie pracy.
h) Nie należy pozostawiać włączonego urządzenia bez
nadzoru.
i) Należy regularnie czyścić urządzenie, aby nie
dopuścić do trwałego osadzenia się zanieczyszczeń.
j) Urządzenie nie jest zabawką. Czyszczenie
i konserwacja nie mogą być wykonywane przez
dzieci bez nadzoru osoby dorosłej.
k) Nigdy nie mierzyć wartości napięcia, gdy przewody
pomiarowe są podłączone do gniazd pomiarowych
wartości natężenia prądu.
l) Zachować ostrożność podczas pracy przy napięciu
powyżej DC60V lub AC42V.
m) Podczas wykonywania pomiaru trzymać przewody
pomiarowe lub sondy za izolowane części.
n) Wybrać odpowiednią funkcję i zakres pomiarowy dla
pomiaru, aby uniknąć uszkodzenia miernika.
o) Odłączyć przewody pomiarowe od punktów
testowych przed przejściem do innej funkcji.
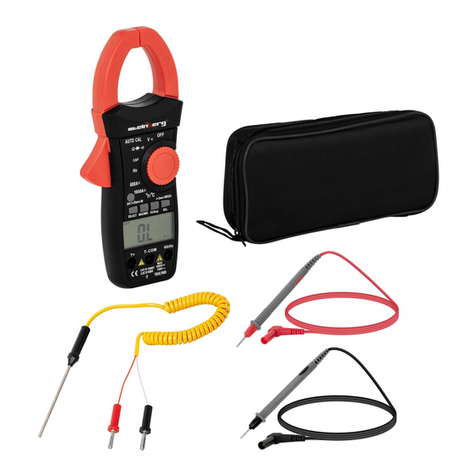
14 15
09.07.2019
Ochrona przed przeciążeniem: 1000V DC/700Vrms AC
Impedancja: 10MΩ w całym zakresie. Ochrona przed przeciążeniem: 36V DC/36Vrms AC
Ochrona przed przeciążeniem: 250V DC/250Vrms AC
Ochrona przed przeciążeniem: 1000V DC/700Vrms AC
Impedancja: 1 MΩ dla zakresu 2V, 10MΩ dla pozostałych
zakresów. Częstotliwość: 40-400Hz dla zakresu 2-20V, 40-
200Hz dla 700V.
Ochrona przed przeciążeniem: bezpiecznik 0,2A/250V,
20A/250V (bezpiecznik 20 A do 10 s).
Częstotliwość: 40-200 Hz
Ochrona przed przeciążeniem: bezpiecznik 0,2A/250V,
20A/250V (bezpiecznik 20 A do 10 s).
Ochrona przed przeciążeniem: 250V DC/250Vrms AC
• Napięcie prądu zmiennego (Średnie wykrywanie:
skalibrowane na RMS (średnia kwadratowa) fali
sinusoidalnej.)
• Częstotliwość
• Temperatura (czujnik NiCr-NiSi)
• Test tranzystora hFe
• Test diody i sygnał przerwanego obwodu
• Natężenie prądu stałego
• Natężenie prądu zmiennego (Średnie wykrywanie:
skalibrowane na RMS (średnia kwadratowa) fali
sinusoidalnej.)
• Rezystancja
PL
3.3. PRACA Z URZĄDZENIEM
3.3.1. INSTRUKCJA POMIARU
Urządzenie włączyć przyciskiem On/O
Uwagi:
1) Jeśli zakres mierzonej wartości nie jest wcześniej
znany, należy ustawić zakres pomiaru za pomocą
pokrętła (7) na najwyższy i stopniowo schodzić
w dół.
2) Gdy na wyświetlaczu wskazywana jest wartość „1”
oznacza to, że zakres został przekroczony i musi
zostać zwiększony.
3) Zachować szczególną ostrożność, aby uniknąć
porażenia prądem podczas pomiarów wysokich
napięć.
3.3.1.1. NAPIĘCIE PRĄDU STAŁEGO
1) Ustawić pokrętło (7) w preferowanym zakresie „V ”.
Zakres Dokładność Rozdzielczość
2V
±(1,5% +10 )
1mV
20V 10mV
200V 100mV
700V ±(2,5% +10) 1V
Zakres Dokładność Rozdzielczość
200kHz ±(3,0% +15) 100Hz
Zakres Dokładność Rozdzielczość
-20~150°C ±(3,0% +2) 1°C
150~300°C ±(3,0% +2) 1°C
300~1000°C ±(3,5% +10) 1°C
Zakres Opis Warunki testu
hFe Wyświetlanie
wartości hFe 0-1000)
testowanego tranzystora
(typ NPN i PNP)
Prąd stały około
10 µA.
Napięcie prądu
stałego około 3,0V.
Zakres Opis Warunki testu
Wyświetlanie
przybliżonego napięcia
diody.
Prąd stały około
1,5 mA.
Napięcie prądu
stałego około 3,0V.
Wbudowany brzęczyk
wydaje sygnał, gdy
opór jest mniejszy niż
80 Ω.
Napięcie
w obwodzie
otwartym około 3,0V
Zakres Dokładność Rozdzielczość
2mA ±(0,8% +8) 1µA
20mA ±(0,8% +8) 10µA
200mA ±(1,2% +8) 100µA
20A ±(2,0% +10) 10mA
Zakres Dokładność Rozdzielczość
2mA ±(1,8% +8) 1µA
200mA ±(2,0% +8) 100µA
20A ±(3,0% +15) 10mA
Zakres Dokładność Rozdzielczość
200Ω ±(1,2% +15) 0,1Ω
2kΩ
±(0,8% +8)
1Ω
20kΩ 10Ω
200kΩ 100Ω
20MΩ ±(2,5% +15) 10kΩ
PL
2) Podłączyć czarny przewód pomiarowy do gniazda
„COM”, a czerwony do gniazda „VΩ”.
3) Podłączyć przewody pomiarowe do obciążenia
w celu wykonania pomiaru.
Uwaga: Zabrania się mierzenia wartości napięcia
powyżej 1000 VDC, może to spowodować
uszkodzenie wewnętrznego układu miernika.
3.3.1.2. NAPIĘCIE PRĄDU ZMIENNEGO
1) Ustawić pokrętło (7) w preferowanym zakresie „V~”.
2) Podłączyć czarny przewód pomiarowy do gniazda
„COM”, a czerwony do gniazda „VΩ”.
3) Podłączyć przewody pomiarowe do obciążenia
w celu wykonania pomiaru.
Uwaga: Zabrania się mierzenia wartości napięcia
powyżej 700Vrms AC, może to spowodować
uszkodzenie wewnętrznego układu miernika.
3.3.1.3. NATĘŻENIE PRĄDU STAŁEGO
1) Ustawić pokrętło (7) w preferowanym zakresie „A ”
2) Podłączyć czarny przewód pomiarowy do gniazda
„COM”, a czerwony do gniazda „mA” (dla minimum)
lub „20A” (dla maksimum).
3) Podłączyć przewody pomiarowe szeregowo do
obciążenia w celu wykonania pomiaru.
Uwaga: Maksymalny mierzony prąd wynosi 200mA
dla gniazda „mA” lub 20 A dla gniazda „20A”. Pomiar
większej wartości będzie przyczyną przepalenia się
bezpiecznika.
3.3.1.4. NATĘŻENIE PRĄDU ZMIENNEGO
1) Ustawić pokrętło (7) w preferowanym zakresie „A~”
2) Podłączyć czarny przewód pomiarowy do gniazda
„COM”, a czerwony do gniazda „mA” (dla minimum)
lub „20A” (dla maksimum).
3) Podłączyć przewody pomiarowe szeregowo do
obciążenia w celu wykonania pomiaru.
Uwaga: Maksymalny mierzony prąd wynosi 200mA
dla gniazda „mA” lub 20 A dla gniazda „20A”. Pomiar
większej wartości będzie przyczyną przepalenia się
bezpiecznika.
3.3.1.5. REZYSTANCJA
1) Ustawić pokrętło (7) w preferowanym zakresie „Ω”.
2) Podłączyć czarny przewód pomiarowy do gniazda
„COM”, a czerwony do gniazda „VΩ”.
3) Podłączyć przewody pomiarowe do obciążenia
w celu wykonania pomiaru.
Uwaga: Dla oporności 1M Ω i powyżej ustabilizowanie
pomiaru może potrwać nawet kilka sekund.
Zawsze należy upewnić się, że testowany obwód jest
całkowicie odłączony od napięcia oraz że wszystkie
kondensatory w badanym układzie są rozładowane.
3.3.1.6. POJEMNOŚĆ ELEKTRYCZNA
1) Ustawić pokrętło (7) w preferowanym zakresie „F”.
2) Przewody pomiarowe podłączyć odpowiednio do
gniazd „C-„ i „C+” i do kondensatora.
Uwaga: Mierzony kondensator powinien być
rozładowany przed podłączeniem do gniazd
pomiarowych.
Podczas testowania kondensatorów o dużej
pojemności, należy zwrócić uwagę na opóźnienie
przed ostatecznym wskazaniem miernika.
Zabrania się podłączania naładowanego
kondensatora do końcówek pomiarowych!
3.3.1.7. CZĘSTOTLIWOŚĆ
1) Ustawić pokrętło (7) na wartość „200kHz”.
2) Podłączyć czarny przewód pomiarowy do gniazda
„COM”, a czerwony do gniazda „VΩHz”.
3) Podłączyć przewody pomiarowe do obciążenia
w celu wykonania pomiaru.
3.3.1.8. TEMPERATURA
1) Ustawić pokrętło (7) na wartość „C”.
2) Podłączyć czarny przewód pomiarowy do gniazda
„T-”, a czerwony do gniazda „T+”.
3) Umieścić sondę czujnika w mierzonym polu
temperatury.
Uwaga: Zawsze należy używać specjalnej sondy do
pomiarów temperatury
3.3.1.9. POMIAR DIODY I TESTU CIĄGŁOŚCI
1) Ustawić pokrętło (7) na zakres pomiarowy „ ”
2) Podłączyć czarny przewód pomiarowy do gniazda
„COM”, a czerwony do gniazda „VΩHz ”
3) Podłączyć czarny i czerwony przewód pomiarowy
do katody (-) i anody (+) testowanej diody, odczytać
wartość spadku napięcia z wyświetlacza.
4) Podłączyć przewody pomiarowe do obwodu, którego
ciągłość ma być testowana. Sygnał dźwiękowy
będzie ciągły, jeśli rezystancja będzie mniejsza niż
około 80Ω.
3.3.1.10. TEST TRANZYSTORA HFE
1) Ustawić pokrętło (7) na zakres pomiarowy „hFe”
2) Ustalić typ tranzystora, a następnie wykonać jego
test podłączając przewody do gniazda hFe.
3.3.2. WSKAZÓWKI UŻYTKOWANIA
• Urządzenie wyłącza się automatycznie po 30
minutach bezczynności.
• Gdy pojawi się symbol „ ”, należy wymienić
baterię.
3.4. CZYSZCZENIE I KONSERWACJA
a) Do czyszczenia powierzchni należy stosować
wyłącznie środki niezawierające substancji żrących.
b) Po każdym czyszczeniu wszystkie elementy należy
dobrze wysuszyć, zanim urządzenie zostanie
ponownie użyte.
c) Urządzenie należy przechowywać w suchym
i chłodnym miejscu chronionym przed wilgocią
i bezpośrednim promieniowaniem słonecznym.
d) Zabrania się spryskiwania urządzenia strumieniem
wody lub zanurzania urządzenia w wodzie.
e) Należy wykonywać regularne przeglądy urządzenia
pod kątem jego sprawności technicznej oraz
wszelkich uszkodzeń.
f) Do czyszczenia należy używać miękkiej ściereczki.
g) Nie pozostawiać baterii w urządzeniu, gdy nie będzie
ono używane przez dłuższy czas.
h) Chronić urządzenie przed wilgocią. Jeśli zmoknie,
należy natychmiast wytrzeć do sucha. Płyny mogą
zawierać minerały, które mogą powodować korozję
obwodów elektronicznych.
i) Używać i przechowywać urządzenie w standardowych
warunkach temperaturowych. Ekstremalne
temperatury mogą skrócić żywotność urządzenia,
uszkodzić baterie i zniekształcić lub stopić plastikowe
części.
Zakres Dokładność Rozdzielczość
200mV
±(0,5% +8)
100µV
2V 1mV
20V 10mV
200V 100mV
1000V ± (1,5% +8) 1V
• Pojemność elektryczna
Zakres Dokładność Rozdzielczość
2nF ±(2,5% +25) 1pF
20nF
±(2,5% +20)
10pF
200nF 100pF
2µF 1nF
200 µF 0-100µF ±(2,5% +25) 100nF
100-200µF ±(6,0% +55) 100nF
• Napięcie prądu stałego

16 17
09.07.2019
PL
j) Z urządzeniem należy obchodzić się delikatnie
i ostrożnie. Upuszczenie może uszkodzić płytki
drukowane i spowodować niewłaściwe działanie
urządzenia.
k) Urządzenie chronić przed działaniem kurzu i brudu.
l) Należy używać tylko nowych baterii o rozmiarze
i typie wskazanym w parametrach technicznych.
m) Przed rozpoczęciem montażu lub wymiany baterii
upewnić się, że urządzenie nie jest podłączone do
zewnętrznego obwodu oraz wyłączone.
INSTRUKCJA BEZPIECZNEGO USUNIĘCIA AKUMULATORÓW
I BATERII.
W urządzeniach zamontowane są baterie 9V.
W celu zamontowania baterii należy:
1. Otworzyć pokrywę baterii znajdująca się z tyłu
urządzenia za pomocą śrubokrętu.
2. Włożyć baterie odpowiadające parametrom
technicznym.
3. Zamknąć i przykręcić pokrywę baterii.
Zużyte baterie należy zdemontować z urządzenia
postępując analogicznie do ich montażu.
Baterie przekazać komórce odpowiedzialnej za
utylizację tych materiałów.
USUWANIE ZUŻYTYCH URZĄDZEŃ.
Po zakończeniu okresu użytkowania nie wolno usuwać
niniejszegoproduktupoprzeznormalneodpadykomunalne,
lecz należy go oddać do punktu zbiórki i recyklingu
urządzeń elektrycznych i elektronicznych. Informuje o tym
symbol, umieszczony na produkcie, instrukcji obsługi lub
opakowaniu. Zastosowane w urządzeniu tworzywa nadają
się do powtórnego użycia zgodnie z ich oznaczeniem.
Dzięki powtórnemu użyciu, wykorzystaniu materiałów lub
innym formom wykorzystania zużytych urządzeń wnoszą
Państwo istotny wkład w ochronę naszego środowiska.
Informacji o właściwym punkcie usuwania zużytych
urządzeń udzieli Państwu lokalna administracja.
Popis parametru Hodnota parametru
Název výrobku Multimetr
Model SBS-DM-1000
Typ baterie 9V
Jmenovitý výkon [W] 3
Stupeň ochrany IP IP20
Přepěťová ochrana CATIII 1000V
Rozsah měření střídavého
a stejnosměrného napětí
200mV~1000V/ 2V~700V
Rozsah měření střídavého
a stejnosměrného proudu
2mA~20A/ 2mA~20A
Rozsah měření odporu/
elektrické kapacity
200Ω~20MΩ/
2nF~200µF
Rozsah měření teploty/
frekvence
-20~1000~/~200kHz
Pracovní teplota, která
zaručuje nejvyšší přesnost
měření [°C]
23±5
Pracovní teplota/ Relativní
vlhkost při provozu
[°C,°F/%RH]
0~40°C/≤75%
Teplota skladování/
Relativní vlhkost při
skladování [°C,°F/%RH]
-20~60°C/≤80%
Rozměry [mm] 195x89x40
Hmotnost [kg] 0,32
TECHNICKÉ ÚDAJE
Pojem „zařízení“ nebo „výrobek“ v bezpečnostních
pokynech a návodu se vztahuje na < Multimetr >. Zařízení
nepoužívejte v prostředí s velmi vysokou vlhkostí / v přímé
blízkosti nádrží s vodou! Zařízení nenořte do vody. Hrozí
nebezpečí úrazu elektrickým proudem!
Nezakrývejte větrací otvory!
2.1. ELEKTRICKÁ BEZPEČNOST
a) Při měření napětí se ujistěte, že je otočný přepínač
nastaven na odpovídající rozsah.
b) Při měření napětí nad 50 V buďte obzvláště opatrní.
c) Je-li to možné, nezapojujte zařízení do živých
obvodů (pod napětím).
d) Před měřením odporu, testem diod, testem
kontinuity nebo měření teploty se ujistěte, že
testovaný obvod není pod napětím.
e) Před zahájením měření se ujistěte, že byla vybrána
správná funkce a rozsah měření.
f) Buďte obzvláště opatrní, dojde-li k přerušení obvodu,
když zařízení používáte v systému s proudovým
transformátorem připojeným ke kleštím.
g) Před každým použitím zkontrolujte, zda jsou
testovací kabely a sondy v dobrém stavu, např. bez
poškození izolace.
h) Před demontáží krytu akumulátoru odpojte testovací
kabely a sondy od zařízení a nastavte otočný
přepínač do polohy „OFF”.
i) Při měření držte testovací kabely za izolované části.
j) Během měření dodržujte obecné zásady a znalosti
elektrotechniky.
2.2. BEZPEČNOST NA PRACOVIŠTI
a) Na pracovišti udržujte pořádek a mějte dobré
osvětlení. Nepořádek nebo špatné osvětlení mohou
vést k úrazům. Buďte předvídaví a sledujte, co se
během práce kolem vás děje. Při práci se zařízením
vždy zachovávejte zdravý rozum.
b) Se zařízením nepracujte ve výbušném prostředí,
například v přítomnosti hořlavých kapalin, plynů
nebo prachu. Zařízení vytváří jiskření, skrze které
může dojít ke vznícení prachu nebo výparů.
c) Pokud zjistíte, že zařízení nepracuje správně, nebo
je poškozeno, ihned jej vypněte a poruchu nahlaste
autorizované osobě.
d) Pokud máte pochybnosti o tom, zda zařízení funguje
správně, kontaktujte servis výrobce.
e) Opravy zařízení může provádět pouze servis výrobce.
Opravy neprovádějte sami!
f) V případě vzniku požáru k hašení zařízení pod
napětím používejte pouze práškové nebo sněhové
hasicí přístroje (CO2).
NÁVOD K POUŽITÍ
1. VŠEOBECNÝ POPIS
Návod slouží jako nápověda pro bezpečné a spolehlivé
používání výrobku. Výrobek je navržen a vyroben přesně
podle technických údajů za použití nejnovějších technologií
a komponentů a za dodržení nejvyšších jakostních norem.
PŘED ZAHÁJENÍM PRÁCE SI DŮKLADNĚ PŘEČTĚTE
TENTO NÁVOD A UJISTĚTE SE, ŽE JSTE POCHOPILI
VŠECHNY POKYNY.
Pro zajištění dlouhého a spolehlivého fungování zařízení
pravidelně provádějte revize a údržbu v souladu s pokyny
uvedenými v tomto návodu. Technické údaje a specikace
uvedené v návodu jsou aktuální. Výrobce si vyhrazuje právo
provádět změny za účelem zvýšení kvality.
VYSVĚTLENÍ SYMBOLŮ
2. BEZPEČNOST POUŽÍVÁNÍ
POZNÁMKA! Přečtěte si tento návod včetně všech
bezpečnostních pokynů. Nedodržování návodu
a pokynů může vést k úrazu elektrickým proudem,
požáru anebo těžkému úrazu či smrti.
Originálním návodem je německá verze návodu. Ostatní
jazykové verze jsou překladem z německého jazyka.
POZOR! Obrázky v tomto návodu jsou pouze
ilustrační a v některých detailech se od skutečného
vzhledu výrobku mohou lišit.
CZ
Výrobek splňuje požadavky příslušných
bezpečnostních norem.
Před použitím výrobku se seznamte s návodem.
Recyklovatelný výrobek.
Pouze k použití ve vnitřních prostorech.
UPOZORNĚNÍ! nebo VAROVÁNÍ! nebo
PAMATUJTE! popisující danou situaci.
(všeobecná výstražná značka).

18 19
09.07.2019
3.2. PŘÍPRAVA K PRÁCI
Teplota okolí nesmí být vyšší než 40 °C a relativní vlhkost
nesmí být vyšší než 80 %. Zařízení postavte takovým
způsobem, aby byla zajištěna dobrá cirkulace vzduchu.
POZOR! Mezní hodnoty ochrany proti přetížení nesmí být
překročeny. Podrobné parametry (elektrické) měření:
Ochrana proti přetížení: 1000 V DC/700 Vrms AC
Impedance: 10 MΩ v celém rozsahu.
Ochrana proti přetížení: 36 V DC/36 Vrms AC
Ochrana proti přetížení: 250 V DC/250 Vrms AC
Ochrana proti přetížení: 1000 V DC/700 Vrms AC
Impedance: 1 MΩ pro 2 V, 10 MΩ pro ostatní rozsahy.
Frekvence: 40–400 Hz pro rozsah 2–20 V, 40–200 Hz pro
700 V.
Ochrana proti přetížení: pojistka 0,2 A/250 V, 20 A/250 V
(pojistka 20 A do 10 s).
Frekvence: 40–200 Hz
Ochrana proti přetížení: pojistka 0,2 A/250 V, 20 A/250 V
(pojistka 20 A do 10 s).
Ochrana proti přetížení: 250 V DC/250 Vrms AC
• Napětí stejnosměrného proudu
• Napětí střídavého proudu (Průměrná detekce:
kalibrována na RMS (kvadratický průměr) sinusové vlny.)
• Frekvence
• Teplota (senzor NiCr–NiSi)
• Test tranzistoru hFe
• Intenzita stejnosměrného proudu
• Intenzita střídavého proudu (Průměrná detekce:
kalibrována na RMS (kvadratický průměr) sinusové
vlny.)
• Odpor
• Elektrická kapacita
CZ
Záznam přesnosti: ±% odečtu + počet posledních
číslic (při teplotě: 23 (± 5)°C a vlhkosti ≤ 75% RH).
Rozsah Přesnost Rozlišení
200mV
±(0,5% +8)
100µV
2V 1mV
20V 10mV
200V 100mV
1000V ± (1,5% +8) 1V
Rozsah Přesnost Rozlišení
2V
±(1,5% +10 )
1mV
20V 10mV
200V 100mV
700V ±(2,5% +10) 1V
Rozsah Přesnost Rozlišení
200kHz ±(3,0% +15) 100Hz
Rozsah Přesnost Rozlišení
-20~150°C ±(3,0% +2) 1°C
150~300°C ±(3,0% +2) 1°C
300~1000°C ±(3,5% +10) 1°C
Rozsah Popis Podmínky testu
hFe
Zobrazení hodnot hFe
0–1000) testovaného
tranzistoru (typ NPN
a PNP)
Stejnosměrný
proud kolem 10
μA.
Napětí
stejnosměrného
proudu kolem
3,0 V.
Rozsah Přesnost Rozlišení
2mA ±(0,8% +8) 1µA
20mA ±(0,8% +8) 10µA
200mA ±(1,2% +8) 100µA
20A ±(2,0% +10) 10mA
Rozsah Přesnost Rozlišení
2mA ±(1,8% +8) 1µA
200mA ±(2,0% +8) 100µA
20A ±(3,0% +15) 10mA
Rozsah Přesnost Rozlišení
200Ω ±(1,2% +15) 0,1Ω
2kΩ
±(0,8% +8)
1Ω
20kΩ 10Ω
200kΩ 100Ω
20MΩ ±(2,5% +15) 10kΩ
200 µF 0-100µF ±(2,5% +25) 100nF
100-200µF ±(6,0% +55) 100nF
Rozsah Přesnost Rozlišení
2nF ±(2,5% +25) 1pF
20nF
±(2,5% +20)
10pF
200nF 100pF
2µF 1nF
POZNÁMKA! I když zařízení bylo navrženo tak, aby
bylo bezpečné, tedy má vhodné bezpečnostní prvky,
tak i přes použití dodatečné ochrany uživatelem při
práci se zařízením nadále existuje malé riziko úrazu
nebo poranění. Doporučuje se zachovat opatrnost
a zdravý rozum při jeho používání.
3. ZÁSADY POUŽÍVÁNÍ
Zařízení slouží k měření elektrických hodnot a teploty
vybraných zařízení a elektrických obvodů. Odpovědnost za
veškeré škody vzniklé v důsledku použití zařízení v rozporu
s určením nese uživatel.
3.1. POPIS PŘÍSTROJE
CZ
1. LCD displej.
2. Tlačítko On/O
3. Tlačítko HOLD/Podsvícení: Blokování/odblokování
zobrazené hodnoty.
4. Zapnutí/vypnutí podsvícení obrazovky a diody
aktuálně zvolené funkce
5. Diody informující o aktuálně aktivní funkci
6. Vstupní zásuvka: hFE
7. Regulátor: volba funkce a rozsahu měření
8. Mechanický zámek zásuvek – ochrana proti
nesprávnému použití
9. Vstupní zásuvka:
a) 20A
b) mA
c) VΩHz , kapacita "+", teplota "+"
d) COM, kapacita "-", teplota "-"
2.3. OSOBNÍ BEZPEČNOST
a) Zařízení nepoužívejte, jste-li unaveni nebo pod
vlivem drog, alkoholu nebo léků, které významně
snižují schopnost zařízení ovládat.
b) Zařízení není určen k tomu, aby jej používaly osoby
(včetně dětí) s omezenými psychickými, smyslovými
nebo duševními schopnostmi nebo osoby bez
příslušných zkušeností a/nebo znalostí, ledaže
jsou pod dohledem osoby zodpovědné za jejich
bezpečnost nebo od ní obdržely pokyny, jak zařízení
obsluhovat.
c) Při práci se zařízením buďte pozorní, řiďte se
zdravým rozumem. Chvilka nepozornosti při práci
může vést k vážnému úrazu.
d) Zabraňte náhodnému spuštění. Ujistěte se, že je
spínač ve vypnuté poloze před připojením zařízení k
napájecímu zdroji.
e) Zařízení není hračka. Dohlížejte na děti, aby si nehrály
se zařízením.
2.4. BEZPEČNÉ POUŽÍVÁNÍ ZAŘÍZENÍ
a) Zařízení nepoužívejte, pokud spínač pro zapnutí
a vypnutí zařízení nefunguje správně. Zařízení, které
nelze ovládat spínačem, je nebezpečné a musí být
opraveno.
b) Nepoužívaná zařízení uchovávejte mimo dosah dětí
a osob, které nejsou seznámeny se zařízením nebo
návodem k obsluze. Zařízení jsou nebezpečná v
rukou nezkušených uživatelů.
c) Zařízení udržujte v dobrém technickém stavu.
d) Udržujte zařízení mimo dosah dětí.
e) Opravu a údržbu zařízení by měly provádět
pouze kvalikované osoby za výhradního použití
originálních náhradních dílů. Zajistí to bezpečné
používání zařízení.
f) Pro zachování navržené mechanické integrity
zařízení neodstraňujte předem namontované kryty
nebo neuvolňujte šrouby.
g) Nepřesouvejte, nepřenášejte a neotáčejte zařízení v
provozu.
h) Zapnuté zařízení nenechávejte bez dozoru.
i) Pravidelně čistěte zařízení, aby nedošlo k trvalému
usazovaní nečistot.
j) Zařízení není hračka. Čištění a údržbu nesmí provádět
děti bez dohledu dospělé osoby.
k) Nikdy neměřte hodnoty napětí, jestliže měřící
kabely jsou zapojené do testovacích zdířek hodnoty
elektrického proudu.
l) Při práci s napětím vyšším než DC60V nebo AC42V
buďte velmi opatrní.
m) Při měření držte testovací kabely nebo sondy za
izolované části.
n) Vyberte příslušnou funkci a měřící rozsah, aby
nedošlo k poškození měřícího přístroje.
o) Odpojte měřící kabely od testovacích bodů před
přechodem do jiné funkce.
g) Na pracovišti se nesmí zdržovat děti a nepovolané
osoby. (Nepozornost může způsobit ztrátu kontroly
nad zařízením.)
h) Je třeba pravidelně kontrolovat stav etiket s
bezpečnostními informacemi. V případě, že jsou
nečitelné, je třeba etikety vyměnit.
i) Návod k obsluze uschovejte za účelem jeho
pozdějšího použití. V případě předánání zařízení
třetím osobám musí být spolu se zařízením předán
rovněž návod k obsluze.
Ochrana proti přetížení: 250 V DC/250 Vrms AC
3.3. PRÁCE SE ZAŘÍZENÍM
3.3.1. NÁVOD K MĚŘENÍ
Přístroj zapněte tlačítkem On/O
Pozor:
1) Pokud je rozsah měřené hodnoty neznámý,
nastavte rozsah měření otočením otočného
přepínače (7) na nejvyšší a postupně ho snižujte.
2) Když se na displeji zobrazí hodnota „1“, znamená
to, že rozsah měření byl překročen a musí být
zvýšen.
3) Při měření vysokého napětí buďte obzvláště
opatrní, aby nedošlo k úrazu elektrickým proudem.
3.3.1.1. Napětí stejnosměrného proudu
1) Nastavte otočný přepínač (7) ve zvoleném rozsahu
„V “.
2) Připojte černý měřící kabel ke zdířce „COM“
a červený měřící kabel ke zdířce „VΩ“.
3) Připojte měřící sondy k měřenému zdroji nebo
zátěži.
Pozor: Je zakázáno měřit napětí nad 1000 V DC,
mohlo by dojít k poškození vnitřního měřicího
systému.
3.3.1.2. NAPĚTÍ STŘÍDAVÉHO PROUDU
1) Nastavte otočný přepínač (7) ve zvoleném rozsahu
„V~“.
2) Připojte černý měřící kabel ke zdířce „COM“ a červený
měřící kabel ke zdířce „VΩ“.
3) Připojte měřící sondy k měřenému zdroji nebo zátěži.
Pozor: Je zakázáno měřit napětí nad 700 Vrms AC,
mohlo by dojít k poškození vnitřního měřicího
systému.
Rozsah Popis Podmínky testu
Zobrazení přibližného
napětí diody.
Stejnosměrný proud
kolem 1,5 mA.
Napětí
stejnosměrného
proudu kolem 3,0 V.
Vestavěný bzučák
vydává signál, když je
odpor menší než 80 Ω.
Napětí v otevřeném
obvodu kolem 3,0 V
• Test diody a signál přerušeného obvodu
POZNÁMKA! Nákres tohoto produktu naleznete na
konci návodu na str. 37.

20 21
09.07.2019
CZ
O tom informuje symbol umístěný na zařízení, v návodě
k obsluze nebo na obalu. Komponenty použité v zařízení
jsou vhodné pro zužitkování v souladu s jejich označením.
Díky zužitkování, recyklaci nebo jiným způsobům využití
opotřebených zařízení významně přispíváte k ochraně
životního prostředí. Informace o příslušné sběrně
opotřebených zařízení poskytne místní obecný nebo
městský úřad
CZ
3.3.1.5. ODPOR
1) Nastavte otočný přepínač (7) ve zvoleném rozsahu
„Ω“.
2) Připojte černý měřící kabel ke zdířce „COM“ a červený
měřící kabel ke zdířce „VΩ“.
3) Připojte měřící sondy k měřenému zdroji nebo zátěži.
Pozor: Pro odpor 1 MΩ a vyšší může stabilizace
měření trvat i několik sekund.
Vždy se ujistěte, že testovaný obvod je zcela odpojen
od napětí a že všechny kondenzátory v testovaném
systému jsou vybité.
3.3.1.6. ELEKTRICKÁ KAPACITA
1) Nastavte otočný přepínač (7) ve zvoleném rozsahu
„F“.
2) Připojte měřící kabely ke zdířkám „C-“ a „C+“ a ke
kondenzátoru.
Pozor: Měřený kondenzátor by měl být před
připojením k měřicím zdířkám zcela vybit.
Při testování velkokapacitních kondenzátorů dávejte
pozor na zpoždění, než bude naměřena hodnota
konečně zobrazena.
K měřicím svorkám je zakázáno připojovat nabitý
kondenzátor!
3.3.1.7. FREKVENCE
1) Nastavte otočný přepínač (7) ve zvoleném rozsahu
„200 kHz“.
2) Připojte černý měřící kabel ke zdířce „COM“ a červený
měřící kabel ke zdířce „VΩHz“.
3) Připojte měřící sondy k měřenému zdroji nebo zátěži.
3.3.1.8. TEPLOTA
1) Nastavte otočný přepínač (7) na hodnotu „C“.
2) Připojte černý měřící kabel ke zdířce „T-“ a červený
měřící kabel ke zdířce „T+“.
3) Umístěte sondu se senzorem do měřeného
teplotního pole.
Pozor: Vždy používejte speciální teplotní sondu.
3.3.1.9. MĚŘENÍ DIOD A TEST KONTINUITY
1) Nastavte otočný přepínač (7) ve zvoleném rozsahu „
“.
2) Připojte černý měřící kabel ke zdířce „COM“ a červený
měřící kabel ke zdířce „VΩHz “.
3.3.1.3. INTENZITA STEJNOSMĚRNÉHO PROUDU
1) Nastavte otočný přepínač (7) ve zvoleném rozsahu
„A “.
2) Připojte černý měřící kabel ke zdířce „COM“ a červený
měřící kabel ke zdířce „mA“ (minimálně) nebo „20 A“
(maximálně).
3) Připojte měřící sondy v sérii k měřenému zdroji nebo
zátěži.
Pozor: Maximální naměřený proud je 200 mA pro
zdířku „mA“ nebo 20 A pro zdířku „20 A“. Měření
větší hodnoty způsobí vyhoření pojistky.
3.3.1.4. INTENZITA STŘÍDAVÉHO PROUDU
1) Nastavte otočný přepínač (7) ve zvoleném rozsahu
„A~“.
2) Připojte černý měřící kabel ke zdířce „COM“ a červený
měřící kabel ke zdířce „mA“ (minimálně) nebo „20
A~“ (maximálně).
3) Připojte měřící sondy v sérii k měřenému zdroji nebo
zátěži.
Pozor: Maximální naměřený proud je 200 mA pro
zdířku „mA“ nebo 20 A~ pro zdířku „20 A~“. Měření
větší hodnoty způsobí vyhoření pojistky.
3) Připojte červený i černý měřící kabel ke katodě (-)
i anodě (+) testované diody. odečtěte pokles napětí
z displeje.
4) Připojte měřící kabely k obvodu, jehož spojitost má
být testována. Pokud je odpor menší než 80 Ω, bude
akustický signál spojitý.
3.3.1.10. TEST TRANZISTORU HFE
1) Nastavte otočný přepínač (7) ve zvoleném rozsahu
„hFe“.
2) Určete typ tranzistoru a poté proveďte test
připojením vodičů k zásuvce hFe.
3.3.2. POKYNY PRO POUŽITÍ
• Přístroj se automaticky vypne po 30 minutách
nečinnosti.
• Když se objeví symbol „ “, vyměňte baterii.
3.4. REINIGUNG UND WARTUNG
a) K čištění povrchu zařízení používejte výhradně
prostředky neobsahující žíravé látky.
b) Po každém čištění je nutno všechny prvky dobře
osušit, než bude zařízení opět použito.
c) Zařízení skladujte na suchém a chladném místě,
chráněném proti vlhkosti a přímému slunečnímu
svitu.
d) Je zakázáno zařízení polévat vodou nebo je do vody
ponořovat.
e) Pravidelně provádějte revize zařízení a kontrolujte,
zda je technicky způsobilé a není poškozeno.
f) K čištění používejte měkký hadřík.
g) Pokud zařízení nebudete používat delší dobu,
vytáhněte z něj akumulátor/baterii.
h) Chraňte zařízení před vlhkostí. Pokud zmokne,
ihned jej otřete do sucha. Kapaliny mohou
obsahovat minerály, které mohou způsobit korozi
elektronického obvodu.
i) Zařízení používejte a skladujte za normálních
teplotních podmínek. Extrémní teploty mohou
zkrátit životnost zařízení, poškodit baterie a poškodit
nebo roztavit plastové díly.
j) Se zařízením zacházejte jemně a opatrně. Upuštění
může poškodit desky s plošnými spoji a způsobit
poruchu zařízení.
k) Chraňte zařízení před prachem a nečistotami.
l) Používejte pouze nové baterie, jejichž velikost a typ
je uveden v technických parametrech.
m) Před instalací nebo výměnou baterie se ujistěte, že
zařízení není připojeno k externímu obvodu a je
vypnuté.
NÁVOD K BEZPEČNÉMU ODSTRANĚNÍ AKUMULÁTORŮ
A BATERIÍ.
V zařízení se používají baterie 9V.
Pro montáž baterií:
1. Otevřete kryt baterií na zadní straně přístroje pomocí
šroubováku.
2. Vložte baterie odpovídající technickým parametrům.
3. Zavřete a zašroubujte kryt baterií.
Vybité baterie ze zařízení vyjměte, postupujte v
opačném pořadí než při jejich vkládání.
Pro zajištění vhodné likvidace baterie vyhledejte
příslušné místo/obchod, kde je můžete odevzdat.
LIKVIDACE OPOTŘEBENÝCH ZAŘÍZENÍ
Po ukončení doby používání nevyhazujte tento výrobek
společně s komunálním odpadem, ale odevzdejte jej k
recyklaci do sběrny elektrických a elektronických zařízení.

22 23
09.07.2019
Collecte séparée.
Pour l'utilisation intérieure uniquement.
ATTENTION! , AVERTISSEMENT! et REMARQUE
attirent l'attention sur des circonstances
spéciques (symboles d'avertissement
généraux).
Description des
paramètres
Valeur des paramètres
Nom du produit Multimètre
Modèle SBS-DM-1000
Type de pile 9V
Puissance nominale [W] 3
Classe de protection IP IP20
Protection contre les
surtensions
CATIII 1000V
Plage de mesure de la
tension du courant
continu/courant alternatif
200mV~1000V/ 2V~700V
Plage de mesure de
l'intensité du courant
continu/courant alternatif
2mA~20A/ 2mA~20A
Plage de mesure de
résistance/capacité
électrique
200Ω~20MΩ/
2nF~200µF
Plage de mesure de la
température/fréquence/
rapport cyclique
-20~1000~/~200kHz
Température de
fonctionnement
garantissant la plus grande
précision de mesure [°C]
23±5
Température de
fonctionnement/ Humidité
relative de travail
[°C,°F/%RH]
0~40°C/≤75%
Température de stockage/
Humidité relative de
stockage [°C,°F/%RH]
-20~60°C/≤80%
Dimensions [mm] 195x89x40
Poids [kg] 0,32
DÉTAILS TECHNIQUES
Les notions d'« appareil », de « machine » et de « produit
» gurant dans les descriptions et les consignes du manuel
se rapportent à/au < Multimètre >. N'utilisez pas l'appareil
dans des pièces où le taux d'humidité est très élevé, ni à
proximité immédiate de récipients d'eau! Ne mouillez pas
l'appareil. Risque de chocs électriques! Ne couvrez pas les
orices de ventilation!
2.1. SÉCURITÉ ÉLECTRIQUE
a) Lors de la mesure de la tension, assurez-vous que le
bouton est réglé sur la plage correcte.
b) Faites particulièrement attention lorsque vous
mesurez une tension supérieure à 50 V.
c) Si possible, évitez de connecter l'appareil à des
circuits sous tension.
d) Avant de procéder aux mesures suivantes, , assurez-
vous que le circuit testé est hors tension : test de
résistance, de diode ou de continuité, de capacité ou
de température.
e) Avant de prendre des mesures, assurez-vous que la
fonction et la plage de mesure appropriées ont été
sélectionnées.
f) Faites particulièrement attention en cas de rupture
du circuit lors de l'utilisation de l'appareil dans un
système avec transformateur de courant connecté
aux pinces.
g) Avant chaque utilisation, assurez-vous que les
câbles et les sondes de mesure sont en bon état,
par exemple que leur isolation ne présente aucun
dommage.
h) Avant de démonter le couvercle du compartiment
des piles, débranchez les câbles et les sondes
de mesure de l'appareil et réglez le bouton sur la
position « OFF ».
i) Lors de la mesure, tenez les câbles par les parties
isolées.
j) Suivez les principes généraux et les connaissances en
électrotechnique pendant la réalisation des mesures.
MANUEL D´UTILISATION
1. DESCRIPTION GÉNÉRALE
L'objectif du présent manuel est de favoriser une utilisation
sécuritaire et able de l'appareil. Le produit a été conçu
et fabriqué en respectant étroitement les directives
techniques applicables et en utilisant les technologies et
composants les plus modernes. Il est conforme aux normes
de qualité les plus élevées.
LISEZ ATTENTIVEMENT LE PRÉSENT MANUEL ET
ASSUREZ-VOUS DE BIEN LE COMPRENDRE AVANT
LA PREMIÈRE UTILISATION.
An de garantir le fonctionnement able et durable de
l'appareil, il est nécessaire d'utiliser et d'entretenir ce
dernier conformément aux consignes gurant dans le
présent manuel. Les caractéristiques et les spécications
contenues dans ce document sont à jour. Le fabricant se
réserve le droit de procéder à des modications à des ns
d’amélioration du produit.
2. CONSIGNES DE SÉCURITÉ
ATTENTION! Veuillez lire attentivement toutes les
consignes de sécurité et toutes les instructions. Le
non-respect des avertissements et des consignes
de sécurité peut entraîner des chocs électriques, un
incendie, des blessures graves ou la mort.
La version originale de ce manuel a été rédigée en
allemand. Toutes les autres versions sont des traductions
de l'allemand.
REMARQUE! Les illustrations contenues dans le
présent manuel sont fournies à titre explicatif. Votre
appareil peut ne pas être identique.
SYMBOLES
Le produit est conforme aux normes de sécurité
en vigueur.
Respectez les consignes du manuel.
FR FR
ATTENTION! Bien que l'appareil ait été conçu en
accordant une attention spéciale à la sécurité et qu'il
comporte des dispositifs de protection, ainsi que des
caractéristiques de sécurité supplémentaires, il n’est
pas possible d’exclure entièrement tout risque de
blessure lors de son utilisation. Nous recommandons
de faire preuve de prudence et de bon sens lorsque
vous utilisez l’appareil.
3. CONDITIONS D’UTILISATION
L'appareil sert à mesurer les valeurs électriques et
la température d'appareils et de circuits électriques
sélectionnés. L’utilisateur porte l’entière responsabilité
pour l’ensemble des dommages attribuables à un usage
inapproprié.
3.1. DESCRIPTION DE L'APPAREIL
ATTENTION! Le plan de ce produit se trouve à la
dernière page du manuel d‘utilisation, p. 37.
1. Écran LCD.
2. Bouton On/Off
3. Bouton HOLD/Rétroéclairage: Verrouille/déverrouille
la valeur affichée.
4. Allumer/éteindre le rétroéclairage de l'écran et de
la diode correspondant à la fonction actuellement
sélectionnée.
5. Diode informant de la fonction actuellement active.
6. Borne d'entrée: hFE
7. Sélecteur: sélectionner la fonction et la plage de
mesure.
8. Verrouillage mécanique des prises - protection
contre une utilisation incorrecte.
2.2. SÉCURITÉ AU POSTE DE TRAVAIL
a) Veillez à ce que votre poste de travail soit toujours
propre et bien éclairé. Le désordre ou un éclairage
insusant peuvent entraîner des accidents. Soyez
prévoyant, observez les opérations et faites preuve
de bon sens lorsque vous utilisez l’appareil.
b) N'utilisez pas l'appareil dans les zones à risque
d'explosion, par exemple à proximité de liquides,
de gaz ou de poussières inammables. Certains
appareils peuvent produire des étincelles
susceptibles d’enammer la poussière et les vapeurs.
c) En cas de dommages ou de mauvais fonctionnement,
l’appareil doit être mis hors tension immédiatement
et la situation doit être rapportée à une personne
compétente.
d) En cas d’incertitude quant au fonctionnement correct
de l’appareil, contactez le service client du fabricant.
e) Seul le service du fabricant peut eectuer des
réparations. Ne tentez aucune réparation par vous-
même !
f) En cas de feu ou d’incendie, utilisez uniquement
des extincteurs à poudre ou au dioxyde de carbone
(CO2) pour étouer les ammes sur l’appareil.
g) Aucun enfant ni personne non autorisée ne doit se
trouver sur les lieux de travail. (Le non-respect de
cette consigne peut entraîner la perte de contrôle
sur l'appareil).
h) Vériez régulièrement l'état des autocollants portant
des informations de sécurité. S’ils deviennent
illisibles, remplacez-les.
i) Conservez le manuel d’utilisation an de pouvoir
le consulter ultérieurement. En cas de cession de
l’appareil à un tiers, l’appareil doit impérativement
être accompagné du manuel d’utilisation.
2.3. SÉCURITÉ DES PERSONNES
a) N'utilisez pas l'appareil lorsque vous êtes fatigué,
malade, sous l'eet de drogues ou de médicaments
et que cela pourrait altérer votre capacité à utiliser
l'appareil.
b) Cet appareil n'est pas conçu pour être utilisé
par les personnes dont les facultés physiques,
sensorielles ou mentales sont limitées (enfants y
compris), ni par des personnes sans expérience
ou connaissances adéquates, à moins qu'elles se
trouvent sous la supervision et la protection d'une
personne responsable ou qu'une telle personne leur
ait transmis des consignes appropriées en lien avec
l'utilisation de l’appareil.
c) Soyez attentif et faites preuve de bon sens lors que
vous utilisez l’appareil. Un moment d'inattention
pendant le travail peut entraîner des blessures
graves.
d) An de prévenir la mise en marche accidentelle de
l'appareil, assurez-vous que celui-ci est éteint et que
l'interrupteur se trouve sur arrêt avant de procéder
au branchement.
e) Cet appareil n'est pas un jouet. Les enfants doivent
demeurer sous la supervision d’un adulte an qu’ils
ne jouent pas avec l’appareil.
2.4. UTILISATION SÉCURITAIRE DE L'APPAREIL
a) N’utilisez pas l’appareil si l’interrupteur MARCHE/
ARRÊT ne fonctionne pas correctement. Les appareils
qui ne peuvent pas être contrôlés à l'aide d'un
interrupteur sont dangereux et doivent être réparés.
b) Les outils qui ne sont pas en cours d'utilisation
doivent être mis hors de portée des enfants et des
personnes qui ne connaissent ni l'appareil, ni le
manuel d'utilisation s'y rapportant. Entre les mains
de personnes inexpérimentées, ce genre d'appareils
peut représenter un danger.
c) Maintenez l'appareil en parfait état de marche.
d) Tenez l'appareil hors de portée des enfants.
e) La réparation et l'entretien des appareils doivent être
eectués uniquement par un personnel qualié, à
l'aide de pièces de rechange d'origine. Cela garantit
la sécurité d’utilisation.
f) Pour garantir l'intégrité opérationnelle de l'appareil,
les couvercles et les vis posés à l'usine ne doivent pas
être retirés.
g) Il est défendu de pousser, de déplacer ou de tourner
l’appareil pendant son fonctionnement.
h) Ne laissez pas l’appareil fonctionner sans surveillance.
i) Nettoyez régulièrement l'appareil pour en prévenir
l’encrassement.
j) Cet appareil n'est pas un jouet. Le nettoyage et
l’entretien ne doivent pas être eectués par des
enfants, à moins qu’ils se trouvent sous la supervision
d’un adulte responsable.
k) Ne mesurez jamais la valeur de la tension lorsque
les cordons de mesure sont branchés aux bornes de
mesure de la valeur du courant.
l) Soyez prudent lorsque vous travaillez avec des
tensions supérieures à DC60V ou AC42V.
m) Tenir les cordons de mesure ou les pointes de touche
au niveau des parties isolées pendant la mesure.
n) Sélectionnez la fonction et la plage de mesure
appropriées pour la mesure an d'éviter
d'endommager l'appareil de mesure.
o) Débranchez les cordons de mesure des points de
mesure avant de passer à une autre fonction.

24 25
09.07.2019
FR
Protection contre les surcharges : 1000V DC/700Vrms AC
Impédance : 10 MΩ dans toute la plage
Protection contre les surcharges : 36V DC/36Vrms AC
Protection contre les surcharges : 250V DC/250Vrms AC
Protection contre les surcharges : 1000V DC/700Vrms AC
Impédance : 1 MΩ pour la plage 2V, 10 MΩ pour les plages
restantes.
Fréquence : 40-400Hz pour la plage 2-20V, 40-200Hz pour
700V.
Protection contre les surcharges: fusible 0,2 A / 250 V, 20
A / 250 V (fusible 20 A jusqu'à 10 s).
Fréquence : 40-200 Hz
Protection contre les surcharges: fusible 0,2 A / 250 V, 20
A/250 V (fusible 20 A jusqu'à 10 s).
Protection contre les surcharges : 250V DC/250Vrms AC
• Tension du courant alternatif (Détection moyenne:
calibré à RMS (la valeur ecace moyenne) d'une
onde sinusoïdale
• Fréquence
• Température (capteur NiCr-NiSi)
• Test du transistor hFe
• Test de diode et signal du circuit interrompu
• Intensité du courant continu
• Tension du courant alternatif (Détection moyenne:
calibré à RMS (la valeur ecace moyenne) d'une
onde sinusoïdale
• Résistance
• Capacité électrique
3.3. UTILISATION DE L'APPAREIL
3.3.1. INSTRUCTIONS DE MESURE
Allumez l'appareil à l'aide du bouton On / O
Remarques:
1) Si la plage de la valeur mesurée n'est pas connue
auparavant, réglez la plage de mesure en tournant
le bouton (7) au maximum et en diminuant ensuite
progressivement.
2) Lorsque l'écran ache la valeur "1", cela signie
que la plage a été dépassée et doit être augmentée.
3) Faites attention au risque d'électrocution lors de la
mesure de hautes tensions.
3.3.1.1. TENSION DU COURANT CONTINU
1) Réglez le bouton (7) dans la plage préférée „V ”.
2) Connectez le câble de mesure noir à la prise "COM"
et le câble de mesure rouge à la prise "VΩ".
3) Connectez les câbles de mesure à la charge pour
eectuer la mesure.
Attention: Il est interdit de mesurer une tension
supérieure à 1000 VDC, cela pourrait endommager
le système de mesure interne.
3.3.1.2. TENSION DU COURANT ALTERNATIF
1) Réglez le bouton (7) dans la plage préférée „V~”.
2) Connectez le câble de mesure noir à la prise "COM"
et le câble de mesure rouge à la prise "VΩ".
3) Connectez les câbles de mesure à la charge pour
eectuer la mesure.
Attention: Il est interdit de mesurer une tension
supérieure à 700 Vrms, cela pourrait endommager
le système de mesure interne.
3.3.1.3. INTENSITÉ DU COURANT CONTINU
1) Réglez le bouton (7) dans la plage préférée „A ”
2) Connectez le câble de mesure noir à la prise "COM"
et le câble rouge à la prise "mA" (pour le minimum)
ou "20A" (pour le maximum).
3) Connectez les câbles de mesure en série à la charge
pour eectuer la mesure.
Attention : Le courant maximal mesuré est de 200
mA pour la prise "mA" ou de 20 A pour la prise
"20A". La mesure d'une plus grande valeur fera
sauter le fusible.
3.3.1.4. INTENSITÉ DU COURANT ALTERNATIF
1) Réglez le bouton (7) dans la plage préférée „A~”
2) Connectez le câble de mesure noir à la prise "COM"
et le câble rouge à la prise "mA" (pour le minimum)
ou "20 A~" (pour le maximum).
3) Connectez les câbles de mesure en série à la charge
pour eectuer la mesure.
Attention : Le courant maximal mesuré est de 200
Plage Précision Résolution
2V
±(1,5% +10 )
1mV
20V 10mV
200V 100mV
700V ±(2,5% +10) 1V
Plage Précision Résolution
200kHz ±(3,0% +15) 100Hz
Plage Précision Résolution
-20~150°C ±(3,0% +2) 1°C
150~300°C ±(3,0% +2) 1°C
300~1000°C ±(3,5% +10) 1°C
Plage Description Conditions de test
hFe
Achage des valeurs
hFe 0-1000) du transistor
testé (types NPN et PNP)
Courant continu
environ 10 µA.
Tension du courant
continu environ
3,0V.
Plage Description Conditions de test
Achage de la tension
approximative de la
diode.
Courant continu
environ 1,5 mA.
Tension du courant
continu environ
3,0V.
La sonnerie intégrée
retentit lorsque
la résistance est
inférieure niż 80 Ω.
Tension de circuit
ouvert environ3,0V
Plage Précision Résolution
2mA ±(0,8% +8) 1µA
20mA ±(0,8% +8) 10µA
200mA ±(1,2% +8) 100µA
20A ±(2,0% +10) 10mA
Plage Précision Résolution
2mA ±(1,8% +8) 1µA
200mA ±(2,0% +8) 100µA
20A ±(3,0% +15) 10mA
Plage Précision Résolution
200Ω ±(1,2% +15) 0,1Ω
2kΩ
±(0,8% +8)
1Ω
20kΩ 10Ω
200kΩ 100Ω
20MΩ ±(2,5% +15) 10kΩ
200 µF 0-100µF ±(2,5% +25) 100nF
100-200µF ±(6,0% +55) 100nF
Plage Précision Résolution
2nF ±(2,5% +25) 1pF
20nF
±(2,5% +20)
10pF
200nF 100pF
2µF 1nF
FR
3.2. PRÉPARATION À L'UTILISATION
La température ambiante ne doit pas dépasser 40 °C et le
taux d'humidité relative ne doit pas être de plus de 80 %.
Positionnez l’appareil de sorte qu’une bonne circulation
d’air soit assurée
Attention! Les valeurs limites pour la protection contre les
surcharges ne doivent pas être dépassées.
Paramètres détaillés (électriques) des mesures:
• Tension du courant continu
Enregistrement de précision: ±% de lecture + nombre
de derniers chires (à la température de: 23(±5)°C, et
d'humidité ≤ 75% RH).
Plage Précision Résolution
200mV
±(0,5% +8)
100µV
2V 1mV
20V 10mV
200V 100mV
1000V ± (1,5% +8) 1V
9. Borne d'entrée :
a) 20A
b) mA
c) VΩHz , capacité « + », température « + »
d) COM, capacité « - », température « - »
mA pour la prise "mA" ou de 20 A~ pour la prise "20
A~". La mesure d'une plus grande valeur fera sauter
le fusible.
3.3.1.5. RÉSISTANCE
1) Réglez le bouton (7) dans la plage "Ω" sélectionnée.
2) Connectez le câble de mesure noir à la prise "COM"
et le câble de mesure rouge à la prise "VΩ".
3) Connectez les câbles de mesure à la charge pour
eectuer la mesure.
Attention : Pour une résistance égale ou supérieure
à 1 MΩ, la stabilisation de la mesure peut prendre
plusieurs secondes.
Assurez-vous toujours que le circuit testé est
complètement déconnecté de la tension et que
tous les condensateurs du système testé sont
déchargés.
3.3.1.6. CAPACITÉ ÉLECTRIQUE
1) Réglez le bouton (7) dans la plage "F" sélectionnée.
2) Connectez les câbles de mesure aux prises "C-" et
"C +" et au condensateur.
Attention : Le condensateur mesuré doit être
déchargé avant la connexion aux prises de mesure.
Lors du test de condensateurs de grande capacité,
faites attention au délai avant l'indication nale du
mesureur.
Il est interdit de connecter un condensateur chargé
aux bornes de mesure!
3.3.1.7. FRÉQUENCE
1) Réglez le bouton (7) sur la valeur "200kHz".
2) Connectez le câble de mesure noir à la prise "COM"
et le câble de mesure rouge à la prise "VΩHz".
3) Connectez les câbles de mesure à la charge pour
eectuer la mesure.
3.3.1.8. TEMPÉRATURE
1) Réglez le bouton (7) sur la valeur "C".
2) Connectez le câble de mesure noir à la prise "T-" et
le câble de mesure rouge à la prise "T+".
3) Placez la sonde dans le champ de température
mesuré.
Attention : Toujours utiliser une sonde spéciale de
température
3.3.1.9. MESURE DE DIODE ET TEST DE CONTINUITÉ
1) Réglez le bouton (7) sur la plage de mesure „ ”
2) Connectez le câble de mesure noir à la prise "COM"
et le câble de mesure rouge à la prise "VΩHz ”
3) Connectez les câbles de mesure, noir et rouge à la
cathode (-) et à l’anode (+) de la diode à tester, lisez
la chute de tension sur l’achage.
4) Connectez les câbles de test au circuit dont vous
souhaitez vérier la continuité. Le signal acoustique
sera continu si la résistance est inférieure à environ
80Ω.
3.3.1.10. TEST DU TRANSISTOR HFE
1) Réglez le bouton (7) sur la plage de mesure "hFe".
2) Déterminez le type de transistor, puis eectuez son
test en connectant les câbles à la prise hFe.
3.3.2.. MODE D'EMPLOI
• L'appareil s'éteint automatiquement après 30
minutes d'inactivité.
• Lorsque le symbole „ ”, apparaît, remplacez la
batterie.

26 27
09.07.2019
FR
3.4 NETTOYAGE ET ENTRETIEN
a) Pour nettoyer les diérentes surfaces, n'utilisez
que des produits sans agents corrosifs.
b) Conservez l'appareil dans un endroit propre, frais
et sec, à l'abri de l'humidité et des rayons directs
du soleil.
c) Il est défendu d'asperger l'appareil à l'aide d'un jet
d'eau.
d) Évitez que de l’eau ne pénètre à l’intérieur de
l’appareil par l’intermédiaire des orices de
ventilation du boîtier.
e) Nettoyez les orices de ventilation à l'aide d'un
pinceau et d'air comprimé.
f) Contrôlez régulièrement l'appareil pour vous
assurer qu'il fonctionne correctement et ne
présente aucun dommage.
g) Utilisez un chion doux lors du nettoyage.
h) Il est conseillé de laver l’appareil uniquement avec
un chion mou et humide.
i) Protégez l'appareil de l'humidité. S'il est mouillé,
essuyez-le immédiatement. Les liquides peuvent
contenir des minéraux susceptibles de corroder les
circuits électroniques.
j) Utilisez et stockez l'appareil dans des conditions de
température standard. Des températures extrêmes
peuvent raccourcir la durée de vie de l'appareil,
endommager les piles et déformer ou faire fondre
les pièces en plastique.
k) Manipulez l’appareil doucement et avec précaution.
Une chute pourrait endommager les cartes de
circuit imprimé et entraîner un dysfonctionnement
de l'appareil.
l) Protégez l'appareil de la poussière et de la saleté.
m) Utilisez uniquement des piles neuves de taille et
type indiqués dans les paramètres techniques.
Avant de commencer le montage ou le
remplacement des piles assurez-vous que
l'appareil n'est pas connecté à un circuit externe,
que le bouton de commande est réglé sur « OFF »
et que les câbles de mesure sont déconnectés des
pinces.
3.4. RECYCLAGE SÉCURITAIRE DES ACCUMULATEURS ET
DES PILES
Les piles suivantes sont utilisées dans l'appareil : 9V.
Pour poser la batterie, il faut:
1. Ouvrir le couvercle du compartiment
correspondant à l'arrière de l'appareil, à l’aide d‘un
tournevis.
2. Insérer la batterie correspondant aux paramètres
techniques.
3. Fermer et visser le couvercle du compartiment
correspondant.
Retirez les batteries usagées en suivant la même
procédure que lors de l'insertion. Pour la mise
au rebut, rapportez les batteries dans un endroit
chargé du recyclage des vieilles piles / remettez-les
à une entreprise compétente.
MISE AU REBUT DES APPAREILS USAGÉS
À la n de sa vie, ce produit ne doit pas être jeté dans
les ordures ménagères ; il doit impérativement être
remis dans un point de collecte et de recyclage pour
appareils électroniques et électroménagers. Un symbole
à cet eet gure sur le produit, l'emballage ou dans le
manuel d'utilisation. Les matériaux utilisés lors de la
fabrication de l'appareil sont recyclables conformément
à leur désignation. En recyclant ces matériaux, en les
réutilisant ou en utilisant les appareils usagés d’une autre
manière, vous contribuez grandement à protéger notre
environnement. Pour obtenir de plus amples informations
sur les points de collecte appropriés, adressez-vous à vos
autorités locales.
Nome del prodotto Parametri - Valore
Nome del prodotto Multimetro
Modello SBS-DM-1000
Tipo di batteria 9V
Potenza nominale [W] 3
Classe di protezione IP IP20
Protezione contro
i sovraccarichi
CATIII 1000V
Campo di misurazione del-
la tensione della corrente
continua/alternata
200mV~1000V/ 2V~700V
Campo di misurazione
dell’amperaggio della
corrente continua/
alternata
2mA~20A/ 2mA~20A
Campo di misurazione
della resistenza/capacità
elettrica
200Ω~20MΩ/
2nF~200µF
Campo di misurazione
della temperatura/
frequenza
-20~1000~/~200kHz
Temperatura di esercizio
per la massima precisione
di misura [°C]
23±5
Temperatura di esercizio/
Umidità relativa
[°C,°F/%RH]
0~40°C/≤75%
Temperatura ambiente
circostante/Umidità
relativa ambiente
circostante [°C,°F/%RH]
-20~60°C/≤80 %
Dimensioni [mm] 195x89x40
Peso [kg] 0,32
DATI TECNICI
Il termine "apparecchio" o "prodotto" nelle avvertenze
e descrizioni contenute nel manuale si riferisce alla/al
<Multimetro>. Non utilizzare l'apparecchio in ambienti
con umidità molto elevata / nelle immediate vicinanze di
contenitori d'acqua! Non bagnare il dispositivo. Rischio di
scossa elettrica! Le aperture di ventilazione non devono
essere coperte!
2.1. SICUREZZA ELETTRICA
a) Durante la misurazione della tensione assicurarsi che
manopola sia impostata sull’apposita posizione.
b) Prestare particolare attenzione durante la
misurazione della tensione superiore a 50 V.
c) Se possibile, evitare di collegare lo strumento ai
circuiti sotto tensione.
d) Prima di eseguire la misurazione della resistenza,
la prova dei diodi o il test di continuità, capacità
o temperatura, assicurarsi che il circuito in prova non
sia sotto tensione.
e) Prima di eettuare le misurazioni, assicurarsi di aver
scelto la funzione e il campo di misura corretti.
f) Prestare particolare attenzione nel caso in cui si
verichi un’interruzione di circuito durante l’utilizzo
dello strumento con il trasformatore di corrente
collegato alle ganasce.
g) Prima di ogni utilizzo, assicurarsi che i cavi e le sonde
di misurazione siano in buone condizioni tecniche,
p.es. senza danni all’isolamento.
h) Prima di smontare il coperchio del vano batterie,
scollegare i cavi e le sonde di misurazione dallo
strumento e portare la manopola nella posizione
„OFF”.
i) Durante la misurazione impugnare i cavi di misura
nella parte isolata.
j) Durante la misurazione attenersi alle regole generali
e alle conoscenze elettrotecniche.
2.2. SICUREZZA SUL LAVORO
a) Mantenere il posto di lavoro pulito e ben illuminato.
Il disordine o una scarsa illuminazione possono
portare a incidenti. Essere sempre prudenti,
osservare che cosa si sta facendo e utilizzare il buon
senso quando si adopera il dispositivo.
ISTRUZIONI PER L’USO
1. DESCRIZIONE GENERALE
Queste istruzioni sono intese come ausilio per un uso sicuro
e adabile. Il prodotto è stato rigorosamente progettato
e realizzato secondo le direttive tecniche e l'utilizzo delle
tecnologie e componenti più moderne e seguendo gli
standard di qualità più elevati.
PRIMA DELLA MESSA IN FUNZIONE È NECESSARIO
AVER LETTO E COMPRESO LE ISTRUZIONI D'USO.
Per un funzionamento duraturo e adabile del dispositivo
assicurarsi di maneggiarlo e curarne la manutenzione
secondo le disposizioni presentate in questo manuale.
I dati e le speciche tecniche indicati in questo manuale
sono attuali. Il fornitore si riserva il diritto di apportare
delle migliorie nel contesto del miglioramento dei propri
prodotti.
2. SICUREZZA NELL'IMPIEGO
ATTENZIONE! Leggere le istruzioni d'uso e di
sicurezza. Non prestare attenzione alle avvertenze e
alle istruzioni può condurre a shock elettrici, incendi,
gravi lesioni o addirittura al decesso.
Il manuale originale è stato scritto in tedesco. Le versioni in
altre lingue sono traduzioni dalla lingua tedesca.
AVVERTENZA! Le immagini contenute in questo
manuale sono puramente indicative e potrebbero
dierire dal prodotto.
IT
SPIEGAZIONE DEI SIMBOLI
Il prodotto soddisfa le attuali norme di
sicurezza.
Leggere attentamente le istruzioni.
Prodotto riciclabile.
Usare solo in ambienti chiusi.
ATTENZIONE o AVVERTENZA! o NOTA!
per richiamare l'attenzione su determinate
circostanze (indicazioni generali di avvertenza).

28 29
09.07.2019
3.2. PREPARAZIONE AL FUNZIONAMENTO
La temperatura ambiente non deve superare i 40°C e
l‘umidità relativa non deve superare l‘80%. Posizionare
l‘apparecchio in modo da garantire una buona circolazione
dell‘aria.
ATTENZIONE: i valori limite per la protezione da
sovraccarico non devono essere superati.
Protezione da sovraccarico: 1000V DC/700Vrms CA
Impedenza: 10MΩ su tutto il range di misura Protezione da sovraccarico: 36V DC/36Vrms CA
Protezione da sovraccarico: 250V CC/250Vrms CA
Protezione da sovraccarico: 1000V DC/700Vrms CA
Impedenza: 1 MΩ sul range 2V, 10 MΩ su tutti gli altri
range. Frequenza: 40-400Hz per il range 2-20V, 40-200Hz
per 700V
Protezione da sovraccarico: fusibile 0,2A/250V, 20A/250V
(fusibile 20A per 10s)
Frequenza: 40-200 Hz
Protezione da sovraccarico: fusibile 0,2A/250V, 20A/250V
(fusibile 20A per 10s)
Protezione da sovraccarico: 250V CC/250Vrms CA
• Tensione CC
• Tensione CA (Rilevamento medio: calibrato a RMS
(media quadratica) dell’ onda sinusoidale • Frequenza
• Temperatura (sensore NiCr-NiSi)
• Test transistor hFe
• Intensità CC
• Intensità CA (Rilevamento medio: calibrato a RMS
(media quadratica) dell’onda sinusoidale)
• Resistenza elettrica
• Capacità elettrica
IT
Campo di misura Precisione Risoluzione
200mV
±(0,5% +8)
100µV
2V 1mV
20V 10mV
200V 100mV
1000V ± (1,5% +8) 1V
Campo di misura Precisione Risoluzione
2V
±(1,5% +10 )
1mV
20V 10mV
200V 100mV
700V ±(2,5% +10) 1V
Campo di misura Precisione Risoluzione
200kHz ±(3,0% +15) 100Hz
Campo di misura Precisione Risoluzione
-20~150°C ±(3,0% +2) 1°C
150~300°C ±(3,0% +2) 1°C
300~1000°C ±(3,5% +10) 1°C
Range di
misura
Descrizione Condizioni del test
hFe Visualizzazione del
valore hFe 0-1000) del
transistor testato (tipo
NPN i PNP)
La corrente
continua è di circa
10 µA.
Tensione CC circa
3.0V.
Campo di misura Precisione Risoluzione
2mA ±(0,8% +8) 1µA
20mA ±(0,8% +8) 10µA
200mA ±(1,2% +8) 100µA
20A ±(2,0% +10) 10mA
Campo di misura Precisione Risoluzione
2mA ±(1,8% +8) 1µA
200mA ±(2,0% +8) 100µA
20A ±(3,0% +15) 10mA
Campo di misura Precisione Risoluzione
200Ω ±(1,2% +15) 0,1Ω
2kΩ
±(0,8% +8)
1Ω
20kΩ 10Ω
200kΩ 100Ω
20MΩ ±(2,5% +15) 10kΩ
200 µF 0-100µF ±(2,5% +25) 100nF
100-200µF ±(6,0% +55) 100nF
Campo di misura Precisione Risoluzione
2nF ±(2,5% +25) 1pF
20nF
±(2,5% +20)
10pF
200nF 100pF
2µF 1nF
ATTENZIONE! Anche se l'apparecchiatura è
stata progettata per essere sicura, sono presenti
degli ulteriori meccanismi di sicurezza. Malgrado
l'applicazione di queste misure supplementari di
sicurezza sussiste comunque il rischio di ferirsi. Si
raccomanda inoltre di usare cautela e buon senso.
3. CONDIZIONI D'USO
Lo strumento serve a misurare i valori elettrici e la
temperatura di dispositivi selezionati e circuiti elettrici.
L'operatore è responsabile di tutti i danni derivanti da
un uso improprio.
3.1. DESCRIZIONE DEL DISPOSITIVO
ATTENZIONE: L´esploso di questo prodotto si trova
nell´ultima pagina del manuale d´uso, p. 37.
IT
1. Display LCD.
2. Pulsante On/Off
3. Pulsante HOLD/ Retroilluminazione: blocca/ sblocca
il valore visualizzato.
4. Attivazione/disattivazione della retroilluminazione
del display e dei diodi LED della funzione scelta.
5. Diodi che informano sulla funzione attiva al
momento.
6. Terminale di ingresso: hFE
7. Manopola rotante: selezione delle funzioni e del
campo di misurazione.
8. Blocco meccanico dei terminali di ingresso –
protezione contro l’uso improprio.
9. Terminale di ingresso:
a) 20A
b) mA
c) VΩHz , Capacità „+”, temperatura „+”.
d) COM, Capacità „-”, temperatura „-”.
b) Non usare il dispositivo all'interno di luoghi
altamente combustibili, per esempio in presenza di
liquidi, gas o polveri inammabili. Il dispositivo può
produrre scintille in presenza di polvere o vapore
inammabili.
c) In presenza di un danno o un difetto, il dispositivo
deve subito essere spento e bisogna avvisare una
persona autorizzata.
d) Se non si è sicuri del corretto funzionamento del
dispositivo, rivolgersi al servizio assistenza del
fornitore.
e) Le riparazioni devono essere eseguite esclusivamente
dal servizio assistenza del produttore. Non eseguire
le riparazioni da soli!
f) In caso di incendio, utilizzare solo estintori a polvere
o ad anidride carbonica (CO2).
g) I bambini e le persone non autorizzate non devono
essere presenti sul posto di lavoro. (La disattenzione
può causare la perdita del controllo sul dispositivo).)
h) Controllare regolarmente lo stato delle etichette
informative di sicurezza. Se le etichette non sono ben
leggibili, devono essere sostituite.
i) Conservare le istruzioni d‘uso per uso futuro. Nel
caso in cui il dispositivo venisse adato a terzi,
consegnare anche queste istruzioni.
2.3. SICUREZZA PERSONALE
a) Non è consentito l'uso del dispositivo in uno stato
di aaticamento, malattia, sotto l'inuenza di alcol,
droghe o farmaci, se questi limitano la capacità di
utilizzare il dispositivo.
b) Questo dispositivo non è adatto per essere utilizzato
da persone, bambini compresi, con ridotte capacità
siche, sensoriali o mentali, così come da privi di
adeguata esperienza e/o conoscenze. Si fa eccezione
per coloro i quali siano sorvegliati da un responsabile
qualicato che si prenda carico della loro sicurezza e
abbia ricevuto istruzioni dettagliate al riguardo.
c) Prestare attenzione e usare il buon senso quando si
utilizza il dispositivo. Un momento di disattenzione
durante il lavoro può causare gravi lesioni.
d) Per evitare avviamenti accidentali, prima di collegare
il dispositivo a una fonte di alimentazione assicurarsi
che questo sia spento.
e) Questo dispositivo non è un giocattolo. I bambini
devono essere sorvegliati anché non giochino con
il prodotto.
2.4. USO SICURO DEL DISPOSITIVO
a) Non utilizzare il dispositivo se l'interruttore ON/
OFF non funziona correttamente (non accendere
o spegnere il dispositivo). I dispositivi con
interruttore difettoso sono pericolosi quindi devono
essere riparati.
b) Gli strumenti inutilizzati devono essere tenuti fuori
dalla portata dei bambini e delle persone che non
hanno familiarità con il dispositivo e le istruzioni
d’uso. Nelle mani di persone inesperte, questo
dispositivo può rappresentare un pericolo.
c) Mantenere il dispositivo in perfette condizioni.
d) Tenere il dispositivo fuori dalla portata dei bambini.
e) La riparazione e la manutenzione dell'attrezzatura
devono essere eseguite esclusivamente da personale
specializzato qualicato e con pezzi di ricambio
originali. Ciò garantisce la sicurezza durante l'uso.
f) Per garantire l'integrità di funzionamento
dell'apparecchio, i coperchi o le viti installati in
fabbrica non devono essere rimossi.
g) È vietato spostare o ruotare il dispositivo durante il
funzionamento.
h) Non lasciare il dispositivo incustodito mentre è in uso.
i) Pulire regolarmente l'apparecchio in modo da
evitare l'accumulo di sporcizia.
j) Questo apparecchio non è un giocattolo! La pulizia
e la manutenzione non devono essere eseguite da
bambini a meno che non siano sotto la supervisione
di un adulto.
k) Mai misurare i valori di tensione quando i li di
misura sono collegati alle prese di misura del valore
di amperaggio della corrente.
l) Prestare attenzione durante lo svolgimento del
lavoro a tensioni superiori a DC60V o AC42V.
m) Durante la misurazione tenere i li di misurazione
o le sonde con le parti isolate.
n) Selezionare la funzione appropriata e il campo
di misura per la misurazione per evitare danni al
misuratore.
o) Prima di passare a un'altra funzione collegare i li di
misura dai punti di test.
Range di
misurazione
Descrizione Condizioni del test
Visualizzazione
della tensione
approssimativa del
diodo
La corrente
continua è di circa
1,5 mA.
Tensione CC è di
circa 3.0V.
Il buzzer integrato
emette un segnale
quando la resistenza è
inferiore a 80 Ω.
Tensione di circuito
aperto è di circa
3,0V
• Test del diodo e segnale di circuito interrotto
Parametri di misura (elettrici) dettagliati:
Registrazione di precisione: ± % della lettura +
numero delle ultime cifre (alla temperatura: 23(±5)°C
e umidità ≤ 75% RH).
Protezione da sovraccarico: 250V DC/250Vrms CA
3.3. LAVORARE CON IL DISPOSITIVO
3.3.1. ISTRUZIONI PER LA MISURAZIONE
Accendere l'apparecchio premendo il tasto On/O
Osservazioni:
1) Se il range del valore misurato non è previamente
conosciuto, impostare il range di misura con
la manopola (7) sul valore più alto e abbassare
gradualmente verso il basso.
2) Quando sul display viene indicato "1" signica che
il range è stato superato e deve essere aumentato.

30 31
09.07.2019
ITIT
3) Prestare particolare attenzione al ne di evitare
scosse elettriche durante la misurazione di tensioni
elevate.
3.3.1.1. Tensione di corrente continua
1) Impostare la manopola (7) nella posizione
desiderata del range "V ".
2) Collegare il cavo di misura nero alla presa "COM" e
quello rosso alla presa "VΩ".
3) Collegare i puntali di misura al carico per eseguire
la misurazione.
Nota: E' vietato misurare tensioni superiori a 1000
V CC, il che potrebbe danneggiare il circuito
interno del misuratore.
3.3.1.2. TENSIONE DI CORRENTE ALTERNATA
1) Impostare la manopola (7) nella posizione
desiderata del range „V~”.
2) Collegare il cavo di misura nero alla presa "COM" e
quello rosso alla presa "VΩ".
3) Collegare i puntali di misura al carico per eseguire
la misura.
Nota: E' vietato misurare tensioni superiori
a 700Vrms CA, il che potrebbe danneggiare il
circuito interno dello strumento.
3.3.1.3. INTENSITÀ DI CORRENTE CONTINUA
1) Impostare la manopola (7) nella posizione
desiderata del range „A ”
2) Collegare il cavo di misura nero alla presa "COM"
e quello rosso alla presa "mA". (per il minimo)
o "20A". (per il massimo).
3) Collegare i puntali di misura al carico per eseguire
la misura.
Nota: La corrente massima misurata è 200mA per la
presa "mA" o 20A per la presa "20A". La misurazione
di un valore superiore può provocare l'incendio del
fusibile.
3.3.1.4. INTENSITÀ DI CORRENTE ALTERNATA
1) Impostare la manopola (7) nella posizione
desiderata del range „A~”
2) Collegare il cavo di misura nero alla presa "COM" e
quello rosso alla presa "mA". (per il minimo) o "20
A~". (per il massimo).
3) Collegare i puntali di misura al carico per eseguire
la misura.
Nota: La corrente massima misurata è 200mA per
la presa "mA" o 20 A~ per la presa "20 A~". La
misurazione di un valore superiore può provocare
l'incendio del fusibile.
3.3.1.5. RESISTENZA
1) Impostare la manopola (7) nella posizione desiderata
del range „Ω”.
2) Collegare il cavo di misura nero alla presa "COM" e
quello rosso alla presa "VΩ".
3) Collegare i puntali di misura al carico per eseguire
la misura.
Nota: Per una resistenza di 1M Ω o superiore, la
stabilizzazione della misura può richiedere anche
parecchi secondi.
Assicurarsi sempre che il circuito testato sia
completamente scollegato dalla tensione e che
tutti i condensatori del circuito testato siano
scaricati.
3.3.1.6. CAPACITÀ ELETTRICA
1) Impostare la manopola (7) nella posizione
desiderata del range “F”
2) Collegare i puntali di misura rispettivamente alle
prese “C-“ e “C+” e al condensatore
Nota: Il condensatore misurato dovrebbe essere
scaricato prima di essere collegato alle prese di
misura.
Durante il test dei condensatori ad alta
capacità, prestare attenzione al ritardo prima
dell'indicazione nale del misuratore.
È vietato collegare un condensatore carico ai
morsetti di misura!
3.3.1.7. FREQUENZA
1) Impostare la manopola (7) sul valore “200kHz”
2) Collegare il cavo di misura nero alla presa "COM" e
quello rosso alla presa "VΩ".
3) Collegare i puntali di misura al carico per eseguire
la misura.
3.3.1.8. TEMPERATURA
1) Impostare la manopola (7) sul valore “C”
2) Collegare il cavo di misura nero alla presa "T-" e
quello rosso alla presa "T+”
3) Impostare la sonda del sensore nel range di
temperatura misurato.
Nota: Utilizzare sempre una sonda speciale per le
misurazioni di temperatura.
3.3.1.9. MISURAZIONE DEL DIODO E TEST DI
CONTINUITÀ
1) Impostare la manopola (7) sul valore „ ”
2) Collegare il cavo di misura nero alla presa "COM" e
quello rosso alla presa „VΩHz ”
3) Collegare i cavi di misura neri e rossi al catodo (-) e
all'anodo (+) del diodo testato, leggere sul display
il valore della caduta di tensione.
4) Collegare i puntali di misura al circuito di cui si
vuole testare la continuità. Se la resistenza sarà
inferiore a 80Ω circa, il segnale acustico sarà
continuo.
3.3.1.10. TEST TRANSISTOR HFE
1) Impostare la manopola (7) sul range di misura
“hFe”
2) Determinare il tipo di transistor e successivamente
eseguire il suo test inserendo i li nella presa hFe.
3.3.2. ISTRUZIONI PER L'USO
• Il dispositivo si spegne automaticamente dopo 30
minuti di inattività.
• Quando appare il simbolo „ ”, occorre sostituire
la batteria.
3.4. PULIZIA E MANUTENZIONE
a) Per pulire la supercie utilizzare solo detergenti
senza ingredienti corrosivi.
b) Dopo la pulizia, prima di riutilizzare l'apparecchio,
asciugare tutte le parti.
c) Tenere l'apparecchio in un luogo asciutto, fresco,
protetto dall'umidità e dalla luce diretta del sole.
d) È vietato spruzzare il dispositivo con un getto
d'acqua o immergere il dispositivo in acqua.
e) Eettuare controlli regolari del dispositivo per
mantenerlo eciente e privo di danni.
f) Per la pulizia utilizzare un panno morbido.
g) Non lasciare la batteria nel dispositivo se il
funzionamento viene interrotto per un lungo
periodo di tempo.
h) Proteggere lo strumento dall’umidità. In caso
venga bagnato, asciugarlo immediatamente.
I liquidi possono contenere minerali corrosivi per
i circuiti elettronici.
i) Utilizzare e stivare lo strumento nelle condizioni
di temperatura standard. Le temperature estreme
potrebbero ridurre la vita dello strumento,
danneggiare le batterie e deformare o fondere le
parti in plastica.
j) Manipolare lo strumento con delicatezza e
attenzione. La caduta potrebbe danneggiare
circuiti stampati e causare il funzionamento
anomalo dello strumento.
k) Proteggere lo strumento da polvere e sporco.
l) Usare solo batterie nuove di dimensioni e tipo
indicati nei parametri tecnici. Prima di montare
o sostituire le batterie, assicurarsi che lo strumento
non sia collegato a un circuito esterno, che il
commutatore rotante sia nella posizione „OFF” e
i cavi di misura siano scollegati.
m) Prima di installare o sostituire la batteria, assicurarsi
che l'unità non sia collegata a un circuito esterno e
che sia spenta.
SMALTIMENTO SICURO DELLE BATTERIE E DELLE PILE
Nel dispositivo vengono utilizzate le seguenti batterie:
9V.
Per inserire le batterie:
1. Aprire il coperchio del vano batterie sul retro
tramite un cacciavite.
2. Inserire batterie con adeguate caratteristiche
tecniche.
3. Chiudere e avvitare il coperchio del vano batterie.
Rimuovere le batterie usate dal dispositivo
seguendo la stessa procedura utilizzata per
l'installazione.
Per lo smaltimento consegnare le batterie
all'organizzazione/azienda competente.
SMALTIMENTO DELLE ATTREZZATURE USATE
Questo prodotto, se non più funzionante, non deve
essere smaltito insieme ai normali riuti, ma deve essere
consegnato ad un’organizzazione competente per lo
smaltimento dei dispositivi elettrici e elettronici. Maggiori
informazioni sono reperibili sull'etichetta sul prodotto,
sul manuale di istruzioni o sull'imballaggio. I materiali
utilizzati nel dispositivo possono essere riciclati secondo
indicazioni. Riutilizzando i materiali o i dispositivi,
si contribuisce a tutelare l'ambiente circostante. Le
informazioni sui rispettivi punti di smaltimento sono
reperibili presso le autorità locali.

32 33
09.07.2019
Respetar las instrucciones de uso.
Producto reciclable.
Uso exclusivo en áreas cerradas.
¡ATENCIÓN!, ¡ADVERTENCIA! o ¡NOTA! para
llamar la atención sobre ciertas circunstancias
(señal general de advertencia).
Parámetro - Descripción Parámetro - Valor
Nombre del producto Multímetro
Modelo SBS-DM-1000
Tipo de batería 9V
Potencia nominal [W] 3
Clase de protección IP IP20
Protección contra
sobretensiones
CATIII 1000V
Rango de medición de
voltaje DC / AC
200mV~1000V/ 2V~700V
Rango de medición de
intensidad DC / AC
2mA~20A/ 2mA~20A
Rango de medición de
resistencia / capacidad
eléctrica
200Ω~20MΩ/
2nF~200µF
Rango de medición de
temperatura / frecuencia/
ciclo de trabajo
-20~1000~/~200kHz
La temperatura de
funcionamiento, que
garantiza la máxima
precisión de medición [°C]
23±5
Temperatura de trabajo/
Humedad relativa de
trabajo [°C,°F/%RH]
0~40°C/≤75%
Temperatura de
almacenaje/ Humedad
relativa de almacenaje
[°C,°F/%RH]
-20~60°C/≤80 %
Dimensiones [mm] 195x89x40
Peso [kg] 0,32
DATOS TÉCNICOS
Conceptos como "aparato" o "producto" en las advertencias
y descripciones de este manual se reeren a <Multímetro>.
¡No utilizar el aparato en locales con humedad muy
elevada / en las inmediaciones de depósitos de agua! ¡No
permita que el aparato se moje! ¡Peligro de electrocución!
¡Los oricios de ventilación no deben cubrirse!
2.1. SEGURIDAD ELÉCTRICA
a) Durante la medición de la tensión, asegúrese de que
la perilla esté ajustada en el rango adecuado.
b) Tenga especial cuidado a la hora de medir tensiones
superiores a 50V.
c) En la medida de lo posible, evite conectar el
dispositivo a circuitos que estén "sometidos
a tensión".
d) Antes de medir la resistencia, hacer las pruebas de
diodos o continuidad, la prueba de capacidad o la
prueba de temperatura, asegúrese de que el circuito
analizado no esté bajo tensión.
e) Antes de realizar las mediciones, asegúrese de haber
seleccionado la función y el rango de medición
adecuados.
f) Tenga especial cuidado en caso de que tenga lugar
una interrupción en el circuito mientras use el
dispositivo junto con el transformador de corriente
conectado a las pinzas.
g) En cada uso, asegúrese de que los circuitos y las
sondas de medición estén en buen estado técnico,
por ejemplo, sin daños de aislamiento.
h) Antes de quitar la tapa de las pilas, desconecte los
circuitos y las sondas de medición del aparato, y
coloque la perilla en posición OFF.
i) Mientras realice la medición, sostenga los cables de
medición o la sonda por las partes aisladas.
j) Mientras realice las mediciones, aténgase a las reglas
generales y al conocimiento de electrotecnia.
2.2. SEGURIDAD EN EL PUESTO DE TRABAJO
a) Mantenga el lugar de trabajo limpio y bien
iluminado. El desorden o la mala iluminación pueden
provocar accidentes. Tenga cuidado, preste atención
al trabajo que está realizando y use el sentido común
cuando utilice el dispositivo.
MANUAL DE INSTRUCCIONES
1. DESCRIPCIÓN GENERAL
Este manual ha sido elaborado para favorecer un empleo
seguro y able. El producto ha sido estrictamente diseñado
y fabricado conforme a las especicaciones técnicas y para
ello se han utilizado las últimas tecnologías y componentes,
manteniendo los más altos estándares de calidad.
ANTES DE LA PUESTA EN FUNCIONAMIENTO,
LEA LAS INSTRUCCIONES MINUCIOSAMENTE Y
ASEGÚRESE DE COMPRENDERLAS.
Para garantizar un funcionamiento duradero y able del
aparato, el manejo y mantenimiento deben llevarse a cabo
de acuerdo con las instrucciones de este manual. Los
datos técnicos y las especicaciones de este manual están
actualizados. El fabricante se reserva el derecho de realizar
modicaciones para mejorar la calidad.
EXPLICACIÓN DE LOS SÍMBOLOS
2. SEGURIDAD
¡ATENCIÓN! Lea todas las instrucciones e
indicaciones de seguridad. La inobservancia de
las advertencias e instrucciones al respecto puede
provocar descargas eléctricas, incendios, lesiones
graves e incluso la muerte.
El texto en alemán corresponde a la versión original. Los
textos en otras lenguas son traducciones del original en
alemán.
¡ADVERTENCIA! En este manual se incluyen fotos
ilustrativas que podrían no coincidir exactamente
con la apariencia real del dispositivo.
ES ES
¡ATENCIÓN! Aunque en la fabricación de
este aparato se ha prestado gran importancia
a la seguridad, dispone de ciertos mecanismos de
protección extras. A pesar del uso de elementos de
seguridad adicionales, existe el riesgo de lesiones
durante el funcionamiento, por lo que se recomienda
proceder con precaución y sentido común.
3. INSTRUCCIONES DE USO
El dispositivo se utiliza para medir los valores eléctricos
y la temperatura de los dispositivos y circuitos eléctricos
seleccionados. El usuario es responsable de los daños
derivados de un uso inadecuado del aparato.
3.1. DESCRIPCIÓN DEL DISPOSITIVO
ATTENTION! Le plan de ce produit se trouve à la
dernière page du manuel d‘utilisation, p. 37.
1. Pantalla LCD.
2. Botón On/Off
3. Botón D.HOLD / luz de fondo: Bloqueo/desbloqueo
del valor mostrado.
4. Encender / apagar la luz de fondo de la pantalla y los
diodos de la función seleccionada actualmente
5. Diodos informando sobre la función actualmente
activa
6. Ranura de entrada: hFE
7. Mando: seleccionar la función y el rango de medición
8. Bloqueo mecánico de enchufes - protección contra
uso inadecuado
9. Ranura de entrada:
a) 20A
b) mA
c) VΩHz , capacidad "+", temperatura "+"
d) COM, capacidad "-", temperatura "-"
b) No utilice el aparato en atmósferas potencialmente
explosivas, p. ej., en la cercanía de líquidos,
gases o polvo inamables. Bajo determinadas
circunstancias los aparatos generan chispas que
pueden inamar polvo o vapores circundantes.
c) En caso de avería o mal funcionamiento, apague el
aparato y contacte con el servicio técnico autorizado.
d) Si no está seguro de que la unidad funcione
correctamente, póngase en contacto con el servicio
técnico del fabricante.
e) Las reparaciones solo pueden ser realizadas por
el servicio técnico del fabricante. ¡No realice
reparaciones por su cuenta!
f) En caso de incendio, utilice únicamente extintores
de polvo o dióxido de carbono (CO2) para apagar el
aparato.
g) Se prohíbe la presencia de niños y personas no
autorizadas en el lugar de trabajo (la falta de
atención puede llevar a la pérdida de control del
equipo)
h) Compruebe regularmente el estado de las etiquetas
de información de seguridad. Si las pegatinas fueran
ilegibles, habrán de ser reemplazadas.
i) Conserve el manual de instrucciones para futuras
consultas. Este manual debe ser entregado a toda
persona que vaya a hacer uso del dispositivo.
2.3. SEGURIDAD PERSONAL
a) No está permitido utilizar el aparato en estado de
fatiga, enfermedad, bajo la inuencia del alcohol,
drogas o medicamentos, ya que estos limitan la
capacidad de manejo del aparato.
b) Este aparato no debe ser utilizado por personas
(entre ellas niños) con capacidades físicas, sensoriales
o mentales reducidas, o con falta de la experiencia
y/o los conocimientos necesarios, a menos que
sean supervisadas por una persona responsable de
su seguridad o que hayan recibido de esta persona
responsable las indicaciones pertinentes en relación
al manejo del aparato.
c) Actúe con precaución y use el sentido común
cuando maneje este producto. La más breve falta de
atención durante el trabajo puede causar lesiones
graves.
d) Para evitar una puesta en marcha accidental,
asegúrese de que el interruptor esté apagado antes
de conectar la clavija a una fuente de alimentación.
e) Este aparato no es un juguete. Debe controlar que
los niños no jueguen con él.
2.4. MANEJO SEGURO DEL APARATO
a) No utilice la unidad si el interruptor ON/OFF no
funcionara correctamente (no enciende o apaga).
Los aparatos que no pueden ser controlados por
interruptores son peligrosos. Estos pueden y deben
ser reparados.
b) Mantenga las herramientas fuera del alcance de los
niños y de las personas que no estén familiarizadas
con el equipo en sí o no hayan recibido las
instrucciones pertinentes al respecto. En manos de
personas inexpertas este equipo puede representar
un peligro.
c) Mantenga el aparato en perfecto estado de
funcionamiento.
d) Mantenga la unidad fuera del alcance de los niños.
e) La reparación y el mantenimiento de los equipos
solo pueden ser realizados por personal cualicado
y siempre empleando piezas de repuesto originales.
Esto garantiza la seguridad durante el uso.
f) A n de asegurar la integridad operativa del
dispositivo, no se deben retirar las cubiertas o los
tornillos instalados de fábrica.
g) Está prohibido mover, cambiar o girar el aparato
durante su funcionamiento.
h) No deje este equipo sin supervisión mientras esté en
funcionamiento.
i) Limpie regularmente el dispositivo para evitar que la
suciedad se incruste permanentemente.
j) Este aparato no es un juguete. La limpieza y el
mantenimiento no deben ser llevados a cabo por
niños que no estén bajo la supervisión de adultos.
k) Nunca mida la tensión cuando los cables de medición
estén conectados a las entradas de medición de la
intensidad de corriente.
l) Tenga cuidado al trabajar con tensiones mayores
a 60 V CC o 42V CA.
m) Al realizar la medición, sostenga los cables de
medición o la sonda por las partes aisladas.
n) Elija la función y el rango de medición adecuados
para prevenir daños en el medidor.
o) Desconecte los cables de medición de los puntos de
ensayo antes de cambiar de función.
El producto cumple con las normas de
seguridad vigentes.
3.2. PREPARACIÓN PARA LA PUESTA EN MARCHA
La temperatura ambiente no debe superar los 40°C y la
humedad relativa no debe exceder el 80%. Instale el equipo
teniendo en cuenta que debe garantizarse una buena
ventilación.
¡ATENCIÓN! Los valores límite para la protección contra
sobrecargas no deben ser excedidos.

34 35
09.07.2019
ES
Protección de sobrecarga: 250V DC / 250Vrms AC
• Prueba de diodo y señal de circuito interrumpido
2) Cuando la pantalla muestra el valor "1" signica
que el rango se ha excedido y se debe aumentar.
3) Tenga cuidado para evitar descargas eléctricas al
medir altos voltajes.
3.3.1.1. CORRIENTE CONTINUA DC
1) Coloque el mando (7) en el rango preferido "V ".
2) Conecte el cable negro a la toma "COM" y el cable
rojo a la toma "VΩ".
3) Conecte los cables de prueba a la carga para la
medición.
¡Atención! Está prohibido medir voltajes por
encima de 1000 VCC, esto puede dañar el sistema
interno del medidor.
3.3.1.2. CORRIENTE ALTERNA AC
1) Coloque el mando (7) en el rango preferido "V~".
2) Conecte el cable negro a la toma "COM" y el cable
rojo a la toma "VΩ".
3) Conecte los cables de prueba a la carga para la
medición.
¡Atención! Está prohibido medir voltajes por
encima de 700Vrms CA, esto puede dañar el
sistema interno del medidor.
3.3.1.3. INTENSIDAD DE CORRIENTE CONTINUA
1) Coloque el mando (7) en el rango preferido "A ".
2) Conecte la punta de prueba negra a la toma "COM"
y la roja a la "mA" (para el mínimo) o "20A" (para el
máximo).
3) Conecte los cables de prueba en serie a la carga
para la medición.
¡Atención! La corriente máxima medida es de 200
mA para el enchufe "mA" o 20 A para el enchufe
"20A". Medir un valor mayor hará que el fusible se
funda.
3.3.1.4. CORRIENTE ALTERNA AC
1) Coloque el mando (7) en el rango preferido "A~".
2) Conecte la punta de prueba negra a la toma "COM"
y la roja a la "mA" (para el mínimo) o "20 A~" (para
el máximo).
3) Conecte los cables de prueba en serie a la carga
para la medición.
¡Atención! La corriente máxima medida es de 200
mA para el enchufe "mA" o 20 A~ para el enchufe
"20 A~". Medir un valor mayor hará que el fusible se
funda.
3.3.1.5. RESISTENCIA
1) Coloque el mando (7) en el rango preferido „Ω”.
2) Conecte el cable negro a la toma "COM" y el cable
rojo a la toma "VΩ".
3) Conecte los cables de prueba a la carga para la
medición.
¡Atención! Para una resistencia de 1MΩ y superior,
puede llevar varios segundos estabilizar la
medición.
Siempre asegúrese de que el circuito probado
esté completamente desconectado del voltaje y
que todos los condensadores en el sistema estén
descargados.
3.3.1.6.CAPACIDAD ELÉCTRICA
1) Coloque el mando (7) en el rango preferido „F”.
2) Conecte los cables de prueba a las tomas "C-" y "C
+" y al condensador.
¡Atención! El condensador medido se debe
Ámbito
de
aplicación
Descripción Condiciones de
prueba
Mostrando el voltaje
aproximado del diodo.
Corriente continua
de aprox. 1.5 mA.
Corriente continua
DC de aprox. 3.0V.
El zumbador
incorporado suena
cuando la resistencia
es menor que 80 Ω.
Circuito abierto
voltaje aprox. 3.0V
descargar antes de conectarlo a las tomas de
medición.
Al probar los condensadores de gran capacidad,
preste atención a la demora antes de que se
indique nalmente el medidor.
¡Está prohibido conectar un condensador cargado
a los terminales de medición!
3.3.1.7. FRECUENCIA:
1) Ajuste el mando (7) a "200kHz".
2) Conecte el cable negro a la toma "COM" y el cable
rojo a la toma "VΩHz".
3) Conecte los cables de prueba a la carga para la
medición.
3.3.1.8. TEMPERATURA
1) Ajuste el mando (7) a "C".
2) Conecte el cable negro a la toma "T-" y el cable rojo
a la toma "T+".
3) Coloque la sonda del sensor en el campo de
temperatura medida.
¡Atención! Siempre use una sonda de temperatura
especial
3.3.1.9. MEDICIÓN DE DIODO Y PRUEBA DE
CONTINUIDAD
1) Ajuste el mando (7) en el rango de medición " "
2) Conecte el cable negro a la toma "COM" y el cable
rojo a la toma „VΩHz ”
3) Conecte los cables de prueba negro y rojo al cátodo
(-) y al ánodo (+) del diodo que se va a probar, lea la
caída de voltaje en la pantalla.
4) Conecte los cables de prueba al circuito cuya
continuidad se va a probar. La señal acústica
será continua si la resistencia es inferior
a aproximadamente 80Ω.
3.3.1.10. PRUEBA DE TRANSISTOR HFE
1) Ajuste el mando (7) en el rango de medición „hFe”
2) Determine el tipo de transistor y luego realice su
prueba conectando los cables a la toma hFe.
3.3.2. INSTRUCCIONES DE USO:
• El dispositivo se apaga automáticamente después
de 30 minutos de inactividad.
• Cuando aparece el símbolo " ", se debe
reemplazar la batería.
3.4. LIMPIEZA Y MANTENIMIENTO
a) Antes de limpiar y ajustar, sustituir accesorios
o cuando no tenga previsto utilizar el equipo,
desenchufe el cable de alimentación y deje que la
unidad se enfríe completamente.
b) Para limpiar la supercie, utilice solo productos
que no contengan sustancias corrosivas.
c) Guarde el aparato en un lugar seco, fresco y
protegido de la humedad y la radiación solar
directa.
d) Se prohíbe rociar la máquina con agua u otros
líquidos.
e) Evite que el agua se introduzca por los oricios de
ventilación de la carcasa.
f) Las aberturas de ventilación deben limpiarse con
un pincel y aire comprimido.
g) En lo que respecta a la eciencia técnica y
posibles daños, el dispositivo debe ser revisado
regularmente.
h) Por favor, utilice un paño suave para la limpieza.
Protección de sobrecarga: 1000V DC/700Vrms AC
Impedancia: 10MΩ en toda la gama.
Protección de sobrecarga: 36V DC / 36Vrms AC
Protección de sobrecarga: 250V DC / 250Vrms AC
Protección de sobrecarga: 1000V DC/700Vrms AC
Impedancia: 1 MΩ para el rango 2V, 10MΩ para los rangos
restantes. Frecuencia: 40-400Hz para el rango 2-20V, 40-
200Hz para 700V.
Protección contra sobrecarga: 0.2A / 250V, fusible 20A /
250V (fusible de 20 A hasta 10 s).
Frecuencia: 40-200 Hz
Protección contra sobrecarga: 0.2A / 250V, fusible 20A /
250V (fusible de 20 A hasta 10 s).
Protección de sobrecarga: 250V DC / 250Vrms AC
• Corriente continua DC (detección de medio:
calibrado a RMS (media rms) de onda sinusoidal)
• Frecuencia
• Temperatura (sensor NiCr-NiSi)
• Prueba de transistor hFe
• Intensidad de corriente continua
• Corriente alterna (Detección de medio: calibrado
a RMS (media rms) de onda sinusoidal).
• Capacidad eléctrica
Rango Precisión Resolución
2V
±(1,5% +10 )
1mV
20V 10mV
200V 100mV
700V ±(2,5% +10) 1V
Rango Precisión Resolución
200kHz ±(3,0% +15) 100Hz
Rango Precisión Resolución
-20~150°C ±(3,0% +2) 1°C
150~300°C ±(3,0% +2) 1°C
300~1000°C ±(3,5% +10) 1°C
Plage Description Conditions de test
hFe Visualización de
valores hFe 0-1000) del
transistor probado (tipos
NPN y PNP)
Corriente continua
de unos 10 μA.
Corriente continua
DC de aprox. 3.0V.
Rango Precisión Resolución
2mA ±(0,8% +8) 1µA
20mA ±(0,8% +8) 10µA
200mA ±(1,2% +8) 100µA
20A ±(2,0% +10) 10mA
Rango Precisión Resolución
2mA ±(1,8% +8) 1µA
200mA ±(2,0% +8) 100µA
20A ±(3,0% +15) 10mA
200 µF 0-100µF ±(2,5% +25) 100nF
100-200µF ±(6,0% +55) 100nF
Rango Precisión Resolución
2nF ±(2,5% +25) 1pF
20nF
±(2,5% +20)
10pF
200nF 100pF
2µF 1nF
ES
Parámetros detallados (eléctricos) de las medidas:
• Corriente continua DC
Registro de precisión: ±% de lectura + número de
últimos dígitos (temperatura: 23 (± 5)°C, y humedad
≤ 75% RH).
Rango Precisión Resolución
200mV
±(0,5% +8)
100µV
2V 1mV
20V 10mV
200V 100mV
1000V ± (1,5% +8) 1V
• Resistencia
Rango Precisión Resolución
200Ω ±(1,2% +15) 0,1Ω
2kΩ ±(0,8% +8) 1Ω
20kΩ 10Ω
Rango Precisión Resolución
200kΩ ±(0,8% +8) 100Ω
20MΩ ±(2,5% +15) 10kΩ
3.3. MANEJO DEL APARATO
3.3.1. INSTRUCCIONES PARA LA MEDICIÓN
Encienda el dispositivo con el botón de On/O
Observaciones:
1) Si el rango del valor medido no se conoce
anteriormente, ajuste el rango de medición girando
el mando (7) al máximo y baje gradualmente.

36 37
09.07.2019
PRODUKTZEICHNUNGEN | PRODUCT’S VIEW | RYSUNKI PRODUKTU | NÁKRESY PRODUKTU SCHÉMAS DU PRODUIT
LE ILLUSTRAZIONI DI PRODOTTO | LAS ILUSTRACIONES DE PRODUCTO
1
2
5
7
8
6
4
3
9d9a 9b 9c
ES
i) Proteja el aparato de la humedad. Si se moja,
frótelo enseguida para secarlo. Los líquidos
pueden contener minerales que podrían provocar
la corrosión de los circuitos electrónicos.
j) Use y almacene el aparato en las condiciones
estándar de temperatura. Las temperaturas
extremas pueden acortar la vida útil del aparato,
dañar la pila y deformar o fundir las partes de
plástico.
k) Trate el aparato con delicadeza y cuidado. Si se
cae, se pueden dañar los circuitos impresos, lo
que puede provocar que el dispositivo no funcione
correctamente.
l) Proteja el aparato frente al polvo y la suciedad.
m) Use tan solo pilas nuevas del tamaño y el tipo
indicados en la cha técnica. Antes de instalar
o reemplazar las baterías, asegúrese de que el
dispositivo no esté conectado a un circuito externo
y que esté apagado.
ELIMINACIÓN SEGURA DE ACUMULADORES Y BATERÍAS
En el aparato se utilizan baterías 9V.
Para montar la batería:
1. Abra la tapa de la batería en la parte posterior del
dispositivo con un destornillador.
2. Inserte las pilas correspondientes a los parámetros
técnicos.
3. Cierre y atornille la tapa de la batería.
Retire las baterías usadas de la unidad siguiendo
el mismo procedimiento que para la instalación.
Para deshacerse de las baterías, entréguelas en una
instalación/empresa acreditada para el reciclaje.
ELIMINACIÓN DE DISPOSITIVOS USADOS
Tras su vida útil, este producto no debe tirarse al
contenedor de basura doméstico, sino que ha de
entregarse en el punto limpio correspondiente para
recolección y reciclaje de aparatos eléctricos. Al
respecto informa el símbolo situado sobre el producto,
las instrucciones de uso o el embalaje. Los materiales
utilizados en este aparato son reciclables, conforme
a su designación. Con la reutilización, aprovechamiento
de materiales u otras formas de uso de los aparatos
utilizados, contribuirás a proteger el medio ambiente.
Para obtener información sobre los puntos de recogida
y reciclaje contacte con las autoridades locales
competentes.

38 39
09.07.2019
NAMEPLATE TRANSLATIONS NOTES/NOTIZEN
expondo.de
Importer: expondo Polska sp. z o.o. sp. k
ul. Nowy Kisielin-Innowacyjna 7, 66-002 Zielona Góra | Poland, EU
Product Name: Multimeter
Model: SBS-DM-1000
Battery: 1 × 9 V 6F22
Production Year:
Serial No.:
1 2 3
DE Importeur Produktname Modell
EN Importer Product Name Model
PL Importer Nazwa produktu Model
CZ Dovozce Název výrobku Model
FR Importateur Nom du produit Modèle
IT Importatore Nome del prodotto Modello
ES Importador Nombre del producto Modelo
4 5 6
DE Batterietyp Produktionsjahr Ordnungsnummer
EN Battery type Production year Serial No.
PL Typ baterii Rok produkcji Numer serii
CZ Typ baterie Rok výroby Sériové číslo
FR Type de batterie Année de production Numéro de serie
IT Tipo di batteria Anno di produzione Numero di serie
ES Tipo di batteria Año de producción Número de serie
1
2
3
5
6
4
Table of contents
Languages:
Other Steinberg Systems Multimeter manuals

Steinberg Systems
Steinberg Systems SBS-CM-1000 User manual

Steinberg Systems
Steinberg Systems SBS-DM-1000USB User manual

Steinberg Systems
Steinberg Systems SBS-DM-1000NCV User manual

Steinberg Systems
Steinberg Systems SBS-DM-600NCV User manual

Steinberg Systems
Steinberg Systems SBS-DMB-1000TR User manual

Steinberg Systems
Steinberg Systems SBS-CM-600 User manual