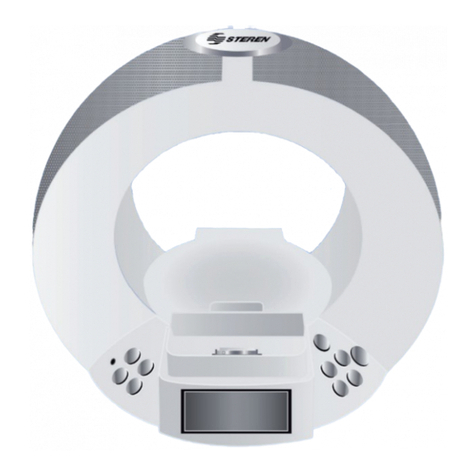
Steren BOC-3200 User manual


2
Gracias
por la compra de este producto Steren.
Este manual contiene todas las funciones de operación y solución de problemas
necesarias para instalar y operar su nuevo Sistema de audio compatible con ipod y MP3
Steren.
Por favor revise este manual completamente para estar seguro de instalar
y poder operar apropiadamente este producto.
Para apoyo, compras y todo lo nuevo que tiene Steren, visite nuestro sitio Web en:
www.steren.com
BOC-3200
SISTEMA DE AUDIO COMPATIBLE
CON IPOD Y MP3

3
• No exponga el equipo a temperaturas extremas.
• No deje caer el equipo, podría ocasionar fallas.
• Siempre utilice un paño suave y seco para limpiar el equipo.
• La garantía es inválida si trata de abrir las bocinas.
• No use ni almacene este equipo en lugares donde existan goteras o salpicaduras de agua.
• En caso de que requiera revisión acuda con su distribuidor autorizado Steren.
Utilizado de manera adecuada, su nuevo equipo le provee de una vida entera de diversión y
placer. Escuchar equipos de audio a un nivel muy alto puede ocasionar daños irreparables,
los cuales son detectados demasiado tarde. Es por eso, que Steren le recomienda no estar
expuesto a sonidos muy altos por un tiempo prolongado. Esta lista de nivel de sonidos es para
su protección:
IMPORTANTE
NIVEL
30
40
50
60
70
80
EJEMPLO
Biblioteca tranquila, murmullos
Sala de estar, refrigerador, recámara
Aire acondicionado a 6 metros, máquina de coser
Aspiradora, secadora de cabello, restaurante ruidoso

4
Los siguientes niveles de ruido pueden ser peligrosos bajo una exposición constante:
• Reloj despertador.
• Pantalla gigante luminosa.
• Entrada universal de audio de 3,5mm.
• Entrada para ipod.
• Control remoto.
• Radio AM/FM.
• Función de sleep (apagado automático).
• Snooze (temporizador despertador).
• Compartimiento para 2 baterías AA de respaldo del reloj.
CARACTERÍSTICAS
NIVEL
90
100
120
140
180
EJEMPLO
Camión de la basura, motosierra, taladro neumático
Concierto de rock en frente de las bocinas
Disparo de arma, despegue de avión
Despegue de cohete

5
CONTROLES
1.- Control de volumen: Hacia la derecha aumenta el nivel de volumen. Hacia la izquierda
disminuye el nivel.
2.- ipod: Permite la reprodución y pausa del ipod. Selecciona la función AUX.
3.- Radio: Permite entrar en modo radio.
4.- Conector dock: Permite conectar un ipod, incluye 5 adaptadores para alojar algunas versiones
de ipod.
5.- AM/FM: Botón para seleccionar estaciones de radio AM o FM.
6.- Sleep: Programación del apagado automático. 15, 30, 60, 90 y 120 minutos.
7.- Set +/-: Permite aumentar los dígitos en el momento de congurar la hora y la alarma además
de sintonizar las estaciones de radio.
8.- Bocinas.
9.- Alarm.reset / power off: Apaga la función de los diferentes modos de operación (ipod, aux,
radio, alarma).
10.-Wake-to: Permite activar la alarma con radio, con ipod o simplemente por timbre (buzzer).
11.- Pantalla LCD.
12.- Snooze/dimmer: Apaga el despertador por 10 minutos. Además enciende y apaga la luz de
la pantalla.
13.- Alm.set: Permite congurar la alarma.
14.- Alm.on/off: Activa o apaga la alarma.
VISTA FRONTAL

6
VISTA POSTERIOR
1.- Entrada del adaptador de corriente eléctrica.
2.- Line out: Salida de línea, por medio de un cable con conector 3,5mm, puede conectar las bocinas
a una fuente de sonido externa.
3.- Clock adj.: Permite congurar el reloj.
4.- Entrada de antena para AM.
5.- Time zone: Permite seleccionar la zona horaria, puede elejir entre ATL, EAS, CEN, I´NTN, PAC
Y ALS.
6.- DST: Horario de verano. Mueva el
interruptor hacia -1 cuando en el horario
de verano se tenga que regresar una hora,
seleccione +1 cuando en el horario de verano
se tenga que aumentar una hora.
7.- Line in: Entrada de línea, en esta entrada
puede conectar un reproductor MP3.
8.- Antena para FM.
CONTROL REMOTO
1.- Botón ON/OFF.
2.- Regresar: Regresa a una canción anterior del reproductor ipod,
tambien permite regresar una estación anterior en modo radio.
3.- Bass (Graves): Permite ajustar tonos graves.
4.- Snooze/Dimmer: Apaga el despertador por 10 minutos. Además
enciende y apaga la luz de la pantalla.
5.- Radio: Activa el radio.
6.- Disminuye el nivel de volumen.
7.- Compartimiento de batería.
8.- Aumenta el nivel de volumen.
9.- AM/FM: Permite cambiar AM o FM para las estaciones de radio.
10.- Treble (Agudos): Permite ajustar tonos agudos.
11.- Adelantar: Pasa a la siguiente canción en modo ipod y avanza a la
siguiente estación de radio.
12.- Play/pausa: Reproduce o pausa una canción del reproductor ipod.
1 2 67
4
3 5 8
Bass
Radio Am/Fm
Snooze/Dimmer
TRE
1
2
3
4
5
6
7
8
9
10
11
12

7
MODO RADIO
1.- Inserte el cable del adaptador de corriente en la entrada “DC” y conecte el adaptador a un
contacto eléctrico.
2.- Oprima el botón radio.
3.- Presione el botón am/fm y seleccione una banda de radio (AM o FM). Si elije AM debe colocar
la antena AM en la entrada “am antenna” del equipo.
4.- Gire hacia la derecha o izquierda el control set +/- para cambiar de estación de radio, o también
puede oprimir los botones del control remoto.
MODO IPOD
1.- Inserte el cable del adaptador de corriente en la entrada “DC” y conecte el adaptador a un
contacto eléctrico.
2.- Coloque un adaptador para ipod en el equipo, de acuerdo al tipo de ipod a colocar.
3.- Coloque el ipod en el conector dock del equipo.
4.- Oprima el botón “ipod” para comenzar a reproducir o también puede oprimir el botón del
control remoto.
5.- Seleccione una canción directamente del ipod.
6.- Controle el nivel de volumen de acuerdo a sus necesidades con el control de volumen del equipo
y no del ipod.
7.- Con el control remoto presione el botón para pasar a la siguiente canción.
8.- Presione el botón del control remoto para regresar a una canción anterior.
9.- Oprima el botón “ipod” del equipo para pausar o también puede oprimir el botón del control remoto.
10.- Para apagar el equipo presione el botón “power off”.
INSTRUCCIONES

8
MODO AUX.
En este modo puede conectar un reproductor MP3, reproductor de CD, una laptop, etc. y reproducir
el audio en este sistema.
1.- Use el cable de audio 3.5mm incluido. Conecte un extremo en la entrada “Line in” y el extremo
contrario conéctelo en la salida de audio (line out) del equipo a reproducir (MP3, laptop, reproductor
CD, etc.)
2.- Inserte el cable del adaptador de corriente en la entrada “DC” y conecte el adaptador a un
contacto eléctrico.
3.- Oprima el botón “ipod” y en pantalla se mostrará la palabra AUX. Para usar este modo no debe
tener conectado un ipod en el equipo. Los controles de avance, regreso, play/pausa se manejarán
directamente del reproductor externo.
4.- Controle el nivel de volumen de acuerdo a sus necesidades con el control de volumen del
equipo.
5.- Para apagar el equipo presione el botón “power off”
MODO RELOJ (FECHA Y ZONA HORARIO)
1.- Oprima y sostenga el botón “clock adj” hasta que se escuche un bip en el equipo, en pantalla
parpadeará el formato de hora.
2.- Gire el control “set +/-” para ajustar tanto los minutos como la hora. Gire hacia la derecha para
aumentar los dígitos y hacia la izquierda para disminuirlos.
3.- Una vez establecida la hora y en pantalla siga parpadeando la hora, oprima nuevamente el
botón “clock adj” y en pantalla parpadeará el formato de año (Y-xx) donde xx son las últimas 2
cifras del año. Gire el control “set +/-” para seleccionar el año. Gire hacia la derecha para aumentar
el número y hacia la izquierda para disminuirlos.

9
4.- Una vez establecido el año, y en pantalla siga parpadeando el formato de año, presione el botón
“clock adj” y en pantalla parpaderá el formato de mes/día. Gire hacia la derecha para aumentar el
número y hacia la izquierda para disminuirlos. Una vez establecido el año, oprima nuevamente el
botón “clock adj” y en pantalla (en la parte del recuadro inferior derecho) parpadeará el formato X
-XX donde X es el mes y XX el día. Gire el control “set +/-” para seleccionar el mes y día; gire hacia
la derecha para aumentar el número e izquierda para disminuir.
5.- Para ajustar la zona horaria, presione el botón “time zone” y con el control “set +/-” cambie de
opciones. Elija entre ATL, EAS, CEN, I´NTN, PAC Y ALS. Para México seleccione CEN.
MODO ALARMA
1.- Presione y sostenga el botón “alm.set” escuchará un bip y en pantalla parpadeará el formato
de alarma.
2.- Gire el control “set +/-” para ajustar tanto los minutos como la hora. Gire hacia la derecha para
aumentar los dígitos o gire hacia la izquierda para disminuirlos.
3.- Oprima nuevamente el botón “alm.set” para conrmar la selección.
4.- Presione el botón “alm.on/off” para activar la alarma.
5.- Seleccione el modo de alarma, presione el botón “wake-to” y seleccione radio para activarlo como
alarma, buzzer para activar sólo el timbre como alarma o ipod para activar el ipod como alarma. En
modo radio previamente debe seleccionar una estación de radio, en modo ipod previamente debe
seleccionar una canción. Cuando la alarma se activa en modo ipod, el equipo tiene un sistema de
seguridad que incrementa gradualmente el nivel de audio del ipod en un lapso de hasta 2 minutos.
Por lo que se recomienda establecer una hora de inicio de alarma en este modo 2 minutos antes
de la hora deseada.
6.- Cuando se active la alarma presione el botón SNOOZE para apagarlo por 10 minutos, pasando
ese tiempo, automáticamente se volverá a encender.
7.- Si desea que se apague completamente la alarma, oprima el botón alm.on/off.
10
ESPECIFICACIONES
Potencia: 6Wrms x 2
Respuesta en frecuencia: 80Hz a 20kHz.
AM: 540-1700kHz
FM: 87-108MHz
Impedancia: 4 ohms
Sensibilidad: 89dB
THD: <0,1% a 1kHz
Entrada: 15V - - - 1,2A
3V - - - (2xAA)
Convertidor
Entrada: 100-240V~ 50/60 Hz 18W
Salida: 15V - - - 1,2A
Control remoto
Entrada: 3V - - - (CR2025)
Consumo nominal: 31,5 kWh/año
Consumo en espera: 7,36 kWh/año
CONEXIÓN
El diseño del producto y las especicaciones pueden cambiar sin previo aviso.
IPOD
BOC-3200
CONTACTO
MP3
ESTÉREO

11
PÓLIZA DE GARANTÍA
Esta póliza garantiza el producto por el término de un año en todas sus partes y mano de obra, contra cualquier defecto
de fabricación y funcionamiento, a partir de la fecha de entrega.
CONDICIONES
1.- Para hacer efectiva la garantía, presente ésta póliza y el producto, en donde fue adquirido o en Electrónica Steren
S.A. de C.V.
2.- Electrónica Steren S.A de C.V. se compromete a reparar el producto en caso de estar defectuoso sin ningún cargo al
consumidor. Los gastos de transportación serán cubiertos por el proveedor.
3.- El tiempo de reparación en ningún caso será mayor a 30 días, contados a partir de la recepción del producto en
cualquiera de los sitios donde pueda hacerse efectiva la garantía.
4.- El lugar donde puede adquirir partes, componentes, consumibles y accesorios, así como hacer válida esta garantía es
en cualquiera de las direcciones mencionadas posteriormente.
ESTA PÓLIZA NO SE HARA EFECTIVA EN LOS SIGUIENTES CASOS:
1.- Cuando el producto ha sido utilizado en condiciones distintas a las normales.
2.- Cuando el producto no ha sido operado de acuerdo con el instructivo de uso.
3.- Cuando el producto ha sido alterado o reparado por personal no autorizado por Electrónica Steren S.A. de C.V.
El consumidor podrá solicitar que se haga efectiva la garantía ante la propia casa comercial donde adquirió el producto.
Si la presente garantía se extraviara, el consumidor puede recurrir a su proveedor para que le expida otra póliza de
garantía, previa presentación de la nota de compra o factura respectiva.
DATOS DEL DISTRIBUIDOR
Nombre del Distribuidor
Número de serie
Fecha de entrega
Producto: Sistema de audio compatible con ipod y MP3
Modelo: BOC-3200
Marca: Steren
ELECTRONICA STEREN S.A. DE C.V.
Camarones 112, Obrero Popular, 02840, México, D.F.
RFC: EST850628-K51
STEREN PRODUCTO EMPACADO S.A. DE C.V.
Biólogo MaximIno Martínez No. 3408 Int. 3 y 4, San
Salvador Xochimanca, México, D.F. 02870,
RFC: SPE941215H43
ELECTRONICA STEREN DEL CENTRO, S.A. DE C.V.
Rep. del Salvador 20 A y B, Centro, 06000, México.
D.F. RFC: ESC9610259N4
ELECTRONICA STEREN DE GUADALAJARA, S.A.
López Cotilla No. 51, Centro, 44100, Guadalajara, Jal.
RFC: ESG810511HT6
ELECTRONICA STEREN DE MONTERREY, S.A.
Colón 130 Pte., Centro, 64000, Monterrey, N.L. RFC:
ESM830202MF8
ELECTRONICA STEREN DE TIJUANA, S.A. de C.V.
Calle 2a, Juárez 7636, Centro, 22000, Tijuana, B.C.N.
RFC: EST980909NU5
En caso de que su producto presente alguna falla, acuda al centro de distribución más
cercano a su domicilio y en caso de tener alguna duda o pregunta por favor llame a
nuestro Centro de Atención a Clientes, en donde con gusto le atenderemos en todo lo
relacionado con su producto Steren.
Centro de Atención a Clientes
01 800 500 9000

12

13
Thank You
on purchasing your new Steren product.
This manual includes all the feature operations and troubleshooting necessary to install
and operate your new Steren´s Ipod and MP3 compatible audio system. Please review this
manual thoroughly to ensure proper installation and operation of this product.
For support, shopping, and everything new at Steren, visit our website:
www.steren.com
BOC-3200
IPOD AND MP3 COMPATIBLE
AUDIO SYSTEM

14
IMPORTANT
• Do not expose the speakers to extreme temperatures.
• Do not drop or bump the speakers, may cause malfunctions.
• Always use a soft and dry cloth in order to clean the equipment.
• Warranty is void if you try to open the equipment.
• Do not use or store the equipment near wet places.
• In case you require a revision of the equipment, please go with an authorized dealer.
Used wisely, your new sound equipment will provide a lifetime of fun and enjoyment. Since
hearing damage from loud noise is often undetectable until it is too late. Steren recommend
you avoid prolonged exposure to excessive noise. This list of sound levels is included for your
protection:
LEVEL
30
40
50
60
70
80
EXAMPLE
Quiet library, soft whispers
Air conditioner at 20ft, sewing machine
Vacuum cleaner, hair dryer, noisy restaurant

15
The following noises can be dangerous under constant exposure:
HIGHTLIGHTS
LEVEL
90
100
120
140
180
EXAMPLE
Garbage truck, chainsaw, pneumatics drill
Rock band concert in front of speakers
Gunshot blast, jet plane
Rocket launching pad
• Alarm-clock.
• Luminous giant screen.
• 3.5mm universal audio input.
• Ipod’s input.
• Remote control.
• AM/FM radio.
• Sleep function (automatic turn off).
• Snooze (timer awakener).
• Battery compartment for clock’s back up.

16
CONTROLS
1.- Volume control:Toward right it increases the volume. Toward left it decreases the level.
2.- ipod: It allows to play and to pause the ipod. It allows you to get into AUX function.
3.- Radio: It allows getting into radio mode.
4.- Dock connector: It allows connecting an ipod, are included 5 adaptors to place different ipod
models.
5.- AM/FM: Button to select AM or FM radio stations.
6.- Sleep: Programming automatic turn off, 15, 30, 60, 90 and 120 minutes.
7.- Set +/-: It allows to increase digits when setting time or alarm, besides tuning the radio stations.
8.- Speakers.
9.- Alarm.reset/power off: It turns off the different operation modes ( ipod, aux, radio, alarm )
10.- Wake-to: It allows activating the alarm with the radio, ipod or simply by the buzzer.
11.- LCD Screen.
12.- Snooze/dimmer: It turns the alarm-clock off for 10 minutes. Besides, it turns on and off the
screen light.
13.- Alm. Set: It allows setting the alarm.
14.- Alm. On/off: It activates and deactivates the alarm.
FRONT VIEW

17
REAR PANEL
1.- Power adaptor input.
2.- Line out: Through a 3.5 mm connector cable, connect the speakers to an external sound source.
3.- Clock adj.: It allows setting the clock.
4.- AM antenna input.
5.- Time zone: To select the time zone, you may choose between ATL, EAS, CEN, I’NTN, PAC and ALS.
(For Mexico is CEN)
6.- DST: Daylight Saving Time. Move the switch
to -1 when during the Daylight Saving Time has
to be set back 1 hour , select +1 when during
the Daylight Saving Time has add one hour.
7.- Line in: Line in, in this input you can connect
a MP3 player.
8.- FM Antenna.
REMOTE CONTROL
1.- On/Off button.
2.- Backward: It goes back to a previous track on the ipod player, it also
allows to go back to a previous radio station en the radio mode.
3.- Bass: It allows adjusting bass tones.
4. Snooze/Dimmer: It turns the alarm-clock off for 10 minutes. Besides, it
turns on and off the screen light.
5.- Radio. It activates the radio.
6.- It decreases volume level.
7.- Battery compartment.
8.- It increases volume level.
9.- AM/FM: It allows to change from AM to FM for the radio stations.
10.- Treble: It allows adjusting treble tones.
11.- Forward: It skips to next song on ipod mode and skips to next radio
station.
12.-Play/pause: It plays or pauses songs from the ipod player.
1 2 67
4
3 5 8
Bass
Radio Am/Fm
Snooze/Dimmer
TRE
1
2
3
4
5
6
7
8
9
10
11
12

18
RADIO MODE
1.- Plug the power adaptor into DC input jack, then connect it to an outlet.
2.- Press the radio button.
3.- Press the am/fm button and select the radio band (AM or FM). If you choose AM you should
place the AM antenna in the equipment’s “am antenna” input.
4.- Turn to right or left the set +/- control to change from radio station or you may choose to press
the buttons from the remote control.
IPOD MODE
1.- Plug the power adaptor into DC input jack, then connect it to an outlet.
2.- Place an ipod adaptor on the equipment according to the ipod to be placed.
3.- Place the ipod on the equipment dock connector.
4.- Press the “ipod” button to start playing or you may also press the button from the remote
control.
5.- Select a song directly from the ipod.
6.- Control the volume level according your needs from the equipment’s volume control not from
the ipod.
7.- From the remote control press the button to skip to next song.
8.- From the remote control press the button to go back to the previous song.
9.- Press the equipment’s “ipod” button to pause or you may press the button from the remote
control.
10.- Turn the power off by pressing the “power off” button.
INSTRUCTIONS

19
AUX MODE
On AUX mode you may connect a MP3 player, a CD player, a laptop, etc. and to play the audio on
this system.
1.- Use a 3.5 mm audio cable (included) and connect one end to the “line in” input and end the (line
out) input in the equipment to be played (MP3, laptop, CD player, etc.)
2.- Insert the current adaptor’s cable in “DC” input and connect the adaptor to an wall outlet.
3.- Press the “ipod” button and on the screen it will be shown the word AUX. To use this mode you
must not have an ipod connected to the equipment. The forward, backward, play/pause controls
should be directly handled from the player.
4.- Control the volume level according your needs from the equipment’s volume control.
5.- Turn the power off by pressing the “power off” button.
CLOCK MODE ( DATE AND TIME ZONE)
1.- Press and hold the “clock adj” button until you hear a blipping sound, the time format will blink
on the screen.
2.- Turn the “set +/-” control to adjust minutes as well the hour. Turn it right to increase the digits and
turn it to left to decrease the digits.
3.- Once the time is established and on the screen the time keeps on blinking, press again the “clock
adj” button and on the screen the year format will blink (Y-xx), in which XX are the last 2 numbers
of the year. Turn the “set +/-” control to select the year. Turn it right to increase the digits and turn it
to left to decrease the digits.

20
Press the button again “clock adj” and on screen will ash format X-XX X XX is the month and day.
Turn the control “set + / -” to select the month and day, turn clockwise to increase the number and
left to decrease.
4.- To adjust the time zone, press the “time zone” button and change the options with the “set +/-”
control. Choose between ATL, EAS, CEN, I’NTN, PAC and ALS. For Mexico is CEN.
ALARM MODE
1.- Press and hold the “alm. Set” button, you will hear a blipping and the screen will blink the alarm
format.
2.- .- Turn the “set +/-” control to adjust minutes as well the hour. Turn it right to increase the digits
and turn it to left to decrease the digits.
3.- Press again the “alm.set” button to conrm the selection.
4.- Pres the “alm.on/off” to activate the alarm.
5.- Select the alarm mode, pres the “wake-to” button and select radio to activate the radio as the
alarm, buzzer to activate just the tone as the alarm or ipod to activate the ipod as the alarm. On
radio mode, you should previously select a radio station, on ipod mode you should previously
select a song. When the alarm is activated in Ipod mode, the equipment has a security system that
gradually increases the audio level from the ipod in a period of up to 2 minutes. So recommended
to set a start time of alarm in this mode 2 minutes before the desired time.
6.- When alarm turns on, press the SNOOZE button to turn it off for 10 minutes, after this period of
time It will automatically turn on again.
7.- If you want to completely turn off the alarm, press alm.on / off button.
Table of contents
Languages:
Other Steren Stereo System manuals

Steren
Steren BOC-3210 User manual

Steren
Steren BAF-515 User manual

Steren
Steren BOC-2120 User manual

Steren
Steren BOC-1170 User manual

Steren
Steren BAF-510 User manual

Steren
Steren BOC-1040 User manual

Steren
Steren BOC-1050 User manual

Steren
Steren BOC-2136 User manual

Steren
Steren BAF-0101 User manual

Steren
Steren BOC-2100 User manual