Advanced operational manual
14.5
13.7
6.0A
0.5A
VOLTS
AMPS
1 2 3 4 5 6
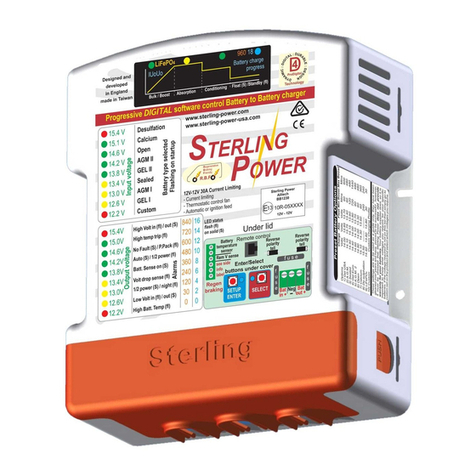
6 Step intelligent battery charging and conditioning
4 Faults
Fault 1 = High output voltage (exceeded 17V)
Fault 2 = High unit temp alarm (80C+)
Fault 3 = Reverse Polarity
Fault 4 = Open circuit / Batt. disconnected
Faults
This bracket is designed to be installed
in a place of your convenience so the
charger can be stored safely. To
operate, simply clip the charger into the
bracket. To release, push back the top
of the bracket to remove the unit.
95mm
83mm
Modifications -
To make changes from default / auto select described above, please read
on. Changes can only be made if the DC cables are connected to a battery
and the charger is NOT charging. If the charger has already started
charging, press the Start-Stop button. This stops the charger from charging.
You can now modify the settings. Once these changes have been and the
Start-Stop button has been pressed, the charger stores this information
(exception is the 6V-12V Force Select option).
Charging a very low voltage 12V battery - Force Select.
If you have a nominally 12V battery that is down at a much lower voltage
(e.g.~6V), you can force the charger to charge at a 12V profile. The charger
shall automatically detect 6V, thus, it assumes that the battery is a 6V
(nominal) battery and shall assume a 6V profile. However, you can override
this by pressing the Force Select button once - the 6V light on the display
shall now read 12V. Once the display reads 12V, press the Start - Stop
button and the charger shall begin charging.
Changing battery chemistry - Battery Type.
You can select the battery type by pressing the battery selector switch.
Simply toggle between 1-6 and select which profile best suits you (table
below):
The voltage requirements of the battery company will override our
recommendations as it is them who are supporting the battery warranty. Get
as close to the recommended voltage that is set by the battery manufacturer
and select the relevant number.
Profile 6* - Desulphation mode
This mode comes with a warning of high voltage. Should not be used unless
you need to desulphate your battery. If you are not familiar with this term
please refrain from using profile 6.
Changing current level - Power Adjust.
Select which current level you want, either 3A, 5A or 7A (default). Use the
Power Adjust button to toggle between these three settings.
When all has been done, press the Start-Stop button at the top. The charger
screen should then briefly display the absorption and float voltages and then
start charging.
During charging, if any parameter needs modifying (nominal voltage /
battery profile / current) the Start-Stop button shall need to be pressed to
turn the charger off, first. Then make the modification, then press the Start-
Stop button to resume charging.
Any parameter changes (except FORCE SELECT) shall be saved for future
use. Therefore, when the charger is disconnected and reconnected the
charger shall fire up with the previously saved settings.
Rescue dead battery
When being connected to a battery and starting the charging course, the
charger detects the voltage of the battery automatically and then changes to
pulse charging mode if the voltage is within the range of 7.5V+/-0.5 to
10.5V+/-0.5. This pulse charging course won’t stop until the battery voltage
rises to 10.5V+/-0.5. Once this point is arrived, the charger changes to the
normal charging mode selected by the user at the beginning and now the
battery can be charged up fast and safely. Through this method, most ‘dead’
batteries can be rescued.
Abnormality protection
Whenever a fault appears (1-4), one of the following abnormal occasions,
such as: Short circuit, high or low battery voltage, open circuit or reverse
connection of the output terminals, the charger will stop charging to avoid
damage. If there is no further order received, the system will remains in the
standby state.
Temperature protection
During the charging course, if the charger is too hot for some reason, it will
reduce the output power automatically to protect itself from damaging.
Phase 1: INITIALIZATION: Test feature evaluates the battery on its size,
condition and state of charge. This step incorporates a FAULT indication in
the event that it deems this battery in such a state or condition that it cannot
be charged.
Phase 2: SOFT START: In order to reduce shock on the power supply and
battery the current is ramped up over a short period of time.
Phase 3: BULK CHARGE: The charge voltage starts to rise to its maximum
charge voltage of about 14.5V. The current runs at max during this phase
delivering as much power as possible to the battery.
Phase 4: SATURATION CHARGE: The voltage has reached its target
voltage and now the current starts to drop back as the battery fills up. It shall
then be unable to take any more charge.
Phase 5: BATTERY TEST and REVALUATION: At this stage the battery
should be almost full and the charge current should be dropping away.
However, the charger shall perform a quick test if: There is a miscalculation,
the battery state was due to a draw being taken off the battery while charging
or the battery is not at the state it should be. Also, if required, add more time
onto the saturation time to ensure the task is completed and the battery is full
charged.
Phase 6: FLOAT CHARGE: Float charge for a portable charger means that
enough voltage and current is supplied to the battery in order to replace an
internal discharge of the battery to maintain the battery at its full state and
readiness for when you require it.
Quick Release Storage Bracket


