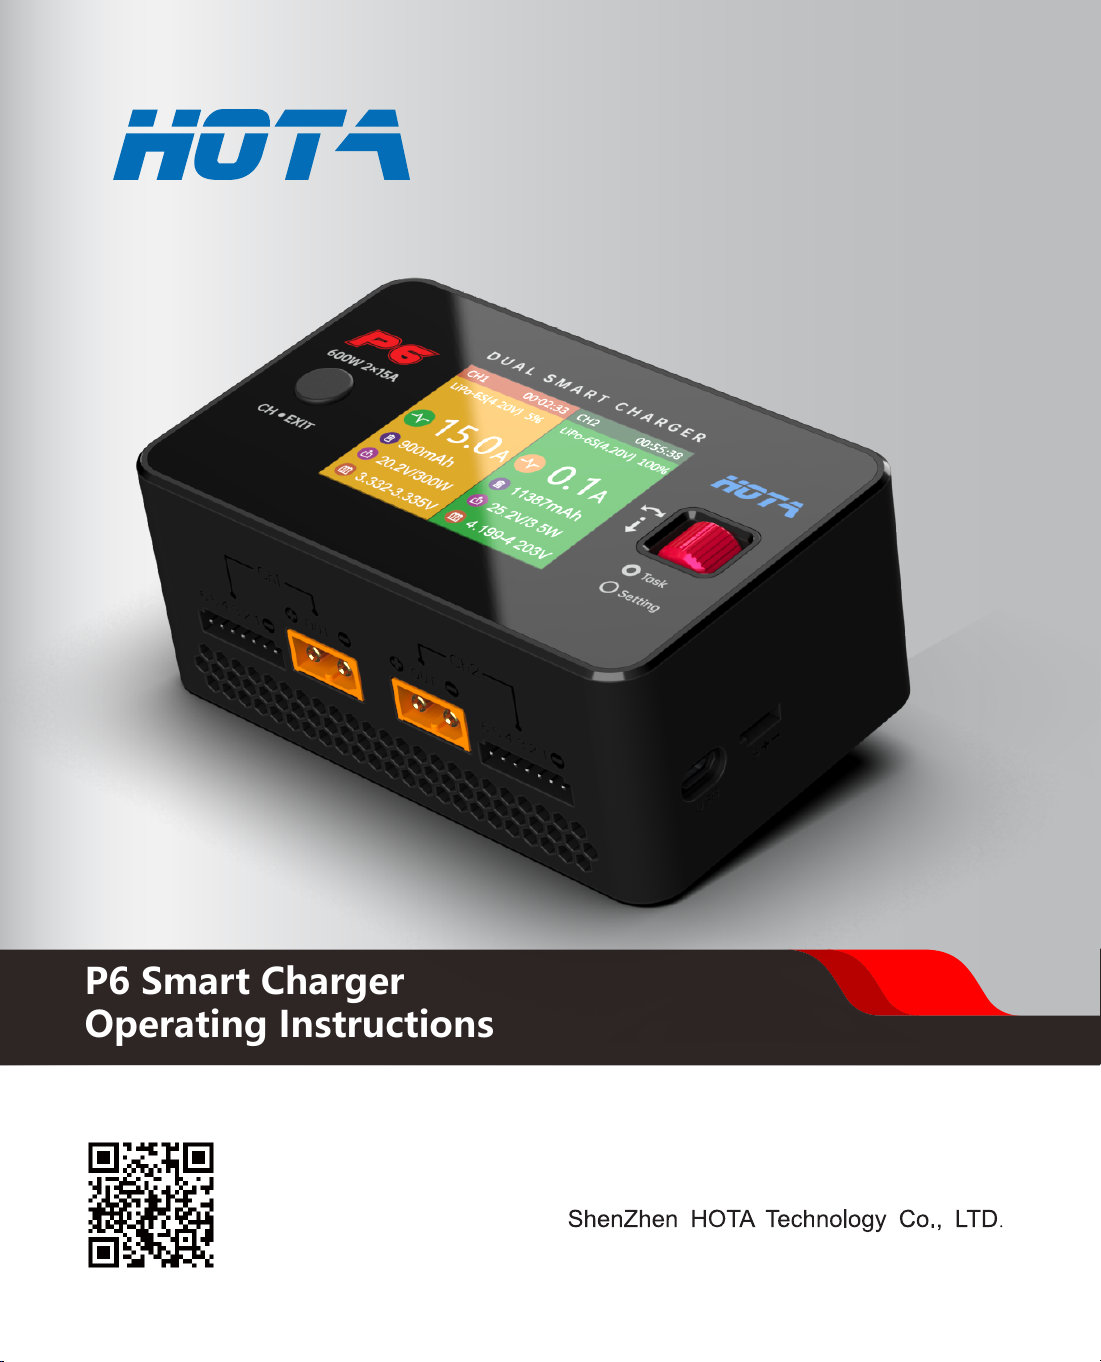
HOTA P6 User manual

P6 Smart Charger
Operating Instructions

Thank you for purchasing the HOTA series of smart
chargers. Please read this Instructions carefully
before use so as to use the product better, also
keep this Instruction in a place safe for easy access.
If you want to know more about our smart chargers,
please visit our website: www.hota-exp.com
P6 Smart Charger
Thank you
Ver 1.0.5

01
01
02
03
04
07
07
08
18
20
22
Product Overview
1、Specifications
2、Introduction
3、Warnings and Safety Notes
4、Recommended Way of Connection
5、Balance port connection and Notes
6、Mutli-Function port
7、Standard battery types and task parameters
Operation and setup
1、How to confirm the Charging Current
2、Operative Skills
3、Display of the working status
4、Charger Settings
5、Charger Settings >Task Parameters
6、Charger Settings >System Parameters
7、Charger Settings > Tools
8、Task Settings
9、Task Settings and Notes
Product Qualification Declaration
Troubleshooting
Warranty and Services
Safety Tips
Safety Notes
21
19
27
23
28
28
29
30
07
05
06
03
Contents

P6 Smart Charger
Product Overview
Safety Protection , make things simple
Based on advanced design of the circuit and the software algorithm , this charger assures users that no
matter in charging and discharging , troubles such as over-voltage ,over-current overheat and short
circuit can be handled easily.
Support various types of batteries
By using innovative , self-defined algorithm for charging lithium batteries , the P6 charger not only
charges smart batteries and other standard types of batteries , but charges them much quicker than
others
Internationalization
Full support for simplified Chinese, traditional Chinese, Japanese, English, German, etc. to ensure
unobstructed use·
This is a high contrast , full color , full view screen that even under sunlight , images are clearly displayed.
A system well matched , with its components' every merit enhanced
IPS sunlight screen
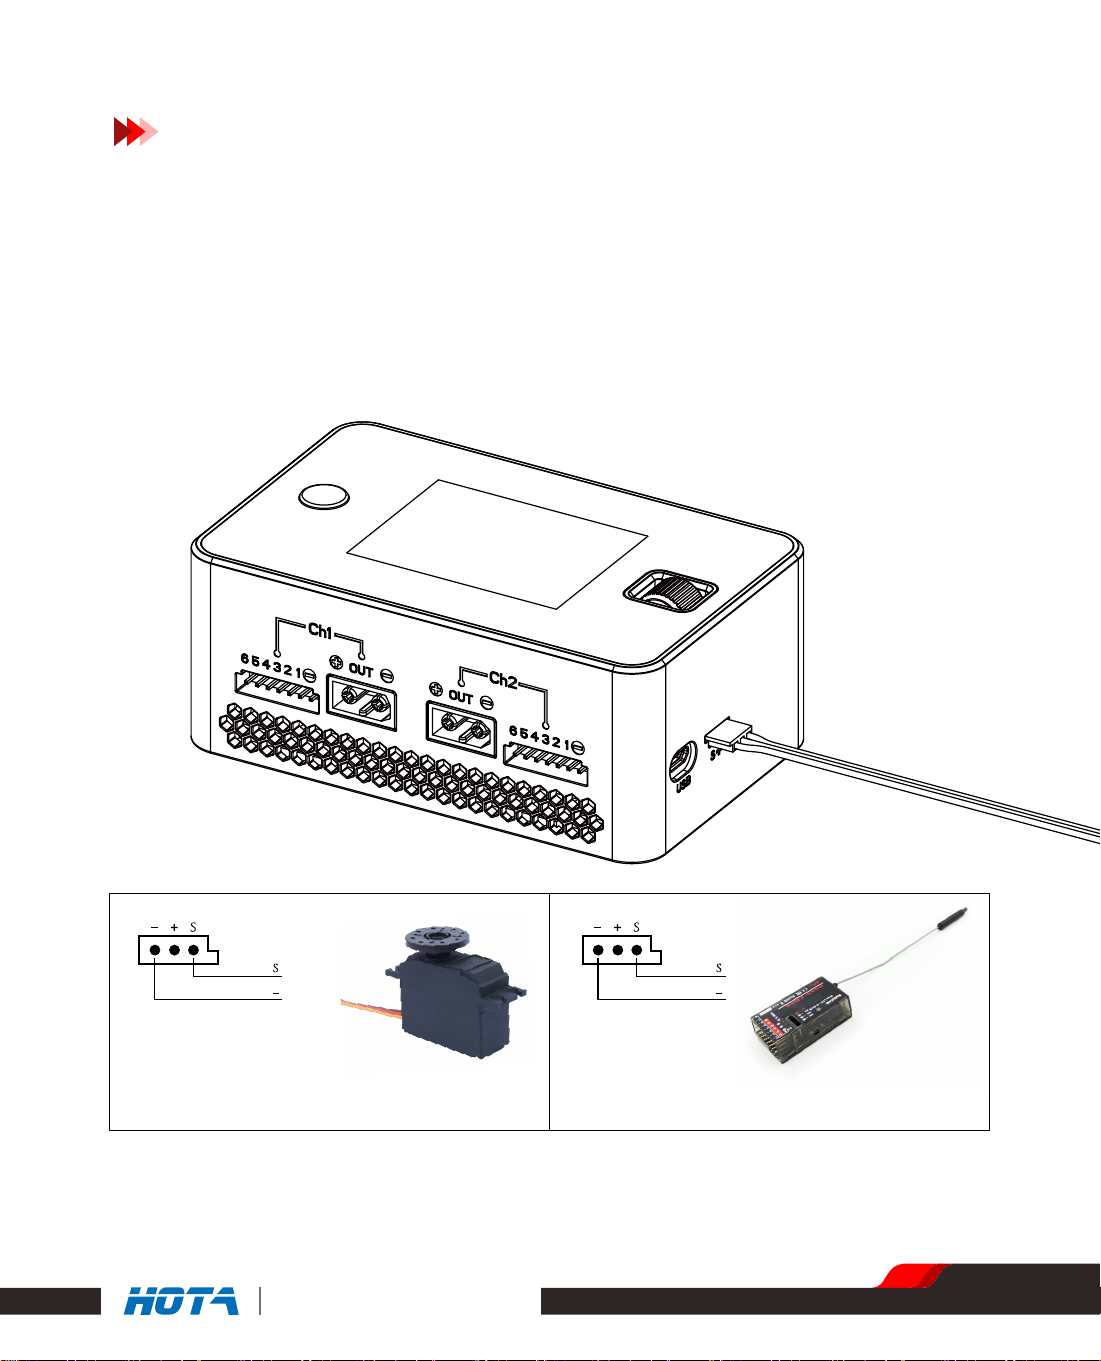
The front panel provides dual XT 60 ports , plug and play, that meet various job requirements easily.
Besides, the Type-C port offers outstanding current output power for charging laptop PC or other
tablets ,making your business journeys much easier.
Abundant user interfaces to meet all applications
High efficiency in heat dissipation
Seemingly simple and easy-to-use intelligence that hides powerful technology
Through constant improvements in system design and optimization of the algorithm inside , the P6
has upgraded its output power , instantaneous power and energy efficiency ratio significantly .
The more you use it , the more you find its simplicity
A soft touch to start many simple ,flexible usages
T240 ,the power supply we recommend, gets wide AC input range of 110~ 240V that enable users to use it
in any country. Work with P6's dual channel enhanced power output , the combination gives
people a feeling of agreement between the two components , which always attracts admiration.
An all-round charging system with ac/dc dual-channel that meets users' requirements in
any situations .It is a portable, separate design that allows people to use it easily wherever
they go .

Product Overview
Specifications
Net weight
Input Voltage
Charge Power
Discharge Power
292g
USB output 5V / 2.1A
Type-C Output Max. 45W
Regenerative
Discharge current
0.1~15A x 2
DC 10.5~30V
300W x 2 @ Input Voltage > 22V
Protection
Function
Temperature protection, Time Protection, Capacity protection, Input reverse
protection,Output reverse protection, Short circuit protection, Output over-
current protection, Output overvoltage protection, overcharge protection,over
discharge protection
Internal Discharge: 12W x 2 (balance
port6Wx2)
External Discharge: 300W x 2 (600W)
Regenerative Discharge: 300W x 2 (600W)
Balance Current
Screen Size
Charge Current Discharge Current 0.1~3A x 2
External Discharge
Current 0.1~15A x 2
1000mA x 2
2.4” IPS 320x240,
260,000 colors
Dimensions 111mm×70mmx45mm
Storage
Temperature -20~60°C
Operating
Temperature 0~40°C
Battery Type
LiHV/LiPo/LiFe/Lilon/Lixx : 1~6S
NiZn/NiCd/NiMH : 1~14S
Smart Battery : 1~6S
Lead Acid(Pb) : 1~12S(2~24V)
Eneloop : 1~14S
0.1~15A x 2
P6 Smart Charger 01

Product Overview
An introduction
1
4 5 6 5 4 7 8
2 3 9
12 13 12
10 11
1.Channel key
2.Screen
3.Speed Shuttle key
4.Balance port
5.Output port
6. Ventilation air intake
7.Update port
8.Multi-Function port
9. Type-C output
10.USB-A output
11.DC port
12. Support
13. Ventilation air out
P6 Smart Charger 02

Recommended way of connection
Product Overview
Warnings and Safety Notes
1. Do not use the charger in an unattended manner, in case of any functional abnormality,please
stop using it and refer to the manual.
2. Keep the charger away from dust, humidity, rain and high temperature, as well as direct expo
sure to sunlight and intense vibration.
3. Input voltage of the charger is 10.5-30V DC. When connecting to the power supply, make sure
that the input voltage match the operating voltage range of the charger.
4. Please place the charger on a heat-resisting, non-flammable and insulating surface. Do not
use it by placing it on the car's seat, carpet or other similar place. Keep inflammable and
explosive objects away from operation areas of the charger.
5. Make sure the heat dissipation hole at the bottom of the charger is not covered while in use,
and ensure the cooling fan smoothly extracts heat.
6. Please fully understand the charging and discharge characteristics as well as the battery‘s
specifications. Additionally, set up proper charging parameters in the charger. Incorrect
setting of parameters can cause damage to the charger and battery ,even give rise to
disastrous consequences such as fire and explosion.
7. When charging or discharging is completed, please first press the speed shuttle key to terminate
the current task, then remove the battery when the charger shows the standby screen.
1、Connect power supply to the charger, wait for the system to
complete its self-checking ;
2、Choose the channel that is linked with the battery ;
3、Through scrolling the Speed Shuttle key and the screen to set
the task parameters suitable for the battery ;
4、Enjoy。
LiPo 6S
LiPo 6S
03
P6 Smart Charger

Balance Port Connection and Notes
1. The detection balance port of this product is suitable for lithium battery packs;
2. When the battery is connected, it is aligned with the " - " sign . The diagram above
shows the alignment of the balance plug;
Product Overview
LiPo 6S
LiPo 6S
04
1S
2S
3S
4S
5S
6S
P6 Smart Charger

Multi-Function Port
1. Connect to the RC airplane control servo
2. Connect to the RC airplane receiver or RF transmitter
Product Overview
05
RC airplane control servo connects to the
Multi-function port
RC airplane receiver or RF transmitter
connects to the Multi-function port
P6 Smart Charger
Multi-Function Port

Be very careful to choose the correct voltage for different types of batteries otherwise it
may cause damages to them. Incorrect settings could cause the battery to burn or to
explode , leading to injury of people or loss of property.
Standard Battery Types and Task Parameters
Product Overview
Rated
Voltage
Battery Type
Task
Parameters
Full Charge
Voltage
Storage
Voltage
No
support
No
Support
Support
Discharge
Voltage
Balance
Charge
Unbalanced
Charge
Support
Cells
Max Charge
Current
NiCd
NiMH LiFe
1.20V
1.50V
0.90V
1-14S
15.0A
3.30V
Support
Support
3.20V
3.65V
2.90V
1-6S
15.0A
3.70V
Support
Support
3.6V
4.10V
3.20V
1-6S
15.0A
3.80V
Support
Support
3.70V
4.20V
3.30V
1-6S
15.0A
3.85V
Support
Support
3.80V
4.35V
3.40V
1-6S
15.0A
1.60V
Support
Support
1.50V
1.93V
1.20V
1-14S
15.0A
3.80V
Support
Support
3.7V
4.20V
3.30V
1-6S
15.0A
3.80V
Support
Support
3.70V
4.20V
3.30V
1-6S
15.0A
Support
2.00V
2.46V
1.90V
1-12S
15.0A
Support
1.20V
1.50V
0.90V
Max Charge
C Value ≦2C ≦4C ≦1C ≦1C ≦1C ≦0.5C ≦1C ≦1C ≦0.5C ≦0.5C
1-14S
15.0A
Lilon LiPo LiHV NiZn Lixx Pb
Smart
Ba�ery Eneloop
06
P6 Smart Charger
No
Support
No
Support
No
Support
No
Support

How to conform the charging current
Operative Skills
Operation and Setup
It is important to know the maximum charging current of the battery before charging as
excessive current could influence the life span of battery ,even cause damages. In addi-
tion, excessive current can cause heating even explosion of the battery during the
charging process.
The charging and discharge capacity of battery is usually marked with C value. Multiply-
ing the charging C value and battery capacity equals to the maximum charging current
supported by the battery. For example, for a 1000 mAh battery with a charging capacity
of 5C, its maximum charging current would be l000 * 5 = 5000mA; that is , the maximum
charging current is 5A.
For a lithium battery, if it is impossible to confirm the supported charging C value, please
set the charging current below 1C for the sake of its (lithium battery) safety.
The reference relation between C value and charging time: charging time >= 60
minutes/ charging C value (it therefore needs around 60~70 minutes to complete
charging with 1C). Due to the differences in battery power conversion efficiency, this
period of time to complete the charging may be extended.
1. Connect power supply to the charger and
wait for the system to complete its self-check-
ing. In standby interface, connect well the
battery to the charger. Short press the Channel
key to choose whatever channel prefers . After
having chosen the channel, short press the
speed shuttle key to pop up the “ Task
Settings “ menu .
2.When a task is being executed, short press
the speed shuttle key to pop up the " Adjust
Task" menu to adjust the task’s current ;
3.Long press the Channel key can end the task
of current channel quickly or enter the "Task
Settings" menu of the channel . Channel Key Speed Shuttle Key
07
P6 Smart Charger

Working parameters Display
Operation and Setup
Split Screen Display
08
P6 Smart Charger
Operation Time
Current
channel
Current Channel
Battery parame-
ters andpercenta-
geofcompletion
Present current
Capacity
charged
Output
Voltage/Power
Battery
Voltage
operation
Time
Battery
parameters and
percentage of
completion
Present
current
Capacity
charged
Output Voltage
/Power
Battery
Voltage
Channel 1 : charging Channel 2 : Charging completed
Split-Screen Display : Simple Operation
1. Boot into the Split-screen display ----- Standby state;
2. In the standby state,long press the speed shuttle key to enter "Charger
Settings" ;
3. Short press CH key to display the channel you choose;
4. Long press the CH key to stop the current task of double channels .

0.0 mAh 0.00 V
Standby...
CH2 00:00:00
-.---V
-.---V
1
4
-.---V
-.---V
2
5
-.---V
-.---V
3
6
0.0
W
0
A
Name
1
Operation and Setup
09
Working parameters Display
P6 Smart Charger
Standby
Operation
Time
Capacity
charged
Task Status
Output
Current
Total Battery
Voltage
Cell Voltage
Device Name
Current channel
Standby State : Simple Operation
1.Connect power supply to the charger, wait for the system to complete its self-checking.
Connect the battery to the charger in the standby interface;
2. In the standby state, the screen is in blue color .At that time, the output current, total
battery voltage ,capacity completed and operation time are all shown as zero .
Scroll the speed shuttle key can switch the display information in the lower half of the screen, which are cell voltage and
the operating data.
3. After selecting the corresponding channel, short press the speed shuttle key can pop up
the "Task Settings" menu.
4. Short press CH key can switch the channel ;
5. Long press the speed shuttle key to enter the “Charger Settings” menu.
Output
Power

10
P6 Smart Charger
33 mAh 24.08
V
Charging...
CH1 00:00:33
4.014V
4.014V
1
4
4.010V
4.023V
2
5
4.010V
4.015V
3
6
5.0
W
121
A
LiPo-6S(4.20V) 73% 2
Operation and Setup
Working parameters Display
Charging
Operation
Time
Capacity
charged
Task Status
Output
Current
Total Battery
Voltage
Cell Voltage
Current channel
Charging Status : Simple Operation
1. Connect power supply to the charger, wait for the system to complete its self-checking.
Connect the battery to the charger in the standby interface;
2. After selecting the corresponding channel, short press the speed shuttle key to pop up
the "Task Settings" menu, set the task to "Charge" ; adjust the task parameters, and short
press the speed shuttle key to start the task;
Scroll the speed shuttle key can switch the display information in the lower half of the screen, which are cell voltage, cell
internal resistance and the operating data. Cell voltage can only be displayed in the mode of balance charging and the
internal resistance can only be displayed while measurement is valid ( not in precharged status and none of the cells
reaches fully charged status within 2 minutes);
3. When the charge task is executing, short press the speed shuttle key can pop up the "Adjust
Task” menu to adjust the charge current ; long press the CH key can stop the current task ;
4. Enjoy.
Battery parameters and
Percentage of completion
Output
Power

Operation and Setup
19 mAh 25.23
V
Fast Charging Completed Status
CH1 00:01:05
4.205V
4.200V
1
4
4.205V
4.203V
2
5
4.206V
4.202V
3
6
0.6
W
16
A
LiPo-6S(4.20V) 100% 2
11
Working parameters Display
Fast Charging Completed Status
Opera-
tion time
Capacity
charged
Task status
Output
current
Total Battery
Voltage
Cell voltage
Current channel
Fast Cha rging Completed Status : Simple Operation
1. When fast charging is completed, the cell voltage difference is less than 2OmV ,show
ing fast charging completed ;
( At that time, press the speed shuttle key to stop the task before removing the battery)
2.Long press the CH key can stop the current task;
3. Short press the CH key can switch the channel .
P6 Smart Charger
Battery parameters and
Percentage of completion
Output
power

-8 mAh 23.90 V
Discharging...
CH1 00:00:43
3.986V
3.987V
1
4
3.989V
3.988V
2
5
3.988V
3.991V
3
6
-0.2
W
-12
A
LiPo-6S(3.60V) 68% 2
Operation and Setup
12
P6 Smart Charger
Output
current
Total Battery
Voltage
Current Channel
Working parameters Display
Discharging
Operation
Time
Capacity
charged
Task status
Cell Voltage
Discharging Status : Simple Operation
1.Connect power supply to the charger, wait for the system to complete its self-checking. Con
nect the battery to the charger in the standby interface;
2. After selecting the corresponding channel, short press the speed shuttle key to pop upthe
"Task Settings” menu, set the task to "Discharge" ; adjust the task parameters andshort
press the speed shuttle key to start the task;
Scroll the speed shuttle key during operation can switch the display information in the lower half of the screen which are
cell voltage and operating data ; the cell voltage can only be displayed in the mode of balance charging;
3. When the discharge task is executing, short press the speed shuttle key can pop up the
"Adjust Task” menu to adjust the discharge current ; long press the CH key can stop
the current task;
4. Enjoy.
Battery parameters and
percentage completed
Output
power

-40 mAh 26.70 V
External Discharging...
CH1 00:00:18
-8.8
W
-236
A
Pb-12S(1.90V) 2
0
pcs
35
C1.11
mWh
26.71V
Total Battery
Voltage
Task Status
Output
Current
Capacity
charged
Charged Times
Input Power
Output Power
Operation Time
Input
Power
Operating
Temperature
Working Parameters Display
Operation and Setup
External Discharging
13
P6 Smart Charger
Current Channel Battery Parameters
External Discharging status : Simple Operation
1. Connect the battery, which is going to discharge ,to the input ends( DC port) of the
charger, and wait for the system to complete its self—checking, then in the standby
interface, connect the high power resistance load to the charger's output ends ;
2. After selecting the corresponding channel, short press the speed shuttle key to pop up
the "Task Settings” menu, set the task to "External Discharge” ; adjust the task parameters and
short press the speed shuttle key to start the task;
3. When the External discharge task is executing, short press the speed shuttle key can pop up the
“Adjust Task" menu to adjust the external discharge current ; long press the CH key can stop the
current task;
4. Enjoy.

56 mAh 22.87 V
Storage Charging...
CH1 00:1:44
3.811V
3.814V
1
4
3.812V
3.807V
2
5
3.811V
3.813V
3
6
1.6
W
38
A
LiPo-6S(3.81V) 44% 2
Total Battery
Voltage
Task Status
Output
Current
Capacity
charged
Cell Voltage
Output Power
Operation Time
Battery parameters and
percentage completed
Working Parameters Display
Operation and Setup
14
P6 Smart Charger
Storage Charging
Storage Charging Status : Simple Operation
1. Connect power supply to the charger, wait for the system to complete its self-checking. Con
nect the battery to the charger in the standby interface;
2. After selecting the corresponding channel, short press the speed shuttle key to pop up the
“Task Settings" menu, set the task to “Storage” ; adjust the task parameters, and short
press the speed shuttle key to start the task;
Scroll the speed shuttle key during operation can switch the display information in the lower half of the screen, which are
cell voltage and the operating data ; the cell voltage only be displayed in the mode of balance charging.
3. When the storage task is executing, short press the speed shuttle key can pop up the"Adjust
Task" menu to adjust the storage current ; long press the CH key can stop the current task;
4. Enjoy.
Current Channel

Operation and Setup
0 mAh 24.23 V
Balancing...
CH1 00:00:38
4.048V
4.046V
1
4
4.044V
4.015V
2
5
4.011V
4.061V
3
6
0.0
W
-12
A
LiPo-6S(4.04V) 76% 2
15
P6 Smart Charger
Current Channel
Balancing
Balancing Status : Simple Operation
1. Connect power supply to the charger, wait for the system to complete its self-checking.
Connect the battery to the charger in the standby interface;
2. After selecting the corresponding channel, short press the speed shuttle key to pop up
the “Task Settings" menu, set the task to “Balance” ; adjust the task parameters, and
short press the speed shuttle key to start the task;
Scroll the speed shuttle key during operation can switch the display information in the lower half of the screen which are
cell voltage and the operating data;
3. When the balance task is executing, short press the speed shuttle key can pop up the“Adjust
Task" menu to adjust the balance current ; long press the CH key can stop the current task;
4. Enjoy.
Total Battery
Voltage
Task Status
Output
Current
Capacity
charged
Cell Voltage
Operation Time
Battery parameters and
percentage completed
Working Parameters Display
Output Power

Working Parameters Display
Operation and Setup
Regenerative Discharge
Regenerative Discharge status : Simple Operation
1. Connect the battery ,which is going to receive power ,to the input ends of the charger
and wait for the system to complete the self-checking . Connect the discharge battery
to the output ends of the charger in the standby interface ;
2. In the standby state , short press the speed shuttle key to pop up the “Task Settings"
menu, set the task to “Regenerative Discharge" ; adjust the task parameters, short
press the speed shuttle key to start the task ;
Scroll the speed shuttle key during operation can switch the display information in the lower half of the screen, which
are cell voltage and the operating data ; the cell voltage can only be displayed in the mode of balance charging.
3. When the task of Regenerative Discharge is executing, short press the speed shuttle key
can pop up the "Adjust Task” menu to adjust the Regenerative Discharge current ;
long press the CH key can stop the current task ;
4. Enjoy.
-3
mAh
23.46 V
Regenerative Discharge...
CH1 00:00:06
3.898V
3.897V
1
4
3.900V
3.905V
2
5
3.903V
3.893V
3
6
-3.1
W
-71
A
LiPo-6S(3.60V) 56% 2
16
P6 Smart Charger
Total Battery
Voltage
Task Status
Output
Current
Capacity
charged
Cell Voltage
Output Power
Operation Time
Battery parameters and
percentage completed
Current Channel
Table of contents
Other HOTA Batteries Charger manuals