Sterling Power ProSport 5 Series Programming manual

SALTWATER
T E S T E D
WATERPROOF
and
F u l l y A u t o m a t i c C h a r g i n g
ProSport 5 & 5/5 Series
Owner's Manual and Installation Guide
For all product, installation or service questions please visit
IMPORTANT NOTICE
Please save and read all safety, operating and installation instructions before
installing or applying AC power
Constructed to:
Marine UL 1236
FCC Class A Part 15
Models Amperage No. Of Banks Volts
ProSport 5 5 1 Bank 12
ProSport 5/5 10 2 Banks 12 v 1 bak 24 12/24
www.sterling-power.com
9am to 5pm (GMT)
Table Of Contents page
Safety Instructions... 1 - 2
ProSport Overview.. 4
Installation Guidelines. 4 - 6
Charging Your Batteries... 6 - 7
Maintenance... 7
Trouble Shooting... 8
Specifications 8
Customer Service & Warranty..
Standard Edition 4 stage Battery Charger
English
German
French

General Safety Instructions
Before connecting your batteries or AC power, read all instructions and cautionary markings
on the battery charger and batteries.
CAUTION -To reduce the risk of injury; charge only lead acid type rechargeable batteries
(lead acid, sealed lead acid, gel cell and AGM). Other types of batteries may burst, causing
personal injury.The is factory set for lead acid and gel batteriesPro Sport
Do not operate the charger if it has received a sharp blow, direct hit of force, dropped or
otherwise damaged in any way.
Do not disassemble the charger. Call the factory directly when service or repair is required.
Incorrect assembly may result in risk of electrical shock or fire.
To reduce the risk of electrical shock, remove AC power from the charger prior to any
maintenance or cleaning.
WARNING: RISK OF EXPLOSIVE GASES
WORKING IN THE VICINITY OF A LEAD ACID BATTERY IS DANGEROUS. BATTERIES
GENERATE EXPLOSIVE GASES DURING NORMAL BATTERY OPERATION. FOR THIS
REASON IT IS OF EXTREME IMPORTANCE THAT EACH TIME BEFORE USING YOUR
CHARGER YOU FOLLOW THESE SAFETY INSTRUCTIONS.
To reduce risk of battery explosion, follow these instructions and those published by the
battery manufacturer, and of any equipment you intend to use in the vicinity of a battery.
Review all cautionary markings and labels.
Personal Safety Precautions
Someone should be within the range of your voice or close enough to come to your aid
when working near a lead acid battery.
Have plenty of water and soap nearby in case battery acid comes in contact with skin,
clothes or eyes.
Wear complete eye protection and clothing protection. Avoid touching eyes while working
with a battery.
If battery acid contacts skin or clothing, wash immediately with soap and water. If acid
enters the eye(s) flood eye(s) with running cold water for at least 10 minutes and get
medical attention immediately.
S a f e t y I n s t r u c t i o n s
1

2
Personal Safety Precautions Continued
Never smoke or allow a spark or a flame in the vicinity of a battery or engine.
Be extra cautious to reduce risk of dropping a metal tool onto a battery. It may spark or
short-circuit the battery or other electrical parts that may cause explosion.
Remove all personal metal items such as rings, bracelets, necklaces, watches, and jewelry
when working near a battery. A battery can produce a short circuit high enough to weld
a ring or any metal, causing serious burns.
Use the charger for charging lead acid and gel batteries only
. It is not intended
to supply low voltage electrical systems other than in a marine application. Do not use
the battery charger to charge dry cell batteries that are commonly used with home
appliances. These batteries may burst and cause injury to persons and property.
Never charge a frozen battery.
Safety Precautions Prior to Charging Batteries
If necessary to remove a battery from a boat to charge, always remove grounded terminal
from battery first. Make sure all accessories in the boat are off, as to not cause an arc.
Be sure the area around the charger and batteries is well ventilated while the batteries
are being charged. Gases can be forcefully blown away using a piece of cardboard or
other nonmetallic material as a fan.
Clean battery terminals with full eye protection to prevent corrosion from coming in
contact with eyes.
Add distilled water in each cell until electrolyte reaches levels specified by the battery
manufacturer. This helps purge excessive gases from cells. Do not overfill. For batteries
without caps, carefully follow manufacturer's recharging instructions.
Study all manufacturer’s specific precautions, such as removing or not removing cell
caps while charging, in addition to rates of charge.
Extension cords should be industrial grade / heavy duty (3 pronged) U.L. approved and grounded.
Check extension cord before use for damage, bent prongs, and cuts. Replace if damaged.
Always make your extension cord connection on the charger side first. After connecting
the extension cord to the charger then proceed to plug the extension cord to a nearby
240 VAC RCD protected outlet.
Always remove the extension cord from the 240 VAC outlet first when charging is completed
followed by unplugging the charger.

General Overview
The charger is a fully Automatic/ Electronic On-board Marine Battery
Charger. ProMite is pre-wired for easy installation and is 100% waterproof for fresh
and salt water applications.
The incorporates a durable one piece plastic housing. The ProMite offersPro Sport Lt
fully automatic charging which includes a "Float " maintenance mode that is safe
for long and short term storage. can be left on indefinitely without harmingPro Sport Lt
or over charging your batteries.
Easy to view LED indicators will provide you with AC Power On and Charging Status.
The LED Indicators can be seen from the front and side of the charger when
installed.
The is available in 2 models and can be used in 12 or 24 volt .Pro Sport
Please attach the DC output cable terminals as illustrated in the installation section of
this manual.
3
Fully Automatic Charging Overview
When the Battery Charger is turned on the green
AC power indicator with turn on followed by the red charging LED indicator.
The Automatic Charger will provide the following:
Pro Sport Charging - Red and Green LED On
During this mode the charger will use its available charging amps (as controlled
by temperature) until battery voltage is raised to 14.1 VDC (safe for lead acid or
AC Power and Charging LED Status Indicators
The ProMite includes two LED indicators as shown below.
Green "AC Power" LED indicator:
When on, the green LED indicates when AC Power is present.
Red " Charging" LED indicator:
When on, the red LED indicates the charger is in its Automatic Charging Mode.
When charging is complete only the green LED will remain on.
General Operation
Install your Pro |Sport Lt - Fully Automatic / Battery Charger to the
guidelines in this manual.
Make sure your charger and batteries are properly vented. Connect your extension
cord with no AC Power present to the charger and proceed to plug your extension
cord in at a nearby 230 v RCD (Ground Fault Circuit Interrupt) outlet.
With your charger plugged in properly, it will automatically charge your batteries
while it conditions and extends the life of your batteries.
always leave your charger plugged in to reduce sulfate buildup allowing your
batteries to be fully charged and maintained until their next use.
gel batteries).
Pro Sport Conditioning - Red and Green LED On
The ProSport will charge batteries to 14.1 VDC to complete charging while
conditioning batteries. Upon completion the ProMite will go to into its
maintenance mode.

4
14
13
12
11
14.1V
13.5V
Charging Conditioning Maintenance / Float Mode
Typical Average Voltage
Volts
Note: The only LED Indicator that will be on during the maintenance mode will
be the green "Power" LED indicator.
Installation
All ProSport Battery Chargers are designed to be permanently mounted on-board,
and can be mounted vertically or horizontally.
Always mount your ProSport Lt Charger in a compartment area that can be properly
ventilated during use.
Do NOT mix battery types on-board. All batteries should be of the same age
and in good operating condition.
Do NOT make any electrical connections to the charger or batteries until the
following steps are completed:
11 Easy to follow installation steps:
1. Select a mounting location that allows for free air ventilation with a minimum of 8 inches
of clear unobstructed space around and in front of the Battery
Charger. Open all battery and engine compartments and ventilate for at least 15 minutes
before starting the installation of the Charger.
Fully Automatic Charging Overview Continued
ProSport Float / Maintenance - Green LED Only On
During this mode the red "Charging" LED will turn off indicating that the charging
process is over and the charger is now maintaining your batteries on-board. Only
the green LED will remain on, indicating Power On / Float-Maintenance mode.
A precision 13.5 volts finishing voltage that maintains each battery (step down
voltage regulation mode) which is perfect for short or long storage periods and
will never overcharge your batteries.

5
Installation Continued
2. Confirm the selected mounting location allows for a minimum of 200 mm inches of free space
around front and sides of the charger. Do not install charger on carpeted ,
upholstered , vinyl or varnished areas. Be sure to place the charger in an accessible
area where all indicators are viewable. Confirm all battery cables can reach each of the
batteries.
3. Using the charger as a template use a small awl or screwdriver to mark the position
of each mounting hole.
4. Using a 1/8" drill bit, drill pilot holes in the (4) marked locations as described in step 3.
Apply a silicon sealer in each of the mounting locations to waterproof the screw holes.
5. Position the charger over the mounting holes and secure with a power screwdriver
by installing 4 marine grade or stainless steel screws. (mounting screws not included
)
1/8" pilot hole
with silicon sealer
IMPORTANT NOTICE
Confirm the surface you will
be mounting the charger to is
adequate in strength and
thickness to hold the charger
in place with the mounting
screws you have selected.
6. Prepare each battery in advance by cleaning each terminal post with a wire
brush until a shiny surface is obtained.
IMPORTANT NOTICE
As you prepare to attach the positive (red) and negative (yellow or black wires)
to the batteries there will be brief low power spark that is generated as you
make the connection. This is due to the high frequency capacitors taking a charge.
Make sure the (black or yellow) wires are connected as illustrated to the
negative side of the battery and the red wires are connected to the positive
side or the battery.
7. Run your cables free from sharp objects and hold each of them in place with
cable ties. Coil excess cable, do not cut or shorten the length of the cables as there
are in-line fuses located 4 inches from the end of each red (positive) cable. These
fuses are in place to protect the charger and output cables in the event of a short
or reverse polarity.
8. Connect the DC output cables as illustrated on page 8. Make sure the (black or
yellow) wires are connected as illustrated to the negative side of the battery and
the red wires are connected to the positive side of the battery.
9. Make sure all DC connections are tight and correct.
10. Locate the AC power cord in an open-air area of your boat at least 21 inches
from the charger, batteries and fuel fill lines.

6
ProSport Series Wiring Diagrams
black or
yellow
Motor Battery 1
+_
AC power
output no.1
Pro Sport 5 Wiring Diagram
red
Charging Batteries
The Series is designed to charge and maintain your batteries. Please follow thesePro Sport
steps each time you use your ProMite Charger:
1.Open all battery compartments and ventilate for at least 15 minutes before applying AC
power to your charger.While charging your batteries make sure to keep your battery
compartment open allowing for free air ventilation.
You are now connected and charging your batteries. View the LED indicators.
Assuming your batteries are discharged you should observe both the green "Power"
LED and the red "Charging" LED on, indicating charging mode is in process.
Lead Acid (Flooded) / Gel Charging Profile
The Battery Charger is factory set with a safePro Sport Lt
charging profile for lead acid (flooded) and gel batteries.
IMPORTANT NOTICE
If only two batteries are used with a 3 bank charger, than connect the unused
output cable to either one of the two batteries, as instructed in item 8 above
Always connect each charger output to a single 12V battery even if the batteries
are wired series for 24V or 24V with an engine battery.
ProSport Series Wiring Diagrams
12v
Battery 1
+_
AC power
output no.1
output no.2
Pro Sport Lt 5/5 1 x 12 v 10 amp
red
black or
yellow
red
black or
yellow
12v
Engine
Motor Battery 2
Aux Battery
Battery 1
+_+_
AC power
output no.1
output no.2
Pro Sport Lt 5/5 2 x 12 v Wiring Diagram
red
black or
yellow
red
black or
yellow
12v 12v
+_+_
AC power
output no.1
output no.2
Pro Sport Lt 5/5 1 x 24 v Wiring Diagram
red
black or
yellow
red
black or
yellow
12v 12v
24 v

Charging Batteries Continued
3. Connect a heavy duty extension cord to the ProSport charger first. After
connecting the extension cord to the charger then proceed to plug the extension cord to
a nearby 230 v RCD protected (Ground Fault Circuit Interrupt) outlet.
4. Observe the on-board LED indicators for a solid green and red Indication. This will tell
you the batteries are in the charging process.
5.Charge your batteries until only the green LED indicator remains on. This indicates the
charging process is completed and your batteries are fully charged and are now being
maintained in a gentle float / storage mode. (recommended while your boat is not in use).
The charger can be left on in this mode indefinitely and will never overcharge your batteries.
Refer to the page 4.
6. When ready to use your boat, unplug the extension cord from the 230 v AC outlet first,
followed by unplugging the charger.
Important Notice: FCC Class A Part 15 Notification.
YourPro Sport L Battery Charger has been designed and tested to
comply with FCC Class A part 15. and CE These regulations are to provide adequate
protection against harmful interference while operated in a commercial application.
If in a residential setting you are encountering interference with TV and radio
reception. Simply remove AC from the charger to confirm if your battery charger
is causing interference. End user can explore the following to minimize interference.
1) Chose a different AC circuit to power your Charger
2) Make sure your outlet is properly grounded
3) Re-position receiving antenna
4) Purchase a separate AC line filter
7
Owner's Periodic Maintenance Guide
Item:
Process:
When:
Battery Connections
Clean and tighten all battery connections. Follow battery
manufacturer's instructions for cleaning a battery. Clean all
battery terminals with a wire brush where required and tighten
all battery connections.
Monthly
Item:
Process:
When:
Battery Electrolyte
Per battery manufactures instructions monitor and maintain
proper levels of distilled water in each battery.
Monthly
Item:
Process:
When:
ProMite DC Output Wiring
Visually inspect all wiring for cuts and abrasions. Contact
ProMariner if charger needs to be serviced with new wiring.
Monthly
Item: AC Power Cord and Mounting Hardware Inspection
Process: Process: Visually inspect the AC power cord. Confirm ground
blade is present and all plug blades are in good conditions
and not bent out of place.
Check all mounting hardware to ensure there is no loose
hardware. Tighten were required.
When: Monthly

Trouble Shooting Guide
Battery is Not Charging, Red and Green Indicator is “on”
Confirm all charger cables are installed with the correct polarity connections
at each battery, and that all connections are clean and tight.
Reverse polarity
connections will blow output fuse, resulting in no output voltage.
With the charger on, read DC voltage at each battery. If any of the readings
are less than 13 VDC Proceed with the following:
A. Disconnect AC power at the 230 VAC outlet.
B. Remove charger cables from each battery.
C. Reconnect AC power and read DC Voltage across each output cable, if
output voltage is approximately 14.1DC the charger is ok and each battery
should be tested with a hydrometer with the charger and engine off to determine
if one or more batteries have bad cells. (batteries should always be replaced
in sets, and always the same type.)
D. If there is no output when trying to read DC voltage check each output fuse
and replace as needed.
If the DC voltage at each charger output is less than 13.0 volts contact Sterling Power
for product service.
No Red or Green LED Indicator
Check for loss of AC power at the 230VAC Outlet. Confirm the RCD (Ground Fault
Circuit Interrupter) has not tripped. Check with a meter to confirm 230 v a/c
is present at the end or your extension cord.
Confirm all charger cables are installed with the correct polarity connections
at each battery and that all connections are clean and tight.
With the AC Power removed and the engine off, check the charge level of
each battery with a DC meter or Handheld DC Tester. If there is no charge
level indication for a battery, check each battery with a hydrometer to determine
if it has one or more bad cells. (batteries should always be replaced in sets,
and always the same type.)
If everything above checks out ok, contact ProMariner for product service.
8
Specifications
Pro Sport 12 5 1 1.5 m 75 x 150 x 65
. 2.5 kg 180-260
Pro Sport 12 & 24 10 2/2 1 x 1.5 m 230 x 130 x 90
3.5 kg 180-260
model volts amps banks DC cable L size L x W x H mm Est. weight AC in

9
Customer Service & Warranty
We are committed to customer satisfaction and value your business. If at any time
during the warranty period you experience a problem with your new Pro Sport
Battery Charger simply contact us www.sterling-power.com
PROMITE
LIMITED TWO-YEAR FACTORY WARRANTY
This charegr model is guaranteed against defects in material and workmanship to the original consumer in
normal use for 2 years from the date of purchase. Sterling Power Products will at it's discretion repair or replace
free of charge any defects in material or workmanship. The following conditions apply:
• Warranty is calculated from the date on the purchase invoice
• Warranty void if unauthorized repairs attempted.
• Customer is responsible for returning the product to Sterling power products.
Inbound shipping costs must be prepaid. The warrantee is at the factory
• This warranty does not cover blemishes due to normal wear and tear or
damaged caused by accidents, abuse, alterations or misuse.
• Cosmetic repairs can be done at owner's request and expense.
Purchase or other acceptance of the product shall be on the condition and agreement that Sterling Power Products
SHALL NOT BE LIABLE FOR INCIDENTAL OR CONSEQUENTIAL DAMAGES OF ANY KIND. (Some states do not
allow the exclusion or limitation of incidental or consequential damages, so the above limitations may not apply
to you.) This warranty is made in lieu of all other obligations or liabilities on the part of Sterling Power Products.
Sterling Power Products neither assumes nor authorizes any person for any obligation or liability in connection with
the sale of this product.
To make a claim under warranty, simply contact Sterling Power Products at www.sterling-power.com,
identifying the product and giving its locations. Follow the company’s return instructions, which will then be
provided by the company. Sterling Power will make its best effort to repair or replace the product, if found
defective within the terms of the warranty, within (10) days after return of the product to the company.
Due to the ever expanding nature of this company
( 5 factories in 12 years ) there is always a current information
problem.
Each time we move to a larger factory, the telephone numbers
and address change, this leaves all our literature and instructions
out of date, so we now only print out web site where all the latest
information can be obtained.
www.sterling-power.com

SALTWATER
T E S T E D
WATERPROOF
a n d
V o l l a u t o m a t i s c h e s L a d e n
ProSport 5 & 5/5 Serie
Handbuch und Installationsanleitung
Für alle Produkt-, Installlations- oder Fragen zur Anwendung,
ACHTUNG:
Bitte lesen Sie alle Sicherheits-,Bedienungs- und Installationsanleitungen genau
bevor sie AC Strom installieren oder einschalten
Constructed to:
Marine UL 1236
FCC Class A Part 15
Modelle Ampere Batteriebanken Volt
ProSport 5 5 1 Bank 12
ProSport 5/5 10 2 Bänke12V, 1 Bank 24V 12/24
bitte gehen Sie zu www.sterling-power.com
Inhalt Seite
Sicherheitsanleitung... 1 - 2
ProSport Überblick.. 4
Installationsrichtlinien.. 4 - 6
Batterien laden... 6 - 7
Wartung... 7
Fehlerhilfe... 8
Spezifikationen 8
Kundenservice & Gewährleistung..
Standard Edition 4 stage Battery Charger

Allgemeine Sicherheitshinweise
Bevor Sie Ihre Batterien an den AC Strom anschliessen, lesen Sie alle Anleitungen und
Warnkennzeichnungen am Ladegerät und den Batterien.
VORSICHT -zur Risikoreduktion: laden Sie nur wiederaufladbare Blei-Säure Batterien
(Blei-Säure, geschlossene Blei-Säure,Gelzelle und AGM). Andere Arten von Batterien
könnten platzen und Verletzungen verursachen.
Das ProSport hat eine Werkseinstellung für Blei-Säure und Gel Batterien
Benützen Sie Das Ladegerät nicht falls es einen heftigen Schlag oder kräftigen Stoß
erlitten hat, fallen gelassen wurde, oder anderwertig beschädigt ist.
Nehmem Sie den Lader nicht auseinander. Rufen Sie direkt beim Werk an wenn Service
oder Reparatur benötigt werden. Bei falschem Zusammenbau riskieren Sie einen .
Um dieses Risiko zu reduzieren, entfernen Sie den AC Strom vom Ladegerät bevor
Reinigung oder Wartung.
Persönliche Sicherheitsvorkehrungen
S a f e t y I n s t r u c t i o n s
1
elektrischen Schock oder Feuer.
WARNUNG: RISIKO EXPLOSIVER GASE
ES IST GEFÄHRLICH NAHE ZU EINER BLEI-SÄURE BATTERIE ZU
ARBEITEN.BATTERIEN ERZEUGEN EXPLOSIVE GASE BEI
NORMALEM BATTERIE-BETRIEB.DAHER IST ES EXTREM WICHTIG
VOR JEDEM GEBRAUCH DES LADEGERÄTES DASS SIE DIESEN
SICHERHEITSANLEITUNGEN FOLGEN.
Um das Risiko einer Batterieexplosion zu reduzieren,folgen Sie dieser Anleitung
und der des Batterieherstellers, und denen jedes Equipments welches Sie in der
Nähe einer Batterie verwenden wollen.
Lesen Sie alle Warnhinweise und Aufkleber auf den Geräten.
Wenn Sie in der Nähe einer Blei-Säure Batterie arbeiten,sollte jemand
in Hörweite von Ihnen sein um zu Ihrer Hilfe kommen zu können.
Sie sollten genug Wasser und Seife bereit haben, falls Batteriesäure
mit Ihrer Haut,Kleidung oder Ihren Augen in Kontakt kommt.
Tragen Sie kompletten Augenschutz. Vermeiden Sie Ihre Augen zu
berühren wenn Sie mit einer Batterie arbeiten.
Falls Batteriesäure an Ihre Haut oder Kleidung kommt, waschen sie
sofort mit Wasser und Seife. Falls Säure in die Augen kommt, spülen
Sie für mindestens 10 Minuten und suchen Sie sofort medizinische
Hilfe auf.

2
Persönliche Sicherheitsvorkehrungen fortgesetzt
Sicherheitsvorkehrungen vor dem Laden der Batterien
Bringen Sie niemals eine brennende Zigarette, eine offene Flamme oder Funken in
die Nähe einer Batterie oder eines Motors.
Seien Sie besonders wachsam dass kein Metallwerkzeug auf die Batterie fallen
kann. Dies kann Funken erzeugen oder die Batterie oder andere Geräte
kurzschließen. Dies kann eine Explosion hervorrufen.
Entfernen Sie alle persönlichen Gegenstände die metallisch sind. zB Ringe,
Armbänder,Halsketten, Uhren und Schmuck wenn Sie mit/bei einer Batterie
arbeiten.
Eine Batterie kann einen Kurzschluss erzeugen der hoch genug ist Metall zu
verschweißen,was zu ernsthaften Verbrennungen führt.
Verwenden Sie das Ladegerät nur um Blei-Säure und Gelbatterien zu laden. Es
ist nicht vorgesehen elektrische Systeme mit niedriger Spannung zu speisen,
ausser in einer Marine-Anwendung. Verwenden Sie den Lader nicht um
Trockenbatterien zu laden welche im Allgemeinen für Haushaltsgeräte verwendet
werden. Diese Batterien könnten platzen und Verletzungen oder Schaden anrichten.
Laden Sie niemals eine gefrorene Batterie.
Falls es notwendig ist eine Batterie zum Laden vom Boot zu nehmen, entfernen
Sie immer den geerdeten Batteriepol zuerst. Stellen Sie sicher dass alles Zubehör
auf dem Boot abgeschalten ist, um eine Bogenentladung zu verhindern.
Während des Ladens sollten Batterie und Ladegerät immer gut belüftet sein.Gase
können durch Fächern eines Stück Kartons oder ähnlichem, nicht metallischem
Material vertrieben werden.
Reinigen Sie Batteriepole mit vollem Augenschutz damit Korrosion nicht in die
Augen gelangen kann.
Füllen Sie distilliertes Wasser in jede der Zellen bis das Electrolyt die
herstellerbestimmten Levels erreicht. Dies hilft, überflüssige Gase aus den Zellen
zu vertreiben. Überfüllen Sie nicht.Bei Batterien ohne Verschlusskappen, folgen
Sie bitte genau den Ladeanleitungen des Herstellers.
Beachten Sie alle Vorsichtsmaßnahmen des Herstellers, wie zB das Entfernen
oder Nicht-Entfernen der Zellverschlusskappen während des Ladens und die
Lademessungen.
.

Verlängerungskabel sollten industriellen Standard haben und
hochleistungsfähig sein (dreiadriges Kabel) U.L.anerkannt und geerdet.
Überprüfen Sie das Verlängerungskabel vor Gebrauch auf Schäden,
verbogene Leitungen und Schnitte. Ersetzen Sie es, falls beschädigt.
Die Verlängerung immer zuerst auf der Ladegerät-Seite
anschliessen.Danach stecken Sie es an einem 240VAC RCD geschützten
Anschluss an.
Entfernen Sie das Verlängerungskabel immer zuerst vom 240VAC
Abschluss wenn das Laden beendet ist, dann können Sie das Ladegerät
abstecken.
Allgemeine Übersicht
Das Ladegerät ist ein voll automatisches, elektronisches On-Board Marine
Batterieladegerät. ProMite ist vor-verkabelt und ist 100% wasserdicht, für Frisch-
und Salzwasser Anwendungen.
Das ProSport Lt umfasst eine Plastikschale die aus einem Stück besteht. Das
ProMite bietet vollautomatisches Laden mit einem Erhaltungsladung-Modus welcher
für Kurz- und langfristige Lagerung geeignet ist. ProSport Lt kann für unbegrenzte
Zeit angelassen sein, ohne Ihre Batterien zu schädigen oder zu überladen.
Leicht sichtbare LEDs zeigen Ihnen AC Power On und den Ladestatus.Nach
Installation sind die LED Anzeigen von Vorne und der Seite des Laders sichtbar.
Das ProSport ist erhältlich in 2 Modellen und kann auf 12V oder 24V verwendet
werden.
Bitte bringen Sie die DC Ausgangs-Kabelanschlüsse wie im Einbau-Abschnitt
dieses Handbuches illustriert,an.
Allgemeine Bedienung
Installieren Sie Ihr ProSport L-Vollautomatisches Ladegerät nach den Richtlinien in
diesem Handbuch.
Stellen Sie gute Belüftung Ihres Laders und der Batterien sicher.Verbinden Sie Ihre
Verlängerung ohne angeschlossenen AC Strom zum Lader und dann zu einer 240V
RCD (Erdungsfehler Kreislauf-Unterbrechend) Buchse.
Sobald das Ladegerät ordentlich angeschlossen ist, wird es automatisch Ihre
Batterien laden und sie zugleich aufbereiten und deren Leben verlängern.
Lassen Sie Ihr Ladegerät immer angeschlossen um Sulfatbildung zu reduzieren.
Somit werden Ihre Batterien vollständig geladen und bis zum nächsten Gebrauch
auch so erhalten.

AC Power und Ladungs LED Indikatoren
Das ProSport hat 2 LED Indikatoren:
Grünes “AC Power” LED: das grüne LED zeigt wenn Strom vorhanden ist
Rotes “Laden” LED: das rote LED zeigt dass der Lader im automatischen
Lademodus ist.
Wenn vollständig geladen, dann bleibt nur das grüne LED an.
Vollautomatisches Laden - Überblick
Wenn das Gerät eingeschalten wird geht das grüne Power LED an,
gefolgt von dem roten Ladungs LED.
Beim automatischen Laden:
?ProSport Laden - rotes und grünes LED an
Während dieses Modus nutzt der Lader alle vorhandenen Amp (durch Temparatur
kontrolliert) bis die Batteriespannung bei 14,1 V erreicht (sicher für Blei-Säure und
Gelbatterien)
?ProSport Konditionierung - rotes und grünes LED an
Das ProSport lädt Batterien bis zu vollen 14,1 V und konditioniert sie gleichzeitig.
Das Gerät in den Erhaltungsmodus wenn das Konditionieren abgeschlossen ist.
?ProSport Erhaltungsmodus - nur das grüne LED an
Während dieses Modus schaltet sich das rote LED automatisch ab und zeigt somit
an dass der Ladevorgang vorüber ist: Das Gerät erhält die Spannung Ihrer Batterien
an Bord nun aufrecht. Nur das grüne LED bleibt an, dies bedeutet dass der
Erhaltungsmodus aktiv ist und das Gerät an ist. Die Endspannung
ist genau 13,5V. Dies ist perfekt für kurz- oder langfristige Lagerung
und wird Ihre Batterien niemals überladen.
Notiz: Das einzige LED welches in diesem Modus an ist ist das grüne “Power on”
LED.
welche die
Batterien erhält
3

5
14
13
12
11
14.1V
13.5V
Laden Konditionieren Erhaltung / Schwebe Modus
Typische Durchschnittsspannung
Volts
Installation
Alle ProSport Ladegeräte sind dazu designt dauerhaft an Bord befestigt zu sein und
können vertikal oder horizontal installiert werden.
Installieren Sie Ihren ProSport immer in einem Bereich der während des Gebrauches
ordentlich belüftet werden kann.
Verwenden Sie KEINE unterschiedlichen Batterietypen an Bord. Alle Batterien sollten
gleich alt sein und in gutem operativem Zustand.
Stellen Sie KEINE elektrischen Verbindung zu Batterien oder Ladegerät her, bevor die
folgenden Schritte beachtet wurden:
11 leicht zu befolgende Installationstipps:
1. Finden Sie einen Installationsort der gut belüftbar ist und zumindest 25-30cm
Freiraum rundherum hat.
Ladegerät: Öffnen Sie alle Batterie und Motor Abteilungen und lüften für mindestens
15 Minuten bevor Sie mit der Installation des Laders beginnen.
2.Stellen Sie sicher dass mindestens 25-30cm Freieraum seitlich und an der Front des
Ladegerätes zur Verfügung stehen werden wenn es installiert ist. Installieren Sie es
NICHT in einem Bereich der gepolstert, geteppicht, lackiert oder mit Vinyl ausgelegt
ist. Das Gerät sollte leicht zugänglich sein und alle Indikatoren leicht sichtbar. Stellen
Sie sicher dass alle Batteriekabel zu jeder der Batterien reichen.
3.Verwenden Sie das Ladegerät als Markierungsmaske. Sie können die
Montagelöcher mit einem Schraubenzieher oder Stift markieren.
4. Bohren Sie die 4 markierten Löcher mit einem 3-4mm Bohrer. Füllen Sie diese mit
Silikon um sie wasserfest zu machen.
5.Halten Sie den Lader über die Löcher und sichern Sie ihn indem Sie 4 Marine- oder
Edelstahlschrauben mit einem elektrischen Schraubendreher montieren.
(Montageschrauben nicht inkludiert)

5
3-4mm Loch
mit Silikonabdichtung
WICHTIGE NOTIZ
Stellen Sie sicher dass
die Montagefläche ausreichend
Stärke und Dicke besitzt
um das Ladegerät mit den von Ihnen
gewählten Schrauben festzuhalten.
6.Bereiten Sie alle Batterien vor indem Sie jeden einzelnen Pol mit einer Drahtbürste
blank putzen .
WICHTIGE INFORMATION
Wenn Sie positiv (rot) und negativ (gelb oder schwarz) zu den Batterien verbinden
wird ein schwacher Stromfunke springen. Dieser entsteht weil die
Hochfrequenzkompensatoren eine Ladung beziehen. Stellen Sie sicher dass die
schwarzen oder gelben Kabel, wie abgebildet, zur negativen Seite und die roten
Kabel zur positiven Seite der Batterie verbunden werden.
7. Verlegen Sie Ihre Kabel außer Reichweite scharfer Objekte und befestigen Sie sie
mit Kabelbindern. Überflüssiges Kabel sollte aufgewickelt werden, nicht
abgeschnitten oder gekürzt! Es befinden sich im roten (positiven) Kabel Sicherungen
die etwa 15cm vom Ende sitzen (an beiden Seiten). Diese Sicherungen sind dort um
das Ladegerät und Ausgangskabel zu schützen falls umgekehrte Polarität oder ein
Kurzschluss auftreten sollten.
8.Verbinden Sie die DC Ausgangskabel wie auf Seite 8 abgebildet. Stellen Sie sicher
dass die negativen (schwarz oder gelb) Drähte, wie abgebildet, zur negativen Seite
und die roten Drähte zur positiven Seite der Batterie verbunden werden.
9. Prüfen Sie dass alle DC Verbindungen richtig sind und festsitzen.
10. Verlegen Sie das AC Stromkabel in einem offen bereich Ihres Bootes (im Freien)
und halten Sie es mindestens 50-60cm vom Ladegerät, den Batterien und
Kraftstoffleitungen fern.
Sie sind nun verbunden und laden Ihre Batterien. Achten Sie auf die LED
Indikatoren. Falls Ihre Batterien entladen sind sollte sowohl das grüne “Power” LED
als auch das rote “Laden” LED aufleuchten. Dies zeigt an dass der Ladevorgang
läuft.
Blei-Säure (Feuchtbatterie)/Gelbatterie Ladeprofil
Das ProSport Ladegerät hat eine Werkseinstellung für ein sicheres Ladeprofil für
Blei-Säure (Feucht-) und Gelbatterien.

6
schwarz oder
gelb
Motor Batterie 1
+_
AC Strom
Ausgang no.1
Pro Sport 5 Wiring Diagram
rot
Batterien laden
12v
Batterie 1
+_
AC Strom
Ausgang no.1
Ausgang no.2
Pro Sport Lt 5/5 1 x 12 v 10 amp
rot
schwarz oder
gelb
rot
schwarz oder
gelb
12v
Motor Batterie 2
Hilfs- Batterie
Batterie 1
+_+_
AC Strom
Ausgang no.1
Ausgang no.2
Pro Sport Lt 5/5 2 x 12 v Schaltplan
rot
schwarz oder
gelb
rot
schwarz oder
gelb
12v 12v
+_+_
AC Strom
Ausgang no.1
Ausgang no.2
Pro Sport Lt 5/5 1 x 24 v Schaltplan
rot
schwarz oder
gelb
rot
schwarz oder
gelb
12v 12v
24 v
?ProSport Serie Schaltplan
WICHTIGE NOTIZ
Falls nur zwei Batterien mit einem 3-Bank Ladegerät verwendet werden, verbinden
Sie das unbenutzte Ausgangskabel zu einer der Batterien, wie in Schritt 8
beschrieben.
Verbinden Sie immer jeden Ladeausgang zu einer einzelnen 12V Batterie,
auch wenn die Batterien für 24V in Serie geschalten sind, oder bei einer 24V
Starterbatterie.
ProSport Serie - Schaltpläne
Die ProSport Serie ist dazu designt worden Ihre Batterien zu laden und zu erhalten.
Bitte folgen Sie diesen Schritten bei jedem Gebrauch des ProSport Laders:
1. Öffnen Sie alle Batteriezellen und lüften Sie für zumindest 15 Minuten bevor Sie AC
Strom an Ihr Ladegerät zuführen. Während Sie Ihre Batterien laden, stellen Sie sicher
dass das Batteriefach offen ist, um genügend Ventilation zu ermöglichen.

7
Regelmäßige Pflegerichtlinien
Element:
Vorgang:
Wann:
Batterieverbindungen
Monatlich
Element:
Vorgang:
Wann:
Batterie Elektrolyte
Erhalten Sie die ordnungsgemäßen Levels an destilliertem Wasser
laut Hersteller-Handbuch für Ihre Batterien.
Monatlich
Element:
Vorgang:
Wann:
ProSport DC Ausgangs-Verkabelung
Begutachten Sie alle Kabel visuell auf Schnitte und Abnützungen
Kontaktieren Sie Sterling Power falls der Lader neue Verbindungen braucht.
Monatlich
Element: AC Stromkabel und Installationszubehör Inspektion
Vorgang: Überprüfen Sie das AC Stromkabel. Stellen Sie sicher dass der
Massezapfen vorhanden ist und die Steckzapfen in gutem
Zustand und nicht verbogen sind.
Überprüfen Sie das Installationszubehör und stellen Sie sicher
dass nichts abgängig oder locker ist. Ziehen Sie nach falls nötig.
Wann: Monatlich
3.Verbinden Sie zuerst das Hochleistungs-Verlängerungskabel zum ProSport
Ladegerät. Dann stecken Sie das Verlängerungskabel an eine 230V geschützte (mit
FI-Schutzschalter) Steckdose.
4.Stellen Sie sicher dass die LED Indikatoren in rot und grün durchgehend leuchten.
Dies zeigt Ihnen dass die Batterien geladen werden.
5.Laden Sie die Batterien bis nur noch das grüne Licht leuchtet. Das bedeutet dass
das Laden vorüber ist und die Batterien in einem sanften Erhaltungs-/Lager Modus
sind (empfohlen wenn das Boot nicht benutzt wird). Der Lader kann in diesem Modus
für unbestimmte Zeit bleiben und wird Ihre Batterien nie überladen (siehe Seite 4)
6. Wenn Sie soweit sind Ihr Boot zu benützen, stecken Sie die Verlängerung erst vom
230V AC Stromanschluss ab, dann stecken Sie das Ladegerät ab.
Wichtig: FCC Klasse A Teil 15 Notifikation
Ihr ProSport Batterie Ladegerät wurde designt und getestet um dem FCC Klasse A Teil
15 und CE Standard zu entsprechen. Diese Regulationen wurden festgelegt um
schädliche Störungen während einer kommerziellen Anwendung zu verhindern.Wenn
Sie den Lader in einer häuslichen Anwendung gebrauchen und eine Störung bei Ihrem
Radio oder Fernsehempfang haben, entfernen Sie die Stromzufuhr vom Ladegerät um
festzustellen ob dieses die Störung hervorgerufen hat.
Als Eigentümer können Sie folgende Dinge überprüfen um Störung zu minimieren:
1. Versuchen Sie einen anderen Stromkreis um Ihren Lader zu betreiben
2.Stellen Sie sicher dass die Dose ordentlich geerdet ist
3.Repositionieren Sie die Empfangsantenne
4.Kaufen Sie einen separaten AC Leitungsfilter
Reinigen und ziehen Sie die Batterieverbindungen fest. Folgen
Sie den Anleitungen des Herstellers zur Reinigung der
Batterie.Säubern Sie alle Batteriepole mit einer Drahtbürste falls
notwendig und ziehen Sie alle Verbindungen fest.

Hilfe bei der Fehlersuche
Batterie lädt nicht, Roter und Grüner Indikator sind “an”
Kein roter oder grüner LED Indikator
8
Spezifikationen
Pro Sport 12 5 1 1.5 m 75 x 150 x 65
. 2.5 kg 180-260
Pro Sport 12 & 24 10 2/2 1 x 1.5 m 230 x 130 x 90
3.5 kg 180-260
Modell Volt Amps Bänke DC Kabel L Größe L x W x H mm Gewicht ca. AC in
Checken Sie ob die Stromversorgung an der 230V Dose unterbrochen ist. Stellen
Sie sicher dass der FI-Schalter nicht gefallen ist. Prüfen Sie mit einem Voltmeter
fest dass Strom am Ende Ihre Verlängerungskabels ist.
Prüfen Sie dass alle Ladekabel mit der korrekten Polarität an jeder Batterie
verbunden sind und dass alle Verbindungen sauber und festsitzend sind.
Mit unverbundenem Strom und abgestelltem Motor, checken Sie das Ladelevel der
Batterien mit einem DC Meter oder DC Tester. Falls keine Ladeangabe bei einer
Batterie erscheint, checken Sie jede Batterie mit einem Hydrometer um festzustellen
ob Sie eine oder mehrere schlechte Zellen hat. (Batterien sollten immer gemeinsam
ausgetauscht werden und immer von der gleichen Art sein)
Falls all diese Checks ok sind, kontaktieren Sie Sterling Power Products.
Prüfen Sie dass alle Ladekabel mit den korrekten Polaritätsverbindungen an den
Batterien installiert sind und dass alle Verbindungen sauber und festgezogen sind.
Verbindungen mit umgekehrter Polarität brennen die Ausgangssicherung durch, das
Resultat ist keine Ausgangsspannung.
Lesen Sie die DC Spannung an den Batterien mit dem Ladegerät “an”. Falls
irgendeines der Ergebnisse weniger als 13V ergibt, folgen Sie diesen Schritten:
A.Trennen Sie die AC Stromverbindung am 230 V Ausgang.
B. Entfernen Sie die Ladekabel von allen Batterien
C. Verbinden Sie den AC Strom wieder und lesen Sie die DC Spannung an allen
Ausgangsleitungen. Falls die Spannung in etwa 14,1V ist, dann ist der Lader OK und
alle Batterien sollten mit einem Hydrometer getestet werden (dabei sollten Ladegerät
und Motor abgestellt sein) um festzustellen ob eine oder meherere Zellen beschädigt
sind. (Batterien sollten immer gemeinsam ersetzt werden und von der selben Art
sein)
D. Falls keine Ausgabe vorhanden ist wenn Sie die DC Spannung lesen wollen,
checken Sie alle Ausgangssicherungen und ersetzen sie falls nötig.
Falls die DC Spannung an allen Ladeausgängen weniger als 13V ist, kontaktieren
Sie den Sterling Power Produktservice.
This manual suits for next models
1
Table of contents
Languages:
Other Sterling Power Batteries Charger manuals
Sterling Power
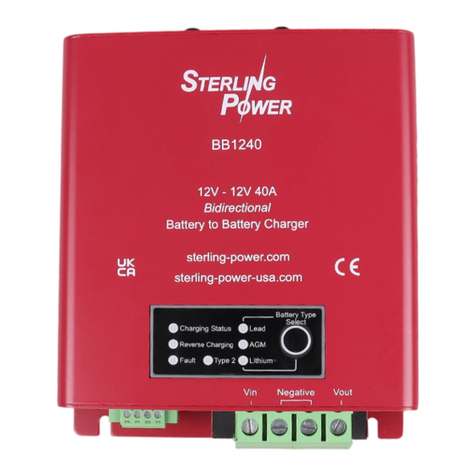
Sterling Power BB1240 User manual
Sterling Power
Sterling Power Portable Battery Charger B121 User manual
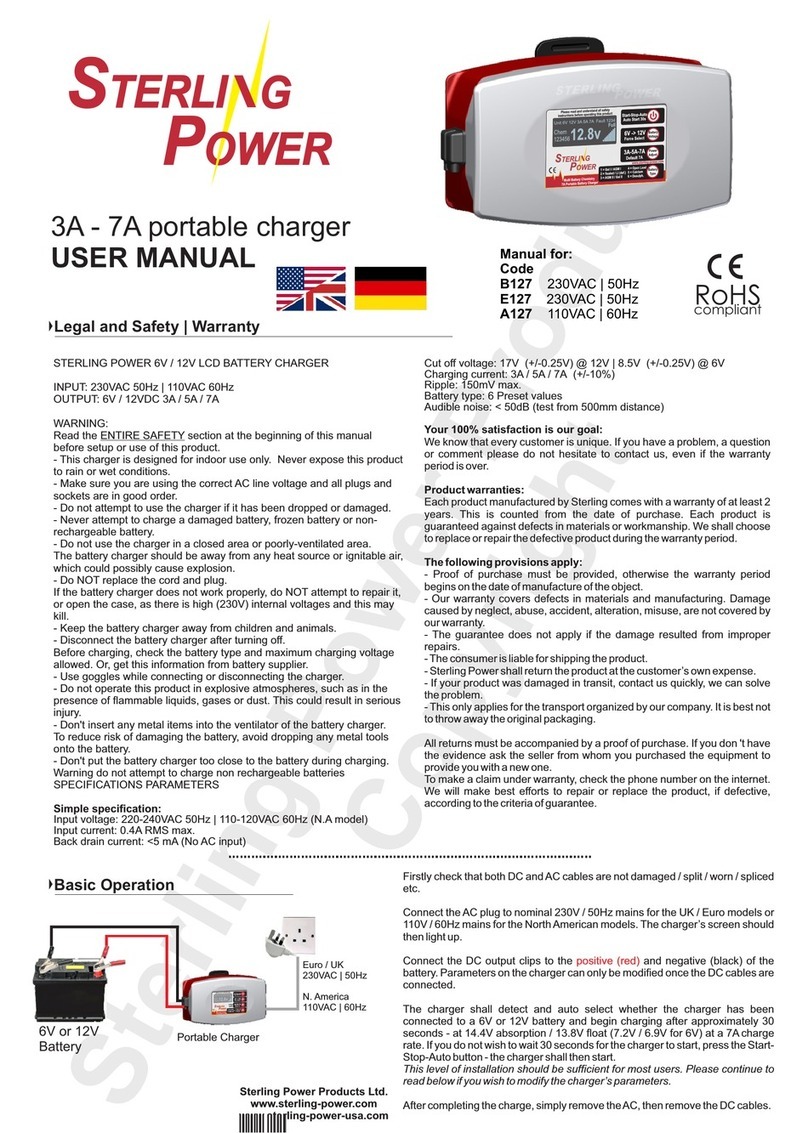
Sterling Power
Sterling Power B127 User manual

Sterling Power
Sterling Power BBWS1225 User manual
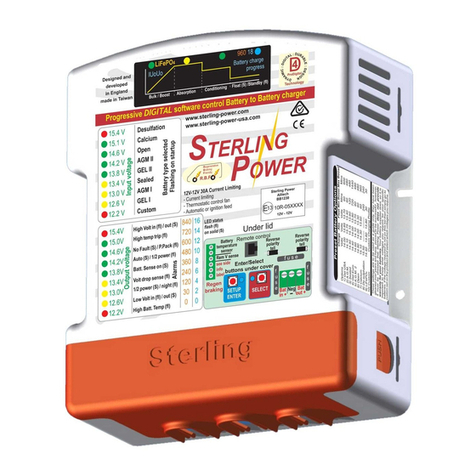
Sterling Power
Sterling Power Pro Batt Ultra User manual
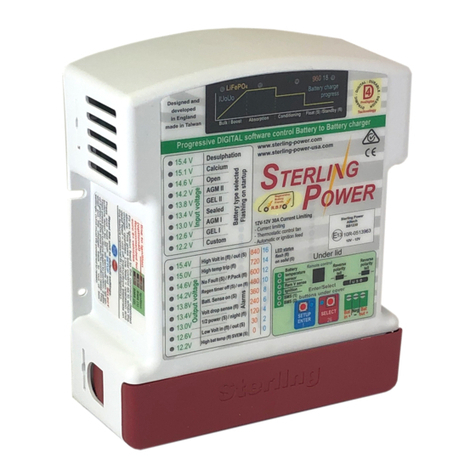
Sterling Power
Sterling Power BB1230 User manual
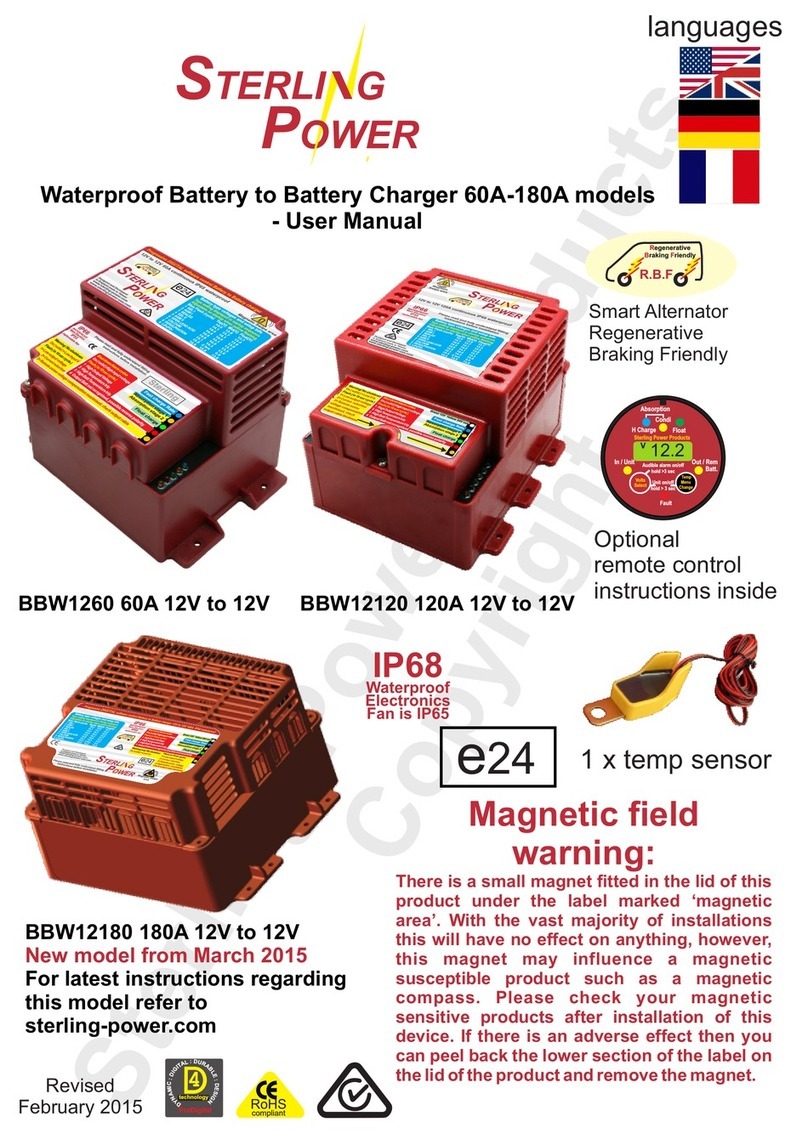
Sterling Power
Sterling Power BBW1260 User manual

Sterling Power
Sterling Power Pro Batt Ultra BB1260 User manual

Sterling Power
Sterling Power BB1224120 User manual

Sterling Power
Sterling Power Pro Batt Ultra User manual


