Stihl BG 45 User manual

STIHL BG 45
Instruction Manual
Owner's Manual
Manual de instrucciones
..
Manual del usuario

1BG 45
Printed on clorine-free paper
© 2000 Andreas Stihl AG & Co., Waiblingen
0458 294 3021. M1,5. C0. PM. Printed in USA
STIHl
english / USA
Contents
Parts and Controls ............................ 2
Safety Precautions ........................... 4
Assembling the Blower ................... 10
Fuel ................................................ 11
Fueling ............................................ 11
Starting / Stopping .......................... 12
Using the Blower ............................ 14
Cleaning the Air Filter ..................... 15
Adjusting the Carburetor ................ 16
Checking the Spark Plug ................ 17
Engine Running Behavior ............... 18
Rewind Starter ................................ 18
Operating Instructions .................... 19
Storing the Machine ........................ 19
Maintenance Chart ......................... 20
Maintenance and Repairs ............... 21
Key to Symbols .............................. 21
Special Accessories ....................... 21
Specifications ................................. 22
STIHL Incorporated Federal and
California Emission Control
Warranty Statement ........................ 23
This manual contains warnings,
operating and safety precautions for the
STIHL BG 45 blower.
Pay special attention to the safety
precautions outlined on pages 4 to 9.
Allow only persons who understand this
Manual to operate your blower.
To receive maximum performance and
satisfaction from your STIHL blower, it is
important that you read and understand
the maintenance and safety precautions
before using your blower.
Contact your STIHL dealer or the STIHL
distributor for your area if you do not
understand any of the instructions in this
Manual.
!Warning!
Because a blower is a high-speed tool,
some special safety precautions must
be observed as with any other power
tool to reduce the risk of personal injury.
Careless or improper use may cause
serious or even fatal injury.
STIHL's philosophy is to continually
improve all of its products. As a result,
engineering changes and improvements
are made from time-to-time. If the
operating characteristics or the
appearance of your blower differs from
those described in this Manual, please
contact your STIHL dealer for
informations and assistance.

2
english / USA
BG 45
1 Ta b
2 Interlock button
3 Spark plug boot
4 Muffler
5 Starter grip
6 Carburetor adjusting screw
7 Choke lever
8 Fuel pump
9 Filter housing
10 Fuel filler cap
11 Fuel tank
12 Assist handle
13 Control handle
14 Switch
15 Throttle trigger
16 Blower tube
17 Round nozzle
P
ar
t
s an
d
C
on
t
ro
l
s
6
13
15
10
9
8
5
2
7
4
3
1
294BA001 KN
11
12
14
16
17

3BG 45
english / USA
Definitions
1. Tab.
Designed to secure the blower tube
to the machine.
2. Interlock Button.
To position the throttle trigger.
3. Spark Plug Boot.
Connects the spark plug to the
ignition wire.
4. Muffler.
Attenuates exhaust noises and
diverts exhaust gases away from
operator.
5. Starter Grip.
The grip of the pull starter, which is
the device to start the engine.
6. Carburetor Adjusting Screws.
For tuning carburetor.
7. Choke Lever.
Eases engine starting by enriching
mixture.
8. Fuel Pump.
Provides additional fuel feed for a
cold start.
9. Filter Housing.
Covers the air filter element.
10. Fuel Filler Cap.
For closing the fuel tank.
11. Fuel Tank.
For fuel and oil mixture.
12. Assist Handle.
Addition handle for use of the
blower tube as a blower and held by
the left hand.
13. Control Handle.
The handle of the blower held by the
right hand.
14. Switch.
Run and stop switch.
15. Throttle Trigger.
Controls the speed of the engine.
16. Blower Tube.
Directs airstream.
17. Round Nozzle.
To be mounted on the blower tube to
aim the air stream.

4
english / USA
BG 45
Warning!
The use of any blower
may be dangerous. It is
important that you read,
fully understand and
observe the following safety
precautions.
!Warning!
Reread the owner`s
manual and the safety
instructions peri-
odically.
!Warning!
Careless or improper use of the machine
may cause serious injury. Have your
STIHL Dealer show you how to operate
your blower. Observe all applicable
local safety regulations, standards and
ordinances.
!Warning!
Minors should never be allowed to use a
blower : Bystanders, especially children,
and animals should not be allowed in the
area where a machine is in use.
Never let the unit run unattended. Do not
lend or rent your machine without the
owner`s manual.
Be sure that anyone using your unit
understands the information contained
in this manual.
Most of these safety precautions and
warnings apply to the use of all STIHL
blowers. Different models may have
different parts and controls.
See the appropriate section of your
owner`s manual for a description of the
controls and function of the parts of your
machine.
Safe use of a blower involves
1. the operator
2. the blower
3. the use of the blower .
THE OPERATOR
Physical Condition
You must be in good physical condition
and mental health and not under the
influence of any substance (drugs,
alcohol, etc.) which might impair vision,
dexterity or judgment. Do not operate a
blower when you are fatigued .
Be alert - if you get tired while operating
your machine, take a break. Tiredness
may result in loss of control. Working
with any blower can be strenuous. If you
have any condition that might be
aggra
vated by strenuous work, check
with
your doctor before operating the
machine.
!Warning!
Prolonged use of a blower, (or other
machines) exposing the operator to
vibrations may produce whitefinger
disease (Raynaud`s phenomenon) or
carpal tunnel syndrome. These condi-
tions reduce the hand`s ability to feel
and regulate temperature, produce
numbness and burning sensations and
may cause nerve and circulation
damage and tissue necrosis.
!Warning!
The STIHL blower is not equipped with
an antivibration (AV) system. Other
STIHL blower models are available with
an AV system designed to reduce the
transmission of engine vibrations to the
operator's hands. An AV system is
recommended for those operators who
use blowers on a regular or sustained
basis.
Antivibration systems do not guarantee
that you will not sustain whitefinger
disease or carpal tunnel syndrome.
Therefore, continual and regular users
should monitor closely the condition of
their hands and fingers. If any of the
above symptoms appear, seek medical
advice immediately.
Safety Precautions

5BG 45
english / USA
Proper Clothing
Clothing must be sturdy and snug-fitting,
but allow complete freedom of move-
ment.
!Warning!
Avoid loose-fitting jackets, flared or
cuffed pants, scarfs, unconfined long
hair or anything that could be drawn into
the air intake.
Wear overalls or long
pants to protect your legs.
Do not wear shorts.
Use of gloves when
working with the blower is
recommended.
Good footing is most
important. Wear sturdy
shoes with nonslip soles.
!Warning!
To reduce the risk of injury associated
with the inhalation of dust, use a face
filter mask when using your blower in
dusty conditions.
!Warning!
Proper eye protection is a must. Even
though the discharge is directed away
from the operator, ricochets and bounce
backs can occur during blower
operations.
Never operate a blower
unless wearing goggles
or properly fitted safety
glasses with adequate
top and side protection
which comply with
ANSI Z 87.1 (or your applicable national
standard).
!Warning!
Blower noise may damage your hearing.
Wear sound barriers (ear plugs or ear
mufflers) to protect your hearing. Conti-
nual and regular users should have their
hearing checked regulary.
THE BLOWER
For illustrations and definitions of the
blower parts see the chapter on "Parts
and Controls"!
!Warning!
Never modify a blower in any way. Only
attachments supplied by STIHL or
expressly approved by STIHL for use
with the specific STIHL blower models
are authorized. Although certain
unauthorized attachment are useable for
the STIHL blower, their use may be
extremely dangerous.
THE USE OF THE BLOWER
Transport
Always turn off the engine before putting
down blower. When transporting your
unit in a vehicle, properly secure it to
prevent turnover, fuel spillage and
damage to the machine.
Fueling
This STIHL unit uses an oil-gasoline
mixture for fuel (see the chapter on
"Fuel" of your owner`s manual).
!Warning!
Gasoline is an extremely
flammable fuel. If spilled
or ignited by a spark or
other ignition source, it
can cause fire and serious
burn injury or property
damage.

6
english / USA
BG 45
Use extreme caution when handling
gasoline or fuel mix.
Do not smoke or bring any fire or flame
near the fuel.
Fueling instructions
Fuel your machine in well-ventilated
areas, outdoors only. Always shut off the
engine and allow it to cool before
refueling. Relieve fuel tank pressure by
loosening fuel cap slowly. Never remove
fuel filler cap while engine is running.
Select bare ground for fueling and move
at least 10 feet (3 m) from the fueling
spot before starting the engine.
Wipe off any spilled fuel before starting
your blower and check for leakage.
Always tighten fuel filler cap securely
after fueling.
!Warning!
Check for fuel leakage while refueling
and during operation. If fuel or oil
leakage is found, do not start or run the
engine until leak is fixed and spilled fuel
has been wiped away. Take care not to
get fuel on your clothing. If this happens,
change your clothing immediately.
Always store gasoline in approved
container.
!Warning!
Unit vibrations can cause an improperly
tightened fuel cap to loosen or come off
and spill quantities of fuel.
In order to reduce risk of
fuel spillage and fire,
tighten fuel cap by hand
with as much force as
possible.
Before Starting
!Warning!
Never operate your machine if it is
damaged, improperly adjusted or not
completely and securely assembled.
You should always inspect your unit
before starting it. Make sure the controls
and safety devices are working properly.
!Warning!
To reduce the risk of injury from thrown
parts, check your fanwheel and fan
housing for damage (cracks, nicks,
chipping). If any damage is found, stop
using the unit and contact your STIHL
dealer for repair.
:Throttle trigger must move freely
and spring back to idle position
when released.
:Stop switch must move easily to $
:Tightness of spark plug boot - if boot
is loose, sparks may occur and
ignite the escaping fuel vapor!
Starting
!Warning!
Your blower is a one-person machine.
To reduce the risk of eye or other injury
from thrown objects, insure that by-
standers are at least 50 feet (15m) away
during use.
Stop the engine immediately if you are
approached.
For specific starting instructions, see the
appropriate section of your owner`s
manual. Place the machine on firm
ground or other solid surface in an open
area. Maintain good balance and secure
footing.
!Warning!
When you pull the starter grip, don`t
wrap the starter rope around your hand.
Do not allow the grip to snap back, but
guide the starter rope slowly back to
permit the rope to rewind properly.

7BG 45
english / USA
Failure to follow this procedure may
result in injury to hand or fingers and
may damage the starter mechanism.
Working instructions
Work carefully.
Operate the blower under good visibility
and daylight conditions only.
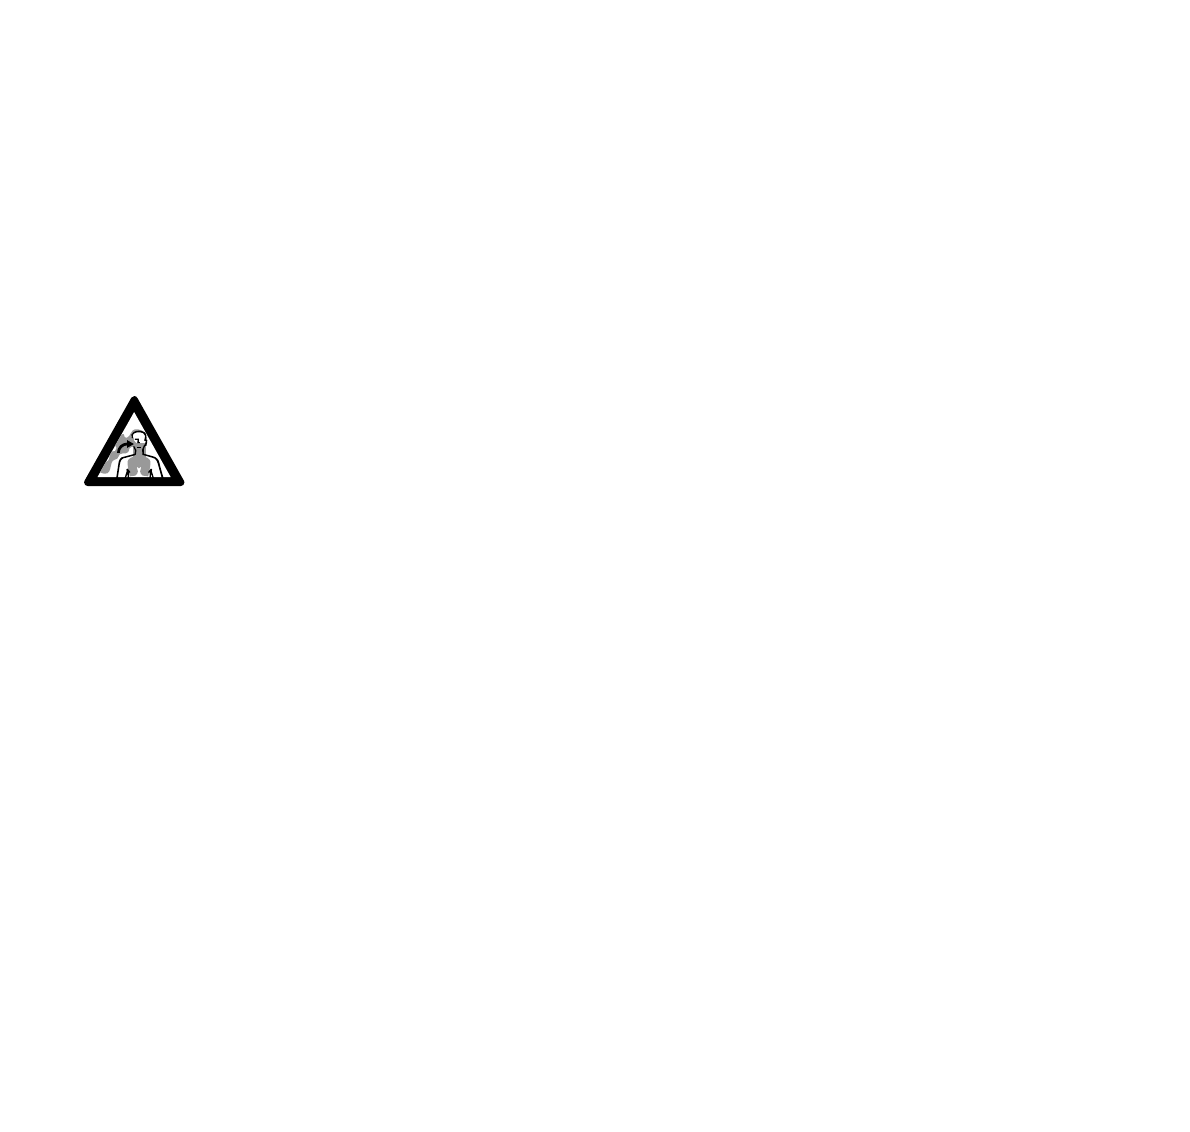
!Warning!
Your blower produces
poisonous exhaust fumes
as soon as the combus-
tible engine is running.
These gases (e.g. carbon
monoxide) may be color-
less and odorless.
To reduce the risk of serious or fatal
injury from breathing toxic fumes, never
start or run the blower indoors or in
poorly ventilated locations. Ensure
proper ventilation when working in
trenches or other confined areas.
Keep the space behind and beside the
engine clear at all times to allow for the
escape of hot and toxic exhaust fumes.
When working with a handheld blower,
always carry it with the muffler away
from you to reduce the risk of burns from
contact with the hot muffler or hot
exhaust fumes.
!Warning!
Use of this product can generate dust,
mists, and fumes containing chemicals
known to cause respiratory disease,
cancer, birth defects, or other reproduc-
tive harm. If you are unfamiliar with the
risks associated with the particular dust,
mists or fumes at issue, consult your
employer, governmental agencies such
as OSHA and NIOSH and other sources
on hazardous materials. If the substance
being blown or vacuumed is a commer-
cial substance, review the material
safety data sheet for that substance and
/ or consult the material manufacturer /
supplier. The state of California and
some other authorities, for instance,
have published lists of substances
known to cause cancer, reproductive
toxicity, etc.
Control dust, mist and fumes at the
source where possible. In this regard
use good work practices and follow the
recommendations of OSHA / NIOSH
and occupational and trade associa-
tions. When the inhalation of toxic dust,
mists and fumes cannot be eliminated,
the operator and any bystanders should
always wear a respirator approved by
NIOSH / MSHA for the substance at
issue.
!Warning!
Dust with silica in its composition may
contain crystalline silica. Silica is a basic
component of sand, quartz, brick, clay,
granite and numerous other minerals
and rocks, including masonry and con-
crete products. Repeated and / or sub-
stantial inhalation of airborne crystalline
silica can cause serious or fatal respira-
tory disease, including silicosis. In addi-
tion, the state of California and some
other authorities have listed respirable
crystalline silica as a substance known
to cause cancer. When encountering
such materials, always follow the re-
spiratory precautions mentioned above.
!Warning!
Breathing asbestos dust is dangerous
and can cause severe or fatal injury, re-
spiratory illness or cancer. The use and
disposal of asbestos containing
products
have been strictly regulated by OSHA
and the Environmental Protection
Agency. Do not blow or disturb asbestos
or asbestos containing products, such
as asbestos insulation. If you have any
reason to believe that you might be
disturbing asbestos, immediately
contact
your employer or a local OSHA
representative.

8
english / USA
BG 45
When working with the blower, always
wrap your fingers tightly around the
handle, keeping the control handle
cradled between your thumb and
forefinger. Keep your hand in this
position to have your machine under
control at all times. Make sure your
control handle (and grip for vacuum
attachment) are in good condition and
free of moisture, pitch, oil or grease.
!Warning!
To reduce the risk of personal injury, do
not direct air blast towards bystanders,
since the high pressure of the air flow
could injure eyes and could blow small
objects at great speed.
!Warning!
Always shut off the engine before
cleaning or servicing the unit or
replacing parts.
The blower fan between the air intake
and output openings rotates whenever
the engine is running. In order to reduce
the risk of injury from contact with the
fan, never operate your unit without a
properly mounted intake screen and
blower tube. Never insert any foreign
object into the air intake or output
openings of the machine.
Pay attention to the direction of the wind,
i.e., do not work against the wind.
To reduce the risk of stumbling and loss
of control,do not walk backward while
operating the machine.
MAINTENANCE, REPAIR AND
STORING
Maintenance, replacement, or repair
of the emission control devices and
systems may be performed by any
nonroad engine repair establishment
or individual. However if you claim
warranty for a component which has
not been serviced or maintained pro-
perly or if nonapproved replacement
parts were used, STIHL may deny
warranty.
Use only identical STIHL replacement
parts for maintenance and repair.
Use of parts manufactured by others
may cause serious or fatal injury.
Follow the maintenance and repair
instructions in the appropriate section of
your owner's manual. Refer to the
maintenance chart at the last pages of
this manual.
326BA000 LA

9BG 45
english / USA
!Warning!
Always stop the engine and make sure
that the fan is stopped before doing any
maintenance or repair work or cleaning
the blower. Do not attempt any mainten-
ance or repair work not described in
your owner's manual. Have such work
performed at your STIHL service shop
only.
Check fuel filler cap for leaks at regular
intervals. Use the specified spark plug
and make sure it and the ignition lead
are always in good condition.
!Warning!
A worn or damaged muffler is a fire
hazard and may cause loss of hearing.
Check to see that the muffler is in good
condition. The blower must not be
opera-
ted if the muffler is not functioning pro-
perly or has been removed.
Remember that the risk of forest fires is
greater in hot weather. Use the spark
arresting muffler supplied with the unit.
Never touch a hot muffler or burn will
result.
!Warning!
In order to reduce the risk of fire, do not
modify or remove any part of the muffler
or spark arrestor.
Keep spark plug and wire connection
tight and clean. The spark plug electrode
gap should be checked with a feeler
gauge at least every 50 operating hours
and reset if necessary. Fit a new spark
plug if the electrodes are badly pitted.
For any maintenance please refer to the
maintenance chart and to the warranty
statement near the end of this manual.
Store blower in a dry, high or locked
location place and out of reach of
children.
Before storing for longer than a few
days, always empty the fuel tank.

10
english / USA
BG 45
:Push the blower tube (1) with lug (2)
into the fan housing stub (3) and
rotate it in the direction of the arrow
to lock in position.
:Push nozzle (4) as onto the blower
tube (1) as far as lug (5), position a
(long) or position b(short), and
rotate it in the direction of the arrow
to lock in position.
Removing blower tube
:Use a suitable tool to lift the
tab (6) on the fan housing stub (3).
Rotate the blower tube in the
direction of the arrow and then pull it
out.
Assembling the Blower
3
2
295BA003 KN
1
1
54
295BA004 KN
ab
6
295BA005 KN
3

11BG 45
english / USA
This engine is certified to operate on
unleaded gasoline and with the mix ratio
50:1.
Your two-stroke engine requires a
mixture of brand-name gasoline and
quality two-stroke engine oil with the
classification TC.
Use regular branded unleaded gasoline
with a minimum octane rating of 89
RON. If the octane number of the regular
grade gasoline in your area is lower use
premium unleaded fuel.
Fuel with a lower octane number may
result in preignition (causing "pinging")
which is accompanied by an increase in
engine temperature. This, in turn,
increases the risk of the piston seizure
and damage to the engine.
The chemical composition of the fuel is
also important. Some fuel additives not
only detrimentally affect elastomers
(carburetor diaphragms, oil seals, fuel
lines etc.), but magnesium castings as
well. This could cause running problems
or even damage the engine. For this
reason it is essential that you use only
name branded fuels!
Use only STIHL two-stroke engine oil or
equivalent branded two-stroke air-
cooled engine oils with the classification
TC for mixing.
We recommend STIHL 50:1 two-stroke
engine oil since it is specially formulated
for use in STIHL engines.
Do not use BIA or TCW (two-stroke
water cooled) mix oils!
Take care when handling gasoline.
Avoid direct contact with the skin and
avoid inhaling fuel vapour.
The canister should be kept tightly
closed in order to avoid any moisture
getting into the mixture.
The fuel tank and the canister in which
fuel mix is stored should be cleaned
from time to time.
Fuel mix ages
Only mix sufficient fuel for a few days
work, not to exceed 3 months of storage.
Store in approved safety fuel-canisters
only. When mixing, pour oil into the
canister first, and then add gasoline.
Dispose empty mixing-oil canisters only
at authorized disposal locations.
Before fueling, clean the filler cap and
the area around it to ensure that no dirt
falls into the tank.
Always thoroughly shake the mixture in
the canister before fueling your
machine.
!Warning!
In order to reduce the risk of burns or
other personal injury from escaping gas
vapor and fumes, remove the fuel filler
cap carefully so as to allow any pressure
build-up in the tank to release slowly.
!Warning!
After fueling, tighten fuel cap
as securely as possible by hand.
Fuel
Gaso-
line
Oil (STIHL 50:1 or
equivalent branded TC oils)
US gal. US fl.oz
12.6
2 1/2 6.4
5 12.8
Fueling
295BA035 KN

12
english / USA
BG 45
Change the fuel pick up body every
year.
Before storing your machine for a long
period, drain and clean the fuel tank and
run engine until carburetor is dry.
Observe safety precautions - see
chapter “Safety Precautions”.
Start as follows:
:Set switch (1) to position I
:Squeeze the throttle trigger (2) and
press in the interlock button (3) at
the same time.
:Release the throttle trigger.
:Release the interlock button, this is
the starting throttle position.
Note:
The interlock button enables the throttle
trigger to be locked in the full throttle
position.
Set the choke lever (5):
For cold start to g
For warm start to e
:Press fuel pump bulb (6) at least five
times.
295BA034 KN
Starting / Stopping
32
1
295BA013 KN
295BA015 KN
5
6

13BG 45
english / USA
:Place the unit on the ground.
:Make sure you have a firm footing:
Hold the unit firmly on the ground
with your left hand on the handle
and press down.
:Pull the starter grip slowly with your
right hand until you feel it engage
and then give it a brisk strong pull.
Do not pull out the starter rope all
the way - it might break.
:Do not let the starter grip snap back.
Guide it slowly back into the housing
so that it can rewind properly.
If the engine is cold:
(choke position g
gg
g)
:Pull the starter rope five times.
:Move the choke lever (5) to e
:Continue cranking until engine runs.
Note: If the engine does not start
after 10 pulls with the choke lever
set to e:
Set choke to g
gg
g, pull the starter
rope five times, set choke to eand
continue cranking.
If engine is warm:
:Continue cranking until engine runs
(choke lever to e)
As soon as engine runs
:Blip the throttle trigger so that
interlock button pops out and the
engine settles down to idle speed.
If the engine stops during warm-up or
acceleration:
:Repeat starting procedure as
described under “If engine is cold”
Your unit is now ready for operation.
295BA016 KN
295BA043 KN
5

14
english / USA
BG 45
To stop the engine:
:Move switch to position O
Additional hints on starting
- If the engine does not start:
:Make sure all settings are correct
(choke shutter, throttle trigger
in starting throttle position, stop
switch to I)
:Repeat the starting procedure
- If the engine still does not start:
:Move switch to O
:Pull off the spark plug boot (7).
:Unscrew and dry off the spark plug.
:Open throttle wide.
:Crank the engine several times with
the starter to clear the combustion
chamber.
:Refit the spark plug and connect the
spark plug boot - push it down firmly.
:Move switch to I
:Set choke lever to e-
even if the engine is cold.
:Now start the engine.
Fuel tank run until dry and then
refueled
:Press the fuel pump bulb (6) at least
five times - bulb must be filled with
fuel.
:Now start the engine.
Your blower is designed for one-handed
operation. It can be carried by the
control handle in either the right or left
hand.
The nozzles supplied enable you to
carry out a wide variety of clean-up jobs.
The round nozzle* is particularly suitable
for use on uneven surfaces (e.g. fields
and lawns).
The fan nozzle* produces a broad and
powerful airstream at ground level. It can
be aimed and controlled very accurately.
This nozzle is highly effective for blow-
sweeping sawdust, leaves, grass
cuttings, etc. on flat surfaces.
* see chapter “Key to Symbols“
7
295BA017 KN
6
295BA018 KN
Using the Blower
326BA033 LA

15BG 45
english / USA
Working techniques
To minimize blowing time, use rakes and
brooms to loosen debris before blowing.
Recommended working techniques to
minimize airborne debris and pollution:
:In dusty conditions, slightly dampen
surfaces.
:Use the full blower nozzle extension
so the air stream can work close to
the ground.
:Do not direct debris at subjects
such as open windows or freshly-
washed cars.
:After using blowers, clean up. Do
not blow debris onto neighbouring
properties.
Recommended working techniques to
minimize noise:
:Operate power equipment only at
reasonable hours - not early in the
morning, late at night or during the
noon-break when people might be
disturbed. Comply with times listed
in local ordinances. Usual
recommendations are 9:00 a.m. to
12:00 a.m. and 03:00 p.m. to 5:00
p.m. on workdays for professionals.
Special considerations should be
given to neighbours on weekends.
:Fewer engines mean less noise;
therefore use only one piece of
power equipment at a time, when
possible.
:Operate power blowers at the
lowest possible throttle speed to do
the job.
:Check your equipment before
operation, especially the muffler, air
intakes and air filters.
Conserve water by using power blowers
instead of hoses for those lawn and
garden applications where a blower can
be properly used, such as cleaning
patios or porches.
Dirty air filters reduce engine power
increase fuel consumption and make
starting more difficult.
If there is a noticeable loss of engine
power
:Move choke lever to g
:Squeeze the tabs (1) together,
swing filter cover (2) open and take
it away.
:Clean away loose dirt from around
the filter.
Cleaning the Air Filter
1
295BA019 KN
2

16
english / USA
BG 45
:Take the foam element (3) out of the
filter cover (2).
:Take the felt element (4) out of the
filter housing (5).
:Wash the foam element in a clean,
non-flammable solution (e.g. warm
soapy water) and then dry.
:Install a new felt filter element . As a
temporary measure you can knock it
out on the palm of you hand or blow
it out with compressed air - do not
wash!
:Replace any damaged parts.
:Fit the foam element (3) in the filter
cover (2).
:Fit the felt element (4) in the filter
housing (5).
:Fit the filter cover (2) so that it snaps
into positon.
Motor Management
Exhaust emissions are controlled by
the design of the fundamental engine
parameters and components
(e.g. carburation, ignition, timing
and valve or port timing) without the
addition of any major hardware.
The carburetor has been adjusted for
optimum performance and fuel
efficiency in all operating states at
the factory.
5
295BA020 KN
2
3
4
Adjusting the Carburetor
295BA022 KN
+
LD
-

17BG 45
english / USA
Standard setting
:Check the air filter and replace if
necessary.
:Start and warm up the engine.
:Carefully screw the idle speed
screw (LD) down onto its seat
counterclockwise (left-hand thread).
Then open it two full turns clockwise
(standard setting).
Adjusting idle speed
Engine stops when engine is idling:
Carry out standard setting
(open the LD screw two full turns)
:Rotate idle speed screw (LD) about
one half turn clockwise until the
engine runs smoothly.
Erratic idling behavior, poor
acceleration:
Carry out standard setting
(open the LD screw two full turns)
:Rotate idle speed screw (LD) about
one half turn counterclockwise.
Wrong fuel mix (too much engine oil in
the gasoline), a dirty air filter and
unfavorable running conditions (mostly
at part throttle etc.) affect the condition of
the spark plug. These factors cause
deposits to form on the insulator nose
which may result in trouble in operation.
If engine is down on power, difficult
to start or runs poorly at idling speed,
first check the spark plug.
:Remove spark plug as discribed
in chapter “Starting“
:Clean dirty spark plug.
:Check electrode gap (A) -
it should be 0.5mm/0.02" -
readjust if necessary.
:Use only resistor type spark plugs
of the approved range.
Rectify problems which have caused
fouling of spark plug:
:Too much oil in fuel mix.
:Dirty air filter.
:Unfavorable running conditions,
e.g. operating at part load.
Fit a new spark plug after approx. 100
operating hours
or earlier if the electrodes are badly
eroded.
Checking the Spark Plug
000BA002 KN

18
english / USA
BG 45
!Warning!
To reduce the risk of fire and burn injury,
use only spark plugs authorized by
STIHL. Always press spark plug boot (2)
snugly onto spark plug boot (1) of the
proper size. (Note: If boot has
detachable SAE adapter nut, it must be
attached.) A loose connection between
spark plug boot and ignition wire
connector in the boot may create arcing
that could ignite combustible fumes and
cause a fire.
If engine running behavior is
unsatisfactory even though the air filter
is clean and the carburetor properly
adjusted, the cause may be in the
muffler.
Have the muffler checked for
contamination (coking) by a STIHL
dealer.
To help prolong the wear life of the
starter rope, observe the following
points:
:Pull the starter rope only in the
direction specified.
:Do not pull the rope over the edge of
the guide bush.
:Do not pull out the rope more than
specified since it might break.
:Do not let the starter grip snap back,
guide it slowly into the housing.
See also chapter “Starting the Engine”.
Replace a damaged starter rope in
good time or have it replaced by your
STIHL dealer.
000BA036 TR
1
Engine Running Behavior Rewind Starter

19BG 45
english / USA
During break-in period
A factory new machine should not be run
at high revs (full throttle off load) for the
first three tank fillings. This avoids
unnecessary high loads during the
break-in period.
As all moving parts have to bed in during
the break-in period, the frictional
resistances in the engine are greater
during this period.
The engine develops its maximum
power after about 5 to 15 tank fillings.
During operation
After a long period of full-throttle
operation, allow engine to run for a while
at idle speed so that the heat in the
engine can be dissipated by flow of
cooling air. This protects engine-
mounted components (ignition,
carburetor) from thermal overload.
After finishing work
Storing for short period:
Wait for engine to cool down. To avoid
condensation, fill the fuel tank and keep
the unit in a dry place until you need it
again.
Storing for a long period:
see chapter "Storing the Machine".
For periods of about 3 months or
longer
:Remove the blower tube and
nozzle.
:Drain and clean the fuel tank in a
well ventilated area.
:Run engine until carburetor is dry -
this helps prevent carburetor
diaphragms sticking together.
:Thoroughly clean the machine - pay
special attention to the cylinder fins
and air filter.
:Store the machine in a dry, high or
locked location - out of the reach of
children and other unauthorized
persons.
Operating Instructions Storing the Machine
Table of contents
Languages:
Other Stihl Blower manuals