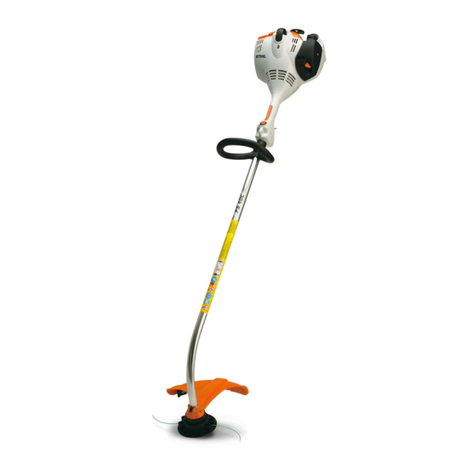
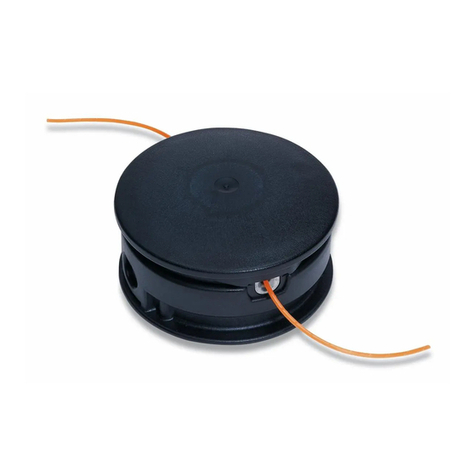
Stihl FSB-KM User manual

Instruction Manual
STIH)
STIHL FSB-KM
BA_U1_01_01.fm Seite 0 Dienstag, 4. Dezember 2007 10:25 10

1FSB-KM
English
BA_SE_211_002_01_03.fmPrinted on chlorine-free paper.
Printing inks contain vegetable oils; paper can be recycled.
© ANDREAS STIHL AG & Co. KG, 2008
0458 541 0121 A. M0,5. D8. Rei. Printed in Germany
STIHl
Contents
CombiSystem ................................... 2
Guide to Using this Manual .............. 2
Safety Precautions and
Working Techniques ......................... 3
Approved CombiEngines ................ 10
Approved Combinations of
Cutting Tool, Deflector,
Handle and Shoulder Strap ............ 11
Mounting the CombiTool ................. 12
Mounting the Deflector ................... 12
Mounting the Cutting Tools ............. 13
Fitting the Shoulder Strap ............... 16
Starting / Stopping
the Engine ...................................... 16
Storing the Machine ........................ 17
Replacing the Nylon Line ............... 17
Maintenance and Care ................... 19
Minimize Wear and
Avoid Damage ................................ 19
Main Parts ...................................... 20
Specifications ................................. 20
Special Accessories ....................... 21
Maintenance and Repairs ............... 21
Certificate of Conformity ................. 22
Quality Certification ........................ 23
Dear Customer,
Thank you for choosing a quality
engineered STIHL product.
This machine has been built using
modern production techniques and
comprehensive quality assurance.
Every effort has been made to ensure
your satisfaction and troublefree use
of the machine.
Please contact your dealer or our
sales company if you have any
queries concerning your machine.
Hans Peter Stihl

2
English
FSB-KM
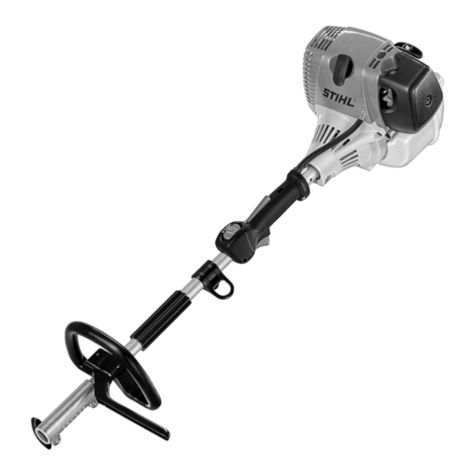
In the STIHL CombiSystem a number of
different CombiEngines and CombiTools
can be combined to produce a power
tool. In this instruction manual the
functional unit formed by the
CombiEngine and CombiTool is referred
to as the power tool.
The CombiEngine and CombiTool come
with separate instruction manuals.
Always read and make sure you
understand both instruction manuals
before starting and using your machine.
Keep the manuals in a safe place for
later reference.
Pictograms
All the pictograms attached to the
machine are shown and explained in
this manual.
The operating and handling instructions
are supported by illustrations.
Symbols in text
The individual steps or procedures
described in the manual may be marked
in different ways:
:A bullet marks a step or procedure
without direct reference to an
illustration.
A description of a step or procedure that
refers directly to an illustration may
contain item numbers that appear in the
illustration.
Example:
Loosen the screw (1)
Lever (2) ...
In addition to the operating instructions,
this manual may contain paragraphs
that require your special attention. Such
paragraphs are marked with the
symbols described below:
Warning where there is a risk of an
accident or personal injury or
serious damage to property.
Caution where there is a risk of
damaging the machine or its
individual components.
Note or hint which is not essential
for using the machine, but may
improve the operator’s under-
standing of the situation and result
in better use of the machine.
Note or hint on correct procedure in
order to avoid damage to the
environment.
CombiSystem
.
.
.
.
002BA159 KN
+
+
Guide to Using this Manual

3FSB-KM
English
Equipment and features
This instruction manual may refer to
several models with different
features. Components that are not
installed on all models and related
applications are marked with an
asterisk (*). Such components may
be available as special accessories
from your STIHL dealer.
Engineering improvements
STIHL’s philosophy is to continually
improve all of its products. As a result,
engineering changes and improvements
are made from time to time. If the
operating characteristics or the
appearance of your machine differ from
those described in this manual, please
contact your STIHL dealer for
assistance.
Therefore some changes, modifications
and improvements may not be covered
in this manual.
Special safety
precautions must be
taken when working with
this power tool because of
the very high speed of the
cutting tool.
It is important that you
read and understand both
instruction manuals
(CombiEngine and
CombiTool) before using
the unit for the first time.
Keep the manuals in a safe place for
future reference.
Non-observance of the safety
precautions in the instruction manuals
may cause serious or even fatal injury.
Observe all applicable local safety
regulations, standards and ordinances.
If you have not used this type of power
tool before:
Have your dealer or other experienced
user show you how to operate your
power tool or attend a special course of
training in power tool operation.
Minors should never be allowed to use a
power tool.
Bystanders, especially children, and
animals should not be allowed in the
area where a power tool is in use.
When the machine is not in use (work
break), shut it off so that it does not
endanger others and secure it against
unauthorized use.
The power tool user is responsible for
avoiding injury to third parties or damage
to their property.
Do not lend or rent your power tool
without the CombiEngine and
CombiTool instruction manuals. Be sure
that anyone using your power tool
understands the information contained
in these manuals.
To operate the power tool you must be
rested, in good physical condition and
mental health.
If you have any condition that might be
aggravated by strenuous work, check
with your doctor before operating a
power tool.
Safety Precautions and
Working Techniques

4
English
FSB-KM
Do not operate the power tool if you are
under the influence of any substance
(drugs, alcohol) which might impair
vision, dexterity or judgment.
Depending on the cutting tool fitted, use
your power tool only for mowing grass,
cutting wild growth and similar materials.
Do not use your power tool for any other
purpose since this may result in
accidents or damage to the machine.
Never attempt to modify your power tool
in any way since this may also result in
accidents or damage to the machine.
Only mount cutting tools and
accessories that are explicitly approved
for this power tool model by STIHL or
are technically identical. If you have any
questions in this respect, consult a
servicing dealer.
To reduce the risk of accidents or
damage to the machine, use only high
quality tools and replacement parts.
STIHL recommends the use of STIHL
original tools and accessories. The
characteristics of these components are
specifically designed to match your
machine and meet your performance
requirements.
The deflector provided with your
machine may not protect the operator
from all foreign objects (stones, glass,
wire, etc.) thrown by the rotating cutting
tool. Thrown objects may also ricochet
and strike the operator.
Clothing and Equipment
Wear proper protective clothing and
equipment.
Clothing must be sturdy
but allow complete
freedom of movement.
Wear snug-fitting clothing,
e.g. an overall and jacket
combination, do not wear
a work coat.
Avoid loose-fitting jackets, scarves,
neckties, jewellery or anything that could
get caught on wood or brush or moving
parts of the machine. Tie up and confine
long hair (cap, hard hat, etc.).
Wear sturdy boots
with non-slip soles.
To reduce the risk of injury
from thrown objects,
always wear a face shield
and safety glasses.
Warning! A face shield
alone does not provide adequate eye
protection.
Wear hearing protection, e.g. ear plugs
or ear muffs.
Wear heavy-duty
gloves, preferably made
of leather.
STIHL offers a comprehensive range of
safety clothing and equipment for
personal protection.

5FSB-KM
English
Transporting the Power Tool
Always turn off the engine.
Carry the unit properly balanced by the
drive tube or loop handle.
By vehicle: Properly secure the power
tool to prevent turnover and damage.
Before Starting
Check that your power tool is properly
assembled and in good condition – refer
to appropriate chapters in the
CombiEngine and CombiTool instruction
manuals:
– The combination of cutting tool,
deflector, handle and shoulder strap
must be approved and all parts
properly assembled.
To reduce the
risk of injury, do
not use metal
cutting tools.
– Cutting tool: Check for correct and
secure assembly and good
condition.
– Check protective devices (e.g.
deflector for cutting tool) for damage
and wear. Always replace damaged
parts. Do not operate your machine
with a damaged deflector.
– Never attempt to modify the controls
or safety devices.
– Keep the handles dry and clean,
free from oil and dirt, for safe
control.
– Adjust shoulder strap and handle(s)
to suit your height and reach.
See chapter on “Fitting the Shoulder
Strap”.
To reduce risk of accidents and personal
injury, do not operate your machine if it is
damaged or not properly assembled.
If you use a shoulder strap or full
harness: Practise removing and putting
down the machine as you would in an
emergency. To avoid damage, do not
throw the machine to the ground when
practising.
See also notes in chapter “Before
Starting” in the CombiEngine instruction
manual.
002BA254 KN

6
English
FSB-KM
Starting the Engine
Place the unit on firm ground in an open
area. Make sure you have good balance
and secure footing. Hold the unit
securely. The cutting tool must be clear
of the ground and all other obstructions
because it may begin to rotate when the
engine starts.
Your power tool is a one-person unit. To
reduce the risk of injury from thrown
objects, do not allow other persons
within a radius of 15 meters of your own
position – even when starting.
To reduce the risk of
injury, avoid contact with
the cutting tool.
Start the engine as
described in the CombiEngine and
CombiTool instruction manuals.
Note that the cutting tool
continues to rotate for a
short period after you let
go of the throttle trigger –
flywheel.
Check engine idle speed setting. The
cutting tool must not rotate when the
engine is idling with the throttle trigger
released – see CombiEngine instruction
manual.
Holding and Controlling the
Machine
Always hold the unit firmly with both
hands on the handles. Make sure you
always have good balance and secure
footing.
On loop-handled machines with barrier
bar: Left hand on loop handle, right hand
on control handle. Left-handers should
follow these instructions too.
During Operation
In the event of imminent danger or in an
emergency, switch off the engine
immediately – move the slide control /
stop switch to 0or STOP.
To reduce the risk of injury from thrown
objects, do not allow bystanders within
15 meters of your own position.
To reduce the risk of damage to
property, also maintain this distance
from other objects (vehicles, windows).
Check and correct the engine idle speed
setting regularly. If the cutting tool still
rotates when the engine is idling, have
your dealer make proper adjustments
and repairs.
Take special care in slippery conditions
– damp, snow, ice, on slopes, uneven
ground, etc.
Watch out for obstacles: Roots, tree
stumps or holes which could cause you
to trip or stumble.
002BA080 KN
15m (50ft)

7FSB-KM
English
Make sure you always have firm and
secure footing.
Be particularly alert and cautious when
wearing hearing protection because
your ability to hear warnings (shouts,
alarms, etc.) is restricted.
To reduce the risk of accidents, take a
break in good time to avoid tiredness or
exhaustion.
Work calmly and carefully – in daylight
conditions and only when visibility is
good – ensure you do not endanger
others – stay alert at all times.
If your power tool is subjected to
unusually high loads for which it was not
designed (e.g. heavy impact or a fall),
always check that it is in good condition
before continuing work – see also
“Before Starting”.
Check in particular that the safety
devices are working properly. Do not
continue operating your power tool if it is
damaged. In case of doubt, have the
machine checked by your servicing
dealer.
To reduce the
risk of personal
injury from
thrown objects,
never operate the
unit without the deflector specified for
the cutting tool being used.
Before cutting, inspect the
area for stones, pieces of
metal or other solid
objects which could be
thrown and cause serious
injury, damage the power
tool and property (e.g. parked vehicles,
windows).
Special care must be taken when
working in difficult, over-grown terrain.
When cutting high scrub, under bushes
and hedges: Keep cutting tool at a
minimum height of 15 cm so as to avoid
harming small animals (e.g.
hedgehogs).
Always shut off the engine before
leaving the unit unattended.
Check the cutting tool at regular short
intervals during operation or
immediately if there is a noticeable
change in cutting behavior:
– Turn off the engine. Hold the
machine firmly and press the cutting
tool into the ground to bring it to a
standstill.
– Check condition and tightness, look
for cracks.
– Replace a damaged or dull cutting
tool immediately, even if it has only
superficial cracks.
Always clean grass and plant residue off
the cutting tool mounting flange –
remove blockages from around cutting
attachment and deflector.
To reduce the risk of unintentional
engine start and injury, always shut off
the engine before and remove the spark
plug boot before replacing the cutting
tool.

8
English
FSB-KM
Never continue using or attempt to
repair damaged or cracked cutting tools.
This may cause parts of the cutting tool
to come off and hit the operator or
bystanders at high speed, and result in
serious or fatal injuries.
Use only the deflector with properly
mounted line limiter blade to ensure that
the nylon lines are automatically
trimmed to the approved length.
To reduce the risk of injury, always shut
off the engine before adjusting length of
the nylon line on manually adjustable
mowing heads.
Using the unit with over-long nylon
cutting lines increases the load on the
engine and reduces its operating speed.
This causes the clutch to slip
continuously and results in overheating
and damage to important components
(e.g. clutch, polymer housing
components). There is also a risk of
injury from the cutting tool rotating while
the engine is idling.
Maintenance and Repairs
Service the machine regularly. Do not
attempt any maintenance or repair work
not described in the CombiTool and
CombiEngine instruction manuals.
Have all other work performed by a
servicing dealer.
STIHL recommends that you have
servicing and repair work carried out
exclusively by an authorized STIHL
servicing dealer. STIHL dealers are
regularly given the opportunity to attend
training courses and receive technical
information bulletins on engineering
changes.
Use only high quality replacement parts
since there is otherwise a risk of
accidents or damage to the machine. If
you have any questions in this respect,
consult a servicing dealer.
STIHL recommends you use only
original STlHL replacement parts. The
characteristics of these parts are
specifically designed to match your
machine and meet your performance
requirements.
To reduce the risk of injury from
unintentional engine startup, always
shut off the engine and disconnect
the spark plug boot before performing
any repairs, maintenance or cleaning
work.
Symbols on Deflectors
Arrows on the deflector (one inside and
one outside) show the direction of
rotation of the cutting tools.

9FSB-KM
English
Shoulder Strap
:Use a shoulder strap.
:Start the engine and then attach the
power tool to the shoulder strap.
:Observe all safety precautions.
The power tool may be used without
a shoulder strap. The shoulder strap
and carrying ring are special
accessories.
Mowing Head with Nylon Line
Produces a "soft" cut for edging and
trimming around trees and fence posts
– less risk of damaging tree bark.
To reduce the risk of serous injury,
never use wire in place of nylon
cutting line.
002BA249 KN
000BA019 KN

10
English
FSB-KM
Mowing Head with Polymer
Blades – STIHL PolyCut 5-3
For mowing unobstructed edges of
meadows (without posts, fences, trees
or similar obstacles).
Observe maintenance instructions for
PolyCut mowing head.
Observe the wear limit marks
Wear limit marks are integrated in the
base of the PolyCut.
Do not continue using the PolyCut if one
of the circular holes (1; arrow) becomes
visible or if the projecting rim (2; arrow)
has worn away. Install a new mowing
head.
If the wear limit marks are ignored,
there is a risk of the cutting tool
shattering and flying parts injuring
the operator or bystanders.
To reduce the risk of accidents from
shattered blades, avoid contact with
stones, metal and similar solid objects.
Check PolyCut blades for cracks at
regular intervals. If a crack is found in
one blade, always replace all blades
Only use CombiEngines supplied by
STIHL or expressly approved by STIHL
for use with the CombiTool.
Depending on the cutting tool used,
always refer to and observe the
recommendations in chapter "Approved
Combinations of Cutting Tool, Deflector,
Handle and Shoulder Strap".
This CombiTool may be operated only in
combination with the following
CombiEngines:
STIHL KM 55 R, KM 85 R, KM 90 R,
KM 100 R, KM 110 R
The barrier bar must be mounted to
loop-handled machines.
CombiTools may also be mounted to
STIHL brushcutters with a split drive
tube (T models).
Operation of this CombiTool is therefore
also permitted on the following power
tool models:
STIHL FS 55 RT, FS 85 RT, FR 85 T
Refer to the power tool instruction
manual for correct use of the barrier
bar.
1
002BA073 KN
2
002BA074 KN
Approved CombiEngines

11FSB-KM
English
Cutting tools
1STIHL AutoCut 11-2 mowing head
2STIHL PolyCut 5-3 mowing head
Deflector
3Deflector with
4Blade for mowing heads: see
"Mounting the Deflector"
Handle
5Loop handle with
6Barrier bar
Shoulder strap
7Shoulder strap may be used
Equipment
Among other parts, the complete unit
includes:
– Cutting tool
– Deflector
– Handle
– Shoulder strap (special accessory)
Approved combinations
Select correct combination from the
table on the basis of the cutting tool you
are using.
For safety reasons only the versions
of the cutting tool, deflector, handle
and shoulder strap shown in the
table may be used together. No
other combinations are permitted
because of the risk of accidents.
Only mowing heads (1, 2) may be used
on trimmers with a curved drive tube.
To reduce the risk of personal injury,
take special care to avoid contact
with the rotating cutting tool.
Approved Combinations of Cutting Tool, Deflector, Handle
and Shoulder Strap
Cutting tool Deflector Handle Shoulder strap
681FK028 KN
2
002BA000 KN
13
4
002BA003 K
5
6
0
02BA125 KN
7

12
English
FSB-KM
Mounting
:Engage lug (1) on drive tube in
slot (2) in the coupling sleeve and
push home the drive tube as far as
stop.
:When correctly installed, the red
line (3) (arrow point) must be flush
with the end of the coupling sleeve.
:Tighten the wing screw (4) firmly.
Removing
:Reverse the above sequence to
remove the drive tube.
Fitting the Line Limiting Blade
:Slide the blade Messer (1) into the
guide on the deflector.
:Use the combination wrench (3) –
supplied with the CombiEngine or
available as special accessory – to
insert the screw (2) and tighten it
down firmly.
Mounting the Deflector
:Slip the clamp (1) over the lug (2) on
the deflector and hold it in position.
:Ease the other side of the clamp (1)
over the deflector.
Mounting the CombiTool
002BA132 KN
1
2
4
3
002BA133 KN
Mounting the Deflector
2
002BA250 KN
1
3
002BA251 KN
1
2

13FSB-KM
English
:Push the deflector (3) onto the drive
tube (4) so that the bead (a) fits in
the notch (b) on the deflector.
:Continue pushing the deflector (3)
onto the drive tube until the lock
screw (5) engages.
:Tighten down the clamp screw (6)
firmly.
Preparations
:Lay your trimmer on its back with
the loop handle and shroud facing
down and the output shaft facing up.
Thrust Plate
The thrust plate comes with the PolyCut
5-3 and is required for this mowing head
only.
STIHL AutoCut 11-2
:If the thrust plate (1) is fitted, pull it
off the shaft (2).
STIHL PolyCut 5-3
:Fit the thrust plate (1) over the shaft
(2) and engage the hex recess (3)
on the external hexagon (4).
5
002BA252 KN
3
4
6
b
Mounting the Cutting Tools
541BA000 KN
541BA001 KN
1
2
3
4

14
English
FSB-KM
Blocking the Output Shaft
The output shaft has to be blocked as
follows to fit or remove the PolyCut 5-3.
:Block the shaft by pushing the stop
pin (1) through the holes (2) in the
deflector and thrust plate – turn the
thrust plate back and forth if
necessary.
Mounting the Mowing Head
Keep the instruction sheet for the
mowing head in a safe place.
STIHL AutoCut 11-2
Assembling
:Fit the spring (1) in the head (2).
:Wind the nylon lines onto the spool:
see "Replacing the Nylon Line"
:Assemble the mowing head: see
"Replacing the Nylon Line"
Mounting
:Slip the mowing head (2)over the
shaft (3)and engage hex recess (4)
on external hexagon (5).
:Fit the cap (6) on the mowing head
and screw it clockwise onto shaft as
far as stop. Tighten it down firmly.
342BA021 KN
1
2
2
1
681BA014 KN
2
4
3
6
2
5
681BA015 KN

15FSB-KM
English
STIHL PolyCut 5-3
:Place the nut (8) in the mowing
head.
:Screw the mowing head (7)
clockwise onto the shaft (3) as far
as stop.
:Use stop pin to block the shaft.
:Tighten down the mowing head
firmly.
Remove the stop pin.
Adjusting Nylon Line
STIHL AutoCut 11-2
:Hold the rotating mowing head
horizontal to the ground – tap it on
the ground – about 3 cm (1 1/4")
fresh line is advanced.
:The blade (1) on the deflector (2)
trims surplus line to the correct
length. Avoid tapping the head more
than once.
Line feed operates only if both lines
are at least 2.5cm (1") long.
Removing the Mowing Head
:Block the shaft.
:Unscrew the mowing head
counterclockwise.
Fitting New Nylon Line
AutoCut
See chapter on "Replacing the Nylon
Line".
Replacing Thermoplastic Blades
PolyCut
Follow the instructions supplied with the
mowing head.
3
7
8
681BA017 KN
342BA024 KN
1
2

16
English
FSB-KM
The type and style of harness depend on
the market.
Shoulder Strap
:Put on the shoulder strap (1).
:Adjust the length of the strap so that
the spring hook (2) is about a hand’s
width below your right hip.
Using the shoulder strap: see chapter on
"Approved Combinations of Cutting
Tool, Deflector, Handle and Shoulder
Strap".
Starting the Engine
To start the engine, always follow the
instructions for the power tool or
CombiEngine you are using.
:Place the unit on the ground: It must
rest securely on the engine support
and the deflector. Check that the
cutting attachment is not touching
the ground or any other obstacles.
:Make sure you have a firm footing.
:Press the unit firmly against the
ground with your left hand. Your
thumb should be under the control
handle.
Do not stand or kneel on the drive
tube!
If you start the engine in the START
positon, the cutting attachment may
begin to rotate as soon as the
engine runs. Do not run the engine
for any longer than necessary in the
starting throttle position.
The starting procedure is now as
described in the instruction manual
supplied with the basic power tool or the
CombiEngine you are using.
Stopping the Engine
:Move the slide control in direction of
arrow ( h) to STOP – O or move the
stop switch to O
Fitting the Shoulder Strap Starting / Stopping
the Engine
355BA007 KN

17FSB-KM
English
For periods of about 3 months or longer:
:Remove, clean and inspect the
cutting attachment.
:If the CombiTool is stored
separately, fit the protective cap on
the drive tube to avoid dirt getting
into the coupling.
:Store the machine in a dry, high or
locked location – out of the reach of
children and other unauthorized
persons.
Always inspect the mowing head for
wear before replacing the nylon line.
If there are signs of serious wear,
replace the parts concerned or
install a new mowing head.
Preparations
:Switch off the engine.
:Lay the brushcutter on its back with
the mowing head facing up.
Removing Remaining Nylon Line
:Open the mowing head – hold it
steady with one hand and unscrew
the cap (1) counterclockwise.
:Disengage the spool (2), take it out
of the mowing head and remove the
remaining nylon line.
Winding Line Onto Spool
A prewound spool – see ’Special
Accessories’ – may be installed
instead of fitting individual lines.
Storing the Machine Replacing the Nylon Line
STIHL AutoCut 11-2
681BA008 KN
12

18
English
FSB-KM
:Use green-coded nylon line with a
diameter of 2 mm (0.08 in).
:Cut two 3 m (10 ft) lengths of nylon
line from the replacement reel – see
’Special Accessories’.
Insert the end of each line (3) in the
holes (4) in the spool.
:Bend the ends of the lines over the
edge of the holes to form a hook.
:Straighten out the nylon lines and
wind them tightly onto the spool –
one nylon line in each chamber.
:Engage the ends of the nylon lines
in the notches (5).
Assembling the Mowing Head
Before assembling, check that the
compression spring is installed (see
"Mounting the Mowing Head").
:Thread the ends of the lines (6)
through the sleeves (7) and push
the spool (2) into the head so that
snaps into position.
Nylon lines must disengage from
the notches (5) as the spool is
pushed into position.
:Pull out the ends of the lines as far
as stop.
:Mount the mowing head on the
machine.
681BA052 KN
4
3
3
R
R
681BA053 KN
5
5
7
681BA011 KN
2
6
6

19FSB-KM
English
Note that the following points apply to
normal operating conditions. If your daily
working time is longer than normal or
conditions are difficult (very dusty work
area, etc.), shorten the specified
intervals accordingly.
Accessible Screws and Nuts
(not adjusting screws)
:Retighten as necessary
Cutting Tools
:Visual inspection, check tightness
before starting work and after every
refueling stop
:Replace if damaged
Safety Labels
:Replace illegible safety labels
Observing the instructions in this manual
and the CombiEngine manual helps
reduce the risk of unnecessary wear and
damage to the power tool.
The power tool must be operated,
maintained and stored with the due care
and attention described in these
instruction manuals.
The user is responsible for all damage
caused by non-observance of the safety
precautions, operating and maintenance
instructions. This includes in particular:
– Alterations or modifications to the
product not approved by STIHL.
– Using tools or accessories which
are neither approved or suitable for
the product or are of a poor quality.
– Using the product for purposes for
which it was not designed.
– Using the product for sports or
competitive events.
– Consequential damage caused by
continuing to use the product with
defective components.
Maintenance Work
All the operations described in the
"Maintenance Chart" must be performed
on a regular basis. If these maintenance
operations cannot be performed by the
owner, they should be performed by a
servicing dealer.
STIHL recommends that you have
maintenance and repair work carried out
only by an authorized STIHL servicing
dealer. STIHL servicing dealers are able
to attend regular training courses and
receive technical information bulletins
on the latest engineering changes.
If these operations are not carried out as
specified, the user assumes
responsibility for any damage that may
occur. Among other things, this includes:
– Corrosion and other consequential
damage resulting from improper
storage.
– Damage to the product resulting
from the use of poor quality
replacement parts.
Maintenance and Care Minimize Wear and
Avoid Damage
Other manuals for FSB-KM
4
Table of contents
Other Stihl Lawn And Garden Equipment manuals
Stihl
Stihl AHT 600.0 User manual

Stihl
Stihl SuperCut 40-2 User manual

Stihl
Stihl SG 31 User manual

Stihl
Stihl FCS-KM User manual

Stihl
Stihl FixCut 30-2 User manual

Stihl
Stihl FS 100 RX User manual

Stihl
Stihl FW 20 User manual

Stihl
Stihl RLE 240 User manual

Stihl
Stihl HTA 65 User manual

Stihl
Stihl FC 75 User manual
Popular Lawn And Garden Equipment manuals by other brands

Roto-Hoe
Roto-Hoe 990-5 Assembly and operations instructions, parts manual

Craftsman
Craftsman 19A30041791 installation manual

Mercia Garden Products
Mercia Garden Products 01GRODB0808-V1 Assembly instructions

EZ FLO
EZ FLO EZ 1010-HB Installation and operating guide

Echo
Echo SRM - 2400SB Operator's manual

Agri-Fab
Agri-Fab VAC-N-GO 45-0407-131 owner's manual