Stihl KB-MM User manual

Contents
1 MultiSystem................................................ 2
2 Guide to Using this Manual.........................2
3 Safety Precautions and Working Techni‐
ques............................................................ 2
4 Using the Unit............................................. 6
5 Approved MultiEngines............................... 8
6 Mounting the MultiTool................................8
7 Starting / Stopping the Engine.................. 10
8 Application with KA................................... 11
9 Storing the Machine.................................. 14
10 Maintenance and Care..............................15
11 Minimize Wear and Avoid Damage...........15
12 Main Parts.................................................15
13 Specifications............................................16
14 Maintenance and Repairs......................... 16
15 Disposal.................................................... 16
16 EC Declaration of Conformity................... 17
1 MultiSystem
469BA028 KN
+
+
In the STIHL MultiSystem, various MultiEngines
and MultiTools are combined to form a machine.
In this Instruction Manual, the functional unit of
MultiEngine and MultiTool is referred to as a
machine.
Accordingly, the instruction manuals for the Mul‐
tiEngine and the MultiTool constitute the entire
Instruction Manual for the machine.
Always read both manuals carefully before using
your machine for the first time and keep them
safe for future reference.
2 Guide to Using this Manual
2.1 Pictograms
All the pictograms attached to the machine are
shown and explained in this manual.
2.2 Symbols in text
WARNING
Warning where there is a risk of an accident or
personal injury or serious damage to property.
NOTICE
Caution where there is a risk of damaging the
machine or its individual components.
2.3 Engineering improvements
STIHL's philosophy is to continually improve all
of its products. For this reason we may modify
the design, engineering and appearance of our
products periodically.
Therefore, some changes, modifications and
improvements may not be covered in this man‐
ual.
3 Safety Precautions and
Working Techniques
Special safety precautions must be
observed when working with the
sweeper drum assembly and bristle
brush.
Read both User Manuals (MultiEn‐
gine or basic power tool and Multi‐
Tool) before using the unit for the first
time and keep them safe for future
reference. Non-compliance with the
User Manuals may cause serious or
even fatal injury.
The power tool must only be passed on or
loaned to people familiar with this model and its
operation. The MultiEngine or basic power tool
and MultiTool User Manuals must always be
handed over with the machine.
Use the bristle brush only for sweeping areas
and paths, including uneven and jointed surfaces
and natural stone paving.
English
2 0458-486-0121-B
© ANDREAS STIHL AG & Co. KG 2023
0458-486-0121-B. VA1.A23.
Printed on chlorine-free paper
Paper is recyclable.
Original Instruction Manual
0000000644_015_GB

Use the sweeper drum assembly only for sweep‐
ing areas and paths, moving wet materials, such
a leaves or dirt to a central point, clearing snow
and removing standing water from solid surfaces.
The machine must not be used for any other pur‐
poses – risk of accident!
Only use attachments and accessories that are
explicitly approved for this power tool model by
STIHL or are technically identical. If you have
any questions in this respect, consult your
dealer.
Use only high-quality parts and accessories. in
order to avoid the risk of accidents and damage
to the machine.
STIHL recommends the use of genuine STIHL
tools and accessories. They are specifically
designed to match the product and meet your
performance requirements.
The deflector on this power tool cannot protect
the operator from all objects thrown by the
attachment (stones, glass, wire, etc.). Ejected
objects may also ricochet and strike the operator.
Never attempt to modify your power tool in any
way since this may increase the risk of personal
injury. STIHL excludes all liability for personal
injury and damage to property caused while
using unauthorized attachments.
Do not use a high-pressure washer to clean the
power tool. The solid jet of water may damage
parts of the unit.
3.1 Clothing and Equipment
Wear proper protective clothing and equipment.
Clothing must be sturdy but allow
complete freedom of movement.
Wear close-fitting clothes such as a
boiler suit, not a loose jacket.
Do not wear clothing which could become trap‐
ped in wood, brush or moving parts of the
machine. Do not wear a scarf, necktie or jewelry.
Tie up and secure long hair above your should‐
ers.
Wear sturdy shoes with non-slip
soles.
WARNING
To reduce the risk of eye injuries,
wear close-fitting safety glasses in
accordance with European Standard
EN 166. Make sure the safety
glasses are a snug fit.
Wear "personal" sound protection, e.g. ear
defenders.
Wear sturdy protective gloves made
of a resistant material (e. g. leather).
STIHL offers a comprehensive range of personal
protective equipment.
3.2 Transporting the machine
469BA001 KN
223BA000 KN
Always stop the engine.
Carry your power tool by the handle, attachment
in front of you.
Do not touch hot parts of the machine – risk of
burn injury!
By vehicle: When transporting in a vehicle, prop‐
erly secure your machine to prevent turnover,
damage and fuel spillage.
3.3 Before starting
Check that the power tool is in safe operating
condition. Refer to the appropriate chapters in
the MultiEngine or basic power tool and Multi‐
Tool User Manuals.
–Sweeping attachments: correctly installed,
secure and in perfect condition
–Both sweeping attachments must be mounted.
–Both deflector extensions fitted for bristle
brush.
3 Safety Precautions and Working Techniques English
0458-486-0121-B 3

–Inspect the deflectors for damage and wear.
Do not operate the machine with a damaged
deflector – replace damaged parts.
–Never attempt to modify the controls or safety
devices.
–Keep the handles dry and clean – free from oil
and dirt – this is important for safe control of
the machine.
–Swing the bike handle to the normal operating
position and tighten it down firmly with the
rotary knob. See chapter on "Adjusting the
Bike Handle" in the MultiEngine user manual.
The power tool must only be operated when it is
in good operating condition – Risk of accident!
Check the gearbox for correct position, adjust if
necessary. This helps reduce the risk of injury
from the MultiTool rotating in the wrong direction.
See also notes on "Mounting the MultiTool".
If you use sweeping attachments, position the
gearbox so that the axle is above the drive shaft.
Use this position for:
–KB-MM bristle brush
–KW-MM sweeper drum assembly
3.4 Holding and Guiding the Tool
Make sure you always have a firm and secure
footing.
469BA045 KN
002BA080 KN
Always hold the unit firmly with both hands on
the handles.
Right hand on control handle, left hand on grip
on handlebar.
3.5 While Working
In the event of impending danger or in an emer‐
gency, switch off the engine immediately by mov‐
ing the slide control / stop switch/button to
0 or STOP.
To reduce the risk of injury from contact with the
tool and ejected objects, do not allow any other
persons within a radius of 5 meters of your own
position.This distance must also be maintained in
relation to objects (vehicles, window panes) –
risk of property damage!
The correct engine idle speed is important to
ensure that the work tool stops moving when you
let go of the throttle trigger. Check and correct
the idle speed setting at regular intervals. If the
attachment still rotates when the engine is idling,
have your dealer repair it – see MultiEngine or
basic power tool User Manual.
English 3 Safety Precautions and Working Techniques
4 0458-486-0121-B

To reduce the risk of injury from thrown objects
or contact with the attachment, never operate the
unit without a properly mounted deflector
designed specifically for the unit and the attach‐
ment.
Always stand behind the deflector or to one side
of the machine during operation – never in front
of the attachment.
Electrostatic charges may build up when working
on synthetic surfaces – risk of electric shock and
accidents!
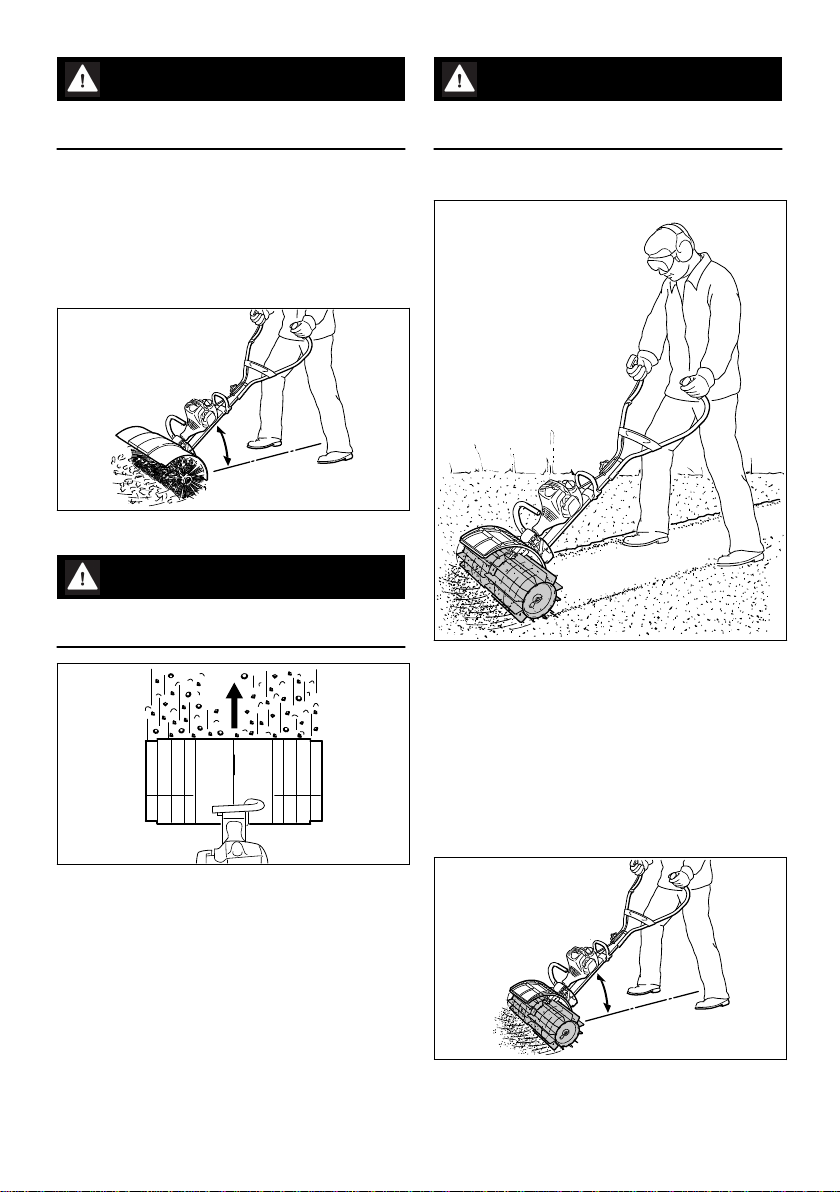
Dust, fumes and smoke produced
while working may be hazardous to
health! If dust levels are high, wear a
suitable respirator.
To reduce the risk of a dust explo‐
sion, spray very dusty surfaces with
water before sweeping.
Take special care in slippery conditions – damp,
snow, ice, on slopes or uneven ground!
To reduce the risk of accidents or injury, remove
all obstacles and objects from the work area.
Check the work site – rocks, metal
objects etc. may be caught up and
ejected – risk of injury!
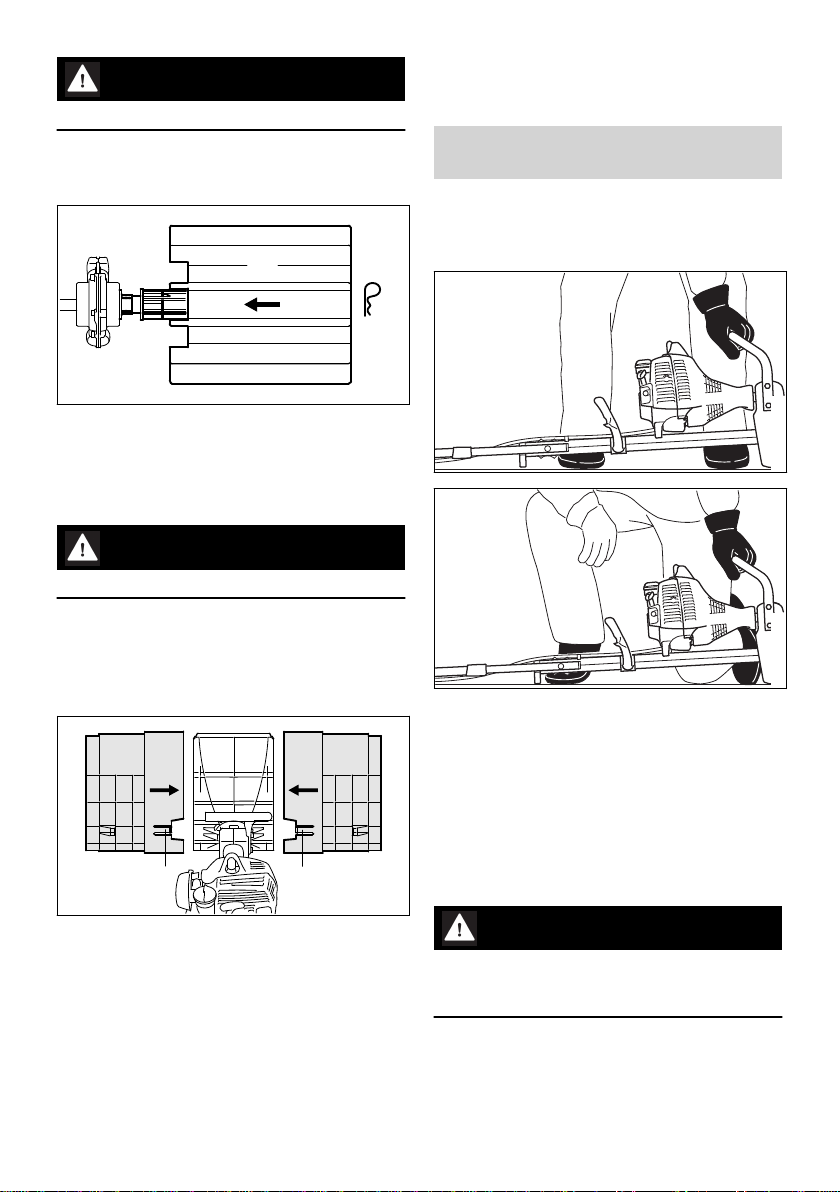
Operate your power tool at normal walking pace
only.
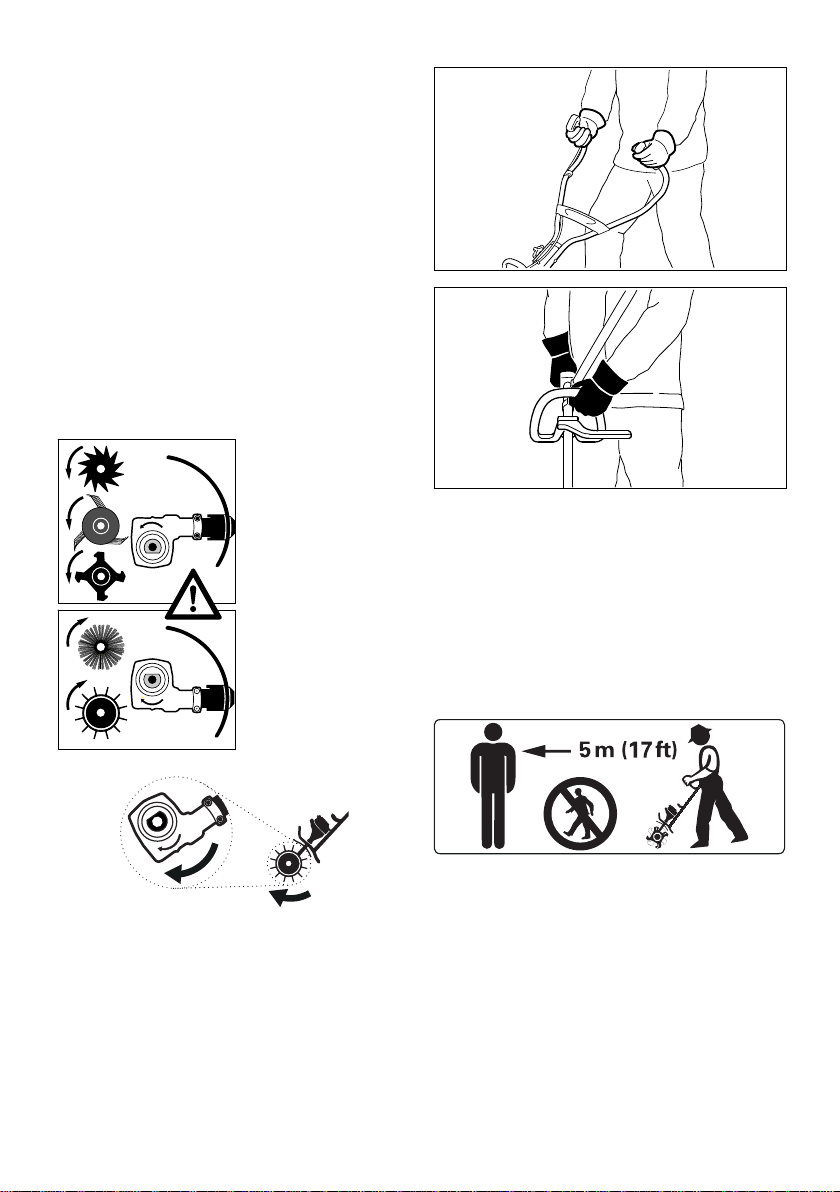
Be extremely cautious when pulling the power
tool towards you because of the risk of injury
from contact with the rotating attachment.
Make sure you always have a firm and secure
footing.
Be extremely cautious when changing direction
with the power tool – especially on slopes.
On slopes, always work parallel to the gradient to
reduce the risk of injury from slipping or contact
with the attachment.
Never work on steep slopes because of the risk
of injury through loss of control of the power tool.
Special care must be taken when working in
overgrown terrain.
When clearing leaves, take care not to harm
small animals.
Be particularly alert and cautious when wearing
ear protection because your ability to hear warn‐
ings (shouts, alarms, etc.) is impaired.
Take breaks when you start getting tired or feel‐
ing fatigue – risk of accidents!
Work calmly and carefully – in daylight conditions
and only when visibility is good. Proceed with
caution, do not put others in danger.
If your power tool is subjected to unusually high
loads for which it was not designed (e.g. heavy
impact or a fall), always check that it is in good
condition before continuing work – see also
"Before Starting". Make sure the safety devices
are working properly. Never use a power tool
that is no longer safe to operate. In case of
doubt, contact a dealer.
Do not touch the attachment while the
engine is running. If the attachment
becomes jammed by an obstruction,
switch off the engine immediately
before attempting to remove the
obstruction – otherwise, risk of injury!
Opening the throttle while the attachment is
blocked increases the load and reduces engine
speed. The clutch then slips continuously and
this causes overheating and damage to impor‐
tant components (e.g. clutch, polymer housing
components) – and this can increase the risk of
injury from the attachment moving while the
engine is idling.
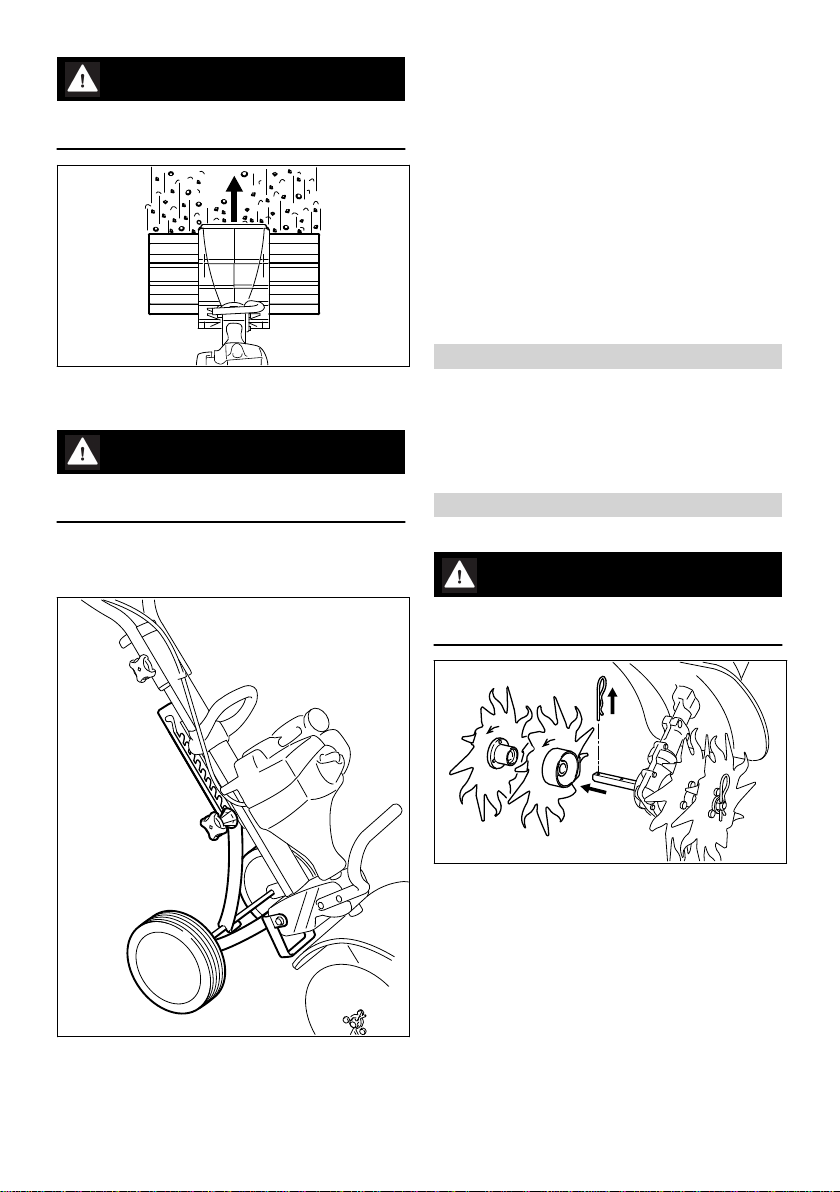
Check the sweeping attachments at regular short
intervals during operation or immediately if there
is a sudden change in behavior:
–Shut off the engine, hold the machine
securely.
–Check condition and proper mounting.
–Replace damaged sweeping attachments
immediately.
Clean the attachment and deflector at regular
intervals during operation.
–Shut off the engine
–Use gloves
–Remove debris from between the sweeping
attachments and from the area around the
gearbox and deflector.
To reduce the risk of injury, shut off the engine
before changing attachments.
3.6 After Finishing Work
After finishing work or before leaving the power
tool unattended: Shut off the engine.
3.7 Maintenance and Repairs
Service the machine regularly. Do not attempt
any maintenance or repair work not described in
the MultiTool and MultiEngine instruction man‐
uals. Have all other work performed by a servic‐
ing dealer.
3 Safety Precautions and Working Techniques English
0458-486-0121-B 5

STIHL recommends that you have servicing and
repair work carried out exclusively by an author‐
ized STIHL servicing dealer. STIHL dealers are
regularly given the opportunity to attend training
courses and are supplied with the necessary
technical information.
Only use high-quality replacement parts in order
to avoid the risk of accidents and damage to the
power tool. If you have any questions in this
respect, consult a servicing dealer.
STIHL recommends the use of original STIHL
replacement parts. They are specifically
designed to match your model and meet your
performance requirements.
To reduce the risk of injury, always shut off the
engine before carrying out any maintenance or
repairs or cleaning the machine.
4 Using the Unit
4.1 Sweeping Attachments
MultiTools for sweeping and cleaning are availa‐
ble in 2 versions:
KB‑MM bristle brush
KW‑MM PowerSweep
4.2 Preparations
If the surface to be cleaned is dry, spray it with
water to reduce the amount of dust created.
WARNING
Clear away all obstacles and solid objects from
the work area.
483BA002 KN
The MultiEngine with sweeping attachment is
operated in the forward direction only.
► Check correct position of gearbox – see
"Mounting the MultiTool".
4.3 Bristle Brush
486BA002 KN
The KB‑MM bristle brush MultiTool is used for
cleaning areas and paths, including uneven and
jointed surfaces, and natural stone paving.
486BA006 KN
English 4 Using the Unit
6 0458-486-0121-B

WARNING
Never work without the properly mounted deflec‐
tor and two extensions.
These devices divert material away from the
machine and the operator.
► Secure the handlebar in the normal operating
position.
► Starting the Engine
► Push the bristle brush steadily at a normal
walking pace.
486BA004 KN
► Always hold and guide the tool at a shallow
angle.
WARNING
The steeper the angle shown above, the more
difficult it is to control the tool.
486BA005 KN
1
► Guide the bristle brush at right angles to the
direction of travel (1). Sweepings are thrown
forwards, ahead of the operator.
WARNING
The bristle brush pushes back towards the oper‐
ator.
4.4 PowerSweep
487BA001 KN
The KW‑MM PowerSweep MultiTool is used for
sweeping areas and paths, moving wet materi‐
als, such a leaves or dirt to a central point, clear‐
ing snow and removing standing water from solid
surfaces.
► Secure the handlebar in the normal operating
position.
► Starting the Engine
► Push the PowerSweep steadily at a normal
walking pace.
487BA002 KN
► Always hold and guide the tool at a shallow
angle.
4 Using the Unit English
0458-486-0121-B 7

WARNING
The steeper the angle shown above, the more
difficult it is to control the tool.
487BA003 KN
1
► Guide the PowerSweep at right angles to the
direction of travel (1). Sweepings are thrown
forwards, ahead of the operator.
WARNING
The bristle brush pushes back towards the oper‐
ator.
4.5 Set of Wheels (Special Acces‐
sory)
486BA006 KN
The set of wheels simplifies handling of the
sweeping attachment – see notes on "Wheels" in
MultiEngine instruction manual.
4.6 Cleaning the Sweeping Attach‐
ment
Clean away any dirt and debris that has accumu‐
lated between the sweeping attachments,
around the gearbox or between the sweeping
attachments and the deflector:
–Shut off the engine.
–Pull the hitch pins out of the axle.
–Remove the sweeping attachments from the
axle and clean them.
–Clean away dirt and debris from the machine.
Refer to "Mounting the MultiTool" for mounting
instructions.
5 Approved MultiEngines
Only use MultiEngines supplied by STIHL or
expressly approved by STIHL for use with the
MultiTool.
This MultiTool may only be used in combination
with the STIHL MM 56 MultiEngine.
6 Mounting the MultiTool
6.1 Removing Existing MultiTools
WARNING
Wear gloves – risk of injury from sharp, pointed
MultiTools and/or hot gearbox surfaces.
481BA008 KN
► Remove the hitch pins and pull the MultiTools
(if fitted) off the axle – see also "Installing the
MultiTool" in the User Manual of the other Mul‐
tiTool.
► Clean the gearbox if necessary
English 5 Approved MultiEngines
8 0458-486-0121-B

6.2 Checking Position of Gearbox
WARNING
Check and potentially adjust the gearbox posi‐
tion – risk of injury by the MultiTool rotating in the
wrong direction!
The axle (1) must be above the shaft (2).
Direction of rotation (3) of MultiTool.
6.3 Adjusting Position of Gearbox
469BA044 KN
► Loosen clamp screws on gearbox.
► Turn the gearbox 180°.
► Line up the gearbox in the correct position
► Tighten the two clamping screws as illustrated
in the diagram below:
–Tighten the first screw slightly
–Tighten the second screw slightly
–Tighten first screw securely
–Tighten second screw scurely
NOTICE
It must not be possible to rotate the gearbox on
the shaft.
6.4 Installing the MultiTool
12
486BA007 KN
► Push the grass shield (1) onto the axle (2) as
far as the limit stop
4
2
3
486BA008 KN
► Push the axle (2) onto the drive shaft (3) as far
as the limit stop
► Insert and engage the pin (4) in the axle and
through the drive shaft
6.5 Installing the Bristle Brushes
6
2
486BA009 KN
5
► Push the bristle brush (5) onto the axle (2)
► Insert the hitch pin (6) in the hole at the end of
the axle and fold it flat
► Use the same procedure to install the other
bristle brush
6 Mounting the MultiTool English
0458-486-0121-B 9

WARNING
Always install both bristle brushes!
6.6 Installing the Sweeper Drum
Assembly
6
2
487BA004 KN
5
► Push the sweeper drum assembly (5) onto the
axle (2) – as shown
► Insert the hitch pin (6) in the hole at the end of
the axle and fold it flat
► Use the same procedure to install the other
sweeper drum assembly
WARNING
Always install both sweeper drum assemblies!
6.7 Deflector Extensions
Deflector extensions come standard with the
bristle brush and are available as special acces‐
sories for the sweeper drum assembly.
11
487BA005 KN
The left and right deflector extensions are differ‐
ent.
6.7.1 Installing the Deflector Extensions
► Slide the right-hand extension onto the deflec‐
tor, push it up to the limit stop at the top and
bottom and engage the tab (1).
► Slide the left-hand extension onto the deflec‐
tor, push up to the limit stop at the top and bot‐
tom and engage the tab (1).
6.7.2 Removing the Deflector Extensions
► Use the combination wrench to disengage the
tabs (1) and then pull off the extensions.
7 Starting / Stopping the
Engine
7.1 Starting the Engine
Always follow the starting procedure described in
the MultiEngine instruction manual.
469BA061 AS
469BA062 AS
► Secure the handlebar in the normal operating
position.
► Retract the wheels, if fitted – see chapter on
"Wheels" in MultiEngine instruction manual.
► Retract the spur, if fitted.
► Check that the MultiTool is not touching the
ground or any other obstacles. The unit must
rest on the engine flange and the support on
the frame.
► Make sure you have good balance and secure
footing – as shown in the illustration.
WARNING
To reduce the risk of injury from contact with the
rotating attachment, always stand to the side of
the power tool, never in front of the attachment.
► With your left hand on the loop handle, press
the unit firmly against the ground – do not
touch the throttle trigger or lockout lever.
English 7 Starting / Stopping the Engine
10 0458-486-0121-B

NOTICE
Do not stand or kneel on the handlebar or frame.
WARNING
The attachment may begin to move as soon as
the engine starts. For this reason, blip the throttle
after starting – the engine returns to idling speed.
Now follow the starting procedure described in
the MultiEngine instruction manual.
7.2 Stopping the Engine
► See MultiEngine instruction manual.
8 Application with KA
WARNING
This MultiTool may only be operated on a basic
power tool with an attached loop handle – see
"Retrofitting a loop handle".
002BA656 KN
Operation of this tool attachment is permitted
only with the following basic power tool:
–STIHL KA 235.0 R
WARNING
Combinations with basic power tools other than
the one listed above are not permitted since they
may result in accidents or serious personal
injury.
8.1 Preparing attachment
WARNING
To reduce the risk of injury, always shut off the
engine before converting the basic power tool.
NOTICE
Always install or remove the MultiTool in a clean
area.
► Rest the power tool on the machine support.
8.1.1 Removing the Protective Cap
If a cap is fitted on the end of the shaft on the
basic power tool:
413BA014 KN
► Pull the protective cap off the end of the shaft
and keep it in a safe place.
002BA248 KN
If the plug comes out of the shaft when you pull
off the cap:
► Push the plug into the shaft as far as the limit
stop.
8 Application with KA English
0458-486-0121-B 11

8.1.2 Removing the Gearbox or Attachment
Remove any existing gearbox or interchangeable
attachment from the basic power tool.
228BA092 KN
BF
228BA090 KN
FCS
228BA091 KN
FCS
FS
228BA083 KN
FS
228BA086 KN
HT
228BA082 KN
SP
228BA084 KN
228BA085 KN
SP 10
► Loosen but do not remove the clamp
screws (arrows) on the gearbox housing.
► Pull the gearbox off the shaft.
If the drive shaft slips out of the tube when you
pull off the gearbox:
► Push the drive shaft into the tube.
English 8 Application with KA
12 0458-486-0121-B

381BA015 KN
L
The drive shaft must not project from the tube by
more than L = 22 mm (7/8 in).
If the length (L) is not correct:
► Apply slight pressure to the drive shaft and
rotate it slowly at the same time until it can be
pushed in to the specified length.
8.2 Mounting the deflector
► Slide the deflector (2) onto the shaft (3) until
distance (A) is 125 mm.
► Line up the deflector (2) so that it is vertical
and the fixing lug (arrow) on the shaft points
up.
► Tighten down the clamp screws (1) slightly.
WARNING
Check that the deflector cannot rotate on the
shaft anymore.
8.3 Installing the Gearbox
3
479BA021 KN
4
► Push the sleeve (4) onto the shaft (3) as far as
stop.
3
479BA019 KN
5
56
► Loosen the clamp screws (5).
► Push the gearbox (6) onto the shaft (3), turn
the gearbox back and forth as necessary.
► Line up the gearbox on the shaft so that the
distance between the horizontal drive shaft (7)
and the deflector is the same at both sides.
► Tighten down the clamp screws firmly.
WARNING
It must not be possible to rotate the gearbox on
the shaft.
► Installing the two sweeping attachments – see
"Installing the bristle brush"
8.4 Installing the sweeping attach‐
ment
► See the chapters on "Installing the bristle
brush" or "Installing sweeper drum assem‐
blies"
8 Application with KA English
0458-486-0121-B 13

8.5 Balancing the Machine
002BA309 KN
3
► Loosen the screw (3).
► Slide the carrying ring up or down the drive
tube until the sweeping attachments touch the
ground.
► Tighten down the screw on the carrying ring
firmly.
8.6 Starting the Engine
Always follow the operating instructions for the
KombiEngine and basic power tool.
406BA007 KN
406BA008 KN
► Place the unit on the ground.
The sweeping attachments may touch the
ground, but no other obstacles – risk of acci‐
dents.
► Make sure you have a firm footing, either
standing, stooping or kneeling.
► Hold the machine with you left hand and press
it down firmly – do not touch the controls on
the control handle – see KombiEngine or basic
power tool instruction manual.
NOTICE
Do not stand or kneel on the drive tube.
WARNING
The sweeping attachments may begin to rotate
and cause the machine to move as soon as the
engine starts. For this reason, blip the throttle
after starting – the engine returns to idling speed.
The starting procedure is now as described in
the instruction manual of the KombiEngine or
basic power tool you are using.
8.7 Stopping the Engine
► See instruction manual of the KombiEngine or
basic power tool.
9 Storing the Machine
For periods of about 30 days or longer
English 9 Storing the Machine
14 0458-486-0121-B

► Remove, clean and inspect the sweeping
attachments and deflector extensions (if fit‐
ted).
► Store the machine in a dry and secure location
Keep out of the reach of children and other
unauthorized persons
10 Maintenance and Care
The following intervals apply to normal operating
conditions only. If your daily working time is lon‐
ger or operating conditions are difficult (very
dusty work area, etc.), shorten the specified
intervals accordingly.
All accessible screws and nuts
► Retighten if necessary
Sweeping attachments and deflectors
► Visual inspection, check tightness before start‐
ing work and after every refueling stop
► Replace if damaged
Safety labels
► Replace illegible safety labels
11 Minimize Wear and Avoid
Damage
Observing the instructions in this manual and the
MultiEngine manual helps reduce the risk of
unnecessary wear and damage to the power
tool.
The power tool must be operated, maintained
and stored with the due care and attention
described in these instruction manuals.
The user is responsible for all damage caused by
non-observance of the safety precautions, oper‐
ating and maintenance instructions. This
includes in particular:
–Alterations or modifications to the product not
approved by STIHL.
–Using tools or accessories which are neither
approved or suitable for the product or are of a
poor quality.
–Using the product for purposes for which it
was not designed.
–Using the product for sports or competitive
events.
–Consequential damage caused by continuing
to use the product with defective components.
11.1 Maintenance Work
All the operations described in the chapter on
"Maintenance and Care" must be performed on a
regular basis. If these maintenance operations
cannot be performed by the owner, they should
be performed by a servicing dealer.
STIHL recommends that you have servicing and
repair work carried out exclusively by an author‐
ized STIHL servicing dealer. STIHL dealers are
regularly given the opportunity to attend training
courses and are supplied with the necessary
technical information.
If these maintenance operations are not carried
out as specified, the user assumes responsibility
for any damage that may occur. Among other
parts, this includes:
–Corrosion and other consequential damage
resulting from improper storage.
–Damage to the product resulting from the use
of poor quality replacement parts.
11.2 Parts Subject to Wear and Tear
Some parts of the power tool are subject to nor‐
mal wear and tear even during regular operation
in accordance with instructions and, depending
on the type and duration of use, have to be
replaced in good time. Among other parts, this
includes:
–Sweeping attachment (sweeper belts, roller
brushes)
–Deflector, deflector extensions (standard with
bristle brush, speciall accessory for Power‐
Sweep)
12 Main Parts
486BA020 KN
2
3
66
4 5
77
3
21
1
10 Maintenance and Care English
0458-486-0121-B 15

12.1 Bristle Brush, Sweeper Drum
Assembly
1 Shield
2 Axle
3 Hitch pin
4 Right-hand deflector extension (standard with
bristle brush, special accessory for Sweeper
Drum Assembly)
5 Left-hand deflector extension (standard with
bristle brush, special accessory for Sweeper
Drum Assembly)
12.2 Bristle brush
6 Brush roller
12.3 Sweeper drum assembly
7 Sweeper drum assembly with sweeper belt
13 Specifications
13.1 Attachment
13.1.1 KB‑MM
Two roller brushes
Diameter: 250 mm
Working width: 600 mm
13.1.2 KW‑MM
Two sweeping drums
Diameter: 270 mm
Working width: 600 mm
13.2 Weight
MultiTool complete with axle and
grass shield
KB‑MM with deflector extensions:4.2 kg
KW‑MM: 3.9 kg
13.3 Sound and vibration values
Sound and vibration values on power tools with
the MultiTools KB‑MM and KW‑MM take into
account idling and nominal maximum speed in a
ratio of 1:6.
For further details on compliance with Vibration
Directive 2002/44/EC, visit
www.stihl.com/vib
13.3.1 Sound pressure level Lpeq in accord‐
ance with ISO 11201
KA 235.0 R with loop handle: 102 dB(A)
13.3.2 Sound power level Lweq in accordance
with ISO 3744
KA 235.0 R with loop handle: 110 dB(A)
13.3.3 Vibration value ahv,eq in accordance
with ISO 20643
Handle, left Handle,
right
KA 235.0 R with loop
handle 6.9 m/s26.9 m/s2
The K‑factor in accordance with Directive
2006/42/EC is 2.0 dB(A) for the sound pressure
level and sound power level; the K‑factor in
accordance with Directive 2006/42/EC is
2.0 m/s2 for the vibration level.
13.4 REACH
REACH is an EC regulation and stands for the
Registration, Evaluation, Authorization and
Restriction of Chemical substances.
For information on compliance with the REACH
regulation (EC) No. 1907/2006 see
www.stihl.com/reach
14 Maintenance and Repairs
Users of this machine may only carry out the
maintenance and service work described in this
user manual. All other repairs must be carried
out by a servicing dealer.
STIHL recommends that you have servicing and
repair work carried out exclusively by an author‐
ized STIHL servicing dealer. STIHL dealers are
regularly given the opportunity to attend training
courses and are supplied with the necessary
technical information.
When repairing the machine, only use replace‐
ment parts which have been approved by STIHL
for this power tool or are technically identical.
Only use high-quality replacement parts in order
to avoid the risk of accidents and damage to the
machine.
STIHL recommends the use of original STIHL
replacement parts.
Original STIHL parts can be identified by the
STIHL part number, the { logo and the
STIHL parts symbol K (the symbol may appear
alone on small parts).
15 Disposal
Contact the local authorities or your STIHL serv‐
icing dealer for information on disposal.
English 13 Specifications
16 0458-486-0121-B

Improper disposal can be harmful to health and
pollute the environment.
000BA073 KN
► Take STIHL products including packaging to a
suitable collection point for recycling in accord‐
ance with local regulations.
► Do not dispose with domestic waste.
16 EC Declaration of Con‐
formity
ANDREAS STIHL AG & Co. KG
Badstr. 115
D-71336 Waiblingen
Germany
declares under our sole responsibility that
Category: MultiTool bristle
brush/sweeper drum
assembly
Make: STIHL
Series: KB‑MM
KW‑MM
Serial identification num‐
ber:
4601
conforms to the relevant provisions of Directive
2006/42/EC and has been developed and manu‐
factured in compliance with the following stand‐
ards in the versions valid on the date of produc‐
tion:
EN ISO 12100 (in conjunction with the specified
KA‑tool)
Technical documents deposited at:
ANDREAS STIHL AG & Co. KG
Produktzulassung
The year of manufacture is specified on the
power tool.
Waiblingen, 2022-09-19
ANDREAS STIHL AG & Co. KG
pp
Robert Olma, Vice President, Regulatory Affairs
& Global Governmental Relations
16 EC Declaration of Conformity English
0458-486-0121-B 17

English 16 EC Declaration of Conformity
18 0458-486-0121-B

16 EC Declaration of Conformity English
0458-486-0121-B 19
Other manuals for KB-MM
4
This manual suits for next models
1
Table of contents
Other Stihl Lawn And Garden Equipment manuals

Stihl
Stihl AR 900 User manual

Stihl
Stihl FS 120 User manual

Stihl
Stihl SuperCut 40-2 User manual

Stihl
Stihl KW 85 User manual

Stihl
Stihl HTA 65 User manual

Stihl
Stihl PolyCut 48-2 User manual

Stihl
Stihl RL-MM User manual

Stihl
Stihl AHT 600.0 User manual

Stihl
Stihl RLA 240 User manual

Stihl
Stihl BF-MM User manual