STILLA Geode H14000 User manual

STILLA
Geode
for the naica® system
User Manual
Geode H14000

Geode H14000 User Manual
1
TECHNICAL SUPPORT
For help and technical advice, please contact the Technical Support Department at Stilla
Technologies. The Technical Support Department:
For European Customers:
Monday to Friday, 9:30 AM - 6:30 PM Central European Time (CET).
Closed on French bank holidays.
Phone: (+33) 9 82 27 47 47
Email: suppor[email protected].
For North American Customers:
Monday to Friday, 8:00 AM –6:00 PM, EST.
Closed on American bank holidays.
Phone: 1-833-888-0150 ext. 1
Email: suppo[email protected]
Online Technical Support is also available at: www.stillatechnologies.com/technical-support/
LEGAL NOTICES
No part of this publication may be reproduced or transmitted in any form or by any means,
electronic or mechanical, including photocopy, recording, or any information storage or
retrieval system, without permission in writing from Stilla Technologies.
Stilla Technologies reserves the right to modify its products and services at any time.
Information contained in this User Manual is subject to change without notice. Stilla
Technologies assumes no liability for errors or any damage resulting from the use of this
information.
Elements of the naica® system and its uses are covered by US and corresponding non-US
patent claims owned by or under license to Stilla Technologies. Details available at:
www.stillatechnologies.com/patents. Purchase of this product includes a limited, non-
transferable right under such intellectual property for use of the product for internal research
only. No rights are granted for diagnostic uses.
No right under any other patent claim and no right to perform commercial services of any kind,
including without limitation, reporting the results of purchaser's activities for a fee or other
commercial consideration, is conveyed expressly, by implication, or by estoppel.
Further information on purchasing licensesmaybeobtained by contacting Stilla Technologies,
1 Mail du Professeur Georges Mathé, 94800 Villejuif, France. It is the responsibility of the
purchaser/end-user to acquire any additional intellectual property rights that may be required.
TRADEMARKS
Crystal Digital PCR™, naica® and Stilla® are registered trademarks of Stilla Technologies. All
other trademarks are the sole property of their respective owners.
COPYRIGHT & INTENDED USE
Copyright 2018-2021, Stilla Technologies. All rights reserved.
For Research Use Only. Not for use in diagnostic procedures.

Geode H14000 User Manual
2
Table of Contents
INTRODUCTION TO CRYSTAL DIGITAL PCR™ 4
Purpose of the document 4
Overview of the Crystal Digital PCR™ Workflow 4
Intended use of the naica® system 5
Citing the naica® system in scientific publications, presentations, seminars, etc. 5
MATERIALS AND EQUIPMENT 6
a) The packaging of the Geode contains: 6
b) Safety instructions for the naica® system 7
c) Labeling 9
d) Declaration of conformity 10
e) Specifications 11
f) Installation of the Geode 11
g) Materials required but NOT supplied 12
h) Crystal Digital PCR™ recommended detection system 12
i) The reference dye 13
SETTING UP A CRYSTAL DIGITAL PCR™ EXPERIMENT 13
Preventing DNA contamination 13
Protocol for setting up Crystal Digital PCR™ 14
a) Sample purification and pre-treatment 14
REACTION MIX PREPARATION 14
OPTIMIZATION OF CRYSTAL DIGITAL PCR™ 14
CRYSTAL DIGITAL PCR™ GEODE PROTOCOL 16
Loading chips for Crystal Digital PCR™ on the Geode 16
Starting a Crystal Digital PCR™ run on the Geode 18
a) The Geode Crystal Digital PCR™ reaction steps 18
Additional protocols on demand 21
HOW TO USE THE GEODE SOFTWARE USER INTERFACE 21
Overview 21
Switch on/off the instrument 22
Create a new program 22
Edit a pre-existing program 24
Run 25
Pause a program 26
Abort a program 26
Import or export a program 27
Export Live Logs or system logs for troubleshooting support 27
Other functionalities 28
TROUBLESHOOTING 29
MAINTENANCE AND TECHNICAL SUPPORT 31
a) Cleaning 31
b) Decontamination 32
c) Disposal 32
d) Shipment 32
I. LICENSE INFORMATION 33


Geode H14000 User Manual
4
Introduction to Crystal Digital PCR™
Purpose of the document
This document provides general information for the use of the Geode for Crystal Digital PCR™.
The workflow and the different hardware components are described in detail.
Overview of the Crystal Digital PCR™ Workflow
Crystal Digital PCR™is Stilla Technologies’ next-generation technology for the absolute
quantification of nucleic acids.
Using cutting-edge microfluidic innovations, this technology integrates the digital PCR process
in a single consumable (Fig. 1). The sample is first flowed through a network of microchannels
and partitioned into a large 2D array of 15,000 to 30,000 individual droplets (Sapphire chips) and
10,000 to 20,000 droplets (Opal chips), also called a droplet crystal. PCR isthen performed within
the chips and the crystal is imaged to reveal the droplets that contain amplified targets. The last
step consists of counting the number of these positive droplets to precisely extract the absolute
quantity of nucleic acids.
With Crystal Digital PCR™, the combination of powerful image analysis and intuitive visual
inspection offers an unmatched level of confidence in the digital PCR measurement, yielding
data you can trust.
Sample loading
Generation of droplet crystal
and PCR
Reading and analysis
Prepare the sample for the
reaction mix. Stilla®
recommends the use of the
naica® PCR MIX reagents,
specifically developed for
Crystal Digital PCR™. Load
the reaction mix into the wells
of the selected chip, seal with
the provided caps.
Place the prepared chips into the
Geode. Launch the combined
partitioning and amplification
program: droplet crystals are
generated from each sample and
PCR amplification is performed
immediately after crystal
generation.
After PCR, transfer the chips to
the Prism3 instrument. Set up
the read-out using Crystal
Reader software for data
acquisition of droplet crystals
using up to 3 fluorescent
channels (Blue, Green, and
Red). Image analysis and data
extraction are performed using
the Crystal Miner software.
Figure 1: Overview of Crystal Digital PCR™ Workflow.

Geode H14000 User Manual
5
Intended use of the naica® system
The naica®system for Crystal Digital PCRTM is composed of two instruments: the Geode, which
performs droplet generation and amplification, and the Prism3, which enables imaging of the
droplet crystals. The Crystal Reader software is used to control and set up Crystal Digital PCR™
experiments on the Prism3 instrument.
The Crystal Miner software is used to extract data from the images acquired using the Prism3
and to calculate the absolute concentrations of the targeted nucleic acids. This software is pre-
installed on the naica® PC delivered with the naica®system.
The naica® system performs Crystal Digital PCR™ within microfluidic chips (Sapphire chips &
Opal chips).
The naica® PCR MIX reagents are recommended for use to achieve optimal Crystal Digital
PCR™ performance on the naica® system.
For detailed instructionsfor Prism3 & Crystal Reader software and CrystalMiner software, please
refer to the respective User Manual. For detailed instructions for Sapphire chips, Opal chips,
naica® PCR MIX, and naica® multiplex PCR MIX refer to the respective Instruction for Use (IFU).
The technical documentation is available here https://www.stillatechnologies.com/technical-
resources/naica-system-prism3/.
The naica®system is a laboratory instrument to be used by qualified personnel in a controlled
environment. Before using the naica®system, the user should be trained by a Stilla Technologies
representative.
The naica® system is intended for Research Use Only. Not for use in diagnostic procedures.
Stilla Technologies recommends installing the devices in a clean, low-lint environment at an
optimal operating temperature between 15-25°C.
In general, Crystal Digital PCR™ can be performed with all types of DNA sample types on the
naica® system. However, individual sample-type compatibility for digital PCR applications may
require a dedicated assay validation by the end-user. Please note that the extraction method
used, and sample purity might influence sample compatibility for digital PCR applications as well.
For application-specific references please visit https://www.stillatechnologies.com/applications/.
Citing the naica® system in scientific publications, presentations, seminars,etc.
To cite the use of the naica®system use:
Crystal Digital PCR™(Stilla Technologies, France)
naica®system (Stilla Technologies, France)
naica® system component names:
•Geode
•Prism3
•Sapphire chips
•Opal chips
•Crystal Reader software
•Crystal Miner software
•naica® PCR MIX reagents
onaica® PCR MIX (Stilla Technologies, France)
onaica® multiplex PCR MIX(Stilla Technologies, France).

Geode H14000 User Manual
6
Materials and Equipment
a) The packaging of the Geode contains:
oFor the Geode:
▪The main instrument with the magnetic frame for Sapphire chips
oFor the peripheral box:
▪Compressed air system (ISPTLAPG3)
▪naica® PC
▪Two screws for securing
▪Accessories (pressure regulator, air hoses, etc.); modifiable without notice
oFor the blue envelope
▪Mouse pad
▪USB key
▪Stylus
▪Sapphire chip and Opal chip Quick User Guides
oFor the kit of power cords
▪Cable for Geode
▪Cable for Prism3
▪Cable for the compressed air system (ISPTLAPG3)
▪Cable for naica® PC and monitor
oFor the naica® system accessory box:
▪Magnetic adapters for the Geode (Fig. 2 A)
▪An electronic level (Fig. 2 A)
▪Opal chip holder for the Geode (Fig. 2 A))
▪Electrostatic pen (Fig. 2 B)
▪Flashlight (Fig. 2 B)
Figure 2: The contents of the Opal upgrade kit: A) Magnetic adapters, an Opal chip holder, and
an electronic level for the Geode, B) Accessories for troubleshooting- an electrostatic pen and
a flashlight.
Geode H14000 User Manual
7
b) Safety instructions for the Geode
Before the first use of the naica®system, please read the User Manual entirely. Special notice
should be taken of the following.
oSafety-Disclaimer for the Geode:
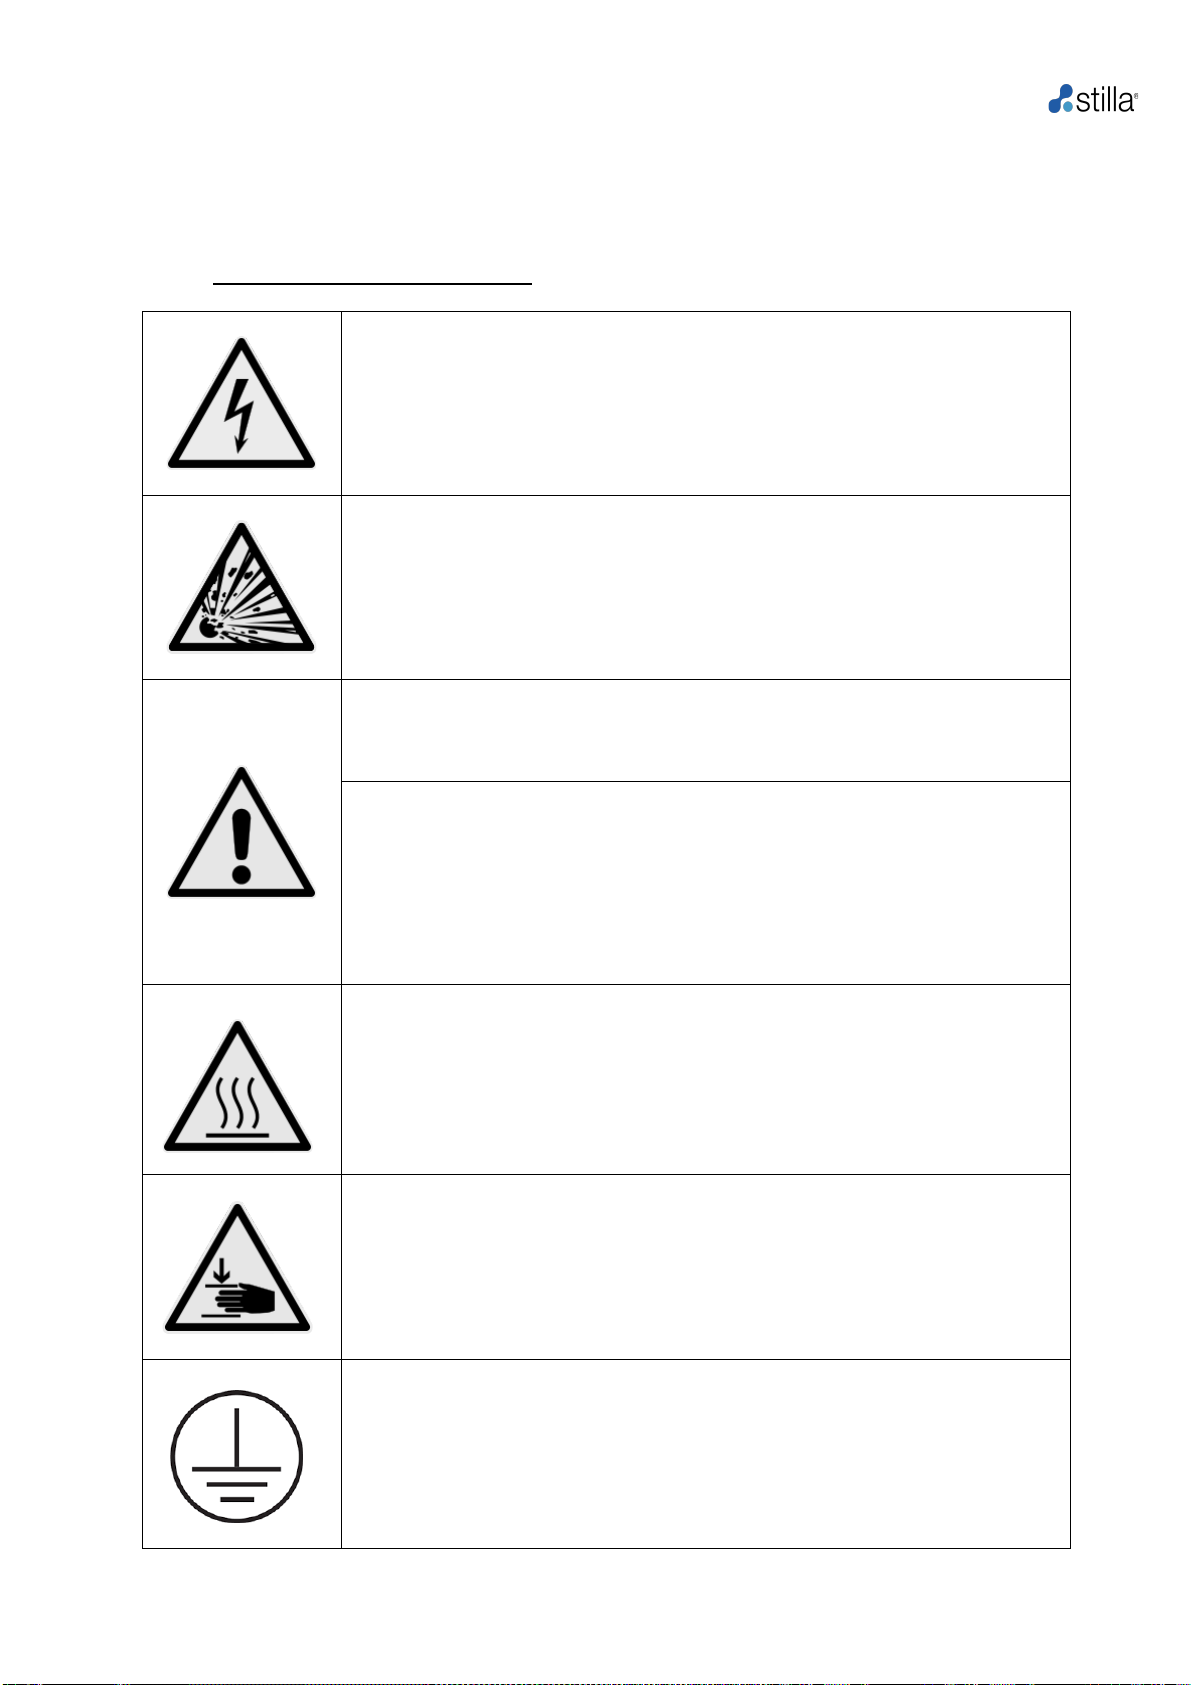
Caution of dangerous voltage
Please ensure that the voltage indicated on the back of the device exactly
matches the local electrical supply.
Caution of dangerous explosive material
Explosive or reactive material must not be heated or placed under
pressure in the Geode.
Caution- liquids
Ensure that no liquids can enter the device. Sample must be loaded
outside of the Geode.
Caution- environment
The ventilation of the device must not be covered.
Caution- use
If the device is used in a manner not described in this manual, safety may
be compromised.
Caution- hot surface
The thermal plate andchips quickly reach temperatures above 50°Cthus,
there are risks of burning or scalding if the equipment is not operated
properly. Keep the lid closed until the temperature reaches 30°C or less.
Only use materials (chips and caps) provided by Stilla Technologies,
which are heat resistant at temperatures up to 95°C.
Caution- the risk of pinching
The lid of the Geode should be closed with caution before starting a run.
Do not try to open the Geode lid during a run. Do not manipulate the
Geode lid handle during a run. Always check that the internal pressure of
the chamber is below 20 mbars before opening the lid.
Protective conductor terminal

Geode H14000 User Manual
8
Caution- biohazard
•The Geode must be placed on a stable, solid, and vibration-free surface.
•No objects should be placed on top of the Geode.
•The Geode should not be exposed to direct sunlight.
•There should be enough space to make sure that the fans at the front, the back, or the sides
are not covered and that the main switch is accessible. There should be a distance of at least
25 cm between the instrument and any wall or neighboring objects. Multiple Geodes should
not be placed back-to-back or back-to-front. Before transportation, the respective chip holder
(Sapphire chips & Opal chips) must be removed, and the 2 transportation lock screws must
be secured.
•For lifting the Geode- get as close to the load as possible. Try to keep your elbows and arms
close to the body. Keep the back straight while lifting by tightening the core muscles, bending
at the knees, keeping the load close, centered in front, and look up and ahead. Get a good
handhold and do not twist while lifting. Do not jerk; use a smooth motion while lifting. If the
load is too heavy to allow this, seek help to lift.
•Carrying the Geode- do not twist or turn the body; instead, move the feet to turn. The hips,
shoulders, toes, and knees should face the same direction. Keep the load as close to the
body as possible with the elbows close to the body. If fatigued, set the load down and rest for
a few minutes. Do not excessively strain while trying to lift the Geode, the proper posture
should be maintained for setting down and lifting technique.
•Setting down the Geode- set the load down in the same way it was picked up, but in the
reverse order. Bend at the knees, not the hips. Keep the head up, the coremuscles tight, and
do not twist the body. Keep the load as close to the body as possible. Wait until the load is
secure to release the handhold.
•If a part of the Geode chamber loosens or breaks, then the Geode is not leakproof. Pressure
cannot build up so that there is no chance any parts are projected to cause harm.
•If a part of the Geode chamber breaks while a 1 bar overpressure is built up, a sudden noise
or pop can be generated for a fraction of a second without causing any harm to the user.
oSafety instructions for the Geode and the compressed air system (ISPTLAPG3):
•Please ensure that the Geode is operated as instructed in the User Manuals. User Manuals
are subjected to changes. The latest version can be accessed at
https://www.stillatechnologies.com/technical-resources/naica-system-prism3/
•Stilla Technologies cannot be held responsible for any damages or injuries arising from
improper operation.
•Do not use the instruments if any parts are broken, chipped, rusty, or if the power cables are
damaged in any way.
•Do not open the housing of the Geode and the compressed air system (ISPTLAPG3).
•Opening the Geode or the compressed air system (ISPTLAPG3) housing may breach any
warranty claims for the instruments.
•Only operate the Geode and the compressed air system (ISPTLAPG3) with the provided and
specified detachable main supply cords. Do not replace the components with non-specified
cords.
•Do not attempt any repairs or alterations except as expressly instructed in the User Manual
or by a Technical Support Representative.
•Always disconnect the instruments from their power source before cleaning or moving the
Geode instrument and the compressed air system (ISPTLAPG3).
•For the Geode and the compressed air system (ISPTLAPG3), the mains supply source must
meet the national regulatory requirements.
Geode H14000 User Manual
9
•The power cord of the Geode and the compressed air system (ISPTLAPG3) must be
connected to a wall outlet with a grounded conductor.
•For the Geode and the compressed air system (ISPTLAPG3), the mains voltage must
correspond to the range given in the product specification.
•Keep liquids away from the Geode and the compressed air system (ISPTLAPG3); avoid
percolation of liquids inside the instrument.
•For optimal use of the Geode, the room temperature should be between 15°C and 25°C.
•Samples can be infectious or cause other damage to health. Safety regulations issued for
the handling of sample material in the laboratory must be followed by wearing the proper
Personal Protective Equipment (e.g., gloves and protective clothing). For detailed
instructions, please refer to Decontamination instructions.
•Mains supply voltage fluctuations 90%.
c) Labeling
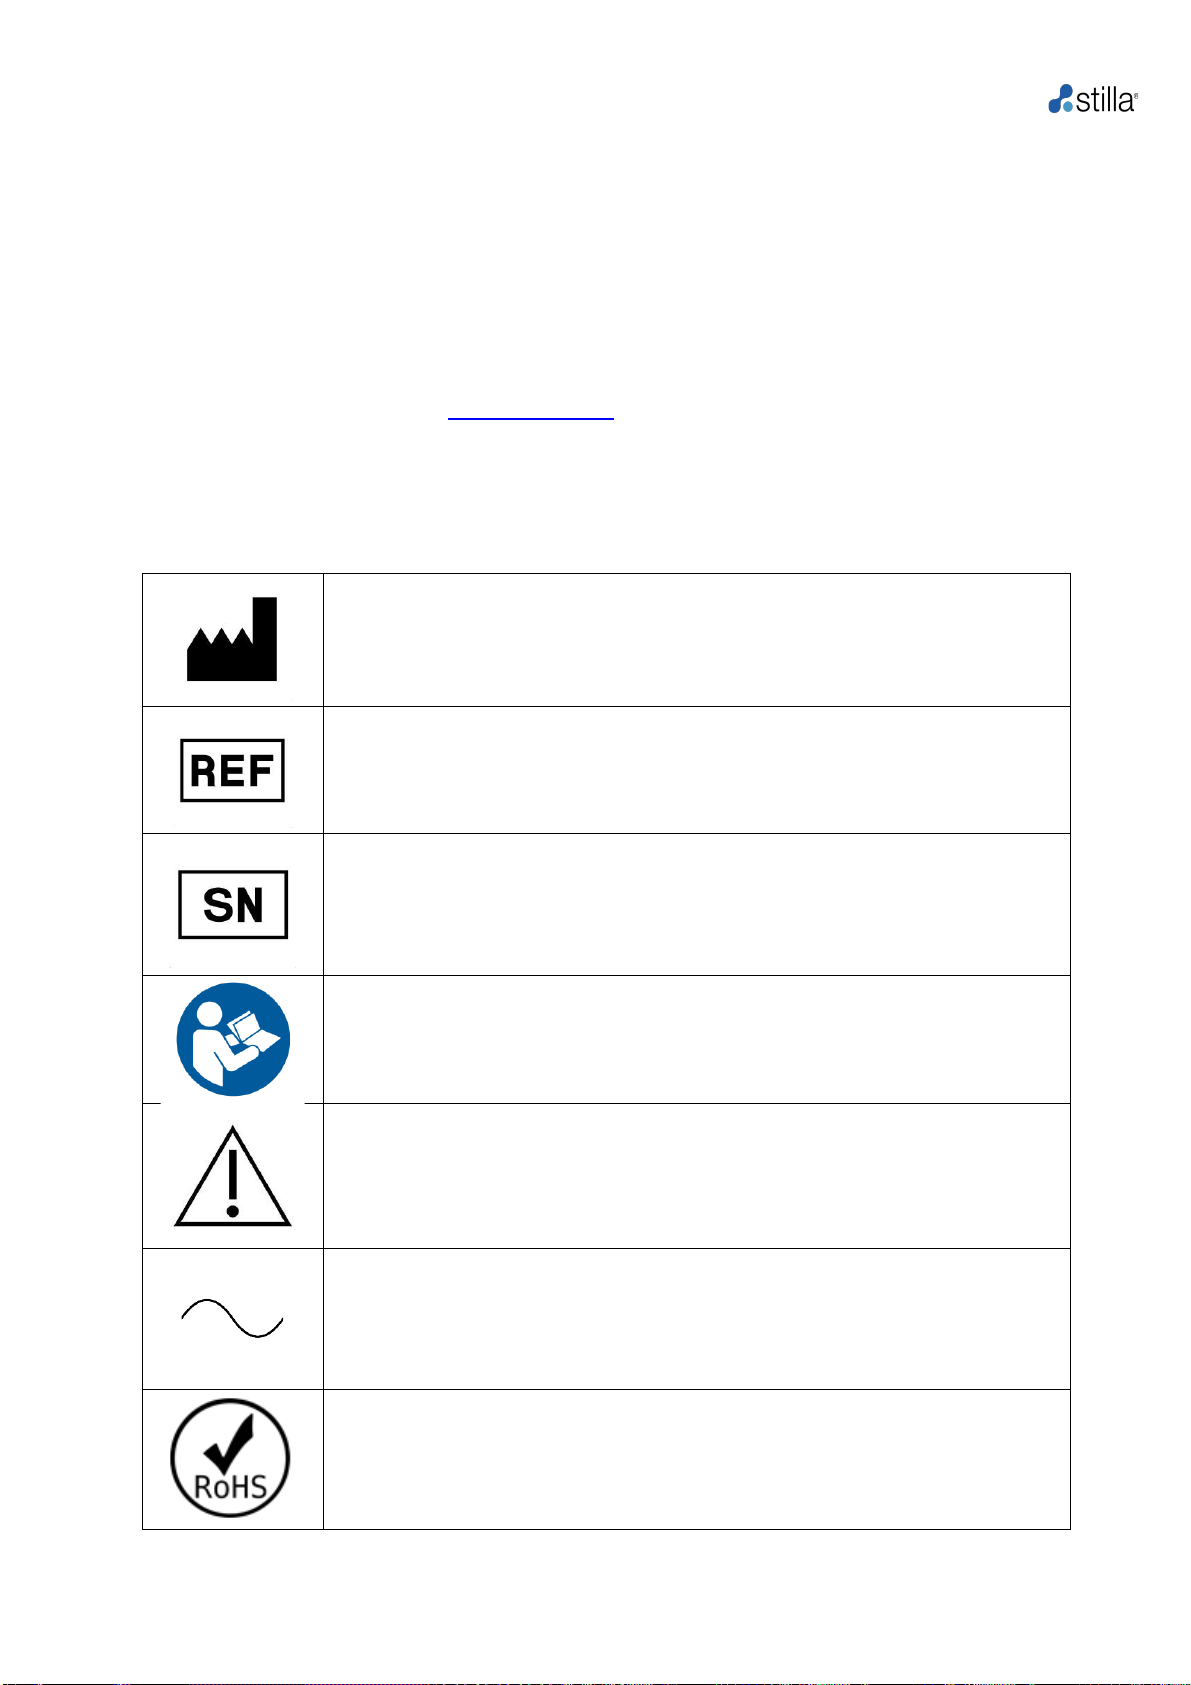
i. Labeling symbols
Manufacturer.
Product reference (part number).
Product serial number.
Read the User Manual before using the product.
Caution: documentation must be consulted in all cases where this symbol
is marked.
Using the product without applying the instructions explained in the User
Manual mayresult in personalinjury or damagethe equipment andfacilities.
Alternating current.
Restriction of Hazardous Substances (Directive 2002/95/EC on the
restriction of the use of certain hazardous substances in electrical and
electronic equipment).

Geode H14000 User Manual
10
The product should be disposed of in an appropriate recovery and recycling
structure.
CE marking (manufacturer's declaration that the product meets the
requirements of the applicable EC directives).
ii. Label type of the Geode
d) Declaration of conformity
To view the declaration of conformity certificate, please visit
https://www.stillatechnologies.com/technical-resources/naica-system-prism3/.

Geode H14000 User Manual
11
e) Specifications
General characteristics
Capacity
Up to 12 samples (Sapphire chips) and 48 samples
(Opal chips); (3 chips)/run
Thermo block temperature range
10 °C to 95 °C
Control accuracy thermoblock
± 0.1 °C
Block uniformity (at 72 °C)
± 1.0 °C
Adjustable ramping
from 0.1°C/s to 2°C/s
Pressure input
0 - 1.3 bar
Pressurizing gas
Air
Screen
Touch-sensitive TFT-Display (VGA, Graphics,
65535 colors)
Interfaces
3 x USB, 1 x Ethernet
Dimensions (W x D x H)
35 x 37 x 29 cm
Weight
16 kg ± 0.5 kg
Power supply
100-240V~ // 50/60Hz // 750W
Fuse
T10AH/250V~
Disconnection device
The plug socket serves as a disconnecting device;
the plug socket must be easily accessible.
Maintenance
All parts are required to be examined or supplied
only by the manufacturer or its agent.
Ambient condition
Pollution degree
2
Operation
Environmental conditions
Indoor use only
Temperature
+15 °C to +25 °C
Relative humidity
Max. 70%
Altitude
Operating at max. 1000m above sea level
Noise level
< 37 dB (A)
Storage
Temperature
+5°C to +40°C
Relative humidity
10% to 95% non-condensing
Barometric pressure
700 hPa to 1060 hPa
Waiting time until operation
8h
Shipping
Temperature
-40°C to +60°C
Relative humidity
10% to 95% non-condensing
Barometric pressure
700 hPa to 1060 hPa
Waiting time until the operation
24h
f) Installation of the Geode
i. Operating requirements
Proper infrastructure requirements for the Geode installation:
oclean laboratory environment
osturdy surface, for supporting from 20 to 40 kg
oa minimum distance of 25 cm to neighboring objects around the Geode.
oroom temperature between 15°C and 25°C
oThe operating pressure of the Geode should be maintained between 1,250 ± 50 mbars (via the
compressed air system (ISPTLAPG3) delivered with the naica®system)
ii. Installing the Geode:
The initial naica®system installation should always be executedby a StillaTechnologies Service
Specialist.
Following the installation, the naica® system performance will be validated according to Stilla
Technologies specifications. At the end of the naica® system installation, Stilla Technologies

Geode H14000 User Manual
12
provides a certification documenting and guaranteeing adequate naica® system installation and
validation. The certification is required to release the naica® system for customer operation.
g) Materials required but NOT supplied
i. Crystal Digital PCR™ recommended PCR mastermixes
Depending on the application, Stilla Technologies recommends the use of naica® multiplex PCR
MIX for fluorescently labeled probe-based digital PCR assays (TaqMan®) or naica® PCR MIX
for EvaGreen® dye-based digital PCR assays for optimal results with Crystal Digital PCR™ for
DNA amplification. These reagents are available at 5X and 10X concentrations and Stilla
Technologies provides fast cycle or conventional PCR cycling protocols for initial protocol
development.
More information is available at: https://www.stillatechnologies.com/naica-system-dpcr-mixes/.
For RT-PCR applications, Stilla Technologies recommends the use of qScriptTM XLT One-Step
RT-qPCR ToughMix® (Quantabio).
As an alternative, the following PCR mastermixes are validated for the naica® system:
PerfeCTa® MultiPlex qPCR ToughMix®, the PerfeCTa® qPCR ToughMix® UNG, and
PerfeCTa® qPCR ToughMix® (Quantabio). When using cDNA, we recommend using the
qScript® Flex cDNA Synthesis kit (Quantabio). For further information and instructions, please
refer to the Technical Resources webpage available at
https://www.stillatechnologies.com/technical-resources/naica-system-prism3/.
Any other enzymatic mix needs to be evaluated by the user before performing experiments, as
Stilla Technologies cannot guarantee the compatibility of any other enzymatic mix with the
naica® system.
h) Crystal Digital PCR™ recommended detection system
For the detection and quantification of the amount of target in the sample, a fluorescent signal is
measured. The Crystal Digital PCRTM technology allows the use of fluorescently labeled
hydrolysis probes (TaqMan®) as well as the non-specific fluorescent intercalating dye
EvaGreen®.
Note: SYBR® Green is not compatible with the naica®system.
i. Fluorescently labeled probes
The Crystal Digital PCRTM technology allows the detection of up to 3 different targets in the same
sample using 3 different fluorophores, depending on the configuration.
A fluorophore is a fluorescent chemical compound that absorbs light energy of a specific
wavelength and emits light at a longer wavelength. They are used in many applications and are
characterized notably by their excitation/emission spectra. In order to be detected by the Prism3
instrument, a fluorophore excitation spectrum must overlap with that of the LED of a given
detection channel, and its emission spectrum must fall within the bandpass of the tri-band filter
used for acquisition (Table 1).
Table 1: The Prism3 optical specifications and examples of compatible fluorophores.
Blue Channel
Green Channel
Red Channel
Excitation range
415-480 nm
530-550 nm
630-640 nm
Emission range
495-515 nm
560-610 nm
655-720 nm
Compatible fluorophores
(reporter)
FAM, Fluorescein
Cy®3, HEX
Alexa Fluor® 647,
Cy®5

Geode H14000 User Manual
13
Note: A fluorophore might be excited by several LEDs and emit light in different acquisition
channels. This phenomenon can readily be corrected by applying compensation post-image
acquisition (refer to the specific Crystal Miner software User Manual for details available here:
https://www.stillatechnologies.com/technical-resources/naica-system-prism3/.
ii. Non-specific fluorescent intercalating dye: EvaGreen®
Intercalating dyes can also be used with Crystal Digital PCRTM like EvaGreen®. EvaGreen® is a
non-mutagenic and non-cytotoxic DNA-binding dye compatible with Crystal Digital PCR™. Non-
fluorescent when free in solution, it becomes strongly fluorescent upon binding to double-
stranded DNA (dsDNA) in a sequence-independent manner. The signal generated can readily
be detected using the same filters as those used for FAM or fluorescein.
Coupled with Crystal Digital PCR™, EvaGreen® thus enables absolute quantification of a target
by using a simple primer pair.
i) The reference dye
In Crystal Digital PCR™, reference dyes are used to increase the basal fluorescence of droplets
to enable their detection by the Prism3 and the Crystal Reader software.
Fluorescein is the reference dye for TaqMan® based assays. The naica® multiplex PCR MIX
already contains the reference dye and does not require the addition of fluorescein. Fluorescein
should always be added to the reaction mix when using PCR mixes other than the ready-to-use
naica® multiplex PCR MIX for successful Crystal Digital PCR™ when using TaqMan® probes.
For EvaGreen® based assays the basal fluorescence from the dye is usually sufficient to allow
droplet detection in the blue channel. However, in case the red channel hasto be used for droplet
detection, Alexa Fluor® 647 can be added as a reference dye. Stilla Technologies recommends
adding Alexa Fluor® 647 as reference dye to all EvaGreen® experiments.
Please confirm that the droplets have been correctly detected when using a new batch of the
reference dye.
Setting up a Crystal Digital PCR™ experiment
Preventing DNA contamination
Due to the extraordinary sensitivity of most Taq polymerases, exogenous DNA amplification can
occur and ruin an entire experiment (Kwok and Higuchi, 1989). Since many sources of
contamination exist such as cross-contamination and previous PCR amplification, adhesion to a
strict set of protocols combined with some precautions is essential.
To limit DNA contamination, the following conventional recommendations for PCR should be
followed (not exhaustive):
•separate areas and dedicate equipment/supplies for sample preparation, PCR setup, PCR
amplification, and analysis of PCR products. Wear a clean lab coat and gloves during each step
of the experiment.
•clean laboratory benches and equipment periodically with water/ethanol, or with
DNase/RNase away depending on the application (avoid aerosols of cleaning reagents to
prevent negative contamination).
Note: Bleach is not recommended; if its use is unavoidable, ensure abundantly rinsing with water
after the bleach treatment.
•keep tubes capped as much as possible.
•centrifuge tubes after vortexing to limit aerosols.
•monitor potential contaminants by including a no template control.

Geode H14000 User Manual
14
•it could be useful to aliquot some reagents to prevent contamination and, at the same time, to
reduce repetitive freezing/thaw cycles that might affect their efficiency.
Protocol for setting up Crystal Digital PCR™
a) Sample purification and pre-treatment
A range of extraction kits and methods can be used to purify nucleic acids from a variety of
sample types, However, individual sample-type compatibility for digital PCR applications may
require a dedicated assay validation by the end-user. DNA samples with ≥10 kb average length
(e.g., genomic DNA) should be fragmented by restriction digestion before partitioning to ensure
even distribution of the DNA template during partitioning. Restriction digestion is not required for
highly fragmented DNA (e.g., FFPE DNA or circulating DNA). Care must be taken to use
restriction enzymes that do not cut within the amplified sequence.
Reaction mix preparation
For Crystal Digital PCR™, Stilla Technologies recommends using the naica® PCR MIX reagents
https://www.stillatechnologies.com/naica-system-dpcr-mixes/.
Always thaw each reagent, vortex, and spin briefly in a microcentrifuge to collect the material in
the bottom of the tube.
i. Fluorescently labeled probes
When using fluorescently labeled TaqMan® probes, Stilla Technologies recommends
using the naica® multiplex PCR MIX.
For the reaction mix composition using the naica® multiplex PCR MIX, view the detailed reaction
preparation information in the corresponding IFU here:
https://www.stillatechnologies.com/technical-resources/naica-system-prism3/
Please refer to the next section for guidelines on primer and probe concentrations.
For other compatible PCR Master mix compositions, refer to the IFU for the Quantabio reagents
for the naica® system available here: https://www.stillatechnologies.com/technical-
resources/naica-system-prism3/.
Vortex and centrifuge the reaction mix after adding the reagents to avoid air bubbles that may
compromise the Crystal Digital PCR™ reaction.
ii. Non-specific fluorescent intercalating dye: EvaGreen®
When using EvaGreen®, Stilla Technologies recommends using the naica® PCR MIX.
For the reaction mix composition using the naica® PCR MIX, view the detailed reaction
preparation information in the corresponding IFU here:
https://www.stillatechnologies.com/technical-resources/naica-system-prism3/
Optimization of Crystal Digital PCR™
i. Fluorescently labeled probes
The optimal primer and probe concentrations as well as the optimal hybridization/elongation
temperature during the cycling should notablybe tested. Optimalresults involve good separability
between positive and negative droplets, no or few “rain” droplets (positive droplets with variable
intensity localized between the negative and positive cluster) that could be due for example to

Geode H14000 User Manual
15
non-specific hybridization of the primers/probe or competition phenomena, as well as good
estimated target concentration.
In addition, the efficiency of a single plex reaction should always be evaluated first before
proceeding to a multiplex one.
For optimal results, Stilla Technologies recommends the use of high-quality quenchers such as
Black Hole Quencher® (BHQ®). These quenchers absorb broadly, do not emit light, and thus
allow the use of multiple reporters with the same quencher (see Table 1 for compatible
fluorophores).
Here are some guidelines for assay design:
•Recommended primer and probe concentrations on the naica® system are 0.25 to 1 µM.
•Before multiplexing, it is recommended to test each primer pair and the corresponding
probe in simplex reactions to verify PCR amplification.
•Increasing the concentration of probes increases the basal fluorescence signal of the
negative droplets in the corresponding detection channel, and to a lesser extent in the
adjacent channels due to spill-over.
•When multiplexing, depending on the primer and probe design, competition between the
different sequencescan occur (for example, primer heterodimer formation or non-specific
annealing). High concentrations of primers and probes can aggravate these phenomena.
Thus, when combining several assays for high multiplexing, it is recommended to start
with low concentrations of primers for all assays (e.g., 0.25 µM), and increase the
concentrations gradually up to 1 µM if needed (for example to increase amplification
efficiency). (see https://www.gene-pi.com/item/primers-and-probes-2/)
Note: When optimizing primer and probe concentrations for a given target, it can be beneficial to
determine the limiting factor first. For example, if the primers are the limiting factor, it is useless
to increase probe concentrations. Other important aspects to consider for assay optimization:
•When designing primers and probes, try homogenizing the melting temperatures of all
the primers together and all the probes together. This will make it easier to pinpoint the
optimal elongation temperature for all targets.
•When designing probes, short sequences of <20 nucleotides place the fluorophore and
quencher in close proximity and result in more efficient quenching. The result is increased
fluorescence differences between positive droplets (where probes are hydrolyzed) and
negative droplets (where probes remain intact).
ii. Non-specific fluorescent intercalating dye: EvaGreen®
When setting up an experiment using EvaGreen®, it is important to remember that high
concentrations of any dsDNA initially present in the PCR mix will lead to higher basal
fluorescence. Moreover, although EvaGreen® has a higher affinity for dsDNA, the dye will also
be able to bind with lower affinity to any oligonucleotides present, thus also contributing to basal
fluorescence.
For optimal estimation of the sample concentration, use 0.2 up to 1,000 copies of template/µL of
final reaction.
Depending on the type of DNA to quantify and the intrinsic properties of the assay, it may be
necessary to assess the practical dynamic range.

Geode H14000 User Manual
16
Crystal Digital PCR™ Geode protocol
There are two microfluidic consumables compatible with the Geode: the Sapphire chips and the
Opal chips.
The Sapphire chips are compatible with all Geode versions.
The Opal chips are only compatible with Geode version H14000 running with software version
2.6.0 and above. Geode versions H13000 and below are not compatible.
For detailed instruction for loading the samples in the Sapphire and Opal chips, please refer to
the respective Instructions for Use and the Quick User Guides available here:
https://www.stillatechnologies.com/technical-resources/naica-system-prism3/.
Loading chips for Crystal Digital PCR™ on the Geode
1) Turn on the power switch located at the back panel of the (Fig. 3 B) and wait for initialization.
Figure 3: Front (A) and back (B) view of the Geode. USB ports are optional and intended for
data import or export; the ethernet port is optional.
2) Check that the pressure source is connected to the pressure inlet behind the device (Fig. 3B).
The pressure tube coming from the pressure source (compressed air system (ISPTLAPG3)) can
be connected to the instrument by simply pushing it in the pressure inlet until it does not go any
further.
3) Switch on the pressure source, wait for a minute, and ensure that the pressure delivered to
the Geode is between 1,250 ± 50 mbars (check the screen of the device or the screen of the
pressure controller behind the device to ensure the accuracy of the pressure delivered to the
Geode) (Fig. 3B). Although the input pressure is adjusted at installation, it can be adjusted
manually but should not exceed 1300 mbars.
4) Open the lid of the Geode by pulling the black handle downward (Fig. 6). Check that the
thermal plate is empty and cleaned. Make sure the gasket around the thermal plate of the Geode
is in good working order, and that the thermal plate is kept free of dust particles or moisture.
5) At installation, the Sapphire chip adaptors and the Sapphire chip magnetic frame are in place
by default. To change the Geode configuration to Opal chip operation, place the provided
magnetic adapters next to the existing clamps and make sure they are secured (Fig. 4).

Geode H14000 User Manual
17
Figure 4: Magnetic clip-on cushions can be easily clipped next to the existing pressure points.
6) Following, ensure the respective Opal chip magnetic frame is placed on the thermal plate;
chamfer placed on the lower left edge.
Place the respective chips in position using the respective magnetic chip frame on the
thermal plate. The correct orientation of the respective magnetic frames is supported by a
blue (left) and white (white) positioning indicator, both on the magnetic frames as well as on
the Geode instrument thermal plate framing (Fig. 5).
Figure 5: Positioning of the Sapphire chip (left), and Opal chip (right) in the respective magnetic
frame on the thermal plate of the Geode instrument.
7) Close the lid of theGeode by pulling the black handle upward. Ensure that the gasket remains
in place ensuring a hermetic seal while closing the Geode lid.
Figure 6: Opening/closing the lid of the Geode.
Magnetic Opal chip clip-on cushions
Geode H14000 User Manual
18
When operating Opal chips –please note: The maximum time spent between sample loading of
the first Opal chip to starting the Crystal Digital PCR™ run on the Geode instrument shall not
exceed 20 minutes. It is not recommended to prepare more than 3 Opal chips per Geode run at
a time. Refer to the respective Instructions for Use for the Opal chip for detailed instructions on
Opal chip operation for Crystal Digital PCR™ available here:
https://www.stillatechnologies.com/technical-resources/naica-system-prism3/.
Starting a Crystal Digital PCR™ run on the Geode
a) The Geode Crystal Digital PCR™ reaction steps
The Crystal Digital PCR™ reaction of the Geode instrument involves 3 steps known as
partitioning (droplet generation), cycling (PCR amplification), and release (pressure decrease
and stabilization of temperature). To design a new Crystal Digital PCR™ program, the user
should select the partition, define the temperatures used during the cycling, and add the release
step.
i. Partitioning
Partitioning is always the first step of a Crystal Digital PCR™ program. The temperature should
always be set at 40°C (Sapphire chips) and 25°C (Opal chips) for optimal Crystal Digital PCR™.
To enable droplet generation, pressure increases from atmospheric pressure (AP) to AP + 1000
mbar (followed by a drop to AP + 950 mbar at the end of the partitioning step) If a modification
of the partitioning temperature is required, please contact Stilla Technologies before proceeding.
For Sapphire chips, the generated droplets have an average volume of ~0.68 nL when using the
naica® PCR MIX and the naica® multiplex PCR MIX.
For Opal chips, the generated droplets have an average volume of ~0.24 nL when using the
naica® PCR MIX and the naica® multiplex PCR MIX.
ii. Thermal Cycling
During the PCR amplification phase, the pressure is fixed at AP + 950 mbar to ensure optimal
Crystal Digital PCR™ performance. If a modification is required, please contact Stilla
Technologies before proceeding.
Stilla Technologies recommends the use of the following cycling parameters for PCR and RT-
PCR experiments:
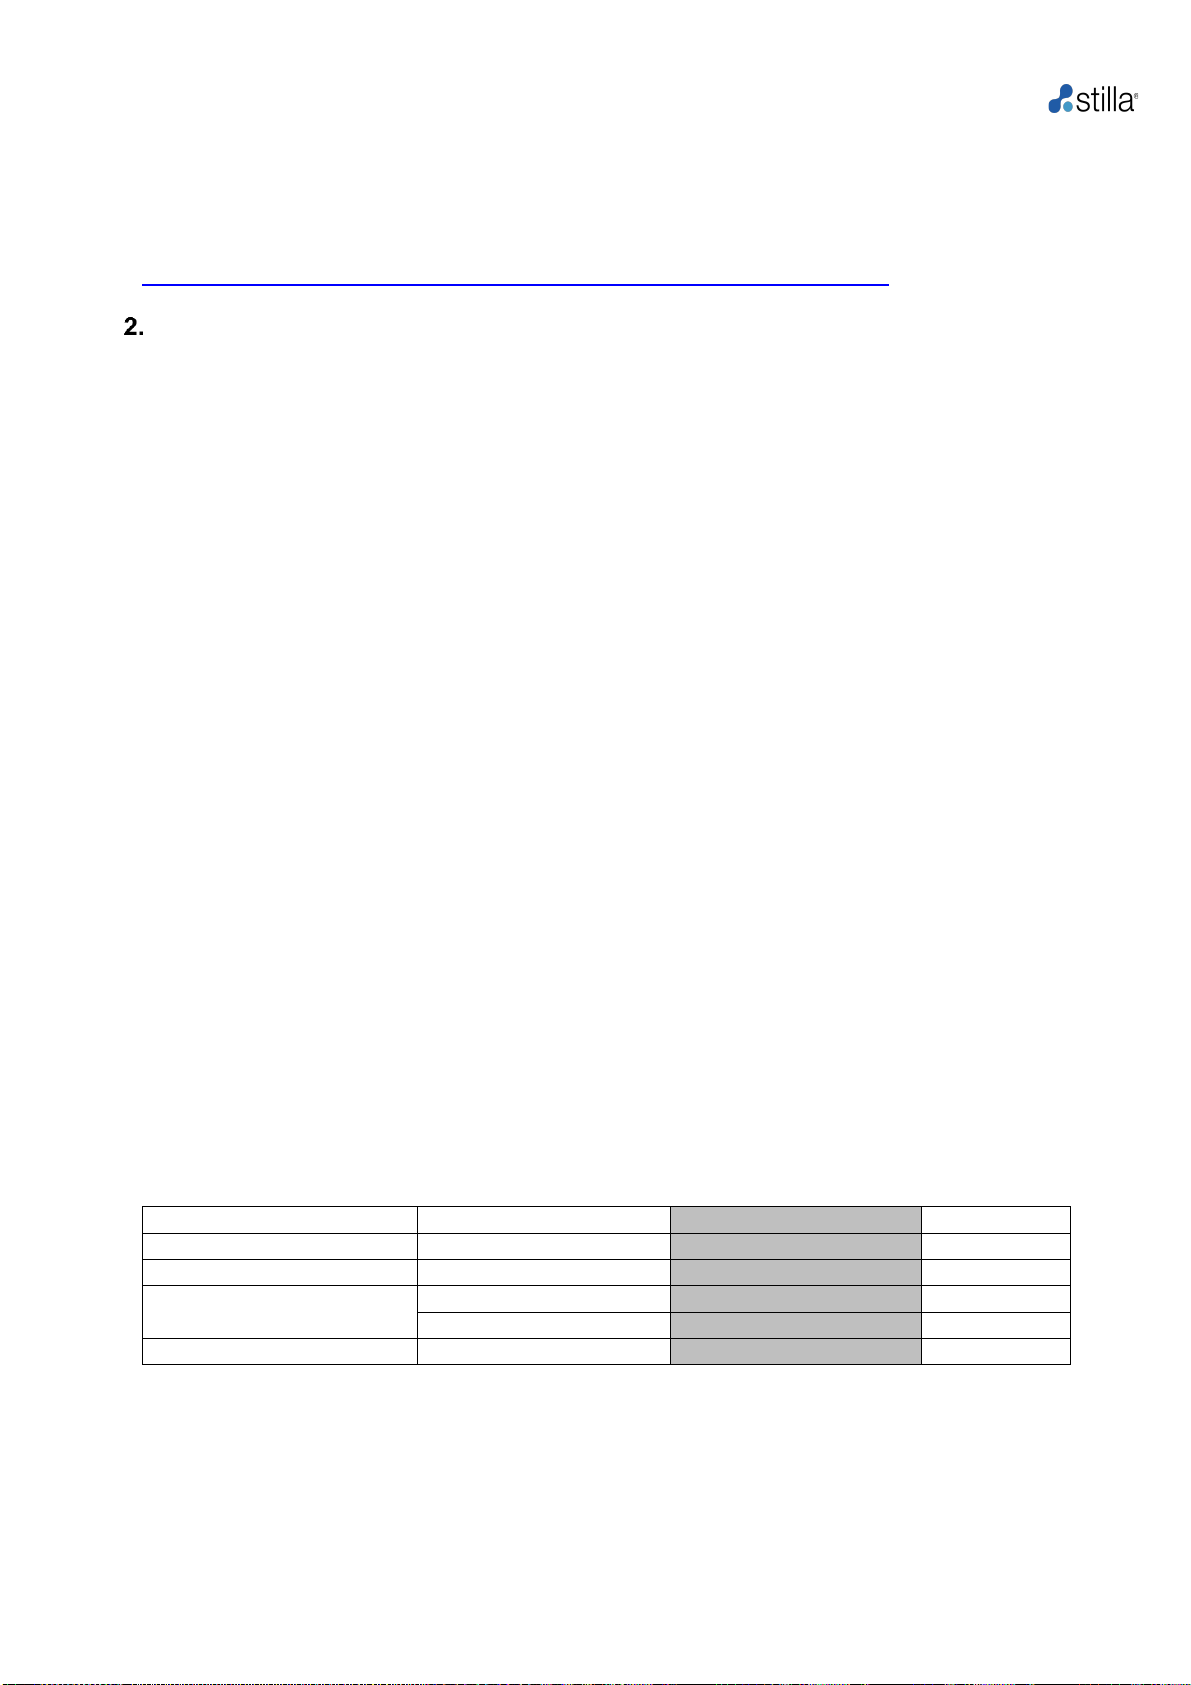
Table 2: Crystal Digital PCR™ template called “FAST-Template Stilla PCR 45 cycles” using
the recommended naica® PCR MIX reagent (EvaGreen® dye) with Sapphire chips. The total
duration of the default program is approximately 2 hours.
Step
Temperature (°C)
Pressure* (mbar)
Duration**
Partition
40*
AP to +950
12 min
Initial denaturation
95
+950
3min
PCR (45 cycles)
95
+950
10 sec
55-65
+950
15 sec
Release
Down to 25
Down to AP
33 min
*Should not be modified, ** Duration states indicative times, variances may occur.
Geode H14000 User Manual
19
Table 3: Crystal Digital PCR™ template called “Template Stilla PCR 45 cycles” using the
recommended naica® multiplex PCR MIX (Fluorescently labeled probes) with Sapphire chips.
The total duration of the default program is approximately 2 hours and 30 min.
Step
Temperature (°C)
Pressure* (mbar)
Duration**
Partition
40*
AP to +950
12 min
Initial denaturation
95
+950
10 min
PCR (45 cycles)
95
+950
30 sec
55-65
+950
15-60 sec
Release
Down to 25
Down to AP
33 min
*Should not be modified, ** Duration states indicative times, variances may occur.
Note: An initial 10-minute denaturation time at 95°C is not required for the naica® mastermixes;
3 minutes is sufficient for this hotstart enzyme.
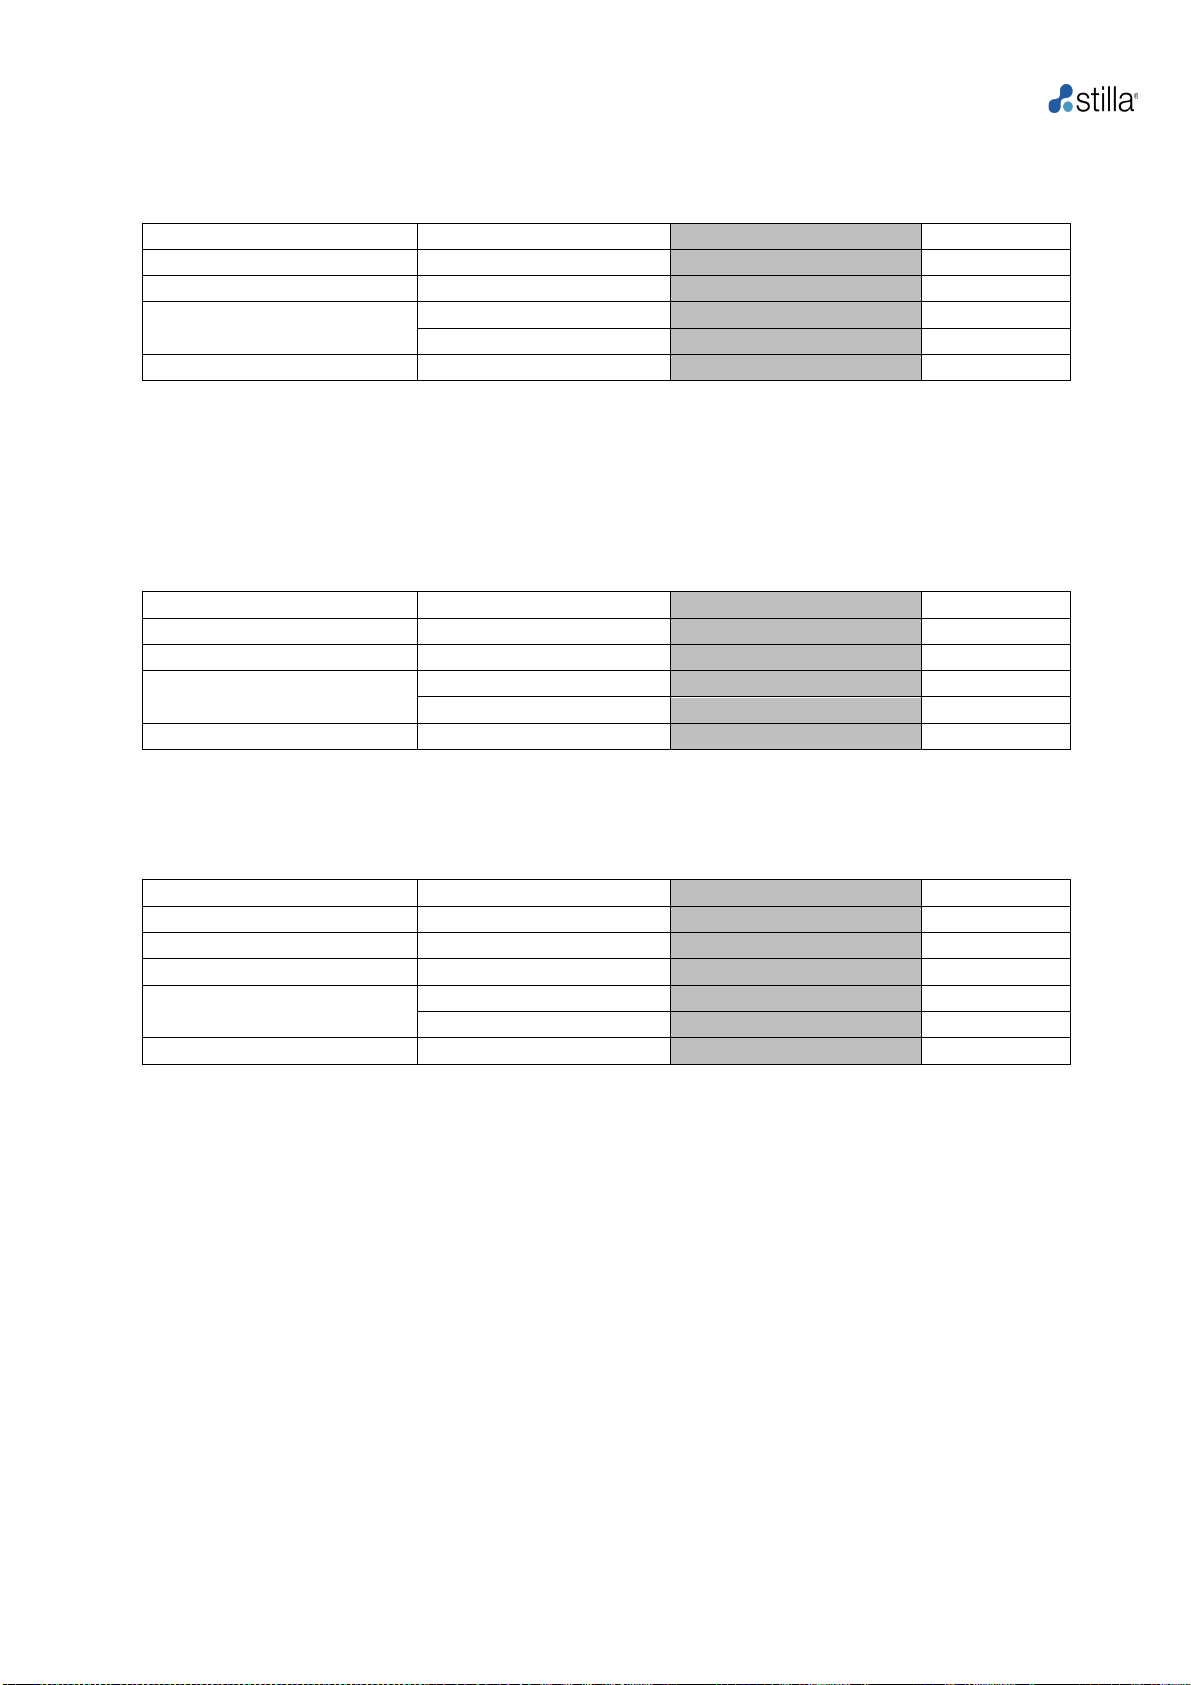
Table 4: Crystal Digital PCR™ template called “Opal Template PCR 45 cycles”using naica®
PCR reagents (naica® PCR MIX, naica® multiplex PCR MIX) with Opal chips. The total duration
of the default program is approximately 2 hours and 30 min.
Step
Temperature (°C)
Pressure* (mbar)
Duration**
Partition
25*
AP to +950
1h
Initial denaturation
95
+950
3min
PCR (45 cycles)
95
+950
10 sec
55-65
+950
30 sec
Release
Down to 25
Down to AP
10 min
*Should not be modified, ** Duration states indicative times, variances may occur.
Table 5: Crystal Digital PCR template for RT-PCR application called “Template Stilla RT-PCR
45 cycles” with Quantabio qScriptTM XLT One-Step RT-qPCR ToughMix® with Sapphire chips.
The total duration of the default program is approximately 2 hours and 30 min.
Step
Temperature (°C)
Pressure* (mbar)
Duration**
Partition
40*
AP to +950
12 min
cDNA synthesis
50
+950
10 min
Initial denaturation
95
+950
1-2 min
PCR (45 cycles)
95
+950
30 sec
55-65
+950
15-60 sec
Release
Down to 25
Down to AP
33 min
*Should not be modified, ** Duration states indicative times, variances may occur.
Notes:
•The above-described templates for PCR and RT-PCR programs are already preloaded in the
Geode. They may be used as starting templates to create new assay-specific custom
programs.
•The total duration of a Crystal Digital PCRTM program is based on the temperature ramp rate
of the thermal plate –around 2°C/sec by default –and the number of cycles during PCR
amplification.
•The exact same Crystal Digital PCRTM program used on two different instruments may have
slightly different durations. This is due to small intrinsic variations of the thermal plate from
one Geode to the other.
•The range of optimal temperature performance of the Geode’s thermal plate is 10-95°C.
Please do not try to modify outside this range.
Table of contents
Other STILLA Laboratory Equipment manuals

Popular Laboratory Equipment manuals by other brands


RS PRO
RS PRO RS-983 instruction manual

IKA
IKA Topolino Mobil operating instructions

Bertin Technologies
Bertin Technologies PRECELLYS 24 Touch user manual

Thermo Scientific
Thermo Scientific TRACE GC Ultra Maintenance and troubleshooting manual

General Data Healthcare
General Data Healthcare TBS SHURMark SMC-A Operator's manual

Koehler
Koehler SV3000 Operation and instruction manual