Storage Options baby cam User manual

2
CAUTION
RISK OF ELECTRIC SHOCK
DO NOT OPEN
TO REDUCE THE RISK OF ELECTRIC SHOCK,
DO NOT REMOVE THE COVER.
NO USER SERVICABLE PARTS INSIDE.
REFER SERVICING TO QUALIFIED PERSONNEL.
The lightning flash with arrowhead symbol, within an equilateral
triangle, is intended to alert the user to the presence of non-
insulated “dangerous voltage” within the product’s enclosure that
may be of sufficient magnitude to constitute a risk of electric shock.
The exclamation point within an equilateral triangle is intended to
alert the user to the presence of important operating and
maintenance (servicing) instructions in the literature accompanying
the appliance.
WARNING:
TO PREVENT FIRE OR SHOCK HAZARD, DO NOT
EXPOSE THIS UNIT TO RAIN OR MOISTURE
CAUTION:
TO PREVENT ELECTRIC SHOCK, ENSURE THE PLUG
IS FULLY INSERTED INTO A MAINS SOCKET

3
WARRANTY AND TECHNICAL SUPPORT
To help you make the most of this product you’ll find a host of information including full product manuals, FAQ, troubleshooting
guides and a support service if you have specific questions, available at our support website: www.storageoptions.com/support.
This product is also backed by a 12 month warranty in the unlikely event of something going wrong. More information and
warranty registration is available at www.storageoptions.com/warranty.
Support:
www.storageoptions.com/support/
Warranty:
www.storageoptions.com/warranty/
TABLE OF CONTENTS
OVERVIEW
4
PACKAGE CONTENTS
4
FEATURES
5
3.1 –Camera
3.2 –Monitor
5
6
POWERING ON
7
4.1 –Camera
4.2 –Monitor
7
7
MENU FUNCTIONS
7
5.1 –Main Menu
5.2 –Baby Cam Setup
5.3 –Monitor Setup
5.4 –System Setup
7
8
8
9
PAIRING THE UNITS
9
6.1 –Method 1
6.2 –Method 2
9
9
ON-SCREEN INDICATORS
10
7.1 –Signal Condition
7.2 –Channel Indicator
10
10
TV OUTPUT MODE
10
APPENDIX –PRODUCT SPECIFICATION
11
4
OVERVIEW
babyCam nursery offers a simple, easy to use method of seeing, hearing and talking to your baby from anywhere in
the home. It includes a compact and versatile wireless camera to provide clear footage of your baby. From the
camera, a clear, full colour video picture and sound are then transmitted wirelessly to the large 7” (17.5cm) screen
for viewing.
The camera also incorporates a night light to provide a reassuring glow in the bedroom or nursery. If darkness is
preferred, then the camera also incorporates a night vision feature allowing you to see your baby in the dark.
100% digital baby monitor kit
Interference-free
Supports up to 4 cameras per monitor
7” colour LCD monitor
Infrared night vision
High sensitivity microphone
2-way communication
Power-save function
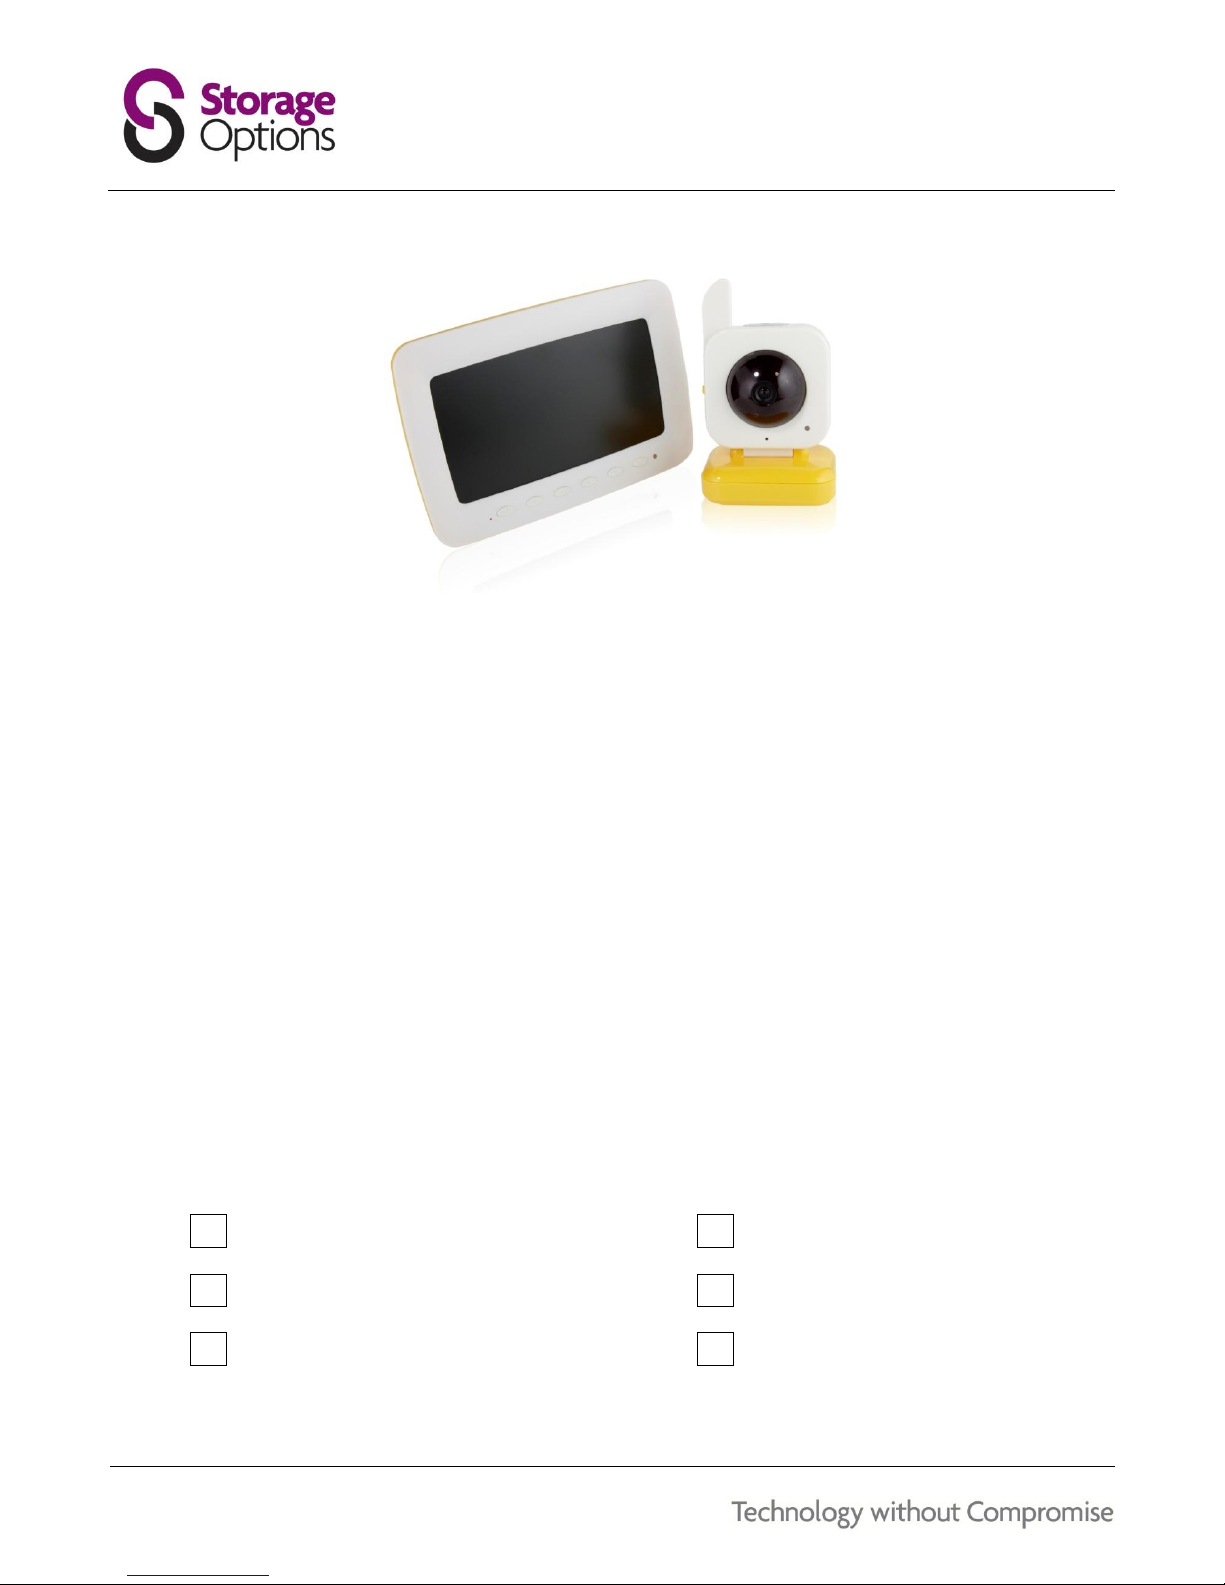
PACKAGE CONTENTS
Check the contents of your Nursery Cam package against this checklist. If anything is missing or damaged, please do
not use the system, and inform your supplier as soon as possible.
7” wireless LCD baby monitor
Wireless camera
12V DC adapter for monitor
6V DC adapter for camera
AV cable
Instruction manual

5
FEATURES
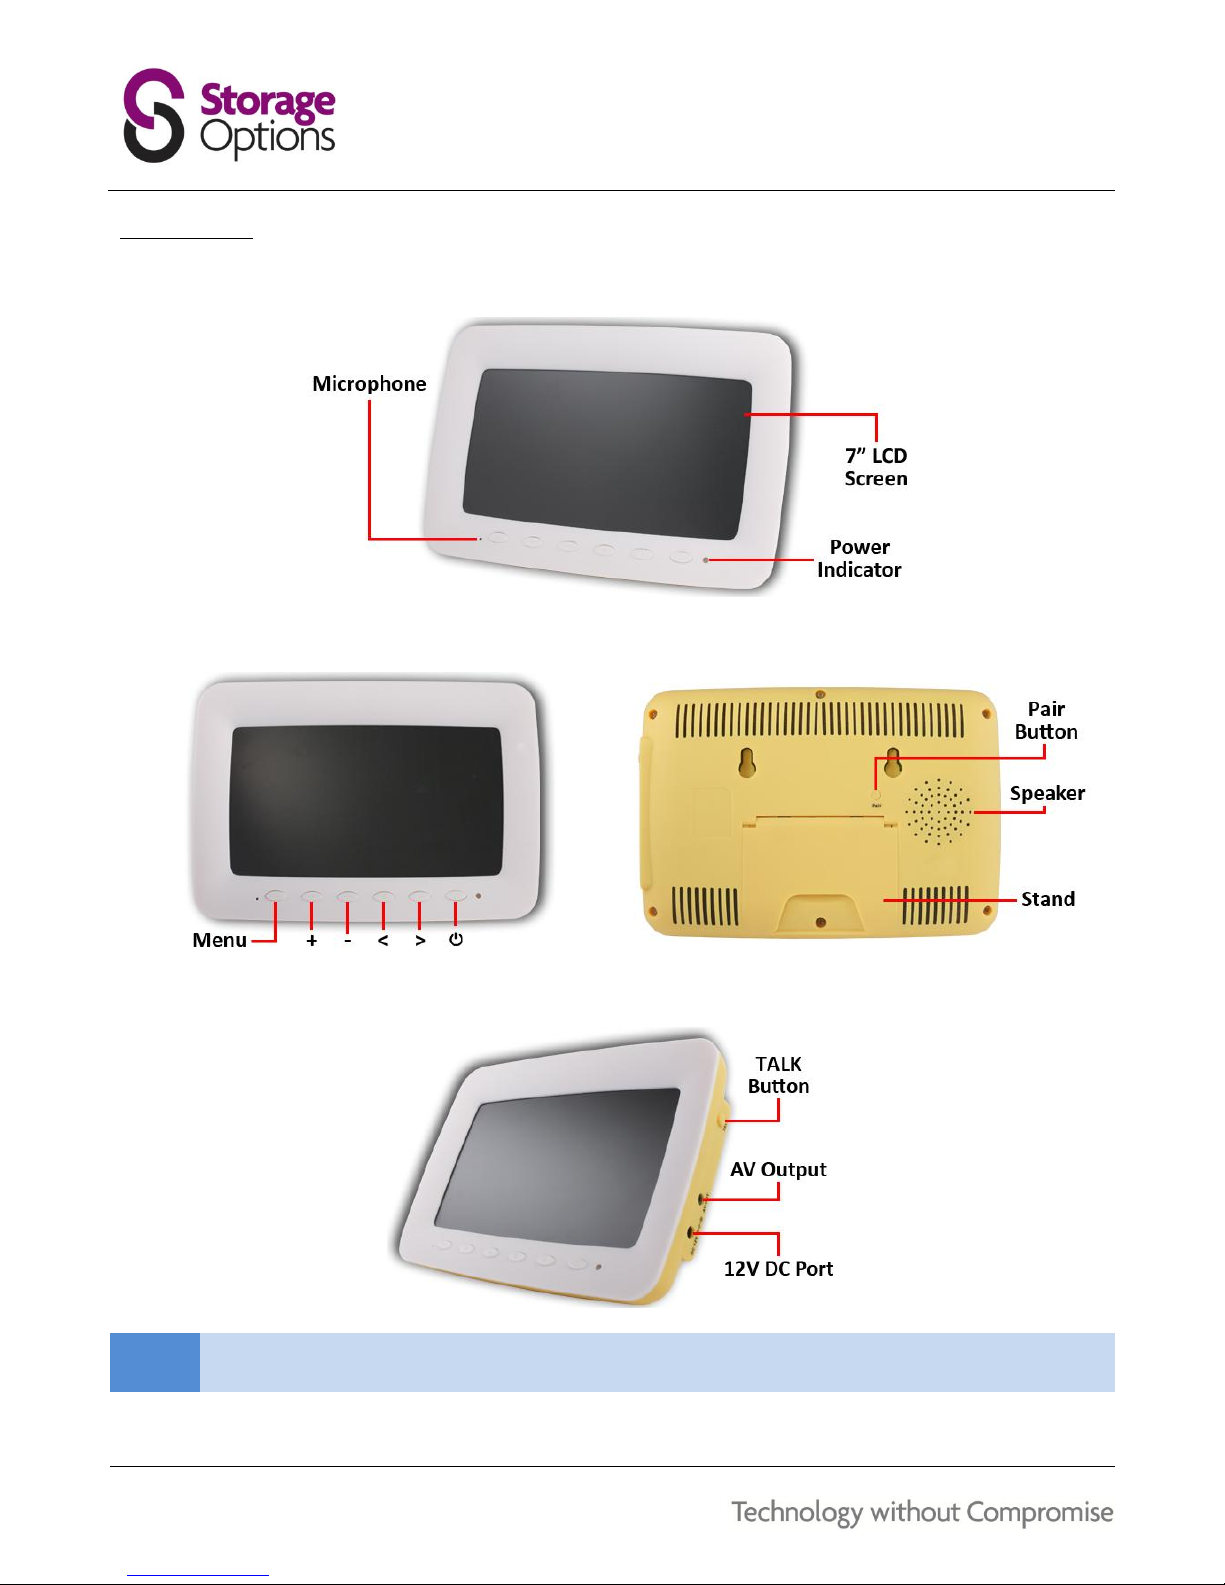
3.1 –CAMERA
The camera has various features you should be familiar with for correct operation.
The PAIR button is located on the back of the camera:
The power socket and on / off switch are on opposite sides of the camera:
6
3.2 –MONITOR
The monitor has various features you should be familiar with for correct operation.
Various options can be changed in the menus. Use the front panel buttons to control these functions:
The AV output socket can be used to connect the monitor to a television:
NOTE
You can talk to your child by holding the “TALK” button down and speaking into the microphone.

7
POWERING ON
4.1 –CAMERA
To turn the camera on:
Connect the 6V DC mains adapter to the mains socket on the camera.
Slide the on / off switch to the “On” position.
To turn the camera off:
Slide the on / off switch to the “Off” position.
TIP
The camera can also be powered by 4x AA batteries (not supplied).
4.2 –MONITOR
To turn the monitor on:
Connect the 12V DC mains adapter to the mains socket on the camera.
Press and hold the button for 2 seconds. The power indicator LED will turn green.
To turn the monitor off:
Press and hold the button for 2 seconds. The power indicator LED will be extinguished.
MENU FUNCTIONS
The monitor unit features buttons along the bottom edge which can be used for navigating menus and changing
various options. Press “M” to display the menu on screen. Use the +and –keys to navigate up and down the menu
options. Press “M” to select a menu option. Press ←and →keys to change values.
TIP
If the menu is not currently on-screen, you may press the +/ –buttons to change the speaker volume on
the monitor. Press ←and →keys to switch between 4 video channels.
5.1 –MAIN MENU
Press the “M” button to display the main menu on screen. You will be presented with the following options:
Baby Cam Setup
Monitor Setup
System Setup

8
5.2 –BABY CAM SETUP
Here you can adjust the volume of the speaker built into the camera. This setting is used in conjunction with the
“TALK” function and determines how loud the parent’s voice will be when talking to the child.
MENU ITEM
ADJUSTMENT
DESCRIPTION
Baby Cam Vol
0-9
Adjust the volume from 0 (minimum) to 9 (maximum).
To adjust the Baby Cam speaker volume:
1. Press “M” to display the menu.
2. “Baby Cam Vol” will be the first option highlighted. Press “M” to select this option.
3. Press +/ –to adjust the volume from 0 (minimum) to 9 (maximum).
4. Press “M” to save your adjustment. This will return you to the main menu. After a few seconds, the menu
will disappear.
5.3 –MONITOR SETUP
Here you can adjust various options for the monitor unit.
MENU ITEM
ADJUSTMENT
DESCRIPTION
Flip Vert
Off
Displays the image normally on the screen.
On
Flip the image vertically on the screen.
Flip Horiz
Off
Displays the image normally on the screen.
On
Flip the image horizontally on the screen.
Contrast
0-8
Adjust the image contrast on a scale of 0 (minimum) to 8 (maximum).
Saturation
0-6
Adjust the colour richness on a scale of 0 (minimum) to 6 (maximum).
For example, to flip the image horizontally:
1. Press “M” to display the menu.
2. Press –to highlight “Monitor Setup”, then press “M” to select this option.
3. Press –to highlight “Flip Horiz”, then press ←or →to switch “off” to “on”.
5. Press “M” to save your adjustment. This will return you to the main menu. After a few seconds, the menu
will disappear.
You can adjust other menu options in a similar manner.

9
5.4 –SYSTEM SETUP
Here you can adjust various system-wide options.
MENU ITEM
ADJUSTMENT
DESCRIPTION
Power Save
Off
The monitor will remain on all the time, unless disconnected from the
mains supply.
On
After a period of inactivity, the monitor will go into sleep mode. If the
camera’s microphone picks up any noise from the baby, the monitor will
immediately turn back on.
Sensitivity
Low
Only loud noises picked up on the camera’s microphone will trigger the
monitor to wake from sleep mode.
High
The monitor will wake from quieter sounds detected by the camera’s
microphone.
TV Mode
PAL
Generally, PAL is used in the UK, France and Hong Kong.
NTSC
NTSC is used in America and other territories.
PAIRING THE UNITS
The camera is paired to the monitor in the factory, but if for some reason they become unpaired (e.g. prolonged
period of no signal), you may need to re-pair the units. Up to four cameras can be used with a single monitor. Each
camera must be paired on a separate channel, numbered 1 to 4. By default, the first camera is paired to channel 1.
6.1 –METHOD 1
1. Select the required channel by pressing ←or →while no menu is on screen. If there is no camera paired to
the channel, a message stating “No Signal” will be displayed on the screen.
2. Press the PAIR key on the back of the monitor. Its power LED will flash, indicating it is in pair mode.
3. Press the PAIR key on the back of the camera. The pairing is complete when the monitor LED stops flashing.
6.2 –METHOD 2
1. Select the required channel by pressing ←or →while no menu is on screen. If there is no camera paired to
the channel, a message stating “No Signal” will be displayed on the screen.
2. Press the PAIR key on the back of the camera. Its power LED will flash, indicating it is in pair mode.
3. Press the PAIR key on the back of the monitor. The pairing is complete when the camera LED stops flashing.

10
ON-SCREEN INDICATORS
The monitor unit features on-screen indicators for device status. Refer to the following descriptions for more
information.
7.1 –SIGNAL CONDITION
INDICATOR
DESCRIPTION
Good signal
Weak signal
No signal
7.2 –CHANNEL INDICATOR
INDICATOR
DESCRIPTION
CH: 1 / CH: 2 / CH: 3 / CH: 4
Indicates current video channel number
TV OUTPUT MODE
The monitor unit can be connected directly to a suitable television through the use of the included AV cable. Video
shown on the monitor’s LCD is duplicated on the television.
To connect the monitor to a television:
1. Connect the 3.5mm jack on the cable to the socket on
the monitor unit.
2. Connect the red, white and yellow RCA connectors to
suitable sockets on your television.
3. Select the correct input on your television’s remote
control. If you are unsure how to do this, refer to your
television’s manual for instructions.
If the image is displayed in black and white, follow these steps to switch TV mode:
1. Press “M” to display the main menu, use the +/ –keys to select “System Setup”, and press “M” to confirm
selection.
2. Use the +/ –keys to select “TV Mode” and press ←or →to switch between PAL and NTSC.

11
APPENDIX –PRODUCT SPECIFICATION
Nursery Cam Kit
GENERAL
Transmission Frequency:
2400 –2480MHz
Modulation Mode:
FHSS
Transmission Power:
17dBm
Operating Temperature:
0oC –60oC
Operating Frequency:
2450MHz
Operating Humidity:
20% –80% RH
Unobstructed Effective Range:
100m
MONITOR
Screen Type:
7” TFT LCD
Colour Configuration:
RGB
Image Resolution:
480 x 234
Power Supply:
DC 12V
Receiving Sensitivity:
-85dBm
Power Consumption:
150mA
Video System:
PAL / NTSC
CAMERA
Image Sensor:
1/3” CMOS
Night Vision Range:
3 –5m
Image Resolution:
PAL: 628 x 582, NTSC: 510 x 492
Battery Life:
Up to 6 hours (approx.)
Horizontal Resolution:
360 TV Lines
Sound Control Sensitivity:
>60dBa
Viewing Angle:
60o
Power Supply:
DC 6V
Minimum Illumination:
1.5 Lux
Power Consumption:
15mA

12
Other manuals for baby cam
1
Table of contents
Other Storage Options Baby Monitor manuals


