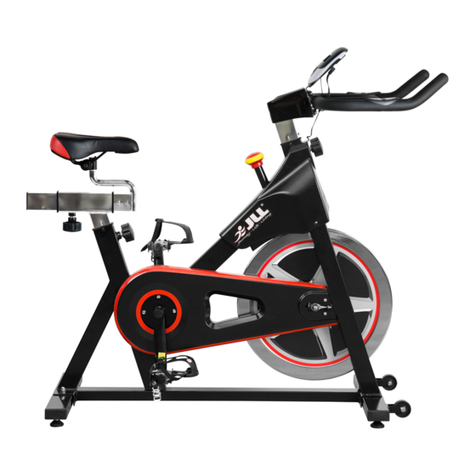
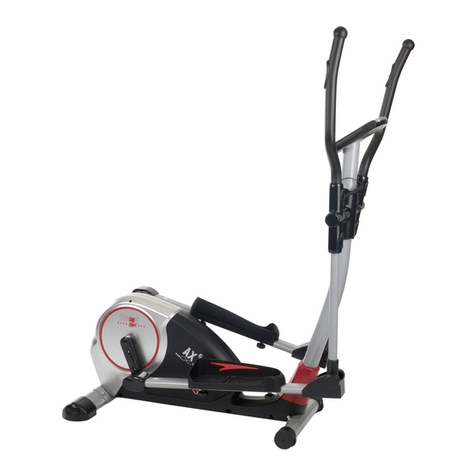
StormRed DEVIL User manual

DEVIL
User Manual –Uživatelský manuál -
Užívateľský manuál - Használati utasítás

2
English
3 –27
Czech
28 –52
Slovak
53 –77
Magyar
78 –102

3
The product user manual contains the product functions, instructions for use and
operating procedure. Read the user manual carefully to get the best experience and
avoid unnecessary damage. Keep this manual for future reference. If you have any
questions or comments about the equipment, please contact the customer service line.
✉www.alza.co.uk/kontakt
✆+44 (0)203 514 4411
Importer Alza.cz a.s., Jankovcova 1522/53, Holešovice, 170 00 Prague 7, www.alza.cz

4
Safety instructions
•It is important to read these instructions carefully before assembling and using the
machine. A safe and effective workout will be achieved by ensuring that all
components are properly assembled and tightened. It is your responsibility to inform
each user of the machine of how to properly secure and use the machine and of all
potential hazards.
•If you have health problems, consult with your doctor about using of the machine. A
doctor's opinion is necessary if you are taking medication that affects your heart
rhythm, blood pressure or cholesterol levels.
•Take note of your body's reaction. Incorrect or excessive exercise can negatively
affect your health! Stop exercising when you feel: pain, chest pressure, irregular
heartbeat, breathing difficulties, dizziness, nausea. Inform your doctor if these
problems occur.
•Keep the machine out of reach of children and animals (the machine is designed for
adults only)!
•Protect the machine from the elements, especially water, dust, intense sunlight and
low/high temperatures. Keep the machine dry and clean, clean it with a dry or
slightly damp cloth.
•The maximum weight of the trainee is 150 kg!
•Always use the machine according to these instructions. If you find any defective
parts while assembling or inspecting the machine, or if you hear an unusual sound
during use, stop assembling or using the machine. Do not use the machine until the
fault has been rectified or defective parts have been replaced! The warranty does not
cover defects caused by unprofessional intervention (repair) of the user or third
parties.
•Use the machine on a firm, level surface and on a mat that protects the floor or
carpet. To ensure safety, it is necessary to have at least 0.5 m of clearance around
the machine when exercising. When assembling the machine, a space of 1.5 m is
required around the machine.
•A safe level of equipment can only be maintained by regular checks for damage and
wear, for example connection points, etc. Before using the machine, check that all
nuts and bolts are properly tightened!
•Wear appropriate clothing when exercising, avoid wearing clothing that may get
caught in moving parts of the machine or restrict your movement.
•When moving the machine, watch out for back injury. Always use the lifting
technique or move the machine with the assistance of another person.
•The machine has been tested and certified according to EN957 and corresponds to
class H - (Home) for use in households. The machine is not intended for professional
or commercial use or for rehabilitation or therapeutic purposes!

5
•Electrical equipment (computers) must not be disposed of with mixed municipal
waste but must be disposed of at designated or take-back sites, as must batteries
used in computers.
•Keep this instruction manual with safety instructions, the warranty card and the
proof of purchase on a safe place!
Assembly
We recommend lubricating the moving parts of the machine with petroleum jelly
during assembly!
This is a mains powered machine. No batteries are used. The input socket for the
adapter is located in the machine - described in the next section of the manual.
Step 1:
Attach the rear stabiliser (24), using M8*55L bolts (20), flat pads (18), lock pads (71) and
M8 dome nuts (25), to the main frame (16). Attach the front stabiliser (21), using M8*55L
bolts (20), flat pads (18), lock pads (71) and M8 dome nuts (25), to the main frame (16).

6
Step 2:
Hold the post with the handle (13), preferably with the help of another person. Connect
the upper connector (15) with the lower connector (107).
Insert the handle post (13), into the main frame (16). Fix the handle post (13), using four
Allen screws (17), flat pads (18) and round pads (19). Tighten securely. Use an Allen key
for this.
Fix the bottle holder (98), using the screws (99), to the handle post (13). Insert the
drinking bottle (100) into the holder (98).

7
Step 3:
Fix the lower part of the handles (85LaR), to the rails (48LaR), using the lock nuts (49), flat
pads (82) and screws (86).
Step 4:
Secure the pedal (88LaR), to the rails (48LaR), using the locking screw (87), flat pad (39)
and nut (51). The pedal can be fixed, in three different positions.

8
Step 5:
Attach the right pedal (48R) to the end of the steel disc, using the corrugated pad (69), D-
pad (105), flat pad (70), lock pad (71) and bolt (72).
Then fold the lower part of the handles (85R), fitting it onto the handle shaft (12), which
is inserted into the handle post (13). The lower part of the handles (85R) must be fixed,
using a corrugated pad (69), a D-pad (101), a flat pad (102), a lock pad (103) and a screw
(104). Continue in the same way with the left, lower part of the handle (85L).
You can use 2 pieces of
corrugated pads (69), in the
handle shaft (12), if there is a
larger gap between the lower
part of the handle (85) and the
handle post (13).

9
Step 6:
Fasten the upper covers (92R, 92L) with the corresponding lower covers (93R, 93L), on
each side with two screws (94, 95), at the ends of the rails (48R, 48L).
Attach the front and rear covers (91R, 91L), at the bottom of the lower parts of the
handles (85R, 85L), using the screws (8).
Then fasten the respective two side covers (97R, 97L), on each side with two screws (96),
on both sides of the machine.

10
Step 7:
Insert the left and right handles (79L, 79R) into the lower parts of the handles (85L, 85R).
Secure them using two screws (84) and two lock pads (71). Secure the two front handle
joint covers and the rear handle joint covers (81L, 81R, 83R, 83L), using four screws (90).

11
Step 8:
Fix the handles with pulse sensors (5) to the handle column (13) using M8 screws (10)
and lock pads (71).
Then attach the handle cover (4) to the handle post (13). Plug the pulse sensor cable (6)
into the computer (1).

12
Step 9:
Unscrew the two screws (2) from the computer (1). Plug the top connector (7) into the
computer cable (3) located on the back of the computer. You can now insert the
computer (1), into the handle post (13). Secure the computer (1) to the handle post (13),
using the two screws (2).

13
Step 10:
Connect the adapter (108) to the socket at the rear of the main frame (16).
Plug the adapter (108) into a power outlet. This will put the machine in working order
and install all data in the computer, according to the special instructions for use.

14
Parts list
#
Name
Specifications
×
1
Computer
1 ×
2
M5 screw
M5*10L
12 ×
3
Computer cable or socket
1 ×
4
Handlebar cover
1 ×
5
Handlebars with belt sensors
1 ×
6
Cable to pulse sensors
1 set
7
Top connector
1 ×
8
M4 screw
M4*30L
2 ×
9
Pin
1×
10
Hex bolt M6
M6*50L
4 ×
12
Handle shaft
1 ×
13
Handle column
1 set
15
Bottom connector
1 ×
16
Main frame
1 set
17
Hex bolt M8
M8*16L
8 ×
18
Flat pad
φ20*φ8*1.2T
10 ×
19
Round pad
φ20*φ8*1.2T
4 ×
20
Screw M8
M8*55L
4 ×
21
Front stabiliser
1 ×
25
Domed nut M8
M8
4 ×
39
Flat pad
φ18*φ6.2*1.0T
9 ×
48
Pedal rail (L&R)
1 set
49
Locking nut M10
M10
3 ×
51
Matrix
M6
2 ×
69
Corrugated pad
φ16
6 ×
70
Flat pad
φ28*φ8*2.0T
2 ×
71
Locking pad
φ8
16 ×
72
Hexagon bolt M8
M8*25L
2 ×
79
Handles (L&R)
1 set
81
Front cover for handle joints (L&R)
1 set
82
Flat pad
φ20*φ10*1.5T
4 ×
83
Rear cover for handle joints (L&R)
1 set
84
Hexagon bolt M8
M8*45L
4 ×
85
Lower part of handles (L&R)
1 set
86
Hexagon bolt M10
M10*100L
2 ×
87
Pedal lock screw M6
M6*45L
2 ×
88
Pedal (L&R)
1 set

15
90
Screw M4
M4*16L
8 ×
91
Cover (L&R)
2 set
92
Cover (L&R)
1 set
93
Cover (L&R)
1 set
94
Screw M5
M5*10L
4 ×
95
Screw M4
M4*16L
4 ×
96
Screw M5
M5*10L
8 ×
97
Cover (L&R)
2 set
98
Bottle holder
1 set
99
Screw M5
M5*14L
2 ×
100
Bottle
1 ×
101
D-pad
φ28*φ16*4.5T
2 ×
102
Flat pad
φ28*φ10*2.0T
2 ×
103
Locking pad
φ10
2 ×
104
Hexagon bolt M10
M10*25L
2 ×
105
D-pad
φ28*φ16*2.0T
2 ×
107
Bottom connector
1 ×
108
Adapter
1 ×
Exercise Instructions
Use of Alza, a.s. fitness machine Prague, will bring you several benefits: it will improve
your physical condition, strengthen your muscles and help you lose weight while
controlling your calorie intake. If you have health problems, consult your doctor about
using the machine.

16
Warm-up phase
The warm-up phase gets your blood circulating, warms up and prepares your muscles to
function properly. At the same time, it will also reduce the risk of cramps and muscle
injuries. Do not skip this phase!
We recommend performing a few stretching exercises as shown below. In each stretch
you should hold for about 30 seconds, do not stretch the muscles in a violent movement
and do not overstretch them - if you feel pain, stop!
Stages of exercise
This is the stage where you put the most effort. With regular exercise, your leg muscles
will become more flexible. Exercise at your own pace, which you maintain throughout
the exercise. It is optimal to exercise for 15-20 minutes at the beginning, longer after a
few sessions. We recommend training at least three times a week, preferably with an
even time distribution. Exercise should be sufficient so that your heart rate reaches the
"optimal heart rate" as shown in the chart.
Soothing phase
This phase is necessary for your cardiovascular system and your muscles to gradually
relax. Repeat the stretching exercises, again remembering not to overstretch or abruptly
tense your muscles.
Muscle shaping
At the same time, if you are trying to improve your physical condition, it is necessary to
change your training program. Exercise as usual during the warm-up and calming phase
but increase the resistance towards the end of the exercise phase.
Weight reduction
An important factor in weight loss is the number of calories you take in and put out. The
longer and harder you exercise, the more you burn. However, you also need to monitor
your intake, especially watch out for fatty, sugary foods and portion sizes.
Lean to the
side
Lean forward
Stretchthe outer thighs
Stretch the inner
thighs
Stretchcalf / achilles
tendon

17
Check your heart rate
To be able to check your heart rate, you first need to know how to measure it. The
easiest way is to press your fingertips against the artery in your neck, between your
muscles and your airway. Count the number of pulses per 10 seconds and multiply it by
6. This will give you your heart rate per minute.
Exercise within your limits
What level of heart rate do you need to maintain during your exercise? Ask your doctor
to give you proper instructions appropriate to your medical condition.
Maximum heart rate
Pulse at rest
Heart rate
Age

18
Instructions for using the computer
Display functions
Icon
Description
TIME
(Time)
Count up - no pre-set time, time will be counted from 00:00 to
maximum 99:59.
Count down - If you train with a pre-set time, the time will count down
from the selected pre-set value until 00:00.
Each pre-set increase or decrease is 1 minute between 00:00 and
99:00.
SPEED
(Speed)
Displays the current speed. The maximum speed is 99.9 KM/H or
ML/H.
RPM
Displays the number of pedalling revolutions (called cadence) per
minute. Display range 0~15~999
DISTANCE
(Distance)
It calculates the total distance from 0.00 to 99.99 KM or ML. The user
can pre-set the target distance data using the UP/DOWN buttons.
Each increase or decrease is 0.1KM or ML between 0.00 and 99.90.
CALORIES
(Calories)
Calculates calorie consumption during a workout from 0 to a
maximum of 9999 calories.
(These data are a guide for comparing different exercises. The results
of the measurements cannot be considered accurate because of the
lack of height and weight data, the result is only indicative)
PULSE
(Tep)
The user can set the target pulse from 0-30 to 230. The computer
beeps when the current heart rate exceeds the target value during
the workout.
WATTS
(Power)
View the current WATTS exercise performance. Display range 0~999.
MANUAL
Exercise in manual mode.
BEGINNER
(Beginner)
In each basic section there are 4 programs to choose from.
ADVANCE
(Advanced)
4 PROGRAMS to choose from.
SPORTS
(Sportsman)
4 PROGRAMS to choose from.
CARDIO
(Cardio)
Maximum target heart rate mode - sets the limit value of the
exerciser's heart rate.
WATT
PROGRAMME
WATT constant training mode.

19
Functions of the buttons
Icon
Description
PLUS (increase)
or UP
Increases the level. Moves menu selections up.
On some devices it may be "UP".
MINUS
(decrease) or
DOWN
Reduces the level. Moves menu selections down.
On some devices it may be "DOWN".
Mode / Enter
Mode selection / confirmation of selection.
Reset
Press and hold for two seconds, the computer will reboot and
start working from user settings.
You will return to the main menu in the exercise preset or in stop
mode.
Start / Stop
Start/stop training.
Recovery
Physical fitness test - measures the rate at which the heart rate
calms down.
Body fat
In the stop mode (STOP), press the button to measure body fat.
Fasteners
Plug in the power supply, the computer will turn on and display all segments on the LCD
for two seconds.

20
Selection of exercises
Use the PLUS or MINUS buttons to exercise in manual mode.
Manual mode
BEGINNER (beginner)
ADVANCE (advanced)
SPORTS (athlete)
CARDIO (cardio)
WATT (power)
Table of contents
Languages:
Other StormRed Fitness Equipment manuals
StormRed
StormRed KING User manual
StormRed
StormRed SEAHAWK User manual
StormRed
StormRed FLYER User manual

StormRed
StormRed KNIGHT User manual
StormRed
StormRed GIANT User manual
StormRed
StormRed PREDATOR User manual
StormRed
StormRed HURRICANE User manual
StormRed
StormRed Slackline User manual
StormRed
StormRed RANGER User manual
