It is important to check with your Local Government Authority prior to installation of your new carport or verandah.
Read these instructions thoroughly before starting your project and refer to them constantly during each stage of construction. If you
have any questions our friendly expert staff will gladly answer them.
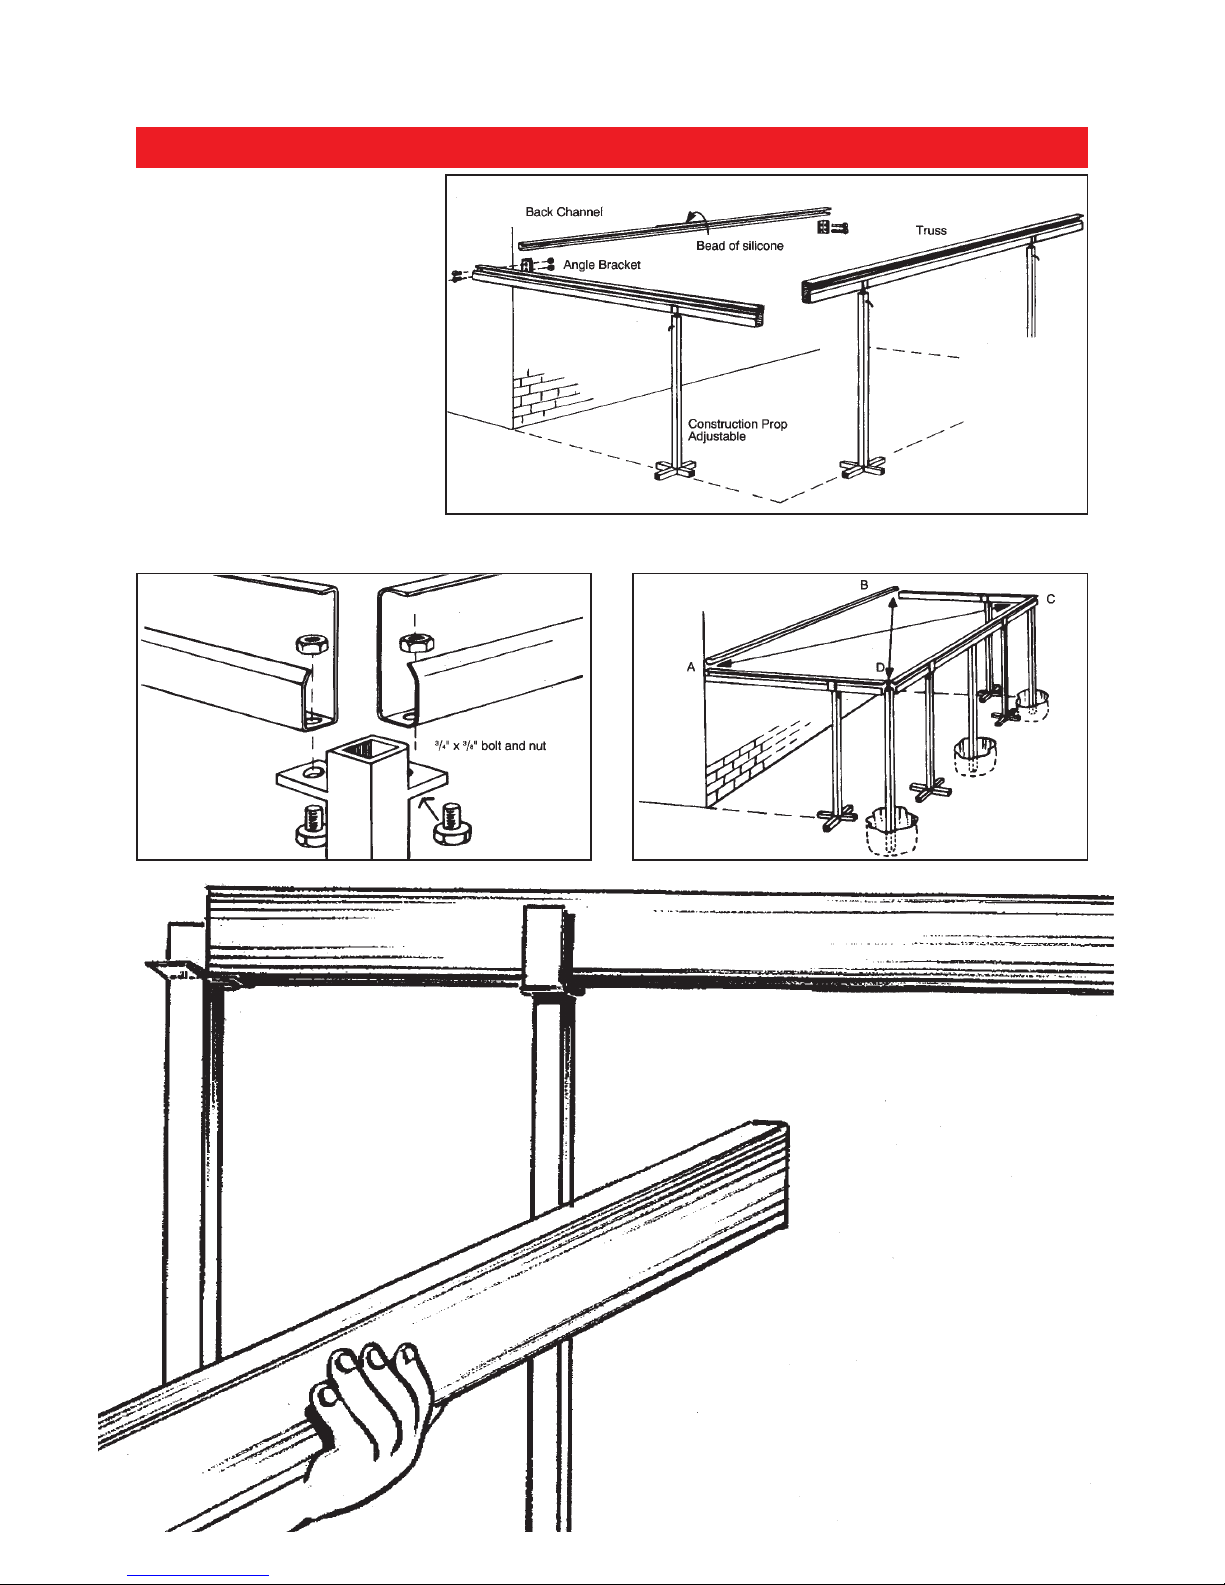
Before starting work, lay out the framework components in order of assembly on the ground and check them off against the Stratco
delivery note. Figure 1 shows the relative location of most of the components.
The sectional views in figures 2, 3 and, 4 will give you a good idea of how some of the components will look fully assembled.
Check a length of decking against your framework which you have laid out on the ground. The decking should overhang the truss
(into the gutter) by approximately 50mm. If necessary, cut the trusses to size at this stage. Pre-drill the trusses to line up with the
plates on the posts.
Remember, always measure twice before cutting or drilling and always remove drill filings ('swarf’) which otherwise can cause
premature rusting.
COUNCIL APPROVAL
BEFORE YOU START
These may be purchased from Stratco if you do not already have them available.
It is advantageous to clear and level the site prior to assembling your verandah or carport.
This makes for easy access when using ladders and extension cords.
ACCESSORIES
SITE PREPARATION
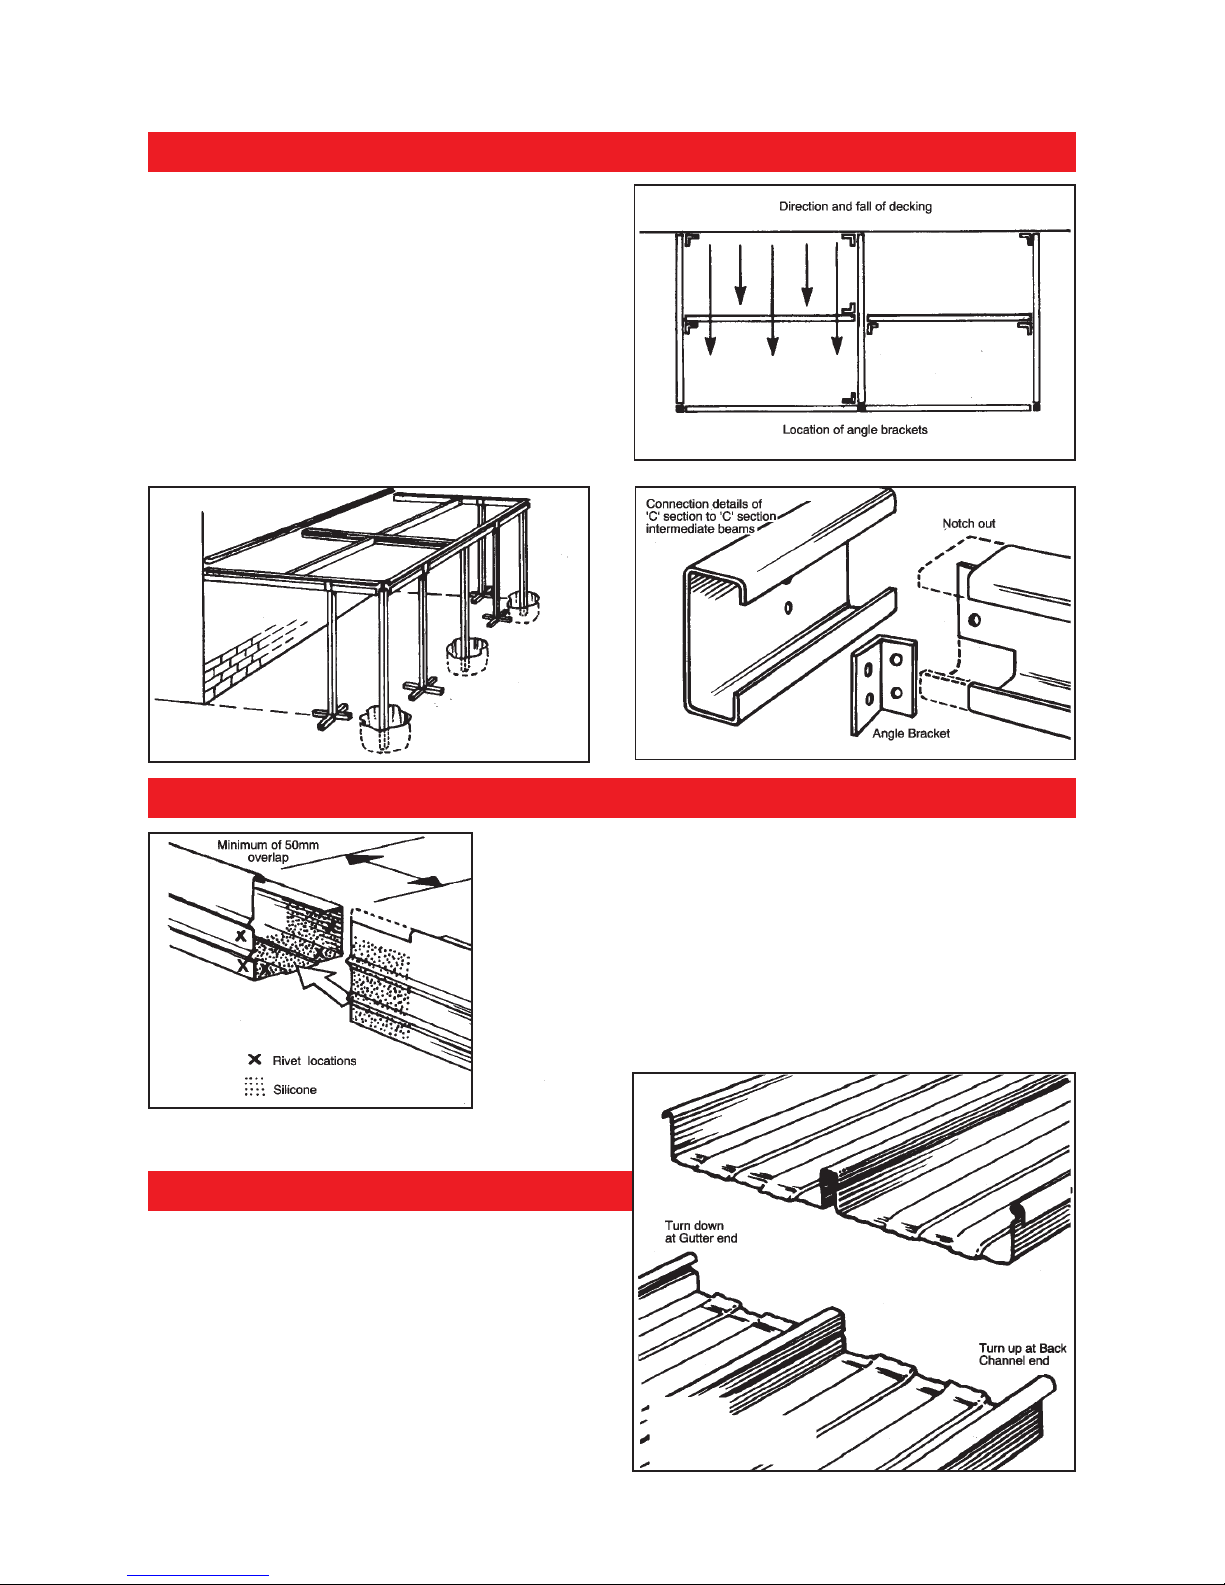
THE BACK CHANNEL
The first stage of construction is to attach the back channel to
the fascia or wall. If more than one length of back channel is to
be used, they just butt together. The first fixing must be no more
than 100mm from the end of each length of the back channel.
The remainder of fixings between must be no more than
600mm apart. It is advisable to pre-drill the back channel on the
ground. Run a bead of silicone along the back of the back
channel to seal the gap between it and the fascia or wall.
For fastening to a timber fascia use 6mm x 32mm coach screws
at 500mm centres. If fastening to brickwork use 6mm x 50mm
masonry anchors at 500mm centres.
Flat and rebate steel fascias require 10 x 16 Teks® screws and
alternate rivets at 250mm centres. A special cover channel may
also be needed for Clickform fascias.
Once the back channel is secured, run another bead of silicone
along the top joint of the back channel and wall or fascia.
ASSEMBLING THE FRAMEWORK
FIG. 2: FASCIA
DETAIL FIG. 3: BACK
CHANNEL DETAIL FIG. 4:
WALL DETAIL