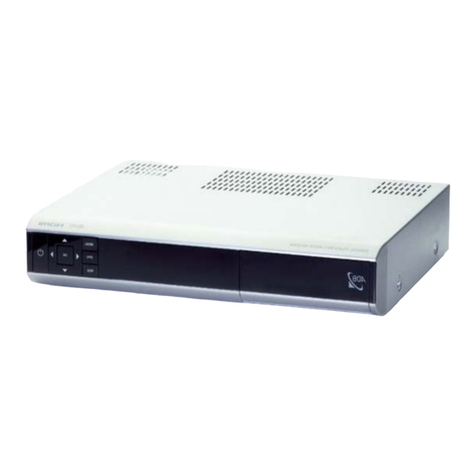
Strong SRT 8900 User manual

ĬĬĬñĊėăÚѪñėī
0_SRT6780_COV.qxd 12/06/08 18:51 Page 1
Picture similar
Digital HD Terrestriell
Mottaker SRT 8900
User manual

1
EN
Content
Introduction............................................. 1
Content.................................................... 1
Safety recommendations ....................... 2
About your HD Decoder........................ 4
What is HD ? ......................................................4
How does the HD work ?................................4
What do you need to enjoy HD Services ? . 4
Connections ............................................ 5
Package content ................................................5
Front Panel Controls.........................................5
Rear Panel Connections ...................................5
Connections to TV & Other Devices............6
Ensure the best HD Connection....................7
Inserting batteries ..............................................7
Remote Control.................................................8
Quick Installation.................................... 9
Everyday Use ......................................... 10
Turning on/off................................................... 10
Changing Channels.......................................... 10
Navigation Clues.............................................. 10
Using the Menus.............................................. 10
Using the Zapping/Info Banner..................... 10
Using the Mini-Guide...................................... 11
EPG......................................................... 11
Menus ..................................................... 12
Charts of the menu......................................... 12
Channel List........................................... 13
Channel List Update....................................... 13
Channel Organizer ............................... 14
Setup ...................................................... 15
Languages .......................................................... 15
Parental Control/Decoder PIN.................... 15
Connection....................................................... 16
Restaure default Settings............................... 16
Conax CA .............................................. 17
Change CA PIN............................................... 17
Maturiting rating .............................................. 17
Main Features ........................................ 18
Trouble Shooting................................... 19
Glossary ................................................. 20
Guarantee Card .................................... 20
Introduction
Copyrights
© 2008 Strong A/S. All rights reserved. Republication or redistribution of Strong content, including by
framing or similar means, is prohibited without the prior written consent of Strong A/S.The Strong logo
is registered trademark and trademark of Strong A/S.
Other trademarks and technology protection
HDMI, the HDMI logo and High-Definition Multimedia Interface are trademarks or registered
trademarks of HDMI Licensing LLC.
Manufactured under license under U.S. Patent #: 5,956,674; 6,487,535; 5,974,380; 864146 & other U.S.
and worldwide patents issued & pending. DTS and DTS Digital Out are registered trademarks and the
DTS logos and Symbol are trademarks of DTS, Inc. © 1996-2008 DTS, Inc.All Rights Reserved.
All other company or product names are either trademarks or registered trademarks of their respective
owners.
Disclaimer
Strong reserves the right to modify the specifications and pictures mentioned in this document at any
time and without prior notice.Therefore the information in these instructions is not contractual. For an
updated description, see http://www.strong.com.
2
Using equipment safely
Your decoder has been manufactured to meet European safety standards, but care must be taken to
ensure proper performance.
It is important that you read this booklet completely, especially the safety instructions below. If you
have any doubts about the installation, operation or safety of decoder, please contact your Customer
Service.
Avoiding the risk of electric shock
• Disconnectthedecoderfromthemainssupplybeforeyouconnectthedecoderto(ordisconnect
it from) any other equipment.Avoid any contact with 230 Volt AC mains, which can be lethal or
cause severe electric shock.
• Donotremovethecoverofthedecoder.Shouldthedecoderfail,contacttheCustomerService
for repair or service.
• Donotinsertanythingintoanyopeningofthecase(excepttheSmartcard)
• Donotblockthedecoder’sventilationslots;donotplaceitonunstablesurfaceslikecarpets.
• Donotputanythingonthedecoderwhichmightspillordripintoit(eg.Lightedcandlesorliquids
containers). Do not splash it with a liquid. If an object or liquid enters inside the decoder, unplug
it immediately and contact the Customer Service.
• Donotstorethedecoderinexcessivelyhot,coldordampconditions.Thedecoderisintended
tooperateatanambienttemperatureoflessthan45degreesCelsiusandamaximumhumidity
level of 75%.
• Incaseofathunderstorm,itisrecommendedthatyouunplugthedecoderfromthemainsand
the antenna from the TV set.
• Leavethemainssocketaccessiblesothatyoucanunplugthesetquickly
Connecting to the mains supply
• Thisdecoderisdesignedtooperateat230VAC,50Hz.
• Ifyouareinanydoubtaboutthemainslead,theplugorconnection,pleaseconsulttheCustomer
Service.
Ensuring optimum performance
• Leave7cmto10cmaroundthedecodertoensureproperventilationtothedecoder.
• Alwaysplaceyourdecoderhorizontally.
• Tocleanthedecoder,useadry,cleansoftclothwithnocleaningsolventorabrasiveproducts.
Clean the ventilation openings regularly.
Safety recommendations
CM
CM
CM
CM

3
EN
Environmental Information
• Thebatteriesusesomehazardoussubstanceswhichpollutetheenvironment.Donotdispose
them out with other articles.Take care to dispose them at special collecting points.
• Ifyouarenotusingthereceiverforalongperiod(includingovernight),pleaseswitchitoverto
standby.This saves energy.
Technical specifications
Operatingvoltage 230VAC/50Hz
Nominal Power consumption < 12W
StandbyPowerconsumption(active) <8W
Weight(withoutaccessories) 1Kg
Dimensions(WxHxD)withoutfeet 260x52x192mm
Operating temperature range 5 – 45°C
Storage temperature range -25 – 70°C
RemoteControlbatteryType 2xAAA
Conditional access ISO7816 - CONAX
Connections
HDMI out HDMI connector type A
RF in IEC60169-2 female
RF out IEC60169-2 male
TV Scart
VCR Scart
AudioOut(LandR) RCAfemale
Electrical Audio out – S/P-DIF RCA female
Meaning of symbols
This symbol on your set guarantees that your product complies with European
Directives 73/23/EEC, 89/336/EEC, 93/68/EEC on safety, electromagnetic compatibility
and marking respectively.
This symbol is intended to alert the user to the presence of un-insulated “dangerous
voltage” within the product housing that may be of sufficient magnitude to constitute
a risk of shock.
This symbol is intended to alert the user to the presence of important operating and
maintenance(servicing)instructionsaccompanyingtheproduct.

4
Thank you for choosing the Strong SRT 8900, the new Strong generation of HD terrestrial set-top
boxes.ThankstoitsHighDenition(HD)feature,youwillbetherstinlinetoenjoyTV in premium
quality!
Equipped with the latest HD technology,your Strong SRT 8900 is ready for the latest standard and is also
compatible with the traditional SD standard.
What is HD?
High denition television (HDTV) is a digital broadcast of television programming with signicantly
superior video and audio quality. HDTV offers higher resolution for a sharper picture with fuller, richer
colors and 16:9 wide screen presentation. An HDTV broadcast has up to 1080 lines, resulting in five
times the picture clarity vs. standard definition.
How does the HD work?
Theimagedenitionismeasuredinpixelunits.Thelargerthenumberofpixels,thebetterisqualityand
sharpness.TheHighDenitionisbasedontwonormswhichproposemuchhigherresolutions(seetable
below).Thus,whatwasblurredandfuzzywiththeSDappearstobeautomaticallysharpanddetailed
with the HD.
TV Resolution HD
(Nb Pixel x Nb lines) Compatibility
Standard TV 720x576 No
HD Ready 1280x720p Yes
HD Ready 1920x1080i Yes
Full HD 1920x1080p Yes
What do you need to enjoy HD services?
To enjoy programmes in High Definition quality, you need:
•anHDTV
•theStrongSRT8900andanHDMIlead(notsuppliedalongwiththedecoder)
•therelevantsubscription.
Ideally you will be using a TV labeled “HD Ready” or “Full HD”. Else check with your TV retailer if your
TV set has HD features.
DiscoverthetechnologyoftomorrowwiththenewStrongHDset-topbox!
About your HD Decoder

5
EN
Connections
Package content
SRT8900set-topbox Remote control
with Batteries
Scart lead
RF cable
Mains lead
User manual
Rear Panel Connections
Antenna input
Antenna output
S/P-DIF electrical digital
audio output TV scart output
HDMI port Analog audio outputs
(leftandright) VCR/DVD scart
output Mains input
Front panel controls
SRT 8900
ĬĬĬñĊėăÚѪñėī
0_SRT6780_COV.qxd 12/06/08 18:51 Page 1
ĔĔĔĔ¸ª¸ėcÄĔ!ĔMăăĊėă¸ÄÄ
ĔĔĔ2ÚėėcÂăĔIEMĔÖĶĶ
Brukerhåndbok
User manual
Green infrared LED blinking:
remote control activity V-/C:Volume - / left
V+/B:Volume + / right
Standby/
Power
4-digit display Smart card
slot P-/t: Programme - / down
P+/s: Programme + / up OK Menu
Green Stand-by LED on:
set-topboxon
Red stand-by LED on:
set-topboxinstand-bymode
Exit

6
Connections to TV & other devices
Please follow figures 1 to 2 for a standard installation.
Note: Before plugging in the receiver, you should connect at least the RF In antenna and the HDMI port. Other
connections are optional.
Figure 1: Connections to TV,VCR/DVD and Hi-Fi system.

7
EN
Ensure the best HD connection
To ensure the best image quality
using an “HD ready” or “Full HD” TV screen, all you need is an HDMI lead to connect the HDMI
portonyourset-topboxwiththeoneonyourTV.
Your TV has no HDMI port but has one DVI-I port.
You will need:
•
1HDMI-DVIleadtoconnecttheHDMIportonyourset-topboxandtheDVI-IportonyourTVset.
• 1audioRCAtoconnecttheLeftandRightanalogaudiooutputsonyourset-topboxwiththe
audio inputs on yourTV set.
Your TV has neither HDMI port nor DVI port
You will be able to watch HD programmes but not in HD quality.You can still enjoy all TV programmes
in digital quality using the supplied scart lead.
Via the Scart, the VCR/DVD player will receive only analogue standard definition video.
You would not be able to record in HD.
Inserting the smartcard
Hold your smartcard with the golden chip up in front of the slot. Insert your smartcard into the slot as
far as it will go without forcing it.
Inserting batteries
Figure 2: Inserting batteries*
*Please respect the environment and prevailing regulations. Before you dispose of batteries or accumulators, ask
your dealer whether they are subject to special recycling and if they will accept them for disposal.
•Donotmixdifferenttypesofbatteriesornewandoldbatteries.
Do not use rechargeable batteries.
•In order to avoid any risk of explosion, observe the polarities
indicated inside the battery compartment.
Replace only with the
type of batteries specified above. Do not dispose of them in a fire or
recharge them.
•Ifyouarenotusingtheremotecontrolforalongperiodoftime,
remove the batteries.

8
Remote control
1 - Power On / Stand-by.
2 - Open/closesaccesstotheElectronicProgramGuide(EPG).
3 - Toggles between TV and radio services.
4 - Displays the channel list.
5 - Increases/Decreases the volume level.
6 - Mutes to audio/Restore the previous audio volume.
7 - Opensthezappingbanner/Openstheinformationbanner/Closesthebanner.
8 - Switchestothenext/previouschannel.
Scrolls one page up/down in a list.
9 - Exitsallmenus
10 - Opens/closes the menu.
11 - Allows navigating up/down/left/right in the menus.
In the viewing mode, the s/tbuttons allow switching between different TV display modes.
12 - In menus, confirms a choice/selection. In the normal viewing mode, opens the TV banner.
13 - Selects functions displayed in the menu. In the normal viewing mode, the purple button displays
theteletext,thegreen button goes back to the previous channel.
14 - Enters directly a number e.g. a PIN number, a channel number.
15 - Displays/Removessubtitles(ifthe option is available).

9
EN
Quick installation
For a quick installation, please follow the steps below:
1. Checkwhetheryourset-topboxisconnectedasshowninFigure1and2(page6 and following).
2. Press the key on your remote to switch on your set.
After a few seconds, a list of menu languages displays on screen.
3. Select your preferred language using the s/tbuttons and press OK.
Two installation modes are available:
- quick installation
- advanced installation
Ifyourset-topboxisconnectedtoapoweredactiveantenna,selectDCpowerONotherwiseletthis
menu item set to OFF.
Note: The DC power setting may also be changed in MENU/Set up/Options.
4. Select Quick installation using the s/tbuttons and press OK.
The TV and radio channel search starts automatically.
Advice: a progress bar keeps you up-to-date on how far the channel search is.
5. Wait until the channel scan is finished and press OK.
You are now watching TV in digital quality!
Tolearnhowusingmainfunctionalitiesofyourset-topbox(changingchannels,usingthemenusect..),
pleasereadthenextchapteronEveryday use!

10
Everyday use
Turning on/off
Press the key on your remote to switch on or off your set.
Note - To keep the Mini-Guide or the Electronic Programme Guide (EPG) updated, the set-top box should be left
in standby, but if you are not going to use the set for a long period of time you should unplug it to save energy.
Changing channels
Press the P+/- keytoswitchtothenext/previouschannelorenterthechannelnumberusingthedigit
keys on your remote and press OK.
Press the green button to come back to the previously watched channel.
Navigation clues
Always read the help bar displayed at the bottom of your screen.
• Inthemenu,EPG,bannerandchannellist,instructionsonavailabilityoffurtherfunctionalitiesandon
active remote control keys are given on screen.
• Todisplayallchannellists,presstheLIST key.
• Toviewavailableoptionssuchassubtitles,audiooptionsontheprogramme,presstheINFO key.
• ToaccesstheElectronicProgrammeGuide,presstheGUIDE key.
• ToaccesstheTeletext,pressthepurple key.
• Todisplaysubtitles,pressthe key
• Toinstallyourreceiverwithyourpersonalpreferences(likeTVresolutionandformat,bannertime-
out),please follow MENU/Setup and select Connection(tosetTVresolutionandformat,TV/VCR
output signal) or Option(tosetbannertime-outorsubtitling).
Tobenetfromourpolicyofcontinuousimprovement,notethatthisset-topboxisupgradeablethrough
download “over the air”.
Using the menus
1. Press the MENU key on your remote to open the menu main page.
2. Use the s/tkeys to navigate in a list and the C/Bkeys to set a selection.
3. Press OK to open the sub-menu or confirm the selection.
4. Press the green key to return to the previous screen EXIT or to return to the viewing mode.
Using the zapping/info banner
The zapping bannergivesbasicinformationaboutcurrentandnextprogrammes:timeanddate,channel
number, channel name, programme title and elapsed time, start and end time of the programme etc.
The information banner provides detailed information (available programme options, programme
genres etc..) and a synopsis of the selected programme.

11
EN
To display the zapping banner:
1. Press the INFO key once.
Advice: a basic zapping banner is automatically displayed when you tune to another channel. To change the
display duration of the zapping banner go in MENU/Setup/Options and select Banner time out.
To display the information banner:
2. Press the INFO key again.
Advice: to display information on the next programme on the selected channel, press the tarrow key.
To escape the zapping/information banner:
3. Press the INFO key a third time or the EXIT key once.
Using the Mini-Guide
Thanks to the Mini-Guideyoucanviewwhat’sonotherchannelswithoutchangingchannel.
To use the mini-guide:
1. Press the INFO key once.
Check that the highlight is set on Mini-Guide. Else, select it using the s/tbuttons.
2. Press the B/Carrowkeysforavirtualzappinginthecurrentlistofchannels.
Informationisgivenonthecurrentandnextprogrammeoftheselectedchannel.
Advice: to switch to a current programme on another channel, select the channel and press the OK key.
EPG
TheElectronicProgrammeGuide(EPG)allowsyoutoviewwhat’sonallchannelsupto7daysinadvance
and to programme a timer.
To use the guide:
Press the GUIDE key once.
To navigate through the channel list, use the sand tkeys.
To navigate through time slots, use the Cand Bkeys.
To switch to a current programme broadcasted on another channel, highlight the programme using
the arrow keys and press OK.
To set a timer to a programme that will be broadcasted later on, highlight the programme using the
arrow keys and press OK.
To scroll pages up/down in the list, use the P+/P- keys.
To get more information about a programme, highlight it and press the INFO key.
To escape the guide:
ToexittheEPG,presstheGUIDE key again.

12
Menus
Charts of the menu
For detailed information about channels, electronic programme guide, timers and some setup
parameters consult the following pages.
#HANNELLIST
4IMER
3ETUP
#HANNELORGANIZER
#ONAX#!
)NFORMATION
,ANGUAGES
/PTIONS
$ECODER0).
#ONNECTION
)NSTALLATION
3OFTWAREUPGRADE
&AVORITENETWORK
2ESTOREDEFAULTSETTINGS
3UBSCRIPTIONSTATUS
%VENTSTATUS
4OKENSSTATUS
#HANGE#!0).
-ATURITYRATING
!BOUT#ONAX#!
$ECODER
3IGNALQUALITY
-AILBOX
4IMEROPTION
4IMERLIST
Menu language, audio and subtitle preferences.
Banner time out, transparency level, DC power, subtitling.
Change PIN code, decoder lock.
TV formatandresolution,HDMI,TV/videostandards,S/P-DIFandzoommode.
Automatic scanning or transport installation.
Check whether a new software version is available on air.
Restore factory settings.
On/off, alarm time, timer list.
Informationonthedecoder(usageidetc..)
Signal power and quality.
To consult the e-mail list.

13
EN
Channel list
This menu gives access to all lists of channels: the All TV list and your favourite lists.You can view list
content and modify the currently viewed list.
Access to the list of channels
1. Press the MENU key.
2. Using the sand tkeys, select Channel list then press OK.
Advice: For a direct access to the Channel list, press the LIST key on your remote.
View list content
To view the content of a list, highlight it using the sand tkeys and press the OK key.
To navigate through the channel list, use the sand tkeys.
To switch to a channel you want to watch,highlight the channel using the sand tkeys and press the
OK keyThe list will automatically be set as current.
To scroll one page down/up in the channel list, use the P+/P- keys.
Set a list as current
To set a list as current, highlight the list using the sand tkeys and press INFO.
Note: The focus is automatically set on the currently viewed list.
Exit the Channel list
Toexitthesub-menulistofchannels,pressthe LIST key again.
Channel list update
Duringtherstinstallation,theset-topboxsearchesforchannelsinthenetwork.Iflaternewchannels
aremadeavailableorarerenamed,suppressedorchanged,theset-topboxwillautomaticallyupdatethe
All Channels list.

14
Channel organizer
Thechannelorganizerallowstocreatefavouritelistsandmodifythedifferentlists:rename,reorderor
remove a list, add/remove channels, lock/unlock channels etc…
Access to the channel organizer
1. Press the MENU key.
2. Using the sand tkeys, select Channel organizer then press OK.
Create a new list
To create a new favourite list, highlight Create a new list using the sand tkeys and press OK.
The new list is automatically added to your current lists.
Modify/delete a list
To modify or delete a list, highlight it using the sand tkeys and press OK. A menu with the
different options displays on screen.
1. To change the list name, select the first item and press OK.
Then use the arrow buttons to change the preset name.
Press the green key to save your settings.
2. To modify the list, select the second item and press OK.
Then use the OK key to add or remove the selected channel from the favourite list.
Press the green key to save your settings.
3. To lock/unlock channels, select the third item and press OK.
Then use the OK key the lock or unlock the selected channel from the favourite list.
Press the green key to save your settings.
4. To reorder the list, select the fourth item and press OK.
Select the channel you want to reorder in the list using the sand tkeys.
Then press OK.
Use the sand tkeys to move the channel at your preferred position in the list.
Press OK to confirm the position.The list has been modified automatically.
Press the green key to save your settings.
5. To delete the list, select the last item on the list and press OK.
To confirm the list removal, press the skey once then press OK twice.
To cancel the removal, press OK.
Press the green key to save your settings.
Exit the channel organizer
Toexitthechannelorganizer,presstheMENU key again.

15
EN
Setup
Languages
Themenu,audioandsubtitlelanguagescanbesetinNorwegian,Swedish,Danish,Finnish,English(ifthe
correspondingtrackexist).
Access to language settings
1. Press the MENU key.
2. Using the sand tkeys, select Setup then press OK twice.
Modify a language
1. Using the sand tkeys, select the menu, audio or subtitle language.
2. Press the Cand Bkey to confirm a language.
Exit the language settings menu
Toexitthelanguagesettingsmenupressthe MENU key again.
Decoder PIN
The Decoder PIN sub-menu allows changing PIN code and lock/unlock the decoder.
Access to decoder PIN
1. Press the MENU key.
2. Using the sand tkeys, select Setup then press OK.
3. Using the sand tkeys, select Decoder PIN then press OK.
A PIN code protects the access. Enter your 4-digit PIN code.
Change decoder PIN code
Certainfeaturesoftheset-topbox(e.g.decoderlock)requiretheentryofaPersonalIdentication
Number(PIN).Thedefaultnumberforthisis1234.Itishighlyrecommendedthatyouchangethis
number.
Important - Keep your PIN secret, but don’t lose it!
1. Select Change PIN code and press OK.
2. Enter the new PIN using the numerical buttons.
3. Finally, confirm the new PIN by entering it again.
Note: To change the CA PIN, see page 17.
Lock decoder
1. Select MENU/Decoder PIN.
2. Enter the current PIN using the numerical buttons.
3. Move focus on Decoder lock.
Use the Cand B keystoenable/disablethechannelslock(unlock)function.
NowlockedchannelsintheChannelorganizerareactivated/desactivated.
Exit the Decoder PIN menu
ToexittheDecoderPINmenupressthe MENU key again.

16
Connection
The connection menu allows mainly settings TV formats, audio and video formats and HD resolutions.
Access to the connection menu
1. Press the MENU key.
2. Using the sand tkeys, select Setup then press OK.
3. Using the sand tkeys, select Connection then press OK.
Modify the connection settings
Use the arrow keys to modify the connection settings. Below are the possible values for each item.
TV format: 4:3, 16:9
Zoommode: for4:3:letterbox,pan&scan,zoom14:9,fullscreen
for16:9:pillarbox,zoom16:9,zoom14:9,fullscreen
TV mode: CVBS, SVHS and RGB
VCR mode: CVBS and SVHS
Video standard: PAL, SECAM
SPDIF mode: stereo, multi
HDMI device Info: Connected, Not connected
Resolution policy: automatic or manual
TV resolution: If manual: 576p, 720p, 1080i
Advice: for a quick access to video formats, press the sand tarrow buttons.
Exit the connection menu
ToexitthismenupresstheMENU key again.
Restore default settings
Be careful when using this menu which is intended to reset your decoder to factory parameters.It means
thatallyourpreferences(favouritelists,timers,preferredconnectionsetc…)willbeerasedandthe
decoder will have to restart the first installation.
Restore default parameters
1. Press the MENU key.
2. Using the sand tkeys, select Setup then press OK.
3. Using the sand tkeys, select Restore default settings then press OK.
4. Enter your decoder PIN code.
A pop-up message appears to ask you to confirm the selection.
5. To cancel the reset, highlight No, press OK and press the EXIT key to return to the viewing mode.
To confirm the reset, highlight Yes and press OK.
The decoder will restart in first installation. For more information on how to process the installation,
please refer to page 9.

17
EN
Conax CA
TheConaxmenuallowsgettinginformationonyouractualsubscription,availabletokensandchanging
the maturity rating.
• TheSubscription status menu informs on rights period on each general channel.
• TheEvent status menu lists all PPV purchased programmes.
• TheToken status menu informs on tokens of each available purse, including their debit and credit
information to each programme that need to use token to be consumed.
Change CA PIN
This sub-menu allows changing the CA PIN code.
Important: The CA PIN code is different from the decoder PIN.The default number is also 1234. It is highly
recommended that you change this number.
Access to Change CA PIN
1. Press the MENU key.
2. Using the sand tkeys, select Conax CA then press OK.
3. Using the sand tkeys, select Change CA PIN then press OK.
4. Enter the old PIN using the numerical buttons.
5. Enter the new PIN using the numerical buttons.
6. Finally, confirm the new PIN by entering it again.
Note: To Change the decoder PIN, see page 15.
Maturity rating
This sub-menu allows viewing and changing the current maturity rating. Four categories of maturity
rating are defined:
• Gforgeneralaudience
• PGforparentalguidance
• Aforover18
• Xforerotic
G has the lowest maturity rating.
Access to Maturity rating
1. Press the MENU key.
2. Using the sand tkeys, select Conax CA then press OK.
3. Using the sand tkeys, select Maturity rating then press OK.
You can view the current maturity rating applied to your decoder.
Modify the Maturity rating
1. Select MENU/Conax CA/Maturity rating then press OK.
2. Using the Cand Bkey, select your preferred maturating rating.
3. Enter your CA PIN to validate the new setting.
Exit the Conax CA menu
ToexittheConaxCAmenupresstheMENU key again.

18
Main features
Strong SRT 8900
• MPEG-4set-topbox:betherstinlinetoenjoyTVinHDquality!
Connections
• HDMIinterface.
• RCAcinchaudiooutputs.
• ElectricalS/P-DIFdigitalaudiooutput.
• 2Scarts:TVscart(CVBS/RGB)andVCRscart(CVBS).
Software
• BroadcastHDprogrammes.
• Bilingualuserfriendlyonscreenmenus(Norwegian,Swedish,Danish,Finnish,English)through256
colorsOnScreenDisplay(OSD).
• Channelorganizerwithupto8favouritelists.
• Electronicprogrammeguidewithnow&nextandmultipledayeventsready.
• InformationBanner(includingsynopsisofthecurrentprogram).
• DVBSubtitling,teletextsubtitlingandfullteletext.
• 2preferredaudioand2preferredsubtitleslanguagesselection(Norwegian,English,otherlanguages
optional).
• ParentalControlbyPINcode.
• Timersavailable.
• Softwareupgradeovertheair.
Accessories
• Remotecontrolwithbatteries.
• RFlead.
• Mainslead.
• Scartcable.
• Usermanual.
This symbol means that your inoperative electronic appliance must be collected separately and not mixed
with the household waste.The European Union has implemented a specific collection and recycling system for
which manufacturers’ are responsible.
This appliance has been designed and manufactured with high quality materials and components that can be recycled
and reused. Electrical and electronic appliances are liable to contain parts that are necessary in order for the system to
work properly but which can become a health and environmental hazard if they are not handled or disposed of in the
proper way. Consequently, please do not throw out your inoperative appliance with the household waste.
If you are the owner of the appliance, you must deposit it at the appropriate local collection point or leave it with the
vendor when buying a new appliance.
- If you are a professional user, please follow your supplier’s instructions.
- If the appliance is rented to you or left in your care, please contact your service provider.
Help us protect the environment in which we live!

19
EN
Trouble shooting
Noteverypictureorsoundproblemiscausedbyadefectinyourset-topbox.Ifyourunitdoessomething
unexpectedwhileyouareusingit,pleaseunplugit,waitafewsecondsthenplugitinagain.
Important – Never open your set yourself.
If this fails to solve the problem or the following measures do not bring satisfactory results, please consult
your retailer.
Problem
Your set-top box
doesn’t seem to be
working, and there are
no lights on the front
panel.
Your set-top box
doesn’t seem to be
working, and the
front-panel standby
light is red.
Your set-top box
doesn’t seem to be
working, and the front-
panel display is green.
You can see on-screen
interference.
Your remote control
isn’t working.
The menus and
banners are in
a language you
don’t understand.
Possible cause
Yourset-topboxisnot
receiving power.
Yourset-topboxis
switched off.
Yourset-topboxisnot
correctly connected to
your other equipment,
or
your other equipment is
not correctly set up.
Your TV is not switched to
show digital cable channels.
Your TV is not correctly
tuned.
The batteries are flat or
inserted the wrong way
round.
Something is between the
remote control and your
set-topbox.
The menu language has
been changed to a language
youdon’tunderstand.
Suggested solution
Make sure that the mains plug is properly
plugged in and that the mains supply is
switched on. Check that the mains wall socket
haspower(tryplugginginalamp).
Press on the front panel or on your
remote control.
Check that all the connections are properly
made(seepage6).
Check that yourTV is plugged into the mains
and that it is switched on.
Ifyourset-topboxisconnectedtoyourTV
via a HDMI lead, try selecting the appropriate
AV channel on yourTV.
Check that yourTV is correctly tuned to
yourset-topbox(seepage6). For further
information, refer to your TV user manual.
Check the batteries and replace them if
necessary.
Make sure you point your remote control
directlyatyourset-topboxandthatnothing
isbetweenitandyourset-topbox.TheIR
receivelightonyourset-topbox’sfrontpanel
should flash each time you press a remote
control button. If not try selecting your TV
“AV input”.
You can change the menu language as follows:
1. Press MENU.
2. Press four time the tarrowkey(starting
from the top item).
3. Press OK twice.
4. Press C/Buntil your language displays.
5. Press the green key to save the new
language.
Table of contents
Other Strong Set-top Box manuals

Strong
Strong SRT 5435 User manual

Strong
Strong SRT4155Evolution User manual

Strong
Strong SRT 6002 User manual

Strong
Strong SRT 2022 User manual

Strong
Strong epic LEAP-S1 User manual

Strong
Strong SRT 5432 User manual

Strong
Strong epic LEAP-S1 User manual

Strong
Strong SRT 5498 User manual

Strong
Strong SRT420 User manual

Strong
Strong SRT 5438 User manual