manuals.online logo
Brands
  1. Home
  2. •
  3. Brands
  4. •
  5. Style selections
  6. •
  7. Indoor Furnishing
  8. •
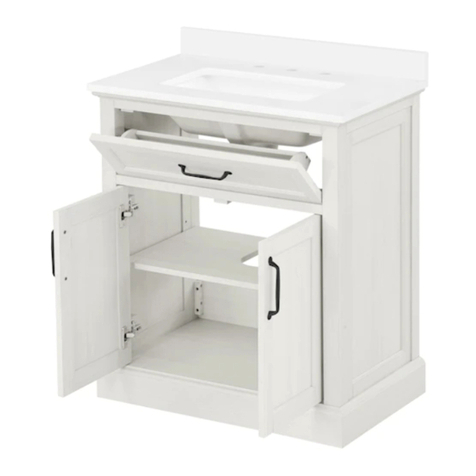
  9. Style selections LWS36OSBV User manual

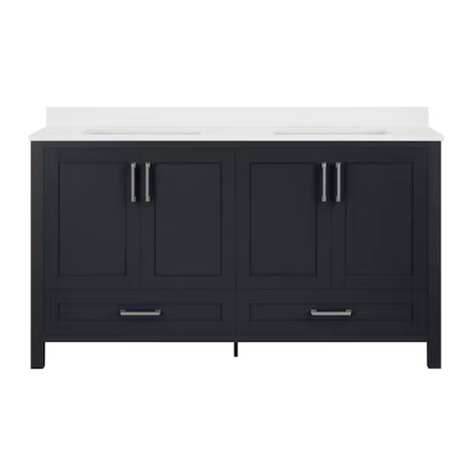
Style selections LWS36OSBV User manual

ITEM/ARTICLE/ARTÍCULO #1505052
MODEL/MODÈLE/MODELO #LWS36OSBV
Serial Number/Numéro de série/Número de serie
Purchase Date/Date d’achat/Fecha de compra
Questions?/Des questions?/¿Preguntas?
Call customer service at 1-877-888-8225,
8 a.m. - 8 p.m., EST, Monday - Friday.
Communiquez avec notre service à la clientèle
au 1-877-888-8225, entre 8 h et 20 h (HNE),
du lundi au vendredi.
Llame al Servicio al Cliente al 1-877-888-8225,
de lunes a viernes de 8 a.m. a 8 p.m., hora
estándar del Este.
ATTACH YOUR RECEIPT HERE
JOIGNEZ VOTRE REÇU ICI
ADJUNTE SU RECIBO AQUÍ
PACKAGE CONTENTS/CONTENU DE L’EMBALLAGE/CONTENIDO DEL PAQUETE
HARDWARE CONTENTS/QUINCAILLERIE INCLUSE/ADITAMENTOS
Note: Hardware shown not actual size./Remarque: La quincaillerie n’est pas illustrée en grandeur réelle./Nota: Los
aditamentos no se muestran en tamaño real.
CARE AND MAINTENANCE/ENTRETIEN/CUIDADO Y MANTENIMIENTO
• Dust the vanity regularly with a soft, non-lint producing cloth or household dusting product./Époussetez
régulièrement le meuble-lavabo à l’aide d’un linge doux et non pelucheux ou d’un accessoire pour l’époussetage
domestique./Limpie el tocador regularmente con un paño suave que no deje pelusas o con un producto de
limpieza doméstico.
• You can clean the vanity with a gentle, non-abrasive household cleaner. Make sure to dry the wood immediately
with a soft cloth or towel./Vous pouvez nettoyer le meuble-lavabo à l’aide d’un nettoyant doux et non abrasif.
Essuyez immédiatement le bois à l’aide d’un linge doux ou d’une serviette./Puede limpiar el tocador con un
limpiador doméstico suave no abrasivo. Asegúrese de secar la madera inmediatamente con un paño o toalla
suave.
PREPARATION/PRÉPARATION/PREPARACIÓN
Before beginning assembly of product, make sure all parts are present. Compare parts with package contents list and hardware
contents list. If any part is missing or damaged, do not attempt to assemble the product./Avant de commencer l’assemblage
de l’article, assurez-vous d’avoir toutes les pièces. Comparez le contenu de l’emballage avec la liste des pièces et celle de la
quincaillerie incluse. S’il y a des pièces manquantes ou endommagées, ne tentez pas d’assembler l’article./Antes de comenzar
a ensamblar el producto, asegúrese de tener todas las piezas. Compare las piezas con la lista del contenido del paquete y la
lista de aditamentos. No intente ensamblar el producto si falta alguna pieza o si estas están dañadas.
Estimated Assembly Time/Temps d’assemblage approximatif/Tiempo estimado de ensamblaje: 20 minutes/20 minutes
20 minutos.
Tools Required for Assembly (not included): Phillips screwdriver./Outils nécessaires pour l’assemblage (non inclus) : tournevis
cruciforme./Herramientas necesarias para el ensamblaje (no se incluyen): Destornillador Phillips.
SAFETY INFORMATION/CONSIGNES DE SÉCURITÉ/INFORMACIÓN DE SEGURIDAD
Please read and understand this entire manual before attempting to assemble or install the product./Assurez-vous de lire et de
comprendre l’intégralité de ce manuel avant de tenter d’assembler ou d’installer l’article./Lea y comprenda completamente este
manual antes de intentar ensamblar o instalar el producto.
WARNING/AVERTISSEMENT/ADVERTENCIA
B
A
C
D
x 1
AA
Touch-up Pen
Crayon à retouche
Aplicador de retoque
CAUTION/ ATTENTION/ PRECAUCIÓN
Do not stand on vanity. Use vanity on level ground. Base vanity supports a maximum weight of 200 lbs. Exceeding maximum
weight limit will compromise the integrity of the vanity structure and could cause the vanity to fail./ Ne vous tenez pas debout
sur le meuble-lavabo. Placez le meuble-lavabo sur un sol plat. La base de meuble-lavabo supporte un poids maximum de
90,71 kg. Si le poids maximum est dépassé, cela compromettra l’intégrité de la structure du meuble-lavabo et celui-ci pourrait
se détériorer./ No se pare sobre el tocador. Coloque el tocador sobre un piso nivelado. La base del tocador resiste un peso
máximo de 90,71 kg. Al exceder este límite de peso máximo, se pone en riesgo la integridad de la estructura del tocador y
este podría fallar.
Do not hang from the vanity./ Ne vous suspendez pas au meuble-lavabo./ No se cuelgue del tocador.
Do not taking o󰀨 the vanity top to avoid damaging the vanity./ Ne retirez pas le comptoir de meuble-lavabo an d’éviter
d’endommager le meuble-lavabo./ No saque la cubierta para tocador para evitar dañarlo.
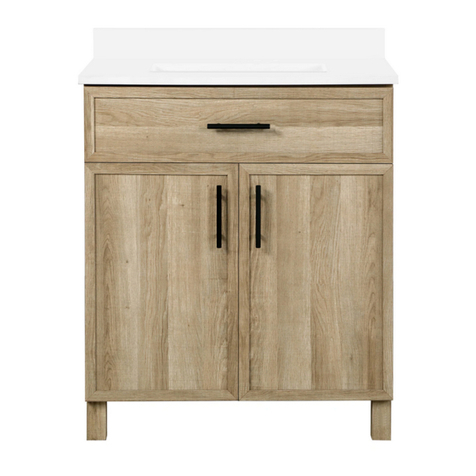
VANITY WITH TOP
MEUBLE-LAVABO AVEC
COMPTOIR
TOCADOR CON CUBIERTA
CARE AND MAINTENANCE/ENTRETIEN/CUIDADO Y MANTENIMIENTO
• The marble top can be cleaned using standard marble cleaning agents (sold separately)./Le comptoir en marbre
peut être nettoyé à l’aide d’un nettoyant standard pour le marbre (vendu séparément)./La cubierta de mármol se
puede limpiar con limpiadores para mármol estándar (se venden por separado).
• Tips for using touch-up pen (AA): For scratches, stroke in direction of scratch; for worn areas, stroke in direction
of wood grain. Rub excess colorant promptly with a soft cloth./Conseils pour l’utilisation du crayon à retouche
(AA) : Pour les égratignures, suivez le sens de l’égratignure. Pour les surfaces usées, suivez le grain du bois.
Essuyez rapidement toute trace de crayon non nécessaire à l’aide d’un linge doux./Consejos para usar el
aplicador de retoque (AA): Para rayones, aplique en dirección del rayón; para áreas desgastadas, aplique en
dirección de la veta. Frote el exceso de colorante rápidamente con un paño suave.
• Keep product away from direct sunlight as it may damage the nish./Conservez l’article à l’abri du soleil pour
éviter d’endommager le ni./Mantenga el producto lejos de la luz solar directa, ya que puede provocar daños en
el acabado.
• Be sure to immediately clean red wine or coke stains within 30 minutes or the top will stain./Assurez-vous de
nettoyer immédiatement les taches de vin rouge ou de coca dans les 30 minutes an d’éviter des taches
permanentes./ Asegúrese de limpiar de inmediato las manchas de vino tinto o de Coca Cola dentro de los 30
minutos o se manchará.
x 1
x 1
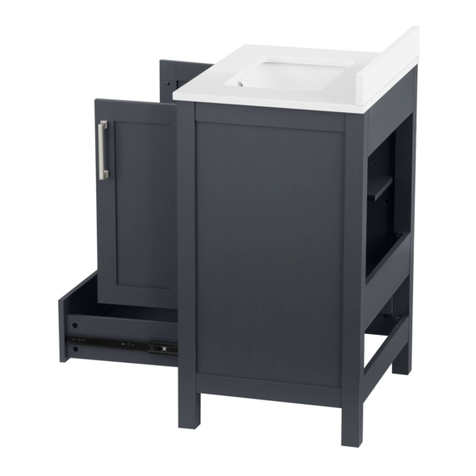
Vanity
Meuble-lavabo
Tocador
Vanity Top(preassembled)
Comptoir de meuble-lavabo
Cubierta para tocador
B
A
x 1 x 1
Backsplash
Dosseret
Protector contra salpicaduras
Sliding Door Set
Ensemble de la porte coulissante
Juego de puertas corredizas
C D
1 2
BB x 2
Bolt
Boulon
Perno
Style Selections®is a registered trademark
of LF, LLC. All rights reserved.
ASSEMBLY INSTRUCTIONS/INSTRUCTIONS POUR L’ASSEMBLAGE
INSTRUCCIONES DE ENSAMBLAJE
1
2
Water Supply Lines and Drain Installation Guide/Guide
d’installation des conduites d’alimentation en eau et du
drain/Guía de instalación de tuberías de suministro de agua
2. Move vanity (B) into proper place against the wall.
Placez le meuble-lavabo (B) contre le mur à l’endroit désiré.
Mueva el tocador (B) hasta su ubicación adecuada contra la pared.
1. Mark wall for vanity placement and note the location of the water supply
lines and drain on the back panel of vanity.
Marquez le mur à l’endroit où vous installerez le meuble-lavabo et notez
l’emplacement des conduites d’alimentation en eau et du drain sur le pan-
neau arrière du meuble-lavabo.
Marque la pared con la ubicación del tocador y tenga en cuenta la ubicación
de las tuberías de suministro de agua y el desagüe en el panel posterior del
tocador.
B
3
3. Install faucet, drain and supply lines (none included) to vanity top (A)
according to the instructions supplied with those items.
Installez le robinet, le drain et les conduites d’alimentation (non inclus) au
comptoir de meuble-lavabo (A) selon les instructions pour l’installation
fournies avec ces articles.
Conecte el grifo, el desagüe y las tuberías de suministro (ninguna de estas
piezas se incluye) a la cubierta para tocador (A) de acuerdo con las
instrucciones provistas con estos artículos.
A
ASSEMBLY INSTRUCTIONS/INSTRUCTIONS POUR L’ASSEMBLAGE
INSTRUCCIONES DE ENSAMBLAJE
4
6
A
Silicone
6. To mount the backsplash (C) to the wall, apply a thin bead of silicone
compound (not included) to the unpolished back side and bottom of the
backsplash (C). Position backsplash (C) as shown onto vanity top (A) and
against the wall. Clean any excess silicone compound before allowing to dry.
Pour installer le dosseret (C) au mur, appliquez un mince trait de composé
de silicone (non inclus) sur les surfaces arrière et inférieure non polies du
dosseret (C). Placez le dosseret (C) sur le comptoir du meuble-lavabo (A) et
contre le mur. Éliminez tout excédent de composé de silicone, puis laissez
sécher.
Para montar el protector contra salpicaduras (C) en la pared, aplique un
cordón delgado de compuesto de silicona (no se incluye) en la parte poste
rior sin pulir y en la parte inferior del protector contra salpicaduras (C).
Coloque el protector contra salpicaduras (C) como se muestra, sobre la cu
bierta de tocador (A) y pegado a la pared. Limpie todo exceso de compuesto
de silicona antes de dejar secar.
Step/Étape/Paso 6: Backsplash Installation/installation du
dosseret/Instalación del protector contra salpicaduras
4. Hang the sliding door set (D) onto vanity (B) by putting the pulleys
preassembled on the sliding door set (D) on the upper bar iron
preassembled on vanity (B),securing with bolt(BB). Then, insert the lower bar
iron on vanity (B) into the groove of the door bottom of sliding door set (D).
Accrochez l’ensemble de la porte coulissante (D) à la base du
meuble-lavabo (B) en posant les poulies préassemblées sur la porte
coulissante (D) sur la barre supérieure en fer préassemblée à la base
du meuble-lavabo (B),et xez-les avec des boulon(BB). Insérez ensuite la
barre de fer inférieure dans la base du meuble-lavabo (B), dans la rainure de
la partie inférieure de la porte coulissante (D).
Instale el juego de puertas corredizas (D) en el tocador (B) colocando las
poleas preensambladas del juego de puertas corredizas (D) en la barra de
hierro superior preensamblada en la base (B),y asegúrelos con perno (BB).
Luego, inserte la barra de hierro inferior en la base del tocador (B) en la
ranura de la parte inferior del juego de la puerta corrediza (D).
Step/Étape/Paso 4: Sliding Door Set Installation/Installation
de l’ensemble de la porte coulissante/instalación del juego
de puertas corredizas
C
D
B
3 4
5
Step/Étape/Paso 5:Adjustable Level/réglage du niveau/
Nivel ajustable
5.In case of uneven oors, oor levelers are provided at the bottom of the
vanity. If necessary, adjust oor levelers by hand to correct tilting and/or level
doors.
Si votre plancher est inégal, utilisez les patins réglables situés au bas
dumeuble-lavabo. Au besoin, ajustez les patins réglables à la main pour
corriger l’inclinaison ou pour mettre les portes de niveau.
En caso de que el piso esté desnivelado, se incluyen niveladores para piso
en la parte inferior del tocador. Si es necesario, ajuste los niveladores de
forma manual para corregir la inclinación o nivelar las puertas.
BB
ASSEMBLY INSTRUCTIONS/INSTRUCTIONS POUR L’ASSEMBLAGE
INSTRUCCIONES DE ENSAMBLAJE
7
Removing the Drawer/ Retrait du tiroir/ Remoción de la gaveta:
1. Unload the contents from the drawer. /Retirez le contenu du tiroir./
Descargue el contenido de la gaveta.
2. Slide out the drawer as far as it will go./Tirez le tiroir jusqu’à la distance
maximale possible./Deslice la gaveta hacia afuera hasta el máximo.
3. Press the lever down on the right-hand track and lift the lever up on the left
track to release the drawer. Pull the drawer out the rest of the way./
Poussez le levier vers le bas sur la glissière droite et soulevez le levier du
côté gauche pour retirer le tiroir. Tirez le tiroir pour le sortir complètement./
Presione la palanca hacia abajo en el riel derecho y levante la palanca en
el riel izquierdo para liberar la gaveta. Jale de la gaveta hasta sacarla.
Replacing the Drawer/ Remplacement du tiroir/ Para volver a colocar la
gaveta:
1. Align the drawer guides with the receiving glides./ Alignez les guides de tiroir
avec les glissières réceptrices./Alinee las guías de la gaveta con los patines
de recepción.
2. Hold the receiving glides rmly and insert the drawer guide./Tenez
fermement les glissières réceptrices et insérez le guide de tiroir./ Sostenga
los patines de recepción rmemente e inserte la guía de la gaveta.
NOTE/ REMARQUE/ NOTA: It is normal for the drawer to close tightly
therst time after it has been removed./ Il est normal que le tiroir ne se
referme pas bien la première fois après avoir été retiré./ es normal que la
gaveta se cierre de manera ajustada la primera vez después de haberse
movido.
3. Push the drawer in completely. /Fermez le tiroir complètement./Empuje la
gaveta completamente hasta el fondo.
Step/Étape/Paso 7: Vanity Drawer/retrait du tiroir du meuble-
lavabo/Remoción de la gaveta del tocador
B
This product is warranted to the original purchaser. If there is a failure in this unit due to defects in materials or workmanship,
the manufacturer will repair or replace this item at our discretion without charge. Warranty is void if product has been assembled
incorrectly, misused, abused by overloading, altered in any way or damaged due to accident. This warranty is not transferable
and does not cover chipping, aking, scratches, rust, dents, or other damages to the surfaces of this product. Responsibility
of the manufacturer is limited to repair or replacement of this product. The manufacturer is not responsible for consequential,
incidental, or other damages or losses resulting from product failure.
This warranty is in lieu of all other expressed warranties. Some states do not allow the exclusion or limitation of incidental or
consequential damages, so the above limitation may not apply to you. This warranty gives you specic legal rights and you
may have other rights which vary from state to state.
La présente garantie n’est o󰀨erte qu’à l’acheteur initial. Si cet article présente des défauts de matériaux ou de fabrication, le
fabricant choisira, à sa seule discrétion, de réparer ou de remplacer l’article sans frais. La garantie sera annulée si l’article
a été assemblé incorrectement, a été utilisé de manière inappropriée ou abusive en le surchargeant ou en l’altérant d’une
quelconque façon, ou a subi des dommages causés par un accident. La présente garantie est non transférable et ne couvre
pas les ébréchures, l’écaillement, les égratignures, la rouille, les bosses et tout autre dommage à la surface de cet article. La
responsabilité du fabricant se limite à la réparation et au remplacement de cet article. Le fabricant n’est pas responsable des
dommages accessoires, consécutifs ou autres ni de toute perte causée par une défectuosité de l’article.
La présente garantie prévaut sur toute autre garantie explicite. Certains États ou certaines provinces ne permettent pas
l’exclusion ou la limitation des dommages accessoires ou consécutifs, de sorte que la limitation ci-dessus peut ne pas s’appliquer
à vous. Cette garantie vous confère des droits précis. Il est possible que vous disposiez d’autres droits, qui varient d’un État ou
d’une province à l’autre.
La garantía de este producto es válida para el comprador original. Si esta unidad presenta alguna falla debido a defectos en
los materiales o la mano de obra, el fabricante reemplazará o reparará este artículo sin cargos y a su discreción. La garantía
se anula si el producto no se ensambló correctamente y debido al mal uso, abuso por sobrecarga, modicación de cualquier
tipo o daños producidos por un accidente. Esta garantía no es transferible y no cubre el desportillado, desprendimiento,
rayones, oxidación, abolladuras u otros daños en la supercie de este producto. La responsabilidad del fabricante se limita a la
reparación o el reemplazo de este producto. El fabricante no se hará responsable por daños accidentales o resultantes u otros
daños o pérdidas causadas por fallas del producto.
Esta garantía reemplaza a todas las demás garantías explícitas. Algunos estados no permiten la exclusión o limitación de los
daños accidentales o resultantes, de modo que las limitaciones anteriores pueden no aplicarse en su caso. Esta garantía le
otorga derechos legales especícos, y podría tener otros derechos, que varían según el estado.
LIMITED LIFETIME WARRANTY/GARANTIE À VIE LIMITÉE/GARANTÍA LIMITADA DE POR VIDA
5 6
Printed in Vietnam
Imprimé au Vietnam
Impreso en Vietnam
Date: 2019-09-20 Rev. 0001-A
Date: 2019-09-20 Rév. 0001-A
Fecha: 2019-09-20 Rev. 0001-A
REPLACEMENT PARTS LIST/LISTE DES PIÈCES DE RECHANGE/LISTA DE PIEZAS DE
REPUESTO
For replacement parts, call our customer service department at 1-877-888-8225./Pour obtenir des
pièces de rechange, communiquez avec notre service à la clientèle au 1 877 888-8225./Para obtener
piezas de repuesto, llame a nuestro Departamento de Servicio al Cliente al 1-877-888-8225.
PART
PIÈCE
PIEZA
DESCRIPTION
DESCRIPTION
DESCRIPCIÓN
PART #
NoDE PIÈCE
PIEZA #
C Backsplash/ Dosseret/ Protector contra salpicaduras *LWS36OSBV-01-B
D Door/ Porte/ Puerta *LWS36OSBV-02-D
E Upper Drawer Box/ Tiroir supérieur/ Caja de gaveta superior *LWS36OSBV-03-UDB
F Drawer Box/ Tiroir/ Estructura del cajón *LWS36OSBV-04-DB
AA Touch-up Pen/ Crayon à retouche/ Aplicador de retoque *LWS36OSBV-05-TP
BB Bolt/ Boulon/Perno *LWS36OSBV-06-B
CC Drawer Handle with Bolt/ Poignée de tiroir avec boulon/
Manija de gaveta con perno
*LWS36OSBV-07-DHB
DD Drawer Slides/Glissières de tiroir/ Deslizadores para gavetas
(35 mm x 35 cm L/ de largo)
*LWS36OSBV-08-DS
EE Floor Protector/ Protecteur de plancher/ Protector para pisos *LWS36OSBV-9-FP
FF Pulley with Screws/ Poulie avec vis/ Polea con tornillos *LWS36OSBV-10-PS
GG Upper Rail with Bolts/ Traverse supérieure avec boulons/
Riel superior con pernos
*LWS36OSBV-11-URB
HH Bottom Rail with Screws/ Traverse inférieure avec vis/
Riel inferior con tornillos
*LWS36OSBV-12-BRS
II Large Cam Lock/ Grande attache Camloc/Cerrojo de leva grande *LWS36OSBV-13-LCL
JJ Door Pull with Bolt/ Poignée de porte avec boulon/
Tirador de puerta con perno
*LWS36OSBV-14-DPB
AA BB
CC
DE
C
DD EE FF
GG
F
HH
7 8
II JJ

This manual suits for next models

1

Other Style selections Indoor Furnishing manuals

Style selections 46305PKXLG User manual

Style selections

Style selections 46305PKXLG User manual

Style selections FTS61460 User manual

Style selections

Style selections FTS61460 User manual

Style selections SUNBURY 30NO COMBO User manual

Style selections

Style selections SUNBURY 30NO COMBO User manual

Style selections 36BV90194-PW07 User manual

Style selections

Style selections 36BV90194-PW07 User manual

Style selections 1678VA-31-311-934 User manual

Style selections

Style selections 1678VA-31-311-934 User manual

Style selections C43136M-SS User manual

Style selections

Style selections C43136M-SS User manual

Style selections CDB30-SS User manual

Style selections

Style selections CDB30-SS User manual

Style selections 8554-3890 Maintenance manual

Style selections

Style selections 8554-3890 Maintenance manual

Style selections 15847L User manual

Style selections

Style selections 15847L User manual

Style selections DOLTON 18NO COMBO User manual

Style selections

Style selections DOLTON 18NO COMBO User manual

Style selections NRS2230MV User manual

Style selections

Style selections NRS2230MV User manual

Style selections MP-LV00811 User manual

Style selections

Style selections MP-LV00811 User manual

Style selections LG-20345-C User manual

Style selections

Style selections LG-20345-C User manual

Style selections LW23-48DT-S109 User manual

Style selections

Style selections LW23-48DT-S109 User manual

Style selections CE29118-SS User manual

Style selections

Style selections CE29118-SS User manual

Style selections LWS30DV User manual

Style selections

Style selections LWS30DV User manual

Style selections LT2026WWMV User manual

Style selections

Style selections LT2026WWMV User manual

Style selections DTC201133B User manual

Style selections

Style selections DTC201133B User manual

Style selections LWXG48VM User manual

Style selections

Style selections LWXG48VM User manual

Style selections CSD630-SS User manual

Style selections

Style selections CSD630-SS User manual

Style selections Camryn LWUSTCA User manual

Style selections

Style selections Camryn LWUSTCA User manual

Style selections LWS26MW User manual

Style selections

Style selections LWS26MW User manual

Style selections BV-8533 4063178 User manual

Style selections

Style selections BV-8533 4063178 User manual

Style selections LC1848C User manual

Style selections

Style selections LC1848C User manual

Popular Indoor Furnishing manuals by other brands

Next AMELIA NEW 462947 Assembly instructions

Next

Next AMELIA NEW 462947 Assembly instructions

Ticaa Erni Instructions for use

Ticaa

Ticaa Erni Instructions for use

Country Living ACS00600 owner's manual

Country Living

Country Living ACS00600 owner's manual

dobue MOVELARIA 3000589 Assembly instruction

dobue MOVELARIA

dobue MOVELARIA 3000589 Assembly instruction

Kvik OU844 manual

Kvik

Kvik OU844 manual

RiverRidge 16-031 Assembly instructions

RiverRidge

RiverRidge 16-031 Assembly instructions

Wilson & Fisher MONTERRA quick start guide

Wilson & Fisher

Wilson & Fisher MONTERRA quick start guide

SUNARGY Smart Comfort 166 Assembly instructions

SUNARGY

SUNARGY Smart Comfort 166 Assembly instructions

Lomado Relita STEFAN bunk bed Assembly instructions

Lomado

Lomado Relita STEFAN bunk bed Assembly instructions

KMART 43333752 ISLA Assembly instructions

KMART

KMART 43333752 ISLA Assembly instructions

DREAMS San Diego TV Bedstead Assembly instruction

DREAMS

DREAMS San Diego TV Bedstead Assembly instruction

Atlantic Furniture SHAKER Assembly instructions

Atlantic Furniture

Atlantic Furniture SHAKER Assembly instructions

Forte CERK232 Assembling Instruction

Forte

Forte CERK232 Assembling Instruction

Tuscany QL055 owner's manual

Tuscany

Tuscany QL055 owner's manual

CONFORAMA HUGO TI-144 Assembling instructions

CONFORAMA

CONFORAMA HUGO TI-144 Assembling instructions

IKEA KULLEN 703.557.33 manual

IKEA

IKEA KULLEN 703.557.33 manual

PARAMOUNT BED PS-0232S instruction manual

PARAMOUNT BED

PARAMOUNT BED PS-0232S instruction manual

easyfurn FRANCA Z7.T14 Series installation instructions

easyfurn

easyfurn FRANCA Z7.T14 Series installation instructions

manuals.online logo
manuals.online logoBrands
  • About & Mission
  • Contact us
  • Privacy Policy
  • Terms and Conditions

Copyright 2025 Manuals.Online. All Rights Reserved.