SunFounder Smart Video Car Kit B+ User manual

Preface
About SunFounder
SunFounder is a technology company focused on Raspberry Pi and Arduino open source
community development. Committed to the promotion of open source culture, we strive to
bring the fun of electronics making to people all around the world and enable everyone to
be a maker. Our products include learning kits, development boards, robots, sensor modules
and development tools. In addition to high quality products, SunFounder also offers video
tutorials to help you make your own project. If you have interest in open source or making
something cool, welcome to join us!
About This Kit
The kit is suitable for the Raspberry Pi model B+, 2 model B and 3 model B.
In this book, we will show you how to build the smart car via description, illustrations of physical
components, and schematic diagrams of circuits, in both hardware and software respects.
You may visit our website www.sunfounder.com to download the related code and view the
user manual on LEARN -> Get Tutorials and watch related videos under VIDEO, or clone the
code on our page of github.com at
https://github.com/sunfounder/Sunfounder_Smart_Video_Car_Kit_for_RaspberryPi
Free Support
If you have any TECHNICAL questions, add a topic under FORUM section on our website
and we'll reply as soon as possible.
For NON-TECH questions like order and shipment issues, please send an email to
service@sunfounder.com. You're also welcomed to share your projects on FORUM.
Reprint 4.0
SunFounder

Contents
Introduction ..............................................................................................................................................1
Components.............................................................................................................................................2
A. Acrylic Plates..............................................................................................................................2
B. Mechanical Fasteners..............................................................................................................3
C. Drive Parts ...................................................................................................................................4
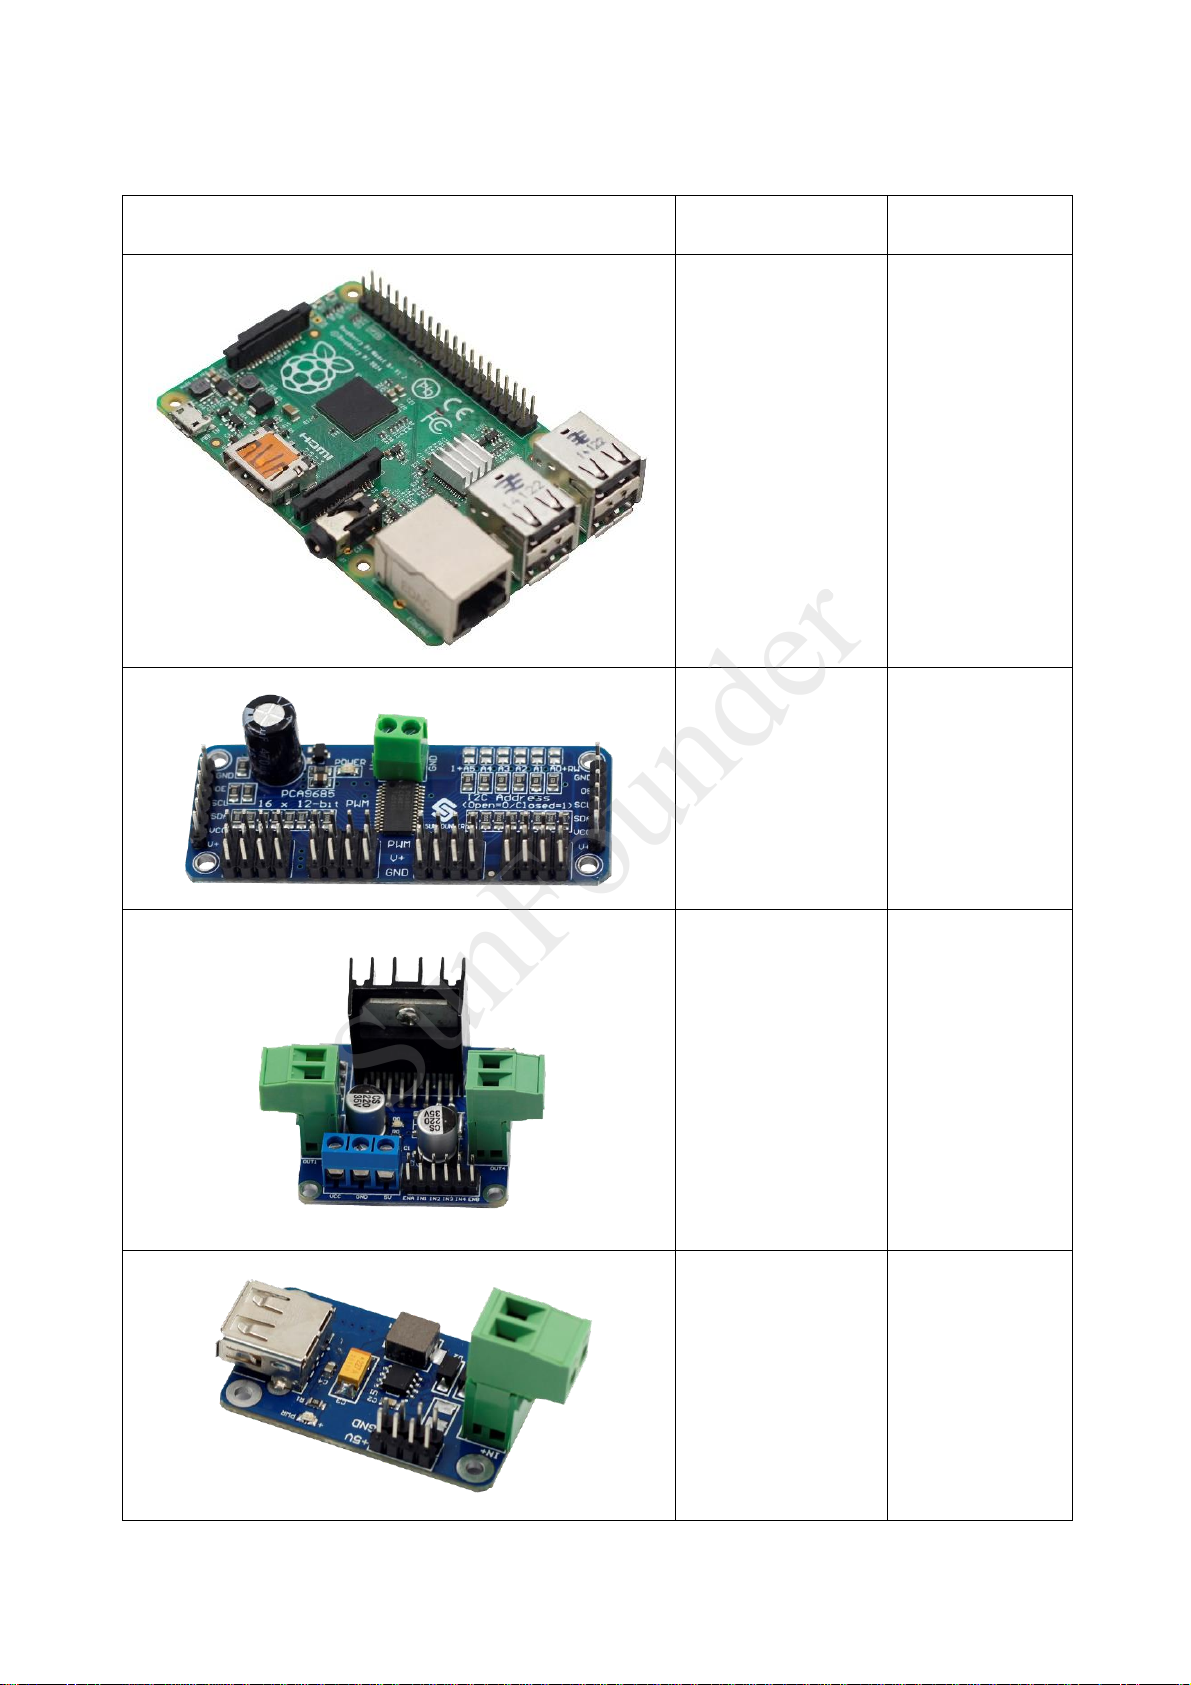
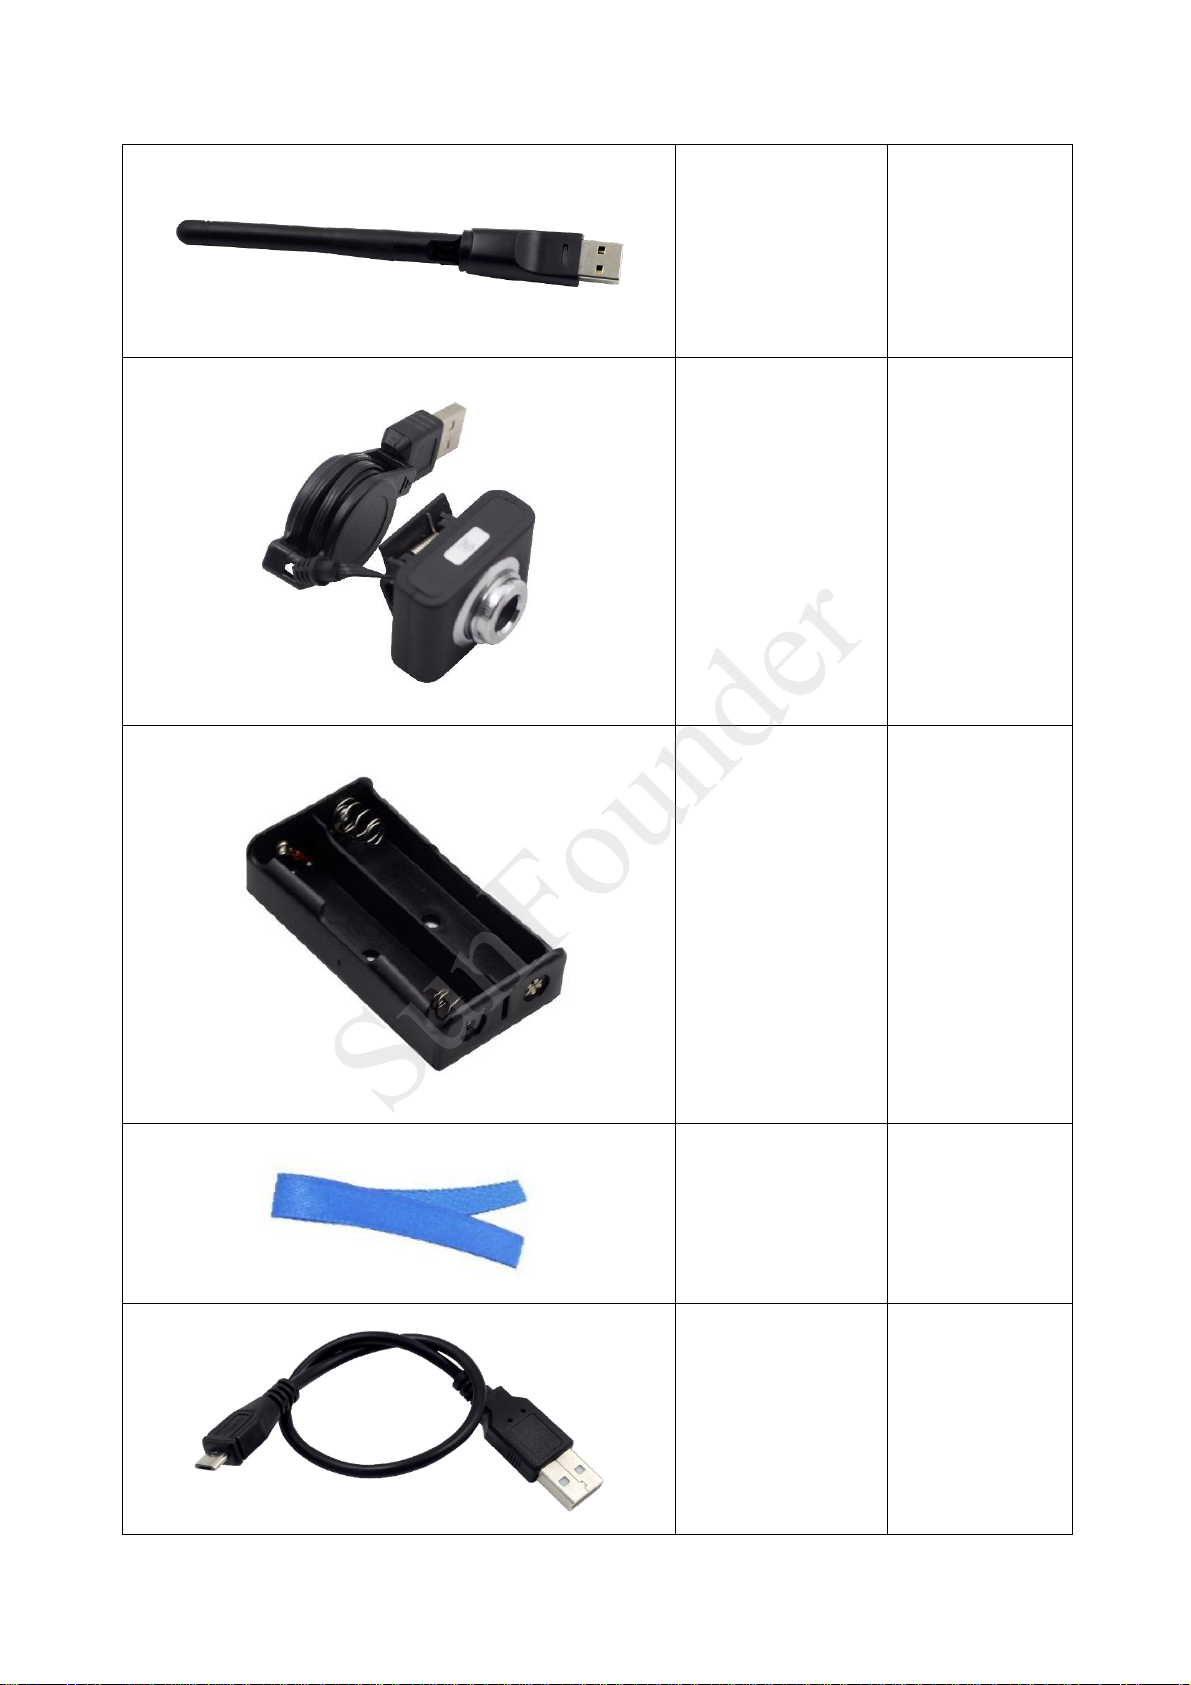
D. Electrical Components ............................................................................................................5
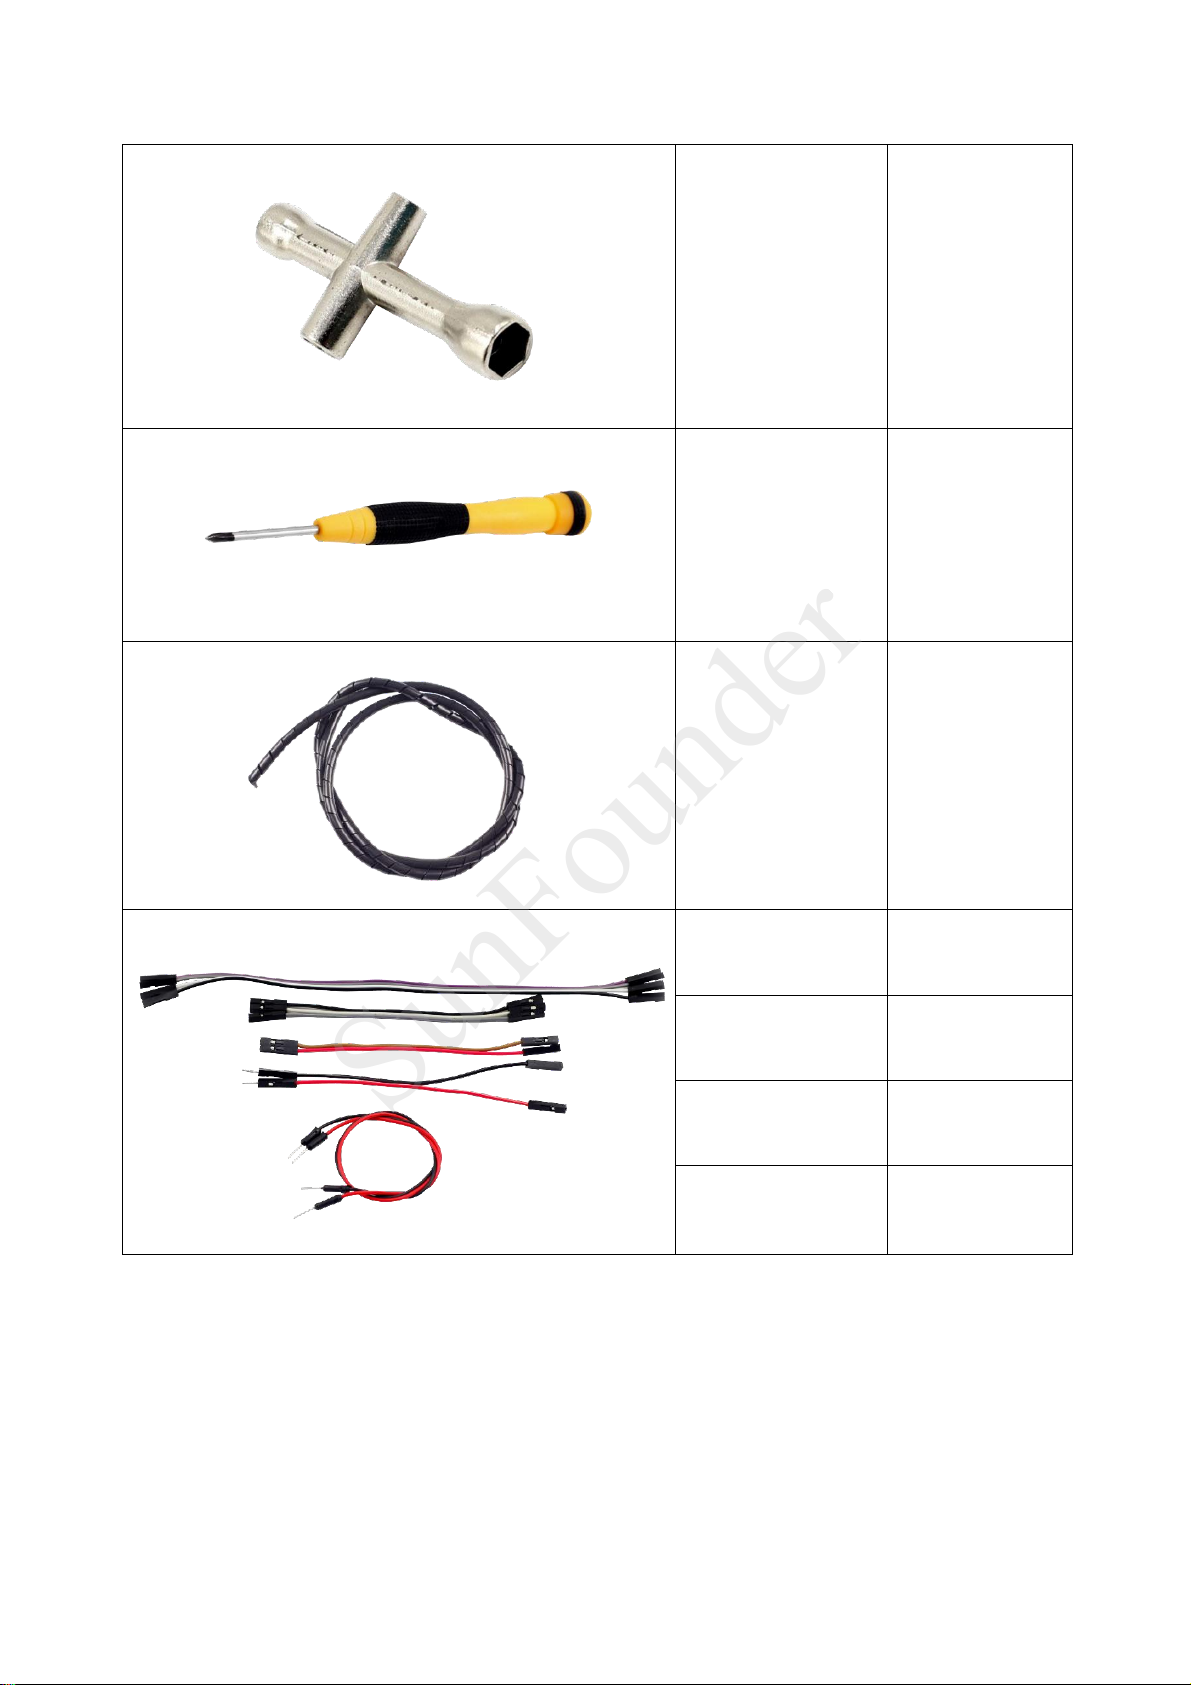
E. Self-provided Parts....................................................................................................................8
Electrical Components Basics...............................................................................................................9
A. Raspberry Pi................................................................................................................................9
B. Step-down DC-DC Converter Module...............................................................................10
C. Servo ..........................................................................................................................................10
D. DC Motor Driver.......................................................................................................................11
E. USB Wi-Fi Adaptor....................................................................................................................11
F. Servo Controller .......................................................................................................................12
G. 18650*2 Battery Holder...........................................................................................................12
Assembly..................................................................................................................................................13
A. Back Half Chassis + Rear Wheels .........................................................................................13
B. Back Half Chassis + Copper Standoffs ...............................................................................15
C. Upper Plate + Copper Standoffs .........................................................................................15
D. Battery Holder ..........................................................................................................................17
E. Back Chassis + Upper Plate...................................................................................................18
F. Electrical Module Assembly..................................................................................................19
Circuit Connecting................................................................................................................................20
Servo Calibration(Operation on Raspberry Pi)...........................................................................29
A. Burn the image........................................................................................................................29
B. Car Power Supply....................................................................................................................30
C. Log into Raspberry Pi..............................................................................................................30
For Linux or Mac OS X Users...................................................................................................30
For Windows Users ...................................................................................................................32
D. Get Source Code....................................................................................................................33
E. Install python-dev, python-smbus........................................................................................33
F. Setup I2C Port ..........................................................................................................................33
G. Start calibration .......................................................................................................................33
Continue to Assemble ..........................................................................................................................35
A. Front Wheels.............................................................................................................................35
B. Steering Linkage + Servo Rocker Arm.................................................................................37
C. Steering Servo + Upper Plate................................................................................................38
SunFounder

D. Steering Servo + Steering Linkage .......................................................................................39
E. Front Chassis + Upper Plate...................................................................................................40
F. Plates + Servo Rocker Arms...................................................................................................41
G. Pan/Tilt Servo + Plate..............................................................................................................42
H. Pan Servo Plate + Tilt Servo Plate.........................................................................................43
I. Servos + Rocker Arm Plates...................................................................................................44
J. Mount + Car.............................................................................................................................45
Car Calibration (Operation on PC) ...................................................................................................47
A. Get the source code .............................................................................................................47
B. Install Python software ...........................................................................................................47
C. Run cali_client..........................................................................................................................48
D. Start Calibration ......................................................................................................................50
Motor Adjustment ...................................................................................................................50
Turning Adjustment .................................................................................................................51
Mount Adjustment ..................................................................................................................51
MJPG-streamer (Operation on Raspberry Pi) ..................................................................................52
A. MJPG-streamer Installation ...................................................................................................52
B. Testing........................................................................................................................................53
Get on the Road! ..................................................................................................................................55
A. Run TCP server (Operation on Raspberry Pi).....................................................................55
B. Run the Client (operation on PC)........................................................................................55
Program Analysis and Explanation ....................................................................................................58
Abstract............................................................................................................................................58
Introduction of Socket ...........................................................................................................58
1. Server..................................................................................................................................59
Process Diagram of Server Program ...................................................................................60
2. Client ..................................................................................................................................60
Introduction of Tkinter ............................................................................................................60
Process Diagram of Client Program....................................................................................62
Summary..................................................................................................................................................63
SunFounder

1
Introduction
The SunFounder Smart Video Car Kit for Raspberry Pi is composed of Raspberry Pi, step-down
DC-DC converter module, USB camera, DC motor driver, and PCA9685-based servo
controller. From the perspective of software, the smart car is of client/server (C/S) structure.
The TCP server program is run on Raspberry Pi for direct control of the car. And the video
data are acquired and delivered via the open source software MJPG-streamer in a real-time
manner. The TCP client program is run on PC to send the control command. Both the client
and server programs are developed in Python.
The smart car is developed based on the open source hardware Raspberry Pi and integrates
the knowledge of mechanics, electronics and computer, thus having profound educational
significance.
SunFounder

2
Components
A. Acrylic Plates
SunFounder

3
B. Mechanical Fasteners
Parts
Name
Qty.
M1.2*4 self-tapping screw
8
M2*8 screw
6
M2.5*6 screw
16
M3*10 countersunk screw
2
M3*8 screw
8
M3*10 screw
6
M3*30 screw
4
M4*25 screw
2
M2.5*8 copper pillar
16
M3*24 copper pillar
8
M2 nut
6
M2.5 nut
16
M3 nut
20
M4 self-locking nut
2
F694ZZ flange bearing
2
SunFounder

4
C. Drive Parts
Parts
Name
Qty.
Tower Pro
Micro Servo
SG90
3
Gear reducer
2
Driven wheel
2
Active wheel
2
SunFounder

5
D. Electrical Components
Parts
Name
Qty.
Raspberry Pi
Model B+
1
16-Channel 12-bit
PWM driver
(servo controller)
1
L298N DC motor
driver
1
Step-down DC-
DC
converter
module
1
SunFounder

6
USB Wi-Fi
adapter
1
USB camera
1
18650*2
Battery holder
1
Ribbon
1
USB cable
1
SunFounder

7
Cross socket
wrench
1
Cross
screwdriver
1
Cable Spiral
Wrap
1
20cm jumper wire
(F to F)
4
10cm jumper wire
(F to F)
5
10cm jumper wire
(M to F)
2
20cm jumper wire
(M to M)
2
SunFounder

8
E. Self-provided Parts
The following parts are not included in the set.
Parts
Name
Qty. Needed
18650 3.7V
rechargeable
Li-ion battery
2
TF Card
1
SunFounder

9
Electrical Components Basics
A. Raspberry Pi
The Raspberry Pi is a low cost, credit-card sized computer that plugs into a computer monitor
or TV, and uses a standard keyboard and mouse. It is a capable little device that enables
people of all ages to explore computing, and to learn how to program in languages like
Scratch and Python. It's capable of doing everything you'd expect a desktop computer to
do, from browsing the internet and playing high-definition video, to making spreadsheets,
doing word-processing, and playing games.
What's more, the Raspberry Pi has the ability to interact with the outside world, and has been
used in a wide array of digital maker projects, from music machines and parent detectors to
weather stations and tweeting birdhouses with infra-red cameras.
In this kit, we use Raspberry Pi as the core controller of driving equipment like DC motor and
servo. With the device and a camera collaborated,video data can be acquired in a real-
time manner and delivered by Wi-Fi network.
SunFounder

10
B. Step-down DC-DC Converter Module
Built based on the chip XL1509, the module converts the battery output of 7.4V to 5V, so as
to supply power to Raspberry Pi and the servo. As a DC to DC converter IC, the chip has an
input voltage ranging from 4.5V to 40V and generates an output voltage of 5V with a current
of as high as 2A. Please note: only when the input voltage is up to 6.5V, a 5V output can be
supported.
C. Servo
In this smart car, one servo controls the direction of the car, and the other two, the movement
of the camera between X axis and Y axis, thus defining the coverage of the camera. A servo
is an automatic control system composed of DC motor, reduction gear set, sensor, and
control circuit. It defines the rotation angle of the output shaft via delivering specific PWM
signals.
Generally, a servo supports a maximum rotation angle of the shaft (like 180 degrees). It differs
from a common DC motor in the rotation mode: a DC motor rotates by circle when a servo
SunFounder

11
rotates in a certain degree and does not rotate in a round circle. Also, the former is used for
power supply by its whole-circle rotation, while the latter is applied to controlling the rotation
angle of an object (like joints of a robot).
D. DC Motor Driver
As the name suggests, the module is used to drive DC motors. The driver is built based on
L298N. As a high-voltage and large-current chip for motor driving, encapsulated with 15 pins,
the chip has a maximum operating voltage of 46V and an instant peak current of as high as
3A, with an operating current of 2A and rated power of 25W. Thus, it is completely capable
of driving two low-power DC motors.
E. USB Wi-Fi Adaptor
The adapter helps Raspberry Pi connect to a Wi-Fi hot spot.
SunFounder

12
F. Servo Controller
The Servo Controller is built based on PCA9685. PCA9685 is a 16-channel LED controller with
I2C bus interface. The resolution ratio of each channel is 12 bits (212=4096 levels). The
controller works in a frequency between 40Hz and 1000Hz and its duty cycle can be adjusted
in a range of 0 to 100%. It provides PWM signals for the servo and controls the rotation angle
of the servo. Meanwhile, the module controls the duty cycle of the square waves output
from channel 14 and 15 to regulate the rotational speed of the DC motor, so as to control
the speed of the car.
G. 18650*2 Battery Holder
The battery is to use two 18650 batteries to power the modules and servos on the car.
Note: Please pay attention to the cathode (-) and anode (+) marks inside the holder (near
each pole). Install the 18650 batteries accordingly: battery cathode to holder -, and battery
anode to holder +.
SunFounder

13
Assembly
A. Back Half Chassis + Rear Wheels
a) Assemble the following two acrylic
plates
b) When completed, the assembly should
look like the figure below.
c) Assemble the gear reducer, the active wheel and following acrylic plates with two
M3*30 screws and M3 nuts.
d) When completed, the assembly should look like the figure below.
SunFounder

14
e) Assemble the following two acrylic
plates
f) When completed, the assembly should
look like the figure below.
g) Assemble the gear reducer, the active wheel and the previously assembled part
with two M3*30 screws and M3 nuts.
h) When completed, the assembly should look like the figure below.
SunFounder

15
B. Back Half Chassis + Copper Standoffs
a) Assemble 4 M3*24 copper standoffs
and 4 M3 nuts into the acrylic plate part
as shown below.
b) When completed, the assembly should
look like the figure below.
C. Upper Plate + Copper Standoffs
a) Assemble 16 M2.5*8 copper standoffs and 16 M2.5 nuts into the acrylic plate as shown
below.
Pay attention to the face of the plate. Refer to the small hole in the plate as pointed by the
arrow in the following figure.
SunFounder

16
b) When completed, the assembly should look like the figure below.
c) The view from the back of the plate:
SunFounder

17
D. Battery Holder
a) Assemble the battery holder to the plate below with 2 M3*10 countersunk screws and
2 M3 nuts.
You can thread a ribbon through the plate below, so it will be easy to remove the
battery, which is up to you.
b) When completed, the assembly should look like the figure below.
c) The view from the top is as follows.
SunFounder
Table of contents
Other SunFounder Motorized Toy Car manuals
Popular Motorized Toy Car manuals by other brands

Atomic
Atomic BZ Evolution 2017 Instruction and assembly manual

Traxxas
Traxxas Nitro 4-Tec 3.3 48077 owner's manual

Matco Tools
Matco Tools ROCK ROVER RC CAR owner's manual

SIKUCONTROL32
SIKUCONTROL32 6780 operating instructions

Radio Flyer
Radio Flyer 997 instruction manual

Ride On Cars
Ride On Cars A228 user guide

REVELL
REVELL CUSTOM CADILLAC LOWRIDER Assembly manual

HOMCOM
HOMCOM 370-097 Assembly instruction

Mattel
Mattel POWER WHEELS GTR89 owner's manual

Truemax
Truemax Mercedes Benz SL65 AMG Ride On Car owner's manual

Atomic
Atomic AMZ SERIES Instruction and assembly manual

Dynacraft
Dynacraft 24V UTV owner's manual