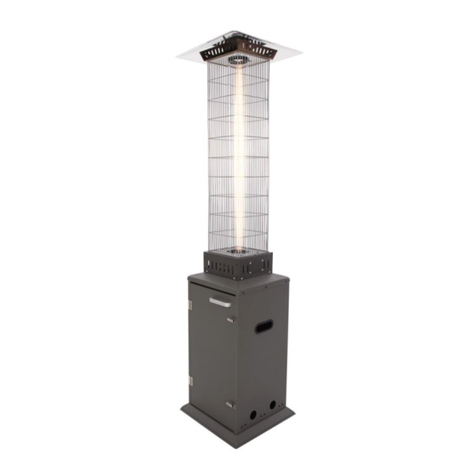
Sunred Flame Torch Black User manual

www.sunred.nl
Manual Square Flame Torch (UK)
Handleiding Flame Torch (NL)
Anleitung Flame Torch (DU)
Manual Flame Torch (FR)
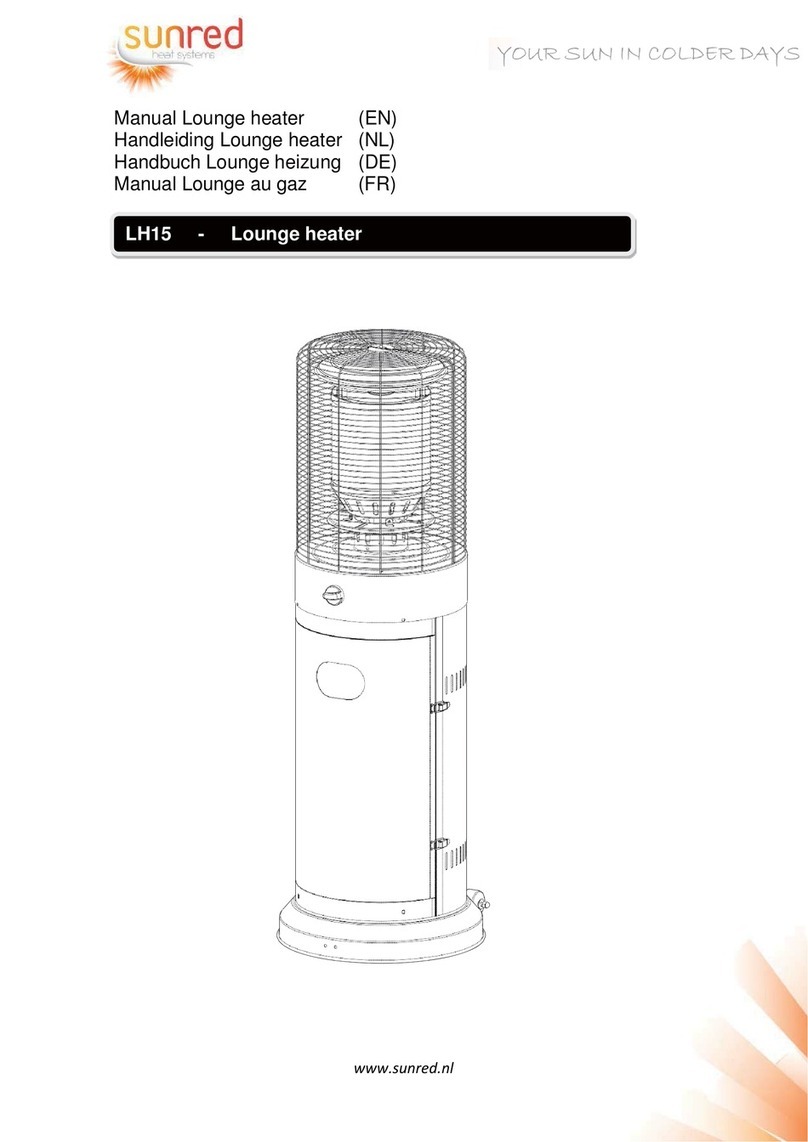
SFT15 – Flame Torch black

www.sunred.nl
Flame Torch (SFT15) UK
TECHNICAL INFORMATION
Wattage: 12500 Watt
Element type: Gas
Expected Life span elements 5000 hrs.
Weight: 25 kg
Certificates: CE
Dimensions: H218 cm
All measurements are approximate
Certified by international recognized standards.
Gas heat wave outdoor heater.
Variable control gas valve with electric push igniter.
Steel with powder coated or stainless steel.
2180mm total height.
Please keep this manual for future references
User instructions - please keep for future references

www.sunred.nl
! WARNING
-Read the instructions before installation and use.
-This appliance must be installed and the gas cylinder stored in accordance with the regulations in force.
-This appliance requires installation by a competent person.
-For use only in well-ventilated areas. An amply ventilated area must have a minimum of 25% of the
surface area open. The surface area is the sum of the walls surface.
-The use of this appliance in enclosed areas can be dangerous and is prohibited.
-This appliance shall not be used for the heating of domestic premises.
-This appliance shall be used for space heating only.
-This appliance shall not be used in basements or below ground level.
-This appliance has no atmospheric sensing device. It shall not be used for heating animal rearing and is
for outdoor use only.
-Use only the type of gas and the type of cylinder specified by the manufacturer.
-Do not place items on or against this appliance.
-Do not store chemicals or flammable materials or spray aerosols near this appliance.
-Do not operate this appliance in an explosive atmosphere like in areas where gasoline or other
flammable liquids or vapours are stored.
-Protect the hot glass tube from rain, water splash or anything that will cause a sudden change in
temperature which may lead to cracking or shattering.
! WARNING
Turn off the gas valve immediately if smell of gas is detected. Extinguish any open flame.
If odour continues, contact your gas supplier immediately.
! WARNING
-The user assumes all risk in the assembly and operation of the gas heater. Failure to follow the warnings
and instructions in this manual can result in severe personal injury, death or property damage.
-If user cannot read or fully understand the instruction manual, please contact your dealer.
-Manufacturer or supplier will not be responsible for user’s negligence.
TABLE OF CONTENTS
1. Caution
2. Heater Stand and Location
3. Gas Requirements
4. Leakage Test
5. Fuel Gas Odour
6. Operation and Storage
7. Assembly Instructions
8. Construction and Specifications
9. Assembly Procedures
10. Problems Check List

www.sunred.nl
CAUTION:
- Installation and repair should be done by a qualified service person.
- Improper installation, adjustment, alteration can cause personal injury or property damage.
- Do not attempt to alter the unit in any manner.
- This appliance must be installed in accordance with the regulations in force.
- The gas cylinder must be stored in accordance with the regulations in force.
- Do not move the appliance when in operation.
- Shut off the valve at the gas cylinder or the regulator before moving the appliance.
- The tubing or the flexible hose must be changed within the prescribed intervals.
- In case of violent wind particular attention must be taken against tilting of the appliance.
- Do not store or use gasoline or other flammable vapours or liquids into the heater unit. The whole
gas system, hose regulator, pilot or burner should be inspected for leaks or damages before use.
- All leak tests should be done with a soap solution. Never use an open flame to check for leaks.
- Do not use the heater until all connections have been leak tested.
- Turn off immediately the gas valve if smell of gas is detected.
- Do not transport heater while it’s operating.
- Do not move the heater after it has been turned off until the temperature has cooled down.
- Keep the ventilation opening of the cylinder enclosure free and clear of debris.
- Do not paint radiant screen, control panel or top canopy reflector.
- Control compartment, burner and circulation air passageways of the heater must be kept clean.
- Frequent cleaning may be required as necessary.
- The LP tank should be turned off when the heater is not in use.
- Check the heater immediately if any of the following exists:
oThe heater does not reach temperature.
oThe burner makes popping noise during use (a slight noise is normal when the burner is
extinguished).
oSmell of gas in conjunction with extreme yellow tipping of the burner flames.
- The gas regulator/hose assembly must be located out of pathways where people may trip over it or
in area where the hose will not subject to accidental damage.
- Any guard or other protective device removed for servicing the heater must be replaced before
operating the heater.
- Change the gas cylinder in a well-ventilated area, away from any inflammation source.
- Check that the regulator seal is fitted and that it is in good condition.
- Do not obstruct the ventilation holes of cylinder housing.
- Adults and children should stay away from high temperature surface to avoid burns or clothing
ignition.
- Children should be carefully supervised when they are in the area of the heater.
- Clothing or other flammable materials should not be hung on the heater or placed on or near the
heater.
- Use may replace the rubber hose by himself and note the length of the hose is 60cm.
- The hose must be required by the national regulations and conditions.

www.sunred.nl
! CAUTION:
PLEASE READ CAREFULLY THE FOLLOWING SAFETY GUIDELINES BEFORE OPERATION
LP Characteristics - Flammable, explosive, heavier than air-settles in low areas.
In its natural state, propane has no odour. For your safety, an odorant is added that smells like rotten cabbage.
Contact with liquid LP can cause freeze burns to skin.
This heater is shipped from the factory for LP gas use only.
Use only EEC approved ”15KG.” Gas cylinders LP gas cylinders (same as commonly used on gas grills) with safety
valves. These valves can be quickly identified by their external and internal threads.
Never use a cylinder with a damaged body, valve, collar or foot ring.
When heater is not in use, turn Control Valve OFF. Close the valve of the gas cylinder or the regulator after use.
The use of this appliance in enclosed areas can be dangerous and is “PROHIBITED”.
1) For use outdoors or in amply ventilated areas.
2) An amply ventilated area must have a minimum of 25% of the surface area open.
3) The surface area is the sum of the walls surface.
HEATER STAND AND PLACE
Gas requirements:
-Use LPG gas mixtures.
-Maximum inlet pressure of propane regulator must not exceed 100 PSI.
-The pressure regulator and hose assembly to be used must conform to local standard
codes.
-The installation must conform to local codes, or in the absence of codes, with standard codes.
-The installation must conform to local codes, or in the absence of codes, with the standard for storage
and handling of liquid petroleum gases.
-A dented, rusted or damaged propane tank may be hazardous and should be checked by your tank
supplier.
-Never use a propane tank with a damaged valve connection.
-The propane tank must be arranged to provide for vapor withdrawal from the operating cylinder.
-Never connect an unregulated propane tank to the heater.

www.sunred.nl
HEATERS STANDPLACE AND LOCATION
-The heater is primarily for outdoor use only.
-Always ensure that adequate fresh air ventilation is provided.
-Always maintain proper clearance to combustible materials, i.e. top 45cm(18”) and sides 70cm (28”)
minimum.
- Heater must be placed on level firm ground.
- Never operate heater in an explosive atmosphere like areas where gasoline or other flammable liquids
or vapours are stored.
- To protect heater from strong wind, it it’s possible to anchor the base securely to the ground with screws.
FUEL GAS ODOR
LP gas and natural gas have manmade odorants added specifically for detection of fuel gas leaks.
If a gas leak occurs you should be able to smell the fuel gas. Since Propane (LP)is heavier than air you
should smell for the gas odours low to the floor.

www.sunred.nl
ANY GAS ODOR IS YOUR SIGNAL TO GO INTO IMMEDIATE ACTION!
oDo not take any action that could ignite the fuel gas.
oDo not operate any electrical switches.
oDo not pull any power supply or extension cords.
oDo not light matches or any other source of flame.
oDo not use your telephone.
oGet everyone out of the building and away from the area immediately.
oPropane (LP) gas is heavier than air and may settle in low areas. When you have reason to suspect a
propane leak, keep out of all low areas.
Contact fuel gas supplier and your fire department. Do not re-enter the building or area.
Stay out of the building and away from the area until declared safe by the fire-fighters and your fuel gas supplier.
FINALLY, let the fuel gas service person and the fire-fighters check for escaped gas. Have them air out the building
and area before you return. Properly trained service people must repair any leaks, check for further leakages, and
then relight the appliance for you.
LEAKAGE TEST
Gas connections on the heater are leak tested at the factory prior to shipment. A complete gas
tightness check must be performed at the installation site due to possible mishandling in shipment or excessive
pressure being applied to the heater. The heater must be checked with a full cylinder. Make sure the safety control
valve is in the OFF position.
Make a soap solution of one part liquid detergent and one part water. The soap solution can
be applied with a spray bottle, brush or rag. Soap bubbles will appear in case of a leak.
Leakage test points. See pictures below.
Turn the gas supply ON.
In case of a leak, turn off the gas supply. Tighten any leaking fittings, then turn the gas supply
on and recheck. Contact your dealer for assistance if bubbles continue to appear.
Never leak test while smoking.

www.sunred.nl
OPERATION AND STORAGE
To turn on the heater:
1. Turn on the valve on the gas supply cylinder completely.
2. Push and control knob in it and turn it the “pilot ” position
3. Press the “ignition ” button several times to light the burner. Hold it for 30seconds. Release
the control knob after the bumer lights.
Note:
oIf a new tank has just been connected, please allows at least one minute for the air in the gas pipeline
to purge out through the pilot hole.
oWhen lighting the pilot flame make sure that the variable control knob is continuously pressed down
while pressing the ignition button. Variable control knob can be released after the pilot flame lights.
oPilot flame can be watched and checked from the small round window with sliding lid located at the
bottom of the flame screen (to the left or right side of the controller).
oIf the pilot flame does not light or it goes out REPEAT STEP 3. A 5-minute complete shutoff period is
necessary before relighting.
4. Turn the Control knob to switch to desired temperature position.
To turn off the heater
1. Turn the knob to “LOW” position for small flame. See picture of “ ”.
2. Turn the knob to “HI” position for big flame . See picture of “ ”.
4. Press and turn the variable control knob to OFF position.
3. Turn off the valve on the gas supply cylinder completely.

www.sunred.nl
Storage
1. Always close the gas valve of the gas cylinder after use or in case of a disturbance.
2. Remove the pressure controller and the hose.
3. Check the tightness of the gas valve and for damage. If you suspect a damage, have it changed by your
gas dealer.
4. Never store liquid gas cylinder in a sub-terrain, or at places without adequate air ventilation.
Cleaning And Care
Wipe off powder coated surfaces with a soft, moist rag. For lacquer surface, use suitable cleaners. Do not clean
heater with cleaners that are combustible or corrosive. Remove debris from the burner to keep it clean and safe
for use.
Components

www.sunred.nl
Construction and characteristics:
-Transportable terrace/garden heater with tank housing
-Casing in steel with powder-coating or stainless steel
-Soluble gas connections are equipped with metal clamp
-Stainless steel flame screen
-Heat emission from reflector
Specifications:
-With CE certificate
-For outdoor use only
-Uses propane or butane gas only
-Max. wattage: 12.5 KW
-Consumption: 900 g/hr
-Weight: Stainless steel model G.W. 25 kgs
-Height: 2180 mm including stand
Item
Patio Heater
Serial No:
Model
HMXD-E(GLASS)-HS
Appliance category
I3+(28-30/37)
I3B/P(30)
I3B/P(37)
I3B/P(50)
Injector size
1.5mm
Reference gas
G30
G31
G30/G31
G30/G31
G30/G31
Pressure(mbar)
28-30
37
29
37
50
Nominal heat input (Hs)
9.0KW 650g/hr
10.5KW
12.5KW
Ignition power
0.22KW
Country Destination :
I3+ for BE-CH-ES-FR-GB-GR-IE-IT-PT 28-30/37mbar
IB/P for CY-CZ-DK-EE-FI-LT-LV-MT-NL-NO-SE-SI-SK-BG-RO-TR 30mbar
IB/P for PL 37mbar
IB/P for AT-CH-DE 50mbar

www.sunred.nl
Assembly Instructions
ASSEMBLY INSTRUCTIONS
1.Attach wheel assembly (M)to base (F).Line up holes in wheel bracket with corresponding holes in base, insert
M6 x 12(BB) through holes, and finger tighten two M6 flange nuts(CC).Be sure that the wheel assembly is parallel
to the base, and fully tighten bolts.
Hardware Used
BB M6*10 *8
CC M6 *8
AA 3/16-24 *8
2.Warning: Remove Protective cover before assemble .
Note: If necessary for proper alignment of reflector sections, loosen each
bolt prior to further assembly and retighten after sections are aligned.
3.1 Slide two reflector panels together.
Insert one bolt M6x10 (II). Slide One washer (HH) Over treaded end of
bolt M6x10 (II) and screw on cap nut (JJ) Loosely.

www.sunred.nl
3.2 Slide reflector plate onto reflector panels.
Insert one bolt M6x10 (II). Slide one washer (HH) over treaded end of bolt
M6x10 (II) and screw on cap nut (JJ) Loosely. Repeat procedure to
complete the assembly of all four sections. Fully tighten all of the bolts in
the rolled edge.
4. The fix the upper plate to 4 upper
support by screws(AA)
(AA) screw *8
5.1 Attach flame screen (B) to the groupware of burner unit (K). Line up the holes in screen bracket with
corresponding holes in burner unit, insert bolt 3/16” (AA) through holes and finger tighten. Be sure that the
screen assembly (B) is paralleled to the burner unit and fully tighten bolts.
5.2. Attach 4 washers (HH) onto the top of screen and insert 3 reflectors
spacers (KK) and hand tightened.
(KK) wing nut * 3
(HH) washer * 9
(LL) reflector spacer *3
(GG) bolt *4
5.3. Attached 4 washers (HH) to the top of reflector spacers and put the reflector onto the 4 reflector spacers.
Make sure each washer is inserted well. Then attach 4 washers (HH) on the top of the reflector and put 4 wing
nuts (KK) to the spacer and tightened.

www.sunred.nl
6. Fix the assembly of groupware (K) onto the top
of tank housing (F) by screen(AA)
(AA) screw *8
7. Carefully put the glass tube (E) up through the
hole in the Center hole in the upper plate (K),
Make sure the runner ring is attached on the lower
end of the glass tube (E).
Move and sit the glass tube (E) through the hole
of the plate cover on the middle plate (K),
check and ensure that the glass tube(E)cover the
center hole of the middle plate

www.sunred.nl
8. Attach the protection guards (D) onto the frame
by putting its hooks into the holes of the frame.
Fix the guards by the fixing brackets (P)
(AA) screw *8
9. Attach regulator to the gas line and tank
Fasten the rubber hose to the inlet connection. Fasten the
regulator to the other end of the rubber hose.
Connect the regulator with the LPG gas tank in counter-clockwise
direction and tighten it by adjustable wrench.
Put LPG gas tank into stand. Make soap testing for the connection
after exchanging the gas tank.

www.sunred.nl
10. Shut the door(H)
Do not store a spare LP-gas cylinder under or near this appliance;
Never fill the cylinder beyond 80 percent full;
Place the dust cap on the cylinder valve outlet whenever the cylinder valve is not in use. Only install the type
of dust cap on the cylinder valve that is provided with the cylinder valve. Other type of caps or plugs may
result in leakage of propane.

www.sunred.nl
Do not store a spare LP-gas cylinder under or near this appliance; Never fill the cylinder beyond 80 percent full;
“Place the dust cap on the cylinder valve outlet whenever the cylinder is not in use. Only install the type of dust
cap on the cylinder valve that is provided with the cylinder valve. Other type of caps or plugs may result in leakage
of propane ”.
PROBLEMS CHECK LIST
PROBLEMS
PROBABLE CAUSES
SOLUTIONS
Pilot will not light
Gas valve may be OFF
Turn the gas valve ON
Tank fuel empty
Refill LPG tank
Opening blocked
Clean or replace opening
Air in supply system
Purge air from lines
Loose connection
Check all fittings
Pilot will not stay on
Debris around pilot
Clean dirty area
Loose connection
Tighten connection
Thermocouple bad
Replace Thermocouple
Gas leak in line
Check connections
Lack of fuel pressure
LPG cylinder is near empty
Burner will not light
Gas pressure is low
LPG cylinder is near empty
Orifice blocked
Remove, clean and replace
Control not on
Turn valve to ON
Thermocouple bad
Replace Thermocouple
Pilot light assembly bent or
not in correct location
Place pilot light in correct position and
retry
Service and Maintenance Information
lf the pilot heater fails to operate correctly, contact place of purchase or their authorised service agent for advice
and service.
DO NOT ATTEMPT REPAIRS YOURSELF.
Periodic maintenance should performed at intervals not exceeding 6 months or when obvious faults exist.
(i.e.) flame burning abnormality or burner discolouration. Flame abnormality or burner discolouration is generally
a sign of gas supply blockage or blocked burner ports.
To clean the burner ports, remove the reflector assembly by removing the three nuts at the top of the reflector.
The mesh screen may than be extracted by removing the four retention screws at the base of the mesh screen
and four screws at the top of the screen. Remove the two screws retaining the burner assembly, Rotate the burner
assembly slightly then remove the burner assembly upwards.
Care should always be taken to avoid damage to the gas piping and Piezo ignition lead.
The burner and mesh screen may than be cleaned by compressed air. Assembly is a reversal of the above
procedure.
If the pilot is blocked by debris, spider webs etc. the pilot flame may be small and the flame failure device may
have not heated up enough for the main burner to come on. If this happens it will be necessary to clean the pilot
and its gas tube.
To clean the pilot, remove the burner and pilot cover as detai1ed above, Inspect the pilot injector and tubing for
blockage. If obstructed clean with compressed air. Clean the flame failure device. Assembly is a reversal of the
above procedure.

www.sunred.nl
Flame Torch (SFT15) NL
TECHNISCHE INFORMATIE
Wattage: 12500 Watt
Element type: Gas
Verwachte levensduur: 5000 hrs.
Gewicht: 25 kg
Certificaten: CE,
Hoogte: H218 cm
Gecertificeerd door internationaal erkende normen.
Traploos regelbare gas heater.
Variabele controle gasklep met elektrische ontsteker.
Staal met poedercoating of roestvrij staal.
2180mm totale hoogte.
Hoed met uitgebreid verwarmingsgebied
Bewaar deze gebruiksaanwijzing voor eventueel toekomstig gebruik
Gebruikershandleiding – Bewaar voor eventueel toekomstig gebruik

www.sunred.nl
! WAARSCHUWING
-Lees de instructies voor installatie en gebruik.
-Dit apparaat moet worden geïnstalleerd en de gasfles opgeslagen in overeenstemming
met de geldende voorschriften.
-Dit apparaat vereist installatie door een bevoegd persoon.
-Voor gebruik alleen in goed geventileerde ruimtes. Een goed geventileerde ruimte moet beschikken
over een minimum van 25% van de oppervlakte wat open is. De oppervlakte is de som van de muren.
-Het gebruik van dit apparaat in gesloten ruimten kan gevaarlijk zijn en is verboden.
-Dit apparaat mag niet worden gebruikt voor de verwarming van gebouwen.
-Dit apparaat wordt alleen gebruikt voor ruimteverwarming.
-Dit apparaat mag niet worden gebruikt in de kelders of onder grondniveau.
-Dit apparaat heeft geen atmosferische sensor.
-Dit apparaat mag niet worden gebruikt voor verwarming van gebouwen die worden gebruikt voor de
veeteelt.
-Gebruik alleen het type gas en de aard van de cilinder door de fabrikant aangegeven.
-Plaats geen voorwerpen op of tegen dit apparaat.
-Bewaar geen chemicaliën of brandbare materialen of spuitbussen in de buurt dit
apparaat.
-Stel dit apparaat niet in werking in een explosieve atmosfeer, zoals in gebieden waar
benzine of andere ontvlambare vloeistoffen en gassen worden opgeslagen.
-Bescherm de hete glazen buis voor regen, opspattend water of iets anders dat zal leiden tot een
plotselinge verandering in de temperatuur die kan leiden tot barsten of verbrijzelen.
! WAARSCHUWING
Draai de gaskraan onmiddellijk dicht als de geur van gas wordt gedetecteerd. Doof alle open vuur. Als de geur
blijft, neem onmiddellijk contact op met uw gasleverancier.
! WAARSCHUWING
-De gebruiker neemt alle risico in de montage en de werking van de gaskachel. Wanneer
waarschuwingen en instructies in deze handleiding niet worden gevolgd kan dat leiden tot ernstig
persoonlijk letsel, dood of schade aan eigendommen.
-Als de gebruiker de handleiding niet kan lezen of volledig begrijpen, neem dan contact op met uw
dealer.
-De fabrikant of leverancier is niet verantwoordelijk voor de nalatigheid van de gebruiker.
INHOUDSOPGAVE
1. Tips
2. Heater stand en locatie
3. Gasbehoeften
4. Lekkage Test
5. Brandstof Geur
6. Werking en opslag
7. Montage-instructies
8. Bouw en specificaties
9. Montage Procedures
10. Problemen Check List

www.sunred.nl
! LET OP:
-Installatie en reparatie moet worden uitgevoerd door een gekwalificeerd persoon.
-Onjuiste installatie, aanpassingen en/of wijzigingen kunnen leiden tot persoonlijk letsel of materiële
schade.
-Probeer niet om de installatie van het apparaat te veranderen.
-Dit toestel moet worden geïnstalleerd in overeenstemming met de geldende voorschriften.
-De gasfles moet worden opgeslagen in overeenstemming met de geldende voorschriften.
-Verplaats nooit het apparaat wanneer het in werking is.
-Sluit het ventiel op de gasfles of de regelaar voordat u het apparaat verplaatst.
-De slang of de flexibele slang moet worden vernieuwd binnen de voorgeschreven intervallen.
-In het geval van hevige wind dient bijzondere aandacht te worden geschonken aan het kantelen van
het apparaat.
-Bewaar geen benzine of andere brandbare dampen of vloeistoffen in de heater.
-Controleer het gehele gassysteem, slang regulator, ontsteker en brander op lekken of schade voor
gebruik.
-Alle lekkage tests moeten worden uitgevoerd met een zeepoplossing. Gebruik nooit een open vlam om
te controleren op lekken.
-Geen gebruik maken van de verwarming totdat alle aansluitingen zijn getest op lekken.
-Zet meteen de gasklep dicht als de geur van gas wordt gedetecteerd.
-Vervoeren de heater nooit terwijl deze brandt.
-Verplaats de heater niet nadat deze is uitgeschakeld totdat de temperatuur is afgekoeld.
-Houd de ventilatieopening van de cilinder behuizing vrij en verwijderd van puin.
-Verf het scherm, bedieningspaneel of top reflector niet.
-Bedieningscompartiment, brander en luchtdoorgangen van de verwarming moeten schoon worden
gehouden.
-Indien noodzakelijk kan frequente reiniging plaatsvinden.
-De gastank dient te worden dichtgedraaid als de heater niet in gebruik is.
-Controleer de heater onmiddellijk bij een van de volgende zaken:
oDe verwarming bereikt de temperatuur niet.
oDe brander maakt knallende geluid tijdens het gebruik (een lichte ruis is normaal wanneer de
brander is gedoofd).
oGeur van gas in combinatie met extreme gele vlammen uit de brander.
-De gas regulator/slang dient voldoende verwijderd te zijn van looppaden waar mensen kunnen
struikelen.
-De gas regulator/slang dient zich niet te bevinden in een gebied waar deze onderworpen kan zijn aan
accidentele schade.
-Elk rooster of andere beschermend apparaat dat verwijderd wordt voor onderhoud aan de heater
moet worden teruggeplaatst voordat de kachel weer wordt aangezet.
-Vervang de gasfles in een goed geventileerde ruimte, uit de buurt van een ontstekingsbron.
-Controleer of de regulator afdichting is aangebracht en dat het in goede staat is.
-Zorg ervoor dat de ventilatieopeningen van de behuizing open blijven.
-Volwassenen en kinderen moeten verwijderd blijven van het oppervlakte om brandwonden of brand
van kleding te voorkomen.
-Kinderen moeten zorgvuldig in de gaten worden gehouden wanneer ze in de buurt van de heater zijn.
-Kleding of andere brandbare materialen mogen nooit worden opgehangen aan de heater of op of nabij
de heater gehouden worden.
-De rubberen slang kan vervangen worden. Let op; de lengte van de slang is 60cm.
-De slang moet voldoen aan de landelijke eisen.

www.sunred.nl
! LET OP:
Lees aandachtig de volgende veiligheidsvoorschriften VOOR GEBRUIK
Kenmerken van gas: brandbaar, explosief, zwaarder dan lucht en vestigt zich in lage ruimtes.
In zijn natuurlijke staat heeft propaan geen geur. Voor uw veiligheid, wordt een geurstof toegevoegd die ruikt
naar rotte kool.
Bij contact met vloeistof kan gas door bevriezing brandwonden veroorzaken aan de huid.
Deze heater is alleen geproduceerd voor gasgebruik.
Gebruik alleen EEG goedgekeurd "15 kg." gasflessen (dezelfde als gebruikt op gas grills) met veiligheidskleppen.
Deze kleppen kunnen snel worden geïdentificeerd door hun externe en interne kenmerken.
Gebruik nooit een cilinder met een beschadigd lichaam, klep, kraag of voetring.
Wanneer verwarming niet in gebruik is, draait u de regelklep uit. Sluit het ventiel van de gasfles of de regelaar
na gebruik.
Het gebruik van dit apparaat in gesloten ruimten kan gevaarlijk zijn en is "verboden".
1) Voor gebruik buitenshuis of in goed geventileerde ruimtes.
2) Een goed geventileerde ruimte moet minimaal 25% van de oppervlakte open hebben.
3) De oppervlakte is de som van de muren.
This manual suits for next models
2
Table of contents
Languages:
Other Sunred Heater manuals
Popular Heater manuals by other brands

Margaroli Home
Margaroli Home COLONNE 380/1 manual

Kampmann
Kampmann Ultra 73 Series Assembly, installation and operating instructions

Gerlach Germany
Gerlach Germany GL 7735 user manual

AAS
AAS DARVALL Cozy instruction manual

Jaga
Jaga MINI CANAL DBE manual

Gabarron
Gabarron ADL 5030/14 Installation instructions and user guide

Helo
Helo 1118-60-04 Installation and user manual

White&Brown
White&Brown ALPATEC RCMB 21 manual

Tecnosystemi
Tecnosystemi Apply air AirFor3 FRONT user manual

Viessmann
Viessmann Vitoplanar EC4 Series operating instructions

NOMA
NOMA 043-5999-2 instruction manual

Zehnder Rittling
Zehnder Rittling Ovida Bow manual