If you have any questions during the setup process, please call a SuperCloset representative at 1.877.476.9787
1. Make sure the cabinet is in its final location, as it will be more difficult to move
when fully assembled. Do not plug in any of the components just yet. Let’s get
everything in place first.
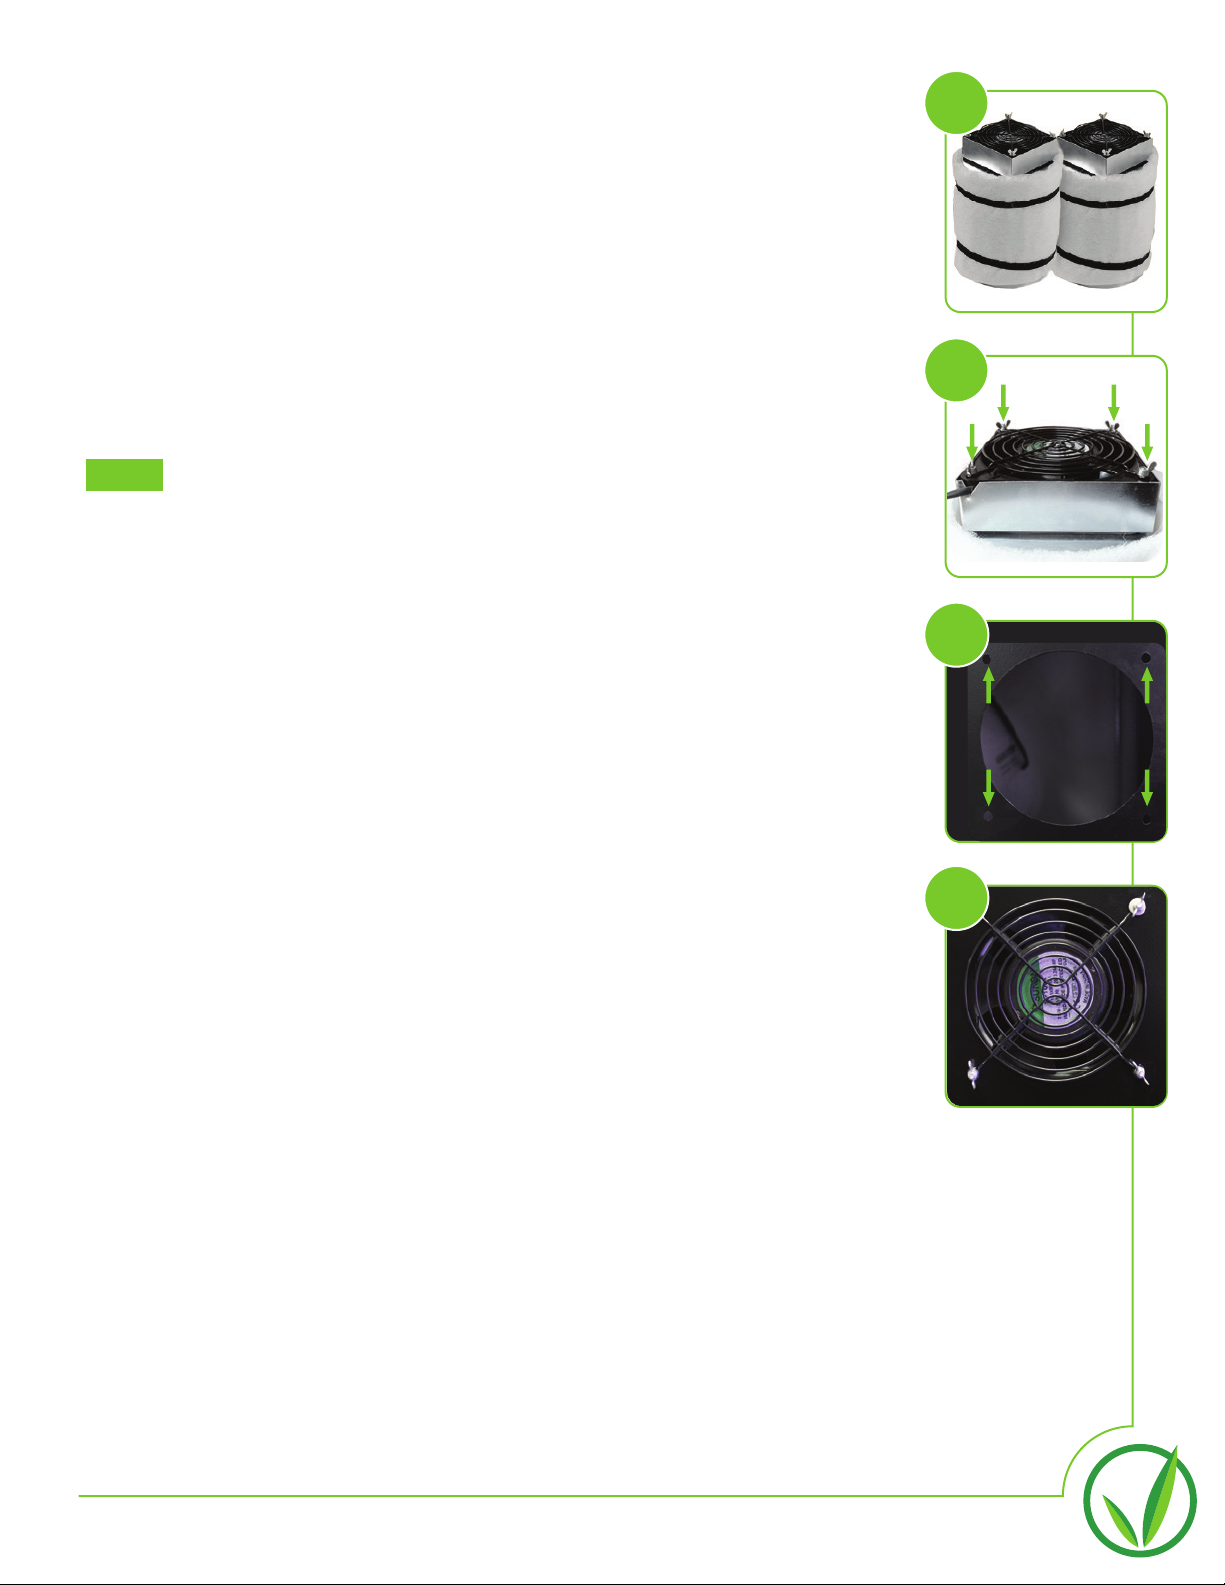
2. The cabinet comes with 4 Black Plastic Elbows (image a). Two 3” Elbows with
foam tape and two 2” Elbows with Foam Tape. One 2” Elbow will have an
extension.
3. The exterior Elbows will allow you to run the cords out of the cabinet with
minimal light leaks and allow for fresh air flow into the cabinet. The interior
Elbow will facilitate airflow between the Cloning Chamber and the
Veggie/Flower Chamber (image b).
4. Locate the Power Strip (image c). Locate the two screws on the center rear of
the cabinet. The power strip has holes on it that fit on these screws for
mounting (image d).
a. Insert the foam side of the two 3” Elbows into large holes
located in rear of the cabinet.
b. Insert the foam side of one 2” Elbow into the hole located
near the top in rear of the cabinet.
c. Detach the Coupling from the remaining 2” Elbow. Insert this
Elbow into the topside of the hole located in the interior shelf
of your cabinet. Reattach the Coupling to the Elbow from the
underside of this shelf (image b).
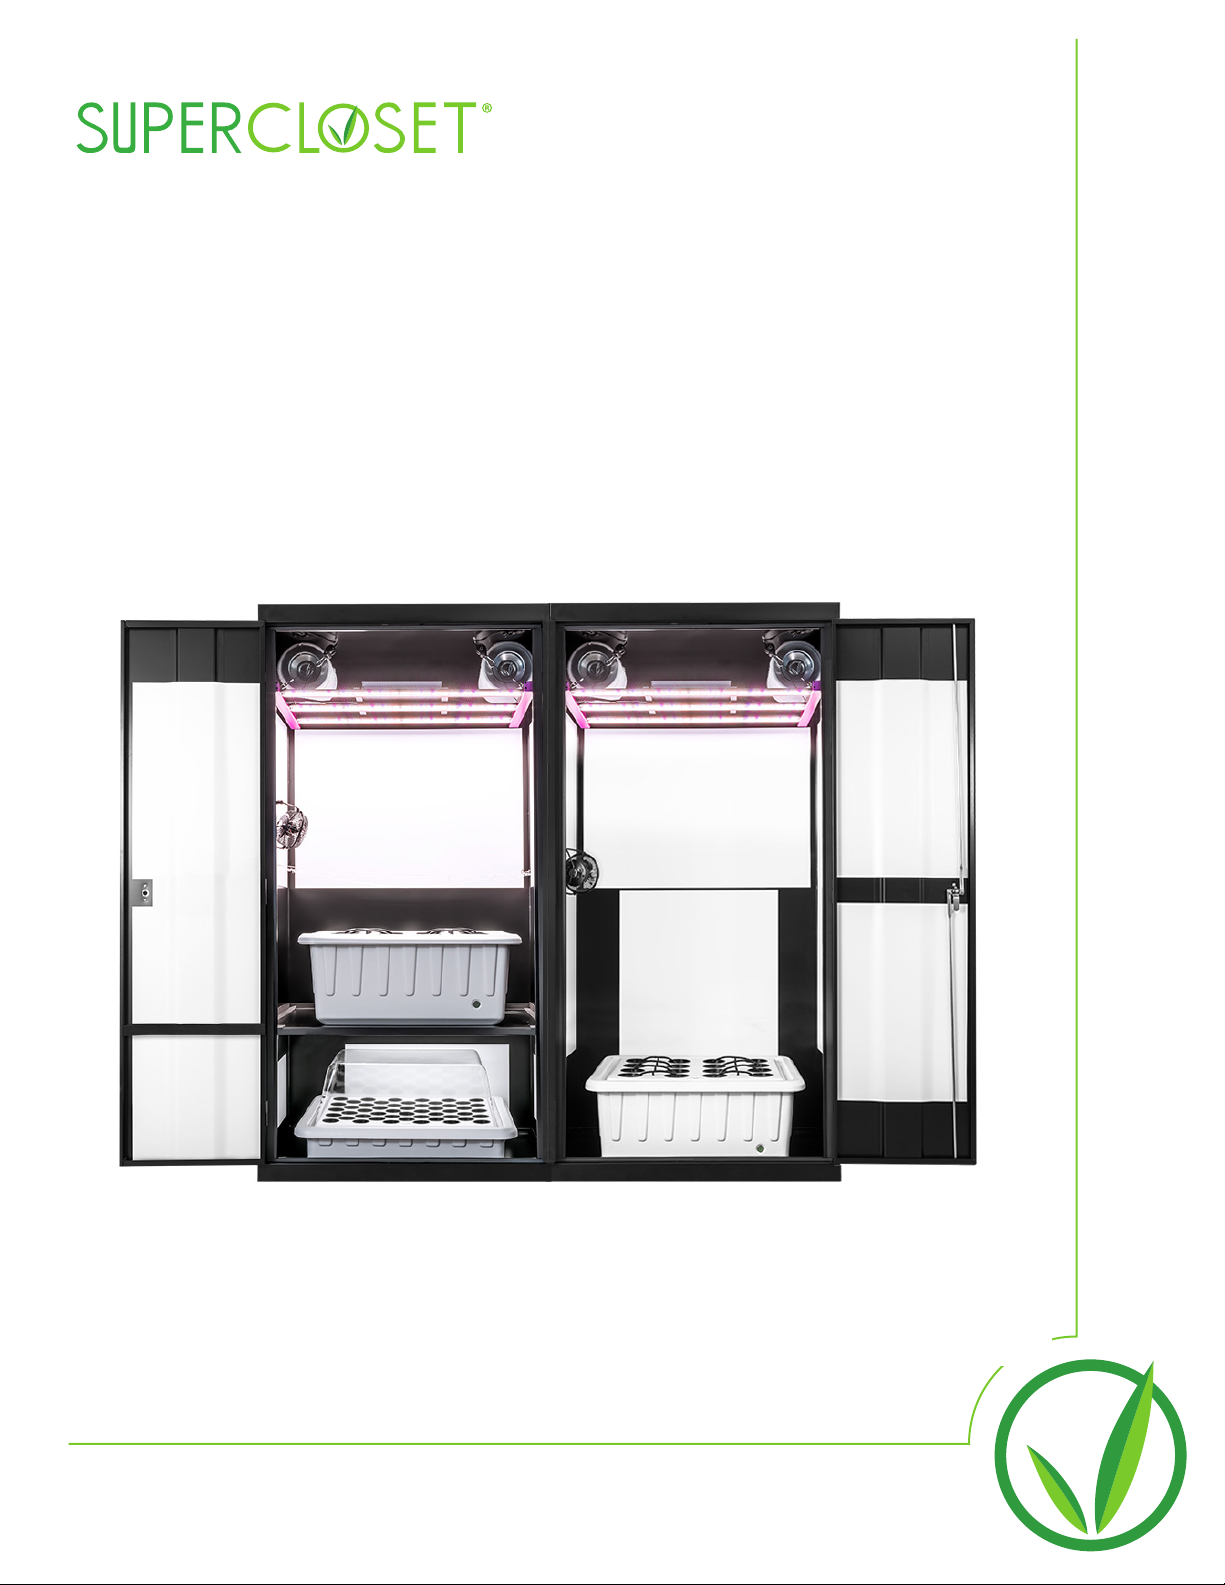
We are now ready to set up the SuperCloset
Use masking tape and a marker to label each component’s
power cord at the plug to help identify the components later in
the assembly.
SUPER GROW TIP:
a
b
c
d
X2