manuals.online logo
Brands
  1. Home
  2. •
  3. Brands
  4. •
  5. Dancover
  6. •
  7. Greenhouse Kit
  8. •
  9. Dancover TITAN Arch+ 60 User manual

Dancover TITAN Arch+ 60 User manual

19-01-2021
for
Greenhouse
TITAN Arch+ 60
Manual
3,0 m 4,0 m
2,1 m
3
2
Technical certificate/GREENHOUSE «TITAN Arch+ 60»
Description
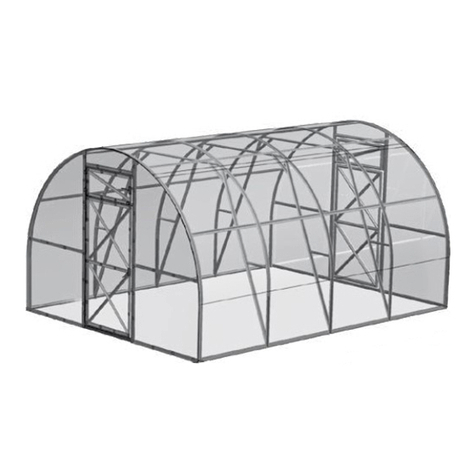
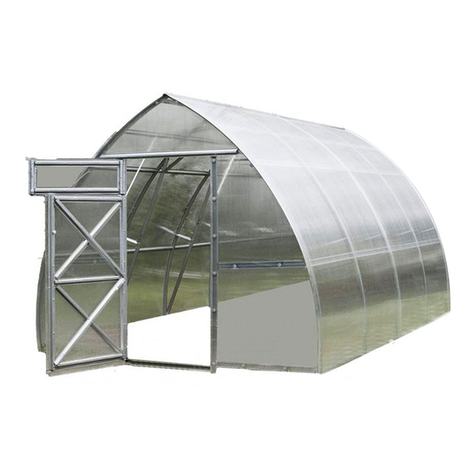
The «TITAN Arch+ 60» greenhouse is designed to create a favorable microclimate for
growing crops in allotments and family gardens.
The greenhouse is available in different lengths depending on the buyer’s choice. The
required length of the greenhouse is attained by buying additional boxs with extension inserts.
Each insert lengthens the standard supply set of the greenhouse by 2 m. The length of the
standard supply set is 4 m. The height of the installed frame of the greenhouse is 2.1 m.
The frame of the greenhouse is made of galvanized steel pipes and profiles and is assembled
with screws and nuts. The kit includes everything you need for fixing the glazing. The complete
set of the greenhouse is glazed at the request of the buyer. The standard supply set requires
3 sheets of 2.1 x 6 m polycarbonate 4 or 6 mm thick: one 2.1 x 6 m polycarbonate sheet for
each insert.
The assembly and operation of the «TITAN Arch+ 60» greenhouse should
be carried out strictly in accordance with the Assembly manual and
operating rules set forth in the technical certificate. The technical
certificate must be kept.
!
Operating rules
Before starting the operation, the greenhouse should be assembled and installed according
to the assembly manual instructions. When installing the greenhouse by third parties, the buyer
should check the assembly quality for compliance with the Assembly manual instructions.
Do not install the greenhouse close to buildings and trees from which snow or ice may fall.
The distance of at least 2 m is recommended.
The greenhouse is designed to withstand the wind speed no more than 24 m/s.
The maximum snow load for the framework occurs when the weight of a snow cover is 60 kg
per 1 m2 of the horizontal surface of the ground. It is necessary to avoid exceeding the snow
load on the greenhouse: either to remove snow from the greenhouse after each snowfall, or
remove the greenhouse glazing for winter, or install the sliding panels over all spans of the
frame and shift them to the lower position for winter.
Technical certificate/GREENHOUSE «TITAN Arch+ 60»
Warranty
Claim submission period is 24 months from the date of purchase.
Cleaning and washing polycarbonate panels
Warranty does not apply to cases if:
1. Installation of the structure in violation of the requirements of the instructions.
2. Violation of the operating rules.
3. Misuse of the structure.
4. The presence of corrosion traces on the cutoffs of parts, because this does not affect the
performance of the structure.
5. Greenhouse deformations due to excess of snow load stated in the technical certificate of
the greenhouse.
6. Greenhouse deformations due to soil movement.
7. Floods, hurricanes, and other natural disasters.
1. Rinse the panel with warm water.
2. Wash the panel with a mild soap solution or household detergent and warm water, using a
soft cloth or sponge to remove dirt.
3. Rinse with cold water and wipe with a soft cloth.
Do not use abrasives or highly alkaline cleaning agents to clean polycarbonate panels. Dry
wiping of the surface will damage the protective layer of the glazing and shorten its effective
life. Do not rub the surface of polycarbonate panels with brushes, metallic fabric or other
abrasive materials. When disinfecting a greenhouse from pathogens of fungal and bacterial
diseases, do not apply sulfur candles to avoid corrosion of the frame.
The manufacturer reserves the right for vent engineering design changes.

5
4
GREENHOUSE BOX 1 BOX 2 BOX
EXTENTION
TITAN Arch+ 60 3 m х 4 m
BASELINE MODEL
+ + -
EXTENTION FOR
GREENHOUSE 2m
-
- +
LIST OF PARTS FOR ASSEMBLY STANDARD SUPPLY SET
BOX 1
№marking denomination q-ty, pcs
11Leg 10
21-2 End wall leg 4
32Purlin 20
48-1 End wall connecting bar 2
58-2 End wall corrugated connecting bar 2
69-2 Doorway post for hinges 2
79-1 Doorway post 2
810 Doorway tie 2
912 Door vertical element for hinges 2
10 12-1 Door vertical element 2
11 12-2 Window vertical element for hinges 2
12 12-3 Window vertical element 2
13 13-1 Door/window horizontal element 6
14 13 Door horizontal element medium 2
15 13-2 Window horizontal element 2
16 -Profile
L=1050 mm 4
17 -Profile
L=1000 mm 4
BOX 2
№marking denomination q-ty, pcs
18 4Т End wall arch 4
19 4ВТ Upper end wall arch 2
20 4В Upper arch 3
21 4Н Lower arch 6
7
6
right end
side
2045
1050
1500
905
door
2 pcs.
left end
side
2045
1050
2 pcs.
2000
1050
base roof and
side walls
6 pcs.
385
905
small window
2 pcs.
2 pcs.
ridge panel-2 pcs.
900
222
2000
1000
base roof and
side walls
6 pcs.
46 -32x4 washer 16
47 -M4 nut 72
48 -M5 nut 36
49 -M6 nut 50
50 -Top metal fastening band 5
51 -Bottom metal fastening band 10
52 -Double-sided tape L=10 m 1
53 -М6х60 bolt 10
54 -М4х25 screw 16
55 -6 washer 20
22 4НТ Lower end wall arch right 2
23 4НТ-1 Lower end wall arch left 2
24 -Inner clamp 15
25 -Outer clamp 15
26 -End wall clamp 10
27 -40x20 clamp 4
28 -40x20 clamp 4
29 -20x20 clamp 40
30 -20x20 angle clamp 32
31 -Hinge 8
32 -Handle kit 4
33 3Support 14
34 -Handle bushing 4
35 -Latch 4
36 -Stop bar 4
37 -Door holder kit (hooks) 2
38 -Washer 10 4
39 -Adhesive tape 1
40 -M4x12 screw 40
41 -M4x35 screw 16
42 -M5x30 screw 36
43 -M6x16 screw 40
44 -4.8x19 self drilling screw 269
45 -4.8x11 sharp-tipped screw 4
TITAN Arch+ 60
polycarbonate walls
9
8
EXTENSION INSERT KIT
№marking denomination q-ty, pcs
56 1Leg 4
57 2Purlin 10
58 4В Upper arch 2
59 4Н Lower arch 4
60 3Support 4
61 -Inner clamp 10
62 -Outer clamp 10
63 -M4x12 screw 20
64 -М4х35 screw 8
65 - M4 nut 36
66 - 32x4 washer 8
67 -4.8x19 self drilling screw 22
68 -Top metal fastening band 2
69 -Bottom metal fastening band 4
70 -Profile L-1000 mm 4
71 М6х60 bolt 4
72 -М4х25 screw 8
73 -М6 nut 4
74 -6 washer 8
75 -Double-sided tape L=5 m 1
BOX EXTENTION
2000
1000
Extension roof
and side walls
6 pcs.
TITAN Arch+ 60
polycarbonate walls
11
10
1If the greenhouse is mounted on a foundation (see para.22), the elements 1 and 3
are not assembled and are not mounted in the subsequent assembly.
3
1-2
№44 from «box 2»
2 pc.
№2 from «box 1»
1 pc.
3
1
№51 from «box 2»
1 pc.
3
1
№44 from «box 2»
2 pc.
№33 from «box 2»
1 pc.
№1 from «box 1»
1 pc.
р.38
р.12 р.13 р.14-15
р.16-17 р.18-19 р.20 р.20-21
р.22 р.26-27 р.28-29 р.30
р.31 р.32 р.33 р.33
р.34 р.36-37
р.40
р.11
1 2 3 4
5 6 7 8
9 10 11 12
13 14 15 16
17 19
21 22
20
р.39
р.35
18
13
12
2
х2
13-2
13-1
12-2
12-3
12-2
13-2
12-3/12-2
13-1/13-2
№13 from «box 1»
1 pc.
№12 from «box 1»
1pc.
№15 from «box 1»
1 pc.
№11 from «box 1»
1 pc.
№30 from «box 2»
2 pc.
№49 from «box 2»
1 pc.
№31 from «box 2»
1 pc.
№42 from «box 2»
2 pc.
313-1
13-1
13
12-1
12
13-1
12-1
13
12-1
№14 from «box 1»
1 pc.
№10 from «box 1»
1 pc.
№13 from «box 1»
2 pc.
№9 from «box 1»
1 pc.
х2
12
13-1
13-1
13
12-1
№29 from «box 2»
2 pc.
Outer side of the window:
Outer side of the door:
№48 from «box 2»
2 pc.
№43 from «box 2»
1 pc.
№30 from «box 2»
2 pc.
№49 from «box 2»
1 pc.
№43 from «box 2»
1 pc.
№49 from «box 2»
1 pc.
№42 from «box 2»
2 pc.
№31 from «box 2»
1 pc.
Inner side of the window. Perforation on the elements from the backside: Inner side of the door. Perforation on the elements from the backside:
№43 from «box 2»
1 pc.
12-3
13-1
12-2
13-2
№44 from «box 2»
1 pc.
№48 from «box 2»
2 pc.
15
14
4
х2
№19 from «box 2»
1 pc.
4ВТ
4НТ 4НТ-1
4ВТ
4НТ 4НТ-1
4ВТ
8-2 8-1
№5 from «box 1»
1 pc.
№4 from «box 1»
1 pc.
№22 from «box 2»
1 pc.
№23 from «box 2»
1 pc.
11
1
4НТ
8-2
8-1
1
4НТ-1
Inner side of the end wall. Perforation on the elements from the backside:
№49 from «box 2»
1 pc.
№29 from «box 2»
2 pc.
№44 from «box 2»
1 pc.
№43 from «box 2»
1 pc.
№44 from «box 2»
1 pc.
№29 from «box 2»
2 pc.
№49 from «box 2»
1 pc. №43 from «box 2»
1 pc.
8-2
8-1
№48 from «box 2»
1 pc.
№42 from «box 2»
1 pc.
17
16
5
х2
№45 from «box 2»
1 pc.
№8 from «box 1»
1 pc.
10
9-2
9-1
№6 from «box 1»
1 pc.
№7 from «box 1»
1 pc.
9-1
10
9-2
10
№34 from «box 2»
1 pc.
9-2
9-1
4ВТ
4ВТ
4ВТ
4НТ
4НТ-1
8-1
8-2
10
9-2
Inner side
№44 from «box 2»
1 pc.
№49 from «box 2»
1 pc.
№43 from «box 2»
1 pc.
№29 from «box 2»
2 pc.
№49 from «box 2»
1 pc.
№44 from «box 2»
3 pc.
№43 from «box 2»
1 pc.
№29 from «box 2»
2 pc.
№45 from «box 2»
1 pc.
19
18
6
х2
4ВТ
4НТ
4НТ-1
4НТ
4НТ-1
10
4Т
4Т
4Т
4Т
1-2 1-2
1-2
4Т
9-2
9-2
8-1
8-2
9-1
9-1
4Т
8-2
8-1
1-2
1
1
№28 from «box 2»
1 pc.
№27 from «box 2»
1 pc.
№18 from «box 2»
1 pc.
Inner side
№49 from «box 2»
1 pc.
№29 from «box 2»
2 pc.
№43 from «box 2»
1 pc.
№29 from «box 2»
2 pc.
№43 from «box 2»
2 pc.
№44 from «box 2»
3 pc.
№49 from «box 2»
2 pc.
№49 from «box 2»
1 pc.
№29 from «box 2»
2 pc.
№43 from «box 2»
1 pc.
№27 from «box 2»
1 pc.
№28 from «box 2»
1 pc.
№49 from «box 2»
2 pc.
№29 from «box 2»
2 pc.
№43 from «box 2»
2 pc.
№44 from «box 2»
3 pc.
№36 from «box 2»
1 pc.
№18 from «box 2»
1 pc.
21
20
7
х2
9-2
9-2
9-1
10
4ВТ
8-1 8-2
4Т 4Т
4НТ-1
4НТ
11
1-2
1-2
12/12-2
8
х2
4ВТ
4Т 4Т
8-2
8-1
4НТ
4НТ-1
№26 from «box 2»
1 pc.
4ВТ
4ВТ
4ВТ
8-2/8-1
8-2/8-1
8-2/8-1
4НТ/
4НТ-1
4НТ/
4НТ-1
4НТ/
4НТ-1
4НТ/
4НТ-1
4НТ/
4НТ-1
4НТ/
4НТ-1
Outer side
Outer side
№42 from «box 2»
2 pc.
№48 from «box 2»
2 pc.
№44 from «box 2»
1 pc.
№26 from «box 2»
1 pc.
№44 from «box 2»
1 pc.
23
22
9
15 mm
10 mm
10 mm
50 mm
18 mm
№44 from «box 2»
18 pc.
№44 from «box 2»
14 pc.
25
24
№44 from «box 2»
29 pc. №44 from «box 2»
19 pc.
№44 from «box 2»
5 pc.
27
26
10
х3
1
1
№20 from «box 2»
1 pc.
4В
№21 from «box 2»
1 pc.
4Н
№21 from «box 2»
1 pc.
4Н
4В
4Н
4В
4Н
1
1
4Н 4Н
1
№44 from «box 2»
1 pc.
№44 from «box 2»
1 pc.
29
28
11
11
х3
4Н
4Н
4Н
4В
4В
4В
4Н
4В
4Н
№24 from «box 2»
1 pc.
1
1
№44 from «box 2»
1 pc.
№44 from «box 2»
1 pc.
№24 from «box 2»
1 pc.
№24 from «box 2»
1 pc.
№44 from «box 2»
1 pc.
№44 from «box 2»
1 pc.
№44 from «box 2»
1 pc.
№24 from «box 2»
1 pc.
31
30
12
2
2
2
13
2
2
2
2
4ВТ
2
2
2
2
2№40 from «box 2»
1 pc.
№47 from «box 2»
1 pc.
4Н
4В/4Н
№25 from «box 2»
1 pc.
4В
4Н
4Н
2
2
2
2
2
4В
4Н
4Н
2
2
2
2
2
1
1
№3 from «box 1»
5 pc.
1
1
№47 from «box 2»
1 pc.
№40 from «box 2»
1 pc.
33
32
14 15
2
2
2
2
L1
L2
L1=L2
!
16
22
2
2
2
2
2
2
4В/4Н
4В
4Н
4Н
2
4ВТ
№3 from «box 1»
5 pc.
№47 from «box 2»
1 pc.
№40 from «box 2»
1 pc.
№40 from «box 2»
1 pc.
№47 from «box 2»
1 pc.
35
34
18
17 LENGTHENING OF THE BASE WITH THE INSERT
2000
№57 from
«box EXTENTION»
10 pc.
№58 from
«box EXTENTION»
2 pc.
2
2
22
2
2
2
2
2
2
4В 4В
4Н
4Н
4Н
4Н
№59 from
«box EXTENTION»
4 pc.
х2
05
№37 from «box 2»
1 pc.
№44 from «box 2»
2 pc.
№34,№35,№38 from
«box 2»
1 pc.
№32 from «box 2»
1 pc.
№32 from «box 2»
1 pc.
№34,№35,№38 from
«box 2»
1 pc.
№37 from «box 2»
1 pc.
№37 from «box 2»
1 pc.
№44 from «box 2»
2 pc.
37
36
19
The arrow on the details
is directed to the front
side greenhouse
1050
№52 from «box 2»
2 pc. х 1,05 m
1050
!
do not fully tighten!
!
tighten!
№46 from «box 2»
1 pc.
№41 from «box 2»
1 pc.
Cellular polycarbonate panels are installed with a certain surface, which has
a protective layer, outside (towards the sun). The protective layer usually has a
side with the inscriptions on the transportation film. The other side of the film is
transparent. Mark the protective side of the sheet in each panel because after
removing the transportation film, the sides of the panel do not visually differ.
The transportation film should be removed from both surfaces before fixing the
glazing on the frame.
It is necessary to stick the adhesive tape over the open polycarbonate shearing
surfaces
№54 from «box 2»
2 pc.
№47 from «box 2»
2 pc.
№16 from «box 1»
2 pc.
№39 from «box 2»
№39 from «box 2»
№47 from «box 2»
1 pc.

This manual suits for next models

4

Other Dancover Greenhouse Kit manuals

Dancover TITAN Peak 240 4,2 User manual

Dancover

Dancover TITAN Peak 240 4,2 User manual

Dancover Polytunnel Greenhouse 3x6m User manual

Dancover

Dancover Polytunnel Greenhouse 3x6m User manual

Dancover ARROW 3m Series User manual

Dancover

Dancover ARROW 3m Series User manual

Dancover ZEN 4.73M2 User manual

Dancover

Dancover ZEN 4.73M2 User manual

Dancover GH152180 User manual

Dancover

Dancover GH152180 User manual

Dancover Polytunnel Greenhouse 3x8m User manual

Dancover

Dancover Polytunnel Greenhouse 3x8m User manual

Dancover TITAN Arch 90 User manual

Dancover

Dancover TITAN Arch 90 User manual

Dancover GH140055 User manual

Dancover

Dancover GH140055 User manual

Dancover TITAN Arch 130 User manual

Dancover

Dancover TITAN Arch 130 User manual

Dancover GH158040 User manual

Dancover

Dancover GH158040 User manual

Dancover GH152190 User manual

Dancover

Dancover GH152190 User manual

Dancover Polytunnel Greenhouse 4m Series User manual

Dancover

Dancover Polytunnel Greenhouse 4m Series User manual

Dancover LOTOS User manual

Dancover

Dancover LOTOS User manual

Dancover GH21100 User manual

Dancover

Dancover GH21100 User manual

Dancover AC120070 User manual

Dancover

Dancover AC120070 User manual

Dancover GH152180 User manual

Dancover

Dancover GH152180 User manual

Dancover GH152100 User manual

Dancover

Dancover GH152100 User manual

Dancover GH152080 User manual

Dancover

Dancover GH152080 User manual

Dancover GH97200 User manual

Dancover

Dancover GH97200 User manual

Dancover Polytunnel Greenhouse User manual

Dancover

Dancover Polytunnel Greenhouse User manual

Dancover GH82121 User manual

Dancover

Dancover GH82121 User manual

Dancover TITAN Classic 480 Series User manual

Dancover

Dancover TITAN Classic 480 Series User manual

Dancover TITAN Arch+ 320 User manual

Dancover

Dancover TITAN Arch+ 320 User manual

Dancover GH152200 User manual

Dancover

Dancover GH152200 User manual

Popular Greenhouse Kit manuals by other brands

WILLAB GARDEN Green Room 3012-FD Assembly instructions

WILLAB GARDEN

WILLAB GARDEN Green Room 3012-FD Assembly instructions

VOLYA FERMER-4,2 Assembly manual

VOLYA

VOLYA FERMER-4,2 Assembly manual

STC Clear View Assembly instructions

STC

STC Clear View Assembly instructions

Winter Gardenz PG0812H Assembly manual

Winter Gardenz

Winter Gardenz PG0812H Assembly manual

Vitavia GAIA JUMBO Assembly instructions

Vitavia

Vitavia GAIA JUMBO Assembly instructions

Palram Canopia Base Kit How to assemble

Palram

Palram Canopia Base Kit How to assemble

Richel J45602 Assembly instructions and user guide

Richel

Richel J45602 Assembly instructions and user guide

USP Duramax owner's manual

USP

USP Duramax owner's manual

Palram Glory Standard Assembly instructions

Palram

Palram Glory Standard Assembly instructions

Royal Well Chili Pepper RW2277 manual

Royal Well

Royal Well Chili Pepper RW2277 manual

Summer Garden Buildings GREENHOUSE 185 Assembly instructions

Summer Garden Buildings

Summer Garden Buildings GREENHOUSE 185 Assembly instructions

Bloomengine B100KHB manual

Bloomengine

Bloomengine B100KHB manual

Velcom CAMELLIA Technical manual

Velcom

Velcom CAMELLIA Technical manual

ClearSpan Pro Solar Star manual

ClearSpan

ClearSpan Pro Solar Star manual

Mercia Garden Products 04MINIG-V1 General instructions

Mercia Garden Products

Mercia Garden Products 04MINIG-V1 General instructions

Otto VM9057-PSC 5000 Assembly instructions

Otto

Otto VM9057-PSC 5000 Assembly instructions

FarmTek Growers Supply 115554 manual

FarmTek

FarmTek Growers Supply 115554 manual

LAMS Melissa manual

LAMS

LAMS Melissa manual

manuals.online logo
manuals.online logoBrands
  • About & Mission
  • Contact us
  • Privacy Policy
  • Terms and Conditions

Copyright 2025 Manuals.Online. All Rights Reserved.