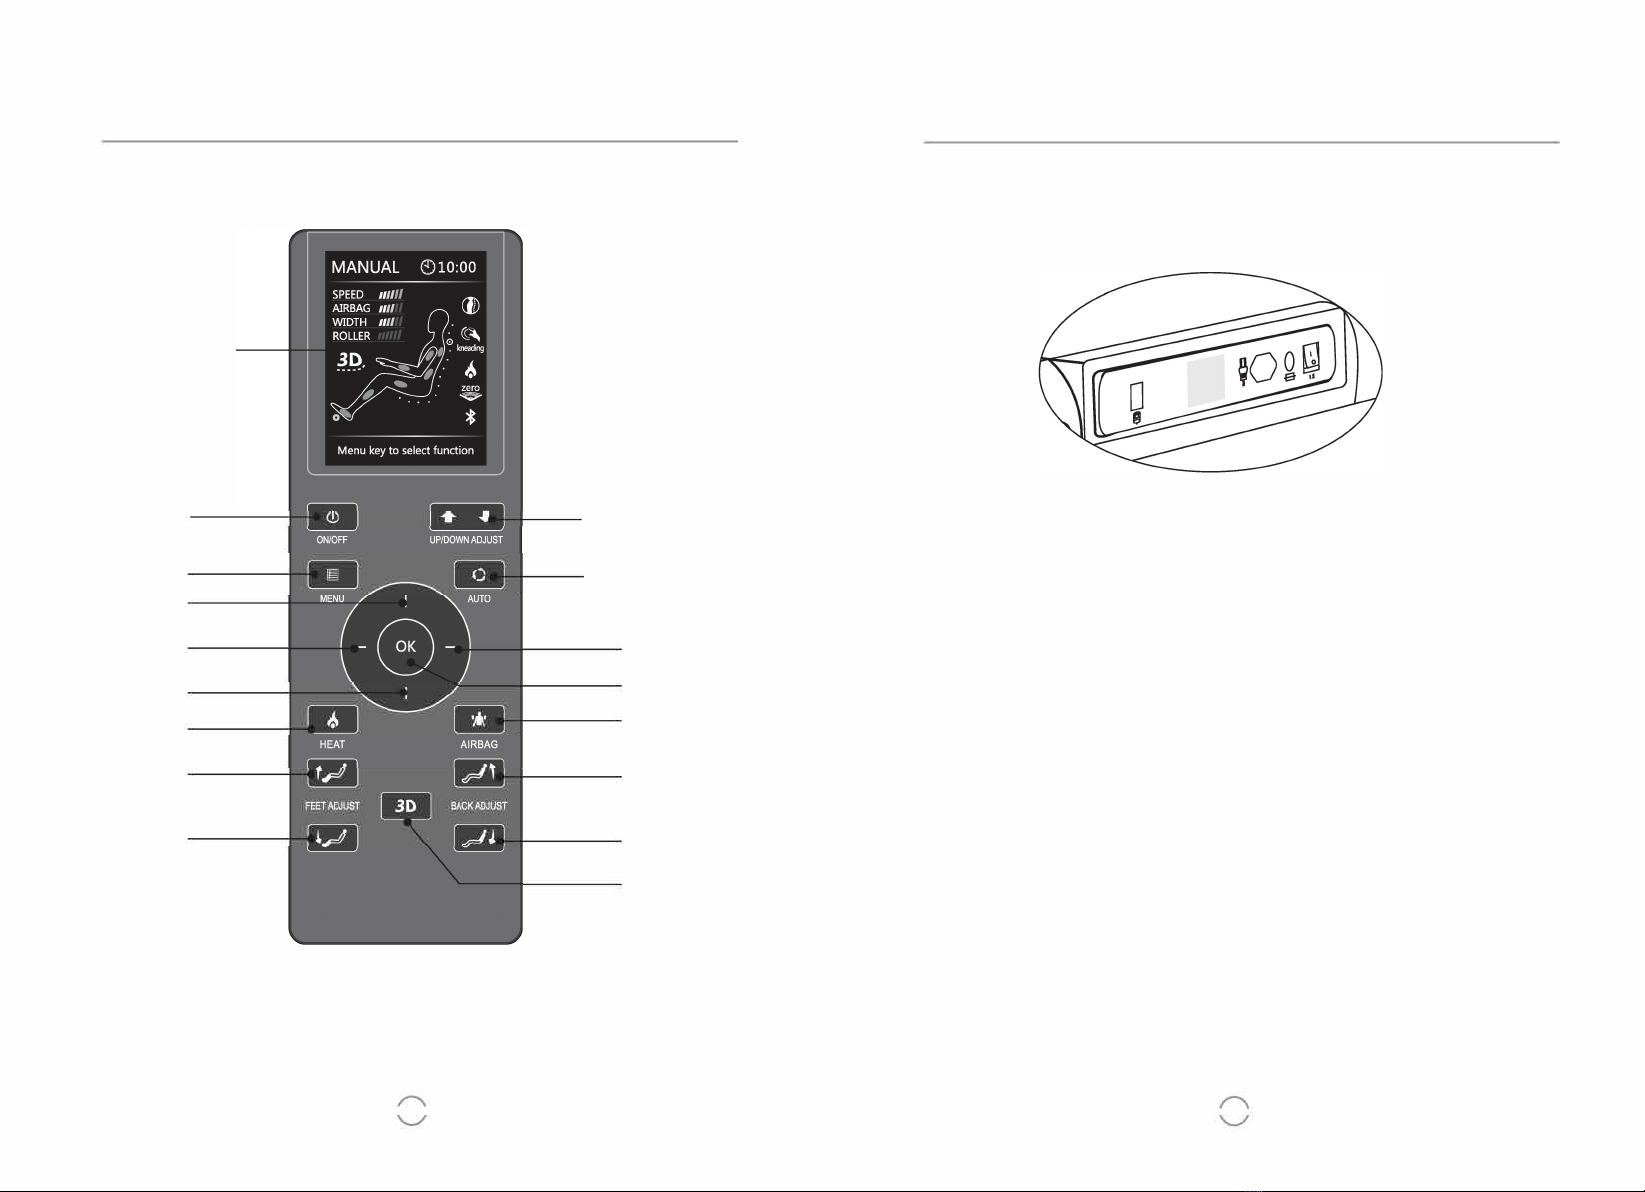
I
►
PRODUCT STORAGE AND MAINTENANCE
Maintenance
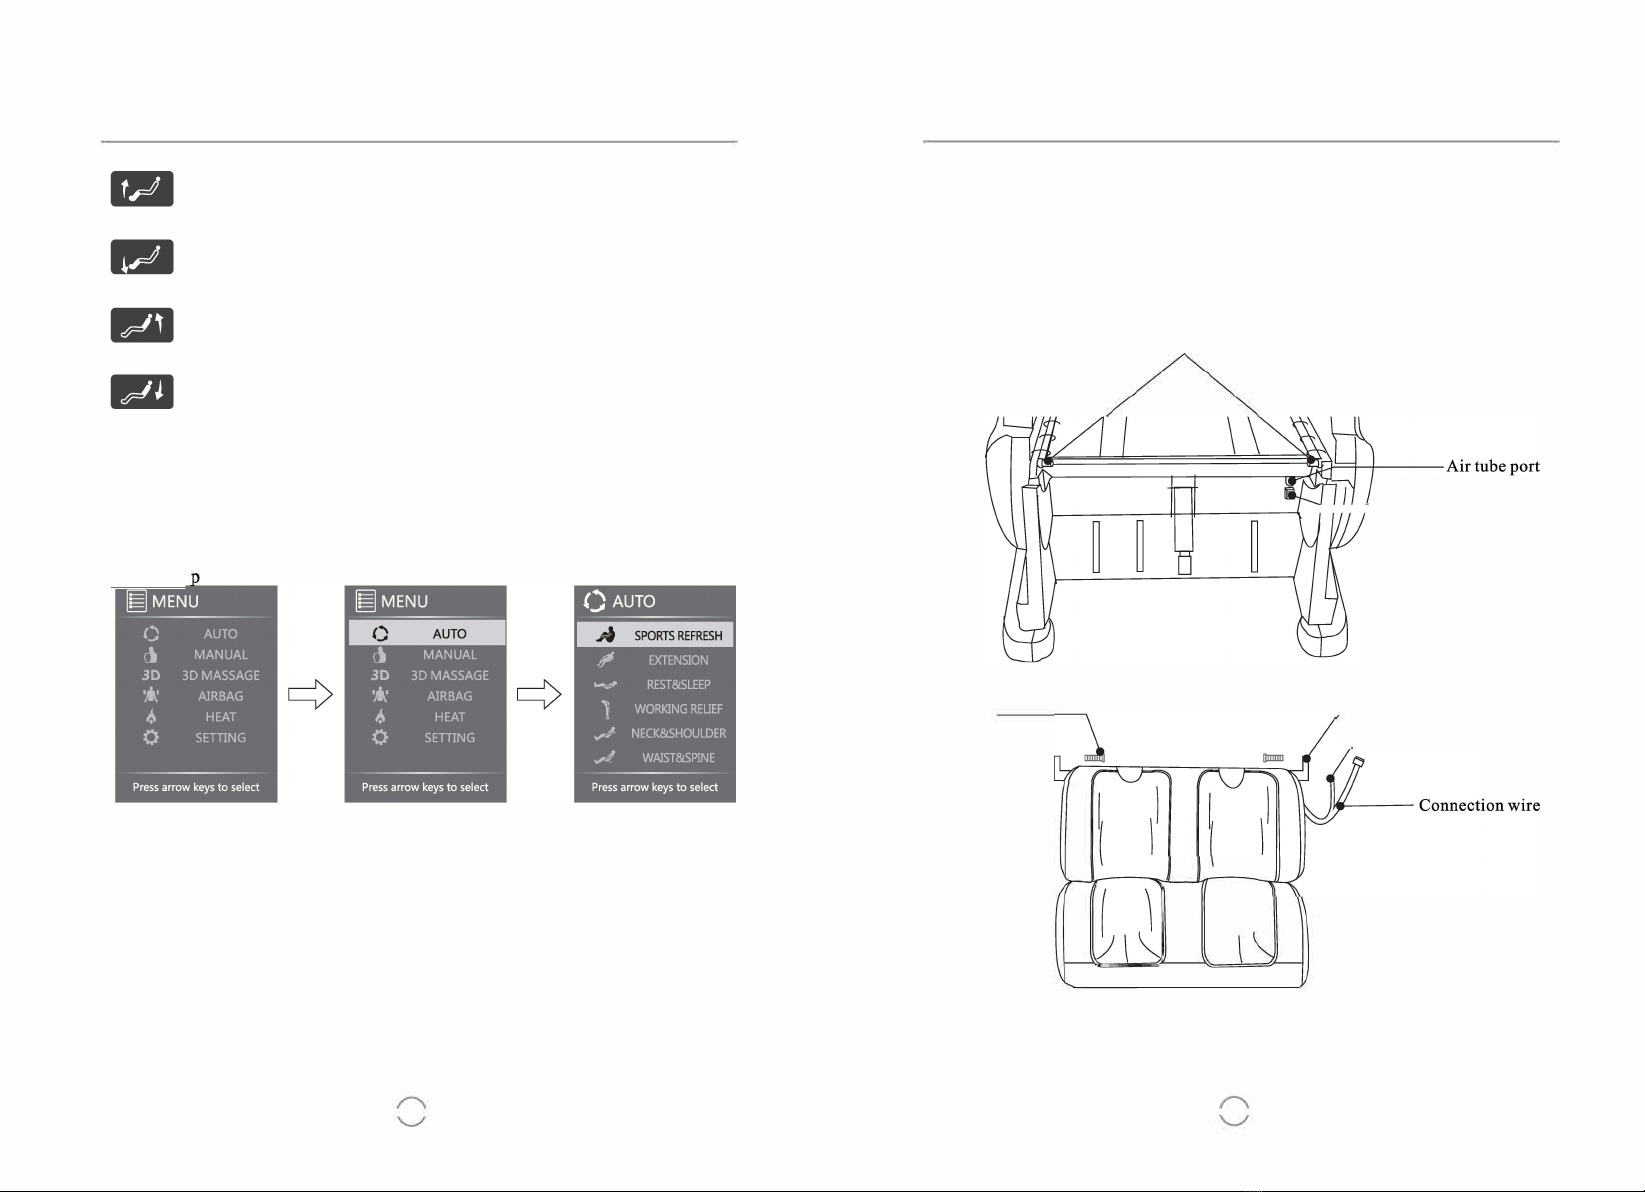
►Use a damp cotton cloth with mild soap to wipe the back cover, hand rest,
legrest, air tube and other plastic components. Then wipe with a dry cotton
cloth.
►Use a dry cloth to wipe the controller and power supply box.
►Use a damp cotton cloth with mild soap to wipe the back cushion and pillow,
wipe again with a different damp cloth. Put them to a well-ventilated place
to dry.
A
Caution
► Make sure to unplug before beginning maintenance. To avoid electric
shock, do not use wet hands to pull out the plug. When cleaning the back
cover, please do not allow soap or water to enter into the power supply
box!
► Do not iron the upholstery.
Storage method
►
Wipe off dust and dirt from the product after use. If
the product is not to be
used for a long period of
time, please cover the product with a dust cover
(self provided).
A
Caution
►
Do not store the product in direct sunlight or in places of high
temperature. This may cause the color of the upholstery to fade.
Reminder
During daily use, please check for the following issues:
►
A scorched or burning odor
►
Power flickering on and off if power cord is touched
►
Extremely hot power cord
►
Other abnormal indicators
A
Caution
►
To avoid breakdowns and accidents, please stop using the massage chair
if any above warning signs occur.
►Turnoff the power switch and pull out the power plug. Contact the local
distributor or headquarters for repair and maintenance.
►
All repairs and maintenance can only be performed by our authorized
dealers or service agents, except for the normal operation and
maintenance detailed above.
--------------- 251-----------------
I
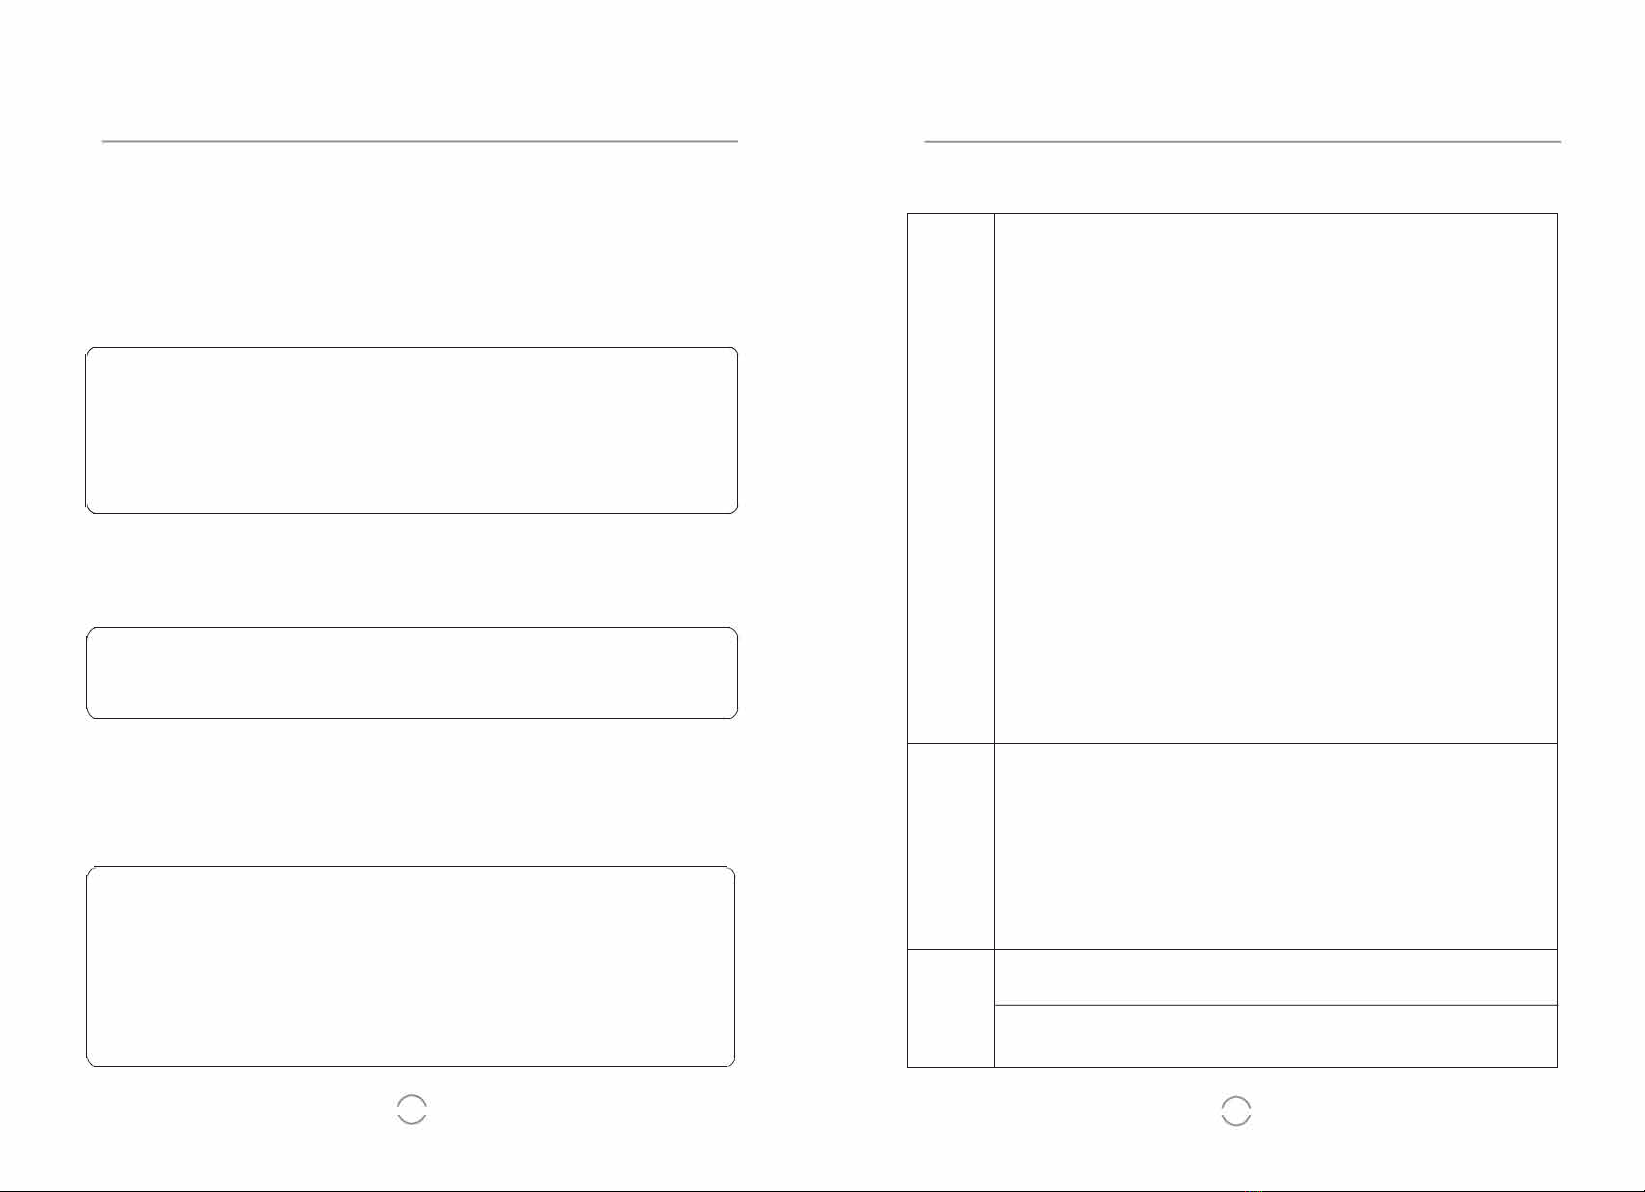
► SAFETY PRECAUTIONS
A
CAUTION
• Please do not continuously use the massage chair for more than 20
minutes. Limit massage to a particular part of body to
5
minutes.
• Please put the massage chair on flat ground during use.
• When adjusting the legrest or backrest, please do not exert excessive
force on it. Keep children and pets well clear.
• When removing the power plug, please hold the insulated plug. Do not
pull the power cord.
• Please do not use a power source that is beyond the specified electric
voltage, as this may cause fire or damage massage chair.
• Before using, please uncover the back cushion to check whether the
backrest or fabric is damaged. If
damaged, please stop using this
-
massage chair immediately, and contact the local distributor for repair.
• Please do not operate the controller with damp hands, and do not put
COMPULSARY
heavy objects on the controller.
• The maximum weight capacity for the massage chair is 250 pounds.
• Please do not use other therapeutic equipment while using this massage
chair.
• If
you feel uncomfortable, please stop using the chair immediately and
consult your doctor.
• This massage chair is designed and intended for non commercial
household use only. Do not use the massage chair for medical
treatment.
• The massage chair is equipped with a heating function. Please use with
caution.
• Always switch off power and remove the plug from the wall socket
immediately after use and before cleaning.
•To avoid causing discomfort, do not use the massage chair immediately
after meals.
(9
• Do not fall asleep in the massage chair while it is operating.
• Do not use the massage chair if you are intoxicated or ill.
• If the upholstery becomes dirty, use only good quality leather cleaner.
PROHIBITED
Do not use chemical cleaners, petrol or detergents.
• To avoid accidental injury or machine damage, do not sit on backrest,
legrest or armrest.
• Please do not smoke while using the massage chair.
• Before performing maintenance, please remove the power plug. To avoid
electric shock, please do not insert or pull out the plug with damp hands.
REMOVE PLUG
• When the massage chair is not in use, please switch off power and
remove the plug from the wall socket.
-----------------12>-----------------