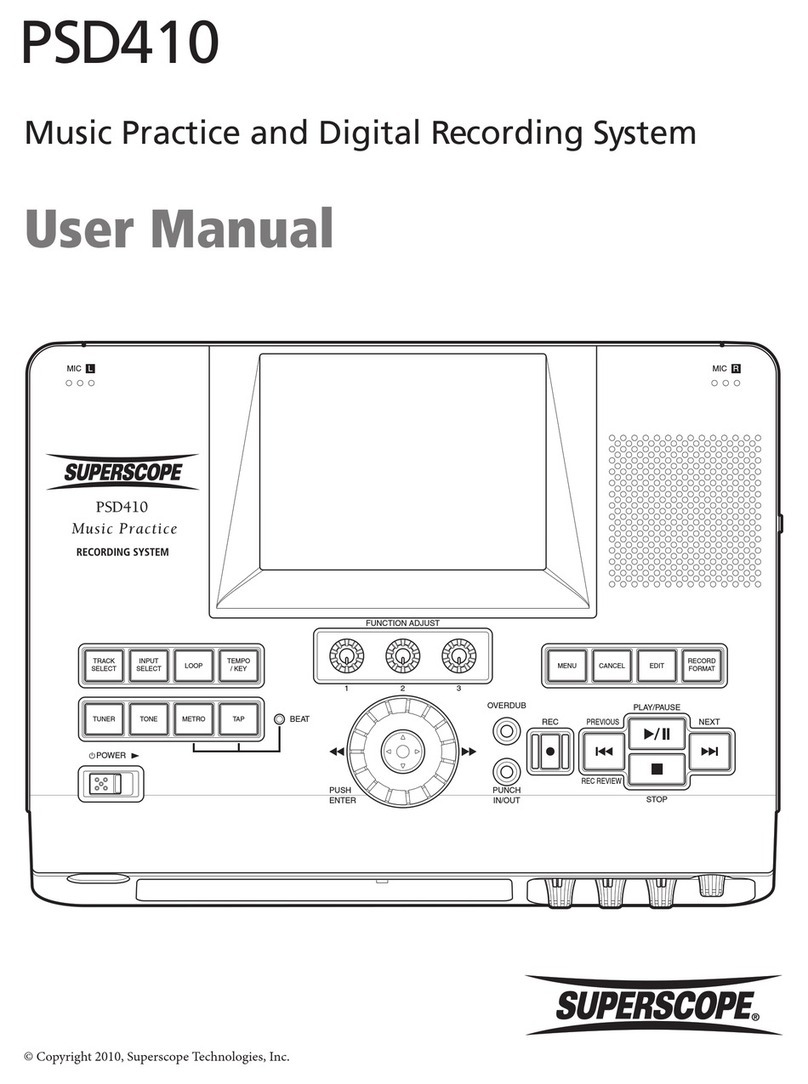
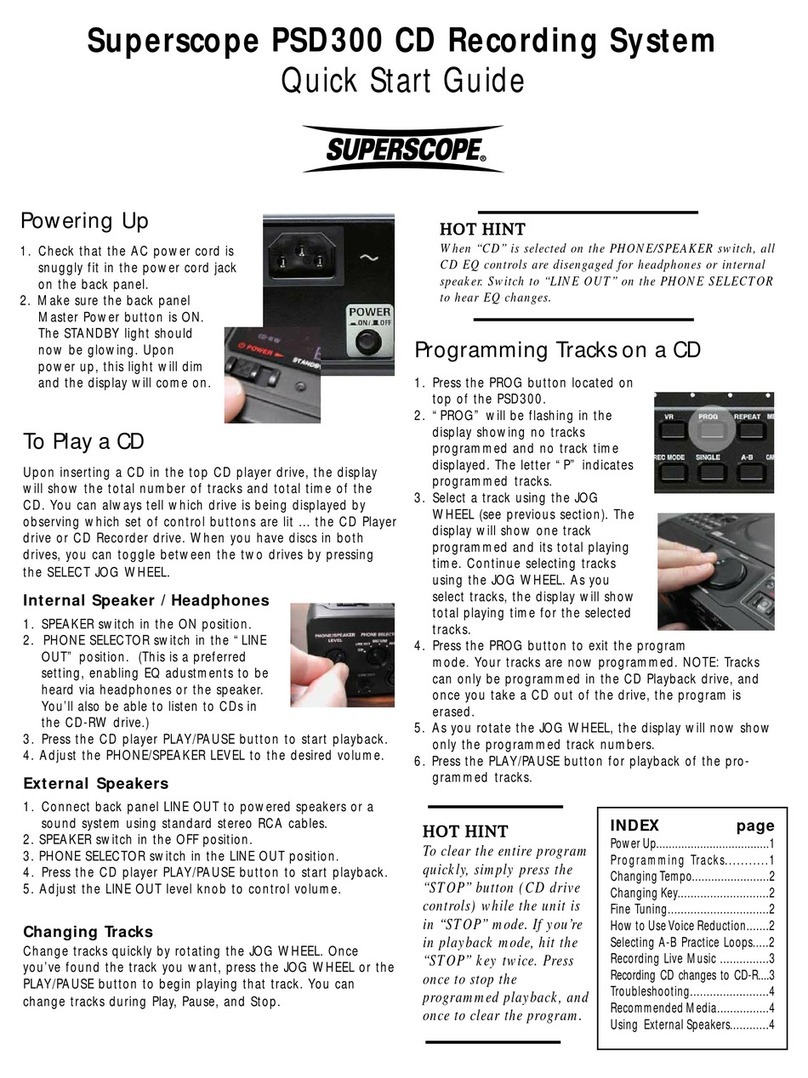
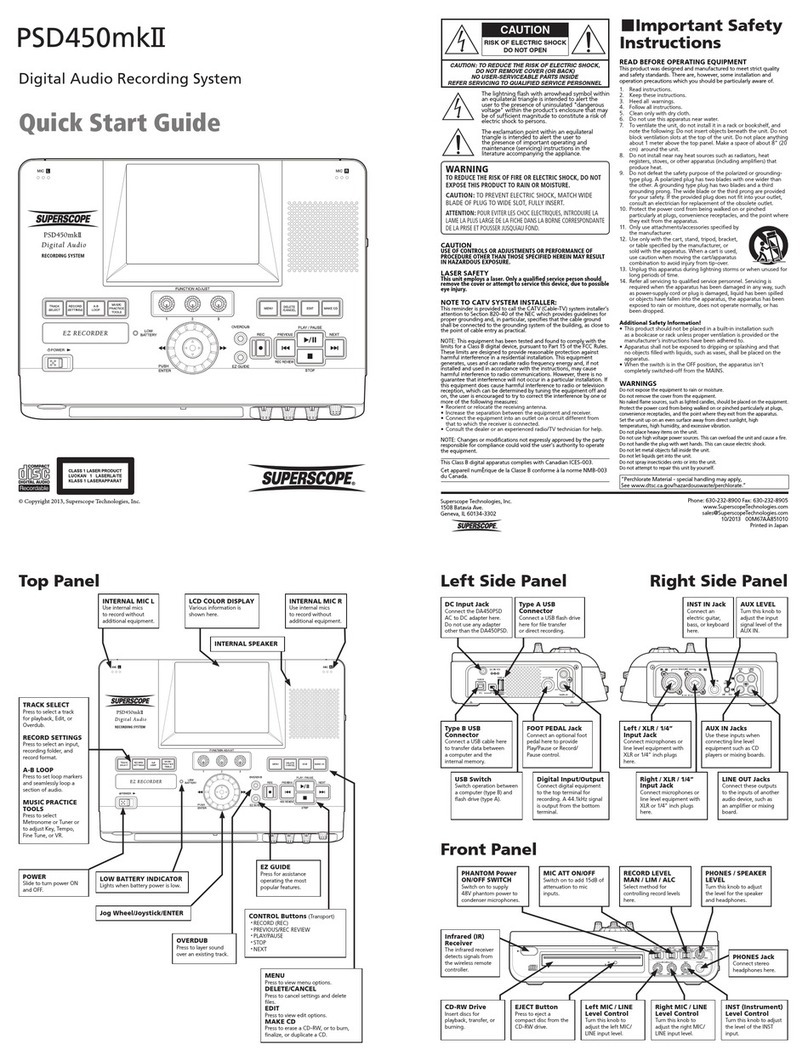
Superscope PSD300 User manual

CD Recording System
PSD300
CLASS 1 LASER PRODUCT
LUOKAN 1 LASERLAITE
KALSS 1 LASERAPPARAT
© 2002, Superscope Technologies Owners Manual
PUSH
BASS MID TREBLE
TEXT VR PROG REPEAT
MENU/STORE
DISP SINGLE A-B
CANCEL/DELETE
REC MODE
CD-RW PLAYBACK
CD RECORDING SYSTEM PSD300
MIC
PLAY
OPEN
REC/PLAY
ERASE FINALIZE
REC
SELECT
PUSH ENTER
POWER KEY TEMPOSTANDBY
PHONE/SPEAKER
LEVEL
PHONE SELECTOR
MIC/LINE
CD
LINE OUT AUX
PHONES LINE OUT
ReWritable
Recordable
CD PLAY / RECORD
OPEN/CLOSE
MIX
SPLIT
MIC
STEREO
ONOFF
ALC
DIGITAL
ANALOG
INPUT
ONOFF
SPEAKER
MIC
LINE INT
LINE
MIC
MIC/LINE
L
PUSH
R
MIC/LINE RIGHT
PUSH
LEFT

- 2 -
RISK OF ELECTRIC SHOCK
DO NOT OPEN
CAUTION
CAUTION: TO REDUCE THE RISK OF ELECTRIC SHOCK,
DO NOT REMOVE COVER (OR BACK)
NO USER-SERVICEABLE PARTS INSIDE
REFER SERVICING TO QUALIFIED SERVICE PERSONNEL
The lightning flash with arrowhead symbol,
within an equilateral triangle, is intended to
alert the user to the presence of uninsulated
"dangerous voltage" within the product's
enclosure that may be of sufficient
magnitude to constitute a risk of electric
shock to persons.
The exclamation point within an equilateral
triangle is intended to alert the user to the
presence of important operating and
maintenance (servicing) instructions in the
literature accompanying the appliance.
WARNING
TO REDUCE THE RISK OF FIRE OR ELECTRIC SHOCK,
DO NOT
EXPOSE THIS APPLIANCE TO RAIN OR MOISTURE.
LASER SAFETY
This unit employs lasers. Only a qualified service person
should remove the cover or attempt to service this device,
due to possible eye injury.
CAUTION
USE OF CONTROLS OR ADJUSTMENTS OR
PERFORMANCE OF PROCEDURE OTHER THAN
THOSE SPECIFIED HEREIN MAY RESULT IN
HAZARDOUS RADIATION EXPOSURE.
CE marking (only EU version)
This product is in conformity with the EMC directive
and low-voltage directive.
Equipment mains working system
This product complies with household power and safety
requirements in your area.
IMPORTANT: (For U.K. only)
This apparatus is fitted with an approved moulded 13 Amp
plug.To change a fuse in this type of plug proceed as follows:
1 Remove fuse cover and fuse.
2 Fix new fuse which should be a BS1362 5A, A.S.T.A.
or BSI approved type.
3 Refit the fuse cover.
If the fitted plug is not suitable for your socket outlets, it
should be cut off and an appropriate plug fitted in its place.
If the mains plug contains a fuse, this should have a value
of 5A. If a plug without a fuse is used, the fuse at the distri-
bution board should not be greater than 5A.
Note:
The severed plug must be destroyed to avoid pos-
sible shock hazard should it be inserted into a 13A socket
elsewhere.
HOW TO CONNECT A PLUG
The wires in this mains lead are coloured in accordance with
the following core:
GREEN−and−YELLOW−"EARTH" ("E")
BLUE−"NEUTRAL" ("N")
BROWN−"LIVE" ("L")
As the colours of the wires in the mains lead of this apparatus
may not correspond with the coloured markings identifying
the terminals in your plug, proceed as follows:
1 The wire which is coloured green-and-yellow must be
connected to the terminal in the plug which is marked
with the letter "E" or by the earth symbol or coloured
green or green-and-yellow.
2 The wire which is coloured blue must be connected to
the terminal which is marked with the letter "N" or
coloured BLACK.
3 The wire which is coloured brown must be connected to
the terminal which is marked with the letter "L" or
coloured RED.
Before replacing the plug cover, make certain that the cord
grip is clamped over the sheath of the lead -- not simply
over the three wires.

- 3 -
SAFETY INSTRUCTIONS
READ BEFORE OPERATING EQUIPMENT
This product was designed and manufactured to meet
strict quality and safety standards. There are, however
some installation and operation precautions which you
should be particularly aware of.
1. Read Instructions – All the safety and operating
instructions should be read before the appliance is
operated.
2. Retain Instructions – The safety and operating
instructions should be retained for future reference.
3. Heed Warnings – All warnings on the appliance and in
the operating instructions should be adhered to.
4. Follow Instructions – All operating and use instructions
should be followed.
5. Water and Moisture – The appliance should not be
used near water – for example, near a bathtub,
washbowl, kitchen sink, laundry tub, in a wet base-
ment, or near a swimming pool, etc. Do not handle
with wet hands.
6. Heat – The appliance should be situated away from
heat sources such as radiators, heat registers, stoves,
or other appliances (including amplifiers) that produce
heat or open flames.
7. Cleaning – The appliance should be cleaned only as
recommended by the manufacturer.
8. Power sources – The appliance should be connected
to a power source only of the type described in the
operating instructions or as marked on the appliance.
9. Ground or Polarization – Do not defeat the grounding
or polarization of the appli-
ance, plug or cord.
10. Power Cord – Route power
and other cords so they are
not likely to be walked on or
pinched by items placed on or
against them. Pay particular attention to cords at
plugs, and receptacles.
11. Non-use Periods – The power cord of the appliance should
be unplugged from the outlet when left unused for a long
period of time.
12. Object and Liquid Entry – Care should be taken so that
objects do not fall and liquids are not spilled into the
enclosure through openings. Do not cover this appliance
with any cloths, newspapers, curtains, etc.
13. Damage Requiring Service – The appliance should be
serviced by qualified service personnel when:
A. The power-supply cord or the plug has been
damaged; or
B. Objects have fallen, or liquid has spilled into the
appliance; or
C. The appliance has been exposed to rain; or
D. The appliance does not appear to operate normally
or exhibits a marked change in performance; or
E. The appliance has been dropped, or the enclosure
damaged.
14. Servicing – The user should not attempt to service the
appliance beyond that described in the operating
instructions. All other servicing should be referred to
qualified service personnel.
AC polarized plug
and receptacle
This Class B digital apparatus meets all
requirements of the Canadian Interference
Causing Equipment Regulations.
Cet appareil numérique de la Class B respecte
toutes les exigences du Réglement sur le
matérier brouilleur du Canada.
NOTE:
This equipment has been tested and found to comply with
the limits for a Class B digital device, pursuant to Part 15 of
the FCC Rules. These limits are designed to provide
reasonable protection against harmful interference in a
residential installation. This equipment generates, uses and
can radiate radio frequency energy and, if not installed and
used in accordance with the instructions, may cause harmful
interference to radio communications. However, there is no
guarantee that interference will not occur in a particular
installation. If this equipment does cause harmful
interference to radio or television reception, which can be
determined by turning the equipment off and on, the user is
encouraged to try to correct the interference by one or more
of the following measures:
– Re-orient or relocate the receiving antenna.
– Increase the separation between the equipment and
receiver.
– Connect the equipment into an outlet on a circuit
different from that to which the receiver is connected.
– Consult the dealer or an experienced radio/TV
technician for help.
NOTE: Changes or modifications may cause this unit
to fail to comply with Part 15 of the FCC Rules and may
void the user's authority to operate the equipment.

Table of Contents
- 4 -
Topic page
Warnings ..............................................................2
Safety Instructions ................................................ 3
Table of Contents .................................................4
Introduction ..........................................................5
Drive terminology .................................................5
Package contents ................................................. 6
Remote batteries .................................................. 6
Connections (basic) .............................................. 6
Controls, Display (top)
1Speaker grill ...................................................8
2CD drive................................................................ 8
3MIC (microphone) ..........................................8
4Model number ................................................8
5Tone controls .................................................8
6 Control buttons
1TEXT button...............................................8
2VR button ...................................................8
3PROG button .............................................8
4REPEAT button ..........................................8
5MENU/STORE button ................................9
REC menu table.........................................9
6DISP button ..............................................10
7REC MODE button ..................................10
8SINGLE button.........................................11
9A-B button ................................................11
10CANCEL/DELETE button ........................11
7PLAY controls ..............................................12
1Fast backward search button ...................12
2Fast forward search button ......................12
3Play/Pause button ....................................12
4Stop button ..............................................12
8Open switch .................................................12
9Standby POWER switch ..............................12
10STANDBY light.............................................12
Control of tempo and pitch ................................12
11KEY controls ................................................12
12TEMPO controls ..........................................13
TUNING ...................................................13
13Display.........................................................13
1TOC.........................................................13
2Record Indicator ......................................13
3Pause Indicator .........................................13
4Play Indicator ............................................13
5PROG Indicator ........................................13
6REPEAT Indicator .....................................13
7DIGITAL Indicator .....................................14
8Level meter ...............................................14
9CD Indicator..............................................14
10TEXT Indicator..........................................14
11A-B Indicator .............................................14
12TOTALTRACK Indicator ...........................14
13AUTOIndicator .........................................14
14SYNC Indicator .........................................14
Topic page
14Alphanumeric display................................14
14SELECT control ........................................14
15REC/PLAY controls...................................14
1ERASE button light ..................................15
2FINALIZE button light ..............................15
3REC button light.......................................15
4CDR drivePLAY controls (see page 11)...15
Controls, Connections (front)
1PHONE/SPEAKER LEVEL control ...........15
2PHONE SELECTOR.................................15
3MIC/LINE/INT controls and input jacks.....15
1Left XLR or 1/4" input jack........................16
2Right XLR or 1/4" input jack......................16
3Left LINE MIC switch ................................16
4Left level control........................................16
5Right LINE MIC INT switch .......................16
6Right level control .....................................16
4INPUT ANALOG/DIGITAL switch .............16
5ALC OFF/ON switch .................................17
6MIC SPLIT/STEREO/MIX switch..............17
7SPEAKER OFF/ON switch .......................17
8OPEN/CLOSE switch ...............................17
9PHONES jack...........................................17
10LINE OUT level control .............................17
11 CDR drive(disc tray).................................17
12Remote control sensor..............................17
Controls, Connections (rear)
1MIX OUT jacks.........................................18
2LINE OUT jacks ........................................18
3AUX IN jacks.............................................18
4DIGITAL IN and OUT jacks.......................18
5REMOTE RC-5 IN and OUT jacks............18
6REMOTE EXT.INT.switch........................18
7FOOT PEDAL jack....................................18
8Power plug ................................................18
9Power switch .............................................18
How to Play
How to Play a CD (basics) ...........................19
How to Pause...............................................19
How to Stop .................................................19
How to switch between drives ......................19
How to display time ......................................19
How to select tracks.....................................20
How to Search .............................................20
How to play a Single Track...........................20
How to cue to music (cue to audio)..............21
How to adjust the cue point..........................21
How to use Voice Reduction ........................22
How to enter CHANGER MODE..................22
How to program tracks.................................22
How to erase a programed track..............23
How to clear a program............................23
(table of contents continues)

- 5 -
Table of Contents continued
Introduction
PUSH
BASS MID TREBLE
TEXT VR PROG REPEAT MENU/STORE
DISP SINGLE A-B CANCEL/DELETE
REC MODE
CD-RW PLAYBACK
CD RECORDING SYSTEM PSD300
MIC
PLAY
OPEN
REC/PLAY
ERASE FINALIZE
REC
SELECT
PUSH ENTER
POWER KEY TEMPO
STANDBY
PHONE/SPEAKER
LEVEL
PHONE SELECTOR
MIC/LINE
CD
LINE OUT AUX
PHONES LINE OUT
ReWritable
Recordable
CD PLAY / RECORD
OPEN/CLOSE
MIX
SPLIT
MIC
STEREO
ONOFF
ALC
DIGITAL
ANALOG
INPUT
ONOFF
SPEAKER
MIC
LINE INT
LINE
MIC
MIC/LINE
L
PUSH
R
MIC/LINE RIGHT
PUSH
LEFT
CD drive
CDR drive
The front, tray loading drive is for recording and
playback and is referred to as the CDR drive.
The PSD300 CD recording system is a CD player with
a built-in CD recorder. It includes features designed
for a music teacher, professional musician, vocalist, or
studio.
For musical practice you can:
•select A-B (point to point) repeat playback
•adjust KEY and TEMPO (adjust the musical pitch
and/or speed of any CD)
For CD recording you can:
•record on CD-R or CD-RW discs
•record any of the playing options (listed below)
For CD playing you can:
•auto cue (start at the beginning of the audio and
adjust the auto cue point)
•use voice reduction (reduce the volume of the
voice track on a CD)
•add (mix in) your own microphone or instrument
input.
•connect to an amplifier/speaker system
•connect to an external CD recorder
•connect an additional CD player (or other line
input) to the PSD300 and mix that input
Drive terminology:
In this manual the top loading drive is for playback
only and is referred to as the CD drive.
Topic page
How to program tracks for recording ........23
How to Record
How to record your voice or instrument
(basics) ........................................................24
SCMS ..........................................................25
How to copy an existing CD (basics) ...........25
Select record mode
REC with CD............................................26
RECORD .................................................26
COPY + LISTEN......................................26
COPY 2X .................................................26
COPY 2X+FINAL .....................................26
CONV HALFSPEED ................................26
SYNC RECORD ......................................26
SYNC RECORD +FINAL .........................26
Recording tips ..........................................26
Record Adjustments
AUTOTRACK and AUTO STOP defaults ...27
AUTOTRACK..............................................27
How to turn AUTOTRACK ON or OFF ....27
AUTO STOP................................................28
How to turn AUTO STOP ON or OFF ......28
How to adjust the MIC EQUALIZER ............28
REC LEVEL .................................................28
How to adjust SPLIT BALANCE ..................29
How to adjust REC BALANCE .....................29
How to select filters......................................30
How to erase
How to erase the last track..........................31
How to erase the entire disc ........................31
How to finalize...............................................31
How to Finalize a CD-R or CD-RW disc.......32
How to Unfinalize a CD-RW disc .................32
About the Remote ............................................33
Track Skip forward button ...............................34
Track Skip backward button............................34
AMS button (Automatic Search) .....................34
TR INC (Track Increment) ..............................34
About CD discs ................................................35
Which discs to use .........................................35
Disc cleaning ..................................................35
CD text...............................................................36
CD text during playback...............................36
Recording CD text........................................36
How to view CD text.....................................37
How to erase CD text ...................................38
RC-5 remote control codes ...........................38
Troubleshooting ............................................39
Maintenance ...................................................39
Specifications ................................................40
Warranty .........................................................41
Other manuals for PSD300
1
Table of contents
Other Superscope Recording Equipment manuals

Superscope
Superscope PSD450mkII User manual

Superscope
Superscope PSD450mk II User manual

Superscope
Superscope PSD340 User manual

Superscope
Superscope PSD410 User manual

Superscope
Superscope PSD300 User manual

Superscope
Superscope PSD430 User manual

Superscope
Superscope PSD450 User manual

Superscope
Superscope PSD410 User manual

Superscope
Superscope PSD330 User manual

Superscope
Superscope PSD430 User manual