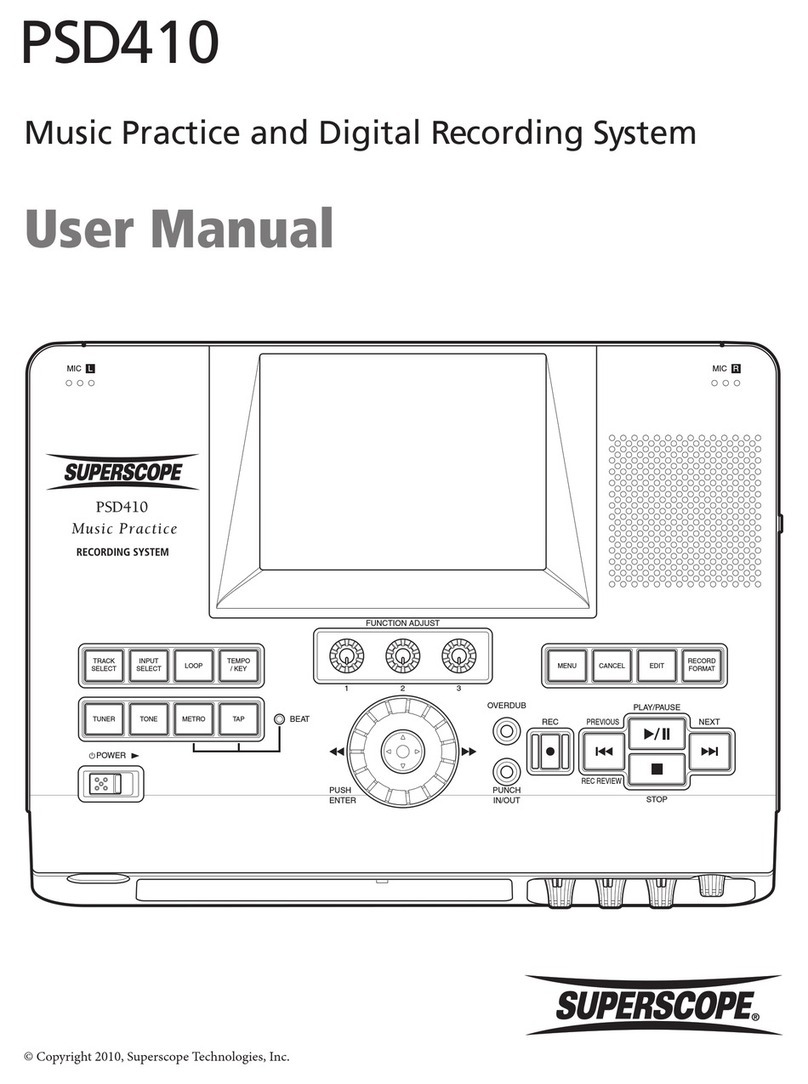
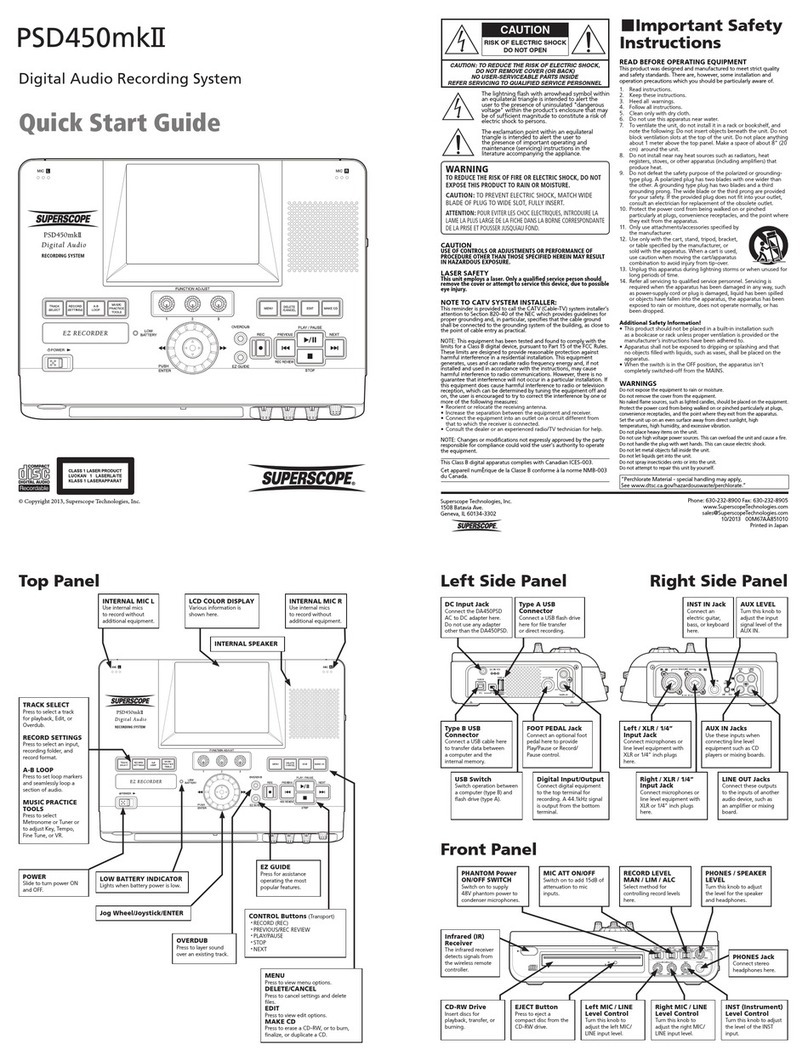
Superscope PSD340 User manual

CLASS 1 LASER PRODUCT
LUOKAN 1 LASERLAITE
KALSS 1 LASERAPPARAT
OWNERS MANUAL
© Copyright 2005, Superscope Technologies, Inc.
PSD340
Music Practice & CD Recording System
POWER
POWER
TEMPO
TEMPO
KEY
KEY
STANDBY
STANDBY
PLAY
PLAY
MIC
MIC
OPEN
OPEN
MP3
MP3
PUSH
PUSH
CD-RW PLAYBACK
CD-RW PLAYBACK
REC REVIEW
REC REVIEW
VR
VR
METRO
METRO
TUNER
TUNER
REV/DLY
REV/DLY
REC/PLAY
REC/PLAY
REC
REC
FINALIZE
FINALIZE
ERASE
ERASE
SELECT
SELECT
PUSH ENTER
PUSH ENTER
CANCEL/DELETE
CANCEL/DELETE
PROG
PROG
DISP
DISP
BALANCE
BALANCE
TR INC
TR INC
MENU/STORE
MENU/STORE
SINGLE
SINGLE
REPEAT
REPEAT
A-B
A-B
REC MODE
REC MODE
-
-
+
+
PSD340
Music Practice
CD RECORDING SYSTEM

The lightning flash with
arrowhead symbol within
an equilateral triangle is
intended to alert the user
to the presence of
uninsulated "dangerous
voltage" within the
product'senclosurethat may be of
sufficient magnitude to constitute a risk of
electric shock to persons.
- 2 -
Important Safety
Instructions
READ BEFORE OPERATING EQUIPMENT
This product was designed and manufactured to meet strict quality and
safety standards. There are, however, some installation and operation
precautions which you should be particularly aware of.
1. Read instructions.
2. Keep these instructions.
3. Heed all warnings.
4. Follow all instructions.
5. Clean only with dry cloth.
6. Do not use this apparatus near water.
7. To ventilate the unit, do not install it in a rack or bookshelf, and
note the following: Do not insert objects beneath the unit. Do not
block ventilation slots at the top of the unit. Do not place anything
about 1 meter above the top panel. Make a space of about 8”
(20 cm) around the unit.
8. Do not install near nay heat sources such as radiators, heat registers,
stoves, or other apparatus (including amplifiers) that produce heat.
9. Do not defeat the safety purpose of the polarized or grounding-
type plug. A polarized plug has two blades with one wider than the
other. A grounding type plug has two blades and a third grounding
prong. The wide blade or the third prong are provided for your safety.
If the provided plug does not fit into your outlet, consult an electrician
for replacement of the obsolete outlet.
10. Protect the power cord from being walked on or pinched particularly
at plugs, convenience receptacles, and the point where they exit
from the apparatus.
11. Only use attachments/accessories specified by the manufacturer.
12. Use only with the cart, stand, tripod, bracket, or
table specified by the manufacturer, or sold with
the apparatus. When a cart is used, use caution
when moving the cart/apparatus combination to
avoid injury from tip-over.
13. Unplug this apparatus during lightning storms or
when unused for long periods of time.
14. Refer all servicing to qualified service personnel. Servicing is required
when the apparatus has been damaged in any way, such as power-
supply cord or plug is damaged, liquid has been spilled or objects
have fallen into the apparatus, the apparatus has been exposed to
rain or moisture, does not operate normally, or has been dropped.
Additional Safety Information!
•This product should not be placed in a built-in installation such as a
bookcase or rack unless proper ventilation is provided or the
manufacturer’s instructions have been adhered to.
•Apparatus shall not be exposed to dripping or splashing and that no
objects filled with liquids, such as vases, shall be placed on the apparatus.
•When the switch is in the OFF position, the apparatus isn’t
completely switched-off from the MAINS.
WARNING
TO REDUCE THE RISK OF FIRE OR ELECTRIC SHOCK, DO
NOT EXPOSE THIS PRODUCT TO RAIN OR MOISTURE.
CAUTION: TO PREVENT ELECTRIC SHOCK, MATCH WIDE BLADE
OF PLUG TO WIDE SLOT, FULLY INSERT.
ATTENTION: POUR EVITER LES CHOC ELECTRIQUES, INTRODUIRE
LA LAME LA PLUS LARGE DE LA FICHE DANS LA BORNE
CORRESPONDANTE DE LA PRISE ET POUSSER JUSQU’AU FOND.
NOTE TO CATV SYSTEM INSTALLER:
This reminder is provided to call the CATV (Cable-TV) system installer’s
attention to Section 820-40 of the NEC which provides guidelines for
proper grounding and, in particular, specifies that the cable ground
shall be connected to the grounding system of the building, as close to
the point of cable entry as practical.
NOTE: This equipment has been tested and found to comply with the
limits for a Class B digital device, pursuant to Part 15 of the FCC Rules.
These limits are designed to provide reasonable protection against
harmful interference in a residential installation. This equipment
generates, uses and can radiate radio frequency energy and, if not
installed and used in accordance with the instructions, may cause
harmful interference to radio communications. However, there is no
guarantee that interference will not occur in a particular installation. If
this equipment does cause harmful interference to radio or television
reception, which can be determeined by tuning the equipment off and
on, the user is encouraged to try to correct the interference by one or
more of the following measures:
• Reorient or relocate the receiving attenna.
• Increase the separation between the equipment and receiver.
• Connect the equipment into an outlet on a circuit different from
that to which the receiver is connected.
• Consult the dealer or an experienced radio/TV technician for help.
NOTE: Changes or modifications not expressly approved by the party
responsible for compliance could void the user’s authority to operate
the equipment.
This Class B digital apparatus complies with Canadian ICES-003.
Cet appareil numérique de la Classe B conforme à la norme NMB-003 du
Canada.
This product is in conformity with the EMC directive and low-
voltage directive.
This product complies with household power and safety
requirements in your area.
The exclamation point within an equilateral
triangle is intended to alert the user to the
presence of important operating and
maintenance (servicing) instructions in the
literature accompanying the appliance.
RISK OF ELECTRIC SHOCK
DO NOT OPEN
CAUTION
CAUTION: TO REDUCE THE RISK OF ELECTRIC SHOCK,
DO NOT REMOVE COVER (OR BACK)
NO USER-SERVICEABLE PARTS INSIDE
REFER SERVICING TO QUALIFIED SERVICE PERSONNEL

CE MARKING
English
The PSD340 is in conformity with the EMC directive and low-voltage directive.
Français
Le PSD340 est conforme à la directive EMC et à la directive sur les basses tensions.
Deutsch
Das Modell PSD340 entspricht den EMC-Richtlinien und den Richtlinien für
Niederspannungsgeräte.
Nederlands
De PSD340 voldoet aan de EMC eisen en de vereisten voor laag-voltage.
Español
El PSD340 estáde acuerdo con las normas EMC y las relacionadas con baja tensión.
Italiano
Il PSD340 è conforme alle direttive CEE ed a quelle per i bassi voltaggi.
Português
O PSD340 conforma com as diretrizes EMC e de baixa voltagem.
Svenska
PSD340 är tillverkad i enlighet med EMC direktiven och direktiven för lågvoltsutrusning.
English
WARNINGS
-
Do not expose the equipment to rain or moisture.
- Do not remove the cover from the equipment.
-
Do not insert anything into the equipment through the ventilation
holes.
- Do not handle the mains lead with wet hands.
-
Do not cover the ventilation with any items such as tablecloths,
newspapers, curtains, etc.
-
No naked flame sources, such as lighted candles, should be placed
on the equipment.
-
When disposing of used batteries, please comply with governmental
regulations or environmental public instruction’s rules that apply in
your country or area.
-
Do not place anything about 0.5 meter above the top panel.
-
Make a space of about 0.5 meter around the unit.
- No objects filled with liquids, such as vases, shall be placed on the
apparatus.
- When the switch is in the OFF position, the equipment is not
completely switched off from MAINS.
Français
AVERTISSEMENTS
- Ne pas exposer l’appareil àla pluie ni àl’humidité.
- Ne pas essayer de retirer le boîtier de l’appareil.
- Ne rien insérer dans l’appareil par les orifices de ventilation.
- Ne pas manipuler le cordon d’alimentation avec les mains
mouillées.
- Ne pas recouvrir les ouïes de ventilation avec un objet quelconque
comme une nappe, un journal, un rideau, etc.
- Ne placer aucune source de flamme nue, comme une bougie
allumée, sur l'appareil.
- Pour mettre au rebut les piles usées, respecter les lois
gouvernementales ou les règlements officiels concernant
l’environnement qui s'appliquent àvotre pays ou région.
-Ne placez aucun object àmoins de 0,5 mètre environ du panneau
supérieur.
-Veiller àce qu’aucun objet ne soit àmoins de 0,5 mètre des côtés
de l'appareil.
- Aucun objet rempli de liquide, un vase par exemple, ne doit être
placésur l'appareil.
- Lorsque l'interrupteur est sur la position OFF, l'appareil n'est pas
complètement déconnectédu SECTEUR (MAINS).
Deutsch
WARNHINWEISE
- Das Gerät nicht Regen oder Feuchtigkeit aussetzen.
- Die Abdeckung nicht vom Gerät abnehmen.
- Keine Gegenstände durch die Belüftungsschlitze stecken.
- Das Netzkabel nicht mit feuchten oder nassen Händen anfassen.
- Decken Sie die Lüftungsöffnungen nicht mit einem Tischtuch, einer
Zeitung, einem Vorhang usw. ab.
- Es dürfen keine Gegenstände mit offener Flamme, wie etwa
brennende Kerzen, auf dem Gerät aufgestellt werden.
- Beachten Sie bei der Entsorgung der verbrauchten Batterien alle
geltenden lokalen und überregionalen Regelungen.
- Darauf achten, daß über dem Gerät ein Freiraum von mindestens
0,5 meter vorhanden ist.
-Auf allen Geräteseiten mußein Zwischenraum von ungefähr 0,5
meter vorhanden sein.
- Auf das Gerät dürfen keine mit Flüssigkeiten gefüllte Behälter, wie
etwa eine Vase, gestellt werden.
- Wenn der Schalter ausgeschaltet ist (OFF-Position), ist das Gerät
nicht vollständig vom Stromnetz (MAINS) abgetrennt.
Nederlands
WAARSCHUWINGEN
- Stel het apparaat niet bloot aan regen of vocht.
- Verwijder de afdekplaat van het apparaat niet.
- Duw niets door de ventilatieopeningen in het apparaat.
- Raak het netsnoer niet met natte handen aan.
- Bedek de ventilatieopeningen niet met enige voorwerpen, zoals
tafelkleden, kranten, gordijnen, enz.
- Plaats geen brandende voorwerpen, zoals kaarsen, op het
apparaat.
- Volg bij het weggooien van verbruikte batterijen de
overheidswetgeving of milieuvoorschriften op die van kracht zijn in
het land of de regio waarin u zich bevindt.
-Zorg dat er tenminste 0,5 meter vrije ruimte boven het toestel is.
-Zorg dat er 0,5 meter vrije ruimte rond het toestel is.
- Plaats geen voorwerpen met een vloeistof erin, zoals een
bloemenvaas, op het apparaat.
- Als de schakelaar op OFF staat, is het apparaat niet volledig
losgekoppeld van de netspanning (MAINS).
2a

Español
ADVERTENCIAS
-
No exponga el equipo a la lluvia ni a la humedad.
- No extraiga la tapa del equipo.
- No introduzca nada en el interior del equipo a través de los orificios
de ventilación.
- No maneje el cable de alimentación con las manos mojadas.
- No cubra la ventilación con objetos como manteles, periódicos,
cortinas, etc.
- No deben colocarse sobre el equipo elementos con fuego, por
ejemplo velas encendidas.
- Cuando se eliminen baterías usadas, deben cumplirse las
reglamentaciones oficiales o las normas de protección
medioambiental aplicables en su país o en su zona.
-No ponga nada a menos de 0,5 metro por encima del panel
superior.
-Deje un espacio de unos 0,5 metro alrededor de la unidad.
- No se deben colocar sobre el aparato recipientes que contengan
líquidos, como por ejemplo jarrones.
- Cuando el interruptor estáen la posición OFF, el equipo no está
completamente desconectado de la alimentación MAINS.
Italiano
AVVERTENZE
-Non esporre l’apparecchio alla pioggia o all’umidità.
- Non rimuovere il coperchio dell’apparecchio.
- Non introdurre oggetti all’interno dell’apparecchio attraverso i fori di
ventilazione.
- Non toccare il cavo di alimentazione con le mani bagnate.
- Non coprire le fessure di ventilazione con tovaglie, giornali, tende
od oggetti analoghi.
- Non posare sull'apparecchio sorgenti di fiamme scoperte quali
candele accese.
- Smaltire le pile usate in conformitàalle norme governative o
disposizioni ambientali vigenti nel proprio paese o zona.
- Non posare alcun oggetto sopra il pannello superiore, lasciando
libero uno spazio di circa 0,5 m.
-Lasciare 0,5 metro liberi tutto intorno l'unità.
- Non mettere sull'apparecchiatura alcun contenitore di liquido, come
ad esempio dei vasi.
- Quando l'interruttore ènella posizione OFF, l'apparecchiatura non è
completamente scollegata da MAINS.
Português
ADVERTÊNCIAS
-Não exponha o equipamento àchuva nem àhumidade.
-Não retire a tampa do equipamento.
-Não atire nada para dentro do equipamento através dos orificíos de
ventilação.
-Não manuseie o cabo de alimentação com as mãos molhadas.
-Não cobrir os orifícios de ventilação com objectos tais como toalhas
de mesa, jornais, cortinas, etc.
-Não colocar chamas abertas tais como velas acesas, sobre o
aparelho.
- Ao deitar foras as pilhas usadas, favor observar os regulamentos
governamentais ou as regras com respeito ao meio ambiente que
se aplicam no seu país ou área de residência.
-Deixar um espaço completamente livre de cerca de 0,5 metro
acima do painel superior.
-Deixar um espaço de cerca de 0,5 metro ao redor do aparelho.
-Não colocar recipientes com água, tal como vasos, sobre o
aparelho.
- Quando o interruptor estána posição OFF, o equipamento não fica
totalmente desligado de MAINS.
Svenska
VARNINGAR
- Utsätt inte utrustningen för regn eller fukt.
- Ta inte bort utrustningens hölje.
-
För inte in föremål i utrustningen genom ventilationshålen.
- Hantera inte nätsladden med våta händer.
-Täck inte för ventilationsöppningarna med några föremål som till
exempel bordsdukar, dagstidningar, gardiner e.d.
- Inga föremål med öppen låga, som till exempel tända stearinljus,
bör placeras påutrustningen.
-Följ de lagar och miljöskyddsråd som gäller i det land eller område
där du bor när du gör dig av med batterier.
-Placera inte någonting närmare än 0,5 meter ovanför apparaten
eller enheten.
-Se till att det finns omkring 0,5 meter fri plats runt omkring enheten.
- Inga objekt som är fyllda med någon vätska, till exempel
blomstervaser, bör placeras påapparaten.
- Även om strömbrytaren står i det avstängda läget OFF, så är
utrustningen inte helt bortkopplad från det elektriska nätet (MAINS).
2b

Table of Contents
- 3 -
Warning ..................................................................2
Safety Instructions .................................................2
Table of Contents ..................................................3
Specifications .....................................................3
Introduction .....................................................4
Package Contents ...................................................4
Features .................................................5
Top of Unit......................................................5
Front of Unit......................................................8
Remote Control...............................................9
Back of Unit.........................................................10
Set Up ........................................................11
Powering Up ......................................................11
Setting Up Speakers ............................................11
Headphones or Built-In Speaker....................11
External Speakers......................................11
Setting Up Instruments, Mics, & Other Sound Sources ....11
Microphones....................................11
Internal Microphone.....................................12
Instruments........................................12
Line Level Sources..............................12
Setting Levels...........................................12
Music Practice & CD Playback ....................................13
How to Use the Tuner .......................................13
How to Use the Metronome .............................14
Playing a CD ...................................................15
Selecting A-B Practice Loops ............................15
Changing Key and Tempo ........................15
Voice Reduction ..........................................16
Recording ......................................................17
Making a Live Recording ...................................17
Minute Track Mode..............................................18
Recording from a Digital Input ................18
Adding Reverb or Delay ........................................18
Right & Left Channel Mix ....................................18
How to Record with CD .................................19
Program a Playlist ....................................19
Recording Key, Tempo and VR Changes .........19
Activating “Record with CD” Mode............19
How to Record a Song Segment ..............................20
How to Copy an Existing CD ............................20
Copying from an External Source .............................20
How to Finalize a Disc .......................................21
How to Unfinalize a CD-RW disc.......................21
How to Erase a CD-RW...................................21
Menus .......................................................................22
Play Menu .........................................22
Record Menu .........................................23
Stop Menu ................................................24
Troubleshooting .......................................................25
Further Information ...................................................27
Warranty......................................................30
Topic Page
Specifications
General
System........................ Compact Disc Digital Audio (CD-DA)
Number of channels...............................................2 (stereo)
Applicable discs.......................................CD, CD-R, CD-RW
Power requirements:
/U1B...........................................120V 60Hz,21W
/N1B............................................230V 50Hz,21W
/K1B............................................220V 50Hz,21W
Dimensions (maximum)
Width.......................................11.625 inches (296 mm)
Height......................................... 3.635 inches (92 mm)
Depth...........................................8.75 inches (222 mm)
Weight...............................................7 pounds (3.2 Kg)
Audio
ADC..............................24 Bit Resolution 64x Oversampling
DAC.......................................................... 20 Bit Resolution
Overall frequency response.............................20Hz - 20kHz
CD-R drive output
Playback S/N................................................................90dB
Playback Dynamic Range.............................................90dB
Playback Total Harmonic Distortion.............................0.01%
Output Voltage/Impedance (Line Output)...............2.0V/2.2K
CD drive output
Playback S/N................................................................90dB
Playback Dynamic Range..............................................90dB
Playback Total Harmonic Distortion............................0.01%
Output Voltage ....................................................2.0V/2.2K
MIC/LINE analog input
LINE level
S/N .....................................................................85dB
THD...................................................................0.05%
Input Sensitivity/Impedance...........................500mV/6K
MIC level
S/N .....................................................................70dB
THD ....................................................................0.1%
Input Sensitivity/Impedance ...........................3.0mV/6K
AUX analog input
S/N ....................................................................85dB
THD ..................................................................0.01%
Input Sensitivity/Impedance ...................... 500mV/50K
Digital Input
Sample rate .................................32kHz/44.1kHz/48kHZ
Digital Output
Output Level/Impedance ..........................0.5Vp-p/75Ω
Headphone Output (10% THD)
Level/Impedance........................................30mW/32Ω
Speaker Output (10% THD)
Level/Impedance ........................................... 2.0W/8Ω
Operating Temperature .........+5° C -+35°C (41°F -95°F)

- 4 -
Package Contents
POWER
TEMPO
KEY
STANDBY
PLAY
MIC
OPEN
MP3
MP3
PUSH
PUSH
CD-RW PLAYBACK
CD-RW PLAYBACK
REC REVIEW
VR
METRO TUNER
REV/DLY
REC/PLAY
REC
FINALIZE
ERASE
SELECT
PUSH ENTER
CANCEL/DELETE
PROG
DISP
BALANCE
TR INC
MENU/STORE
SINGLE
REPEAT
A-B
REC MODE
òó
-+
PSD340
Music Practice
CD RECORDING SYSTEM
PSD340 Infrared (IR)
Remote
AC Power Chord
RCA Patch Cables
Installing Remote Batteries
Press and lift at arrow to open the remote control
battery compartment.
Install two AA batteries then replace compartment
cover.
When disposing of used batteries, please comply with
governmental and environmental regulations.
AA batteries (2)
Introduction
Congratulations on your purchase of the PSD340 Music
Practice CD Recording System. The PSD340 is a combina-
tion CD player and CD recorder with special features
designed for music teachers, choral directors, vocalists,
musicians and sound engineers. Tune up, practice to the
metronome, control the playback of CDs and MP3 files
for custom accompaniment, and record directly to CD.
It’s convenient and easy with the PSD340.
Features for Music Practice
• Change the key of a song without affecting tempo
(± one octave in half steps or finer increments)
• Change the tempo of a song without affecting
musical pitch (-75% to +50%)
• Change key and tempo simultaneously
• Select A-B (Point A to Point B) repeat loops
• Reduce lead vocals from stereo recordings
• Use built-in metronome
• Use built-in chromatic tuner and 440Hz tone
• Play and manipulate MP3 audio files on a CD-R or
CD-RW disc
• CD-G graphics output (with optional decoder)
Recording Features
• Direct recording to CD-R (write once) or CD-RW
(rewritable) discs
• Recording of music manipulations such as key or
tempo changes
• Built-in microphone preamplifiers
• Built-in condenser microphone
• Automatic Rec Level Control
for “worry free”
recording
• Record-Review which allows immediate playback of
the last track recorded
• Mixing of CD or CD-MP3 (MP3 files on a disc)
accompaniment with mic or instrument input
• Independent operation of the CD recording drive
and CD player drive. Audio from the CD player can
be mixed with other sources, processed, and routed
back to the CD recording drive through the DIGITAL IN
Recommended Media
The PSD340 will record on computer CD-R or CD-RW
data discs as well as “Music CD-R” discs. The most
important factor in choosing CD-R or CD-RW media is a
1X speed rating. Choose brand name discs that are
rated 1X (e.g. 1X - 40X) or imply 1X (e.g., “up to
40X”). We do not recommend using generic discs with
the PSD340. If possible, test any brand before buying in
bulk.

POWER
TEMPO
KEY
STANDBY
PLAY
MIC
OPEN
MP3
MP3
PUSH
PUSH
CD-RW PLAYBACK
CD-RW PLAYBACK
REC REVIEW
VR
METRO TUNER
REV/DLY
REC/PLAY
REC
FINALIZE
ERASE
SELECT
PUSH ENTER
CANCEL/DELETE
PROG
DISP
BALANCE
TR INC
MENU/STORE
SINGLE
REPEAT
A-B
REC MODE
òó
-+
PSD340
Music Practice
CD RECORDING SYSTEM
Features
2
1.2
5-1
9 8 7 6
1 Control Buttons
2 Speaker
3 CD Player Drive
4 Internal Microphone
5 CD Player and CD Recorder Controls
11 Key Controls
12 Standby Light
13 Standby Power Button
14 Display
Top of Unit
3a
3b
5-2
34
14
13
- 5-
1011
12
1.1
CANCEL/DELETE
PROG
DISP
BALANCE
TR INC
MENU/STORE
SINGLE
REPEAT
A-B
REC MODE
A B C D E
F G H I J
A. Record Mode
B. A-B Loop
C. Repeat
D. Single Track Play
E. Menu/Store
F. Track Increment
G. Balance
H. Display
I. Program
J. Cancel/Delete
[1-1] Control Buttons
A. RECORD MODE (REC MODE) button
With a CD-R or CD-RW disc in the CD Recording
drive, press this button to enter Record mode.
Turn the SELECT jog wheel to select the recording
mode. Then press the SELECT jog wheel to
choose that mode.
B. A-B LOOP (A-B) button
While a CD is playing in the CD player drive, press
this button to start point A to point B repeat play
(pg. 15).
C. REPEAT button
There are two Repeat modes: Track or Entire CD.
6 Finalize Button
7 Record Button
8 Erase Button
9 Select Jog Wheel
Tempo Controls
10

prefer, you can use the OUTPUT feature to take
audio from one channel and send it into both
channels or both sides of your headphones. How
to do this:
1. While the unit is stopped, press the MENU/
STORE button.
2. Turn the SELECT jog wheel until you see the
option OUTPUT.
3. Press the SELECT jog wheel to enter.
4. If display reads “STEREO” turn the SELECT jog
wheel to change the display to read “MONO.”
5. Press the MENU/STORE button to store the new
setting.
H. DISPLAY (DISP) button
While playing a CD in either drive, press the
DISPLAY button once to display the remaining
play time for the current track. The display reads
“TRACK.”
Press the button a second time to display the
remaining play time for the entire CD. The display
reads “TOTAL TRACK.” Press the DISPLAY button
again to return to the default display showing
elapsed track time.
I. PROGRAM (PROG) button
Use this button to program a play list of tracks or
MP3s (for the CD drive only.) (See pg. 19 for more
information).
J. CANCEL/DELETE button
Press this button to delete tracks from a program,
to delete text when entering CD text, to cancel
menu changes, or to return to a higher level in
the menu.
- 6 -
Track Repeat
While playing a CD in either drive press this
button once to repeat only the track being
played. The display reads “REPEAT 1.”
Entire CD Repeat
Press the REPEAT button twice to repeat the
entire CD. The display reads “REPEAT.”
Press REPEAT a third time to exit Repeat mode.
D. SINGLE TRACK PLAY (SINGLE) button
Press the SINGLE button to toggle Single Track
Play ON or OFF.
While in Single Track Play and when a track is
selected with the SELECT jog wheel, the track
does not automatically start playing. Instead, it is
paused and cued up at the beginning of the audio
and the PLAY/PAUSE button flashes.
Press the PLAY/PAUSE button to begin playback.
When the track is finished, the PSD340 will
automatically pause, cued to music, at the
beginning of the next track. (See pg. 27 on how
to adjust the cue point).
E. MENU/STORE button
Press this button to enter Menu mode. Menu
selections and changes are made using the
SELECT jog wheel. Turn the SELECT jog wheel to
scroll through the options. Press the SELECT jog
wheel to select an option. Press the MENU/STORE
button to store changes and exit Menu mode. (For
a complete list of menu selections see pg. 22).
F. TRACK INCREMENT (TR INC) button
During recording, press this button to manually
increment a new track. RECOMMENDED: When
using this feature, set AUTO TRACK to OFF (See
pg. 23).
G. BALANCE button
The BALANCE control allows you to adjust the
right-left stereo balance of the line output and
headphones and the R-L channel mix of the
speaker. Press the BALANCE button, then turn the
SELECT jog wheel to adjust the stereo balance.
When transcribing, you might want to zero in on
a particular instrument in the stereo mix. If that
instrument is located mostly in the right channel,
you may turn the BALANCE control all the way to
the right. However, this will remove all the sound
from the left channel and left headphone. If you
VR
METRO TUNER
REV/DLY
K. Metronome
L. Reverb/Delay
M. Tuner
N. VR (Voice
Reduction)
[1-2] Music Practice Controls
K. METRONOME (METRO) button
Press this button to turn the metronome ON/OFF
and to adjust metronome settings (pg. 14).
L. REVERB/DELAY (REV/DLY) button
Press this button to add a Reverb or Delay effect
to AUX IN, the left MIC/LINE/INST input and/or
the right MIC/LINE/INT MIC input and to adjust
Reverb/Delay settings (pg. 18).
K L M N

[7] RECORD (REC) button / light
Press this button to enter Record Pause mode. Press
it to start recording when the unit is in Record
Pause mode. Also used when finalizing.
[8] ERASE button / light
Use to enter Erase mode (CD-RW only) (pg. 21).
[9] SELECT jog wheel
This is the master control for the PSD340. Press
the SELECT jog wheel to switch between drives.
For most operations, you scroll through choices
with the SELECT jog wheel and press it to accept
your choice.
• In Program mode, turn to select a track, then
press to program the track.
• In Play mode, turn to select a track.
• When recording, turn to adjust recording level.
• After the MENU/STORE button is pressed, turn
the SELECT jog wheel to scroll through menu
selections and make adjustments.
[10] Tempo Change buttons
Press the “+” button to increase or the “-”
button to decrease the tempo of the disc in the
CD drive (pg.15). The key will be unaffected.
[11] Key Change buttons
Press to lower or to raise the key (musical
pitch) (pg. 15). The tempo will be unaffected.
[12] STANDBY light
STANDBY light is lit when power is switched OFF by
the Standby POWER switch on the unit or remote.
[13] Standby POWER switch
Slide the Standby POWER switch to the right to
turn power ON or OFF. The MASTER POWER
button on rear of unit must be ON (the red
STANDBY light must be lit).
[14] Display
1. TOC - Lit when TOC (disc table of contents)
information is held in memory. The table of
contents includes the total number of tracks,
playback time and other CD text if provided.
2. Record indicator - Lit when recording.
3. Pause indicator - Lit when recording or when
playback has been paused.
4. Play indicator - Lit during recording or playback.
5. PROG indicator - Lit during Programming
mode (selecting track playback sequence).
6. REPEAT indicator - Lit during a repeat opera-
tion. NOTE: When the “1” indicator is also lit,
only the currently playing track is repeated.
- 7 -
M. TUNER button
Press this button to activate the built-in tuner and
to adjust tuner settings (pg. 13).
N. VOICE REDUCTION button (VR)
Press this button to activate voice reduction. A
special processor reduces the volume of centered
lead vocals during playback of stereo CD or MP3
recordings (See pg. 16).
[2] Internal Speaker
The internal speaker allows listening to the
PSD340 recording system without having to
connect to other equipment for amplification.
[3] CD Player Drive
The top loading CD drive is for playback only. The
PSD340 can playback CD, CD-MP3, CD-R and
CD-RW discs.
The CD drive is opened by the OPEN slide switch
(3a), and closed by pushing on the corner marked
PUSH (3b).
[4] Built-In Microphone (MIC)
Internal condenser microphone.
[5] Play controls
Play controls (5-1)control
playback of a disc in the CD
player drive [3]. Another
set of play controls (5-2)
control playback of a disc in
the CD-R drive (pg 9, #13 ).
A. FAST BACKWARD
SEARCH button. Hold down to go backwards
within an audio track. NOTE: Use the SELECT
jog wheel to change tracks.
RECORD-REVIEW button.
For the CD-R drive, the
FAST BACKWARD SEARCH
button (A) also controls the
RECORD REVIEW feature.
Press this button while
recording, or after the
recording has been stopped, and the unit will
stop and play back the last track recorded.
B. FAST FORWARD search button. Hold down to
advance within an audio track.
C. PLAY/PAUSE button
D. STOP button
[6] FINALIZE button / light
Press this button to enter CD-R Finalize mode (pg. 21 ).
(Fig. 5-1)
AB
CD
REC REVIEW
(Fig. 5-2)
AB
CD

Front of Unit
(controls and connections)
[1] PHONE/SPEAKER LEVEL control
Turn this knob to adjust the level (volume) of the
built-in speaker or headphones plugged into the
PHONE jack.
[2] PHONE SELECTOR knob
Select the audio source for the PHONE jack and
INTERNAL SPEAKER by turning this knob to one
of the following four settings:
CD – CD player drive
LINE OUT – Audio available at the LINE OUT jacks.
MIC/LINE – Audio being input via the MIC/
LINE/INST and MIC/LINE/INT MIC input jacks.
AUX – Audio being input via the AUX IN jack.
[3] LEFT LINE/MIC/ INSTRUMENT
(INST) switch
Switch to LINE for a line level input, MIC for a
microphone level input or INST for an instrument
level input.
Note: Audio from the front inputs can be mixed
with audio entering the stereo AUX input on the
rear panel.
[4] Left level control
Turn this knob to adjust the Left Input signal level.
[5] Right LINE/MIC/INT MIC switch
Switch to LINE for a line level input, MIC for a
microphone level input, or INT when using the
internal microphone. When using an instrument
in the right channel, select MIC and set the ALC/
ATT switch to -15dB (See #8).
INST
INST
MIX
MIX
SPLIT
SPLIT
STEREO
STEREO
MIC/LINE
MIC/LINE
ON
ON
OFF
OFF
-20dB
-20dB
LINE
LINE
MIC
MIC
LEFT
LEFT
RIGHT
RIGHT
MIC/LINE
MIC/LINE
OPEN/CLOSE
OPEN/CLOSE
SPEAKER
SPEAKER
ALC/ATT
ALC/ATT
INPUT
INPUT
ON
ON
OFF
OFF
DIGITAL
DIGITAL
ANALOG
ANALOG
PHONE SELECTOR
PHONE SELECTOR
MIC/LINE
MIC/LINE
LINE
LINE
CD
CD
PHONE/SPEAKER
PHONE/SPEAKER
MIC/LINE
MIC/LINE
AUX
AUX
R
R
LINE OUT
LINE OUT
MIC
MIC
INT MIC
INT MIC
LEVEL
LEVEL
L
L
PHONES
PHONES
LINE OUT
LINE OUT
CD PLAY/RECORD
CD PLAY/RECORD
PUSH
PUSH
NEUTRIK
NEUTRIK
PUSHPUSH
PUSH
NEUTRIK
NEUTRIK
Note: When INTERNAL MIC is selected, both the
LEFT level control and the RIGHT level control are
active. Use the RIGHT and LEFT level control
knobs to adjust the INTERNAL MIC level applied
to each channel.
[6] Right level control
Turn this knob to adjust the Right Input signal
level.
[7] INPUT ANALOG/DIGITAL switch
Select between analog or digital external input.
[8] ALC/ATT switch
Record level limiter or MIC/LINE/INST attenuator.
ON - Limits any analog input signal greater than
-6 dB. Record balance and Record Level are
inactive when ALC is on.
OFF - Set level using left and right MIC/LINE/INST
(or INT MIC) level controls. Levels in excess of 0
dB may be recorded and may result in distorted
recordings.
-15dB – Reduces right and left MIC levels by
-15dB. Does not effect the internal mic.
[9] MIC/LINE SPLIT/STEREO/MIX switch
Determines how the signal from the CD drive and
the signals from the MIC/LINE/INST (or INT MIC)
inputs are recorded.
SPLIT - Left and right signals from the CD drive
are sent to the left channel of the recording. Left
and right signals from MIC/LINE/INST (or INT MIC)
are sent to the right channel of the recording.
Left and right signals from the AUX inputs are sent
to the left and right channels of the recording.
1 2 3 4 5 6 7 8 9 10 11
17 16 15 14 13 12
- 8 -

Most of the controls on the remote work identically to
the controls on the unit. Special attention is given here
for controls that are on the remote only or that
function differently from controls on the unit.
Note: When using the remote to scroll through
menus, use the forward search button >> to scroll
forward and the backward search button << to scroll
backward. Press the Enter button to confirm selections.
1) CD-R select button. Press to select the CD-R drive.
When selected, buttons on this remote such as Play,
Pause, Stop, and Search work on the CD-R drive.
2) CD select button. Press to select the CD player
drive. When selected, buttons on this remote such
as PLAY, PAUSE, STOP and SEARCH work on the CD
player drive.
3) TEMPO RESET button. Pressing the TEMPO RESET
button on the remote will reset the tempo to 0%
(normal speed).
4) VOLUME MUTE (VOL MUTE). Press to mute the
audio to the Line Output. This does not affect the
built-in speaker.
5) VOLUME UP/DOWN. Press these buttons to control
the volume of the audio sent to the Line Output.
6) BALANCE LEFT/ BALANCE RIGHT buttons (BAL
LEFT/ BAL RIGHT). Press these buttons to control
the right-left stereo balance of the Line Output and
headphones, and the right-left channel mix of the
speaker.
7) BALANCE RESET (BAL RESET). Press this button to
return the right-left stereo balance of the Line
Output and headphones, and the right-left channel
mix of the speaker, to the center position (right and
left channels equal).
8) Alphanumeric keypad. Performs some of the
functions of the SELECT jog wheel. In Play and
Program modes, press a number to select a track.
Then press ENTER to enter the selection. When
entering CD TEXT, press a number button once to
select the first of the three letters, twice for the
second and three times for the third. Press ENTER to
enter the selected letter.
STEREO - Left and right signals from the CD
drive are sent to the left and right channels of the
recording. Left and right signals from the MIC/
LINE/INST (or INT MIC) and/or AUX inputs are
sent to the left and right channels of the
recording.
MIX - Left and right signals from the CD drive
and the AUX inputs are sent to the left and right
channels of the recording. MIC/LINE/INST (or INT
MIC) inputs are mixed together and then sent to
both channels of the recording.
[10] SPEAKER OFF/ON switch
Turns the built-in speaker ON or OFF.
[11] OPEN/CLOSE switch
Press to OPEN the CD-R drive. Press again to
CLOSE the CD-R drive.
[12] Remote control sensor
Sensor for the supplied wireless remote control.
[13] CD-R drive (disc tray)
In this manual, this drive is referred to as the
CD-R drive or CD Recording drive. It is used for
recording and can record both CD-R and CD-RW
discs. NOTE: It cannot
record in MP3 file format.
The CD-R drive can
also playback CD,
CD-R and CD-RW
discs. You can not
use music practice
features such as key and
tempo controls with this drive.
[14] Right XLR or 1/4" input jack
Plug in a microphone or line level audio source
here to provide audio to the right stereo channel.
[15] Left XLR or 1/4" input jack
Plug in a microphone, instrument or line level
audio source here to provide audio to the left
stereo channel.
[16] LINE OUT level control
Turn this knob to adjust the output level of the
LINE OUT jacks.
[17] PHONES jack
Plug stereo headphones in here. Adjust
headphone volume with the PHONE/SPEAKER
level control.
Remote Control
- 9 -

Phantom Power
Phantom Power
IN
IN
RC-5
RC-5
OUT
OUT
ON
ON
OFF
OFF
IN
IN
OFF
OFF
ON/
ON/
POWER
POWER
OUT
OUT
DIGITAL
DIGITAL
OUT
OUT
AUX
AUX
LINE
LINE
MIX
MIX
IN
IN
PEDAL
PEDAL
FOOT
FOOT
OUT
OUT
IN
IN
L
L
R
R
Input
Level
[1] MIX OUT jacks
Sound from the CD drive can be mixed with sound
from the MIC/LINE/INST input, the MIC/LINE/INT
MIC input, and the AUX IN jacks. The mixed signal
is output through the MIX OUT jack as L-R line
levels. This signal can be output to an external
recorder, amplifier or powered speakers. This signal
bypasses the CD-R drive, so it is available for output
even if the CD-R drive is stopped.
[2] LINE OUT jacks
Sound from the CD-R drive is output as L-R line
levels to an external recorder, amplifier or powered
speakers. When the CD-R drive is not recording,
the LINE OUT jacks output the MIX OUT signal.
Unlike the MIX OUT signal, the LINE OUT signal can
be adjusted by the LINE OUT level control and
equalized with the OUTPUT EQ feature (pg. 22).
[3] AUX IN jacks
Use this stereo RCA connection for recording onto
the CD-R drive from an external audio source such
as a cassette deck. Audio from the AUX IN can be
mixed with audio from the front panel inputs, the
internal microphone and the CD player drive.
[4] AUX IN level control
Turn to adjust the input signal level of the AUX IN.
[5] DIGITAL IN and OUT jacks
Plug in RCA coaxial cables here to connect to the
input and/or output of an external digital unit.
Use DIGITAL IN for recording onto the CD-R drive
from an external digital audio source. Use DIGITAL
OUT for going to an external digital device.
[6] REMOTE RC-5 IN and OUT jacks
Plug in RCA coaxial cables here to connect to the
input or output of an RC-5 remote control system.
For more information on the RC-5 system please
contact Superscope Technologies.
[7] Phantom Power ON/OFF switch
Switch ON to apply 48V phantom power to XLR
mic inputs. Switch OFF if the microphones being
used do not require 48V phantom power.
[8] FOOT PEDAL jack
An optional foot pedal can provide Play/Pause
control for the CD drive and Play/Pause or Record/
Pause control for the CD-R drive. The FT200 Foot
Pedal is available from Superscope Technologies
Inc. NOTE: Use foot pedal menu selection to
select which drive (CD or CD-R) the foot pedal is
controlling. (See pg. 22 for this menu selection).
[9] Power plug
Plug one end of the supplied power cord in here
and the other end into an AC outlet.
[10] MASTER Power switch
Press to turn power ON (in position). Press again
to turn power OFF (out position).
To retain certain settings in memory, leave this
switch ON and turn power ON and OFF with
the Standby POWER slide switch on the top of
the unit.
Back of Unit
(rear panel connections)
1 2 3 4 5 6 7 8 9 10
- 10 -

INST
INST
MIX
MIX
SPLIT
SPLIT
STEREO
STEREO
MIC/LINE
MIC/LINE
ON
ON
OFF
OFF
-20dB
-20dB
LINE
LINE
MIC
MIC
LEFT
LEFT
RIGHT
RIGHT
MIC/LINE
MIC/LINE
OPEN/CLOSE
OPEN/CLOSE
SPEAKER
SPEAKER
ALC/ATT
ALC/ATT
INPUT
INPUT
ON
ON
OFF
OFF
DIGITAL
DIGITAL
ANALOG
ANALOG
PHONE SELECTOR
PHONE SELECTOR
MIC/LINE
MIC/LINE
LINE
LINE
CD
CD
PHONE/SPEAKER
PHONE/SPEAKER
MIC/LINE
MIC/LINE
AUX
AUX
R
R
LINE OUT
LINE OUT
MIC
MIC
INT MIC
INT MIC
LEVEL
LEVEL
L
L
PHONES
PHONES
LINE OUT
LINE OUT
CD PLAY/RECORD
CD PLAY/RECORD
PUSH
PUSH
NEUTRIK
NEUTRIK
PUSHPUSH
PUSH
NEUTRIK
NEUTRIK
Powering Up
1. Check that the AC power cord fits snuggly into the
power cord jack on the back panel.
2. Make sure the back panel MASTER POWER switch is
ON. The STANDBY light should now be ON. Slide
the STANDBY POWER switch to the right. Upon
power up, this light will dim and the display will
come on.
TIP:TIP:
TIP:TIP:
TIP: If you are switching power ON/OFF via the
Remote or if you wish to retain certain settings in
memory when powering off, leave the back panel
MASTER POWER switch ON.
Setting Up Instruments, Mics
and other Sound Sources
The PSD340 is designed to work with microphones,
instruments, and line level sources (e.g., mixers, external
preamps). See the following diagrams for the setup that
suits your application:
Microphones
Setting Up Speakers
When using the built-in speaker, turn on
the SPEAKER switch. Turn off the
speaker when using headphones or
when connecting to powered speakers
or other sound equipment. Adjust
volume of the headphones or speaker by using the
PHONE/SPEAKER level knob.
The PHONE SELECTOR knob
determines which audio path will
be amplified/monitored through
the headphones and built-in
speaker. It does not affect any
audio being recorded. Use it to
monitor one of the following:
CD, AUX inputs, MIC/LINE inputs,
or LINE OUT which is a mix of the
CD drive or CD-R drive, and front
and rear panel inputs.
TIP:TIP:
TIP:TIP:
TIP: Typically, you will want to leave the PHONE
SELECTOR knob set on LINE OUT. Remember that
the LINE OUT level control affects the volume of
sound emanating from any external speakers.
Headphones or Built-In Speaker
SPEAKER
SPEAKER
ON
ON
OFF
OFF
REMOTE
REMOTE
IN
IN
RC-5
RC-5
OUT
OUT
EXT.
EXT.
INT.
INT.
IN
IN
OFF
OFF
ON/
ON/
POWER
POWER
OUT
OUT
DIGITAL
DIGITAL
OUT
OUT
AUX
AUX
LINE
LINE
MIX
MIX
IN
IN
PEDAL
PEDAL
FOOT
FOOT
OUT
OUT
IN
IN
L
L
R
R
Input
Level
Connect external powered speakers to the rear panel
RCA line outputs, making sure the Left channel line
output is securely attached to the speaker’s Left input
and the Right channel line output is securely attached
to the speaker’s Right input. (see Figure A.)
Or, similarly connect the L-R channel line outputs to the
L-R auxiliary or line inputs of a stereo amplifier that is
attached to speakers.
External Speakers
Fig A. - Powered Speaker Set Up
1. Set both front panel input switches to MIC. The left
switch is labeled LINE/MIC/INST and the right switch
is labeled LINE/MIC/INT MIC.
2. Plug microphones into either the XLR or 1/4” front
panel inputs, depending on your mic type
3. For condenser microphones that use batteries, make
sure the mic’s batteries are fresh. When using
microphones that require +48V phantom power,
connect mics to the XLR inputs and make sure that
the phantom power switch on the rear panel is ON.
4. See Setting Levels sidebar (pg. 12).
Set Up
- 11 -
INST
MIX
SPLIT
STEREO
MIC/LINE
ON
OFF
-20dB
LINE
MIC
LEFT
RIGHT
MIC/LINE
OPEN/CLOSE
SPEAKER
ALC/ATT
INPUT
ON
OFF
DIGITAL
ANALOG
PHONE SELECTOR
PHONE SELECTOR
MIC/LINE
LINE
CD
CD
PHONE/SPEAKER
PHONE/SPEAKER
MIC/LINE
MIC/LINE
AUX
AUX
R
LINE OUT
LINE OUT
MIC
INT MIC
LEVEL
LEVEL
L
PHONES
PHONES
LINE OUT
LINE OUT
CD PLAY/RECORD
PUSH
NEUTRIK
PUSH
NEUTRIK

INST
INST
MIX
MIX
SPLIT
SPLIT
STEREO
STEREO
MIC/LINE
MIC/LINE
ON
ON
OFF
OFF
-20dB
-20dB
LINE
LINE
MIC
MIC
LEFT
LEFT
RIGHT
RIGHT
MIC/LINE
MIC/LINE
OPEN/
COPEN/CLOSE
SPEAKER
SPEAKER
ALC/ATT
ALC/ATT
INPUT
INPUT
ON
ON
OFF
OFF
DIGITAL
DIGITAL
ANALOG
ANALOG
PHONE SELECTOR
PHONE SELECTOR
MIC/LINE
MIC/LINE
LINE
LINE
CD
CD
PHONE/SPEAKER
PHONE/SPEAKER
MIC/LINE
MIC/LINE
AUX
AUX
R
R
LINE OUT
LINE OUT
MIC
MIC
INT MIC
INT MIC
LEVEL
LEVEL
L
L
PHONES
PHONES
LINE OUT
LINE OUT
CD PLAY/RECORD
CD PLAY/RECORD
PUSH
PUSH
NEUTRIK
NEUTRIK
PUSHPUSH
PUSH
NEUTRIK
NEUTRIK
REMOTE
REMOTE
IN
IN
RC-5
RC-5
OUT
OUT
EXT.
EXT.
INT.
INT.
IN
IN
OFF
OFF
ON/
ON/
POWER
POWER
OUT
OUT
DIGITAL
DIGITAL
OUT
OUT
AUX
AUX
LINE
LINE
MIX
MIX
IN
IN
L
L
PEDAL
PEDAL
FOOT
FOOT
R
R
OUT
OUT
IN
IN
L
L
R
R
INST
INST
MIX
SPLIT
STEREO
MIC/LINE
ON
OFF
-20dB
LINE
LINE
MIC
MIC
LEFT
LEFT
RIGHT
RIGHT
MIC/LINE
MIC/LINE
OPEN/CLOSE
SPEAKER
ALC/ATT
INPUT
ON
OFF
DIGITAL
ANAL
OANALOG
PHONE SELECTOR
PHONE SELECTOR
MIC/LINE
MIC/LINE
LINE
LINE
CD
CD
PHONE/SPEAKER
PHONE/SPEAKER
MIC/LINE
MIC/LINE
AUX
AUX
R
R
LINE OUT
LINE OUT
MIC
MIC
INT MIC
INT MIC
LEVEL
LEVEL
L
L
PHONES
PHONES
LINE OUT
LINE OUT
CD PLAY/RECORD
PUSH
PUSH
NEUTRIK
NEUTRIK
PUSHPUSH
PUSH
NEUTRIK
NEUTRIK
Internal Microphone
1. Set the Right LINE/MIC/INT MIC switch to “INT MIC.”
2. When “INT MIC” is selected, both the left level
control and the right level controls are active. Adjust
both left and right level controls to determine how
much signal is sent to either channel.
3. When using the INTERNAL MIC, it is recommended
that the SPEAKER switch be turned OFF. If you need
to monitor the incoming sound, use headphones.
Using headphones avoids feedback--the nasty squeal
that is heard when the mic picks up sound from the
speaker and amplifies it, creating a feedback loop.
Using the remote will also ensure that the INTERNAL
MIC will not pick up the sound of any buttons being
depressed.
4. See Setting Levels sidebar on this page.
Instruments
1. Set the Left LINE/MIC/INST switch to “INST.”
2. Plug an instrument into the Left 1/4” front panel
input.
3. Set the Right LINE/MIC/INT MIC switch to “LINE.”
4. See Setting Levels sidebar on this page.
Setting Levels
If you are setting levels while using the CD
recorder drive, make sure to press RECORD
first. This will place the unit in record pause
mode. You may set levels at any time during
CD player operation. As you sing or play your
instrument, turn the Left and Right input-level
control knobs clockwise while observing the
display VU meters. When your performance is
at its loudest, the VU meter should read close
to 0 dB without going into the red zone. If
the meter consistantly bounces into the red,
adjust the level control knob counter clock-
wise to reduce the level. If your mics have
higher than normal output, try switching the
ALC/ATT switch to -15dB. Peaking at 0 dB will
provide the greatest dynamic range while
avoiding distortion.
Line Level Sources
1. Set the Left LINE/MIC/INST switch to “LINE” and set
the Right LINE/MIC/INT MIC switch to “LINE.”
2. Line level equipment can be connected to the front
panel Right and Left inputs ... OR ... to the rear panel
RCA AUX inputs. Note: When connecting an auxil-
iary source into the rear panel AUX inputs, you can
adjust the signal input level using the AUX IN control
on the rear panel. Use the front panel inputs for
individual control of Right and Left input levels.
3. See Setting Levels sidebar on this page.
OR
R
L
dB-50 -30 -22 -16 -12 -8 -4 0OVER
- 12 -
SIDEBAR
Mixer
Stereo Preamp

Music Practice & CD Playback
5. Press the TUNER button to stop the tone genera-
tor and exit the Tuner.
NOTE: The next time you press the TUNER button,
the 440Hz tone will sound. This is because the
PSD340 remembers which mode; Chromatic or
Tuning Tone was used last. To switch back to the
Chromatic Tuner, simply turn the SELECT jog wheel
and select “Chromatic Tuner.” The unit will return
to the Chromatic Tuner display.
Adjusting the Tuning Tone
The Tuning Tone can be adjusted between 435 and
445Hz. Follow these steps for adjusting Tuner
frequency.
1. While the Tone generator is active and the display
shows your current Tone frequency and volume
settings, press the SELECT jog wheel.
2. The display will now read “TUNER FREQ ADJ.”
Press the SELECT jog wheel to enter.
3. The current frequency setting will blink. Turn the
SELECT jog wheel to adjust the frequency.
4. Press the SELECT jog wheel to confirm changes.
The display will now show the current Tone
frequency and volume settings.
To adjust the volume of the Tuning Tone:
1. While the tone generator is active and the display
shows your current Tone frequency and volume
settings, press the SELECT jog wheel.
2. The display will now read “TUNER FREQ ADJ.”
Turn the SELECT jog wheel until the display reads
“TUNER VOL ADJ.” Press the SELECT jog wheel to
enter.
4. The current volume setting will now blink. Turn
the SELECT jog wheel to adjust the volume.
5. Press the SELECT jog wheel to confirm changes.
The display will show the current Tone frequency
and volume settings.
- 13 -
INST
MIX
SPLIT
STEREO
MIC/LINE
ON
OFF
-20dB
LINE
MIC
LEFT
RIGHT
MIC/LINE
C
LOSE
OPEN/CLOSE
SPEAKER
ALC/ATT
INPUT
ON
OFF
DIGITAL
ANALOG
PHONE SELECTOR
MIC/LINE
LINE
CD
PHONE/SPEAKER
MIC/LINE
AUX
R
LINE OUT
MIC
INT MIC
LEVEL
L
PHONES
LINE OUT
CD PLAY/RECORD
PUSH
NEUTRIK
PUSH
NEUTRIK
REMOTE
IN
RC-5
OUT
EXT.
INT.
IN
OFF
ON/
POWER
OUT
DIGITAL
OUT
AUX
LINE
MIX
IN
L
PEDAL
FOOT
R
OUT
IN
L
R
How to Use the Tuner
The PSD340 has two modes for tuning your instrument,
Chromatic Tuner or 440Hz Tuning Tone.
Using the Chromatic Tuner
The PSD340 Chromatic Tuner will pick up monophonic
signals from the Left Mic/Line/Inst input, the Right Mic/
Line input or the internal mic. The musical note corre-
sponding to the incoming frequency is displayed in
concert pitch as natural (no indication) or sharp (#). The
Tuner operates on a wide range of pitches from A0 to
C8. The CD and CD-R must be in Stop Mode for the
Tuner to operate.
1. Press the TUNER button.
2. Turn the SELECT Jog Wheel until the display reads
“Chromatic.” Press the SELECT Jog Wheel to accept
this selection. The chromatic tuner display will
appear.
3. Play a note on your instrument and watch, as the
unit will display the closest musical pitch.
4. Adjust the pitch of your instrument until the square
indicator is in the center box. Right (sharp) or left
(flat) arrows indicate an out of tune condition.
5. Press the TUNER button to exit the Tuner.
How to Use the 440Hz Tuning Tone
1. Press the TUNER button.
2. If the display reads, “Chromatic”,turn the SELECT jog
wheel until the display reads “Tuner Tone.”
3. Press the SELECT jog wheel to accept change. A
440Hz tone will sound in the speaker, headphones,
and LINE OUT.
4. Play the appropriate tuning note on your instrument
and adjust the instrument to match the 440Hz tone
generated by the PSD340.
CD
R
L
dB-50 -30 -22 -16 -12 -8 -4 0
TOTAL
OUT OF TUNE
CD
R
L
dB-50 -30 -22 -16 -12 -8 -4 0
TOTAL
IN TUNE

How to Use the Metronome
The sound of the metronome will be output through the
Line Out. When using the PSD340 with a separate
amplifier or powered speakers (pg. 11), it may be best
to turn down the LINE OUT level control knob on the
front panel before starting the metronome and then
turn the LINE OUT level control up to an appropriate
listening level. If the PHONE SELECTOR knob is set for
LINE OUT, the metronome will also be heard in the
speakers and headphones. Therefore, you may also want
to turn the PHONE/SPEAKER LEVEL knob down before
starting the metronome and then turn the PHONE/
SPEAKER LEVEL up to an appropriate listening level.
The METRONOME has four adjustable parameters,
• Tempo
• Metronome Volume
• Accent Beat
• Accent Beat Level
Tempo and Metronome Volume
1. Press the METRONOME (METRO) button. The
metronome will start “clicking” and the tempo will
be displayed.
2. To change the tempo, press the SELECT jog wheel.
The tempo will start to blink. Turn the SELECT jog
wheel to adjust the tempo. Press the SELECT jog
wheel to accept the change or wait 10 seconds and
the PSD340 will automatically accept it.
3. The display will now show the new tempo. To adjust
the metronome volume, turn the SELECT control
until the display shows the current metronome
volume setting.
4. Press the SELECT jog wheel. The metronome volume
will start to blink.
5. Turn the SELECT jog wheel to adjust metronome
volume. Then press the SELECT jog wheel to accept
the change.
6. Press the METRONOME button to stop the metronome.
Accent Beat and Accent Beat Levels
By designating a particular beat to play louder than
others, the PSD340 metronome is able to imply different
rhythmic meters. For instance, setting the Accent Beat
to 3 will cause every third beat to sound louder than the
other two. At moderate tempos, this will create a Waltz
feel. Adjusting the Accent Beat volume will determine
how much louder the Accent Beat will sound over the
non-accented beats.
Follow these steps for adjusting Accent Beat and Accent
Beat volume:
1. Press the METRO button. The metronome will start
“clicking” and the tempo will be displayed.
2. Turn the SELECT jog wheel until the display shows
the current Accent Beat setting. Press the SELECT jog
wheel to enter.
3. The Accent Beat value (abbreviated as ACENT)
should be flashing. Turn the SELECT jog wheel to
change the Accent Beat. The Accent Beat is adjust-
able from 1-6 or turned OFF for no accent. Press the
SELECT jog wheel to enter the change.
4. The display will now show the new Accent Beat.
Turn the SELECT jog wheel until the display shows
the current Accent Volume setting. Press the SELECT
jog wheel to enter.
5. The current Accent Volume will be flashing. Turn the
SELECT jog wheel to adjust the Accent Volume. Press
the SELECT jog wheel to enter.
The display will show the new Accent Volume. After
10 seconds, the unit will return to the main metro-
nome display.
NOTE: For the Accent Beat to be heard, the Accent
Beat Volume must be higher than the Metronome
Volume level. The PSD340 automatically adjusts the
Accent Beat to a higher level than the Metronome
Volume. However, you can adjust the volume
difference by either increasing the Accent Beat
Volume level or decreasing the Metronome Volume
level.
R
L
dB-50 -30 -22 -16 -12 -8 -4 0
R
L
dB-50 -30 -22 -16 -12 -8 -4 0
R
L
dB-50 -30 -22 -16 -12 -8 -4 0
R
L
dB-50 -30 -22 -16 -12 -8 -4 0
R
L
dB-50 -30 -22 -16 -12 -8 -4 0
- 14 -

Playing a CD
When placing a CD in the CD player drive, be sure to
firmly push the CD onto the drive spindle so the CD snaps
into the place and doesn’t wobble. When you close the
drive lid, after a moment the display will show the total
number of tracks and total playing time on the CD.
NOTE: You can always tell which drive is active (the CD
player or CD recorder) by which set of control buttons
are lit. You can change the active drive by pressing the
SELECT jog wheel or pressing the Stop button of the
drive to be activated.
In Play mode, change tracks by turning the SELECT jog
wheel.
Selecting A-B Practice Loops
When practicing with a CD audio track in either drive, it
is easy to continuously loop a section of music. Here are
the steps:
1. While a CD is playing, press the A-B button when
playback reaches the beginning of the segment you
want to repeat (A point).
2. Press the A-B button again when playback reaches
the end of the segment you want to repeat (B point).
Playback will automatically start again from the A
point when the B point is reached.
ALTERING THE AB LOOP
1. You can make the B point the A point of the next
loop by pressing the A-B button again. Let playback
continue until you reach the end of the next segment
you wish to loop, then press the A-B button again. In
this way, you can select loops and step through an
entire song.
TOTAL TRACK
CD
R
L
dB-50 -30 -22 -16 -12 -8 -4 0
CD
START END
00:00
A-B
A-B
2. At any time before or after you select an A-B loop,
you can also use the other music practice features
such as Key and Tempo changing.
3. To keep the A point but extend the loop to a new B
point, press and hold the A-B button for one second.
Press the A-B button again to set a new B point,
while keeping the A point.
Changing Key & Tempo
The CD player drive allows control of key (musical pitch)
and tempo of any CD or MP3 file on CD.
Changing Key
KEY control can change a music
CD or MP3 on disc as much as an
octave up or down. Press either
of the Key Change buttons once
to start key control.
The KEY control system works on the following musical
principles:
100 cents = 1 half step
2 half steps = 1 whole step
12 half steps = 1 octave
There are two key change methods available, depending
on how long you hold down the buttons.
Half Step Method: When playing a CD, press and hold
to decrease or increase the key in half step increments.
The display will read whole integers for each half step.
(For example,1.00 = 1 half step)
12.5 Cent Increment Method. If Key control is active,
and you press or without holding, the key will
change by 12.5 cent increments. The display shows the
increment rounded to 0.13 cents. (For example, 1.13 =
1 half step + 12.5 cents).
• Press both the and buttons at the same time to
return to the original Key position (0.00).
• If the or the buttons are pressed while another
display (such as CD-TEXT) is shown, the current
position of the KEY control is shown first. Once one
of the or buttons are pressed a second time
the Key changes.
• Once the Key has been adjusted by pressing either
the or button, it is possible to also adjust the
tempo (CD or MP3 on disc playback speed). For a
Key adjustment in the range of ±5.00 half steps or
less, the Tempo can also be adjusted -50% to +50%.
• Pressing the STOP button during stop mode will reset
the Key to the 0.00 position.
KEY
- 15 -

TEMPO control
TEMPO can be changed as much
as +50% to -75%.
• Pressing the “+” button
increases the speed in incre-
ments of 1%.
• Pressing the “-” button decreases the tempo in steps
of 1%.
• Holding down either a “+” or a “-” button causes
the tempo adjustment to change in 5% increments.
Pressing both the “+” and “-” buttons at the same
time returns the TEMPO to 0% (original tempo).
Fine Tuning
Once the Tempo has been adjusted by pressing either
the “-” or “+” button, it is possible to also “fine tune”
the key (musical pitch). Fine tuning is useful when
practicing an instrument because it lets you adjust the
music practice source (CD drive only) to your instru-
ment. (+/- 2% maximum adjustment.)
After the desired tempo change has been made, press
to lower the key (musical pitch) or to raise it.
The button lowers the tuning in 0.1% increments
and is displayed as a whole number with a “-” sign. For
example, to lower the tuning by 0.8% the display
should read “TUNING -0.8”.
The button raises the tuning in 0.1% increments and
is displayed as a whole number with a “+” sign. For
example, to raise the tuning of the CD or MP3 by 1.5%
the display should read “TUNING + 1.5.”
Voice Reduction
In most commercial recordings, prominent elements
such as lead vocals are mixed in the center of the stereo
field (equal amounts on the right and the left channel).
With this in mind, the VR feature is able to reduce the
relative volume of lead vocals by cancelling certain
elements in the center channel. This is useful for
vocalists who want to blend their voices with a stereo
recording containing prerecorded lead vocals.
NOTE: The results of this feature will vary. VR will be less
TEMPO
effective if the lead vocal in the recording was not
originally mixed in the center of the stereo field or if a
considerable amount of stereo processing such as reverb
and delay has been added to the lead vocal track.
While the CD player drive is playing or paused, press the
VR button. The display will show the VR status.
Pressing the VR button again switches the status of
voice reduction. When voice reduction is ON, VR is
displayed during play.
CD
TRACK R
L
dB-50 -30 -22 -16 -12 -8 -4 0
TOTAL TRACK
CD
R
L
dB-50 -30 -22 -16 -12 -8 -4 0
CD
- 16 -
If your Key adjustment is greater than 5.00 half steps,
then no tempo adjustment can be made. To adjust both
Key and Tempo, you must first adjust Key and then
adjust Tempo. Adjusting Tempo first will turn on the Fine
Tune feature.
NOTE: A-B Looping, Key, Tempo and Voice Reduction
can only be applied to the CD being played in the top
CD player drive.
When Voice Reduction is ON, the OUTPUT EQ feature
will be not be available in the menu.

Making a Live Recording
We realize that one of the primary reasons you pur-
chased a PSD340 is to record live to CD. That’s why
we’ve made the recording process as direct as possible.
It shouldn’t take long from the time you open the box
to the time you record your first CD. Just follow these
simple steps:
1. Insert a disc. The
PSD340 can record
onto any 1X or 2X
compatible CD-R (write
once), or CD-RW
(rewritable) disc. Just
make sure you place
the disc in the CD
recording drive and not the
CD player drive on top!
2. Connect your equipment. If you’ve already set up
the PSD340 for practice, you may be ready to move
on. If not, see pages 11-12 for setting up micro-
phones, instruments and line level sources.
3. Set the INPUT switch to “ANALOG.” This switch is
located above the CD recording drive. The INPUT
switch tells the PSD340 what type of signal it will be
recording. Microphones, instruments, and most
mixers are analog sources. Don’t let this switch
confuse you. Even though you are making a digital
CD recording, input sources are typically analog. The
only time you would set this switch to DIGITAL, is if
you were recording from the rear panel digital input.
(see sidebar pg. 18)
4. Press the RECORD button. The
first time you press RECORD, the
PSD340 enters ‘Record Pause
Mode.’ In this mode, you will now
be able to adjust the Record
Levels.
5. Set your record levels. After a moment, the display
will now prompt you to ‘Push Rec Key.’ But, you may
want to first adjust your record levels. The overall
record level is set by turning the SELECT jog wheel
control. This level is adjustable from -78dB to +6dB.
While monitoring record levels, we recommend using
headphones. This helps to eliminate feedback. (See
pg.12 for advice on how to set up the PSD340 to
record optimal levels.)
Recording 6. Press RECORD again. You are now recording. The
level meters should respond to your Input signals
(mics, instruments, etc.) and the counter should
display the total elapsed time for the track you are
recording. The red dot and triangular “PLAY” icon in
the display indicate that a recording is in progress.
Press STOP to end the recording or
press the REC REVIEW button on
the unit or remote to listen back
to the most recent track recorded.
(See PLAY Controls pg. 7, [5].)
This CD will playback in the CD recording drive or the
CD player drive. To playback this CD in other standard
CD players, proceed to HOW TO FINALIZE (pg.21).
TIP: For standard stereo recording, make sure the
MIC/LINE SPLIT switch is set for STEREO. This
ensures that the left input is recorded to the left
channel and the right input is recorded to the
right channel. For MIC/LINE SPLIT/STEREO/MIX
switch operation. (See pg. 8).
Independent Drive Operation
When you turn on the PSD340, by default the CD
recording drive will operate independently from the CD
playback drive. This allows you to start and stop either
the CD player or CD recorder at any time during the
recording process. When the INPUT ANALOG/DIGITAL
switch is in the ANALOG position, the CD player audio
will be channeled to the CD-R drive.
Track Increments
Creating New Tracks Manually
Every time you press STOP or PAUSE during the record-
ing process, you will create a new track. To create new
tracks during recording, press the TR INC button on the
top panel or the IR remote. You can create up to 99
tracks on a CD-R or CD-RW disc.
Auto Track Mode
When copying prerecorded material from external
sources, tracks can be set automatically by using AUTO
TRACK Mode. Press the MENU/STORE button and select
“AUTO TRACK.” Change the AUTO TRACK status to
REC
CD-RW
dB-50 -30 -22 -16 -12 -8 -4 0OVER
R
L
TRACK
CD
R
L
dB-50 -30 -22 -16 -12 -8 -4 0
CD-RW
REC REVIEW
- 17 -

Certain mixers and outboard effects processors are
equipped with digital outputs. If you are recording with
equipment that has a coaxial digital output, connect to
the PSD340’s DIGITAL IN. Follow the same recording
steps from pg. 17, with the exception of step #3.
When recording digital equipment, set the Input switch
to “DIGITAL.”
Adding Reverb or Delay
You can add a reverb or a delay effect to either input
(right or left) on the front panel and the AUX IN. The
PSD340 provides three effects presets: ROOM REVERB,
HALL REVERB, and DELAY. Only one preset can be
used at a time. After an effect preset is selected, you
are then able to determine how much of the effect
you want in each channel. This is known as the MIX
parameter. Reverb cannot be added to recorded tracks.
1. Press the REV/DLY button.
2. Turn effects ON. The display should read “REV/
DELAY OFF”. Turn the SELECT jog wheel to change
the display to “REV/DELAY ON.” Press the SELECT jog
wheel to enter.
3. Select an effect preset. As you turn the SELECT jog
wheel, the display should indicate the different preset
options, REVERB ROOM, REVERB HALL, and DELAY.
Press the SELECT jog wheel to choose a preset.
If you find the sound of the effect to be appropriate,
press the REV/DLY to exit the effects menu and continue
practicing or recording. If you would like to fine tune
certain parameters, proceed to the following section.
4. Adjust the Delay Time. If you have chosen REVERB
ROOM OR REVERB HALL, skip to step #5. If you have
chosen DELAY, you will now be able to adjust delay
time. When the display reads “DELAY TIME,” press
the SELECT jog wheel. The actual delay time value is
now displayed in milliseconds and should be blinking.
The PSD340 is capable of producing delay times up to
1 second. Turn the SELECT jog wheel to adjust the
delay time and press the SELECT jog wheel to enter
the change.
5. Adjust the MIX levels. For each preset, the PSD340
has default MIX settings designed to provide a moder-
ate blend of processed and unprocessed sound. If you
would like to hear more or less Reverb or Delay in
either the right or left channel, adjust the MIX levels.
Here’s how:
a. After completing steps 1-4, the display will read
“MIX LEFT.” Press the SELECT jog wheel to accept.
b. The MIX percentage is now flashing. Turn the
SELECT jog wheel to adjust the MIX level. As you
turn the SELECT jog wheel, you should be able to
hear the change in MIX level. Press the SELECT jog
wheel to accept your setting. The display should
read “MIX LEFT.”
c. If you do not need to adjust the RIGHT MIX level,
press the REV/DLY button to return to the CD
display. If you do need to adjust it, turn the SELECT
jog wheel to change the display to “MIX RIGHT”
and press the SELECT jog wheel to accept.
d. The MIX percentage is now flashing. Turn the
SELECT jog wheel to adjust the RIGHT MIX level.
Press the SELECT jog wheel to accept your setting.
e. Press the REV/DLY button to return to the CD display.
Here’s how the MIX function works.
• A MIX setting of 100% means that all audio is
processed through the Reverb/Delay effect.
- 18 -
REVERB/DELAY
INPUT
>
>
100%
0%
+
100%
ON by turning the SELECT jog wheel. Press it to accept
the change. Press the MENU/STORE button to exit and
proceed with recording. The unit will then increment
tracks when audio falls below a threshold of silence (-
40dB) for a minimum of three seconds.
Minute Track Mode
MINUTE TRACK will automatically create a track incre-
ment every minute during recording. That means each
track is one minute long, offering a quick and conve-
nient way to locate a particular time in a recording. For
example, Track 10 is ten minutes into the recording, and
Track 17 is 17 minutes into the recording.
To access this mode press the MENU/STORE button, then
select “AutoTrack.” Select “MIN” and press ENTER.
Recording from the DIGITAL INPUT
REMOTE
REMOTE
IN
IN
RC-5
RC-5
OUT
OUT
EXT.
EXT.
INT.
INT.
IN
IN
OFF
ON/
POWER
OUT
OUT
DIGITAL
DIGITAL
OUT
OUT
AUX
AUX
LINE
LINE
MIX
MIX
IN
IN
L
L
PEDAL
PEDAL
FOOT
FOOT
R
R
OUT
OUT
IN
IN
L
L
R
R
Effects Processor
Table of contents
Other Superscope Recording Equipment manuals

Superscope
Superscope PSD410 User manual

Superscope
Superscope pmr61 User manual

Superscope
Superscope PSD430 User manual

Superscope
Superscope PSD450 User manual

Superscope
Superscope PSD450mk II User manual

Superscope
Superscope PSD450mkII User manual

Superscope
Superscope PSD300 User manual

Superscope
Superscope PSD410 User manual

Superscope
Superscope PSD430 User manual

Superscope
Superscope PSD450mkII User manual