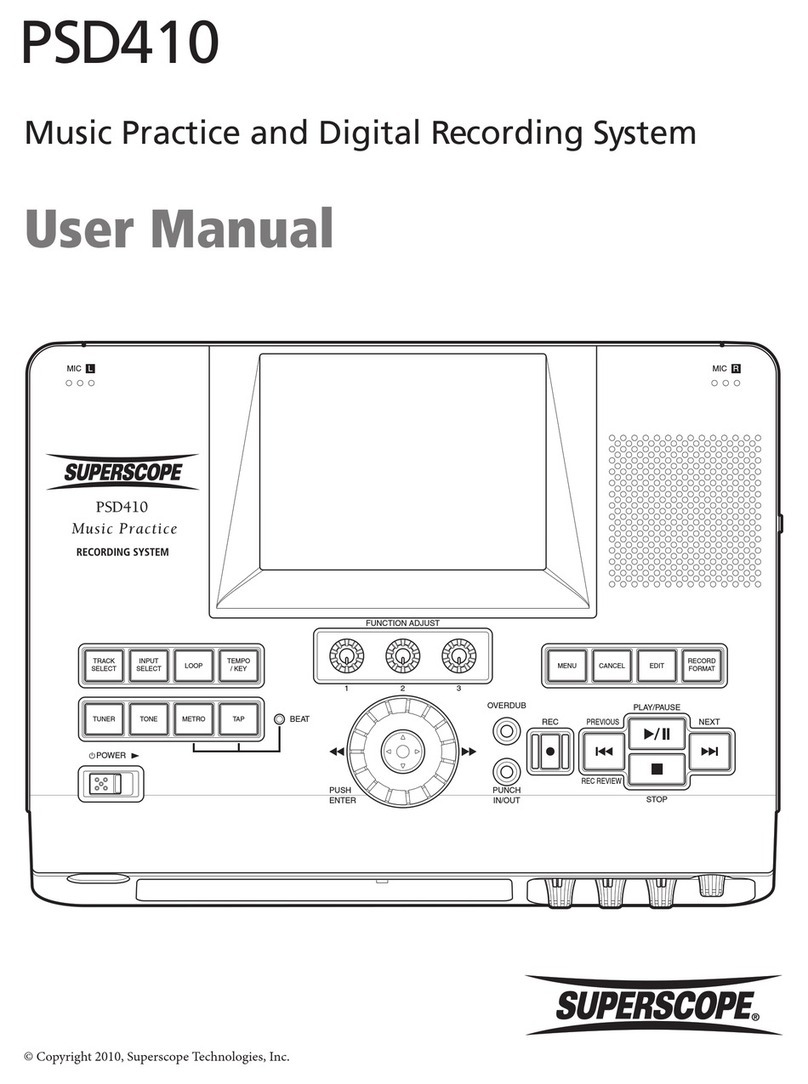
Superscope PSD410 User manual

Quick Start Guide
© Copyright 2010, Superscope Technologies, Inc.
PSD410
Music Practice and Digital Recording System
PREVIOUS
OVERDUB
PUNCH
IN/OUT
PUSH
ENTER
BEAT
LMIC RMIC
32
FUNCTION ADJUST
1
NEXT
PLAY/PAUSE
REC REVIEW
STOP
REC
POWER
TAPMETROTONETUNER
TEMPO
/ KEY
LOOP
INPUT
SELECT
TRACK
SELECT EDITCANCELMENU RECORD
FORMAT

- 2 -
The lightning flash with arrowhead symbol
within an equilateral triangle is intended to
alert the user to the presence of uninsulated
"dangerous voltage" within the product's
enclosure that may be of sufficient magnitude to
constitute a risk of electric shock to persons.
The exclamation point within an equilateral
triangle is intended to alert the user to
the presence of important operating and
maintenance (servicing) instructions in the
literature accompanying the appliance.
Important Safety
Instructions
READ BEFORE OPERATING EQUIPMENT
This product was designed and manufactured to meet strict quality
and safety standards. There are, however, some installation and
operation precautions which you should be particularly aware of.
1. Read instructions.
2. Keep these instructions.
3. Heed all warnings.
4. Follow all instructions.
5. Clean only with dry cloth.
6. Do not use this apparatus near water.
7. To ventilate the unit, do not install it in a rack or bookshelf, and
note the following: Do not insert objects beneath the unit. Do not
block ventilation slots at the top of the unit. Do not place anything
about 1 meter above the top panel. Make a space of about 8“ (20
cm) around the unit.
8. Do not install near nay heat sources such as radiators, heat
registers, stoves, or other apparatus (including amplifiers) that
produce heat.
9. Do not defeat the safety purpose of the polarized or grounding-
type plug. A polarized plug has two blades with one wider than
the other. A grounding type plug has two blades and a third
grounding prong. The wide blade or the third prong are provided
for your safety. If the provided plug does not fit into your outlet,
consult an electrician for replacement of the obsolete outlet.
10. Protect the power cord from being walked on or pinched
particularly at plugs, convenience receptacles, and the point where
they exit from the apparatus.
11. Only use attachments/accessories specified by
the manufacturer.
12. Use only with the cart, stand, tripod, bracket,
or table specified by the manufacturer, or
sold with the apparatus. When a cart is used,
use caution when moving the cart/apparatus
combination to avoid injury from tip-over.
13. Unplug this apparatus during lightning storms or when unused for
long periods of time.
14. Refer all servicing to qualified service personnel. Servicing is
required when the apparatus has been damaged in any way, such
as power-supply cord or plug is damaged, liquid has been spilled
or objects have fallen into the apparatus, the apparatus has been
exposed to rain or moisture, does not operate normally, or has
been dropped.
Additional Safety Information!
• This product should not be placed in a built-in installation such
as a bookcase or rack unless proper ventilation is provided or the
manufacturer’s instructions have been adhered to.
• Apparatus shall not be exposed to dripping or splashing and that
no objects filled with liquids, such as vases, shall be placed on the
apparatus.
• When the switch is in the OFF position, the apparatus isn’t
completely switched-off from the MAINS.
WARNINGS
Do not expose the equipment to rain or moisture.
Do not remove the cover from the equipment.
No naked flame sources, such as lighted candles, should be placed on the
equipment.
Protect the power cord from being walked on or pinched particularly at plugs,
convenience receptacles, and the point where they exit from the apparatus.
Set the unit up on an even surface away from direct sunlight, high
temperatures, high humidity, and excessive vibration.
Do not place heavy items on the unit.
Do not use high voltage power sources. This can overload the unit and cause a
fire.
Do not handle the plug with wet hands. This can cause electric shock.
Do not let metal objects fall inside the unit.
Do not let liquids get into the unit.
Do not spray insecticides onto or into the unit.
Do not attempt to repair this unit by yourself.
WARNING
TO REDUCE THE RISK OF FIRE OR ELECTRIC SHOCK, DO NOT
EXPOSE THIS PRODUCT TO RAIN OR MOISTURE.
CAUTION: TO PREVENT ELECTRIC SHOCK, MATCH WIDE
BLADE OF PLUG TO WIDE SLOT, FULLY INSERT.
ATTENTION: POUR EVITER LES CHOC ELECTRIQUES, INTRODUIRE LA
LAME LA PLUS LARGE DE LA FICHE DANS LA BORNE CORRESPONDANTE
DE LA PRISE ET POUSSER JUSQUíAU FOND.
NOTE TO CATV SYSTEM INSTALLER:
This reminder is provided to call the CATV (Cable-TV) system installer’s
attention to Section 820-40 of the NEC which provides guidelines for
proper grounding and, in particular, specifies that the cable ground
shall be connected to the grounding system of the building, as close to
the point of cable entry as practical.
NOTE: This equipment has been tested and found to comply with the
limits for a Class B digital device, pursuant to Part 15 of the FCC Rules.
These limits are designed to provide reasonable protection against
harmful interference in a residential installation. This equipment
generates, uses and can radiate radio frequency energy and, if not
installed and used in accordance with the instructions, may cause
harmful interference to radio communications. However, there is no
guarantee that interference will not occur in a particular installation. If
this equipment does cause harmful interference to radio or television
reception, which can be determined by tuning the equipment off and
on, the user is encouraged to try to correct the interference by one or
more of the following measures:
• Reorient or relocate the receiving antenna.
• Increase the separation between the equipment and receiver.
• Connect the equipment into an outlet on a circuit different from
that to which the receiver is connected.
• Consult the dealer or an experienced radio/TV technician for help.
NOTE: Changes or modifications not expressly approved by the party
responsible for compliance could void the user’s authority to operate
the equipment.
This Class B digital apparatus complies with Canadian ICES-003.
Cet appareil numÈrique de la Classe B conforme à la norme NMB-003
du Canada.
SD Logo is a trademark. microSD Logo is a trademark.
CAUTION: TO REDUCE THE RISK OF ELECTRIC SHOCK,
DO NOT REMOVE COVER (OR BACK)
NO USER-SERVICEABLE PARTS INSIDE
REFER SERVICING TO QUALIFIED SERVICE PERSONNEL
RISK OF ELECTRIC SHOCK
DO NOT OPEN
CAUTION
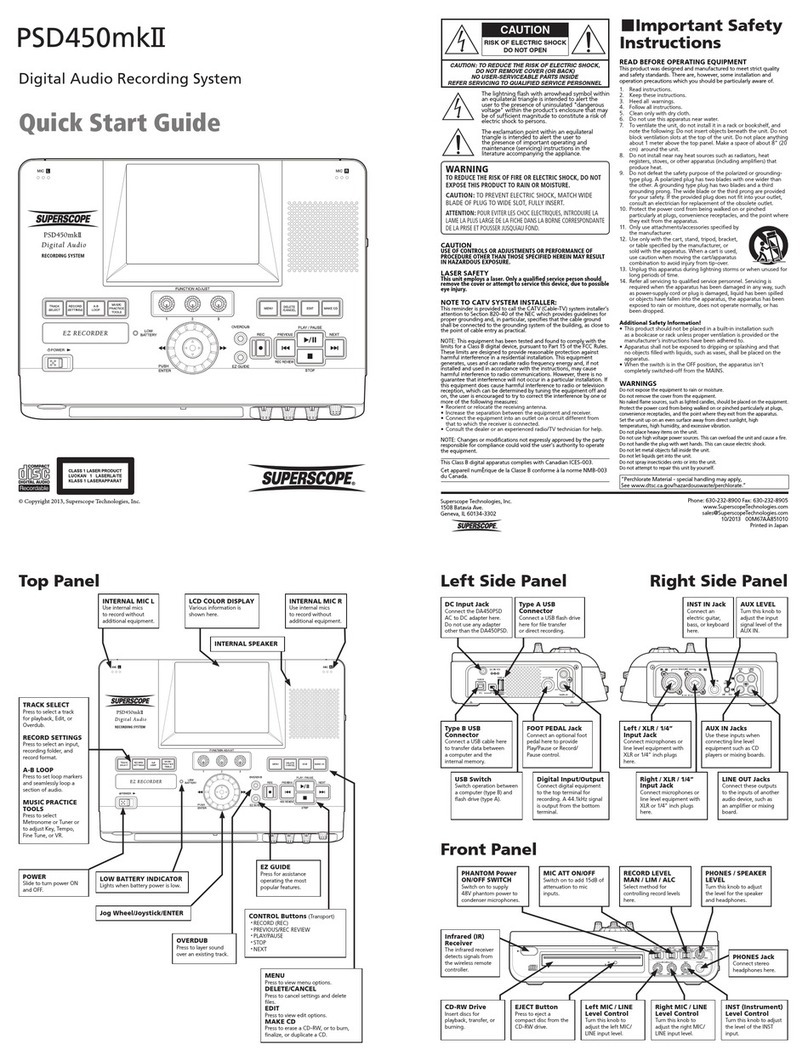
- 3 -
Table of Contents
Topic Page
Important Safety Instructions ................................................................................................................ 2
Table of Contents .................................................................................................................................... 3
Supplied Accessories............................................................................................................................... 4
Infrared (IR) Remote ............................................................................................................................................................4
AAA Batteries .....................................................................................................................................................................4
AC Adapter ......................................................................................................................................................................... 4
Micro SD Card .....................................................................................................................................................................4
Mini SD Card Adapter ......................................................................................................................................................... 4
SD Card Adapter .................................................................................................................................................................4
USB Cables ..........................................................................................................................................................................4
AC Power Cord ................................................................................................................................................................... 4
RCA Patch Cables ................................................................................................................................................................4
PSD410 Keys and Inputs/Outputs .......................................................................................................... 5
PSD410 Screen Icons ............................................................................................................................... 6
a. Status Icons .....................................................................................................................................................................6
b. Loop Icons.......................................................................................................................................................................6
c. Repeat Icons .................................................................................................................................................................... 6
d. Voice Reduction Icons .....................................................................................................................................................6
e. Monitor Icons ..................................................................................................................................................................6
f. Mute Icons .......................................................................................................................................................................6
g. AC/Battery Icons .............................................................................................................................................................6
Music Practice & Recording .................................................................................................................... 7
Powering Up .........................................................................................................................................................7
Inserting an SD Card ............................................................................................................................................7
Recording .............................................................................................................................................................7
Recording with the Internal Microphones ...........................................................................................................................7
Recording with External Microphones ................................................................................................................................ 8
Recording with the Line Inputs ...........................................................................................................................................8
Recording with the AUX Inputs .......................................................................................................................................... 8
Playback ................................................................................................................................................................8
Playback using an SD Card ................................................................................................................................................. 8
Playback using External USB Memory or Hard Drive (HDD). ................................................................................................9
Playback Controls ................................................................................................................................................................9
Loop Playback ....................................................................................................................................................10
Change Key & Tempo ........................................................................................................................................ 11
Overdub ............................................................................................................................................................. 11
A. Overdubbing for Composition (Layering sections of a Track) ........................................................................................ 11
B. Overdubbing for Practice (Recording over a Loop) ......................................................................................................... 11
Punch-In/Out ......................................................................................................................................................12
Chromatic Tuner ................................................................................................................................................ 13
Tuning Tone .......................................................................................................................................................13
Voice Reduction .................................................................................................................................................13
Metronome ........................................................................................................................................................ 13
Tap ................................................................................................................................................................................... 14
Editing .................................................................................................................................................................14
Divide................................................................................................................................................................................ 14
Combine ........................................................................................................................................................................... 14
Move ............................................................................................................................................................................... 15
Delete .............................................................................................................................................................................. 15
Copy ................................................................................................................................................................................ 15
Trim In/Out ....................................................................................................................................................................... 15
Trademarks, Copyrights and Disclaimers .........................................................................................................16

- 4 -
3
GHI
2
DEF
1
ABC
6
PQR
5
MNO
4
JKL
9
XYZ
8
VW
7
STU
0
SPACE
REPEAT
OFF
/
1
/
ALL
SDCD
DRIVE SELECT
HDDLOOP
ENTER / EXIT
MUTE
ON / OFF
BA
MENU CANCEL
FINE TUNE +
KEY RESET TEMPO RESET
ENTER
KEY
KEY
#
TEMPO TEMPO
+
FINE TUNE RESET
REMOTE CONTROL RC450PSD
LOCATION
♭
FINE TUNE
RECORD
j
POWER
MIC/LINE/AUX
ON / OFF
ON / OFF
ON / OFF
INPUT
TONE
TUNER
METRO
FOLDERSEARCH
PLAY
STOPNEXT
PREVIOUS
PAUSEFFREW
xwfd
rsa
MONTOR
REC REVIEW
Adapter
Adapter
2GB
LOCK
Infrared (IR) Remote
Micro SD Card
Mini SD Card Adapter
SD Card Adapter
USB Cables RCA Patch Cables
AC Adapter
AC Power Cord
AAA Batteries
Supplied Accessories

- 5 -
PSD410 Keys and Inputs/Outputs

- 6 -
PSD410 Screen Icons
a. Status Icons
STOP
PLAYBACK
PLAYBACK PAUSE
RECORD
RECORD PAUSE
b. Loop Icons
“A – B” Loop Playback is ON
“A – B” Loop Playback is OFF
c. Repeat Icons
Playback current track once (then stop at top
of the current track)
Playback and repeat current track
Playback all tracks once (then stop at top of
the first track)
Playback and repeat all tracks
Playback current track once (then stop at top
of the next track)
No indication when Repeat Mode is OFF
d. Voice Reduction Icons
VR is ON
No indication when VR is OFF
e. Monitor Icons
Appears when monitoring Playback Audio
Appears when monitoring Record Audio
f. Mute Icons
MUTE is ON
No indication when MUTE is OFF
g. AC/Battery Icons
Appears when the AC Adapter is connected
Indicates the battery level is full
Indicates the battery level is OK
Indicates the battery level is low
Changes to red to indicate battery level is
almost empty (needs charging or replacement)
a b c d e f g

- 7 -
Music Practice &
Recording
Powering Up
1. Connect the AC Adapter to the DC Jack [34].
2. Connect the AC Cord to the Input of the AC
Adapter, and then connect the AC Plug to AC
120V (power source).
3. Slide the Power switch [1] to power on.
Inserting an SD Card
The PSD410 will begin creating a file database once
an SD card is detected. During this process, the
PSD410 scans the SD card for audio files (WAV, MP3)
and file tag information (Artist, Title, Album, etc.).
The time to create this database will vary, based on
the contents of the SD card you insert:
A. Inserting an SD Card with a Large Number of
Audio Files
Although the PSD410 can support high capacity (mini
or micro) SD cards (8GB, 16GB, etc.), the amount of
audio files and folders you choose to store on your SD
card will directly affect the amount of time it takes to
create a file database. Superscope recommends that
you limit the number of files/folders on the SD card.
B. Inserting an SD Card with a Large Number of
Non-Audio Files
The PSD410 must scan all files before proceeding,
so using the same SD card for non-audio files is not
recommended. Any number of additional files on
your SD card (e.g., jpg, mov, pdf, etc) will slow down
database creation.
C. Inserting an SD Card Containing Large Audio
Files
When an audio file is detected on the SD card, the
PSD410 will open the audio file and begin searching
for content information, e.g. Title, Artist, Album,
etc. The PSD410 must search the entire file in case
this information is stored at the end of the file.
Large audio files therefore require more time during
database creation.
Recording
Recording with the Internal
Microphones
1. Insert a Mini SD Card into the SD Card Slot [30].
2. Push the INPUT SELECT button [2-B], and then
turn the jog wheel [5-B] until ‘Internal MIC’
appears as the Input Source.
Figure 1 — Input Select Screen
Input Source list
Input MUTE
Internal MIC
External MIC
LINE
INST
Internal MIC (L ch) + INST
External MIC (L ch) + INST
LINE (L ch) + INST
AUX
DIGITAL
Note: The Input Source setting will be stored after
the PSD410 is powered off.
3. Press the REC button [8-A] to enter Record
Standby Mode. The REC button [8-A] will flash.
4. Adjust the REC Level knobs [16] so that the Record
Level (left and right channels) does not exceed 0
dB as indicated on the Level meters See Figure 2.

- 8 -
Figure 2 — Rec Pause Screen
5. Press the REC button [8-A] again to start
recording.
6. Press the STOP button [8-D] when the recording is
complete.
Hint:
a) Press the REC button [8-A] during recording to
increment the track number.
b) The Rec Level Switch [20] determines the method
for setting record levels. The limiter [LIM] can
be used to prevent unexpected volume peaks
from distorting the recording. Select ALC [20] to
disengage the REC Level knobs [16] and set the
recording level automatically.
c) Press the PREVIOUS button [8-B] during recording
to stop the recording and playback the recorded
audio (Rec Review function).
Recording with External Microphones
1. Press the INPUT SELECT button [2-B], and then
turn the jog wheel [5-B] until ‘External MIC’
appears as the Input Source. See Figure 1.
2. Connect a microphone to the MIC/LINE INPUT
Jack [23, 24]. If your microphone requires
phantom power, switch on the PHANTOM switch
[18].
3. The remaining procedures are the same as
"Recording with the Internal Microphones.”
Hint: When using sensitive microphones, the level
indicator may display "Over" even though
the Record level controllers [16] are only
slightly turned up. In this case, switch on the
Microphone Attenuator [19] to reduce input
level and extend the range of control for the
Record level controllers [16]. The Line inputs
[23], [24] and AUX Input [27] will not be
affected the Microphone Attenuator [19].
Recording with the Line Inputs
1. Press the INPUT SELECT button [2-B], and then
turn the jog wheel [5-B] until ‘LINE’ appears as the
Input Source. See Figure 1.
2. Connect an external device, such as a mixer or
preamp to the MIC/LINE INPUT Jacks [23, 24].
3. The remaining procedures are the same as
"Recording with the Internal Microphones.”
Recording with the AUX Inputs
1. Press the INPUT SELECT button [2-B], and then
turn the jog wheel [5-B] until ‘AUX’ appears as the
Input Source. See Figure 1.
2. Connect an external device, such as a mixer or
preamp to the AUX inputs Jack [27].
3. You can adjust the input level with the AUX Level
control [26].
4. The remaining procedures are the same as
"Recording with the Internal Microphones.”
Note: Maximum Input level of the Microphone Jack
must be no greater than 75mV RMS (Mic.
ATT:Off). Maximum Input level of Line Inputs
must be no greater than 4.0V RMS. There is
no limit for AUX Input levels.
Playback
Playback using an SD Card
1. Insert a mini SD Card containing WAV or MP3 files
into the SD Card Slot [30].
2. Press the TRACK SELECT button [2-A] to view the
Track Select menu.
3. Use the joystick [5-A] or jog wheel [5-B] to select
a track you want to play.
Figure 3 — Track Select [Folder] Screen

- 9 -
4. Press the PLAY/PAUSE button [8-C] to begin
playback.
Figure 4 — Normal Status Screen
Playback using External USB Memory
or Hard Drive (HDD).
1. Connect USB Memory or a Hard Drive containing
WAV or MP3 files to the USB port [29].
2. Press the TRACK SELECT button [2-A].
Figure 5 — Track Select [Folder] Screen
3. Use the joystick [5-A] to select “USBHDD,” and
then press ENTER [5-A].
Figure 6 — Track Select [Folder] Screen
4. Use the joystick [5-A] or jog wheel [5-B] to select
a track you want to play.
Figure 7 — Normal Status Screen
5. Press the PLAY/PAUSE button [8-C] to begin
playback.
Playback Controls
Pause
Press the PLAY/PAUSE [8-C] to pause the track during
playback.
Stop
Press the STOP button [8-D] to stop the track during
playback.
Fast Forward
Move the joystick [5-A] to the right during playback.
Holding the joystick [5-A] to the right will increase the
speed of Fast Forward.
Rewind
Move the joystick [5-A] to the left during playback.
Holding the joystick [5-A] to the left will increase the
speed of Rewind.

- 10 -
Next
Pressing the NEXT button [8-E] will move the
playback position to the beginning of the next track.
Previous
1. Pressing the PREVIOUS button [8-B] will move the
playback position to the beginning of the current
track.
2. Press the PREVIOUS button [8-B] again within
one second to move the playback position to the
beginning of previous track.
Loop Playback
Follow these steps to repeat a section of audio:
1. Press the LOOP button [2-C] during playback to
change Loop Setting menu.
Figure 8 — Loop / A&B Setting Screen
2. Press FUNCTION ADJUST #1 [4-A] to set the start
point of the loop.
Figure 9 — Loop / A&B Setting Screen
3. Press FUNCTION ADJUST #2 [4-B] to set the end
point of the loop. Playback will begin looping
between the start and end markers automatically.
Figure 10 — Loop / A&B Setting Screen
4. Move the joystick [5-A] down to turn off Loop
playback. Move the joystick [5-A] up to start Loop
Playback on.
5. Turn FUNCTION ADJUST #1 [4-A] to reposition the
start point of the loop.
6. Turn FUNCTION ADJUST #2 [4-B] to reposition the
end point of the loop.
7. Move the joystick [5-A] left/right to Rewind and
Fast Forward.

- 11 -
Change Key & Tempo
1. Press the TEMPO/KEY button [2-D] during
playback to display the Tempo/Key menu.
Figure 11 — Tempo & Key Screen
2. Turn the jog wheel [5-B] to change Tempo [25%
to +150%]. Press Enter [5-A] to reset Tempo.
3. Turn FUNCTION ADJUST #1 [4-A] to change Key
[range: +/- 1 octave]. Press FUNCTION ADJUST #1
[4-A] to reset Key.
4. Turn FUNCTION ADJUST #2 [4-B] to fine tune
playback pitch [range: +/- 50 cent). Press
FUNCTION ADJUST #2 [4-B] to reset Fine Tune.
Note: When you exit the TEMPO/KEY menu, the
Tempo, Key, and Fine Tune settings will be
stored with the selected file.
Overdub
A. Overdubbing for Composition
(Layering sections of a Track)
In this mode, you will identify a section of audio, and
then record additional audio over that section. The end
result is a file identical to the original in length, but with
an added layer of audio within the section you have
outlined.
1. Select a track to record over by pressing the
TRACK SELECT button [2-A]. If you have already
set your Overdub points, proceed to step 6. If not,
press the PLAY/PAUSE button [8-C] to listen to the
track.
2. Press the LOOP button [2-C] during playback to
view the LOOP setting menu.
3. Press FUNCTION ADJUST #1 [4-A] during playback
to set Overdub point A. This is the point in the
track you wish to begin layering audio.
4. Press FUNCTION ADJUST #2 [4-B] during playback
to set Overdub point B. This is the point at which
you will finish layering audio. Loop Playback will
start at point A automatically.
5. Move the joystick [5-A] down to turn Loop
playback OFF.
6. Press the OVERDUB button [6] to enter REC Pause
mode.
Figure 12— Rec Pause (Overdub) Screen
7. Adjust the REC Level knobs [16] so that the Record
Level (left and right channels) does not exceed 0
dB as indicated on the Level meters. See Figure
12.
8. Press the REC button [8-A] or PLAY/PAUSE button
[8-C] to start overdubbing.
9. The accompaniment track will stop at the end of
point B. The Save menu will then appear.
Figure 13 — Save Screen
10. Select OK and the new file (executed overdub) will
be saved. Select Cancel and the file will not be
saved.
B. Overdubbing for Practice (Recording
over a Loop)
In this mode, you will identify a section of audio, and
then record additional audio over that section until the

- 12 -
STOP button [8-D] is pressed. Unlike Mode A (Layering
Sections of a Track), the length of the new file in this
mode is determined by how long you choose to record
over the repeating loop.
1. Select a track to record over by pressing the
TRACK SELECT button [2-A]. Press the PLAY/
PAUSE button [8-C] to listen to the track.
2. Press the LOOP button [2-C] during playback to
view the LOOP setting menu. If you have already
set your Overdub points, simply move the joystick
[5-A] up to turn Loop playback ON, and proceed
to step 5.
3. Press FUNCTION ADJUST #1 [4-A] during playback
to set the beginning of your accompaniment loop
(point A).
4. Press FUNCTION ADJUST #2 [4-B] during playback
to set the end of your accompaniment loop
(point B). Loop Playback will start at point A
automatically.
5. Press the OVERDUB button [6] to enter REC Pause
mode. See Figure 12.
6. Adjust the REC Level knobs [16] so that the Record
Level (left and right channels) does not exceed 0
dB as indicated on the Level meters. See Figure
12.
7. Press the REC button [8-A] or PLAY/PAUSE button
[8-C] to start Overdubbing.
8. Press the STOP button [8-D] when you are
finished recording. The Save menu will appear.
See Figure 13.
9. Select OK and the new file (executed overdub) will
be saved. Select Cancel and the file will not be
saved.
Punch-In/Out
(Replace a Section of a Recording)
1. Press the TRACK SELECT button [2-A] to select a
track. If you have already set your Punch In/Out
points, proceed to step 5. If not, press the PLAY/
PAUSE [8-C] button to start playback.
2. Press the LOOP button [2-C] during playback to
view the LOOP setting menu.
3. Press FUNCTION ADJUST #1 [4-A] during playback
to set the Punch-in point.
4. Press FUNCTION ADJUST #2 [4-B] during playback
to set the Punch-out point. Loop Playback will be
started at point A automatically.
5. Press the PUNCH-IN/OUT button [7] to enter to
REC Pause Mode (Punch-In/Out).
Figure 14 — Rec Pause (Punch In/Out) Screen
6. Adjust the REC Level knobs [16] so that the Record
Level (left and right channels) does not exceed 0
dB as indicated on the Level meters [13].
7. Start Punch-In/Out by pressing the REC button [8-
A] or PLAY/PAUSE button [8-C].
Note: Playback will begin a number of seconds
before point A (Punch-IN) as determined by
the Pre-Roll setting. To adjust Pre-Roll, press
the Record Format button [9-D]. Use the jog
wheel [5-B] to select “Pre-Roll Time” and
press ENTER [5-A]. Turn the jog wheel [5-B] to
select a time from 0 to 10 seconds and press
ENTER [5-A].
Figure 15 — Menu Screen
Pre/Post-Roll Time Settings
Pre-Roll Time : 0 to 10 sec.
Post-Roll Time : 0 to 10 sec.
8. When Recording between point A (Punch-In) and
point B (Punch-Out) has finished, the recording
will stop automatically and the Save menu will
appear. See Figure 13.
9. Select OK and the file (executed Punch-In/Out)
will be saved. Select Cancel and the file will not be
saved.

- 13 -
Chromatic Tuner
1. Press the TUNER button [2-E] to enter Chromatic
Tuner Mode.
Figure 16 — Chromatic Tuner Screen
2. Select the Input Source by turning the jog wheel
[5-B].
3. Set the calibration frequency (410 Hz - 470 Hz) by
turning FUNCTION ADJUST #3 [4-C].
4. Play your tuning note and tune your instrument
until the desired tuning note is displayed and the
tuning gauge remains in the center position.
Figure 17-1: Chromatic Tuner (-20cents) Flat
Figure 17-2: Chromatic Tuner (In Tune)
Figure 17-3: Chromatic Tuner (+20cents) Sharp
Tuning Tone
1. Press the TONE button [2-F] to display the Tuning
Tone menu.
2. Set the calibration frequency (410 Hz - 470 Hz) by
tuning FUNCTION ADJUST #3 [4-C].
3. Select a tone by turning the jog wheel [5-B].
4. Set desired volume level by turning the PHONES/
SPEAKER knob [21].
5. Tune your instrument to the selected tone.
Voice Reduction
1. Press the TEMPO/KEY button [2-D] during
playback.
2. Move the joystick [5-A] up to display the Tempo &
Key [VR] menu.
3. Move the joystick [5-A] left to switch Voice
Reduction ON.
4. Press the TEMPO/KEY button [2-D] to exit.
Metronome
1. Press the METRO button [2-G].
Figure 18 — Metronome Screen
2. Move the joystick [5-A] up to switch the
metronome function ON.
3. Turn the jog wheel [5-B] to change BPM [range:
35 – 250 BPM]. Press ENTER [5-A] to reset to
BPM.
4. Turn FUNCTION ADJUST #1 [4-A] to change the
Accent Beat Number. Press FUNCTION ADJUST #1
[4-A] to reset Accent Beat.
5. Change Normal Beat Volume by turning
FUNCTION ADJUST #2 [4-B]. Press FUNCTION
ADJUST #2 [4-B] to reset Normal Beat Volume.
6. Change the Accent Beat Volume by turning
FUNCTION ADJUST #3 [4-C]. Press FUNCTION
ADJUST #3 [4-C] to reset Accent Beat Volume.

- 14 -
Tap
Metronome Tempo can also be determined by
pressing the TAP button [2-H]. Press the TAP button
[2-H] at the desired tempo a minimum of 6 times to
adjust the BPM setting of the metronome.
Editing
Divide
Note: This function works for WAV files only.
1. Press the TRACK SELECT button [2-A] and then
select a Track that you want to divide.
2. Press the EDIT button [9-C] to open the Edit
menu.
3. Move the joystick [5-A] up/down to select
"Divide,” and then press ENTER [5-A].
Figure 19 — Edit Menu Screen
4. Press the PLAY/PAUSE button [8-C] to begin
playback. The joystick [5-A] can also be used to
fast forward or rewind.
Figure 20 — Track Edit Screen
5. Press FUNCTION ADJUST #1 [4-A] at the point you
want to divide. Playback will loop the 4 seconds
before the Divide point.
6. You can fine-adjust the divide point by turning
FUNCTION ADJUST #1 [4-A].
7. Press the ENTER button [5-A] to divide the track.
8. The two new files will be placed in the same
folder as the original track.
Combine
Note: This function works for WAV files only.
1. Press the TRACK SELECT button [2-A]. Select the
first track to be combined.
2. Press the EDIT button [9-C] to open the Edit
menu.
3. Move the joystick [5-A] up/down to select
"Combine,” and then press ENTER [5-A].
Figure 21 — Edit Menu Screen
4. Select the track to be combined in the Track Select
menu, then press ENTER [5-A].
Figure 22 —Combine [Select Track] Screen
5. The new file will be created in the same folder as
the first track.

- 15 -
Figure 23 — Progress Screen
Move
1. Press the TRACK SELECT button [2-A]. Select a file
that you want to move.
2. Press the EDIT button [9-C] to open the Edit
menu.
3. Move the joystick [5-A] up/down to select
"Move,” and then press ENTER [5-A].
Figure 24 — Edit Menu Screen
4. Use the joystick [5-A] to select the folder that you
want to move the file to, and then press ENTER
[5-A].
5. Select [Current Folder] and press ENTER [5-A].
6. The target file will be moved to the selected
folder.
Delete
1. Press the TRACK SELECT button [2-A] to select a
file you want to delete.
2. Press the EDIT button [9-C] to open the Edit
menu.
3. Move the joystick [5-A] up/down to select
"Delete,” and then press ENTER [5-A].
4. "Delete this file?" will be displayed. Move the
joystick [5-A] left to Select "OK,” and then press
Enter [5-A].
5. The target file will be deleted.
Copy
1. Press the TRACK SELECT button [2-A]. Select a file
you want to copy.
2. Press the EDIT button [9-C] to open the Edit
menu.
3. Move the joystick [5-A] up/down to select "Copy,”
and then press ENTER [5-A].
4. Select the folder that you want to copy the file to,
and then press ENTER [5-A].
5. Select [Current Folder] and press ENTER [5-A].
6. The target file will be copied to selected folder.
Trim In/Out
Note: This function works only for WAV files.
1. Press the TRACK SELECT button [2-A]. Select a file
you want to trim.
2. Press the EDIT button [9-C] to open the Edit
menu.
3. Move the joystick [5-A] up/down to select "Trim
In/Out,” and then press ENTER [5-A].
4. Press the PLAY/PAUSE button [8-C] to begin
playback. The joystick [5-A] can also be used to
fast forward or rewind.
5. Press FUNCTION ADJUST #1 [4-A] at the point you
want to trim. Playback will loop 4 seconds after
the Trim point. Audio from beginning of the track
to this point will be removed.
6. Press FUNCTION ADJUST #2 [4-B] to switch
playback to the second trim point. Playback will
loop 4 seconds before the Trim point. Audio from
this point to the end of the track will be removed.
7. You can fine-adjust the trimming points by turning
FUNCTION ADJUST #1 [4-A] and FUNCTION
ADJUST #2 [4-B].
8. Press ENTER [5-A] to execute the Trim In/Out.
9. The trimmed file will be saved in the same folder
as the original file.

Superscope Technologies, Inc.
1508 Batavia Ave.
Geneva, IL 60134-3302
3/2010
Phone: 630-232-8900 Fax: 630-232-8905
www.SuperscopeTechnologies.com
sales@SuperscopeTechnologies.com
00M27AA851020
Printed in Japan
www.SuperscopeTechnologies.com
Trademarks, Copyrights and
Disclaimers
• SDHC logo is a trademark.
• Microsoft and Windows are either registered
trademarks or trademarks of Microsoft
Corporation in the United States and/or other
countries.
• Macintosh, Mac OS and Mac OS X are trademarks
of Apple Inc.
• Supply of this product does not convey a
license nor imply any right to distribute MPEG
Layer-3 compliant content created with this
product in revenue-generating broadcast
systems (terrestrial, satellite, cable, and/or other
distribution channels), streaming applications (via
Internet, intranets, and/or other networks), or
other content distribution systems (pay-audio or
audio-on-demand applications and the like) or
on physical media (compact discs, digital versatile
discs, semiconductor chips, hard drives, memory
cards and the like). An independent license for
such use is required. For details, please visit http://
mp3licensing.com.
• MPEG Layer-3 audio coding technology licensed
from Fraunhofer IIS and Thomson.
• Other company names, product names and logos
in this document are the trademarks or registered
trademarks of their respective owners.
This product is designed to help you record and
reproduce sound works to which you own or
copyright, or where you have obtained permission
from the copyright holder or the rightful licensor.
Unless you own the copyright, or have obtained
the appropriate permission from the copyright
holder or the rightful licensor, your unauthorized
recording, reproduction or distribution thereof may
result in severe criminal penalties under copyright
laws and international copyright treaties.
Other manuals for PSD410
1
Table of contents
Other Superscope Recording Equipment manuals

Superscope
Superscope PSD330 User manual

Superscope
Superscope pmr61 User manual

Superscope
Superscope PSD450mkII User manual

Superscope
Superscope PSD410 User manual

Superscope
Superscope PSD300 User manual

Superscope
Superscope PSD450 User manual

Superscope
Superscope PSD430 User manual

Superscope
Superscope PSD450mkII User manual

Superscope
Superscope PSD300 User manual

Superscope
Superscope PSD430 User manual