manuals.online logo
Brands
  1. Home
  2. •
  3. Brands
  4. •
  5. Surveon
  6. •
  7. Security Camera
  8. •
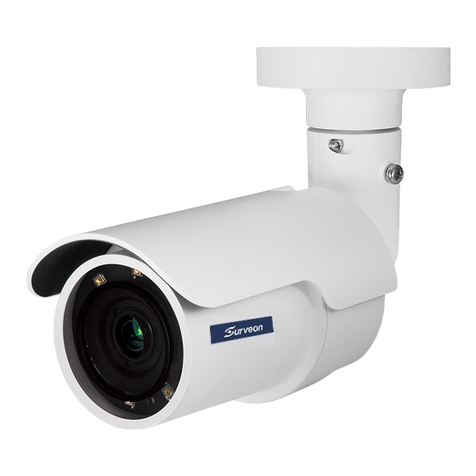
  9. Surveon CAM3351 User manual

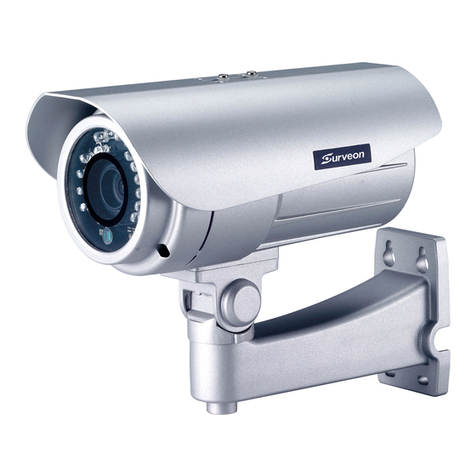
Surveon CAM3351 User manual

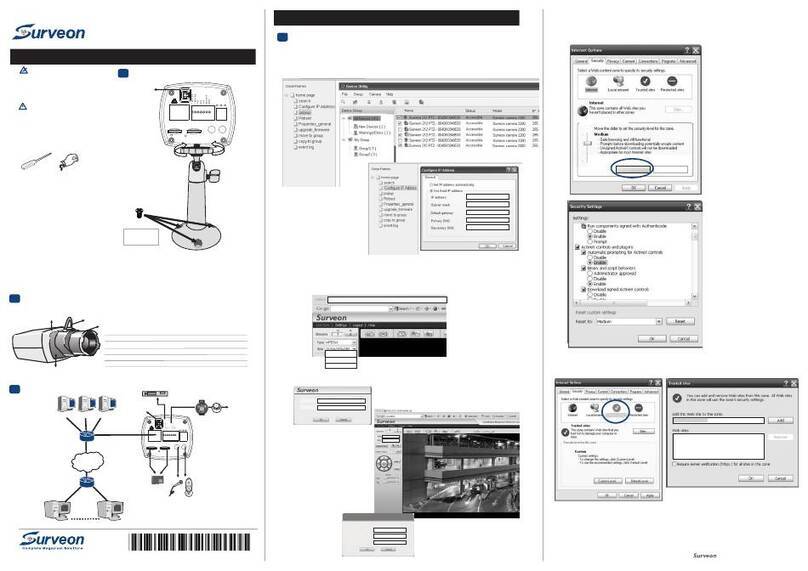
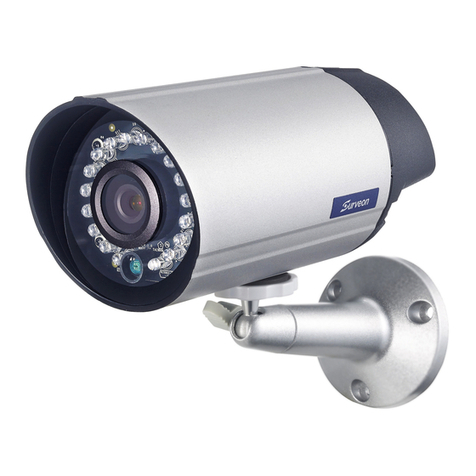
QUICK INSTALLATION GUIDE
Bullet Network Camera
Hardware Installation
Accessories
Product DVD x1 (including manuals)
● Anchors and Mounting Screws x3
● Camera Bracket x1
● RoHs Compliance x1
● (Optional) Power Adapter
● Quick Installation Guide x1
●
© by Surveon Technology, Inc. All rights reserved.
P hillips Screwdriver
Tools Required
Warning!
Only qualified service personnel should install and service this
product in order to avoid risk of injury from electrical shock and
energy hazard.
Observe all ESD (Electro-static Discharge) procedures during
installation to avoid damage to the camera and its components.
User-provided Items
●
LAN Cable
● PC with Windows (XP or above) and web
browsers (Internet Explorer 6.0 or above)
installed
●
●
Electric Drill
QMC 3 3 5 1 A E R 1 2
4. Connect the camera to the network with the network connector.
5. onnect the power connector to the power adapter, and then
connect the adapter to a power outlet.
6. Check if the live view displays normally after the camera is logged in. Please refer to Logging to the System
Section on p2 for more details.
PoE (802.3af) is supported. You can also c
Installation
2
1. Use the camera bracket to mark the desired camera position on a flat interface.
Make one cable entry hole and three screw holes on the surface with the electric
drill.
2. Fix the camera bracket on the surface with screws and screw anchors.
3. Join the camera with the bracket.
The bracket is suggested to be tightened after positioning the camera to ensure the waterproof
characteristics of the camera are maintained.
1
1
11
Before You Start
4
Please prepare a PC with Windows (XP or above) and web browsers (Internet Explorer 6.0 or above)
installed.
Camera Deployment
3
1
1Hardware Overview
Front View
3
2
1
2
1
Note: The power connector is provided for the solutions without PoE.
5Appendix: Resetting the Camera with the Reset Cable
To reset the device to the factory default settings:
1. Make sure the device is in operation mode.
2. Poke the little hole on the reset cable cover or press and hold the red button with a needle after
removing the cable cover until the camera restarts (about 2 seconds). The status LED will change to
amber during startup.
3. When the status indicator changes back to green (which may take up to 1 minute), the process is
complete. The default IP address is 192.168.88.10 if not assigned by a DHCP server.
4
6
5
1IR LED
2Lens
3Light Sensor
4Power Connector
5
6
Network Connector
Reset Cable
Note: (1) Resetting to the factory default settings using the reset cable will cause all parameters
(including IP address) to be reset. To reset the unit without changing parameters, disconnect
and reconnect the power connector. (2) Camera resets can also be performed under System
> Reset To Factory Default on the web interface.
.
71
Installing ActiveX Components in Internet Explorer
4
1
Logging out of the System
5
1Network Configuration
6
The following information will prompt for logging in:
•Username – The username for the domain. Default is always admin.
•Password – The password for the domain. Default is always admin.
Click OK.
Once successfully logged in, live video displays in the center of your browser.
You may be prompted to install ActiveX® components when accessing the network camera’s Live View
page; click Yes when prompted. You will be able to access the camera after installation is completed.
Under Windows, this action may require administrator privileges. If the dialog box suggests that you are
not allowed to install ActiveX components, try resolving the problem using the following steps:
1. In Internet Explorer, open Tools > Internet Options > Security. Click the Custom Level button.
2. Search for Download signed ActiveX controls. Under this heading select Prompt and then click OK.
3. Continue installing the ActiveX components.
4. After installing ActiveX, go to Tools > Internet Options > Trusted Websites > Sites and add the IP
address of the camera.
Logging off of the camera can be performed by closing the browser window. Users can also choose to
click the Logout link located at the top of the screen.
Prepare your internet connectivity by clicking Settings > Network > Network Configuration.
From here you can configure DHCP, static IP, DNS, PPPoE, or DDNS. DDNS is configured by selecting a
DDNS site from its drop-down menu.PPPoE setting changes will take effect after a camera reboot.
Provide the username and password from your Internet Service Provider (ISP) within the PPPoE
section. When PPPoE is applied, the associated DDNS service must be enabled.
Software Installation
Obtaining IP Address through the IP Utility
1
1
1
1
The IP address can be obtained using the IP Utility in your product CD:
1. Double click Start SearchToolInstall.exe to begin the utility installation.
2.After the installation is complete, click the Auto Search button or click Camera > Search in the menus.
The camera search will begin, and a status bar will display the search progress.
3. The details of the camera will display after the search is finished.
Logging into the System
3
Note: For details about accessing camera video using QuickTime or Real Player over RTSP,
please refer to the IP Camera user manual.
Connecting to the Network Camera
1
2
Launch the web browser (Microsoft ® Internet Explorer 6.0 or higher is recommended).
Enter the IP address of the network camera in the address bar of your browser and press enter.
You can also Click the Link to Camera button or click to Camera > Link to Camera in the IP Utility menu bar.
The camera’s live view webpage will open in a browser window.
Note: (1) The search may take up to 2 minutes, depending on your network configuration.
(2) If your network does not have DHCP service, the default IP address is 192.168.88.10.
Other manuals for CAM3351

1

Other Surveon Security Camera manuals

Surveon CAM2100 User manual

Surveon

Surveon CAM2100 User manual

Surveon CAM2200 User manual

Surveon

Surveon CAM2200 User manual

Surveon CAM6120 User manual

Surveon

Surveon CAM6120 User manual

Surveon CAM4260 User manual

Surveon

Surveon CAM4260 User manual

Surveon CAM2441HI User manual

Surveon

Surveon CAM2441HI User manual

Surveon CAM4xxx Series User manual

Surveon

Surveon CAM4xxx Series User manual

Surveon CAM6571LZ User manual

Surveon

Surveon CAM6571LZ User manual

Surveon CAM3365 User manual

Surveon

Surveon CAM3365 User manual

Surveon CAM6120 User manual

Surveon

Surveon CAM6120 User manual

Surveon CAM4310 User manual

Surveon

Surveon CAM4310 User manual

Surveon CAM2 Series User manual

Surveon

Surveon CAM2 Series User manual

Surveon CAM5130 User manual

Surveon

Surveon CAM5130 User manual

Surveon CAM2441HC-5 User manual

Surveon

Surveon CAM2441HC-5 User manual

Surveon CAM42xx Series User manual

Surveon

Surveon CAM42xx Series User manual

Surveon CAM6160 User manual

Surveon

Surveon CAM6160 User manual

Surveon CAM1471H2-5 User manual

Surveon

Surveon CAM1471H2-5 User manual

Surveon CAM4310 User manual

Surveon

Surveon CAM4310 User manual

Surveon CAM2300 User manual

Surveon

Surveon CAM2300 User manual

Surveon CAM6351 User manual

Surveon

Surveon CAM6351 User manual

Surveon CAM13XX Series User manual

Surveon

Surveon CAM13XX Series User manual

Surveon CAM4 Series User manual

Surveon

Surveon CAM4 Series User manual

Surveon CAM2300 User manual

Surveon

Surveon CAM2300 User manual

Surveon CAM4220 User manual

Surveon

Surveon CAM4220 User manual

Surveon CAM3365 User manual

Surveon

Surveon CAM3365 User manual

Popular Security Camera manuals by other brands

TRASSIR TR-D3121IR2 manual

TRASSIR

TRASSIR TR-D3121IR2 manual

Axis P5532-E installation guide

Axis

Axis P5532-E installation guide

DW x39 user manual

DW

DW x39 user manual

Speco VL-611C instruction manual

Speco

Speco VL-611C instruction manual

ECOLINE TV7094 installation instructions

ECOLINE

ECOLINE TV7094 installation instructions

Vivotek Supreme MD8564-EH user manual

Vivotek

Vivotek Supreme MD8564-EH user manual

Channel Vision 6010 instructions

Channel Vision

Channel Vision 6010 instructions

Bosch WZ16 installation manual

Bosch

Bosch WZ16 installation manual

Exibel DW-908SI user manual

Exibel

Exibel DW-908SI user manual

Hanwha Vision PNV-A6081R-E2T user manual

Hanwha Vision

Hanwha Vision PNV-A6081R-E2T user manual

Speco O4LT1 quick start guide

Speco

Speco O4LT1 quick start guide

urmet domus 1092 user manual

urmet domus

urmet domus 1092 user manual

Lorex CVC6945PK4 quick start guide

Lorex

Lorex CVC6945PK4 quick start guide

ALIBI ALI-CD1720PVF Quick installation and user guide

ALIBI

ALIBI ALI-CD1720PVF Quick installation and user guide

Iteris RZ4 Advanced installation guide

Iteris

Iteris RZ4 Advanced installation guide

Honeywell 60 Series Configuration guide

Honeywell

Honeywell 60 Series Configuration guide

D-Link DCS-8325LH user manual

D-Link

D-Link DCS-8325LH user manual

Dalsa Spyder2 S2-2x-04K40 user manual

Dalsa

Dalsa Spyder2 S2-2x-04K40 user manual

manuals.online logo
manuals.online logoBrands
  • About & Mission
  • Contact us
  • Privacy Policy
  • Terms and Conditions

Copyright 2025 Manuals.Online. All Rights Reserved.