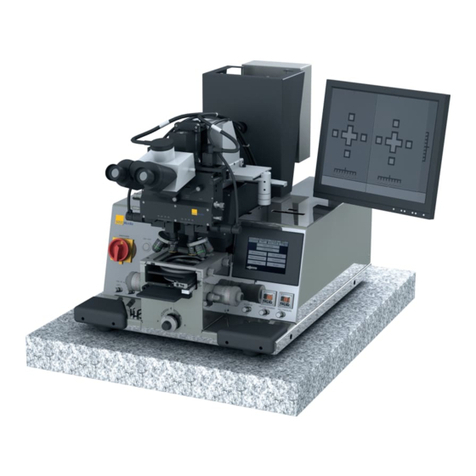
SUSS MA6 User manual

USER MANUAL
Mask Aligners
MA6 / MA8
Manual Mask Aligner
Rev05/ 07-06
www.suss.com


Contents
MA6 / MA8 - Contents - Rev.05 07-06 I
I
Contents
Preface .................................................................................................................................................. a
1. Operation of the Machine ................................................................................. 1
1.1 Definitions .......................................................................................................................... 3
1.1.1 How to Use this Manual ........................................................................................ 3
1.1.2 Key LED's ............................................................................................................. 3
1.1.3 Coordinate Systems .............................................................................................. 4
1.1.4 Components of the Exposure Optics ..................................................................... 5
1.1.4.1 Exposure Lamp ....................................................................................... 6
1.1.4.2 Ellipsoidal Mirror ...................................................................................... 6
1.1.4.3 Cold Light Mirror ..................................................................................... 6
1.1.4.4 Fly’s Eye Lens ......................................................................................... 6
1.1.4.5 Condenser Lens ...................................................................................... 6
1.1.4.6 Filters ...................................................................................................... 6
1.1.4.7 Integrator Block ...................................................................................... 6
1.1.4.8 Field Lens ............................................................................................... 6
1.1.4.9 Turning Mirror ......................................................................................... 6
1.1.4.10 Front Lens ............................................................................................... 6
1.1.4.11 Cleaning of Optical Parts ......................................................................... 7
1.1.4.12 Deep UV Exposure .................................................................................. 7
1.2 Controls and Indicators ...................................................................................................... 8
1.2.1 Alignment Stage Controls ...................................................................................... 8
1.2.2 Front Panel Controls .............................................................................................. 9
1.2.3 Keyboard Controls .............................................................................................. 11
1.2.4 TSA-Microscope Controls ................................................................................... 15
1.2.4.1 M 3xx Microscope ................................................................................ 16
1.2.4.2 Dual Video Microscope DVM 6/8 .......................................................... 18
1.2.5 Lamp House Controls ......................................................................................... 18
1.2.6 Joystick and Buttons ........................................................................................... 19
1.3 Operating Procedures ..................................................................................................... 20
1.3.1 Power on Procedure ........................................................................................... 20
1.3.2 First Mask Print Mode ......................................................................................... 20
1.3.3 Top Side Alignment ............................................................................................. 21
1.3.4 Bottom Side Alignment ........................................................................................ 23
1.3.5 Single Bottom Side Alignment ............................................................................. 24
1.4 Advanced Technology ..................................................................................................... 26
1.4.1 Exposure Programs ............................................................................................. 26
1.4.2 Multiple Exposure ................................................................................................ 27
1.4.3 Wedge Error Compensation ................................................................................ 27
1.4.4 Load Mask by Slide ............................................................................................. 27
1.5 Step by Step Machine Interactions .................................................................................. 29
1.5.1 Select Mask Loading Type .................................................................................. 29
1.5.2 SELECT PROGRAM for Exposure ....................................................................... 30
1.5.3 EDIT PARAMETER Menu .................................................................................... 31
1.5.4 Changing the TSA, BSA and Stage Alignment Speed .......................................... 32
1.5.5 EDIT PROGRAM Menu ........................................................................................ 33
1.5.6 Change Mask ...................................................................................................... 34
1.5.7 Load Wafer ......................................................................................................... 35
1.5.8 Load Mask by Slide ............................................................................................. 36
2. Maintenance ....................................................................................................39
2.1 General ............................................................................................................................. 39

Contents
MA6 / MA8 - Contents - Rev.05 07-06
I
II
2.1.1 General Maintenance ............................................................................................ 39
2.1.2 Visual Checks ....................................................................................................... 39
2.1.3 Test Run ............................................................................................................... 39
2.1.4 Safety System Check ........................................................................................... 39
2.2 Preventive Maintenance for MA6/ MA8 ............................................................................. 39
2.2.1 Cleaning ............................................................................................................... 39
2.2.2 Lamp Service ....................................................................................................... 40
2.2.3 Greasing ............................................................................................................... 40
2.2.4 WEC-Check ......................................................................................................... 40
2.2.5 Recommended SUSS Service .............................................................................. 40
2.3 Measuring the Intensity/ Uniformity of the Exposure Light ................................................. 40
2.3.1 Power Supply Calibration ...................................................................................... 40
2.3.2 Alignment of Lamp in Ellipsoid Mirror .................................................................... 41
2.4 Replacement of the Exposure Lamp 1000 W .................................................................... 43
2.4.1 Replacement Procedure ....................................................................................... 43
2.4.2 Adjusting the Exposure Lamp ............................................................................... 43
2.4.3 N2-Control ........................................................................................................... 45
2.4.4 Exhaust Flow Control (in Lamp house Intake Tube) ............................................... 45
2.4.5 Use of Other Lamps ............................................................................................. 45
2.4.6 Lamp House 350W and 350W Lamp Replacement .............................................. 45
2.5 Replacement of the Microscope Lamp ............................................................................. 46
2.6 Cleaning of Optical Components ...................................................................................... 47
2.6.1 Cleaning Materials ................................................................................................ 48
2.6.2 Application Technique .......................................................................................... 48
2.6.3 Cleaning Procedure .............................................................................................. 48
2.6.4 Safe Clean-up after Use of Solvents ..................................................................... 50
2.6.5 Removal and Re-Insertion of Specific Optical Components .................................. 50
2..6.6 Conclusion ........................................................................................................... 51
2.7 Facts and Data for Maintenance and Service .................................................................... 51
2.7.1 Consumables ....................................................................................................... 51
2.7.2 Hazardous Materials and Solid Waste .................................................................. 52
2.7.3 Service Exchange of Heavy Subassemblies ......................................................... 52
2.7.4 Supplier’s Contact ................................................................................................ 52
3 Appendix ......................................................................................................... 53
3.1 Parameter Ranges and Default Settings ........................................................................... 53
3.2 List of Abbreviations ....................................................................................................... 55
3.3 Spare Parts Llist (Extract) ................................................................................................. 57
3.4 Lock-Out / Tag-Out Checklist .......................................................................................... 63
3.5 Schematics of the Pneumatic System .............................................................................. 65
3.6. Schematics of the Electronic System MA6/8 BA6/8........................................................... 82
3.7 Service Information .......................................................................................................... 84
3.7.1 Subassemblies: MA8; MA6; MA6/BA6; BA6; MA6/BA6-ISA; ............................... 84
3.7.2 Overview for Valves, Throttles, Sensors, etc. ....................................................... 85
3.8 International Chemical Safety Cards ................................................................................. 95

Preface
MA6 / MA8 - Preface - Rev.05 07-06 a
Preface
The SUSS laboratory mask aligners are machines designed for photolithography applica-
tions in laboratories and for small-scale production. The MA6 and MA8 machines only differ
insignificantly in terms of operation.
Accordingly, the manuals for the mask aligners MA6 and MA8 have also been combined.
In this manual, minor differences are given special mention or are described by means of
specially identified pictures or sketches. Essentially, the differences relate to:
– machine dimensions, outline and weight
– travel path of the microscscope
– maximum size of the masks and substrates/wafers which are used
– changeover between mask aligner and bond aligner operation
(a detailed description is provided in BA6 Bond Aligner manual)
All of the tooling for the MA6 and MA8, e.g. chucks, mask holders and mask holder adapter
frames can be used on both mask aligners. Excepted from this are the BSA chucks for
BSA microscopes with split-field magnification. The BSA apertures are approx. 185mm
wide in a horizontal direction. This means that these chucks cannot be used on a standard
mask aligner with standard BSA microscopes.

MA6 / MA8 - Preface - Rev.05 07-06
b

Attention !
MA6 / MA8 - Attention ! - Rev.05 07-06 c
Attention !
It is strongly recommended to read this
User Manual before starting the Mask
Aligner the first time.

MA6 / MA8 - Attention ! - Rev.05 07-06
d

Operation of the Machine
MA6 / MA8 - 1. Operation of the Machine - Rev.05 07-06 1
1
1. OPERATION OF THE MACHINE
The SUSS MA6 Mask Aligner is designed for high
resolution photolithography in a laboratory for devel-
opment, small volume production or pilot production
environment.
It offers unsurpassed flexibility in the handling of irreg-
ularly shaped substrates of varying thickness, as well
as standard size wafers up to 150 mm in diameter
and substrates up to 6"x 6".
Wafers and substrates up to 6 mm thickness may be
processed.
With the modular concept, the MA6 enable easy ser-
vice. The functional groups are easily accessible and
the subassemblies can be quickly exchanged.
The SUSS MA6 represents a new generation of state
of the art mask aligners, combining time proven fea-
tures with newly developed technology for mask
aligning wafers, substrates and fractions of it. Based
on the proven world wide leader in it's lithography ap-
plication for more then three decades the SUSS
MJB3.
With the SUSS MA6, all contact exposure programs
are supplied (vacuum, hard, soft contact and proxim-
ity). X- and Y-shift are below 0.1 µm and not detect-
able by optical means.
The 400 nm exposure wavelength version is capable
of 0.6 µm resolution in vacuum contact. Using 300
nm or 250 nm exposure optics or an excimer laser
improves resolution to 0.2 µm.
Various alignment options are available. Top side
alignment with a splitfield or a video microscope.
Back side alignment with BSA scopes as well as sev-
eral infrared alignment solutions.
SUSS Mask Aligner MA6
1 EMERGENCY POWER OFF
2 TSA microscope
3 Upper panel control
4 Alignment stage
5 Keyboard

OPERATION OF THE MACHINE
MA6 / MA8 - 1. Operation of the Machine - Rev.05 07-06
1
2
SUSS Mask Aligner MA8
1 EMERGENCY POWER OFF
2 TSA microscope
3 Front panel
4 Alignment stage
5Keyboard

Operation of the Machine
MA6 / MA8 - 1. Operation of the Machine - Rev.05 07-06 3
1
1.1 Definitions
1.1.1 How to Use this Manual
Start to reading this manual, some rules are applica-
ble. The name of a control function or control indica-
tor is written in capitals. For example:
EDIT PROGRAM
Refers to the key named edit program. Words shown
in the display are included in quotation marks. For ex-
ample:
"move slide into machine and confirm
with ENTER"
A warning for the operator of the machine is written
cursive. For example:
Watch out for the microscope movement!
Every operator control function and display is referred
by a number. The first digit of this is equal to the figure
number showing it. For example:
204. VACUUM gauge
This means that the element labeled VACUUM is a
gauge explained as item 4 and is displayed in figure
2. This documentation is for using the machine as a
mask aligner. The term TOP SUBSTRATE (on which
is the upper focus plane) represents the upper sub-
strate during bond alignment and a mask during li-
thography. The term BOTTOM SUBSTRATE (on
which is the lower focus plane) is replaced in the text
by the word wafer for bondalignment and lithogra-
phy.
1.1.2 Key LED's
Each key of the keyboard except the ARROW keys is
equipped with a light emitting diode, indicating the
following:
–LEDon:
key selected or function active
– LED off:
key not selected or function deactivated
– LED flashing:
most applicable key to continue

OPERATION OF THE MACHINE
MA6 / MA8 - 1. Operation of the Machine - Rev.05 07-06
1
4
1.1.3 Coordinate Systems
The length units for the x and y-direction are in milli-
meter. The z-direction length unit is µm. They refer to
a coordinate system whose origin is in the center of
the alignment stage unit. The origin of the z-axis is
equal to the mask plane or upper substrate plane
(see Figure 1).
Alignment Stage with Coordinate System
101 MAIN POWER switch
102 EMERGENCY POWER OFF key
103 Knob STG-X-MOVEMENT
104 Knob STG-Y-MOVEMENT
105 Knob STG-Θ-MOVEMENT
1 Mask holder
2 Transport slide
3 Snap in connector mask vacuum

Operation of the Machine
MA6 / MA8 - 1. Operation of the Machine - Rev.05 07-06 5
1
1.1.4 Components of the Exposure
Optics
The components of the optical system are depend-
ing on the used lamp house system.
The UV400, UV300, and UV250, exposure optics
are similar in design. The optical system consists of
an exposure lamp, ellipsoidal mirror, cold light mir-
ror
fly’s eye lens, condenser lenses, lens plates, turn-
ing
mirrorsand a front lens as shown in the adjacentfig-
ure.
The following lamp houses are available:
•LH350
• LH1500/1000
•LH5000
Exposure Optics MA 8 with LH1000
1Exposure Lamp
2Ellipsoidal Mirror
3Cold Light Mirror
4Fly’s Eye Lens or Glass Window
5Condenser Lens
Warning!
UV light can harm eyes and skin.
Work on optical components should
be done with the exposure lamp
switched off, or at least with closed
lamp house shutter. If lighting is es-
sential for adjustment purposes, wear
UV protecting goggles and skin protec-
tion.
6Filter, optional
7Integrator Block
8Field Lens
9Turning Mirror
10 Front Lens
Essential Note!
Accurate arrangement of optical com-
ponents is essential for the quality of
exposure.
Modifypositionsorcomponentsonlyif
trained for this job, and when the ap-
propriate adjustment procedure is
available.
Also orientation of lenses and the cold
light mirror must not be changed.
1
4
10 8765
92
3
9

OPERATION OF THE MACHINE
MA6 / MA8 - 1. Operation of the Machine - Rev.05 07-06
1
6
1.1.4.1 Exposure Lamp
For the UV400 and UV300 exposure optics, the
standard exposure lampis a 1000 W high pressure
mercury short-arc lamp in the LH1000.
1.1.4.2 Ellipsoidal Mirror
The exposure lamp is mounted inside an ellipsoidal
mirror in a way that the light source is exactly at its
first focal point. This mirror collects the radiation
emitted by the lamp and focusses it to the second
focal point. The ellipsoidal mirror can be the same
for all exposure optics. But very hight reflection is
available for standard UV400.
1.1.4.3 Cold Light Mirror
The cold light mirror splits the lamp radiation in the
not needed long wavelengths and the exposure
light. The long wavelengths pass through the mirror
andareabsorbedbyaheatsink.Theexposurelight
(cold light) is reflected 90° to the integrator optics. A
selective coating determines the reflected wave-
lengths. This application range (e.g. UV400) is
marked on the mirror as well as the coated face (by
the tip of an arrow at the edge).
Because of the selective coating at least the cold
lightmirrorhasto beexchangedwhen ahangingthe
light application range.
Warning!
Mirror exchange must be done only by
trained personnel, who understand all
the risks associated with lamp replace-
ment!
1.1.4.4 Fly’s Eye Lens
This lens disperses the light and directs it to the
condenserlens.Thefly’seye lensismadeofoptical
grade fused silica for all optical systems.
Alternatively for more intensity but with less unifor-
mity in the exposure area, a glass window (same
material) is available.
1.1.4.5 Condenser Lens
The condenser lens collimates the exposure light.
The position of this lens in the mirror house tube af-
fects the intensity and uniformity of the exposure
light. A scale is mounted along the optical bench in-
side the house tube. The position of the condenser
lens depends on the type of exposure optics. The
condenser lens is made of optical grade fused sili-
ca.
1.1.4.6 Filters
The filter is located between the condenser lens
and the integrator block. Filters are used to select
more specific the exposure wavelength then the
cold light mirror can do it or reduce the intensity
(broad band intensity filter). All filters are made of
quartz glass.
1.1.4.7 Integrator Block
The integrator block has two lens plates with an ex-
actly defined distance to each other. For a good uni-
formity, each single light channel is super
positioned at the exposure plane.The material of
the lenses is optical grade fused silica.
1.1.4.8 Field Lens
For best uniformity and a maximum of intensity of
the exposure light, the field lens overlays each light
channel of the integrator in the exposure plane on
each other. The material of the lens is optical grade
fused silica.
1.1.4.9 Turning Mirror
Itdeflectstheexposurebeam to the exposurearea.
The coated side of the mirror has to face the beam.
Mirrors with dielectric coating are marked with the
application range and a sign for the coated surface.
Metallized mirrors are broad band mirrors, but not
optimized to spectral areas.
1.1.4.10 Front Lens
This lens provides collimation and uniformity of the
exposure beam. The lens is specific for each wave-
length range. For the UV 400 exposure optics the
front lens is fabricated of optical crown glass.
UV300 requires quartz glass.
250 nm 313 nm 365 nm 405 nm 436 nm

Operation of the Machine
MA6 / MA8 - 1. Operation of the Machine - Rev.05 07-06 7
1
1.1.4.11 Cleaning of Optical Parts
Optical Components can degrade with time by dep-
osition of particles or fumes.
In this case they must be removed from the ma-
chine and cleaned very carefully, in order to recon-
stitute the original quality of the machine.
Optical surfaces are polished and/ or coated. Be-
cause of this they are extremely susceptible to me-
chanical damage. For cleaning they must not be
wiped, but only rinsed with liquid solvent.
No other solvent than DI-water (with or without mild
detergent) or IPA (Isopropyl alcohol) shall be used.
The choice between those depends on the charac-
ter of contamination. The final cleaning step should
always use clear DI. If there is any doubt about the
adequate cleaning procedure call SUSS service.
See also instructions in the Maintenance chapter
and in the Preventive Maintenance Manual.
Caution!
To avoid damage on optical compo-
nents, use only recommended solvent
and do not wipe.
Place the part back to the identical po-
sitioninthe exposureoptics system as
before
Warning!
When using IPO protect your skin
against contact with the solvent.
IPOis flammable, useit onlyawayfrom
any ignition source. Do not spill IPO.
Used IPO and tissues soaked with IPO
must be deposited as flammable waste
following local regulations.
Fordetailsrefertothehostinterface documentation
delivered separately. This document describes the
GEMcompliantSECS-IIinterfaceforthementioned
equipment. It includes the information required by
theSECS-IIandGEMstandards including the GEM
State Models, SECS-II Message Documentation,
and other interface details.
1.1.4.12 Deep UV Exposure
Short-wave UV-light (<315nm) has a high biological
radiation effectivness and recommended maximum
dose for skin and eye exposure is very low.
Extended work in front of a laboratory mask aligner at
UV250 or UV300 optics can result in exceeding the
dose limit. Therefore it is recommended not to look to
the stray light, exiting from the mask stage during ex-
posure and to keep unprotected hands away from
the stage during exposure.
Warning!
When using UV250 or UV300 then min-
imize eye-and skin- exposure from UV
stray light by increasing your distance
to the stage during exposure times.
SUSS MicroTec could also provide a
special stray light barrier to be placed
on top of the mask holder frame.

OPERATION OF THE MACHINE
MA6 / MA8 - 1. Operation of the Machine - Rev.05 07-06
1
8
1.2 Controls and Indicators
101 MAIN POWER switch
This connects the machine to the public power sta-
tion for electricity.
102 EMERGENCY POWER OFF key
In any case of danger press this button to disconnect
the machine from the public power line.
1.2.1 Alignment Stage Controls
103 Knob STG-X-MOVEMENT
This is located at the right side of the alignment stage
and moves the wafer in x-direction. Maximal travel
±10mm.
104 Knob STG-Y-MOVEMENT
This is located at the left side of the alignment stage
and moves the wafer in y-direction. Maximal travel
±5mm.
105 Knob STG-Θ-MOVEMENT
This is the small knob at the right side of the align-
ment stage. Maximal travel ±5°.

Operation of the Machine
MA6 / MA8 - 1. Operation of the Machine - Rev.05 07-06 9
1
1.2.2 Front Panel Controls
Front panel
Note
Controls of MA8 Front Panel are identical
except their position.
201 POWER SWITCH ELECTRONIC
1 Pressure
202 COMPRESSED AIR gauge
203 NITROGEN gauge
4Vacuum
204 VACUUM gauge
205 VACUUM CHAMBER gauge (with regulator)
206 VACUUM SEAL (with regulator)
207 WEC - PRESSURE gauge (with regulator)
208 LCD-display
209 CONTACT indicator
3 Illumination
210 ILLUMINATION switch
211 BSA/IR microscope illumination
212 TSA microscope illumination
213 MAGNIFICATION BSA switch
214 SPLITFIELD switch
2Substrate
215 TOP SUBSTRATE LEFT/RIGHT
216 BOTTOM SUBSTRATE LEFT/RIGHT
322 BSA MICROSCOPE key
323 LEFT key
324 BOTH key
325 RIGHT key
326 TOP/BOTTOM key

OPERATION OF THE MACHINE
MA6 / MA8 - 1. Operation of the Machine - Rev.05 07-06
1
10
201 POWER SWITCH ELECTRONIC
Start the MA6 by turning the switch shortly clockwise
to ON and release. Stop the MA6 also by turning the
switch shortly clockwise to OFF and release.
202 COMPRESSED AIR gauge
The machine operates properly when the pressure is
set to 5 bar. The air pressure is controlled by a regu-
lator adjusted by a service engineer.
203 NITROGEN gauge
N2gas is used to cool the exposure lamp, establish
a nitrogen "pillow" under the wafer (hard contact ex-
posure), purge the wafer exposure area, and to break
residual vacuum after vacuum contact and other sec-
ondary functions. At 1 bar N2(adjusted by a service
engineer) the machine operates properly.
204 VACUUM gauge
The vacuum supplied to the machine should be
-0.8 bar related to normal air pressure what means
0.2 bar absolute pressure.
205 VACUUM CHAMBER gauge
(with regulator)
The gauge indicates the vacuum level in the vacuum
chamber during exposure. The vacuum level is ad-
justed opening a N2leak valve. Open the vacuum re-
strictor LOW VACUUM ADJUSTMENT below the
gauge counter clockwise. Close it by turning the
knob clockwise.
206 VACUUM SEAL (with regulator)
The required pressure to inflate the rubber lip (neces-
sary to create the vacuum chamber) should be set to
a value p = 0.1 to 0.2 bar for standard thickness wa-
fer according SEMI specification. Thicker wafer might
need a slightly higher pressure. A improper high pres-
sure could create an overcurrent error.
207 WEC - PRESSURE gauge (with regulator)
To perform the wedge error compensation the wafer
must be pressed with a defined force against the
mask. The WEC-pressure is used to compensate the
higher gravitation force of a bigger chuck. The WEC-
pressure also must be changed proportional to a
change of the wafer area. The air pressure for the
WEC-head can be set in accordance with your pro-
cess requirements (range 0.2 and 1.0 bar). This is
done with the corresponding regulator below the
gauge.
208 LCD-display
This user interface displays instructions, confirma-
tions and other messages.
209 CONTACT indicator
That lamp lights whenever mask and wafer or two
wafers for bond alignment are in contact. If you move
the wafer manually further up, this indicator starts
flashing.
210 ILLUMINATION switch
The illumination is supplied either to the TSA or BSA
microscope by way of fiber optic light cables from a
light source. BSA illumination is selected in the BSA/
IR position.
211 BSA/IR microscope illumination
The potentiometers labeled LEFT and RIGHT realize
the fine illumination adjustment for the two objectives
of the BSA microscope (BSA/IR is selected).
212 TSA microscope illumination
The fine illumination adjustment is performed with the
TSA adjustment knob. For the coarse adjustment use
control 501 (see chapter 3.2.5 Lamp house controls).
213 MAGNIFICATION BSA switch
Select between low and high magnification.
214 SPLITFIELD switch
With the rotary switch in middle position, the left/right
objective image is shown on the left/right half side of
the video monitor simultaneously. With the switch in
right or left position, the right/left objective image is
displayed on the whole video monitor. Only for the
microscope type M3xx this switch must be in left po-
sition and the splitfield must be selected at the micro-
scope itself.
215 TOP SUBSTRATE LEFT/RIGHT
In order to improve the image of the mask structures
displayed on the video monitor only minor focus ad-
justments are necessary. The two potentiometers in-
dividually control the fine focus of the BSA and TSA
microscope objectives at the upper focus plane.
216 BOTTOM SUBSTRATE LEFT/RIGHT
In order to improve the image of the wafer structures
displayed on the video monitor only minor focus ad-
justments are necessary. The two potentiometers in-
dividually control the fine focus of the BSA and TSA
microscope objectives at the lower focus plane.

Operation of the Machine
MA6 / MA8 - 1. Operation of the Machine - Rev.05 07-06 11
1
1.2.3 Keyboard Controls
Keyboard
301 X, Y-ARROW keys
302 FAST key
303 SEP keys
304 ALIGN CONT/EXP key
305 ALIGNMENT CHECK key
306 F1 key
307 LOAD key
308 UNLOAD key
309 CHANGE MASK key
310 SELECT PROGRAM key
311 EDIT PARAMETER key
312 EDIT PROGRAM key
313 ENTER key
314 SET REFERENCE key
315 SCAN key
316 EXPOSURE key
317 Multiple Exposure key
318 LAMP TEST key
319 PRE-BOND key
320 PERFORM CLAMPING key
321 OPTION key
322 BSA MICROSCOPE key
323 LEFT key
324 BOTH key
325 RIGHT key
326 TOP/BOTTOM key
327 GRAB IMAGE key

OPERATION OF THE MACHINE
MA6 / MA8 - 1. Operation of the Machine - Rev.05 07-06
1
12
301 X, Y-ARROW keys
The function of these keys depends on the task per-
formed:
– movement of the upper microscope (TSA)
– movement of the lower microscope(BSA)
– movement of the wafer (only motorized stage)
(STG)
– selection of next/last parameter in the control soft-
ware (X-arrows)
– change of parameter values (Y-arrows)
Arrow keys marked with X are labeled with an triangle
pointing to the right/left. To move the manipulators
along the X-axis press one of this keys. Arrow keys
marked with Y are labeled with an triangle pointing
upward/downward. To move the manipulators along
the Y-axis press one of this keys. In case the manip-
ulator reaches one/both limit positions along the X-
and/or Y-axis, the message on the monitor indicates:
"HW or SW limits active - use ARROW
keys"
to move back into regular range use the key for the
opposite direction.
302 FAST key
Activating this key (LED is ON) enables the movement
of the microscope manipulator and motorized stage
if existing into the desired direction with the fast
speed (otherwise the movement is performed with
the slow speed). The speed level can be adjusted
with function F1 - change align speed (see explana-
tions to key F1).
303 SEP keys
The keys are labeled with an arrow pointing upward
and downward and marked with SEP (separation).
With these keys the alignment position of the wafer
can be changed in steps of 1 µm along the z-axis.
The keys are active after WEC. Moving to mask con-
tact the CONTACT indicator lights on. Further moving
the wafer up this indicator flashes.
If mask and wafer are in contact
(CONTACT INDICATOR on),
don't align the wafer!
304 ALIGN CONT/EXP key
Acts as a toggle switch. The operator can quickly
change the position of the wafer between alignment
gap and exposure position relative to the mask.
If mask and wafer are in contact
(CONTACT INDICATOR on),
don't align the wafer!
305 ALIGNMENT CHECK key
With this key one can check the alignment prior ex-
posure. Particles between mask and wafer or the
edge bead can affect the alignment of the wafer to
the mask. To test that the alignment remains stable
while moving to exposure position, all parameters of
the exposure program are triggered except the expo-
sure itself. This key is active for the exposure pro-
grams: Vacuum Contact, Low Vacuum Contact, and
Hard Contact. For example: starting the exposure
program "Vacuum Contact" triggers the pneumatic
procedures:
Pre Vac and Full Vac:
To check the possible influence of these unexpected
factors before exposure, press the ALIGNMENT
CHECK key. Press this key again to release the wafer
back into alignment gap.
If mask and wafer are in contact
(CONTACT INDICATOR on),
don't align the wafer!
306 F1 key
If one wishes to leave the variable unchanged, simply
press the flashing F1 key.
The different functions of F1 key are:
– Microscope up/down
During loading, aligning and exposure the micro-
scope does all necessary up and down move-
ments automatically. For a better view to mask
and wafer this is manually possible by using the
F1 key.
– Change alignment speed
The user can select between slow and fast align-
ment speed by the FAST key. The speed selected
by the FAST key (fast or slow) will be displayed
here. Select the desired alignment speed for the
microscopes and motorized stage (if existing).
The Y-ARROW keys change the parameter value,
the X-ARROW keys toggle between the TSA, BSA
and STG parameter. Pressing the FAST key en-
ables the adjustment of the other speed parame-
ter (see also 3.5.4 Changing the TSA, BSA and
stage alignment speed).
– Single step config
Define the step width for the alignment stage
movement per each depression of a arrow key.
– Centering stage
For every WEC procedure the alignment stage
move to the center position for x, y and Θ. Center-
ing stage on (default) means, the wafer goes to
alignment gap keeping this center position. Cen-
tering stage off means, the alignment stage move
Table of contents
Other SUSS Laboratory Equipment manuals
Popular Laboratory Equipment manuals by other brands

Fluigent
Fluigent LINEUP SWITCH EZ user manual

NuAire
NuAire LabGard ES NU-545-300 Operation and maintenance manual

Dynascan
Dynascan B&K PRECISION 3010 instruction manual

Pfeiffer Vacuum
Pfeiffer Vacuum SPM 200 operating instructions

Tuttnauer
Tuttnauer 3840 ELVG-D Technician manual

Lacor
Lacor 39012 Instructions for use and maintenance

Molecular Devices
Molecular Devices SpectraMax Mini user guide

Vremya-ch
Vremya-ch VCH-315M Operation manual

Thermo IEC
Thermo IEC Micromax 3590 Service manual

Orion
Orion StarShoot Pro V2.0 instruction manual

Thermo Scientific
Thermo Scientific Finnpipette Instructions for use

Miele
Miele A 105/1 operating instructions