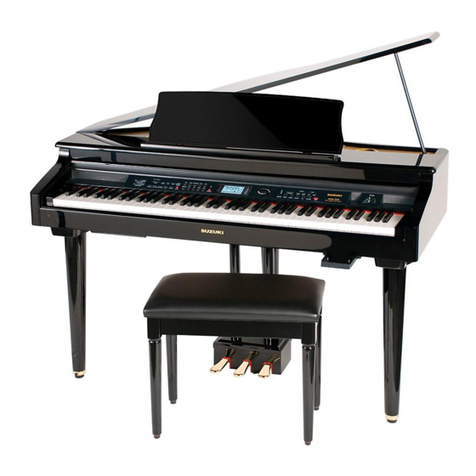
Suzuki Micro Grand User manual

Owner ’s Manual
The Name You Know
Micro Grand Digital Piano

The Name You Know
Suzuki Musical Instrument Corporation
P.O. Box 710459
Santee, California 92072–0459
800–854–1594
www.suzukimusic.com
Copyright Suzuki Musical Instrument Corporation

Taking Care Of Your Digital Piano. . . . . . . . . . . . 8
Panel Controls. . . . . . . . . . . . . . . . . . . . . . . . . . . . . . 9
Connector Panel. . . . . . . . . . . . . . . . . . . . . . . . . . . 17
Piano Pedals. . . . . . . . . . . . . . . . . . . . . . . . . . . . . . . 18
Basic Operation . . . . . . . . . . . . . . . . . . . . . . . . . . . 19
Power Switch . . . . . . . . . . . . . . . . . . . . . . . . . . . . . .19
Adjust the Volume . . . . . . . . . . . . . . . . . . . . . . . . .19
Demo Play. . . . . . . . . . . . . . . . . . . . . . . . . . . . . . . . .19
Tap/Tempo . . . . . . . . . . . . . . . . . . . . . . . . . . . . . . . .20
Transpose . . . . . . . . . . . . . . . . . . . . . . . . . . . . . . . . .20
Reverb . . . . . . . . . . . . . . . . . . . . . . . . . . . . . . . . . . . .20
Adjusting Reverb level . . . . . . . . . . . . . . . . . . . . .20
Chorus . . . . . . . . . . . . . . . . . . . . . . . . . . . . . . . . . . . .20
Adjusting Chorus Level. . . . . . . . . . . . . . . . . . . . .21
Metronome. . . . . . . . . . . . . . . . . . . . . . . . . . . . . . . .21
Touch . . . . . . . . . . . . . . . . . . . . . . . . . . . . . . . . . . . . .21
Octave . . . . . . . . . . . . . . . . . . . . . . . . . . . . . . . . . . . .21
Keyboard Voices. . . . . . . . . . . . . . . . . . . . . . . .22
Quick Select . . . . . . . . . . . . . . . . . . . . . . . . . . . . . . .22
Selecting One Of The 137 Voices. . . . . . . . . . . .22
User Dened Quick Selection Button . . . . . . .23
Layer Voice . . . . . . . . . . . . . . . . . . . . . . . . . . . . . . . .23
Split Voice . . . . . . . . . . . . . . . . . . . . . . . . . . . . . . . . .23
Assigning The Split Point For Voice . . . . . . . .24
Adjusting Keyboard Volume. . . . . . . . . . . . . . . .24
Rhythm Section . . . . . . . . . . . . . . . . . . . . . . . .25
Selecting One Of The 100 Styles . . . . . . . . . . . .25
Start a Style. . . . . . . . . . . . . . . . . . . . . . . . . . . . . . . .25
Please see function for Changing the Chrod
Point for Voice . . . . . . . . . . . . . . . . . . . . . . . . . . . . .25
Stop a Style. . . . . . . . . . . . . . . . . . . . . . . . . . . . . . . .25
Auto Accompaniment . . . . . . . . . . . . . . . . . .26
Chord Function . . . . . . . . . . . . . . . . . . . . . . . . . . . .26
Fingered Mode . . . . . . . . . . . . . . . . . . . . . . . . . . . .27
Fingering Guide . . . . . . . . . . . . . . . . . . . . . . . . . . .27
Auto Harmony . . . . . . . . . . . . . . . . . . . . . . . . . . . . .28
Starting And Stopping
The Auto Accompaniment . . . . . . . . . . . . . . . . .28
Assigning The Split Point
For The Auto Accompaniment . . . . . . . . . . . . .29
O.T.S. . . . . . . . . . . . . . . . . . . . . . . . . . . . . . . . . . . . . . .29
Adjusting the Accompaniment Volume . . . . .29
Function . . . . . . . . . . . . . . . . . . . . . . . . . . . . . . .30
Reverb Level Setting . . . . . . . . . . . . . . . . . . . . . . .30
Chorus Level Setting . . . . . . . . . . . . . . . . . . . . . . .31
Changing The Split Point For Voice. . . . . . . . . .32
Changing The Chord Point For Voice . . . . . . . .32
Changing the Chord Type . . . . . . . . . . . . . . . . . .33
Metronome Type . . . . . . . . . . . . . . . . . . . . . . . . . .33
Pan . . . . . . . . . . . . . . . . . . . . . . . . . . . . . . . . . . . . . . . .34
Tune. . . . . . . . . . . . . . . . . . . . . . . . . . . . . . . . . . . . . . .35
Auto Harmony Type Selecting . . . . . . . . . . . . . .35
Song Grading. . . . . . . . . . . . . . . . . . . . . . . . . . . . . .35
Song Volume . . . . . . . . . . . . . . . . . . . . . . . . . . . . . .36
USB Playmode . . . . . . . . . . . . . . . . . . . . . . . . . . . . .36
USB Playspeed. . . . . . . . . . . . . . . . . . . . . . . . . . . . .36
USB Volume . . . . . . . . . . . . . . . . . . . . . . . . . . . . . . .37
USB Mute Track . . . . . . . . . . . . . . . . . . . . . . . . . . . .37
Local MIDI . . . . . . . . . . . . . . . . . . . . . . . . . . . . . . . . .37
MIDI Reception . . . . . . . . . . . . . . . . . . . . . . . . . . . .37
MIDI Transmission . . . . . . . . . . . . . . . . . . . . . . . . .38
Reset . . . . . . . . . . . . . . . . . . . . . . . . . . . . . . . . . . . . . .38
Record . . . . . . . . . . . . . . . . . . . . . . . . . . . . . . . . .39
Quick Recording . . . . . . . . . . . . . . . . . . . . . . . . . . .39
Multi Track Recording . . . . . . . . . . . . . . . . . . . . . .39
Delete Song . . . . . . . . . . . . . . . . . . . . . . . . . . . . . . .41
File Button. . . . . . . . . . . . . . . . . . . . . . . . . . . . . . . . .41
Adjusting Song’s Volume . . . . . . . . . . . . . . . . . . .41
Registration Memory . . . . . . . . . . . . . . . . . . .42
Save . . . . . . . . . . . . . . . . . . . . . . . . . . . . . . . . . . . . . . .42
Load. . . . . . . . . . . . . . . . . . . . . . . . . . . . . . . . . . . . . . .42
Saving the Registration Data to USB Disk . . .42
Use Registration Data From USB . . . . . . . . . . . .42
Delete REG File From USB . . . . . . . . . . . . . . . . . .42
Play Along Songs . . . . . . . . . . . . . . . . . . . . . . .43
Selecting A Song. . . . . . . . . . . . . . . . . . . . . . . . . . .43
Listening to the Entire Song . . . . . . . . . . . . . . . .43
Practicing the right hand
of the selected song . . . . . . . . . . . . . . . . . . . . . . .43
Practicing the left hand
of the selected song . . . . . . . . . . . . . . . . . . . . . . .43
Practicing Both hands
of the selected song . . . . . . . . . . . . . . . . . . . . . . .44
MIDI . . . . . . . . . . . . . . . . . . . . . . . . . . . . . . . . . . .45
Voice List. . . . . . . . . . . . . . . . . . . . . . . . . . . . . . .47
Style List . . . . . . . . . . . . . . . . . . . . . . . . . . . . . . .49
Specications . . . . . . . . . . . . . . . . . . . . . . . . . .50
Warranty . . . . . . . . . . . . . . . . . . . . . . . . . . . . . . .51
Table of Contents

4OWNER’S MANUAL
Page
4
IMPORTANT SAFETY INSTRUCTIONS
denotes that care should be taken.
The example instructs the user to take care not to allow fingers to be trapped.
denotes a prohibited operation.
The example instructs that disassembly of the product is prohibited.
denotes an operation that should be carried out.
The example instructs the user to remove the power cord plug from the AC outlet.
Examples of Picture Symbols
Read all the instructions before using the product.
CAUTION
RISK OF ELECTRIC SHOCK
DO NOT OPEN
AVIS : RISQUE DE CHOC ELECTRIQUE - NE PAS OUVRIR.
TO REDUCE THE RISK OF ELECTRIC SHOCK, DO NOT REMOVE COVER (OR BACK).
NO USER-SERVICEABLE PARTS INSIDE. REFER SERVICING TO QUALIFIED SERVICE PERSONNEL.
The lighting flash with arrowhead symbol, within an
equilateral triangle, is intended to alert the user to
the presence of uninsulated “dangerous voltage”
within the product’s enclosure that may be of
sufficient magnitude to constitute a risk of electric
shock to persons.
The exclamation point within an equilateral triangle
is intended to alert the user to the presence of
important operating and maintenance (servicing)
instructions in the literature accompanying the
product.
WARNING
TO REDUCE THE RISK OF
FIRE OR ELECTRIC
SHOCK, DO NOT EXPOSE
THIS PRODUCT TO RAIN
OR MOISTURE.
INSTRUCTIONS PERTAINING TO A RISK OF FIRE, ELECTRIC SHOCK, OR INJURY TO PERSONS
SAVE THESE INSTRUCTIONS
1) Read these instructions.
2) Keep these instructions.
3) Heed all warnings.
4) Follow all instructions.
5) Do not use this apparatus near water.
6) Clean only with dry cloth.
7) Do not block any ventilation openings. Install in
accordance with the manufacturer’s
instructions.
8) Do not install near any heat sources such as
radiators, heat registers, stoves, or other
apparatus (including amplifiers) that produce
heat.
9) Do not defeat the safety purpose of the
polarized or grounding-type plug. A polarized
plug has two blades with one wider than the
other. A grounding type plug has two blades
and a third grounding prong. The wide blade or
the third prongs are provided for your safety.
If the provided plug does not fit into your outlet,
consult an electrician for replacement of the
obsolete outlet.
10) Protect the power cord from being walked on
or pinched particularly at plugs, convenience
receptacles, and the point where they exit from
the apparatus.
11) Only use attachments/accessories specified by
the manufacturer.
12) Use only with the cart, stand, tripod, bracket, or
table specified by the manufacturer, or
sold with the apparatus. When a cart is used,
use caution when moving the cart/apparatus
combination to avoid injury from tip-over.
13) Unplug this apparatus during lightning storms
or when unused for long periods of time.
14) Refer all servicing to qualified service
personnel. Servicing is required when the
apparatus has been damaged in any way,
such as power-supply cord or plug is
damaged, liquid has been spilled or objects
have fallen into the apparatus, the apparatus
has been exposed to rain or moisture, does not
operate normally, or has been dropped.

5
MICRO GRAND DIGITAL PIANO
The product is not completely disconnected from the
power supply even when the power switch is turned
o. If the product will not be used for a long time,
unplug the AC power cord from the AC outlet.
Failure to do so may cause rein case of
lightning.
Failure to do so may over-heat the product,
resulting in re.
This product may be equipped with a polarised line plug (one blade
wider than the other). This is a safety feature.
If you are unable to insert the plug into the outlet, contact an
electrician to replace your obsolete outlet.
Do not defeat the safety purpose of the plug.
When disconnecting the AC powercord’s
plug, always hold the plug
and pull it to remove it.
Pulling the AC power cord itself may damage
the cord, causing a re, electric shock or
short-circuit.
Doing so may cause the product tofall over,
resulting in injury.
Do not lean against the keyboard.
When using the headphones, do not
listen for long periods of
time at high volume levels.
Doing so may result in hearing problems.
It is a good practice to place the instrument near the AC outlet and to place the power cord plug in a
position that allows the plug to be disconnected easily in the event of an emergency. Electricity is always
charging while the plug is in the AC outlet even when the power switch is in the ‘OFF’ position.
The chair must be used properly (it must be
used only when playing the product).
Do not play with it or stand on it.
Only one person is allowed to sit on it.
Do not sit on it when opening the lid.
Re-tighten the bolts occasionally.
Doing so may cause the chair to fall over or your
ngers to be trapped, resulting in injury.
WARNING
The product should be connected to
an AC outlet of the specied voltage.
If you aregoing to use an AC power cord,
make sure that it has the correct plug shape
and conforms to the specied power voltage.
Failure to do so may result in re.
120V 240V230V
Indicates a potential hazard that could result in death
or serious injury if the product is handled incorrectly.
Do not insert or disconnect the power
cord plug with wet hands. Doing so may cause electric shock.
WARNING - When using electric products, basic precautions should always be followed,
including the following.
Do not use other AC adaptors to power this
instrument.
Do not use the included AC adaptor or AC
power cord to power other equipment.
Use only the AC adaptor included with
this instrument to power the instrument.
Do not disassemble, repair or modify
the product. Doing so may result inproductbreakdown, electric
shock or short-circuit.
Table of contents
Other Suzuki Musical Instrument manuals

Suzuki
Suzuki HDP User manual

Suzuki
Suzuki G-33 User manual

Suzuki
Suzuki HP-97 User manual

Suzuki
Suzuki DG-401P User manual

Suzuki
Suzuki S-350 User manual

Suzuki
Suzuki HP-275E User manual

Suzuki
Suzuki qc-1 User manual

Suzuki
Suzuki TP-100 User manual

Suzuki
Suzuki FP-S User manual

Suzuki
Suzuki MDG-330 User manual

Suzuki
Suzuki G-33 User manual

Suzuki
Suzuki DG-401P User manual

Suzuki
Suzuki SS-100 User manual

Suzuki
Suzuki Omnichord User manual

Suzuki
Suzuki HP-275E User manual

Suzuki
Suzuki SHINOBIX SNB-20 User manual

Suzuki
Suzuki GP-3 Mini-Grand User manual

Suzuki
Suzuki HG-425e User manual

Suzuki
Suzuki Deluxe Home DP-77 User manual

Suzuki
Suzuki HG-425e User manual