1/30
FIRST INSTRUCTIONS CAMERA INSTALLATION
Applicable to:
Mini rearview camera for V70, XC70, S60, S80 2000 –2008 and XC90 2003-2012
Start point;
Your car is cleanly washed (makes sure you have less chances on making scratches while
working on the car.
Required tools;
Drill, 8.5 or 9mm (9mm preferred) and 3 or 4 mm drill.
Torx 20 screw driver
Plastic spoon/ Volvo fishbone tool.
Usage materials required:
Black tape
INDEX
First instructions Camera installation.....................................................................................................................1
Index .......................................................................................................................................................................1
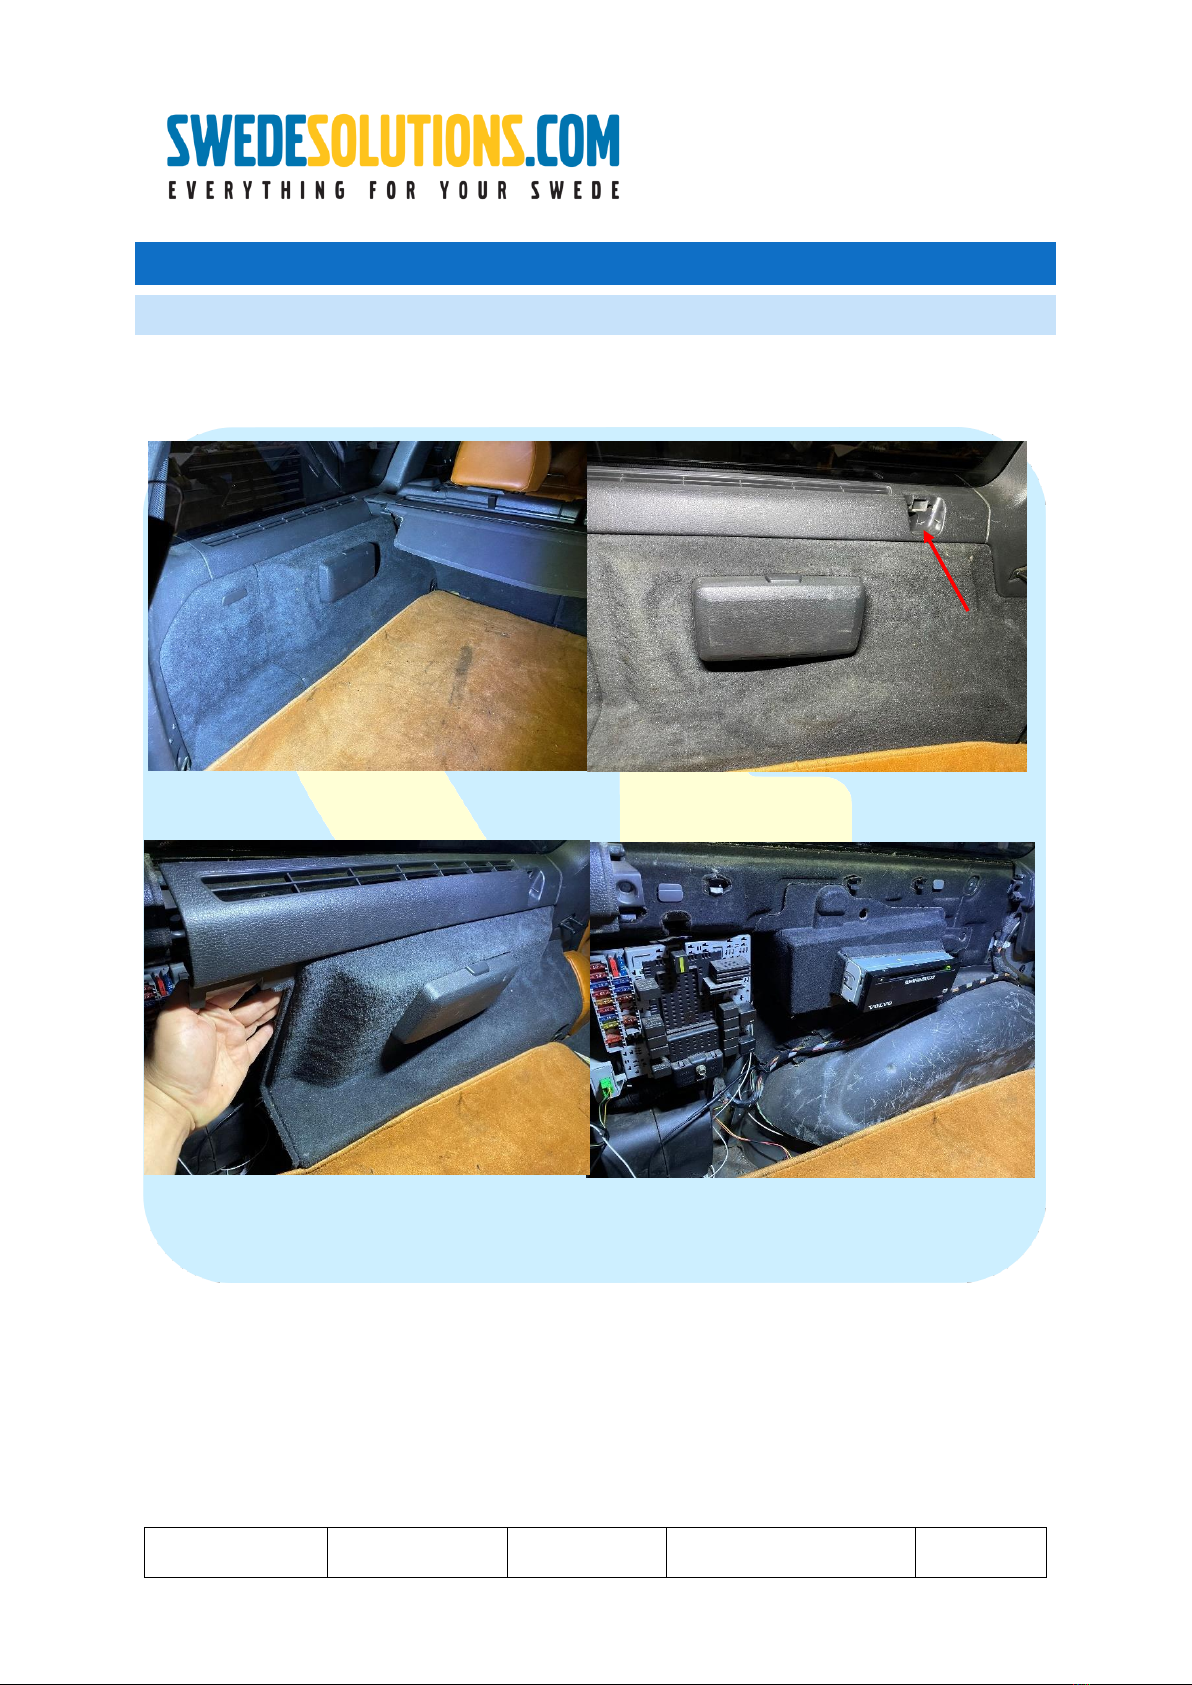
Connect the P2 Litecam..........................................................................................................................................2
V70/S60/S80.......................................................................................................................................................2
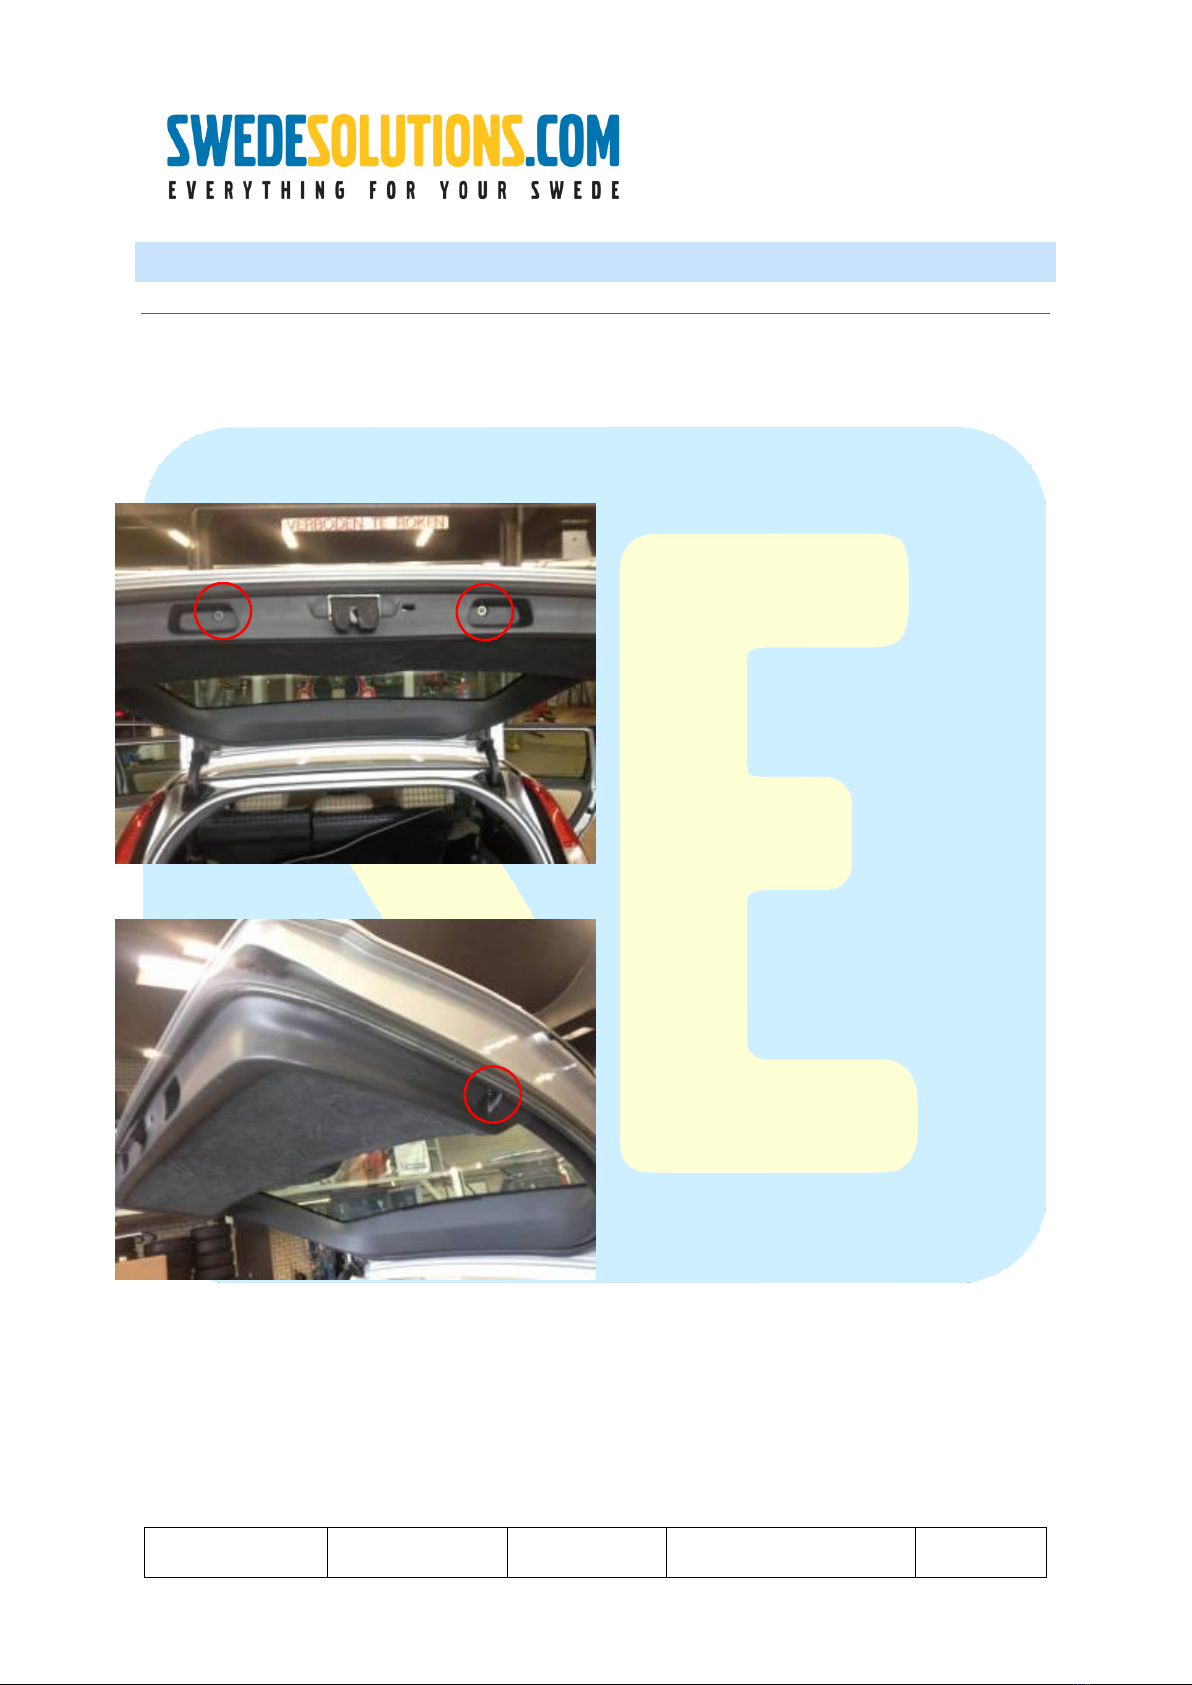
Camera installation.............................................................................................................................................7
For V70/XC70:.................................................................................................................................................7
CABLES..........................................................................................................................................................12
FOR S60/S80: ................................................................................................................................................14
XC90......................................................................................................................................................................19
Rearview camera ..............................................................................................................................................20
FOR ALL MODELS AGAIN: .....................................................................................................................................27
FAQ: ......................................................................................................................................................................28