©2015 SWELLPRO All Rights Reserved 03
1. Product Introduction
2. Function Abstract
3. What’s in the Box?
4. Splash Drone PRO version
4.1 Configuration
4.1.1 Aircraft Configuration
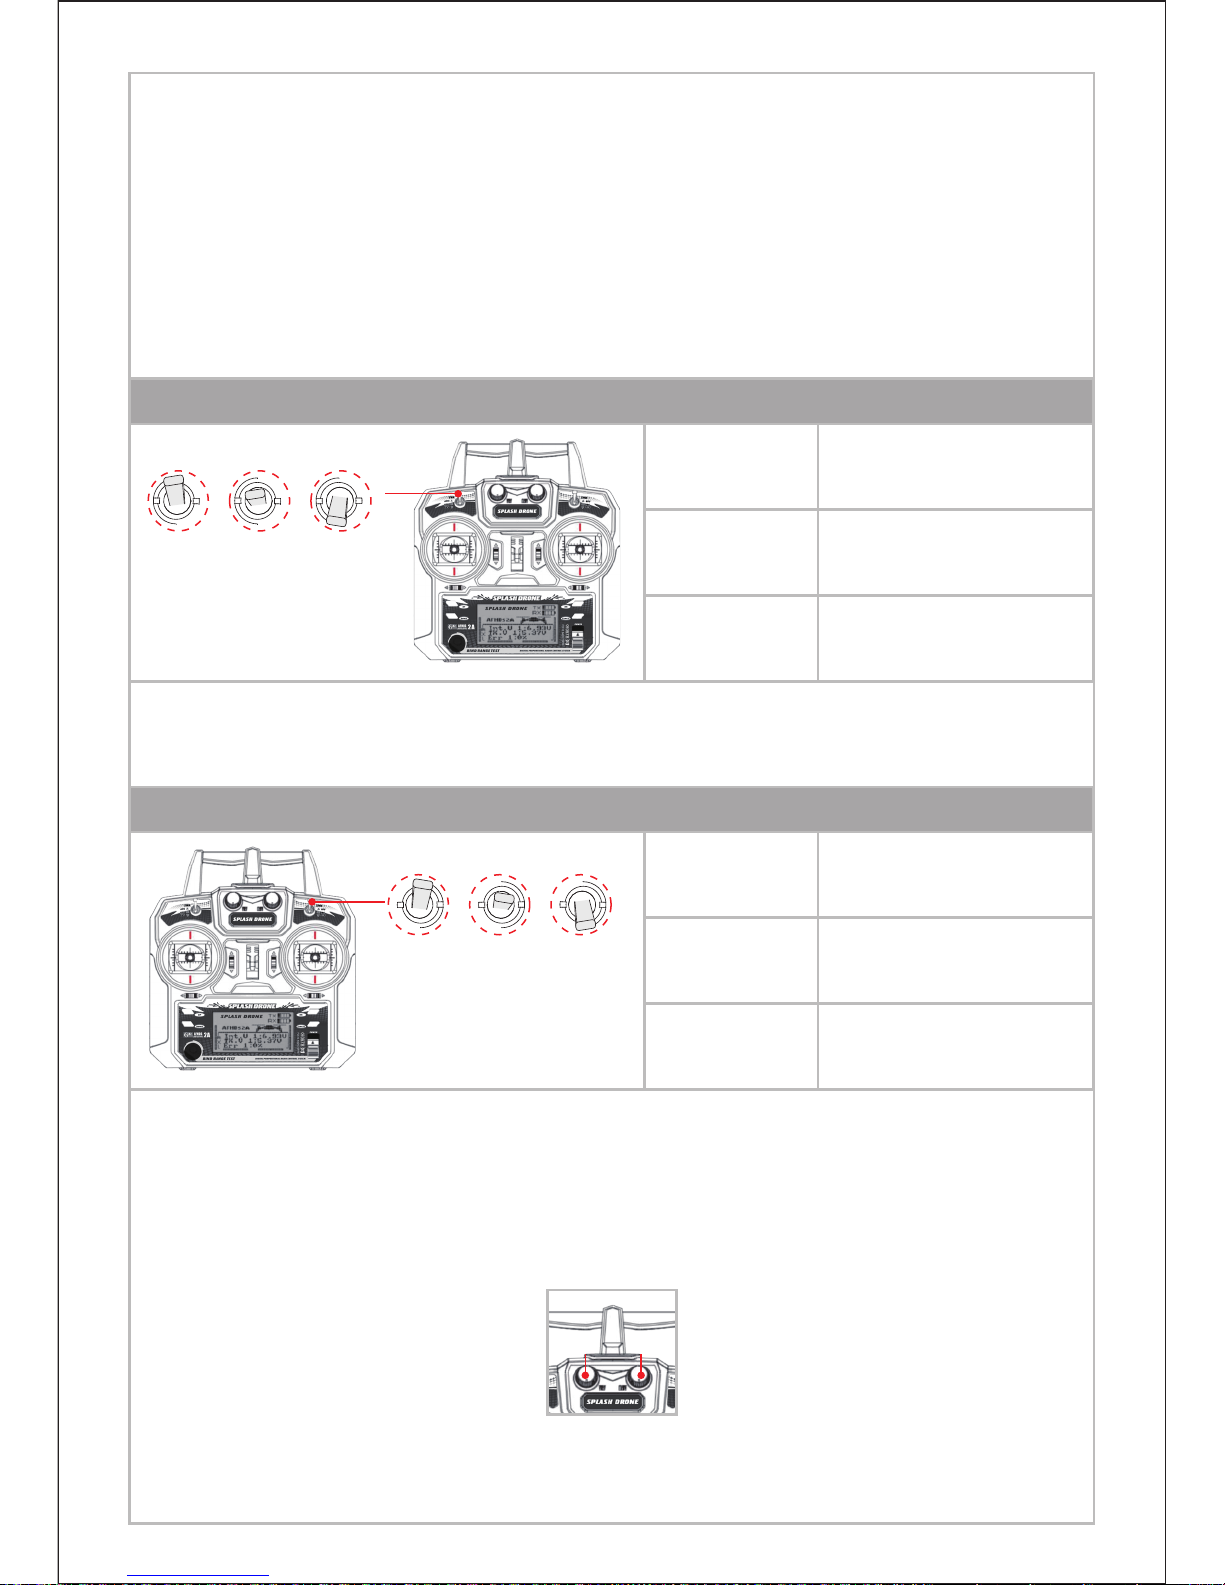
4.1.2 Radio Controller Configuration
04
05
06
08
08
08
09
Fundamental Awareness
8. Damage(s) or injuries caused by using malfunction & aging parts;
9. Damage(s) or injuries occurred by persistent flight after the low-battery warning;
10. Damage(s) or injuries occurred by salty corrosion without (thoroughly) washing & drying the
parts that engaged in sea water;
11. Damage(s) or injuries caused by losing control on aircraft due to change the location of flight
controller;
12. Damage(s) or injuries caused by using other third party appliances, such as
Transmitter/Receiver/Remote control device;
13. Damage(s) or injuries occurred in circumstances with possible interference, including the
magnetic filed, radio signal and other subjective operation troubles caused by bad judgments,
obscure vision & poor-eyesight;
14. Damage(s) or injuries occurred when the aircraft is in the following situations: collision, fire,
explosion, floods, tsunamis, ice, snow, avalanche, flooding, landslide, earthquake, etc. ;
15. Damage(s) or injuries caused by abusing & modifying the protective circuit inside of Battery;
16. Any legal liability incurred by illegal activities. Please use products within limits permitted by
local laws and regulations;
SWELLPRO reserves all the rights for final interpretation. Forbidden (Important)
Please QUIT using the aircraft if any exceptional abnormality occurs.
Please DO make sure the Throttle joystick is staying at neutral position before switching on
radio controller. Damage(s) or injuries may occur in tuning Splash Drone, so please DO ensure
all engines are turned off before any calibrations.
Forbidden (Important) Caution (Important)
Index
Symbols Highlighting