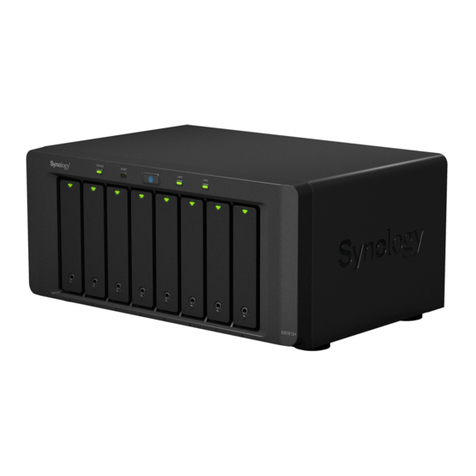
Synology RX1213sas User manual

RX1213sas User’s Guide
For Synology RackStation
RX10613xs+
Synology_QIG_RX1213sas_20120820


Table of Contents
TOC
3
5 Chapter 1: Get Started with RX1213sas
5 PackageContents
6 HardwareSpecications
6 OperatingRequirements
6 Appearance
8 LEDBehavior
9 SafetyInstructions
11 Chapter 2: Set Up RX1213sas
11 ToolsandPartsforHardDiskInstallation
11 InstallHardDisks
13ReplaceaMalfunctioningCoolingFan
16 ConnectwithRS10613xs+
18 WorkwithRS10613xs+
20 LearnMore


1
5
CongratulationsonyourpurchaseofSynologyRX1213sas.Thisproduct
isspeciallydesignedforthestorageexpansionofSynologyRackStation
RS10613xs+.Thisuser’sguidewillguideyouthroughtheinstallation.
PackageContents
Beforeinstallation,pleasecheckthepackagecontentstoverifythatyou
havereceivedtheitemsbelow.
Main Unit x 1 AC Power Cord x2
User’s Guide x 1
Screws for 3.5”
Hard Drives x 52
Screws for 2.5”
Hard Drives x 52 SAS Cable x2
Get Started with RX1213sas

6 Chapter1:GetStartedwithRX1213sas
HardwareSpecications
Internal HDD 12XSATA(II),SATA(III)orSAS
EXPANSION Port # 4X(SAS-INX2,SAS-OUTX2)
Max Capacity (Internal HDD) 12X4TB
Hot Swappable HDD Yes
Size (HxWxD) (mm) 88x445x570mm
Weight 14.385kg
System Fan 4X(80X80mm)
Power Fan 4X(40X40mm)
Power Recovery Syncwithserver
AC Input Power Voltage 100Vto240VAC
Power Frequency 50/60Hz,SinglePhase
Operating Temperature 5°C~35°C(40°F~95°F)
Storage Temperature -10°C~70°C(15°F~155°F)
Relative Humidity 5%to95%RH
Maximum Operating Altitude 10,000feet
Certication FCCClassA,CEClassA,BSMIClassA
OperatingRequirements
Synology RackStation RS10613xs+withDSMversionupgradedto
4.0-2240oronwards
Appearance
Front View
1
2

Chapter1:GetStartedwithRX1213sas 7
Back View
4
8
8 9
76
6 7
110 3
1
1111
5
Article Name Description
1LED
Indicators
TheLEDindicatorsareusedtodisplaythestatusofthesystem.
Forcompletedetails,pleaserefertothenexttable:LED
Behavior.
2Hard Drive
Trays
Theharddrivetraysaredesignedforloadingtheharddrives
withRX1213sas.
3Expansion
Unit ID
OneRX1213sascanbeconnectedwithuptoeightRX1213sas.
TheexpansionunitIDisusedtodisplaythenumberIDof
connectedRX1213sas,allowingyoutodistinguishthestatusof
differentRX1213sasatMain Menu>Storage Manager.
4EXPANSION
Port
TheexpansionportisusedtoconnectRX1213sastoSynology
RackStation.
5Power Supply
Safety Panel Removescrewsandpanelbeforeremovingpowersupply.
6 Fan
Thepowerfansarebuilttoexhaustwasteheatoutofthepower
supply.
Thesystemfans(insideRX1213sas)arebuilttoexhaustwaste
heatoutofRX1213sas.Ifthefanisnotworking,RX1213sas
will“beep”everyfewseconds.
7Power Supply
On/Off Switch
Thepowersupplyon/offswitchisusedtoturnon/offthepower
supply.
8Power Supply
Safety Latch
Thepowersupplysafetylatchisusedtosecurethepower
supplyinplace.
9Beep Off
Button
Thebeepoffbuttonisusedtoturnoffthebeepingsoundthat
warnsofpowerfailure.
10 Power Port Thepowerportiswhereyouconnectthepowercordto
RX1213sas.

8 Chapter1:GetStartedwithRX1213sas
LEDBehavior
LED Behavior Description
POWER
(Back; )
Solid Green Powerison
Off Powerisoff
Redundant
Power-
STATUS
Solid Green Bothredundantpowersuppliesareworking
Flashing Green 1redundantpowersupplyorfanisnotworking
Off Poweroff
PowerSupplyOn/OffSwitchisturnedoff("O")
Orange PowerSupplyOn/OffSwitchisturnedon("-")but
theRackStationisturnedoff
ALERT Flashing Orange Systemfanisnotworking
Off Systemfanisfunctioning
STATUS
Solid Green RX1213sasisnotreadyorothererrorsare
encountered
Off
Flashing Green RX1213sasisready
SAS IN/OUT Solid Green AnotherRX1213sasisconnected
Off NoRX1213sasisconnected
Disk Status/
Activity
Indicator
(On Tray)
Solid Green Diskisreadyandidle
Flashing Green Diskisbeingaccessed
Solid Orange Read/writeorothererrorsareencountered
Off Nointernaldiskisfound

Chapter1:GetStartedwithRX1213sas 9
SafetyInstructions
TouseyourSynologyproductsafely,pleasefollowtheseinstructionsand
warningsatalltime.
Keepawayfromdirectsunlightandawayfromchemicals.Makesure
theenvironmentdoesnotexperienceabruptchangesintemperatureor
humidity.
DonotplacetheSynologyproductclosetoanyliquid.
Beforecleaning,unplugthepowercordrst.WipeSynologyproduct
withdamppapertowels.Donotusechemicaloraerosolcleanersto
cleanit.
DonotplacetheSynologyproductonacart,table,ordesk,whichisnot
stabletoavoidtheproductfromfallingover.
Thepowercordmustplugintotherightsupplyvoltage.Makesurethat
thesuppliedACvoltageiscorrectandstable.
Toremoveallelectricalcurrentfromthedevice,ensurethatallpower
cordsaredisconnectedfromthepowersource.


2
11
ToolsandPartsforHardDiskInstallation
• Ascrewdriver
• Atleastone3.5”or2.5”SATAharddisk
(Pleasevisitwww.synology.comforcompatibleharddiskmodels.)
Warning:Ifyouinstallaharddiskthatcontainsdata,systemwillformatthehard
diskanderasealldata.Ifyouneedthedatainthefuture,pleasebackitupbefore
installation.
InstallHardDisks
1 Findthesmallbuttonlocatedontheharddrivetrayhandle.Pressthebutton
downandpulltheharddrivetrayhandleoutasillustratedbelow.
Set Up RX1213sas

12 Chapter2:SetUpRX1213sas
2 Removetheharddrivetrayandplacetheharddiskasfollows:
• For 3.5” Hard Disk: Placetheharddiskintheharddrivetray.Turnthe
trayupsidedownandtightenscrewsintothefourplacesindicatedbelow
tosecureyourharddisk.
• For 2.5” Hard Disk: Placetheharddiskintheharddrivetray.Turnthe
trayupsidedownandtightenscrewsintothefourplacesindicatedbelow
tosecureyourharddisk.
3 Aftersecuringtheharddisktotheharddrivetray,inserttheharddrivetray
intotheemptyharddrivebay.
Important:Makesurethetrayispushedinalltheway.Otherwise,theharddisk
mightnotbeabletofunctionproperly.
4 Pushtheharddrivetrayhandletosecuretheharddrivetray.
5 Repeatthestepsabovetoinstallallpreparedharddisks.
Note:IfyouwanttosetupaRAIDconguration,werecommendedallinstalledhard
disksbethesamesizetoguaranteethebestusageofharddiskcapacity.

Chapter2:SetUpRX1213sas 13
ReplaceaMalfunctioningCoolingFan
1 ShutdownyourRX1213sas,anddisconnectallconnectedcablestoprevent
anypossibledamage.
2 RemovethetwoscrewslocatedonthebackofyourRX1213sas.Thenpull
thetopcoverinthedirectionindicatedbelow.
3 Fansarenumberedasfollows:
4 123
4 Findthemalfunctioningcoolingfan.Liftthefanupwardtoremove.

14 Chapter2:SetUpRX1213sas
5 Applyrmpressuretothepowerplugandslideitoffthepowerportasshown
below.
6 Removethemalfunctioningfanfromthefancasing.
7 Slideanewcoolingfanintothecasing.
8 Applyrmpressureandslidethepowercordontothepowerport.

Chapter2:SetUpRX1213sas 15
9 SlidethenewcoolingfanunitintoyourRX1213sas.Makesurethe
powerportisalignedproperly.
ab

16 Chapter2:SetUpRX1213sas
ConnectwithSynologyRS10613xs+
1 Connectoneendofthepowercord(s)tothepowerportofRX1213sasand
theothertothepoweroutlet(s).
Note: YourRX1213sasaswellasRS10613xs+comesequippedwitharedundant
powersupplysystem,allowingtwopowercordstobeconnected.Thesystemmay
bepoweronwithonlyonepowercord,butwerecommendusingtwopowercordsto
avoidunexpectedpowerfailures.
2 ConnectoneendoftheSAScable(atleastone)totheSAS-INportof
RX1213sasandtheothertotheSAS-OUTportofRS10613xs+.
RS10613xs+
RX1213sas
RX1213sas
Note: IfyouwanttoconnectRX1213sastoanotherRX1213sas,connectoneend
oftheSAScabletotheSAS-OUTportandtheothertotheSAS-INportofanother
RX1213sas,orviceversa.FormoreinformationabouthowtostartupRS10613xs+,
pleaserefertotheQuickInstallationGuidethatcomeswithyourRackStation.

Chapter2:SetUpRX1213sas 17
3 TurnonthepowersupplylocatedonthebackofbothRS10613xs+and
RX1213sas("-").
RS10613xs+
RX1213sas
RX1213sas
The Expansion Unit ID of RX1213sas connected to RS10613xs+
will be displayed here in sequence.

18 Chapter2:SetUpRX1213sas
WorkwithRS10613xs+
1 LogintoDiskStationManagerwithawebbrowser.GotoMain Menu >
Storage Manager >Storage OverviewtoconrmRX1213sasisconnected
toyourRS10613xs+.
2 GotoMain Menu>StorageManager >RAID Grouptomanage
RX1213sasforstoragecreationorexpansion.
• If you want to create a new RAID group with RX1213sas,clickCreate
andfollowthewizardtocompletethecreation.
Note: PleasemakesureyourRS10613xs+hasanexistingRAIDGroupwith
allocatablespacerstbeforecreatingvolumeswithRX1213sas.

Chapter2:SetUpRX1213sas 19
• IfyouwanttoexpandaRAIDgroupwithRX1213sas,selecttheRAID
groupyouwanttoexpandfromthegrouplist,clickManage>Expand or
Add Diskandfollowthewizardtocompletetheexpansion.
3 OncetheRAIDgroupisready,gotoVolumeontheleftpanelandclick
CreatetocreatevolumesorclickEdittoexpandvolumes.
Fordetailedinformationaboutvolumeorothertypesofstoragemanagement,
gotoMain Menu>Storage Manager andseethehelppagebyclickingthe
Helpbuttonatthetop-rightcorner.

20 Chapter2:SetUpRX1213sas
Limitations:BeforestartingtouseRS10613xs+withRX1213sas,pleaseseethe
followinglimitationsofRX1213sas.
•RX1213sascanbepairedwithonlyoneRS10613xs+.
•Thedataofapplications(suchasPhotoStationandAudioStation)canbestored
onRX1213sasonlyifyoucreateanexpandedvolumewithit.Theywillnotbe
storedonRX1213sasifyoucreateanewvolumewithit.
•HarddrivespreviouslyusedinRS10613xs+willnotbereadablebydirectly
insertingthemintoRX1213sasandviseversa.
LearnMore
Congratulations!YourRX1213sasissetupnow.Formoreinformationor
onlineresourcesaboutRX1213saspleasevisitwww.synology.com.
Table of contents
Other Synology Computer Hardware manuals