t.a.c. TS-8101 Instruction manual

Printed in U.S.A. 8-08 ©Copyright 2008 TAC All Rights Reserved. F-22633-5
APPLICATION
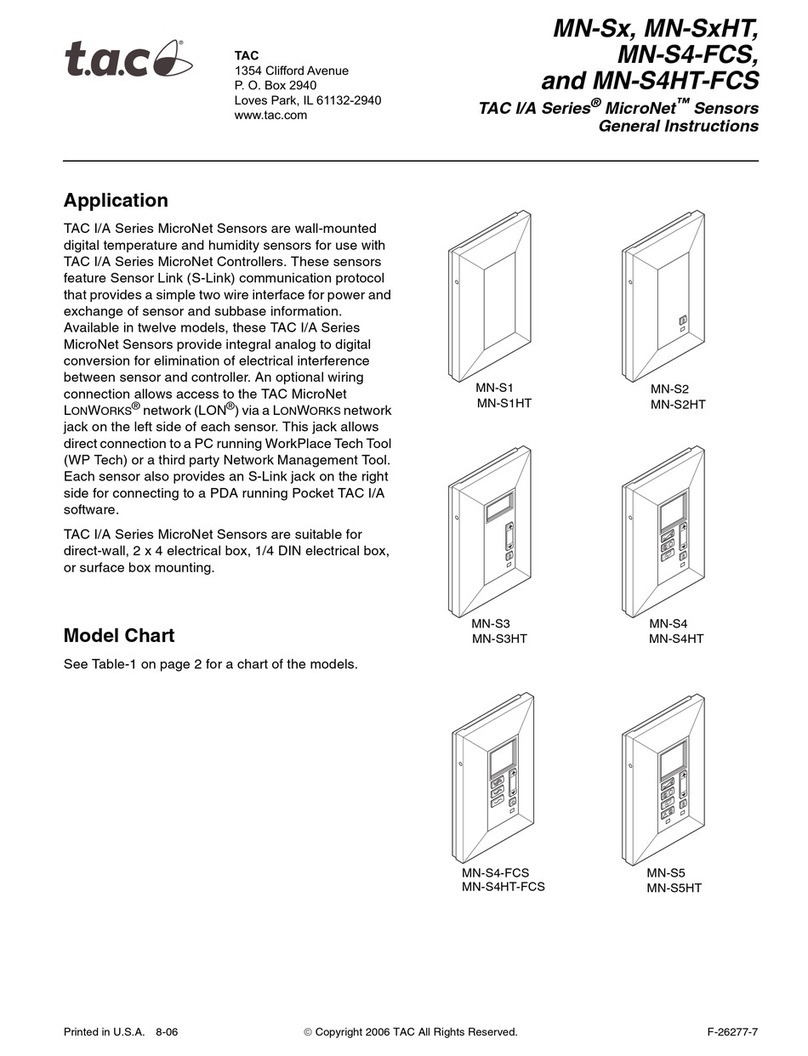
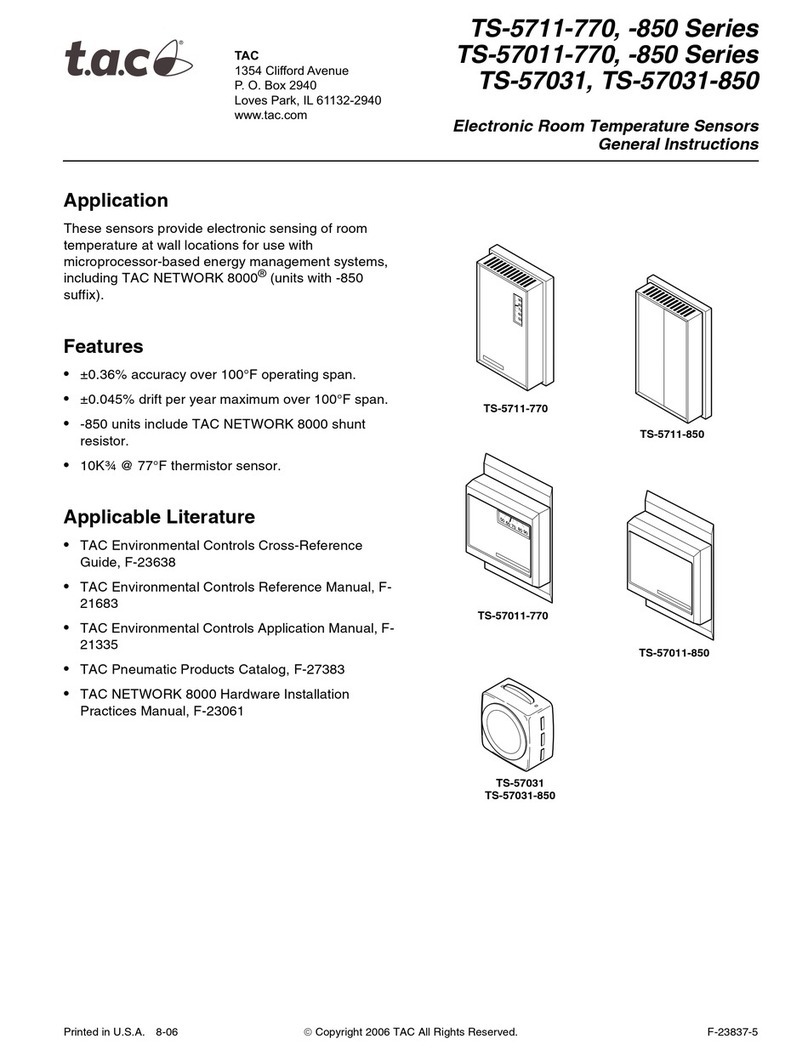
Electronic sensing of room temperature at wall locations.
SPECIFICATIONS
Sensing Element: Temperature sensitive Balco resistance.
TS-8101 Series, 1000 ohms ±0.1% at 70°F (21°C);
changes 2.2 ohms per 1°F (0.5°C at 70°F (21°C).
TS-811 Series, 1000 ohms when control dial is set to
sensed temperature.
Control Dial Range: See Table 1.
Environment:
Ambient Temperature Limits,
Shipping and Storage -40 to 160°F (-40 to 71°C).
Operating 40 to 140°F (4 to 60°C).
Humidity, 5 to 95% RH, non-condensing.
Locations, NEMA Type 1 indoor only.
Connections: Coded screw terminals.
Cover: Beige plastic.
Mounting: Wall.
Dimensions: 4-3/8" high x 2-3/4" wide x 1-5/8" deep
(111 mm x 70 mm x 43 mm).
STANDARD
TS-8111 °F
TS-8111-116 °C
TS-8111-770 °F only
OPTIONS (TS-8111 & TS-8111-116 only)
(for quantities of 24 or more of each part number)
Add “dash-number” (-XXX) suffix to base part no. for desired option.
Table-1 Specifications.
Part
Number Company
Identification Control
Dial Range Cover
Configuration
TS-8101 TAC -Blank
TS-8101-770 Robertshaw
TS-8111
TAC
55-85°F Standard cover
and two inserts
(see Options
also)
TS-8111-116 13 to 29°C
TS-8111-770 Robertshaw 55-85°F Standard cover
and two inserts
ACCESSORIES
AT-61 Series Brushed bronze cover plates
AT-70 Series Brushed bronze cover plates (TS-81XX-770)
AT-82 Series Digital thermometer cover kit
AT-82-770 Digital thermometer cover kit (TS-81XX-770)
AT-101 Lock cover kit
AT-104 Dial stop pins
AT-504 Plaster hole cover kit (small)
AT-505 Surface mounting base
AT-546 Auxiliary mounting plate
AT-602 Selector switch sub-base DP4T
AT-1103 Wire guard
AT-1104 Cast aluminum guard
AT-1105 Plastic guard
AT-1155 Plastic guard
AT-1165 Plastic guard
PKG-1093 Digital thermometer battery replacement kit
Figure-1 Sensor Wiring.
TS-8101, TS-8101-770
TS-8111, TS-8111-116
TS-8111-770
Electronic Room Temperature Sensors
General Instructions

2©Copyright 2008 TAC All Rights Reserved. F-22633-5
PRE-INSTALLATION
Inspection
Inspect the carton for damage. If damaged, notify the
appropriate carrier immediately. If undamaged, open the
carton and inspect the device for obvious damage. Return
damaged products.
Required Installation Items
•Wiring diagrams
•Tools (not provided):
DVM (digital volt-ohm meter)
Appropriate screwdriver for mounting screws and termi-
nal connections
•Appropriate accessories
•Mounting screws, two (2) provided for securing to a 2 x 4
conduit box
INSTALLATION
Caution:
•Installer must be a qualified, experienced technician.
•Make all connections in accordance with the wiring
diagram, and in accordance with national and local
electrical codes. Use copper conductors only.
•Do not exceed ratings of the device.
Mounting
LOCATION
Locate the sensor on a wall where it will be exposed to
unrestricted air circulation, at a minimum of 15 ft./min., which
represents the average temperature of the sensed space.
Normally, the sensorislocated 5-1/2 to 6-1/2 ft.(1.7 to 2.0 m)
from floor level.
Caution:
Do not locate the sensor near sources of heat or
cold, such as lamps, motors, sunlight or concealed ducts or
pipes. Avoid location where excessive vibration, moisture,
corrosive fumes or vapors are present. NEMA Type 1 covers
are intended for indoor use primarily to provide a degree of
protection against contact with the enclosed equipment.
Figure-2 Mounting Dimensions.
Figure-3 TS-8101 Series Mounting (Cover Removed) and
Part Identification.
Figure-4 TS-8111 Series Mounting (Cover Removed) and
Part Identification.
Wiring
Two conductor twisted pair wires (six turns per foot), Class II,
low voltage, are suitable for the sensor leads except as stated
below.
Caution:
Shielded cable must be used when it is necessary
to install the sensor lead in the same conduit with power
wiring, or when it is known that high RFI/EMI generating
devices are near. System ground the shield at the controller
only on the COM (-) terminal or Blue (-) lead. Do not use an
earth ground.
Do not use inside of the cover as a junction box for other
control circuits.
Restrict element lead to shortest length practical (see
Table 2).
Table-2 MAXIMUM SENSOR WIRING RUN.
Wire
Gauge
Length of Run in ft. (m)
TS-81XX/TS-81XX-770 Sensor
to Controller (except TP-810X
or “TSP” Transmitter)
TS-8101/
TS-8101-770
Sensor to TP-810X
22 150 (46) 125 (38)
18 1000 (305) 300 (91)
16 2250 (686) -
14 4000 (1219) -

F-22633-5 ©Copyright 2008 TAC All Rights Reserved. 3
Figure-5 Wiring for TS-8111 Series with Remote Sensor.
ADJUSTMENTS
Turn the control dial knob to required setting on TS-8111
adjustable models. No adjustments are possible on TS-8101.
CHECKOUT
Measure the resistance between terminals 7 and 8 (see
Figure 1).
TS-8101 Series: 100 ohms ±0.1% at 70°F (21°C); changes
2.2 ohms per 1°F (0.5°C) at 70°F (21°C).
TS-8111 Series (see Figure 5): 1000 ohms when control dial
is set to sensed temperature.
CONCEALED CONTROL DIAL
ADJUSTMENT
Knurled Dial Removal
See Figure 6.
1. Remove sensor cover.
2. Secure the control dial with hand so that the dial will not
rotate.
3. Placeneedle nose pliers at knurled ring of the controldial
at the points where the knurled ring is attached to the
control dial.
4. Twistthepliersateachknurledringattachmentpointuntil
the entire knurled ring of the control dial is removed.
Figure-6 Knurled Dial Removal.
LIMIT CONTROL DIAL RANGE
Dial Stop Pin Insertion - Included with Mounting
Plate
See Figure 7.
1. Remove sensor cover.
2. Secure the control dial with hand so that the dial will not
rotate.
3. Place a dial stop pin in the jaws of a needle nose pliers.
4. Insertthedial stoppinin theappropriatehole oneither(or
both) side(s) of the control dial to restrict dial rotation.
Figure-7 Dial Stop Pin Insertion.
Cover Insert Installation (See Figure 8)
1. Select appropriate cover insert.
Note:
If blank insert is used, The knurled ring must be
removed from the setpoint dial. See Knurled Dial Removal
above. Also, remove dial window by sliding and/or pressing
window from front of cover.
2. Remove protective backing and protective skinon faceof
cover insert.
3. Press insert uniformly on the thermostat with company
logo in lower left-hand corner.
Figure-8 Cover Insert Installation.

Copyright 2008, TAC
All brand names, trademarks and registered
trademarks are the property of their respective
owners. Information contained within this
document is subject to change without notice.
F-22633-5
www.tac.com
TAC
1354 Clifford Avenue
P.O. Box 2940
Loves Park, IL 61132-2940
MAINTENANCE
Regular maintenance of the total system is needed to assure
sustained optimum performance. Sensors should be periodically
inspected for dirt or blockage of air over the elements.
FIELD REPAIR
These sensors are not field repairable. Replace a defective sensor
with a functional unit.
This manual suits for next models
4
Table of contents
Other t.a.c. Temperature Controllers manuals