-9-
About the protection function when changing the mode
Sequence of Usage
1. If moisture or dirt remains in the body or inner box, remove them with a dry
towel etc.
2. Insert the power plug, and then press the power switch .
The Peltier unit will be activated and the fan will be rotated at the same time.
*The LEDs of the power switch and the mode indication will light up.
*The Cool mode is engaged by default.
3. Press the mode change switch to select your desired mode.
*
The mode indication LED to be lit is changed every time you press the mode change switch.
*When you change the mode, the changed mode will be memorized.
5. Close the door tightly.
4. Insert basket in the inner box and place wet rolled towels on the basket.
*In the event the amount of towels put into the box is low, place them
on the basket as flat and as far apart as possible.
*The interior of the cabinet becomes heated from the backside.
Place towels inside the cabinet so that they do not come into contact with such surfaces.
*When warm towels are needed in a hurry, please use towels that have been rolled
after having been immersed in warm water.
*Put towels in heat resisting polyethylene wrap. If used without such wrapper, towels
are apt to drying up quickly or becoming discolored.
When using in Hot mode
*The interior of the cabinet becomes cool from the backside.
*This product is to keep cool towels, etc. and it may take time to cool. Therefore,
switching on well in advance or prior cooling of towels, etc. to be placed in the unit
When using in Cool mode
When changing the mode, the protection function will work until a certain temperature
is reached after the mode is changed to prevent deterioration of components owing to
rapid temperture changes.(The longest : approx. 30 minutes)
●While the protection function is working, the power LED will light up and the LED of
the selected mode will blink, letting you know that the protection function is working.
When the status of the LED of the selected mode changes from blinking to lighting,
the operation will be resumed.
*How long the protection function works differs depending on the ambient temperature,
temperature inside the inner box, and installation condition.
*The fan will continue to rotate even while the protection function is working.
● Select the mode within 5 minutes after turning on the power switch.
Otherwise, the protection function may work depending on the temperature inside
the inner box.
● When you turn on the power switch again within 30 minutes after you turn off the
power switch, the protection function may work after the mode change depending
on the temperature inside the inner box.
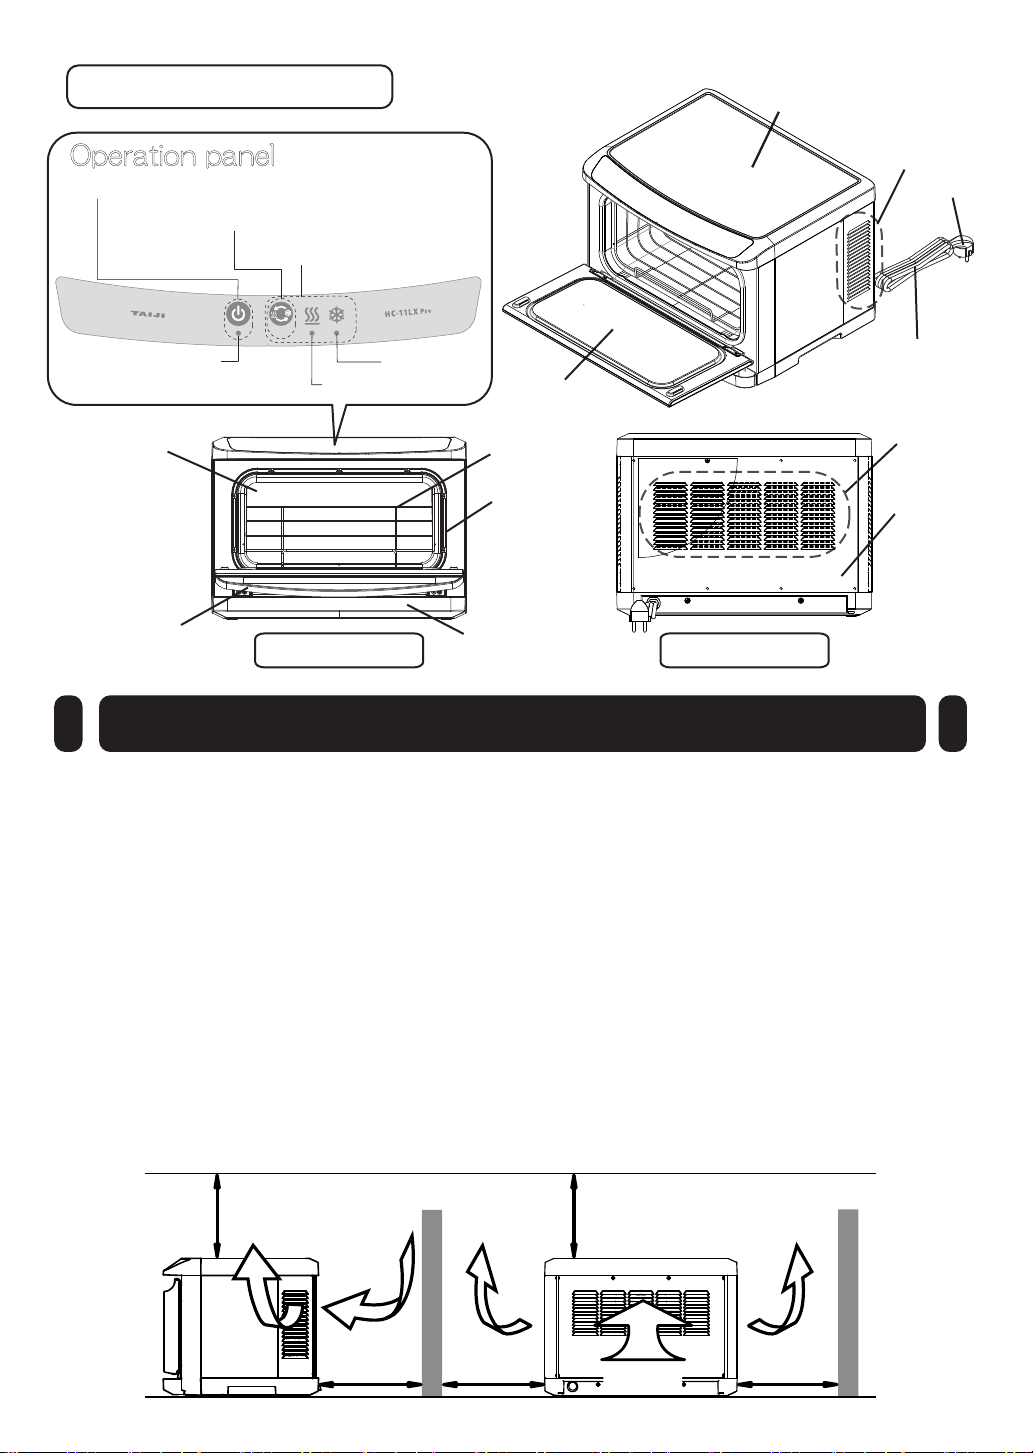
Hot mode
(Blue)LED lights (Orange)LED lights
Cool mode
Press to change