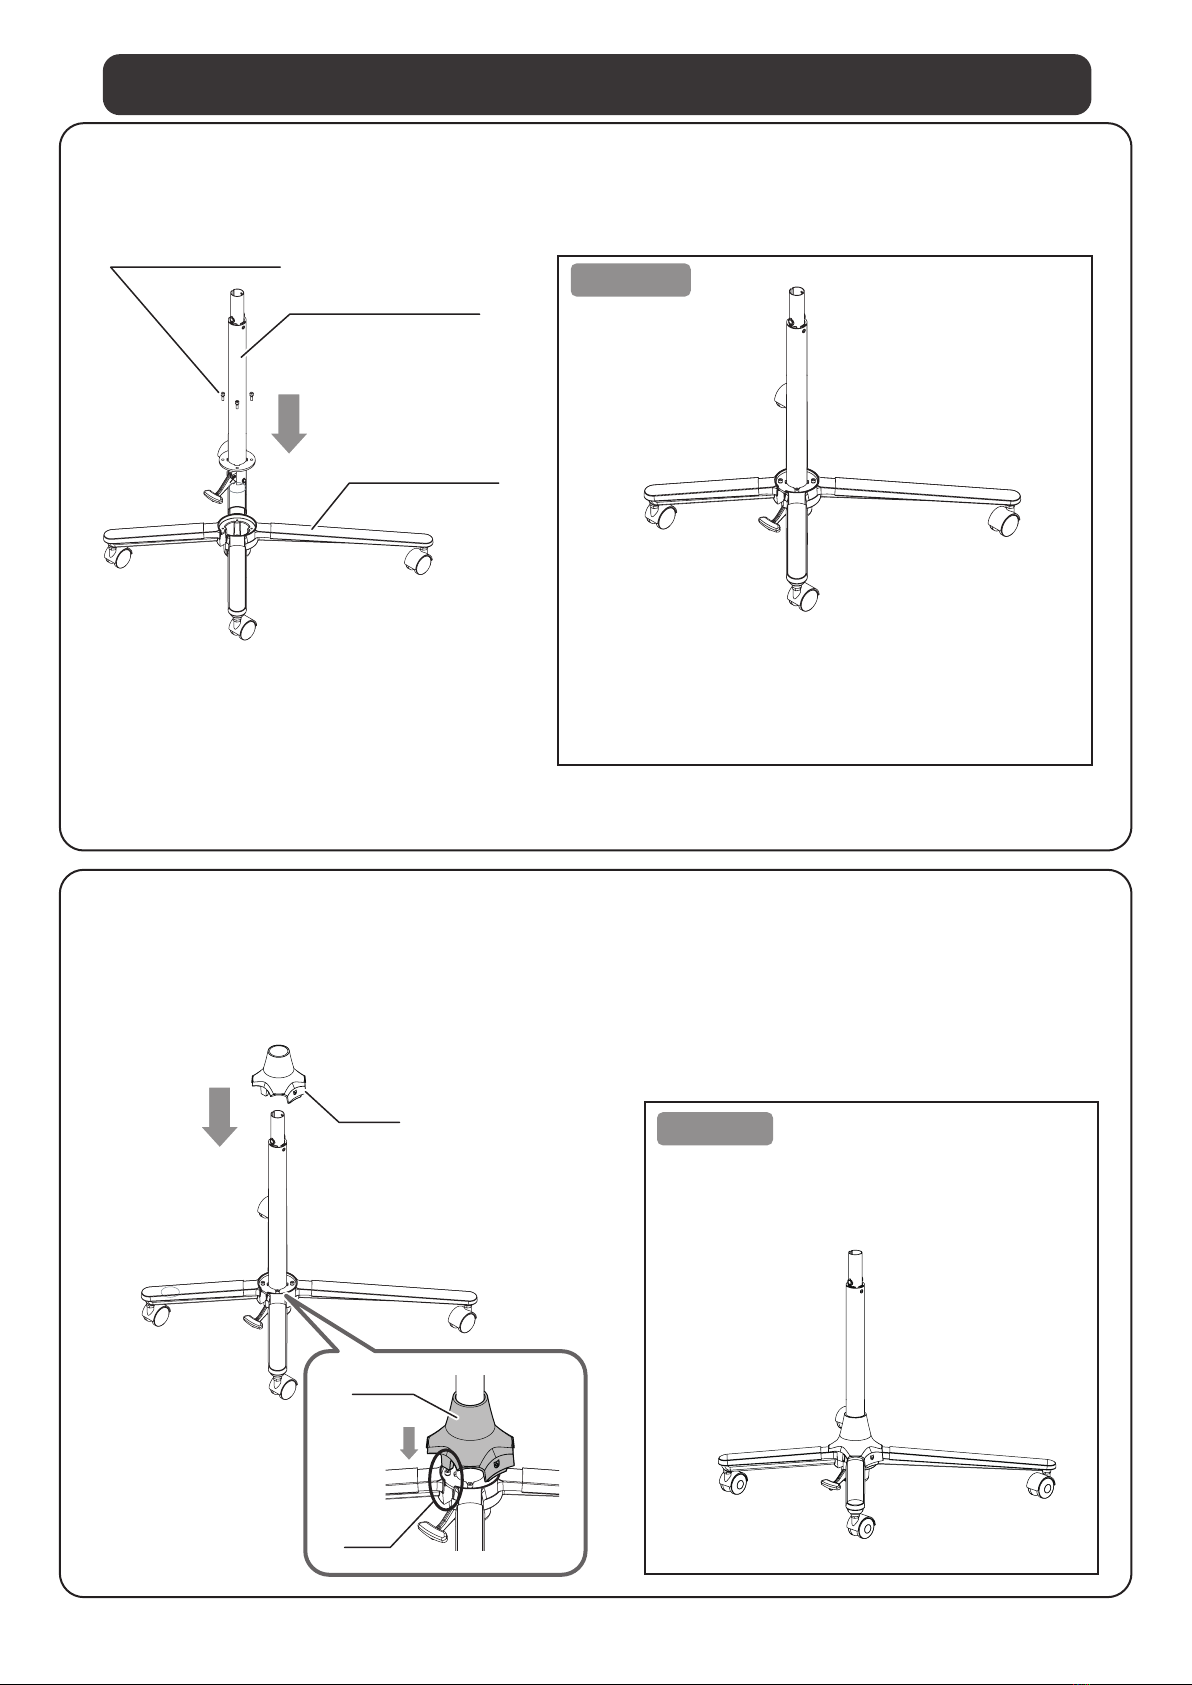
Assembling the Care Dry G Main Unit
5
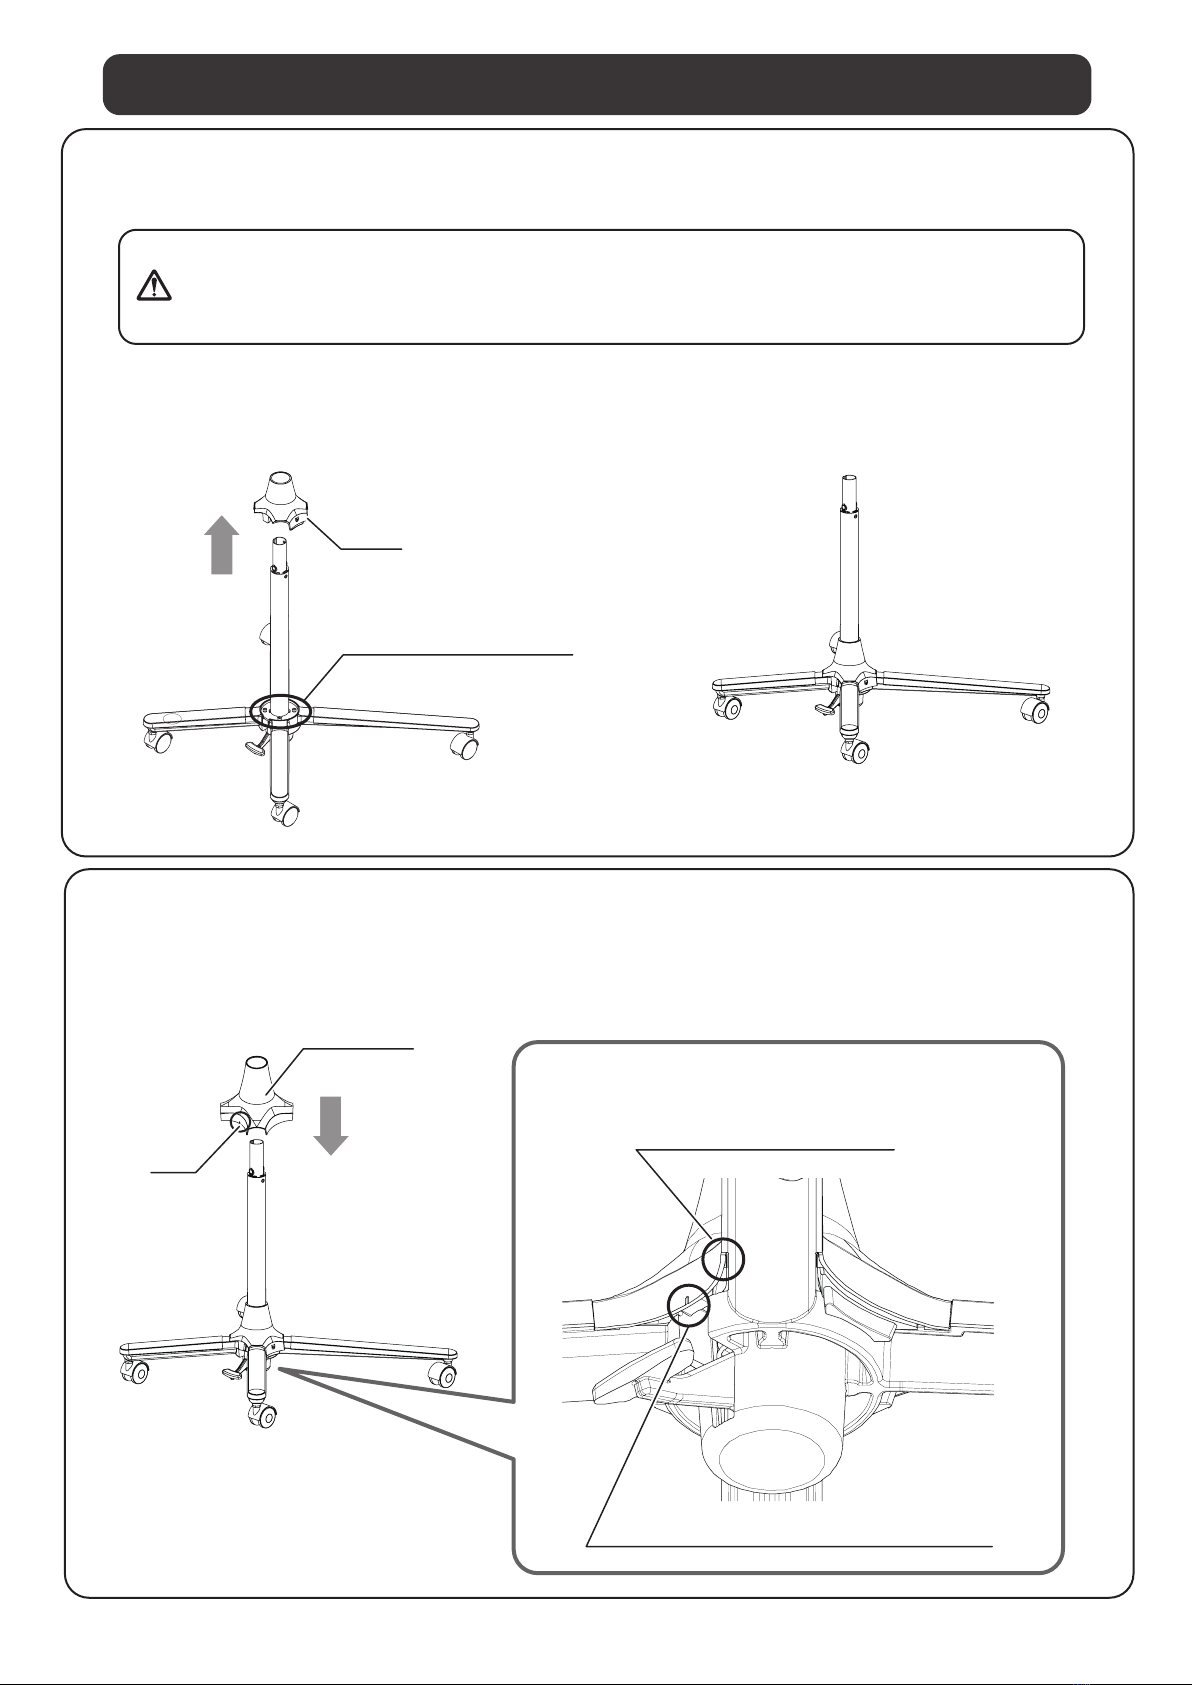
(5) Insert the upper main unit into the height-adjustment pipe.
Cover of the
upper main unit
* When inserting the upper main unit, do not hold it by the heater unit.
Hold it by the shaft or the cover of the upper main unit instead.
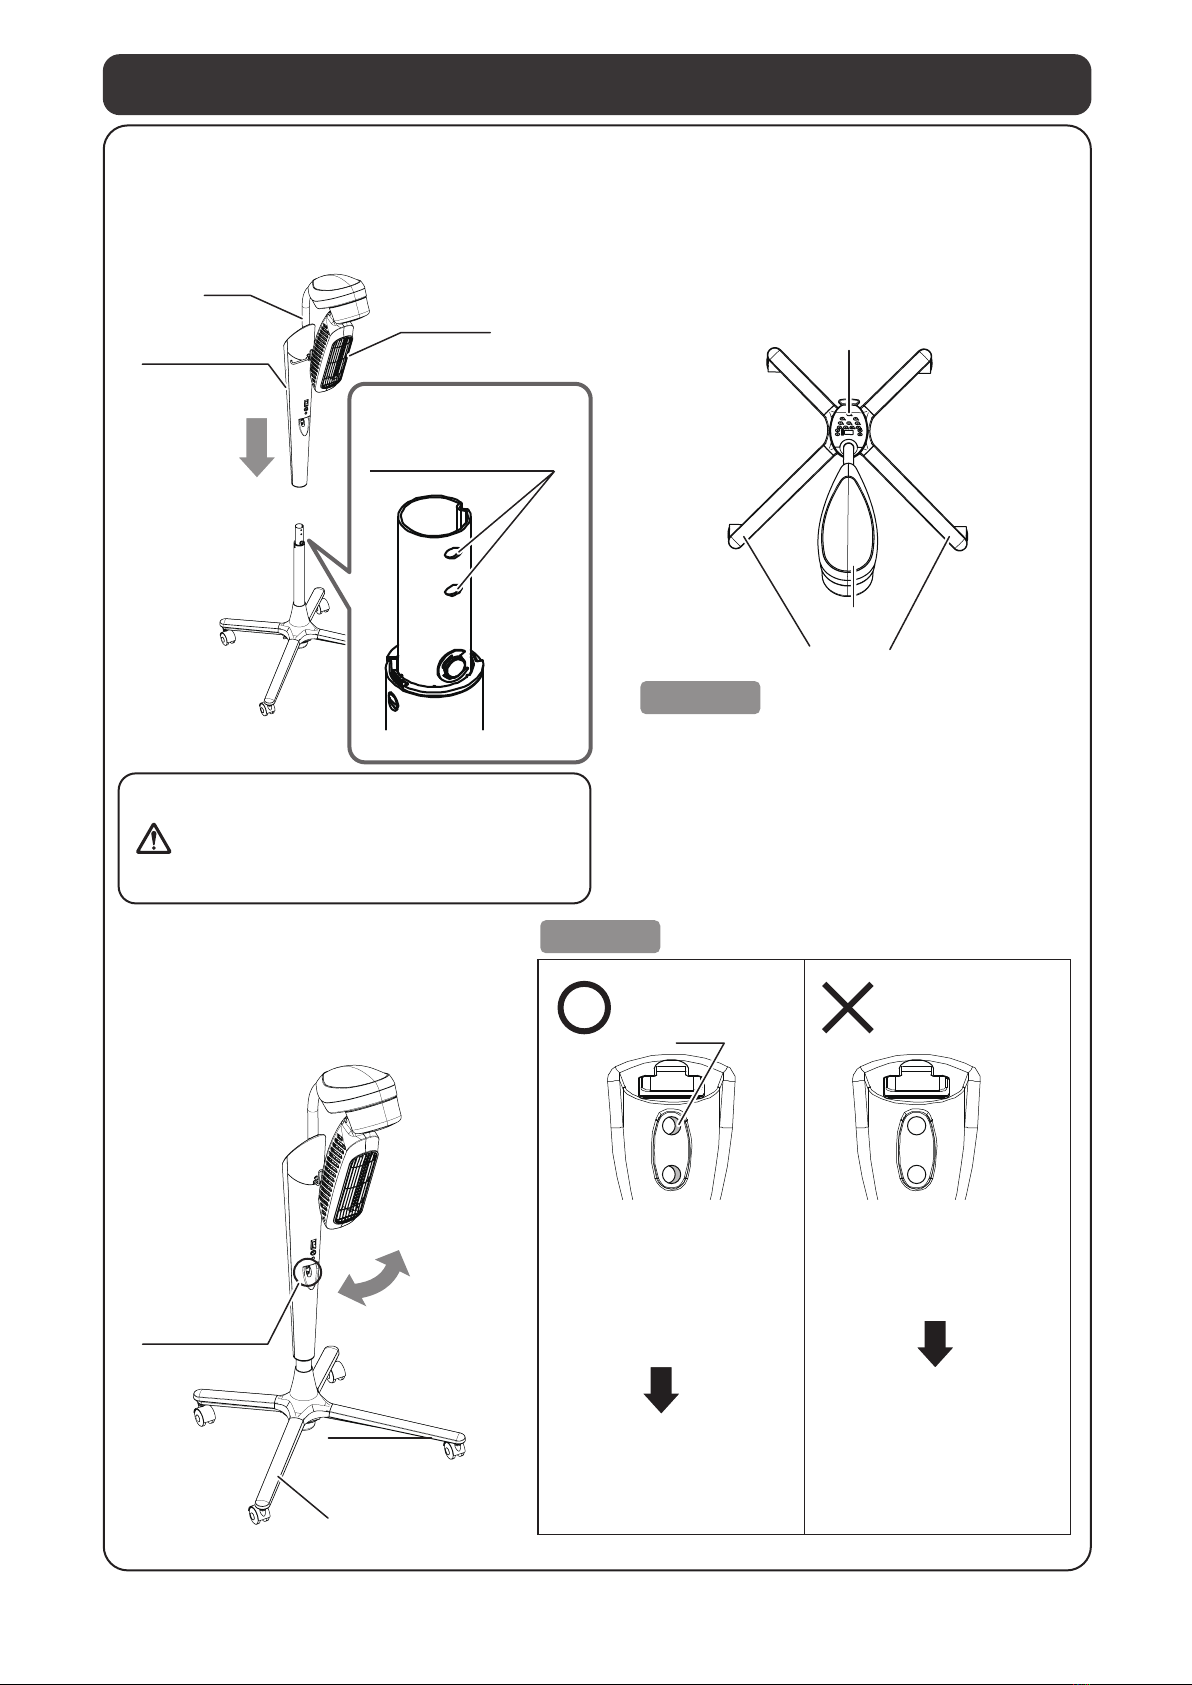
Check before tightening the screws:
After inserting the upper main unit into
the height-adjustment pipe, lock the
four-legged stand and shift the upper
main unit slowly to the right and left.
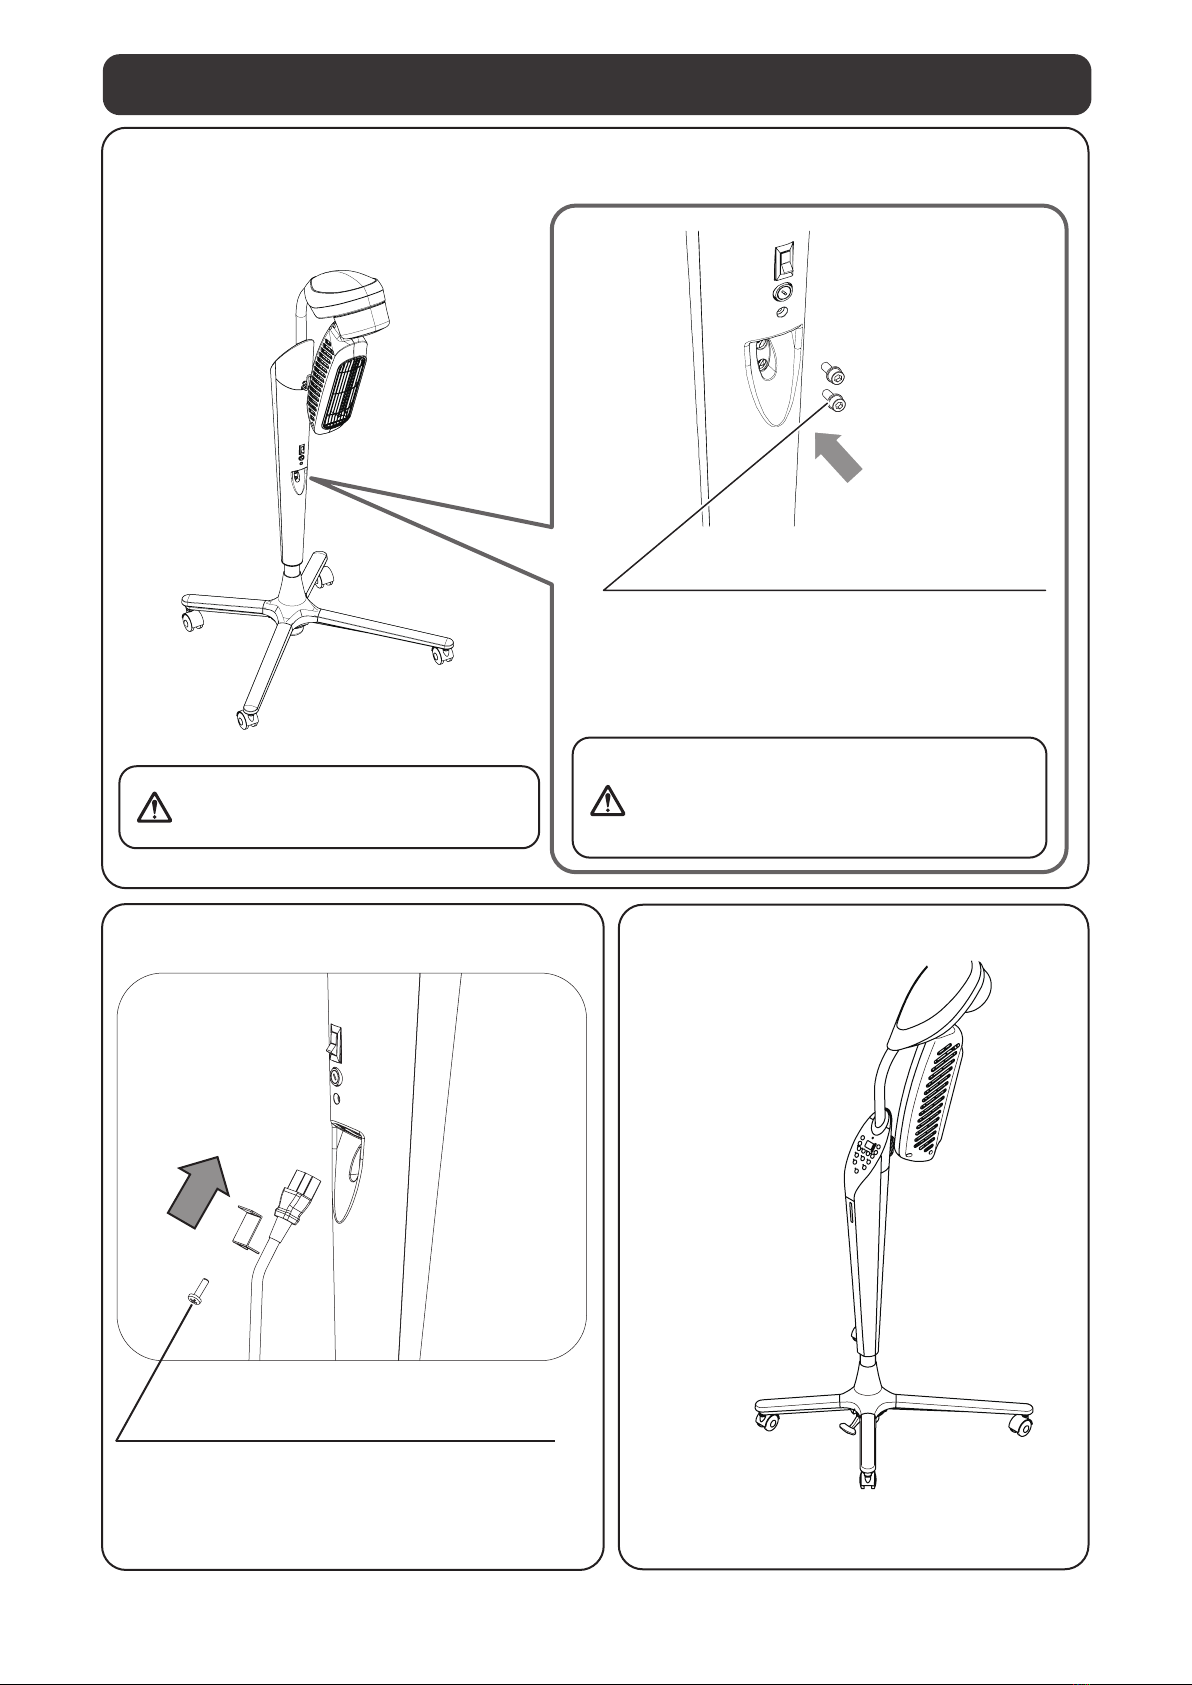
Align the Care Dry G main unit with the Care Dry
G stand. Then, move on to “(6) Screw the upper
main unit onto the height-adjustment pipe.”
Top view
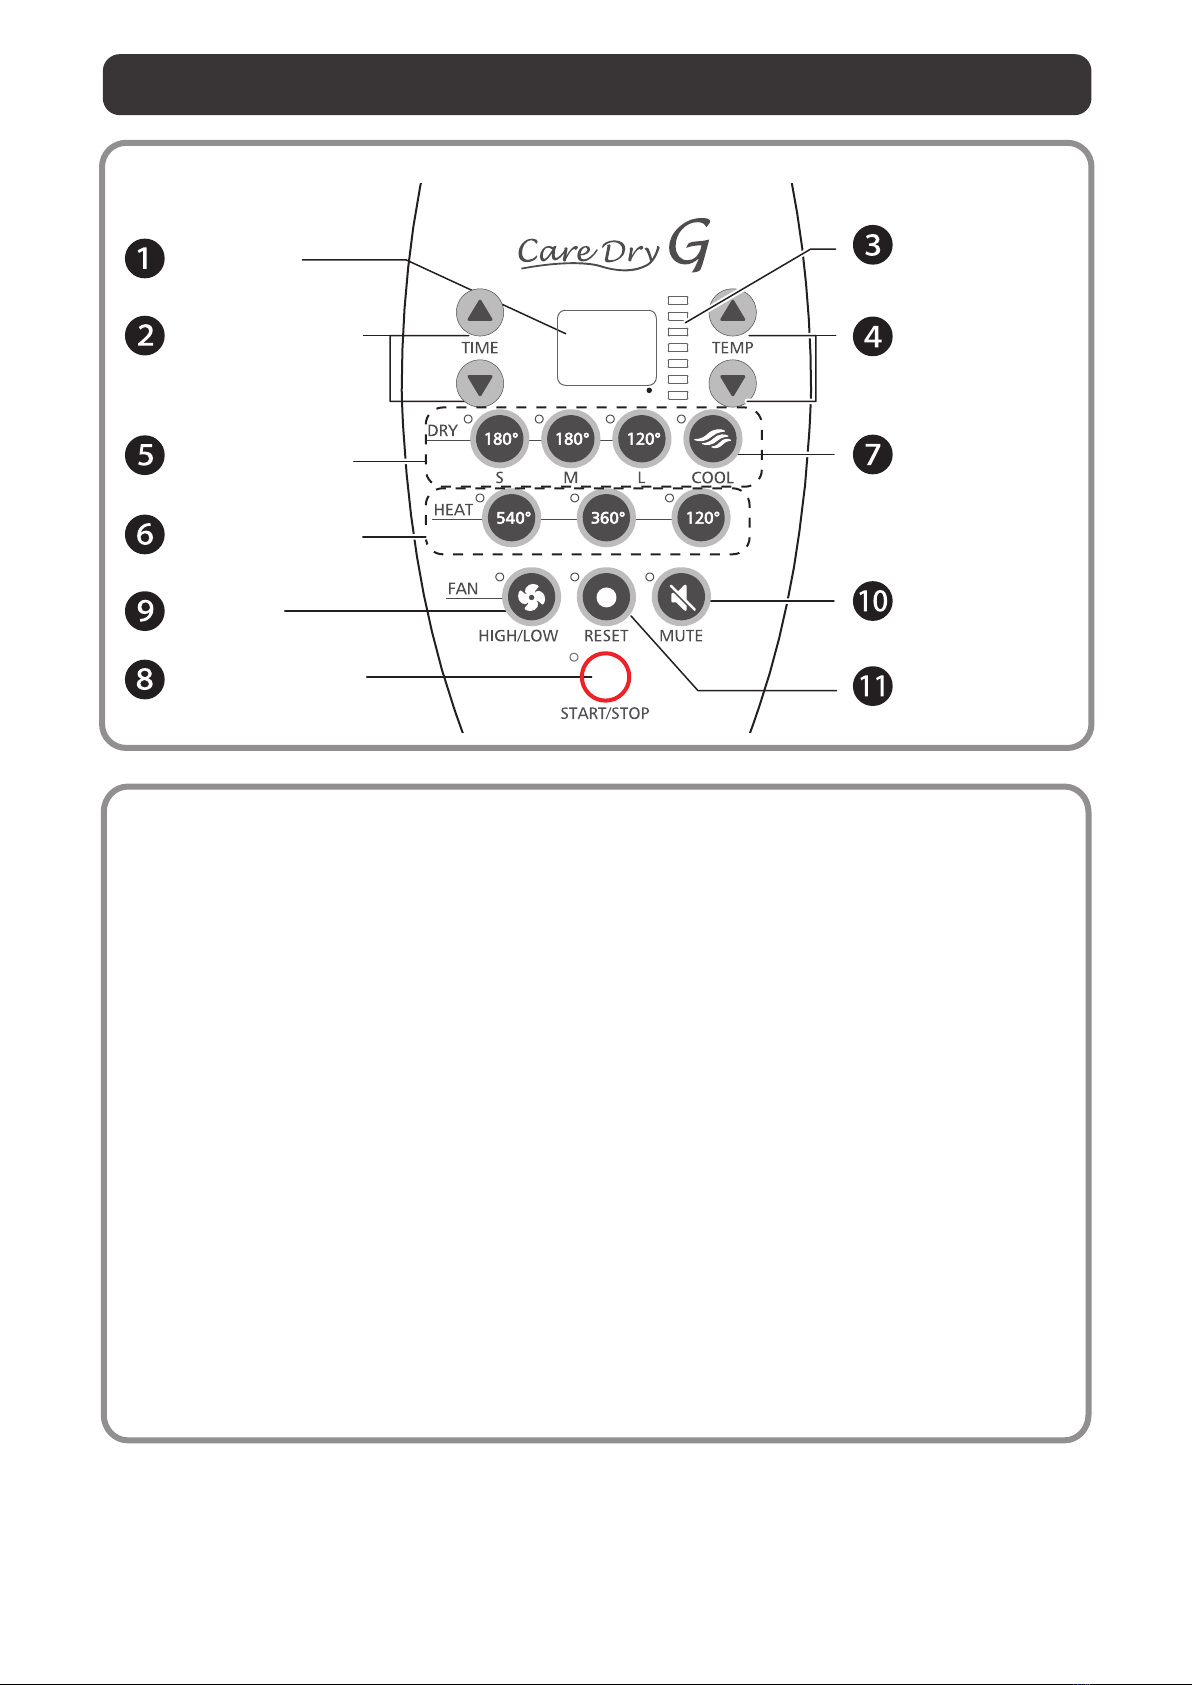
Control panel
Head
Longer legs
The main unit is not properly
inserted into the
height-adjustment pipe.
Recheck the orientation of
the upper main unit with
respect to the stand, and
insert the main unit again.
Move on to “(6) Screw the
upper main unit onto the
height-adjustment pipe.”
When you slide the upper
main unit, the screw holes
become open or closed.
(The screw holes are open
when those in the main unit
align with those in the stand.)
When you slide the upper
main unit, the screw holes
remain open and they do not
become closed.
Stand
These holes are elongated to
allow later adjustment of the
orientation of the Care Dry G
main unit with respect to the
Care Dry G stand.
CAUTION
Heater unit
Shaft
IMPORTANT
Through these holes in the
stand, you will screw the
upper main unit to the stand.
IMPORTANT
Four-legged stand
Screw
tightening area