TAKE-A-LABEL TAL-3000R User manual

O
OP
PE
ER
RA
AT
TI
IO
ON
NS
S
M
MA
AN
NU
UA
AL
L
M
MO
OD
DE
EL
L
T
TA
AL
L-
-3
30
00
00
0R
R
R
RO
OU
UN
ND
D
P
PR
RO
OD
DU
UC
CT
T
L
LA
AB
BE
EL
L
A
AP
PP
PL
LI
IC
CA
AT
TO
OR
R
TAKE-A-LABEL®
3631 44th Street, Suite C
Grand Rapids, MI 49512-3950
Phone: (616) 698-1882
Fax: (616) 698-2812
http://www.take-a-label.com
E-Mail [email protected]

T
TA
AL
L-
-3
30
00
00
0R
R
R
RO
OU
UN
ND
D
P
PR
RO
OD
DU
UC
CT
T
L
LA
AB
BE
EL
LE
ER
R

3
30
00
00
0R
R
S
Sy
ys
st
te
em
m
T
Ta
ab
bl
le
e
O
Of
f
C
Co
on
nt
te
en
nt
ts
s
Section 1 (Introduction)
General Page 1.1
Section 2 (System Operation)
Machine Start Up Page 2.1
Label Threading Page 2.2
Label Tensioning Page 2.3
Product Carriage Adjustment Page 2.4
Product Carriage Adjustment Page 2.5
Product Drive Head Adjustment Page 2.6
Product Drive Head Adjustment Page 2.7
Label Position Page 2.8
Photo Eye Adjustment Page 2.9
Label Sensor Adjustment Page 2.10
Label Sensor Adjustment Page 2.11
Pinch Roll Cam Lock Adjustment Page 2.12
Product Drive Head Thrust Bearing Adjustment Page 2.13
Product Drive Head Thrust Bearing Adjustment Page 2.14

Section 3 (Maintenance Procedures)
General Maintenance Page 3.1
General Maintenance Page 3.2
General Maintenance Page 3.3
Preventive Maintenance Page 3.4
Preventive Maintenance Page 3.5
Spare Parts List Page 3.6
Troubleshooting Guide Page 3.7
Section 4 (Machine Component Description)
Electrical Schematics Page 4.1
3000R Assembly Table of Contents Page 4.2
3000R Assembly Drawings Page 4.3 Thru 4.11
Section 5 (Optional Assembly Instructions)

Section #1
I
In
nt
tr
ro
od
du
uc
ct
ti
io
on
n

Page 1.1
G
Ge
en
ne
er
ra
al
l
Thank you for purchasing the TAL-3000R Round Product Labeler. The TAL-3000R
system is known for its high quality and operating simplicity. With proper maintenance it
will provide years of dependable and trouble free service.
Our equipment is manufactured to the strictest standard; and is thoroughly tested before
being released into the field. However, sometimes a problem may arise that is not
covered by the scope of this manual. If a situation as such occurs, further technical
support is just a phone call away.
Power
Requirements: 110 VAC 15 Amps 60 Hz, Grounded
60 PSI; Clean, Dry Air
System Weight: 75 lbs.
Unit Dimensions: 34” L X 18” W X 16” H
34” L X 18” W X 25” H with Hot Stamp
Maximum Roll Size: 12" converted on a standard 3" diameter core.

Section #2
S
Sy
ys
st
te
em
m
O
Op
pe
er
ra
at
ti
io
on
n

Page 2.1
M
Ma
ac
ch
hi
in
ne
e
S
St
ta
ar
rt
tu
up
p
1. Unpack the TAL-3000R system from the shipping container.
2. Inspect the labeler for damage. If you see any damage, please notify the shipping
company and TAL before setting the labeler up and using it.
3. Set labeler on an appropriate stand or table.
4. Plug the labeler directly into a 110 VAC 15 AMP (GROUNDED) outlet. Do not
use an extension cord.
Note: Extension cords may result in improper labeler operation and are not
recommend by TAL.
4. Install the label roll and thread the labeler. (See page 2.2 )
WARNING: To avoid inadvertent operation, always thread the machine with the
power switch in the off position.
5. Adjust the position of the Round Product Carrier. ( See page 2.4-2.5 Product
Carriage Adjustment).
6. Turn the power switch on. The red LED in the switch will light when the power is
on.
Label Advance +/-
7. Using the LABEL ADVANCE +/- dial, adjust the label advance position. (See page
2.8 Label Position).
8. Adjust the tension of the label web tensioner see. (See page 2.3 Label Threading
and Tensioning).

Page 2.2
L
La
ab
be
el
l
T
Th
hr
re
ea
ad
di
in
ng
g
Unwind Disk
Unwind
Take-up Label Sensor
Peel Plate
Traction Roller
Pinch Roller
Cam Lock
Rewind Mandrel
Threading: 1. Turn labeler off.
2. Remove the outer unwind disk.
3. Install a new label roll on unwind shaft.
4. Replace the unwind disk.
5. Thread the labeler as shown in the diagram above until the label
material reaches the pinch roller and traction roller. Be sure to thread
the label web through the label sensor.
6. Lift the cam lock to release the pinch roller.
7. Thread the label web around the pinch roller and cam rollers as shown
in the diagram above.
8. Pull enough of the label material through the pinch and traction rollers
to attach it to the rewind mandrel.
9. Lower the cam lock, locking the pinch roller down.
10. Remove the rewind clip from the rewind mandrel, wrap the label web
around the bottom of the mandrel, and reattach the clip.

Page 2.3
L
La
ab
be
el
l
T
Te
en
ns
si
io
on
ni
in
ng
g
Take-Up
Tension Knob Rocking Motion
Rocking Motion
Set Screw
Tensioning:
1. Begin dispensing labels.
2. Unlock set screw on tension knob.
3. Slowly turn the tension knob on the unwind until the take-up starts a
slight rocking motion as labels are dispensing.
4. Tighten set screw on tension knob.

Page 2.4
P
Pr
ro
od
du
uc
ct
t
C
Ca
ar
rr
ri
ia
ag
ge
e
A
Ad
dj
ju
us
st
tm
me
en
nt
t
Set Screws
Product Line
Product Carriage
Center Line
Traction Roller
Adjusting Product Carriage:
1. Loosen the setscrews on both sides of one of the rollers, adjust the roller
so your product is in the center of the traction roller. Note: the product
must not be too low. Product line will vary depending on the product.
2. Loosen the other side the same way. Note: the same product line.
3. The product should be setting on the rollers so it will roll easily, keeping
the center line on center to slightly behind, and the product line not too deep
in the product carriage. Too deep will cause pinching of the product not
allowing it to roll smoothly.

Page 2.5
P
Pr
ro
od
du
uc
ct
t
C
Ca
ar
rr
ri
ia
ag
ge
e
A
Ad
dj
ju
us
st
tm
me
en
nt
t
1/2" Gap
Product Carriage
Bolts (2)
Product Carriage
Traction Roller
1. Raise or lower the product carriage by loosening the product carriage
bolts. Move the product carriage to make a gap of ½” between the
traction roller and your product.
2. Tighten the product carriage bolts. Adjust the air pressure on the product
drive head (see page 2.6).

Page 2.6
r
rr
r
P
Po
od
du
uc
ct
t
D
Di
iv
ve
e
H
He
ea
ad
d
A
Ad
dj
ju
us
st
tm
me
en
nt
t
Product Drive Head
A
Ad
du
us
sn
ng
g
P
Po
od
du
uc
c
D
Dr
ri
iv
ve
e
H
He
ea
ad
d:
:
j
jt
ti
ir
rt
t
1
1.
.
T
Th
he
e
a
ai
ir
r
p
pr
re
es
ss
su
ur
re
e
a
ad
dj
ju
us
st
tm
me
en
nt
t
o
on
n
t
th
he
e
3
30
00
00
0R
R
R
Ro
ou
un
nd
d
P
Pr
ro
od
du
uc
ct
t
L
La
ab
be
el
le
er
r
i
is
s
s
se
et
t
t
to
o
o
on
nl
ly
y
a
ap
pp
pl
ly
y
e
en
no
ou
ug
gh
h
p
pr
re
es
ss
su
ur
re
e
t
to
o
t
th
he
e
p
pr
ro
od
du
uc
ct
t
d
dr
ri
iv
ve
e
h
he
ea
ad
d
t
to
o
t
tu
ur
rn
n
t
th
he
e
p
pr
ro
od
du
uc
ct
t.
.
Air Pressure
Adjustment
Air gauge

Page 2.7
r
rr
r
P
Po
od
du
uc
ct
t
D
Di
iv
ve
e
H
He
ea
ad
d
A
Ad
dj
ju
us
st
tm
me
en
nt
t
Flow Control
A
Ad
du
us
sn
ng
g
P
Po
od
du
uc
c
D
Dr
ri
iv
ve
e
H
He
ea
ad
d
U
Up
p:
:
j
jt
ti
ir
rt
t
A
Ad
dj
ju
us
st
t
t
th
he
e
f
fl
lo
ow
w
c
co
on
nt
tr
ro
ol
l,
,
s
so
o
t
th
he
e
h
he
ea
ad
d
r
re
et
tu
ur
rn
ns
s
s
sm
mo
oo
ot
th
hl
ly
y.
.
(
(A
Ai
ir
r
d
do
oe
es
sn
n’
’t
t
p
pu
ul
ll
l
t
th
he
e
h
he
ea
ad
d
u
up
p,
,
a
a
s
sp
pr
ri
in
ng
g
p
pu
ul
ll
ls
s
t
th
he
e
h
he
ea
ad
d
u
up
p.
.)
)
T
To
o
a
ad
dj
ju
us
st
t
t
th
he
e
s
sp
pe
ee
ed
d
o
of
f
t
th
he
e
h
he
ea
ad
d
r
re
et
tu
ur
rn
n,
,
i
in
ns
se
er
rt
t
a
an
n
a
al
ll
le
en
n
w
wr
re
en
nc
ch
h
i
in
nt
to
o
t
th
he
e
s
se
et
t
s
sc
cr
re
ew
w
i
in
n
t
th
he
e
f
fl
lo
ow
w
c
co
on
nt
tr
ro
ol
l,
,
l
lo
oo
os
se
en
n
t
th
he
e
n
nu
ut
t
o
on
n
t
th
he
e
o
ou
ut
ts
si
id
de
e
o
of
f
t
th
he
e
s
se
et
t
s
sc
cr
re
ew
w.
.
T
Tu
ur
rn
n
i
it
t
c
cl
lo
oc
ck
kw
wi
is
se
e
t
to
o
s
sl
lo
ow
w
t
th
he
e
h
he
ea
ad
d
r
re
et
tu
ur
rn
n,
,
c
co
ou
un
nt
te
er
rc
cl
lo
oc
ck
kw
wi
is
se
e
t
to
o
i
in
nc
cr
re
ea
as
se
e
t
th
he
e
h
he
ea
ad
d
r
re
et
tu
ur
rn
n.
.
T
Ti
ig
gh
ht
te
en
n
t
th
he
e
n
nu
ut
t
w
wh
he
en
n
y
yo
ou
u
h
ha
av
ve
e
i
it
t
i
in
n
t
th
he
e
d
de
es
si
ir
re
ed
d
p
po
os
si
it
ti
io
on
n.
.

Page 2.8
L
La
ab
be
el
l
P
Po
os
si
it
ti
io
on
n
Label Advance
Label Advance Position:
Before being dispensed, each label should stop near to the edge of the
peel plate, but should not come off the peel plate. Adjust the label
advance as follows:
1. Unlock the LABEL ADVANCE +/- dial. The dial is located on top
of the labeler’s control unit.
2. Dispense a single label.
3. Note; if the dispensed label advanced completely off the peel plate,
and note the position of the next label still on the peel plate.
4. Turn the LABEL ADVANCE +/- dial in small amounts to adjust
the label advance position.
•If the dispensed label does not come off the label web, turn the
dial to the right (to + for longer advance distance).
•If the next label on the peel plate extends over the peel plate
edge, turn the dial to the left (to – for shorter advance
distance).
•If the dispensed label comes off the label web and the next
label is close to the peel plate edge, the advance distance is
correct. No adjustment is necessary.
5. Repeat steps 2 through 4 until the label advances to the correct
position.
6. Once desired position is achieved, lock the LABEL ADVANCE
dial in position.

P
Ph
ho
ot
to
o
E
Ey
ye
e
A
Ad
dj
ju
us
st
tm
me
en
nt
t
P
Ph
ho
ot
to
o
E
Ey
ye
e
M
Mo
od
de
e:
:
1
1.
.
I
In
ns
se
er
rt
t
l
li
in
ne
er
r
o
on
nl
ly
y
i
in
nt
to
o
t
th
he
e
p
ph
ho
ot
to
o
e
ey
ye
e.
.
2
2.
.
P
Pr
re
es
ss
s
a
an
nd
d
h
ho
ol
ld
d
t
th
he
e
“
“n
no
or
rm
ma
al
l”
”
b
bu
ut
tt
to
on
n
f
fo
or
r
t
th
hr
re
ee
e
s
se
ec
co
on
nd
ds
s.
.
T
Th
he
e
r
re
ed
d
l
li
ig
gh
ht
t
w
wi
il
ll
l
s
sh
hu
ut
t
o
of
ff
f,
,
t
th
he
en
n
t
th
he
e
g
gr
re
ee
en
n
l
li
ig
gh
ht
t
w
wi
il
ll
l
b
be
eg
gi
in
n
t
to
o
f
fl
la
as
sh
h.
.
W
Wh
he
en
n
t
th
he
e
r
re
ed
d
l
li
ig
gh
ht
t
c
co
om
me
es
s
o
on
n
t
th
he
e
p
ph
ho
ot
to
o
e
ey
ye
e
h
ha
as
s
b
be
ee
en
n
t
ta
au
ug
gh
ht
t,
,
r
re
el
le
ea
as
se
e
t
th
he
e
b
bu
ut
tt
to
on
n.
.
Page 2.9

Page 2.12
P
Pi
in
nc
ch
h
R
Ro
ol
ll
l
C
Ca
am
m
L
Lo
oc
ck
k
A
Ad
dj
ju
us
st
tm
me
en
nt
t
Unlock
Lock
Cam Lock
Pinch Roller
Teaction Roller
A
Ad
dj
ju
us
st
tm
me
en
nt
t
i
is
s
n
ne
ec
ce
es
ss
sa
ar
ry
y
i
if
f
t
th
he
e
b
ba
ac
ck
ki
in
ng
g
i
is
s
n
no
ot
t
b
be
ei
in
ng
g
p
pu
ul
ll
le
ed
d
t
th
hr
ro
ou
ug
gh
h
t
th
he
e
l
la
ab
be
el
le
er
r
s
sm
mo
oo
ot
th
hl
ly
y.
.
C
Ca
am
m
L
Lo
oc
ck
k
A
Ad
dj
ju
us
st
tm
me
en
nt
t:
:
1
1.
.
T
Tu
ur
rn
n
t
th
he
e
p
po
ow
we
er
r
o
of
ff
f
t
to
o
l
la
ab
be
el
le
er
r
a
an
nd
d
u
un
np
pl
lu
ug
g
i
it
t
f
fr
ro
om
m
t
th
he
e
p
po
ow
we
er
r
s
so
ou
ur
rc
ce
e.
.
2
2.
.
U
Un
nl
lo
oc
ck
k
t
th
he
e
c
ca
am
m
a
as
s
i
if
f
y
yo
ou
u
w
we
er
re
e
g
go
oi
in
ng
g
t
to
o
t
th
hr
re
ea
ad
d
t
th
he
e
l
la
ab
be
el
le
er
r.
.
3
3.
.
R
Re
em
mo
ov
ve
e
t
th
he
e
e
el
le
ec
ct
tr
ri
ic
ca
al
l
h
ho
ou
us
si
in
ng
g
c
co
ov
ve
er
r.
.
4
4.
.
I
In
ns
se
er
rt
t
a
an
n
a
al
ll
le
en
n
w
wr
re
en
nc
ch
h
i
in
nt
to
o
t
th
he
e
a
al
ll
le
en
n
b
bo
ol
lt
t
i
in
n
t
th
he
e
c
ca
am
m
l
lo
oc
ck
k.
.
5
5.
.
L
Lo
oc
ca
at
te
e
t
th
he
e
n
nu
ut
t
t
th
ha
at
t
i
is
s
h
ho
ol
ld
di
in
ng
g
t
th
he
e
c
ca
am
m
l
lo
oc
ck
k.
.
6
6.
.
I
In
ns
se
er
rt
t
a
a
t
th
hi
in
n
w
wr
re
en
nc
ch
h
o
on
nt
to
o
t
th
he
e
n
nu
ut
t
a
an
nd
d
l
lo
oo
os
se
en
n
i
it
t
(
(Y
Yo
ou
u
m
mi
ig
gh
ht
t
h
ha
av
ve
e
t
to
o
r
re
em
mo
ov
ve
e
t
th
he
e
e
el
le
ec
ct
tr
ri
ic
ca
al
l
b
bo
oa
ar
rd
d
t
to
o
r
re
ea
ac
ch
h
t
th
he
e
n
nu
ut
t.
.)
).
.
7
7.
.
M
Mo
ov
ve
e
t
th
he
e
c
ca
am
m
d
do
ow
wn
n
t
to
ow
wa
ar
rd
ds
s
t
th
he
e
p
pi
in
nc
ch
h
r
ro
ol
ll
l
(
(R
Re
em
me
em
mb
be
er
r
t
th
ha
at
t
y
yo
ou
u
h
ha
av
ve
e
t
to
o
l
lo
oc
ck
k
i
it
t
s
so
o
d
do
on
n’
’t
t
m
mo
ov
ve
e
i
it
t
d
do
ow
wn
n
t
to
oo
o
f
fa
ar
r.
.)
).
.
8
8.
.
T
Ti
ig
gh
ht
te
en
n
t
th
he
e
c
ca
am
m
l
lo
oc
ck
k
n
nu
ut
t
a
an
nd
d
t
tr
ry
y
t
th
he
e
l
la
ab
be
el
le
er
r
a
ag
ga
ai
in
n.
.
9
9.
.
R
Re
ep
pe
ea
at
t
i
if
f
n
ne
ec
ce
es
ss
sa
ar
ry
y.
.

Page 2.13
P
Pr
ro
od
du
uc
ct
t
D
Dr
ri
iv
ve
e
H
He
ea
ad
d
T
Th
hr
ru
us
st
t
B
Be
ea
ar
ri
in
ng
g
A
Ad
dj
ju
us
st
tm
me
en
nt
t
Thrust Bearing Adjustment Nut
Bearing Adjustment:
1. The thrust bearing adjustment nut should be checked periodically.
2. With labeler unplugged you should to tighten the nut with a little
pressure on the thrust bearing so everything is snug; however not
too tight. Do Not over tighten this bearing it will cause the bearing
to wear out prematurely.
3. Always make sure that the bearings have plenty of grease in them.

Page 2.14
P
Pr
ro
od
du
uc
ct
t
D
Dr
ri
iv
ve
e
H
He
ea
ad
d
T
Th
hr
ru
us
st
t
B
Be
ea
ar
ri
in
ng
g
A
Ad
dj
ju
us
st
tm
me
en
nt
t
Thrust Bearings
Pivot Spacer
Thrust Bearing Nut
Checking Bearings And Lubing:
1. Turn power off; unplug the labeler.
2. Locate the screws around the product drive motor housing and remove.
3. Note; the motor leads, unplug the motor leads and set the housing down.
4. Remove the thrust-bearing nut. Note; the thrust bearings under the
washer, remove the thrust-bearing make sure not to get dirt in the
bearing.
5. Using care, slide the product drive head, note the pivot shaft spacer.
6. Also be careful the set of thrust bearings on the inside (note: Washer,
Bearing, and Washer per set).
7. Clean, inspect and / or replace all the bearings and washers.
8. Do Not replace only part of the set.
9. Grease the bearings and pivot shaft (using a good grade of regular
grease), reassemble.

Section #3
M
Ma
ai
in
nt
te
en
na
an
nc
ce
e
P
Pr
ro
oc
ce
ed
du
ur
re
es
s
Table of contents
Other TAKE-A-LABEL Label Maker manuals
TAKE-A-LABEL
TAKE-A-LABEL TAL-750HD User manual

TAKE-A-LABEL
TAKE-A-LABEL 250 User manual
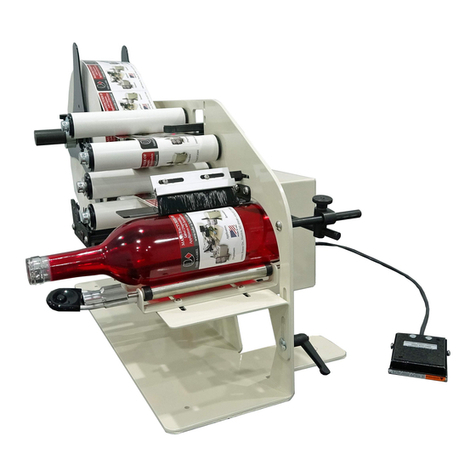
TAKE-A-LABEL
TAKE-A-LABEL TAL-3100T User manual

TAKE-A-LABEL
TAKE-A-LABEL TAL-3100R User manual

TAKE-A-LABEL
TAKE-A-LABEL TAL-2100ER User manual
TAKE-A-LABEL
TAKE-A-LABEL TAL-3100R User manual
TAKE-A-LABEL
TAKE-A-LABEL TAL-3000C User manual

TAKE-A-LABEL
TAKE-A-LABEL 250 User manual