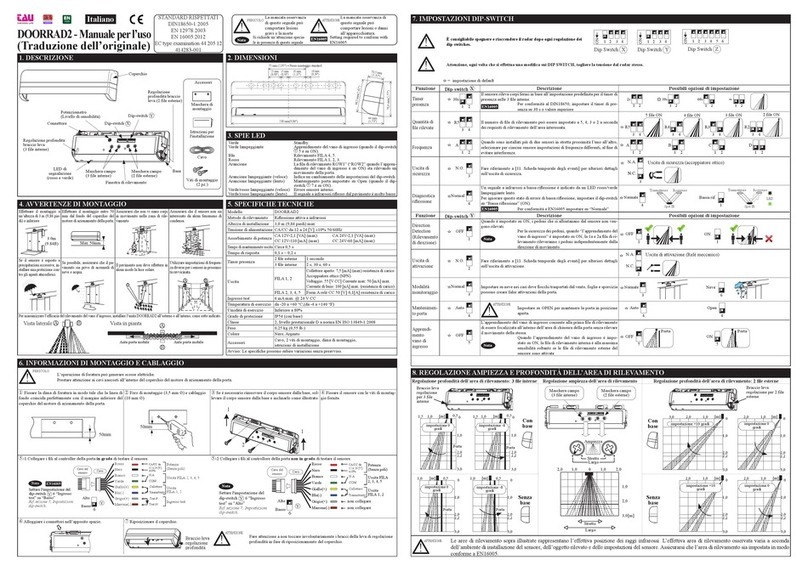
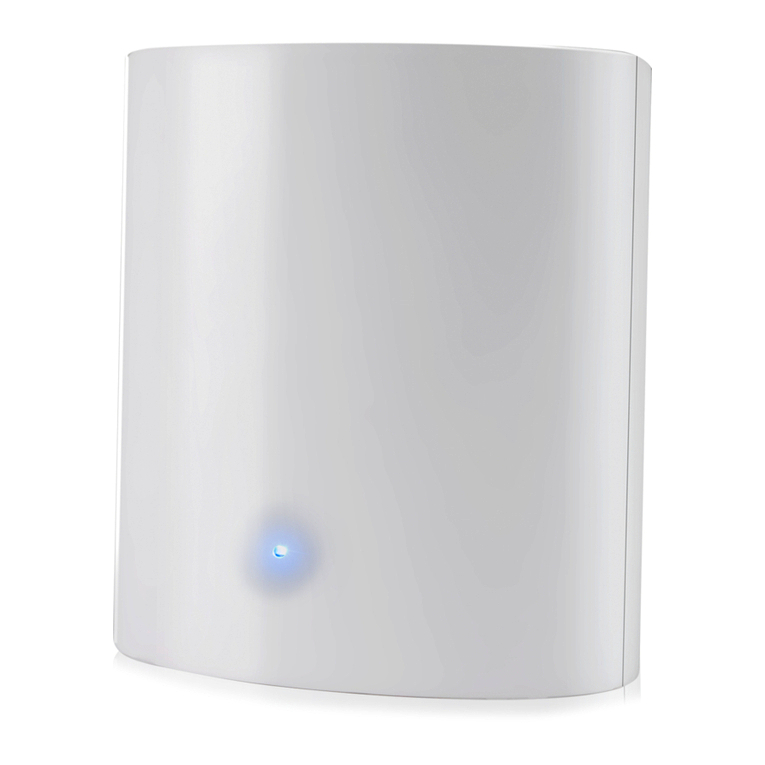
tau DOORSS User manual

1. General Description / Features
2. Components
3. Mounting and Wiring Information
3.1. Notice CAUTION
WARNING
!
1 2 3
Do not mount the
sensor higher than
2.6 [m]( 8' 6" ).
Do not mount the
sensor where rain or
snow will fall directly
on the unit.
Ensure the minimum
of reflected sunlight
from the floor.
Ensure no condensation
gets onto the sensor.
4
The Aluminum
Case(s) should be
located close to the
Leading edge of the
door to maximise
safety detection.
5
3.2 Mounting Hole
3.3 Mounting the Aluminum Case
1) 2)
12
34
3.5 Wiring to the door controller
Install the Jamb Hole Cover and Wire Sheath when wiring to the door controller.
Connect the wires to the
door controller using the
Terminal Block
Drill following holes. Clamp the Wire Sheath between the Jamb Hole Cover A/B
Unit : [mm]
30
10 15
Screw Holes
Wiring Hole
CAUTION
!
Length
[mm]
Filter
Cover
Installation
Instruction
Wire Sheath
600 [mm]
(1) (3)
(2)
Mounting
Screws
4×16 [mm]
(5)
Mounting
Screws
3x10 [mm]
Jamb Hole
Cover A/B
Accessories
Before mounting this sensor please note the following remarks.
!
2,6 [m]
Joint
3 - φ2,6
φ10
English
Note
WARNING
!CAUTION
!
EN16005
Model name
3.4 Replacing the PCB unit(s)
CAUTION
!
1
Side Cover-L
Side Cover-R
Filter Cover
Aluminum Case
Screw
Screw
PCB unit
Hinge
Hinge
Leading edge Leading edge
<Top view>
torque
0.5 Nm
Infrared
Beam
Infrared
Beam
Hinge
2
Power supply ( AC/DC 12〜24[V] )
Relay Output ( Common )
Relay Output1
Relay Output 2(Another PCB Unit Output)
TEST Input ( - )
TEST Input ( + )
2
3
4
1
5
6
7
1
7
PCB unit
Note
Wires to
the controller
Jamb Hole
Cover A
Wire Sheath
Wire size
0.15 to 3.5 [mm2]
Screw (3×10 [mm])
Jamb Hole
Cover B
Push SW
Angle Stabilizer
PCB Holder
PCB unit
PCB unit Assembly
LEADING
EDGE
MARK
LEADING EDGE MARK
LEADING EDGE MARK
Unit : [mm]
390 390
DOORSS1023T
3-φ3,5
Screws
Joint
6Be careful not to drop the sensor, during transportation and installation. It may cause the sensor to break.
Fix the Aluminum Case to the door with
Screws.
Front view of PCB unit
Dip SW
Terminal Block
Operation LED
Communication Cable
(4)
4. Dip Switch Settings
PCB unit
=
4.1 TEST Input
21 3 4 5 6 7 8
To avoid dangerous door movements,
configure the DIP-SW settings of the sensor
before powering up the sensor.
When connected to a door controller without a
TEST input, set to “A”. When connected to a
door controller with a TEST input, set to “B”
Refer to [6.Timing Chart of events].
When two DOORSS's are installed in close proximity ,
optical cross interference between DOORSS's might
cause mis-operation. To avoid this , different frequency
settings should be selected using DIP Switch #2.
1
A
Senza TEST
Con TEST
0v
B
Senza TEST
0v
B
A
Set to “B” to comply with EN16005
4.2 Optical Interference DOORSS DOORSS
A
2
B
2
21 3 4 5 6 7 8
4.5 Detection Range
4.3 Relay Output Mode
Refer to [6. Timing chart of events]
for full details on Relay Output Mode.
3
NO NC
21 3 4 5 6 7 8
3
Set Non-Detection
distance A
21 3 4 5 6 7 8
5. Detection Angle Adjustment
Angle Stabilizer
PCB unit
5゜
The detection angle can be adjusted between 5〜25 [deg] in 5 [deg] increments using the Angle Stabilizer.
Example) Changing angle from 5°to 25°
Side View
5゜25゜
20゜
15゜
10゜
1.
(1)Lift (3)Rotate PCB unit (4)Slide Back
(2)Slide
2. 3.
25゜
21 3 4 5 6 7 8
67
50 mm
100 mm
150 mm
200 mm
250 mm
300 mm
400 mm
500 mm
Check that the detection area position conforms to EN16005
5
EN16005
Check that the detection
range conforms to EN16005
EN16005
EN16005
8
6 7 8
678
678
678
67 8
6 7 8
6 7 8
Door Leaf
Detection
Non-Detection A
4.4 Masking detecting
spots 45
1
2
3
4
5
6
spots
spots
spots
spots
4 5
1
2
3
4
5
-
45
1
2
3
4
-
-
4 5
1
2
3
-
-
-
3.6.1 Option 1: Plan View of SSS-5 Installation
(PCB units on both sides of the door wired back to the Door Controller independently)
PLAN VIEW and Wiring
Wire Sheath
Door Controller
Door Controller
Hinge
Hinge
Jamb Hole Cover
Jamb Hole Cover
Leading
Edge
Leading
Edge
Extra Wire Hole through the door
Connector 6P
Unità PCB 1
Unità PCB 2
7P Terminal stand
(Unused)
7P Terminal stand
PCB units are connected to each other
using the Communication Cable
(supplied)
Slide SW
「OFF」
Hole( 」 φ10) drilled through the
door.
3.6.2
Option 2: Plan View of SSS-5 Installation
(PCB units connected using Communication Cable and only 1 PCB units is wired back to the Door Controller)
「ON」
「OFF」
「OFF」
Note: Remember to set the Slide SW as indicated
Default Setting
BORDO DI
CHIUSURA
Slide SW
User Manual (Original)
DOORSS
Safety Sensor for
Swing Doors
The DOORSS is a microprocessor controlled active infrared presence detector for swing doors.
- 6 detection spots per PCB unit provide a wide detection area.
- The detection distance to the floor is set automatically by pressing a Push Switch.
- The detection range can be adjusted manually, using dip switches in increments of 50mm
- The relay output can be changed from NO to NC using a dip switch.
- Self diagnostic and monitoring functions are implemented.
The illustration below shows the standard configuration of DOORSS with one PCB units.
Table.1 Information of DOORSS
!
COMPLIED STANDARDS
DIN18650-1:2010
EN 12978:2003 +A1:2009
EN16005:2012
EC type examination
44 205 13738001
Disregarding this symbol may result
in serious injury or death
Special attention is required when
this symbol is shown
Disregarding this symbol may result
in injury or damage to equipment
Setting required to conform with EN16005
Drill fixing holes as illustrated
below. When installing the
DOORSS on both sides of the
door it may be necessary to drill
a wiring hole through the door.
(Ref. 3.6 Plan View of DOORSS
Installation)
Drilling may cause Electric shock! When drilling, pay attention to
hidden wires.
Unscrew the Side Covers and remove the Filter
Cover.
Remove the PCB Unit. Loosen the Screw on the PCB Holder and slide it
aside to remove the PCB Unit.
When replacing the PCB unit it is very important that the side with "LEADING EDGE" marked on it is inserted
so that it is closest to the leading edge of the door. This will ensure maximum pedestrian safety at the door
edge.
Remove the Terminal Block from the PCB unit.
Insert the PCB unit into the Aluminum Case, making sure that the
side marked “LEADING EDGE” is closest to the leading edge of the
door.
Attach the Angle Stabilizer and tighten the screws on the PCB
Holders.
Remove Angle Stabilizer.
1)Lift and slide the Angle Stabilizer to the side as indicated.
2)Push the Angle Stabilizer with your thumb to remove it from
the Aluminum Case.
Leading Edge
Leading Edge
PCB unit
Hinge
PCB Unit 2
7P Terminal
stand
PCB Unit1
7P Terminal
stand
S-10DOORSS340 / DOORSS1023T
S-10DOORSS340 0 2340 1
S-10DOORSS1023T 2 31023 3
DOORSS340
2-φ3.5 Screw holes
200

State Red LED
Red LED
Red LED
Green LED
Green LED
Green LED
Non-Detect ON
ON
OFF
7. LED information
2
34
Cut out the Side Cover wiring point and insert the
Wire Sheath into it.
Attach the Side Cover with
Screws provided.
14. Dimensions
Screw
6. Timing chart of events
Relay Output / Test Input
DETECTION as
response to TEST
POWER OFF NO DETECTION NO DETECTIONDETECTION
TEST RESPONSE
T
Test Input
NON-TEST NON-TEST
TEST
B
Dip Switch #3
Dip Switch #1
T : 8 to 18 [mSec]
Test Input
Relay Output Mode
Interromperelacorrente
NO
COM
NC
NO
COM
NC
NO
COM
NC
NO
COM
NC
NO
COM
NC
NO
COM
NC
NO
COM
NC
NO
COM
NC
T
NO
COM
NC
NO
COM
NC
NO
COM
NC
NO
COM
NC
NO
NC
A
6
7
6
7
6
7
Supplying DC12 to 24V,
make current flow from
7th terminal to 6th.
Sensor
Sensor
Sensor Sensor
SensorSensor
6
7
6
7
6
7
12. Final Detection Range Check
After the Filter Cover is fitted, confirm that the detection range is as expected
and conforms with local regulations.
13. Technical Data
MODEL
TECHNOLOGY
POWER SUPPLY
CURRENT
CONSUMPTION
RELAY OUTPUT
TEST INPUT OPERATING
TEMPERATURE
MOUNTING HEIGHT
DETECTION RANGE WEIGHT
95 [mA] a DC12[V]
55 [mA] a DC24[V]
1.7 [VA] a AC12 [V]
2.3 [VA] a AC24[V]
OPTO RELAY 1A (NON POLE)
DC 50[V] 0.1[A] (RESISTANCE LOAD)
RESPONSE SPEED
DIP SW FUNCTIONS
TEST INPUT : 1 [BIT]
OPTICAL INTERFERENCE : 1 [BIT]
RELAY OUTPUT MODE :1 [BIT]
MASKING DETECTING SPOTS:2[BIT]
DETECTION RANGE:3[BIT]
LESS THAN 100 [mSec]
AC/DC 12〜24[V] ±10% BEAM ANGLE
ADJUSTMENT 5 , 10 , 15 , 20 , 25 [degrees]
COMPLETE STATIONARY DETECTION with PSD DISTANCE MEASUREMENT
2,6 [m] max
0 - 2,55 [m] Max
-20 〜+60 [゜C]
6 [mA] max. a 24 [V CC]
OFF
7-1 Normal state
Detect PCB unit
7-2 Error state
Cause
“N”
times
N
1
3 over
Error category
Environmental error
Environmental noise or the
reflection level from the floor is
too low.
Execute the “TEACH” from
Section 8 whilst laying a sheet
of white paper on the floor.
Other Error Internal component failure Change the units.
7-3 Teaching state See Section 8
8. Teaching
Conduct the following steps with the Filter Cover off.
1) Check the wiring connection and supply power.
2) Execute “TEACHING”
“TEACHING” is necessary to make the sensor work properly, that is to learn the distance from
the sensor to the floor.
STEP 1.
Press the “Push SW" switch
for more than 2 seconds.
STEP 2.
LED blinks slowly for 10 sec’s in a non-detection
state. Ensure that there are no people or objects
(ladder etc) in the detection area during this time.
STEP 3.
After STEP2, LED blinks faster and starts " TEACHING". If during
this time, a person or object is in the detection area, try again from
STEP 1.
STEP 4.
After STEP3, the green LED blinks once and then this process is
completed.
9. Detection Area
9.1 FRONT VIEW 9.2 SIDE VIEW
2000
2600 400 200 0
600
1000 1000
2000
2600 400 200
6008001000 0
5
25
10. Detection Range Check without Filter Cover
Check the detection range without the Filter Cover attached.
Put a test object in the detection area to check the detection patterns and other Dip Switch
settings. Tests according to local standards should be carried out.
After this check, Turn power off.
Description of Product:
DOORSS Safety Sensor for Swing Doors .
Complete stationary detection with PSD distance measurement.
15. EC DECLARATION OF CONFORMITY
Check that the detection area conforms to EN16005
When the test is completed, go to Section 11 to install the Filter Cover and Side Cover.
If an error occurs, re-check the settings referring to Section 3.
EN16005
Check that the detection area conforms to EN16005EN16005
1200
Check the adjustments , range and other setting.
3
Date
Unit: [mm]
11. Replacing the Filter Cover and Side Cover
1CAUTION
!
Be careful not to obstruct
the optical components
with wires.
800
1000
1) First fit the upper side of the Filter Cover into the full
length of the Aluminum Case.
2) Slightly bend the Filter Cover at one end to latch
it onto the bottom lip of the Aluminum Case.
3) Slide your hand along the bottom lip to lock the Filter Cover
onto the Aluminum Case all along the length of the Aluminum
Case.
1) Snap the Joint into the Aluminum Case.
2) Slide the Joint so that it fits snugly into the Filter Cover. Make sure there are no gaps left.
3) Attach remaining Filter Covers as illustrated
123
5
3
4
5
3
4
5
3
4
5
3
4
5
3
4
5
3
4
5
3
4
5
3
4
5
3
4
5
3
4
5
3
4
5
3
4
Safety Sensor for Swing Doors DOORSS
Compiler of Technical File (EC Community)
Loris Virgilio Danieli
TAU S.r.l. - Via E. Fermi, 43 - 36066 Sandrigo (VI) - IT
Tel: +39 0444 750190 - Fax: +39 0444 750376
Declaration made by
Loris Virgilio Danieli
Location of Declaration
(Manufacture)
TAU S.r.l..
Via Enrico Fermi, 43
Sandrigo (VI), Italia
05-02-2018
D-MNL 0DOORS S
TAU S. r.l.
Via Enrico Fermi, 43
36066 Sandrigo (VI) - Italy
e-mail: [email protected]
Tel.: +39 0444 750190
Fax: +39 0444 750376
www.tauitalia.com
Solution
Red LED
Green LED
Red LED
Green LED
Red LED
Green LED
Attaching the Joint
Directives Fulfilled:
DIRECTIVE 2006/42/EC Machinery Directive
DIN 18650-1:2010 Powered pedestrian doors Part 1: Product requirements. Chapter 5.7.4
EN12978:2003 +A1:2009 Industrial, commercial and garage doors and gates - safety devices for power operated doors
and gates - Requirements and test methods.
EN62061:2005 Functional safety of electrical/electronic/programmable electronic safety-related systems.
EN ISO 13849-1:2008 /AC:2009 Safety of machinery - Safety-related parts of control systems.
EN 16005:2012 Power operated pedestrian doorsets - Safety in use - Requirements and test methods. Chapter 4.6.8
EC type examination No. 44 205 13738001
Above EC Type Directives Certified by:
TUV NORD CERT GmbH
Langemarckstr.20 45141 Essen Germany
Harmonized Standards
Used:
EN ISO 13849-1:2008/AC:2009
Other Technical Standards
Used:
DIN 18650-1:2005
EN16005:2012
<Disclaimer> The manufacturer cannot be held responsible for the below.
1. Misinterpretation of the installation instructions, miss connection, negligence, sensor modification and inappro-
priate installation.
2. Damage caused by inappropriate transportation.
3. Accidents or damages caused by fire, pollution, abnormal voltage, earthquake, thunderstorm, wind, floods and
other acts of providence.
4. Losses of business profits, business interruptions, business information losses and other financial losses caused by
using the sensor or malfunction of the sensor.
5. Amount of compensation beyond selling price in all cases.
Rev. 02 31/08/2023
Unità: [mm]
DOORSS340: CIRCA 350 [g]
DOORSS1023T: CIRCA 760 [g]
48
50,5
1023
DOORSS1023T
DOORSS340 47,5
49
360
This manual suits for next models
2
Other tau Security Sensor manuals
