manuals.online logo
Brands
  1. Home
  2. •
  3. Brands
  4. •
  5. Taymor
  6. •
  7. Plumbing Product
  8. •
  9. Taymor KAI 06-4021HS User manual

Taymor KAI 06-4021HS User manual

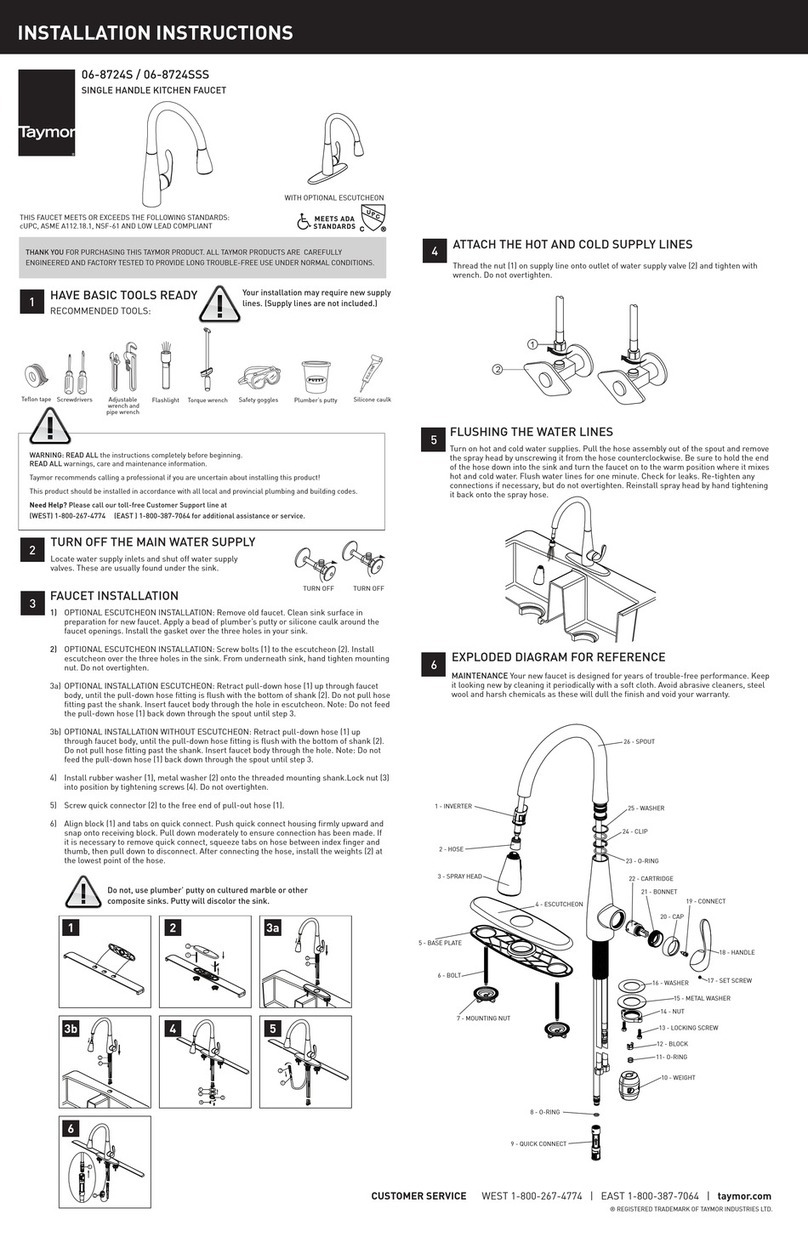
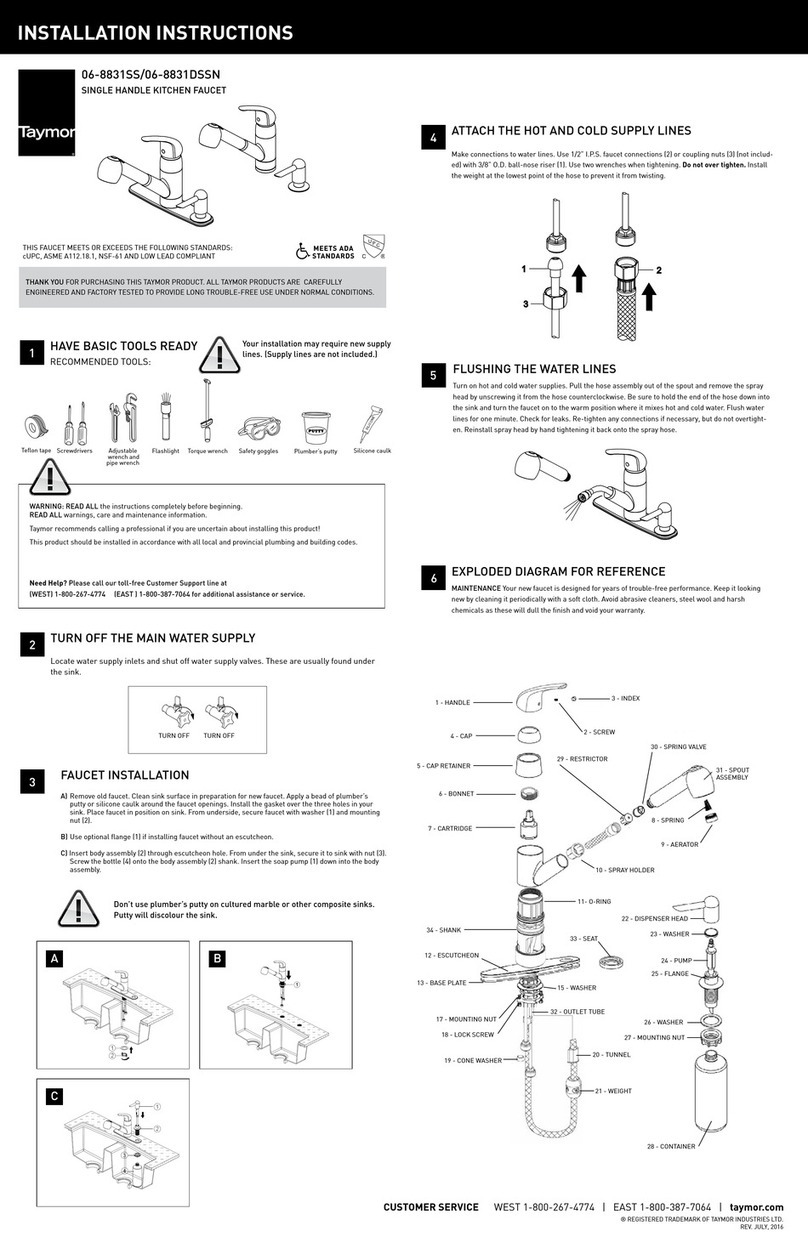
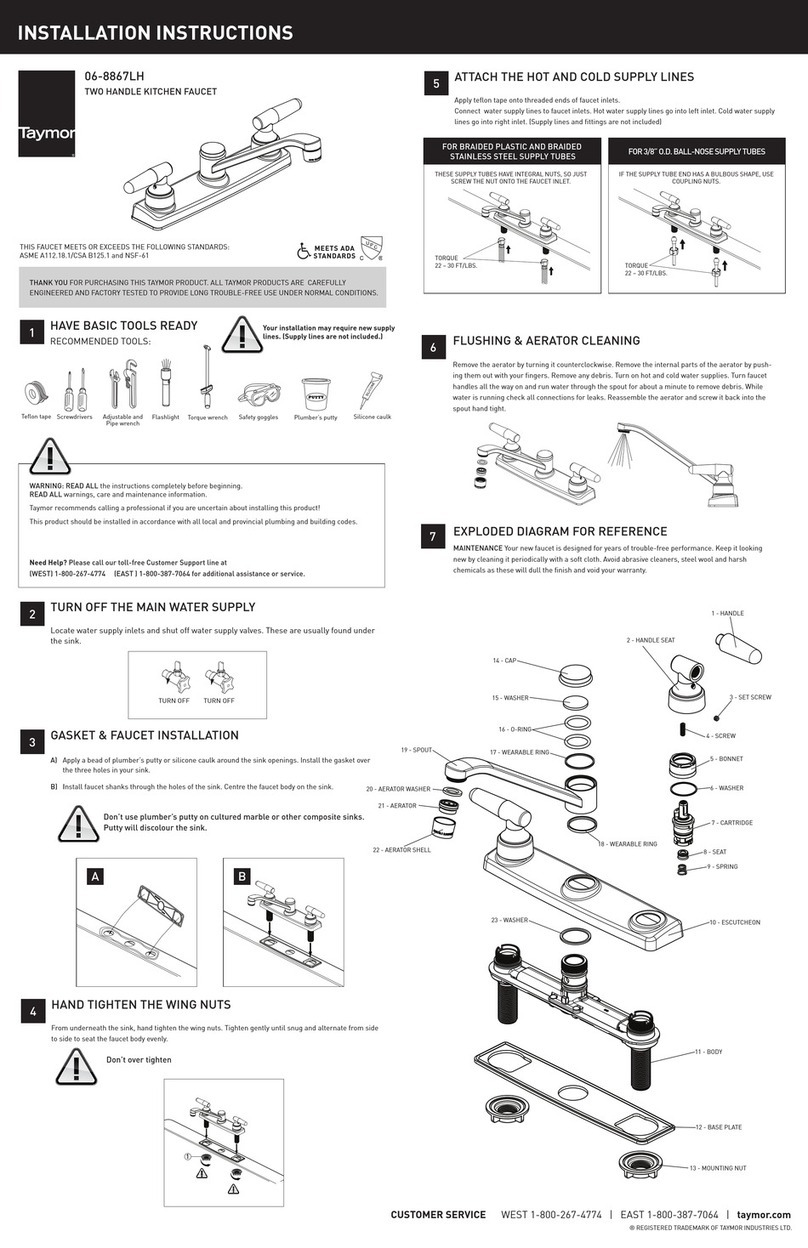
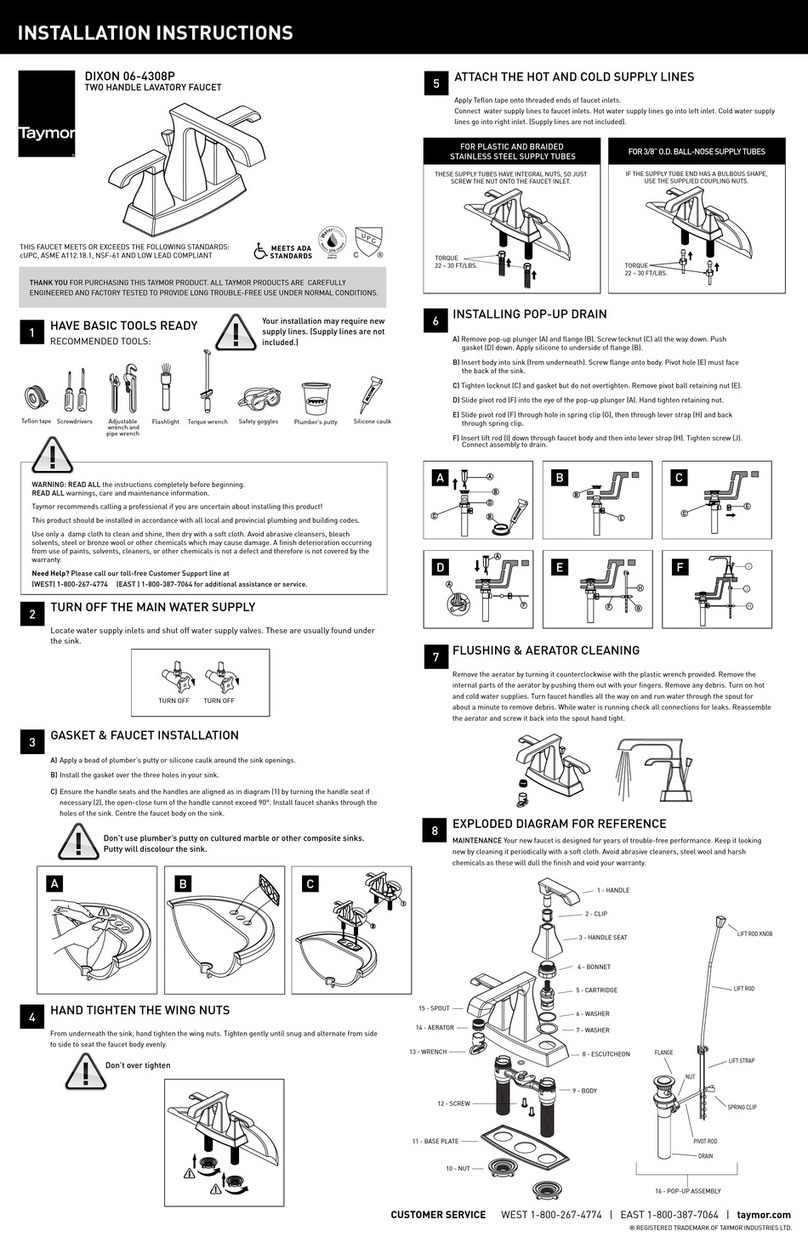
INSTALLATION INSTRUCTIONS
KAI 06-4021HS
ROMAN TUB FAUCET
THIS FAUCET MEETS OR EXCEEDS THE FOLLOWING STANDARDS:
ASME A112.18.1/CSA B125.1 and NSF-61
TURN OFF
TURN OFF
SILICONE
Your installation may require new supply
lines. (Supply lines are not included.)
® REGISTERED TRADEMARK OF TAYMOR INDUSTRIES LTD.
CUSTOMER SERVICE WEST 1-800-267-4774 | EAST 1-800-387-7064 | taymor.com
4
2
1
3
THANK YOU FOR PURCHASING THIS TAYMOR PRODUCT. ALL TAYMOR PRODUCTS ARE CAREFULLY
ENGINEERED AND FACTORY TESTED TO PROVIDE LONG TROUBLE-FREE USE UNDER NORMAL CONDITIONS.
HAVE BASIC TOOLS READY
RECOMMENDED TOOLS:
1
Flashlight
Teflon tape Screwdrivers Adjustable
wrench and
pipe wrench
Plumber’s putty
Safety goggles
Torque wrench Silicone caulk
2TURN OFF THE MAIN WATER SUPPLY
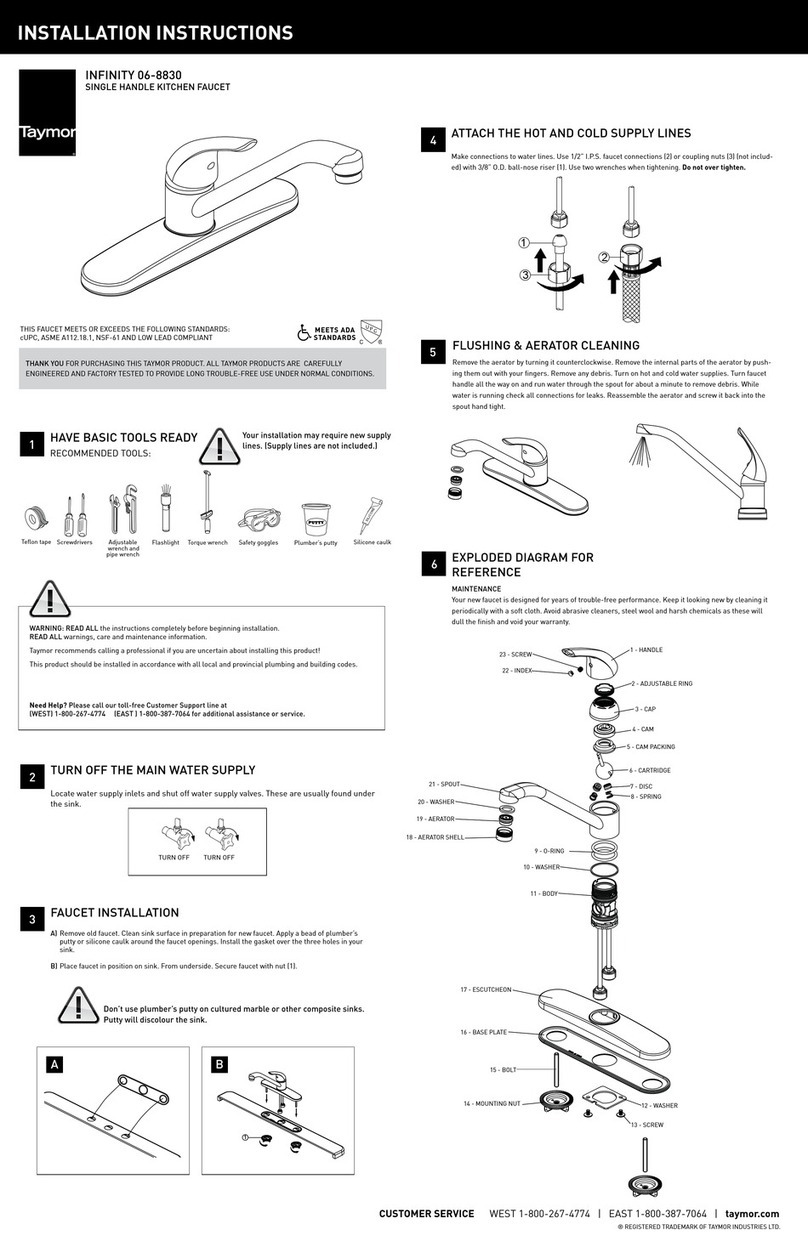
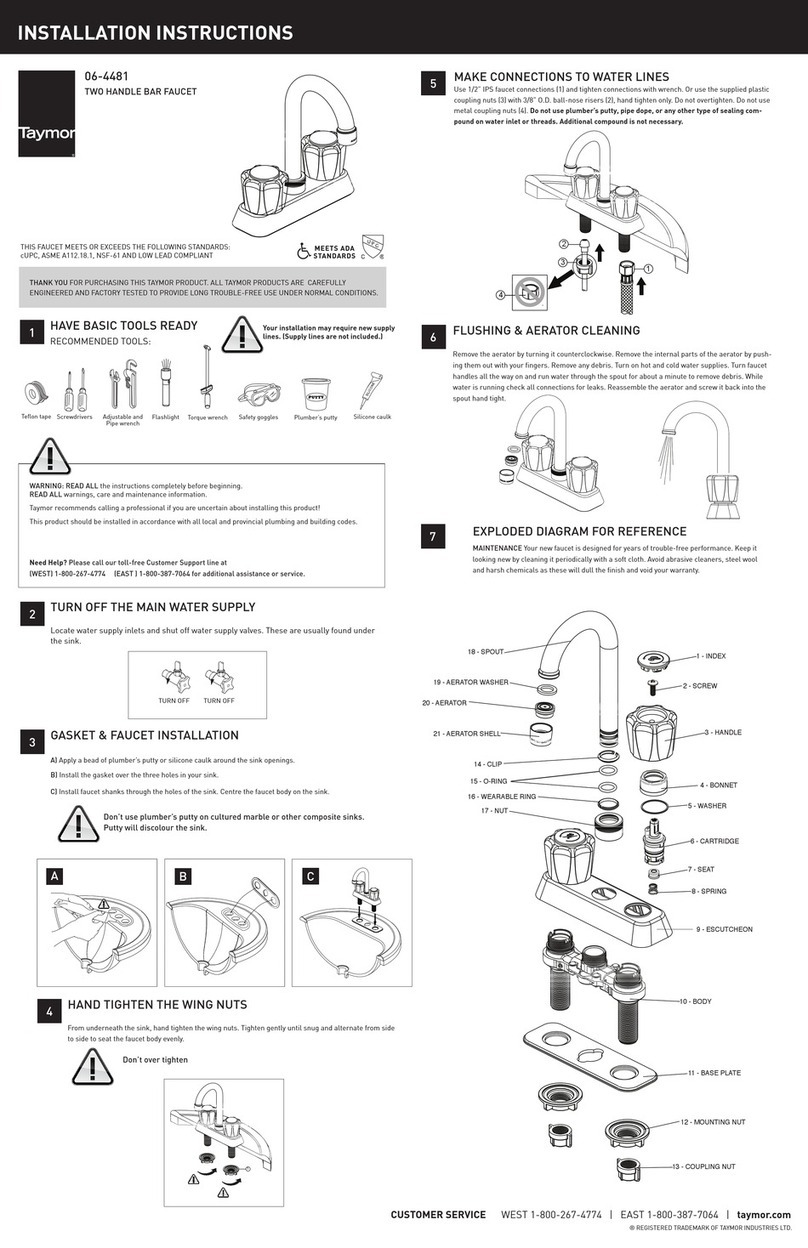
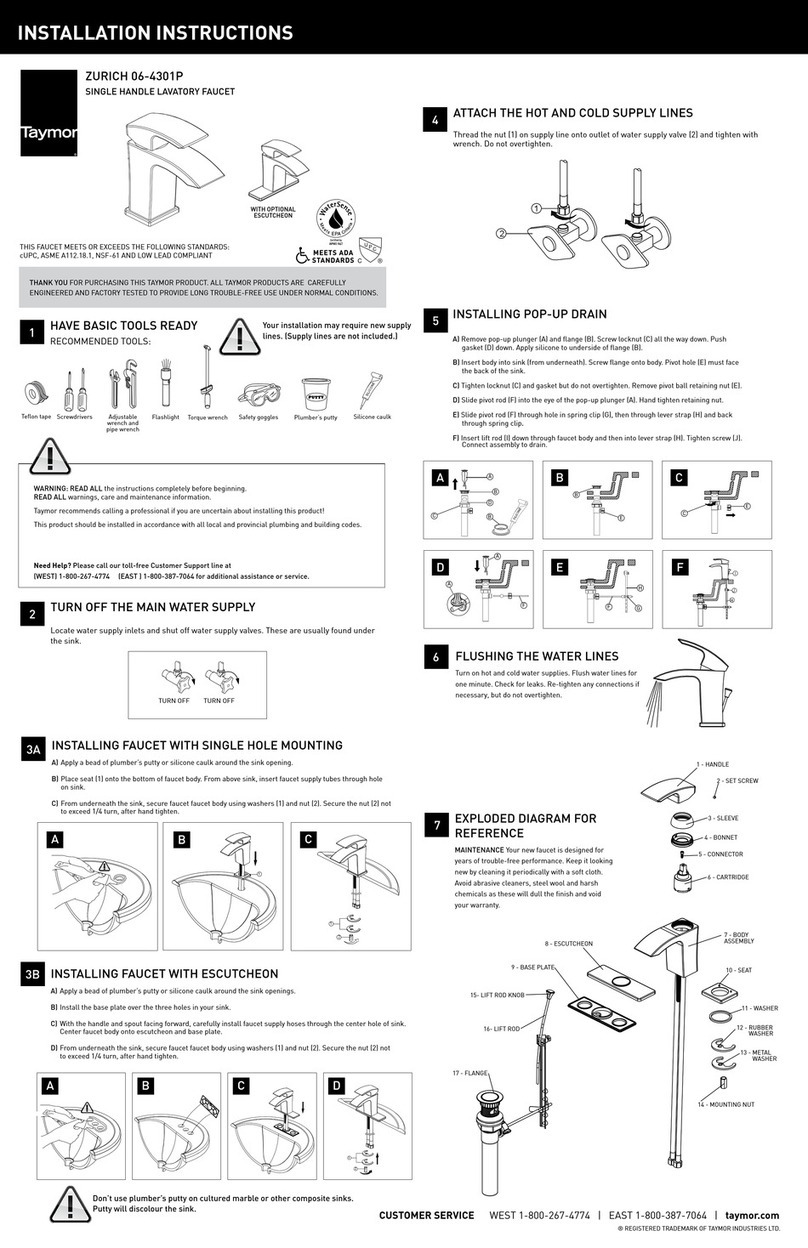
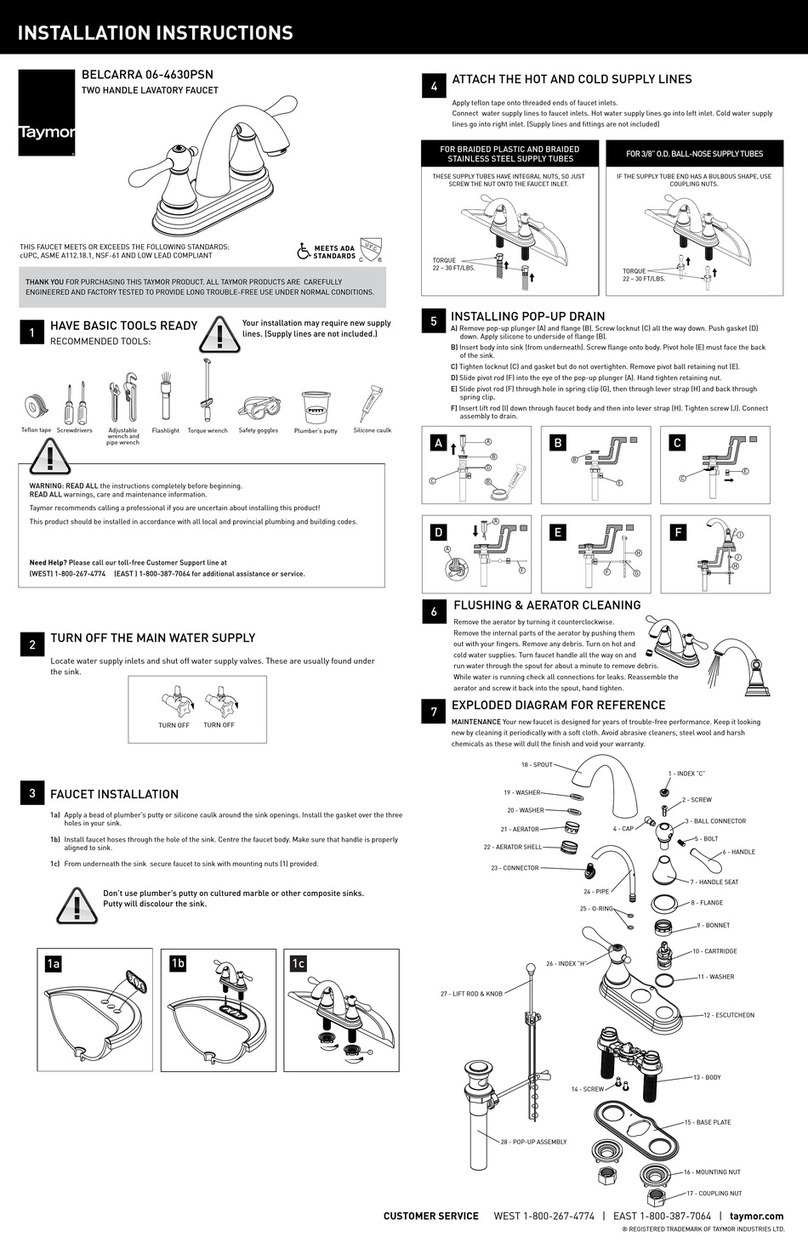
Locate water supply inlets and shut off water supply valves.
These are usually found near water meter.
WARNING: READ ALL the instructions completely before beginning.
READ ALL warnings, care and maintenance information.
Taymor recommends calling a professional if you are uncertain about installing this product!
This product should be installed in accordance with all local and provincial plumbing and building codes.
Need Help? Please call our toll-free Customer Support line at
(WEST) 1-800-267-4774 (EAST ) 1-800-387-7064 for additional assistance or service.
3DECK PREPARATION
Drill holes in FINISHED DECK per diagram.
NOTE: This kit is intended for installation up to 1-1/4” thick.
4INSTALL THE VALVE SYSTEM
Place a flange on each housing assembly.
Thread each flange down. Adjust each lower
locknut and washer. Wrench tighten locknuts.
Place a handle flange on each housing
assembly. Thread each handle flange down.
5HANDLE INSTALLATION
Install handles (1) and tighten the set screw (2).
Remove lift rod knob (1) and remove set
screw (2).
Remove spout (1)
from diverter body (2).
Remove connector(1) from diverter
body (2).
From underneath the deck, insert diverter
body with rubber washer (1), metal washer
(2) and mounting nut (3) through center hole.
From above, thread connector (4) onto di-
verter body. Tighten mounting nut (3), so that
the connector (4) sits flush to the surface of
working area.
TORQUE
11 - 15 FT/LBS.
7SPOUT INSTALLATION
Assemble and align spout (1) onto diverter body and tighten set screw (2). Insert index
(5). Place lift rod knob (3) onto lift rod (4) and hand tighten.
Remove flange (1) from housing assembly. With the housing assembly marked “HOT” on
the left, insert the housing assembly through
the mounting holes from the underside of the
deck/rim.
A B
C D
6DIVERTER INSTALLATION
A B
C D
1
1
TORQUE
11 - 15 FT/LBS.
TORQUE
11 - 15 FT/LBS.
2
1
1
2
2
1
1
2
3
4
5
1
2
4~6"(10.2-15.2cm)
5" min.(12.7cm)
3" min.
(7.6cm)
8~16"(20.3-40.6cm)
Ø1-3/8”
(35mm)
Ø1-1/8”
(29mm)
Ø1-3/8”
(35mm)
Ø1-3/8”
(35mm)
1-1/8” (29mm) MAX. DECK THICKNESS
INSTALLATION INSTRUCTIONS
® REGISTERED TRADEMARK OF TAYMOR INDUSTRIES LTD.
CUSTOMER SERVICE WEST 1-800-267-4774 | EAST 1-800-387-7064 | taymor.com
13 EXPLODED DIAGRAM FOR REFERENCE
MAINTENANCE Your new faucet is designed for years of trouble-free performance.
Keep it looking new by cleaning it periodically with a soft cloth. Avoid abrasive cleaners,
steel wool and harsh chemicals as these will dull the finish and void your warranty.
8HOSE GUIDE INSTALLATION
Insert hose guide (1) into deck. From underneath deck, secure hose guide
with rubber washer (1), metal washer (2)
and locknut (3). Wrench tighten.
Connect the valve body outlets to the
diverter body inlets using high flow flexible
lines supplied.
A B
C
9SPRAY HOSE CONNECTION
CAUTION: Check all connections for leaks.
Failure to do so can result in water damage.
WATER SUPPLY CONNECTION
Connect water supply lines (1) to housing assembly (2). Hot water supply lines go into
left inlet. Cold water supply lines go into right inlet. (Supply lines not included.)
11 FLUSHING
Turn on hot and cold water supplies and flush the water
lines for one minute. Pull hose to its farthest extension
and point it down into the tub. Pull the lift rod up to the
full ON position and flush water lines for one minute.
After flushing, turn the handles all the way off to shut
off the water. The lift rod should now be in its normal
position.
12 HAND HELD SHOWER INSTALLATION
Connect hand held shower (1) into the end of the elbow (2)
by turning clockwise. Hand tighten.
10
KAI 06-4021HS
ROMAN TUB FAUCET
8 - O-RING
1 - LIFT ROD KNOB
2 - LIFT ROD
3 - INDEX
5 - SET SCREW
6 - RECTIFIER
7 - DISC
9 - VALVE
10 - HANDLE
11 - SET SCREW
12 - CONNECTOR
13 - INVERTER
14 - HANDLE FLANGE
15 - DIVERTER
16 - O-RING
17 - CONNECTOR
18 - O-RING
19 - WASHER
20 - RUBBER
WASHER
21 - METAL
WASHER
22 - LOCKNUT
23 - BODY
24 - BONNET
25 - CARTRIDGE ASSEMBLY
27 - DISC SPRING
28 - FLANGE WASHER
30 - RUBBER WASHER
31 - METAL WASHER
32 - LOCKNUT
26 - DISC WASHER
29 - WASHER
33 -HOUSING ASSEMBLY
34 - COUPLING NUT
35 - HIGH FLOW FLEXIBLE LINES
36 - BRAIDED CONNECTOR HOSE
37 - HAND HELD SHOWER
38 - SHOWER FLANGE
39 - SET SCREW
40 - O-RING
41 - ELBOW
42 - LONG SHANK
43 - WASHER
44 - RUBBER
WASHER
45 - METAL
WASHER
47 - CLIP
48 - COILED
SPRAY
HOSE
46 - LOCKNUT
1
4 - SPOUT
1
3
2
TORQUE
11-15 FT/LBS
Insert coiled spray hose (1) through hose
guide (2).
Carefully thread and tighten one end of the
braided connector hose (1) to the coiled
spray hose (2) and one end to the diverter
body (3). Restrain coiled spray hose (2) with
clip (4).
3
2
1
4
A B
2
1
TORQUE
6 - 10 FT/LBS.
1
2
1
2
2
1

Other Taymor Plumbing Product manuals

Taymor 06-8724S User manual

Taymor

Taymor 06-8724S User manual

Taymor 06-9523SP User manual

Taymor

Taymor 06-9523SP User manual

Taymor 06-8834S User manual

Taymor

Taymor 06-8834S User manual

Taymor ASTRAL 06-4029P User manual

Taymor

Taymor ASTRAL 06-4029P User manual

Taymor INFINITY 06-4588P User manual

Taymor

Taymor INFINITY 06-4588P User manual

Taymor NORTHERN LIGHTS 06-3331P User manual

Taymor

Taymor NORTHERN LIGHTS 06-3331P User manual

Taymor BELCARRA 06-4630PSN User manual

Taymor

Taymor BELCARRA 06-4630PSN User manual

Taymor 06-4625PH User manual

Taymor

Taymor 06-4625PH User manual

Taymor 06-8831SS User manual

Taymor

Taymor 06-8831SS User manual

Taymor LUNA 06-8728S User manual

Taymor

Taymor LUNA 06-8728S User manual

Taymor 06-4481 User manual

Taymor

Taymor 06-4481 User manual

Taymor HIGH SOCIETY 06-8882S User manual

Taymor

Taymor HIGH SOCIETY 06-8882S User manual

Taymor ZURICH 06-4301P User manual

Taymor

Taymor ZURICH 06-4301P User manual

Taymor INFINITY 06-8830 User manual

Taymor

Taymor INFINITY 06-8830 User manual
Taymor DIXON 06-4308P User manual

Taymor

Taymor DIXON 06-4308P User manual

Taymor ZURICH 06-4001HS User manual

Taymor

Taymor ZURICH 06-4001HS User manual

Taymor LUNA 06-4629P User manual

Taymor

Taymor LUNA 06-4629P User manual

Taymor 06-8867LH User manual

Taymor

Taymor 06-8867LH User manual

Taymor INFINITY 06-4579P User manual

Taymor

Taymor INFINITY 06-4579P User manual

Popular Plumbing Product manuals by other brands

VITRA RIM-EX user manual

VITRA

VITRA RIM-EX user manual

Grohe Atrio 34 061 manual

Grohe

Grohe Atrio 34 061 manual

Fir Italia FIRUnico 8550198 manual

Fir Italia

Fir Italia FIRUnico 8550198 manual

Sanela SLP 03NZ Instructions for use

Sanela

Sanela SLP 03NZ Instructions for use

Santec E-Series Instruction booklet

Santec

Santec E-Series Instruction booklet

Karibu 80391 Building instructions

Karibu

Karibu 80391 Building instructions

Kalia BELLINO BF1057 installation instructions

Kalia

Kalia BELLINO BF1057 installation instructions

Symmons Temptrol 2000 Installation & operation manual

Symmons

Symmons Temptrol 2000 Installation & operation manual

Harvia Sentiotec KASKI 240 VIEW Canopy Assembly instructions

Harvia

Harvia Sentiotec KASKI 240 VIEW Canopy Assembly instructions

glass 1989 MySpa OF 210 Installation, operation & maintenance manual

glass 1989

glass 1989 MySpa OF 210 Installation, operation & maintenance manual

Laufen ILBAGNOALESSI One 8.1197.2 Installation

Laufen

Laufen ILBAGNOALESSI One 8.1197.2 Installation

Glacier bay 7032E-B6104 Installation and care guide

Glacier bay

Glacier bay 7032E-B6104 Installation and care guide

Bristan Java J BASNW C Fitting Instructions & Contents List

Bristan

Bristan Java J BASNW C Fitting Instructions & Contents List

Toto UMI TX496SUN quick start guide

Toto

Toto UMI TX496SUN quick start guide

American Standard Silhouette 7179.011 Specification sheet

American Standard

American Standard Silhouette 7179.011 Specification sheet

Schell LINUS D-C-T Assembly instructions

Schell

Schell LINUS D-C-T Assembly instructions

Moen Bayhill Posi-Temp 82244BN Specifications

Moen

Moen Bayhill Posi-Temp 82244BN Specifications

Wolff Finnhaus Melina 40 Building instructions

Wolff Finnhaus

Wolff Finnhaus Melina 40 Building instructions

manuals.online logo
manuals.online logoBrands
  • About & Mission
  • Contact us
  • Privacy Policy
  • Terms and Conditions

Copyright 2025 Manuals.Online. All Rights Reserved.