manuals.online logo
Brands
  1. Home
  2. •
  3. Brands
  4. •
  5. TDK-Lambda
  6. •
  7. Power Supply
  8. •
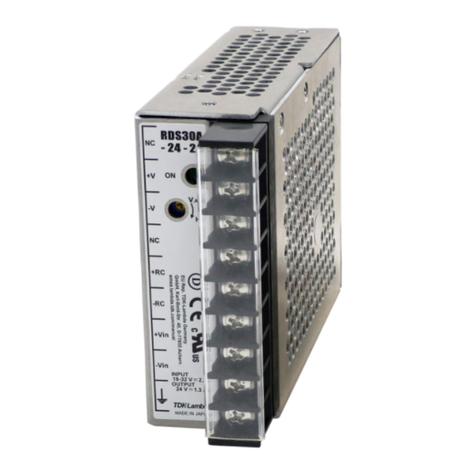
  9. TDK-Lambda ZWS10C User manual

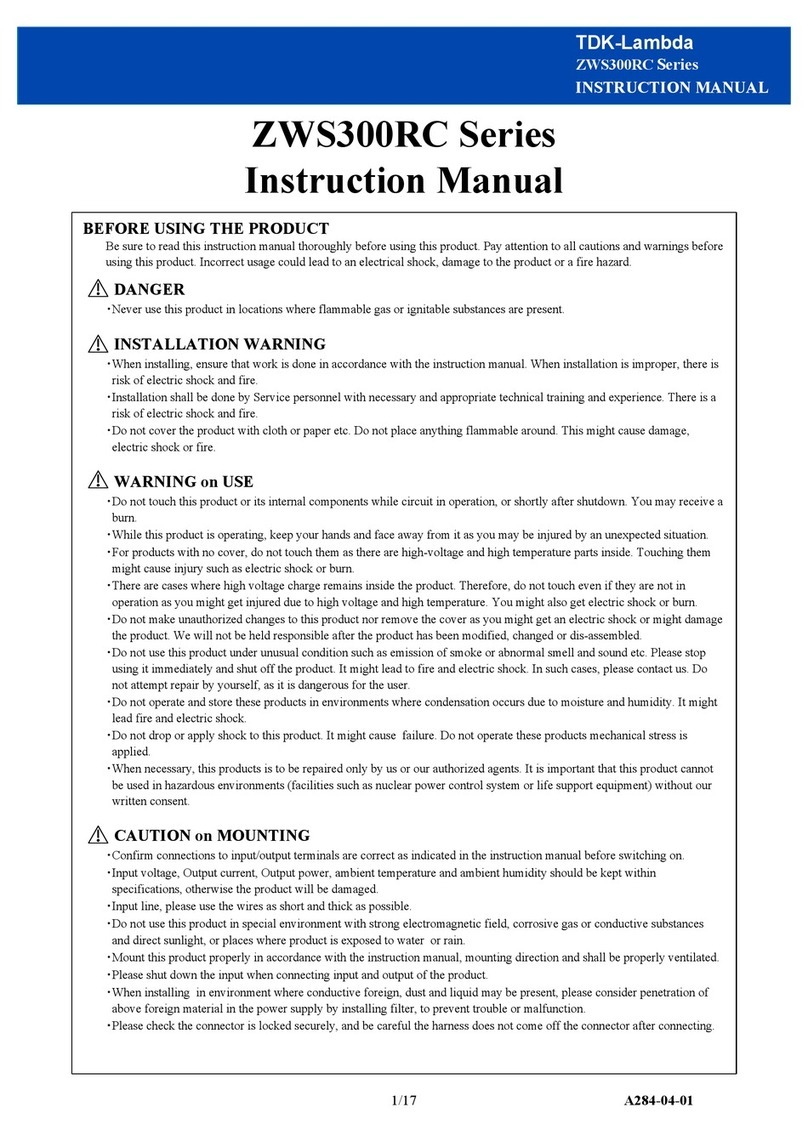
TDK-Lambda ZWS10C User manual

This manual suits for next models

3

Other TDK-Lambda Power Supply manuals

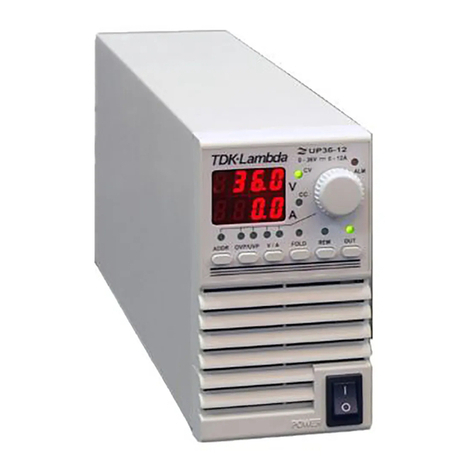
TDK-Lambda ZPS40 Series User manual

TDK-Lambda

TDK-Lambda ZPS40 Series User manual

TDK-Lambda Alpha 1500 User manual

TDK-Lambda

TDK-Lambda Alpha 1500 User manual

TDK-Lambda G10-500 Setup guide

TDK-Lambda

TDK-Lambda G10-500 Setup guide

TDK-Lambda EZA2500 Series Installation guide

TDK-Lambda

TDK-Lambda EZA2500 Series Installation guide

TDK-Lambda DRJ120 Series User manual

TDK-Lambda

TDK-Lambda DRJ120 Series User manual

TDK-Lambda CN-A110 Series User manual

TDK-Lambda

TDK-Lambda CN-A110 Series User manual

TDK-Lambda ZWQ Series User manual

TDK-Lambda

TDK-Lambda ZWQ Series User manual

TDK-Lambda Genesys Series User manual

TDK-Lambda

TDK-Lambda Genesys Series User manual

TDK-Lambda GH10-150 Setup guide

TDK-Lambda

TDK-Lambda GH10-150 Setup guide

TDK-Lambda HFE2500-S1U User manual

TDK-Lambda

TDK-Lambda HFE2500-S1U User manual

TDK-Lambda GENESYS 10KW User manual

TDK-Lambda

TDK-Lambda GENESYS 10KW User manual

TDK-Lambda ZWP350-1000 Series User manual

TDK-Lambda

TDK-Lambda ZWP350-1000 Series User manual

TDK-Lambda LZS-A1500-3-001 User manual

TDK-Lambda

TDK-Lambda LZS-A1500-3-001 User manual

TDK-Lambda Genesys Series User manual

TDK-Lambda

TDK-Lambda Genesys Series User manual

TDK-Lambda CPFE500F-28 User manual

TDK-Lambda

TDK-Lambda CPFE500F-28 User manual

TDK-Lambda 2U GENESYS 5KW User manual

TDK-Lambda

TDK-Lambda 2U GENESYS 5KW User manual

TDK-Lambda NV350 User manual

TDK-Lambda

TDK-Lambda NV350 User manual

TDK-Lambda Z160-1.3 User manual

TDK-Lambda

TDK-Lambda Z160-1.3 User manual

TDK-Lambda ZWX Series User manual

TDK-Lambda

TDK-Lambda ZWX Series User manual

TDK-Lambda CUT35 Series User manual

TDK-Lambda

TDK-Lambda CUT35 Series User manual

TDK-Lambda LZS-A1500-4 User manual

TDK-Lambda

TDK-Lambda LZS-A1500-4 User manual

TDK-Lambda RWS 1000B Series User manual

TDK-Lambda

TDK-Lambda RWS 1000B Series User manual

TDK-Lambda ZWS240RC Series User manual

TDK-Lambda

TDK-Lambda ZWS240RC Series User manual

TDK-Lambda CUS350MP-1000 Series User manual

TDK-Lambda

TDK-Lambda CUS350MP-1000 Series User manual

Popular Power Supply manuals by other brands

Videx 520MR Installation instruction

Videx

Videx 520MR Installation instruction

Poppstar 1008821 Instructions for use

Poppstar

Poppstar 1008821 Instructions for use

Calira EVS 17/07-DS/IU operating instructions

Calira

Calira EVS 17/07-DS/IU operating instructions

Monacor PS-12CCD instruction manual

Monacor

Monacor PS-12CCD instruction manual

VOLTIMA MagicBox 15 Installation and operating instructions

VOLTIMA

VOLTIMA MagicBox 15 Installation and operating instructions

Miller Auto Deltaweld 452 owner's manual

Miller

Miller Auto Deltaweld 452 owner's manual

BCP PUOUBK How to install

BCP

BCP PUOUBK How to install

HC 2210 manual

HC

HC 2210 manual

Agilent Technologies 6032A Service manual

Agilent Technologies

Agilent Technologies 6032A Service manual

Radial Engineering SB-48UB user guide

Radial Engineering

Radial Engineering SB-48UB user guide

Puls CT5.241 installation manual

Puls

Puls CT5.241 installation manual

OCZ ZX1250W Technical specifications

OCZ

OCZ ZX1250W Technical specifications

iseg ECH 238 manual

iseg

iseg ECH 238 manual

Agilent Technologies 6631B Service manual

Agilent Technologies

Agilent Technologies 6631B Service manual

Power XXL A Series instruction manual

Power

Power XXL A Series instruction manual

HP 6200B Operating and service manual

HP

HP 6200B Operating and service manual

Epson Stylus Scan 2500 Product information sheet

Epson

Epson Stylus Scan 2500 Product information sheet

Pulsar GREEN POWER CCTV PoE POE044816 manual

Pulsar

Pulsar GREEN POWER CCTV PoE POE044816 manual

manuals.online logo
manuals.online logoBrands
  • About & Mission
  • Contact us
  • Privacy Policy
  • Terms and Conditions

Copyright 2025 Manuals.Online. All Rights Reserved.

INSTRUCTION MANUAL
ZWS10C - 50C Series
TDK-Lambda
<Page>
BEFORE USING THE POWER SUPPLY UNIT (Common)
Be sure to read this instruction manual thoroughly before using this product. Pay attention to all cautions and warnings before
using this product. Incorrect usage could lead to an electrical shock, damage to the unit or a fire hazard.
DANGER
•Never use this product in locations where flammable gas or ignitable substances are present.
INSTALLATION WARNING
•When installing, ensure that work is done in accordance with the instruction manual.
When installation is improper, there is risk of electric shock and fire.
•Installation shall be done by Service personnel with necessary and appropriate technical training and experience.
There is a risk of electric shock and fire.
•Do not cover the product with cloth or paper etc.
Do not place anything flammable around.
This might cause damage, electric shock or fire.
WARNING on USE
•Do not touch this product or its internal components while circuit in operation, or shortly after shutdown.
You may receive a burn.
•While this product is operating, keep your hands and face away from it as you may be injured by an unexpected situation.
•For product without cover, do not touch this product or its internal components while product is in operation, or shortly
after shutdown. There are high voltage potential and high temperature parts in the product.
This might cause injury such as electric shock or burn.
•There are cases where high voltage charge remains inside the product. Therefore, do not touch even if they are not in
operation as you might get injured due to high voltage and high temperature.
You might also get electric shock or burn.
•Do not make unauthorized changes to this product nor remove the cover as you might get an electric shock or might
damage the product. We will not be held responsible after the product has been modified, changed or dis-assembled.
•Do not use this product under unusual condition such as emission of smoke or abnormal smell and sound etc.
Please stop using it immediately and shut off the product.
It might lead to fire and electric shock. In such cases, please contact us.
Do not attempt repair by yourself, as it is dangerous for the user.
•Do not operate and store these products in environments where condensation occurs due to moisture and humidity.
It might lead fire and electric shock.
•Do not drop or apply shock to this product. It might cause failure.
Do not operate these products mechanical stress is applied.
•When necessary, this products is to be repaired only by us or our authorized agents.
It is important that this product cannot be used in hazardous environments (facilities such as nuclear power control system
or life support equipment) without our written consent.
CAUTION on MOUNTING
•Confirm connections to input/output terminals are correct as indicated in the instruction manual before switching on.
•Input voltage, Output current, Output power, ambient temperature and ambient humidity should be kept within
specifications, otherwise the product will be damaged.
•Input/output line, please use the wires as short and thick as possible.
•Do not use this product in special environment with strong electromagnetic field, corrosive gas or conductive substances
and direct sunlight, or places where product is exposed to water or rain.
•Mount this product properly in accordance with the instruction manual, mounting direction and shall be properly be
ventilated.
•Please shut down the input when connecting input and output of the product.
•When installing in environment where conductive foreign, dust and liquid may be present, please consider penetration of
above foreign material in the power supply by installing filter, to prevent trouble or malfunction.
1/20
ZWS10C - 50C Series
Instruction Manual
FA011-04-01A
INSTRUCTION MANUAL
ZWS10C - 50C Series
TDK-Lambda
<Page>
CAUTION on USE
•Product individual notes are shown in the instruction manual.
If there is any difference with common notes individual notes shall have priority.
•Before using this product, be sure to read the catalog and instruction manual.
There is risk of electric shock or damage to the product or fire due to improper use.
•Input voltage, Output current, Output power, ambient temperature and ambient humidity should be kept within
specifications, otherwise the product will be damaged, or cause electric shock or fire.
•If the built-in fuse is blown, do not use the product even after replacing the fuse, as there is risk of abnormality inside.
Be sure to request repair to our company.
•For products without built-in protection circuit (element, fuse, etc.), insert fuse at the input to prevent smoke, fire during
abnormal operation. As for products with built-in protection circuit, depending on usage conditions, built-in protection
circuit might not work. It is recommended to provide separate proper protection circuit.
•For externally mounted fuse do not use other fuses aside from our specified and recommended fuse.
•This product was made for general purpose electronic equipment use and is not designed for applications requiring high
safety (such as extremely high reliability and safety requirements.
Even though high reliability and safety are not required, this product should not be used directly for applications that have
serious risk for life and physical safety.
Take sufficient consideration in fail-safe design (such as providing protective circuit or protective device inside the system,
providing redundant circuit to ensure no instability when single device failure occurs).
•When used in environments with strong electromagnetic field, there is possibility of product damage due to malfunction.
•When used in environment with corrosive gas (hydrogen sulfide, sulfur dioxide, etc.) , there is possibility that they might
penetrate the product and lead to failure.
•When used in environments where there is conductive foreign matter or dust, there is possibility of product failure or
malfunction.
•Provide countermeasure for prevention of lightning surge voltage as there is risk of damage due to abnormal voltage.
•Connect together the frame ground terminal of the product and the ground terminal of the equipment for safety and noise
reduction. If these ground is not connected together, there is risk of electric shock.
•Parts with lifetime specifications (built-in fan, electrolytic capacitor) are required to be replaced periodically.
Set the overhaul period depending on the environment of usage and perform maintenance.
Also, note that there are cases when EOL products cannot be overhauled.
•Take care not to apply external abnormal voltage to the output. Especially, applying reverse voltage or overvoltage more
than the rated voltage to the output might cause failure, electric shock or fire.
• This product is designed under condition Material group Ⅲb, Pollution Degree (PD): PD2, Over Voltage category (OVC):
OVCII and Class of equipment: Class Ⅰ and Class II.
This product is designed to be accessible only to service technicians as part of indoor use device.
•This product contains a printed circuit board utilizing surface mounted devices.
PCB stress such as bending, twisting etc. could cause damage. Therefore, please handle with care.
•When handling this product, hold the board edge and take care not to touch the component side.
When installing this product in apparatus or equipment, mount it on spacers.
•The outputs of this product may, under fault conditions, exceed ES1 voltage limits.
Therefore the outputs must be protected in the end equipment to maintain ES1.
•This product has used Power Thermistor to protect the circuit from Inrush Current.
Frequent repetition of input might cause damage to internal components because of generating surge current.
2/20
INSTRUCTION MANUAL
ZWS10C - 50C Series
TDK-Lambda
<Page>
Note
•Take note that traces of sheet metal processing be left in our power supplies.
•When disposing product, follow disposal laws of each municipality.
•Published EMI (CE, RE) or immunity is the result when measured in our standard measurement conditions and
might not satisfy specification when mounted and wired inside end-user equipment.
Use the product after sufficiently evaluating at actual end-user equipment.
•When exporting our products, apply for necessary permissions as required by rules and regulations of Foreign Exchange
and Foreign Trade Control Act.
•Catalogue, contents of the instruction manual may be changed without a prior notice. Refer to latest catalogue or
instruction manual.
•Reproduction or reprinting the instruction manual or its portion is forbidden without our permission.
LONG-TERM STORAGEMETHODANDLONG-TERMSTORAGEPERIOD
•Please keep the product in carton box.
•Please do not apply excessive vibration, shock or mechanical stress applied directly to the product.
•Please keep away from direct sunlight.
• For long-term storage temperature and humidity, the following conditions shall be used as a guideline :
Temperature range : 5℃~30℃
Humidity range : 40%~60%RH
Please keep away from the places where temperature and humidity can change drastically.
It can cause condensation on the product or deterioration.
•For long-term storage period, we recommend to use within 2 years after receiving the product.
< Soldering and PCB mounted products : On Board, Power Module and etc >
For products that have been received for more than 1 year, please check lead oxidation and solderability.
In addition, SMD type products may have MSL (Moisture Sensitivity Level) provision.
Please be sure to read the instruction manual and delivery specifications.
< Unit type or PCB type of products : the product is used an aluminium electrolytic capacitor >
There is tendency that the leakage current of an aluminium electrolytic capacitor may increase when stored without using
 for a long time. This phenomenon can be improved by applying voltage to the aluminum electrolytic capacitor to reduce
 the increased leakage current through the self-recovery effect of the electrolyte.
For reference, before using products that have been stored for a very long time, please warm-up first for 30 minutes or  
 more without taking load.
< Criterion of warm up voltage condition >
(1)Implementation period : 1 year or above after the delivery
(2)Electrical continuity condition
Input voltage : Rating
Load : 0A
Ambient temperature : Normal temperature
Time : 30 minutes or more
3/20
INSTRUCTION MANUAL
ZWS10C - 50C Series
TDK-Lambda
<Page>
1. Model name identification method
ZWS 10C - 5 /□
Option (*1)
Rated Output Voltage
Series Name
Output Power type
Series Name
2. Terminal Explanation
L : Input terminal Live line (Fuse in line) (CN1)
N : Input terminal Neutral line (CN1)
: Earth ( ) Terminal (CN2)
Mounting hole (hole diameter : φ3.5mm)
This hole is electrically connected to terminal of CN2.
The mounting surface of the spacer should be within Maxφ6.2mm.
Mounting hole (hole diameter : φ3.5mm)
These holes are used for support the unit.
+ : + Output Terminal (CN51)
–: –Output Terminal (CN51)
4/20
(*1) Blank : Standardtype.
/L : Withchassismodel.
/A : Withchassisandcovermodel.
/CO2 : Withcoatingonbothsidesof
PCBmodel.
1
2
3
7
6
5
4
+
-
+
-
ZWS10C/ZWS15C
CN1
3
1
L
N
INPUT
CN2
CN51
OUTPUT 1
2
COMPONENT SIDE
CN1
3
1
L
N
INPUT
CN2
CN51
OUTPUT 1
2
COMPONENT SIDE
1
2
3
4
5
7
6
5
1
2
3
4
5
7
6
5
-
+
-
+
CN1
3
1
L
N
INPUT
CN2
CN51
OUTPUT
1
2
COMPONENT SIDE
3
4
1
2
3
4
55
7
6
5
ZWS30C
ZWS50C
INSTRUCTION MANUAL
ZWS10C - 50C Series
TDK-Lambda
<Page>
3. Block Diagram
ZWS10C, ZWS15C
ZWS30C
ZWS50C
•Circuit topology, switching frequency
Flyback topology 100kHz
 
•Fuse rating
ZWS10C : 1.0A
ZWS15C : 1.0A
ZWS30C : 2.5A
ZWS50C : 2.5A
5/20
Line Filter
Rectifier
Filter
L
N
Rectifier & Filter
Input
85~265VAC
+V
Output
-V
Control Circuit
Output
Sensing
Photo-
coupler
Switching
Circuit
OVP
Circuit
OCP
Circuit
Inrush Current
Limit Circuit
Line Filter
Rectifier
Filter
L
N
Rectifier & Filter
Input
85~265VAC
+V
Output
-V
Control Circuit
Output
Sensing
Photo-
coupler
Switching
Circuit
OCP
Circuit
Inrush Current
Limit Circuit
OVP
Circuit
Line Filter
Rectifier
Filter
L
N
Rectifier & Filter
Input
85~265VAC
+V
Output
-V
Control Circuit
Output
Sensing
Photo-
coupler
Switching
Circuit
OCP
Circuit
Inrush Current
Limit Circuit
OVP
Sensing
Photo-
coupler
INSTRUCTION MANUAL
ZWS10C - 50C Series
TDK-Lambda
<Page>
4. Sequence time chart
ZWS10C, ZWS15C
(*1) OVP point
5V-15V : >115%.
24V : >112%.
ZWS30C, ZWS50C
(*1) OVP point
ZWS30C, ZWS50C : >115%.
0V
Vout
0V
Input on
Input off
Input on
Input off
OVP point (*1)
Input Voltage
Output Voltage
OVP act on
OCP act on
OCP reset
0V
Vout
0V
Input on
Input off
Input on
Input off
OVP point (*1)
Input Voltage
Output Voltage
OVP act on
OCP act on
OCP reset
6/20`
INSTRUCTION MANUAL
ZWS10C - 50C Series
TDK-Lambda
<Page>
5. Terminal connecting method
Pay attention to the input wiring. If it is connected to wrong terminal, the power supply will be damaged.
•Input must be off when making connections.
•Connect terminal and mounting hole to protective earth (frame ground of the equipment etc.) of the equipment in
Class I insulation.
When connecting the terminal to a protective earth, use a thick wire for safety and improvement of noise sensitivity.
•The output load line and input line shall be separated to improve noise sensitivity.
•Do not apply stress to PCB, when connecting or removing connector.
•Use input/output connector (housing) specified by the table below.
•Use recommended crimping tool. Connector is not included with this product. (Refer to the following)
7/20
Connector / Housing and terminal Pin
Terminal Symbol Connector Housing Terminal Pin Maker
Matching housing and terminal --- Not included with the product
Hand Crimping Tool
Hand Crimping Tool Terminal Pin Maker
SVH-21T-P1.1 or BVH-21T-P1.1
SVH-41T-P1.1 or BVH-41T-P1.1
CN51
(ZWS50C)
B4P-VH(LF)(SN)
VHR-4N
(AWG#20 ~ AWG#16)
Output connector
FG TAB
CN2
-
STO-21T-250N
(AWG#22 ~ AWG#18)
STO-61T-250N
(AWG#18 ~ AWG#14)
-
YC-160R
SVH-21T-P1.1
or BVH-21T-P1.1
J.S.T.
YC-930R
YC-931R
SVH-41T-P1.1
or BVH-41T-P1.1
Input connector
CN1
B2P3-VH(LF)(SN)
VHR-3N
(AWG#22 ~ AWG#16)
J.S.T.
CN51
(ZWS10C - 30C)
B2P-VH(LF)(SN)
VHR-2N
(AWG#20 ~ AWG#16)
+
-
+
-
ZWS10C/ZWS15C
CN1
3
1
L
N
INPUT
CN2
CN51
OUTPUT 1
2LOAD
COMPONENT SIDE
ZWS30C
CN1
3
1
L
N
INPUT
CN2
CN51
OUTPUT 1
2LOAD
COMPONENT SIDE
-
+
-
+
ZWS50C
CN1
3
1
L
N
INPUT
CN2
CN51
OUTPUT
1
2LOAD
COMPONENT SIDE
3
4
INSTRUCTION MANUAL
ZWS10C - 50C Series
TDK-Lambda
<Page>
6. Explanation of Functions and Precautions
6-1. Input Voltage Range
Input voltage range is single phase 85-265VAC (47-63Hz).
Input voltage, which is out of specification, might lead unit damage.
For cases where conformance to various safeties required, described as 100-240VAC (50-60Hz).
6-2. Inrush Current
This series equipped power thermistor to limit the inrush current. Higher inrush current will flow at higher ambient
temperature or re-input condition. Please select input switch and fuse carefully with the high temperature and re-input the
power condition. The Inrush Current value is under cold start at 25oC in the specification.
6-3. Over Voltage Protection (OVP)
ZWS10C/ZWS15C : The over voltage protection (OVP) circuit with zener diode clamp system is built in. Over 115% of
nominal voltage will clamp the output. If the output voltage is lowered due to the over voltage application, the output will not
resume. Replacement of the power supply unit is necessary.
ZWS30C/ZWS50C : The OVP function is output shut down method and manual reset type. Over 115% of nominal voltage
will shut down the output. If the output voltage is lowered due to the over voltage application, the output will not resume. To
reset OVP, remove the input of power supply for a few minutes, and then re-input.
In addition, the setting value of OVP is fixed and not adjustable. Pay attention not to apply higher voltage externally to the
output terminal to avoid unit failure. In case of inductive load, put protective diode in series to the output power line. In heavy
load condition, OCP may triggered before output reach OVP threshold.
6-4. Over Current Protection (OCP)
Current limiting (Hiccup) with automatic recovery.
OCP function operates when the output current exceeds 105% of maximum DC output current of specification.
The outputs will be automatically recovered when the overload condition is removed. Never operate the unit under over
current or shorted conditions, which may lead unit damage. OCP setting is fixed and cannot be adjusted externally.
6-5. Output Ripple & Noise
The standard specification for maximum ripple value is measured according to below measurement circuit .
When load lines are longer, ripple will becomes larger. In this case, electrolytic capacitor, film capacitor, etc. might be
necessary to use across the load terminal. The output ripple cannot be measured accurately if the probe ground lead of
oscilloscope is too long.
8/20
Coaxial Cable
+Load
+
-
150mm
Oscilloscope
Power
Supply
Bandwidth : 100MHz
1.5m 50Ω
C1 : 0.1uF Cap., Film.
C2 : 100uF Cap., Elect.
C3 : 4700pF Cap., Ceramic.
R1 : 50Ω
C1 C2
C3
1R
INSTRUCTION MANUAL
ZWS10C - 50C Series
TDK-Lambda
<Page>
6-6. Series Operation
For series operation, either method (A) or (B) is possible.
Method (A) Method (B)
Note : Ensure that all units must be in operation. (Never use in condition that one of the units is not operated.)
Please select a bypass diode with maximum forward current rating more than output load current.
And maximum reveres voltage must withstand each power supply output voltage.
6-7. Isolation Test
Isolation resistance between Output - terminal is more than 100MΩat 500VDC.
For safety operation, voltage setting of DC isolation tester must be done before the test.
Ensure that the unit is fully discharged after the test.
Output - terminal : 500VDC More than 100MΩ
9/20
+V
Power
Supply Load
-V
+V
-V
+
-
+
-
Power
Supply Load
+V
-V
+V
-V
+
-
Bypass diodes
Power
Supply
Power
Supply
Load
+V
-V
AC (L)
Isolation Tester
AC (N)
INSTRUCTION MANUAL
ZWS10C - 50C Series
TDK-Lambda
<Page>
6-8. Withstand Voltage
This series is designed to withstand 3.0kVAC between input and output, 2.0kVAC between input and and 750VAC
between output and each for 1 minute. When testing withstand voltage, set current limit of the withstand voltage test
equipment to 10mA (output - : 20mA). The applied voltage must be gradually increased from zero to the testing value and
then gradually decreased for shut down. When timer is used, the power supply may be damaged by high impulse voltage at
timer switch on and off. Connect input and output as follows.
Input - Output (Dotted line) : 3.0kVAC 1min(10mA)
Input - terminal (Solid line) : 2.0kVAC 1min(10mA)
10/20
Withstand
Voltage Tester
+V
-V
AC (L)
Withstand
Voltage Tester
+V
-V
AC (L)
Output - terminal : 750VAC 1min(20mA)
Withstand
Voltage Tester
AC (N) AC (N)