Te Pari C1000 Headbail User manual
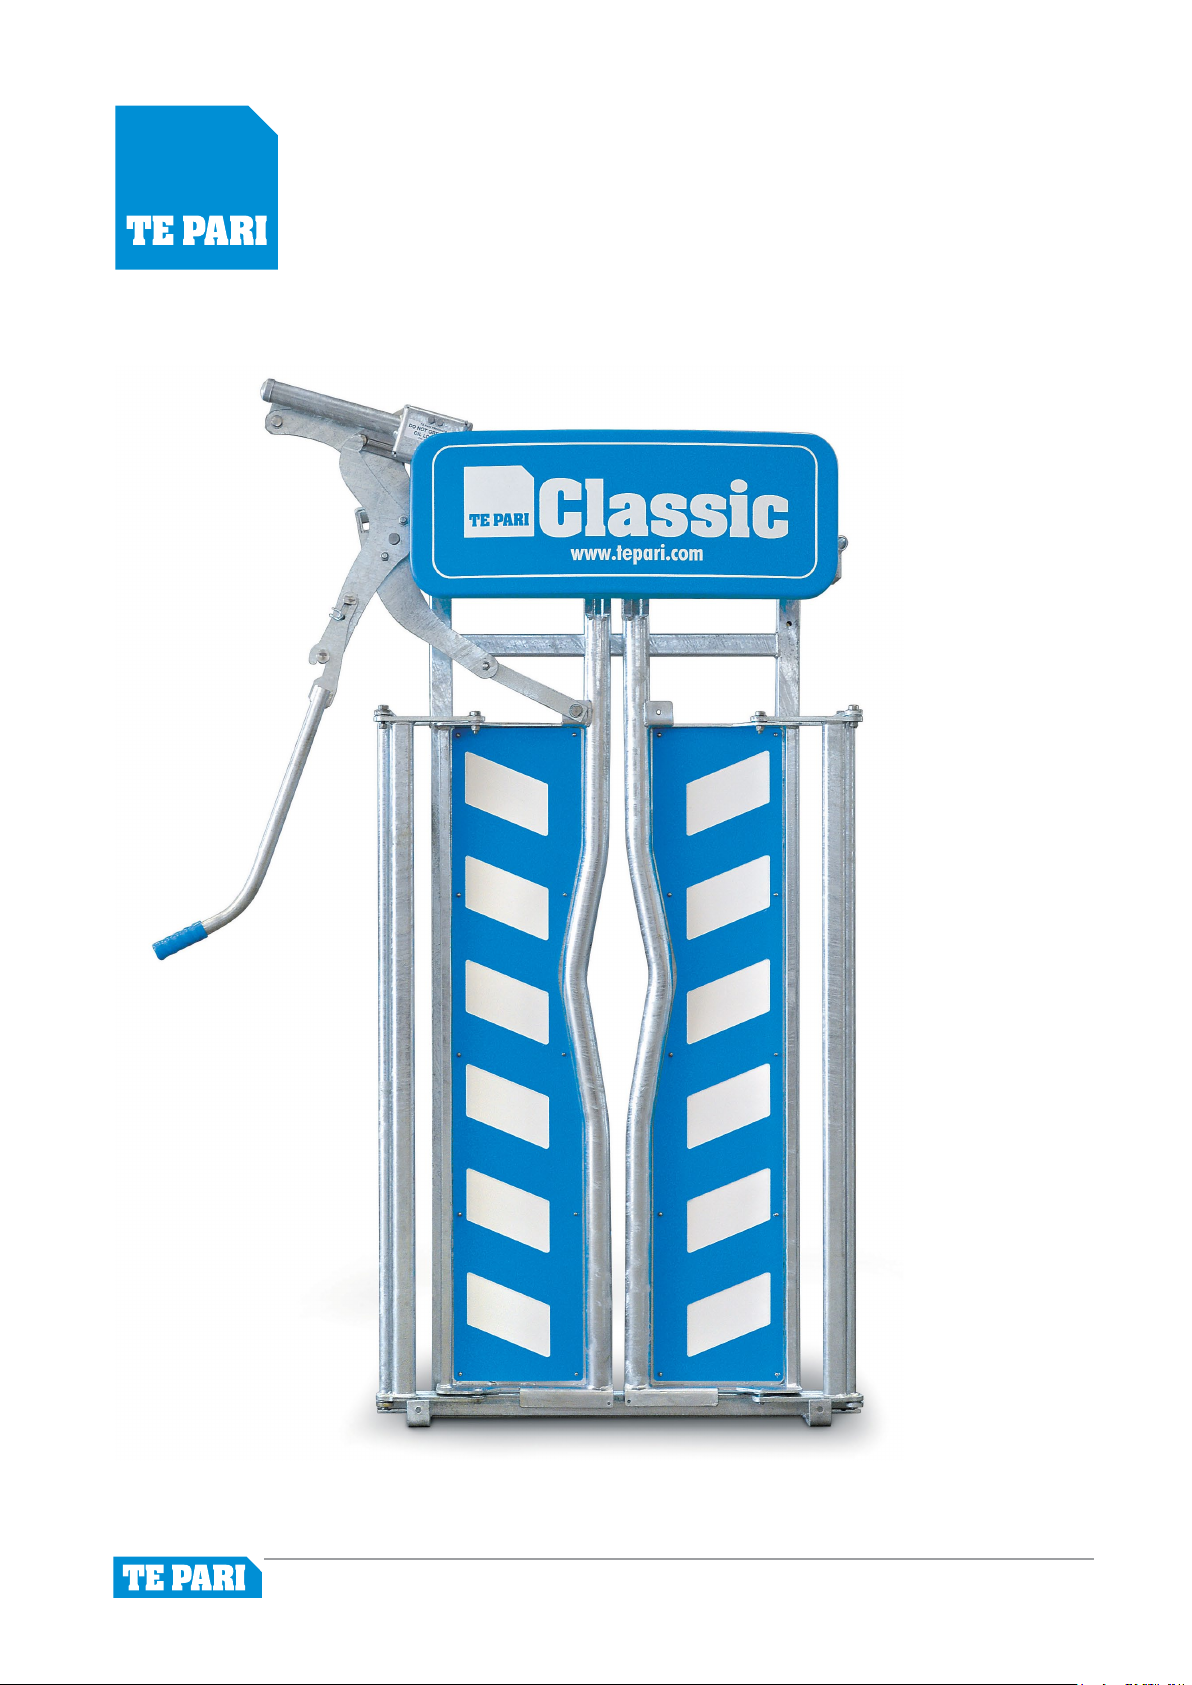
C1000 Head Bail
C1000
Headbail

C1000 Head Bail
Introduction
Your safety is our focus
All Te Pari products are designed for the ultimate in safety.
Working with livestock can be a dangerous business at times so we have designed many features
into our cattle crushes and headbails to reduce the risk of accidents and injuries.
Animals safety is also paramount, so all our equipment is designed to get the job done with
minimal discomfort and distress to the animal.
At Te Pari Products, we take quality seriously.
We only use top quality raw materials and have thorough quality control systems in place.
Now you have purchased a C1000 headbail, you can be assured that the equipment has been
manufactured from rst grade materials under strict quality control standards.
We guarantee our headbails for 36 months against defective workmanship and materials
from the time of purchase.
Health and Safety
• Keep your hands, ngers and limbs well clear of any pivots, hinges or other pinch points on
your headbail for example, the headbails doors, and other moving mechanisms.
• Do not enter the area in front of the headbail until you have checked that the animal is fully
secured. It is safe work practice to keep clear of this area.
• Whenever possible do not work alone.
• Make sure you read and understand the correct operating procedure for your headbail
before you use it.
Installation recommendations
When your headbail is delivered it is important to check that it is damage free, if you notice any
freight damage please notify Te Pari Products dispatch department immediately.
Ensure you note on the drivers copy of the delivery consignment note any damages.
Your C1000 headbail will mount into either a steel yard or the strainer posts of a wooden yard.
The approximate weight of the C1000 headbail is 200 kg.
Note: The actual weight of your delivered unit will vary due to options tted to the unit.

C1000 Head Bail
Fitting to a steel yard
The headbail is bolted directly to the end of the cattle yard panel.
4 bolt holes are provided, 2 holes being drilled through each of the RHS vertical main frames of the
headbail, 1 towards the top and 1 towards the bottom at each side.
A top bolt hole is shown here A. as seen from the entry side of the headbail.
The headbail frame is mounted to t ush with the upright ends of the yard panels using M12
x 120 galvanised bolts with appropriate washers and nuts. Shown below through the 50 x 50
uprights of the headbail B and cattle yard panel C.
Fitting to a wooden yard or strainer posts
The headbail is mounted to the posts using bolts. 4 bolt on mounting width extension brackets
are supplied for this purpose. Note: The brackets may be already attached to the headbail frame
for you - a bracket is shown tted to headbail frame below D.
We recommend that holes are drilled right through the wooden strainer posts and that the
headbail is bolted to the posts using M12 galvanised thread rod, washers and nuts.
Important
You must ensure that the edge of the post does not project into the headbail entry area E, that is
beyond the inside edge of the headbail frame as shown in the plan view graphic below.
D
C
B
A
E
D
Plan view
Not to scale
Entry area
Side view
Not to scale

C1000 Head Bail
Standard Operating procedures for the C1000 headbail
General cattle handling
Keep calm. A calm and in control operator will help keep cattle from becoming alarmed or over
excited. This is one of the most important rules of good cattle handling.
For best operation open the doors to the approximate width of the animals head but less than the
shoulders.
• The animal will put its head in the gap
• Then close the headbail
Important: close the head bail in one fast continuous motion ensuring that all the backlash
(Slop) in the linkages is removed as the head bail closes tight on the animals neck.
If the head bail maintenance is not kept up to date with the head bail regularly greased it will
make operating more dicult and the animal may not be held tight enough.
A quick reex is required to catch horned animals. We recommend the Baulk Gate option is tted
to assist in catching larger horned animals.
If a rear handle option is tted to your C1000 headbail disengage the front handle when using the
rear handle and visa versa. A rear handle option assists in the ecient use of the headbail as you
are always standing behind the animal when headbailing and makes catching the animal easier.
We recommend you t Anti Backing Ratchets to use in conjunction with your C1000 headbail
Always ensure you stand on the headbail side of the pipe when you are inserting the anti-backing
ratchet pipe behind the animal if the animal suddenly moves backwards it will ick the pipe away
from the operator.
Always ensure the anti backing ratchet collar is engaged in the track to stop it sliding out sideways
as the animal moves.
Cleaning and Maintenance
Cleaning
• Simply cleaning down your C1000 headbail after use will increase its working life. Cattle urine
and/or faeces can have a corrosive eect on your equipment.
Lubrication
• Lubricate all grease nipples, pivots and tracks on your C1000 headbail at least every 4 weeks,
or for every 1,000 cattle processed. The nylon wheels on the top of the headbail require
lubrication every 2 months.
Check and replace any worn components
• Annually check pivots and bolts for wear and replace as required. Te Pari Products have a full
range of replacement parts for your headbail.

C1000 Head Bail
Model
Serial No Purchase Date
Name
Farm or trading name
Address
Post code
Telephone Fax
Email
Warranty reply card
Te Pari Cattle Handling Equipment - C1000 Headbail
TE PARI PRODUCTS
WARRANTY
13.1 Subject to the conditions of warranty set out in clause 13.2 and 13.3 the Seller warrants that if any defect in any workmanship
of the Seller becomes apparent and is reported to the Seller within twelve (12) months of the date of delivery for electronics, hydraulic
and/or electrical components, and thirty-six (36) months for steel framework and componentry and hot dip galvanising (time being of
the essence) then the Seller will either (at the Seller’s sole discretion) replace or remedy the workmanship.
13.2 The conditions applicable to the warranty given by clause 13.1 are:
(a) the warranty shall not cover any defect or damage which may be caused or partly caused by or arise through:
(i) failure on the part of the Buyer to properly maintain any Goods; or
(ii) failure on the part of the Buyer to follow any instructions or guidelines provided by the Seller; or
(iii) any use of any Goods otherwise than for any application specied on a quote or order form; or
(iv) the continued use of any Goods after any defect becomes apparent or would have become apparent to a reasonably prudent operator or user; or
(v) fair wear and tear, any accident or act of God.
(b) the warranty shall cease and the Seller shall thereafter in no circumstances be liable under the terms of the warranty if the workmanship is repaired,
altered or overhauled without the Seller’s consent.
(c) in respect of all claims the Seller shall not be liable to compensate the Buyer for any delay in either replacing or remedying the workmanship or in properly
assessing the Buyer’s claim.
13.3 No warranty will apply for any damage to electrical and/or electronic Goods which are not protected by a Residual Current Device (RCD), where the existence
of an RCD could reasonably be expected to have prevented such damage.
13.4 For Goods not manufactured by the Seller, the warranty shall be the current warranty provided by the manufacturer of the Goods. The Seller shall not be
bound by nor be responsible for any term, condition, representation or warranty other than that which is given by the manufacturer of the Goods.
13.5 To the extent permitted by statute, no warranty is given by the Seller as to the quality or suitability of the Goods for any purpose and any implied warranty,
is expressly excluded.The Seller shall not be responsible for any loss or damage to the Goods, or caused by the Goods, or any part thereof however arising.
13.6 The conditions applicable to the warranty given on Goods supplied by the Seller are contained on the“Warranty Card”that will be supplied with the Goods.
13.7 In the case of second hand Goods, the Buyer acknowledges that he has had full opportunity to inspect the same and that he accepts the same with all faults
and that no warranty is given by the Seller as to the quality or suitability for any purpose and any implied warranty, statutory or otherwise, is expressly excluded.
The Seller shall not be responsible for any loss or damage to the Goods, or caused by the Goods, or any part thereof however arising.
Head Oce
9 Endeavour Crescent. PO Box 25, Oamaru, 9400, New Zealand
Freephone NZ 0800 837 274 AU 1800 650 682 Int +64 3 433 0077
www.tepari.com
Warranty reply card
Te Pari Cattle Handling Equipment - C1000 Headbail
Please complete all details on the reverse and post to Te Pari Products oce:
Te Pari Products Ltd
New Zealand Head Oce:
PO Box 25,
Oamaru, 9400
New Zealand.
www.tepari.com
For our full range of cattle handling solutions visit
Table of contents
Other Te Pari Farm Equipment manuals


Popular Farm Equipment manuals by other brands

Schaffert
Schaffert Rebounder Mounting instructions

Stocks AG
Stocks AG Fan Jet Pro Plus 65 Original Operating Manual and parts list

Cumberland
Cumberland Integra Feed-Link Installation and operation manual

BROWN
BROWN BDHP-1250 Owner's/operator's manual

Molon
Molon BCS operating instructions

Vaderstad
Vaderstad Rapid Series instructions


