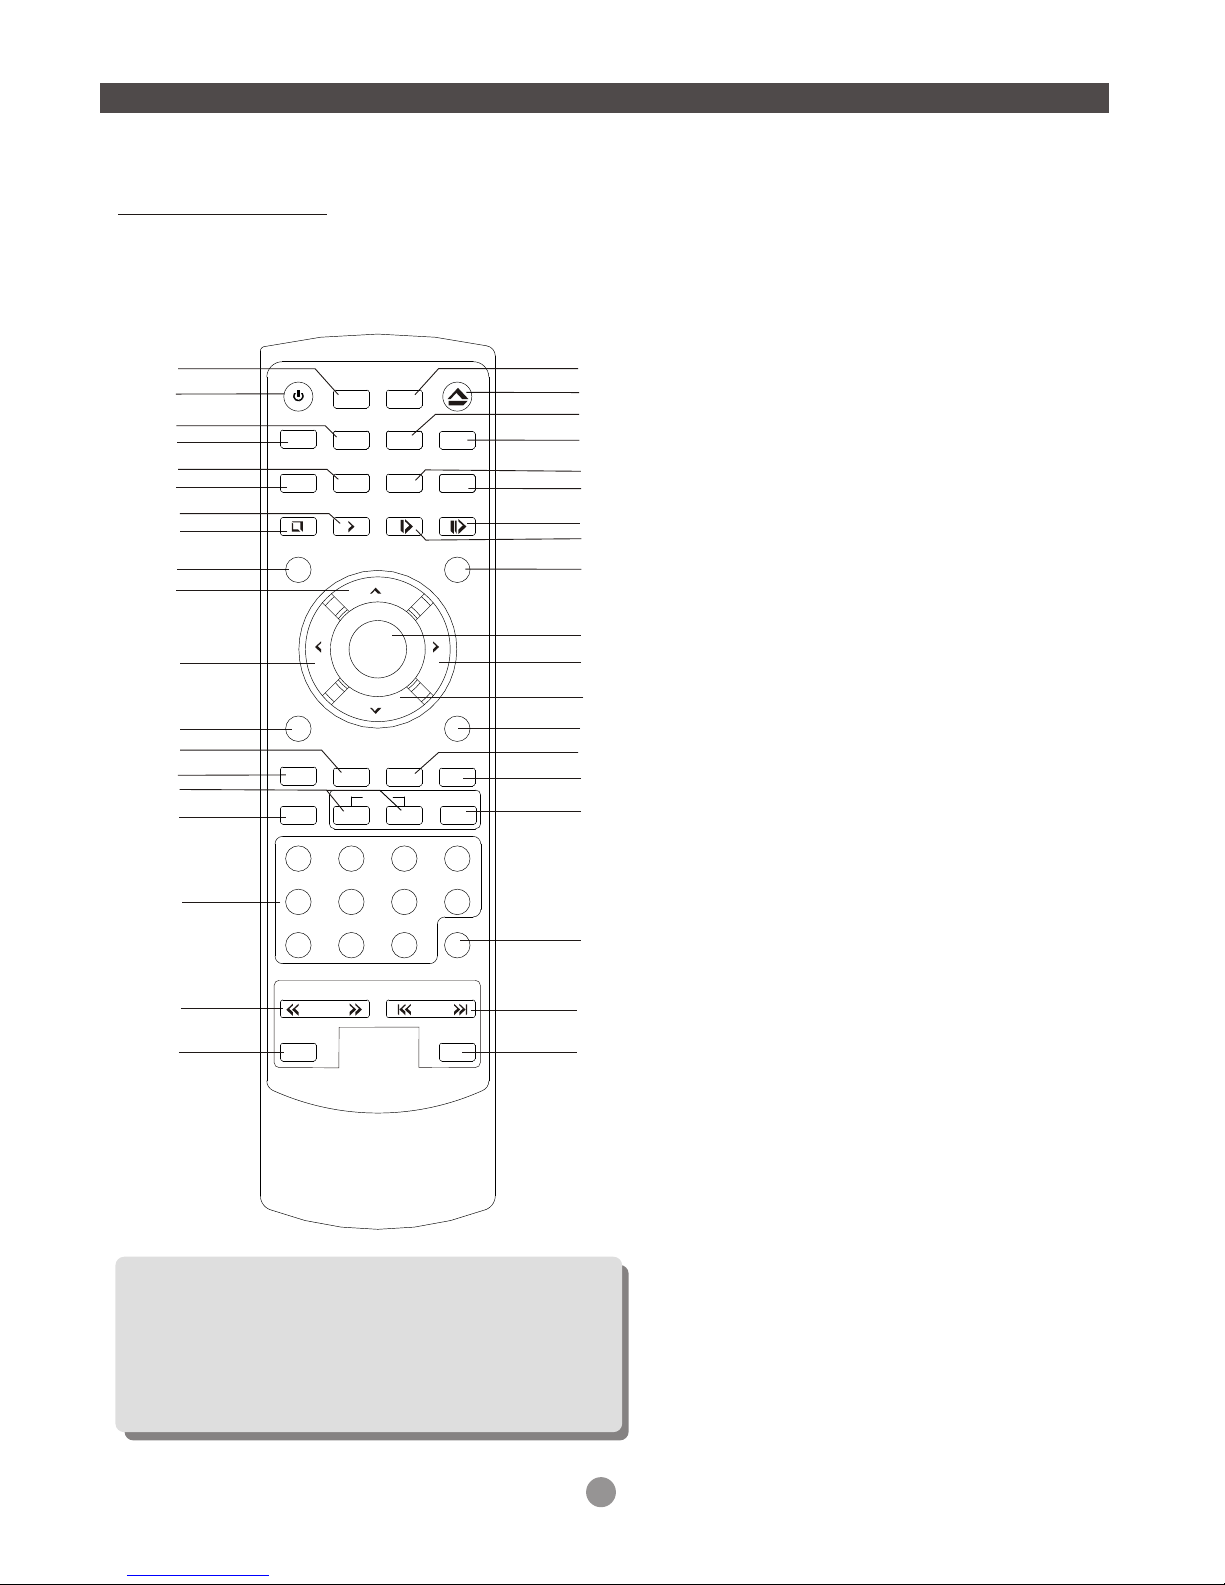
About DVD
DVD (Digital Versatile Disc) isa digital videomedium
under the MPEGII format, featuringa variety of
revolutionary entertainment capabilities.The MPEGII
video compression technologyprovides capacity foran
excellent picture ofminimum 500 linesresolution on
screen, up to8 language soundtracks,up to 9views
from differentcamera angles andup to 32language
subtitles (provided bythe DVD discitself which supports
these features).
Select aDVD disc
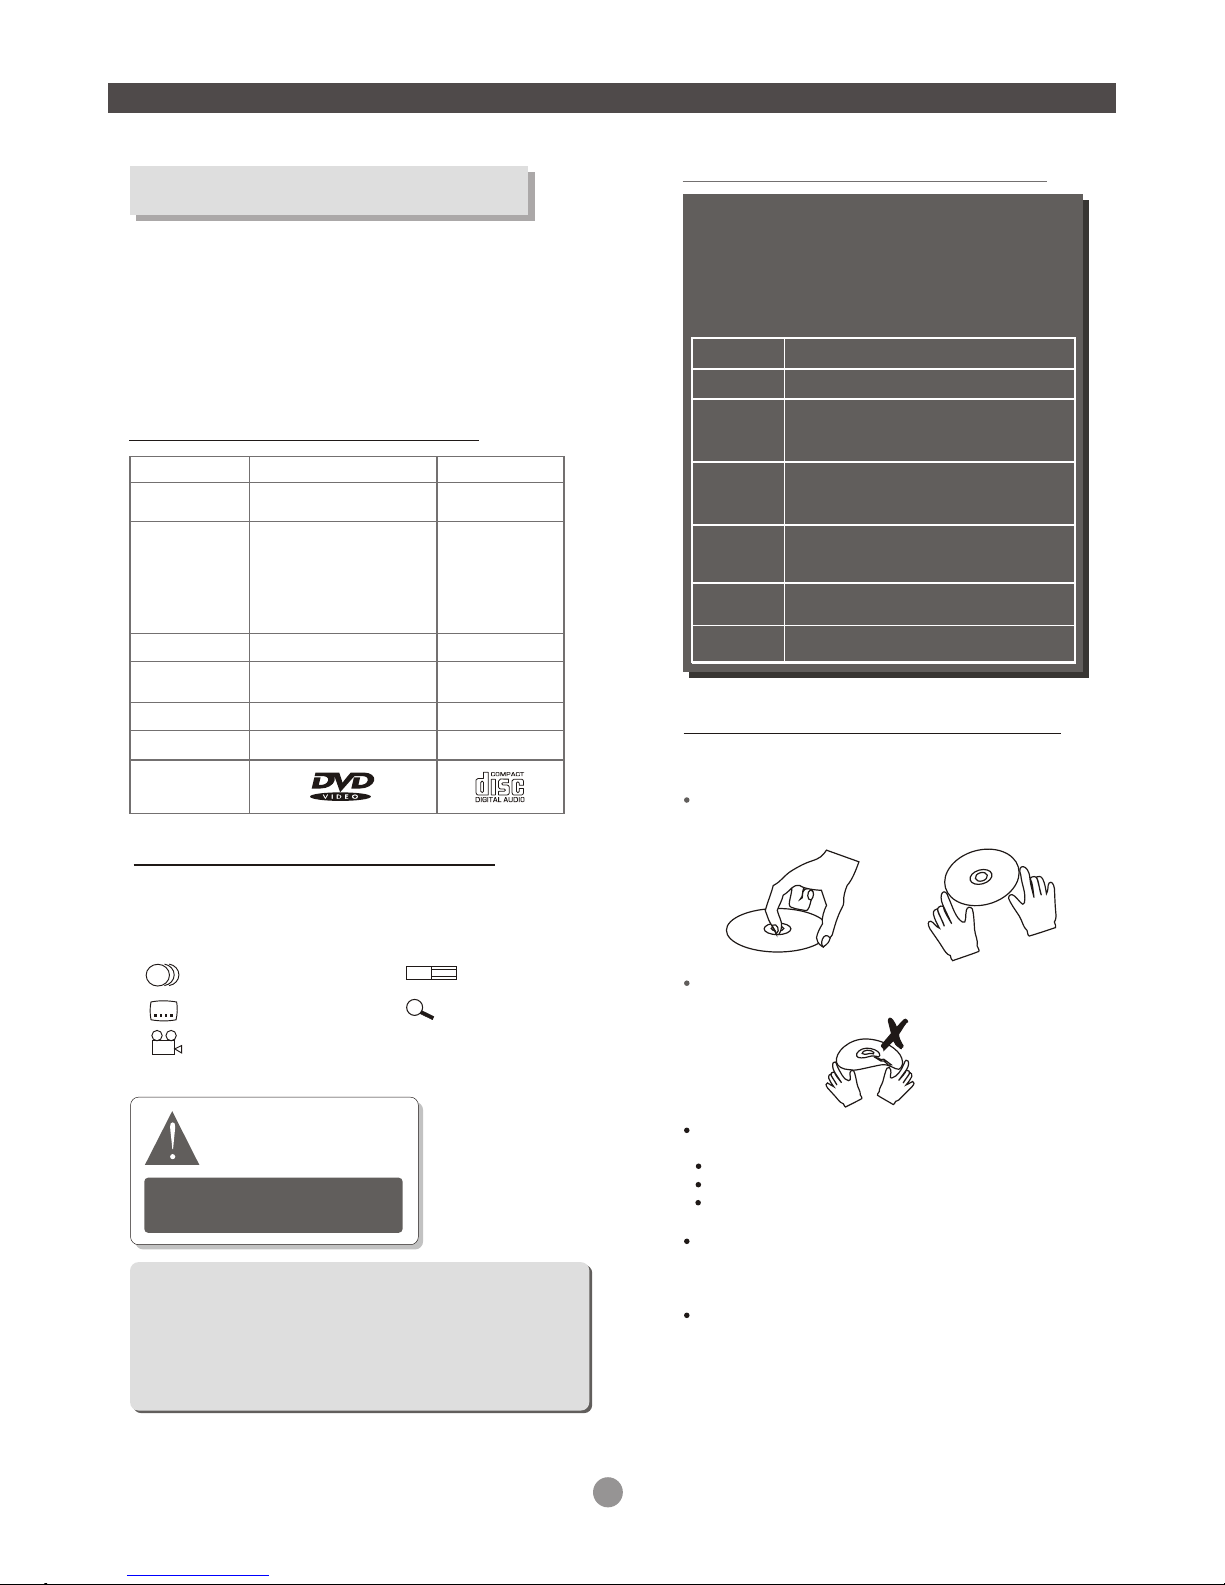
Disc information
Disc types
Recording
Method
Capacity
Disc size
Horizontal
Resolution
Sub-titles
Sound tracks
Symbol
DVD
Digital / MPEG II
CD
Digital
Single-layer / Single side
4.7GB = 2 hr
Double-layers / Single side
8.5GB = 4 hr
Single-layer / Double sides
9.4GB = 4.5 hr
Double-layers / Double sides
17GB = 8 hr
12cm / 8cm
500 lines up
32
8
650MB = 74min
12cm / 8cm
-
-
1
DVD featuressymbols
2
2
2
Each DVD disccontains various featuresdepending
on production ofthe disc. Beloware some ofthe
symbols representing thefeatures:
Number ofAudio Tracks
Number of Subtitles
Angle Indicator
16 : 9 L B
Care ofdisc
Hold the discwith fingers. Holdthe disc's outer
edge and/or thecenter spindle hole.Do not touch
the disc surface.
Do not bendor press thedisc. Do NOTexpose the
disc to directsunlight or heatingsources.
Store discs incabinet vertically, in drycondition.
Prevent exposure to:
Direct sunlight
Heat or exhaustfrom a heatingdevice.
Extreme humidity.
Clean the discsurface with asoft, dry cleaningcloth.
Wipe the discsurface gently, radically, from center
toward the outeredge.
Do not applythinner, alcoholchemical solvent, or
sprays when cleaning.Such cleaning fluidswill
permanently damage thedisc surface.
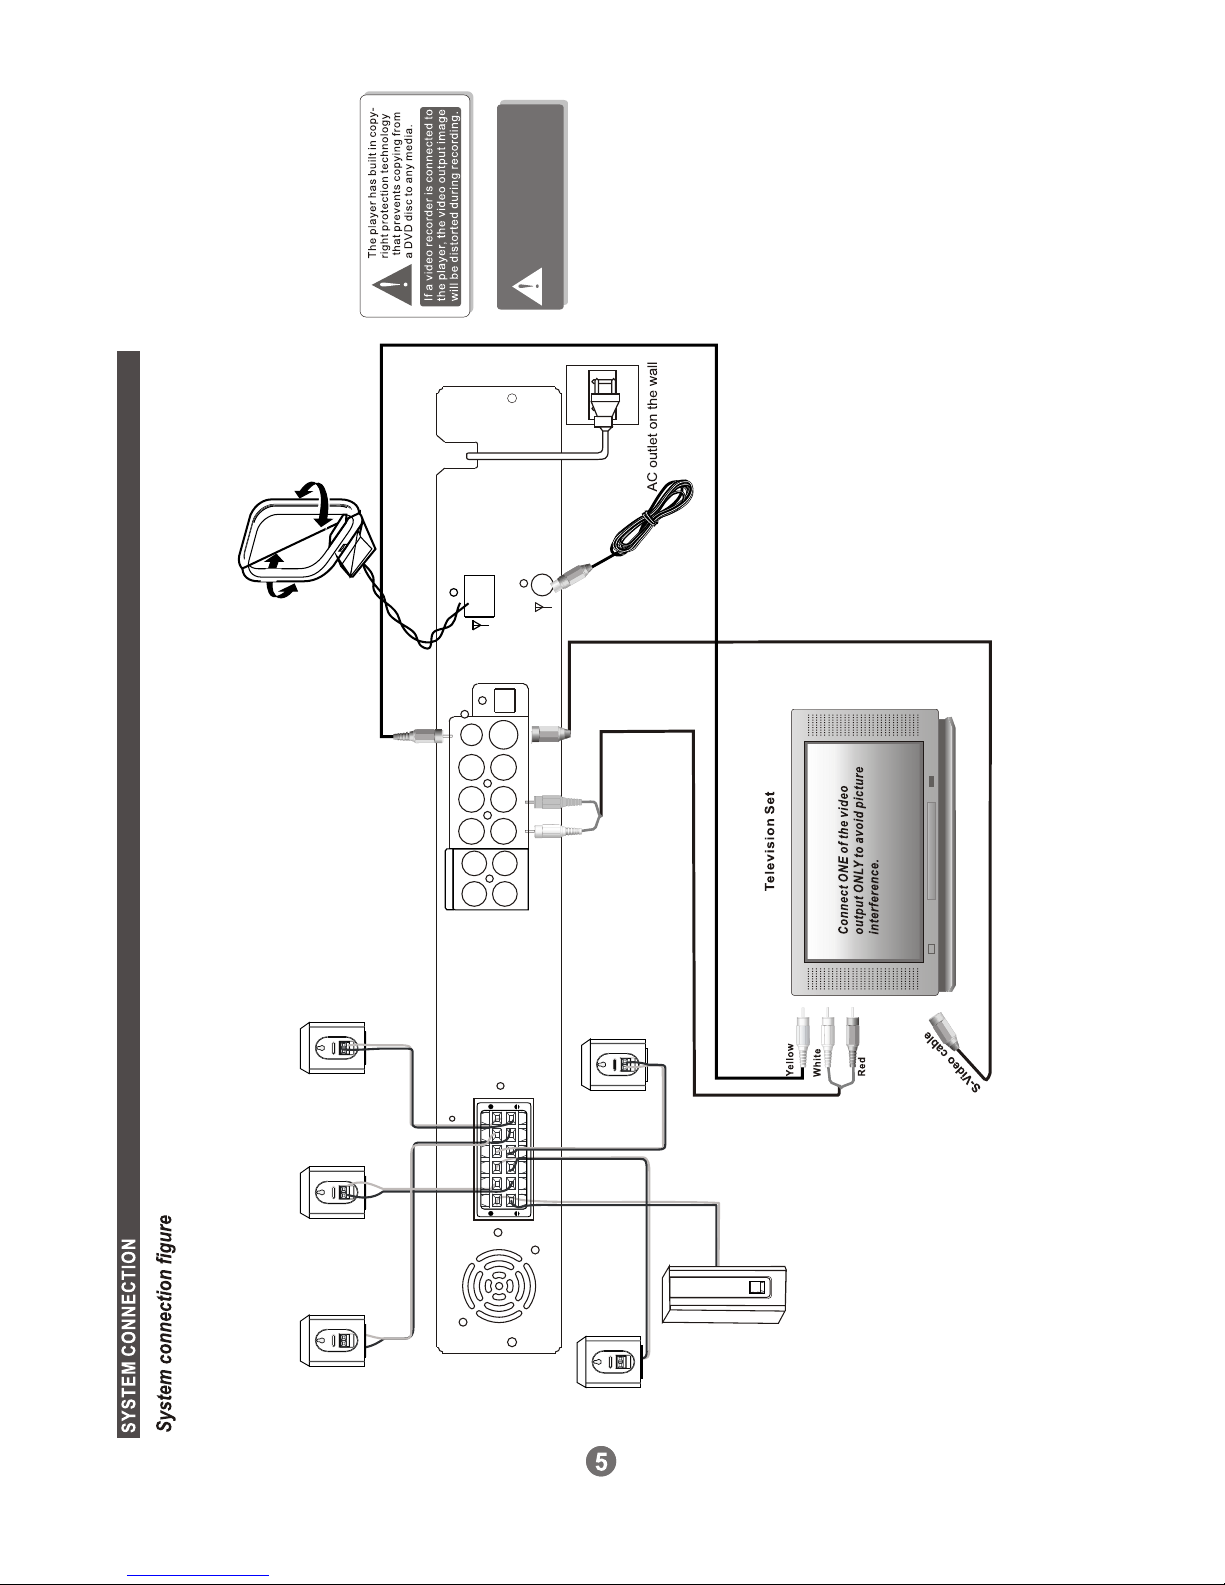
The player has built in copyright
protection technology that
prevents copying froma DVD
disc to any media.
If a video recorder is connectedto
the player, the videooutput image
will be distorted during recording.
Screen Format
Zoom
Region code
1
2
3
4
5
6
Region
Canada, USA
Europe (incl. Poland,Romania,The Czech
republic), Japan, Middle East(incl. Saudi
Arabia, Egypt, Iran,SouthAfrica)
EastAsia (incl.Hong Kong, Taiwan, South
Korea),
South-EastAsia
Australia, Caribbean, Central &South
America, Mexico,
New Zealand
Africa, Former SovietUnion, India, North
Korea, Pakistan, Turkmenistan
China
DVD Region Code
DVD discs andDVD players aremanufactured
under the worldwide agreed DVDRegional
Code System that theplayer will operate only
with corresponding disc ofthe same Regional
Code.
Video disc containshigh-density compressed data
that needs properhandling
Some features contained in this DVD player are related to
the DVD disc's software.
Check the featuresprinted onthe disc's packing or follow
the instructions of the Disc's on screen menu.
REMARK
Some features cannot beperformed if the disc does not
support the feature, or requires special settings.
++
1
INTRODUCTION