Teac LP-U200 User manual

ENGLISH
CEC6P10501531
Multi music player/Memory recorder
OWNER’S MANUAL
MANUEL DU PROPRIÉTAIRE
MANUAL DEL USUARIO
Z
LP-U200
FRANÇAIS ESPAÑOL
Z
This appliance has a serial number located on the rear panel. Please record
the model number and serial number and retain them for your records.
Model number Serial number 0508.MA-1356A
TEAC CORPORATION 1-47 Ochiai, Tama-shi, Tokyo 206-8530, Japan Phone: (042) 356-9156
TEAC AMERICA, INC. 7733 Telegraph Road, Montebello, California 90640 Phone: (323) 726-0303
TEAC CANADA LTD. 5939 Wallace Street, Mississauga, Ontario L4Z 1Z8, Canada Phone: (905) 890-8008
TEAC MEXICO, S.A. De C.V Rio Churubusco 364, Colonia Del Carmen, Delegación Coyoacàn, CP 04100, México DF, México Phone: (5255)5010-6000
TEAC UK LIMITED Unit 19 & 20, The Courtyards, Hatters Lane, Watford, Hertfordshire, WD18 8TE, U.K. Phone: (0845) 130-2511
TEAC EUROPE GmbH Bahnstrasse 12, 65205 Wiesbaden-Erbenheim, Germany Phone: 0611-71580
LP-U200(EFS)Aspread.qxd08.5.2711:04AMページ1

ESPAÑOL
99
Mensajes
DEV BUSY
La unidad está leyendo el dispositivo de grabación (USB o SD).
Espere unos segundos.
READING
La unidad está leyendo CD, USB o SD.
CLOSE
Se cierra bandeja del disco.
NO DISC
No se ha cargado un disco legible.
OPEN
Se abre la bandeja.
P-**
Número de programa
P*
Canal preajustado
Mensajes de error
FULL
No hay espacio en la tarjeta de memoria USB o en la tarjeta
de memoria SD, o no hay más pistas disponibles.
P FULL
Se han programado 40 pistas. No pueden programarse más
pistas.
PROTECT
La tarjeta de memoria SD está bloqueada.
REC ON
Durante la grabación (el botón no funciona)
(** es variable.)
Specifications
Sección del amplificador
Potencia de salida . . . . . . . . . . . . . . . . . . . . . . 3.5 W + 3.5 W
Respuesta en frecuencia . . . . . . . . . . . . . . De 50 Hz a 20 kHz
Sensibilidad e impedancia de entrada de audio
. . . . . . . . . . . . . . . . . . . . . . . . . AUX: -6 dBV (0.5V)/20 kΩ
Nivel máximo de entrada . . . . . . . . . . . . . AUX: +6 dBV (2.0V)
Sección del reproductor de CD
Respuesta en frecuencia . . . . . . . . De 20 Hz a 20 kHz (±2 dB)
Relación señal/ruido . . . . . . . . . . . . . . . . . . . . . Más de 80 dB
Distorsión armónica total. . . . . . . . . . . . . . . . Menos de 0,1%
Sección del sintonizador
Rango de frecuencia (FM) . . . . . . . de 87,5 MHz a 108,0 MHz
Rango de frecuencia (AM). . . . . . . . . de 520 kHz a 1,710 kHz
Sección de reproductor de discos
Motor. . . . . . . . . . . . . . . . . . . . . . . . . . . . . . . Servomotor DC
Sistema de transmisión . . . . . . . . . . . . Transmisión por correa
Velocidad . . . . . . . . . . . . . . . . . . 33-1/3 rpm, 45 rpm, 78 rpm
Ululación y vibración . . . . . . . . . . . . . menos de 0,25% (WDT)
Tipo de cartucho . . . . . . . . . . . Cartucho estéreo de cerámica
Lápiz . . . . . . . . . . . . . . . . . . . . . . . . . . . . . . . . . . . . . STL-103
Nivel de salida. . . . . . . . . . . . . . . . . . . . . . . . . . 160 - 360 mV
Sección del sistema de altavoces
Unidad . . . . . . . . . . . . . . . . . . . . . . . . . . . . . . . . . . . . 70 mm
Impedancia . . . . . . . . . . . . . . . . . . . . . . . . . . . . . . . . . 4 ohms
GENERALIDADES
Requisitos de energía . . . . . . . . . . . . . . . . . . . . . 120V, 60 Hz
Consumo. . . . . . . . . . . . . . . . . . . . . . . . . . . . . . . . . . . . 25 W
Dimensiones (ancho x largo x alto) . . . . . 470 x 230 x 390 mm
Peso . . . . . . . . . . . . . . . . . . . . . . . . . . . . . . . . . . . . . . . 10 kg
Accesorios estándar
Adaptador de 45 RPM (1)
Mando a distancia (RC-1158) (1)
(Batería de ión litio incluida)
Antena de FM (1)
Antena de AM (1)
Cable pin estéreo RCA (1)
Manual del usuario (1)
Tarjeta de garantía (1)
<El diseño y las especificaciones están sujetos a cambios sin
aviso.
<El peso y las dimensiones son aproximados.
<Las ilustraciones pueden diferir levemente de los modelos de
producción.
IMPORTANT SAFETY INSTRUCTIONS
1) Read these instructions.
2) Keep these instructions.
3) Heed all warnings.
4) Follow all instructions.
5) Do not use this apparatus near water.
6) Clean only with dry cloth.
7) Do not block any ventilation openings. Install in accordance
with the manufacturer’s instructions.
8) Do not install near any heat sources such as radiators, heat
registers, stoves, or other apparatus (including amplifiers) that
produce heat.
9) Do not defeat the safety purpose of the polarized or
grounding-type plug. A polarized plug has two blades with
one wider than the other. A grounding type plug has two
blades and a third grounding prong. The wide blade or the
third prong are provided for your safety. If the provided plug
does not fit into your outlet, consult an electrician for
replacement of the obsolete outlet.
10) Protect the power cord from being walked on or pinched
particularly at plugs, convenience receptacles, and the point
where they exit from the apparatus.
11) Only use attachments/accessories specified by the
manufacturer.
12) Use only with the cart, stand, tripod,
bracket, or table specified by the
manufacturer, or sold with the
apparatus. When a cart is used, use
caution when moving the
cart/apparatus combination to avoid
injury from tip-over.
The lightning flash with arrowhead symbol, within an
equilateral triangle, is intended to alert the user to the
presence of uninsulated “dangerous voltage” within
the product’s enclosure that may be of sufficient
magnitude to constitute a risk of electric shock to
persons.
The exclamation point within an equilateral triangle is
intended to alert the user to the presence of important
operating and maintenance (servicing) instructions in
the literature accompanying the appliance.
2
CAUTION: TO REDUCE THE RISK OF ELECTRIC SHOCK,
DO NOT REMOVE COVER (OR BACK). NO USER-
SERVICEABLE PARTS INSIDE. REFER SERVICING TO
QUALIFIED SERVICE PERSONNEL.
13) Unplug this apparatus during lightning storms or when
unused for long periods of time.
14) Refer all servicing to qualified service personnel. Servicing is
required when the apparatus has been damaged in any way,
such as power-supply cord or plug is damaged, liquid has
been spilled or objects have fallen into the apparatus, the
apparatus has been exposed to rain or moisture, does not
operate normally, or has been dropped.
<Do not expose this apparatus to drips or splashes.
<Do not place any objects filled with liquids, such as vases, on
the apparatus.
<Do not install this apparatus in a confined space such as a
book case or similar unit.
<The apparatus draws nominal non-operating power from the
AC outlet with its STANDBY/ON switch in the standby
position.
<Where the MAINS plug or an appliance coupler is used as the
disconnect device, the disconnect device shall remain readily
operable.
<An apparatus with Class
!
construction shall be connected to
an AC outlet with a protective grounding connection.
<Batteries (battery pack or batteries installed) shall not be
exposed to excessive heat such as sunshine, fire or the like.
<Excessive sound pressure from earphones and headphones
can cause hearing loss.
LP-U200(EFS)Aspread.qxd08.5.2711:04AMページ3

98
Resolución de problemas
Si experimenta algún problema con la unidad, compruebe la
siguiente tabla para intentar resolver el problema usted mismo
antes de ponerse en contacto con el distribuidor o un centro de
servicios de TEAC.
No hay alimentación
eCompruebe la conexión a la fuente de alimentación de CA.
Compruebe y asegúrese de que la fuente de CA no sea una
toma conmutada y, si lo es, que el interruptor esté
encendido. Asegúrese de que se suministre alimentación a la
toma de CA enchufando otro elemento, como por ejemplo
una lámpara o un ventilador.
No hay sonido.
eAjuste el volumen.
El sonido es ruidoso.
eTLa unidad se encuentra demasiado cerca de un televisor o
un aparato similar.
Vuelva a colocar la unidad lejos de los mismos, o desconecte
los demás aparatos.
El mando a distancia no funciona.
ePulse el botón STANDBY/ON para encender la unidad
principal.
eSi las pilas están agotadas, cámbielas.
eUtilice el mando a distancia dentro del alcance (5m) y
apúntelo hacia el panel delantero.
eAparte los obstáculos entre el mando a distancia y la unidad
principal.
eSi una luz potente se encuentra cerca de la unidad,
apáguela.
CD
No se puede reproducir.
eCargue un disco con la cara de reproducción mirando hacia
abajo.
eSi el disco está sucio, limpie la superficie del disco.
eSe ha cargado un disco en blanco. Cargue un disco
pregrabado.
eSegún el disco, etc. puede que no sea posible reproducir
discos CD-R/CD-RW. Inténtelo con otro disco.
El sonido salta.
eColoque la unidad en una superficie estable para evitar
vibraciones e impactos.
eSi el disco está sucio, limpie la superficie del disco.
eNo use discos rayados, deformados o deteriorados.
Sintonizador
No es posible oír ninguna emisora, o la señal es demasiado
débil.
eSintonice la emisora de forma adecuada.
eSi un TV se encuentra cerca de la unidad, apáguelo.
eGira la unidad o la antena para la mejor posición de
recepción. En una zona donde la señal sea débil, se precisará
una antena exterior de FM.
Giradiscos
No se puede reproducir.
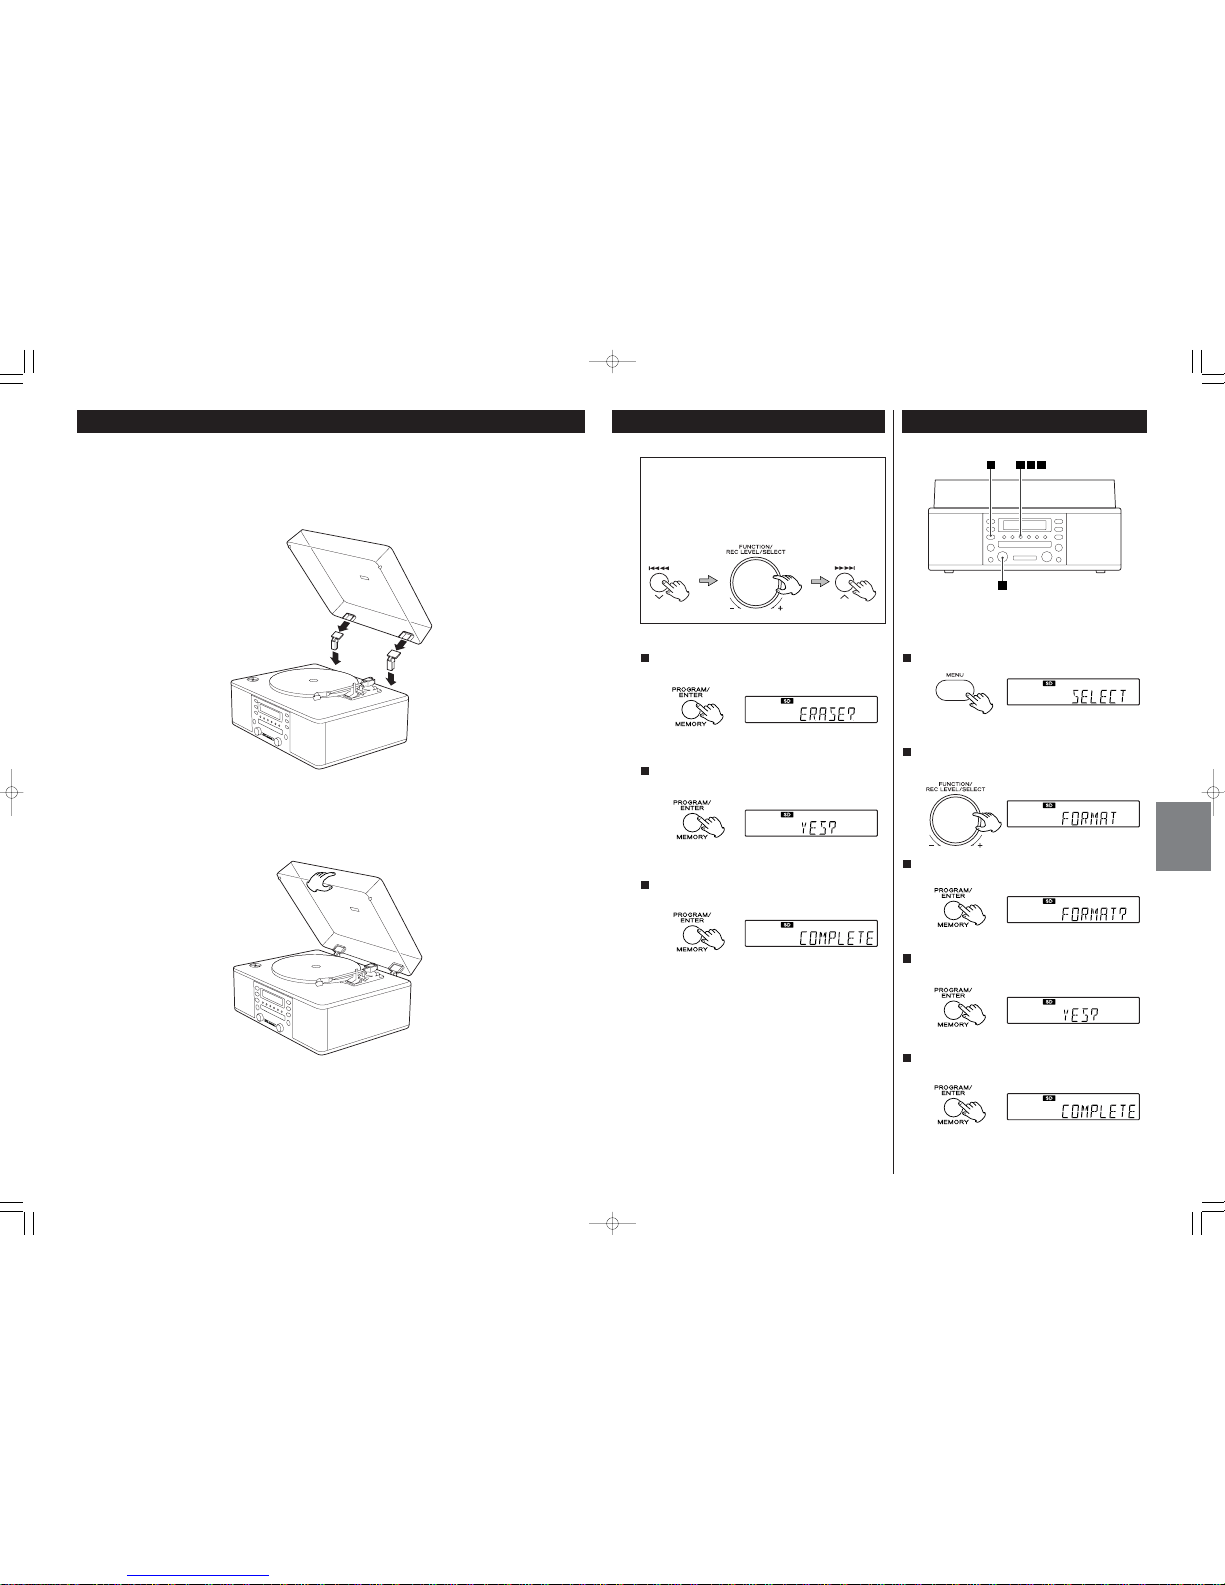
eAfloje el tornillo de transporte y saque el protector del lápiz.
(El protector del lápiz es una tapa de plástico que lo protege
durante el transporte. Si no se saca esta protección, el lápiz
no podrá entrar en contacto con el surco del disco y no se
emitirá sonido.)
El sonido es ruidoso o raro.
eSi el lápiz está gastado, cámbielo.
eSeleccione la velocidad correcta de reproducción.
SEl sonido salta.
eColoque la unidad en una superficie estable para evitar
vibraciones e impactos. Asegúrese de que la unidad esté
nivelada tanto de atrás a adelante como de lado a lado.
eLimpie la superficie del disco.
eNo use discos rayados, deformados o deteriorados.
MP3
No se emite sonido incluso pulsando el botón PLAY (y).
eCompruebe si hay archivos MP3 en el USB.
eLos formatos de archivos no reproducibles (por ejemplo,
archivo MPEG 1 CAPA 2 y WMA) no pueden reproducirse.
En la pantalla se muestran algunos caracteres desconocidos.
eEsta unidad no puede mostrar correctamente símbolos y
caracteres de tamaño máximo o de doble bit (como
japonés, chino, etc.). Los nombres de los archivos MP3
deberán estar formados por caracteres alfanuméricos.
No es posible la grabación.
eLa tarjeta de memoria USB o la tarjeta de memoria SD no
disponen de una zona grabable. Use otra tarjeta de
memoria USB o tarjeta de memoria SD.
eTEl nivel de grabación es demasiado bajo. Ajuste del nivel de
grabación.
eDesplace el dispositivo de candado de la tarjeta de memoria
SD para desbloquearlo.
Si no puede conseguirse un funcionamiento normal,
desconecte el cable de alimentación de la toma y conéctelo
de nuevo.
Tenga cuidado con la condensación
Cuando la unidad (o disco) es trasladada de un lugar frío a
uno de cálido, o se utiliza después de un cambio drástico de
la temperatura, existe el riego de condensación; el vapor del
aire podría condensarse en el mecanismo interno, impidiendo
un funcionamiento normal. Para evitarlo, o si esto ocurre,
deje la unidad conectada durante una o dos horas. La unidad
se estabilizará a la temperatura de su entorno.
Mantenimiento
Mantenga siempre limpio el giradiscos.
Si la superficie de la unidad se ensucia, límpiela con un paño
suave o utilice un jabón líquido suave diluido. Asegúrese de
eliminar completamente el líquido sobrante. No utilice
diluyente, benceno o alcohol, ya que podrían dañar la
superficie de la unidad. Deje que la superficie de la unidad se
seque completamente antes de utilizarla.
CAUTION:
<DO NOT REMOVE THE EXTERNAL CASES OR CABINETS TO
EXPOSE THE ELECTRONICS. NO USER SERVICEABLE PARTS
ARE WITHIN!
<IF YOU ARE EXPERIENCING PROBLEMS WITH THIS PRODUCT,
CONTACT TEAC FOR A SERVICE REFERRAL. DO NOT USE THE
PRODUCT UNTIL IT HAS BEEN REPAIRED.
<USE OF CONTROLS OR ADJUSTMENTS OR PERFORMANCE OF
PROCEDURES OTHER THAN THOSE SPECIFIED HEREIN MAY
RESULT IN HAZARDOUS RADIATION EXPOSURE.
WARNING: TO PREVENT FIRE OR SHOCK
HAZARD, DO NOT EXPOSE THIS APPLIANCE
TO RAIN OR MOISTURE.
This equipment has been tested and found to comply with the
limits for a Class B digital device, pursuant to Part 15 of the
FCC Rules. These limits are designed to provide reasonable
protection against harmful interference in a residential
installation. This equipment generates, uses, and can radiate
radio frequency energy and, if not installed and used in
accordance with the instructions, may cause harmful
interference to radio communications. However, there is no
guarantee that interference will not occur in a particular
installation. If this equipment does cause harmful interference
to radio or television reception, which can be determined by
turning the equipment off and on, the user is encouraged to
try to correct the interference by one or more of the following
measures:
• Reorient or relocate the equipment and/or the receiving
antenna.
• Increase the separation between the equipment and
receiver.
•Connect the equipment into an outlet on a circuit different
from that to which the receiver is connected.
•Consult the dealer or an experienced radio/TV technician
for help.
CAUTION:
Changes or modifications to this equipment not expressly
approved by TEAC CORPORATION for compliance will void the
user’s warranty.
For U.S.A.
3
ENGLISH
Optical pickup :
Type : SF-P101NXR
Manufacturer : SANYO ELECTRIC CO., LTD.
Laser output : Less than 0.5 mW on the objective lens
Wavelength : 765 - 815 nm
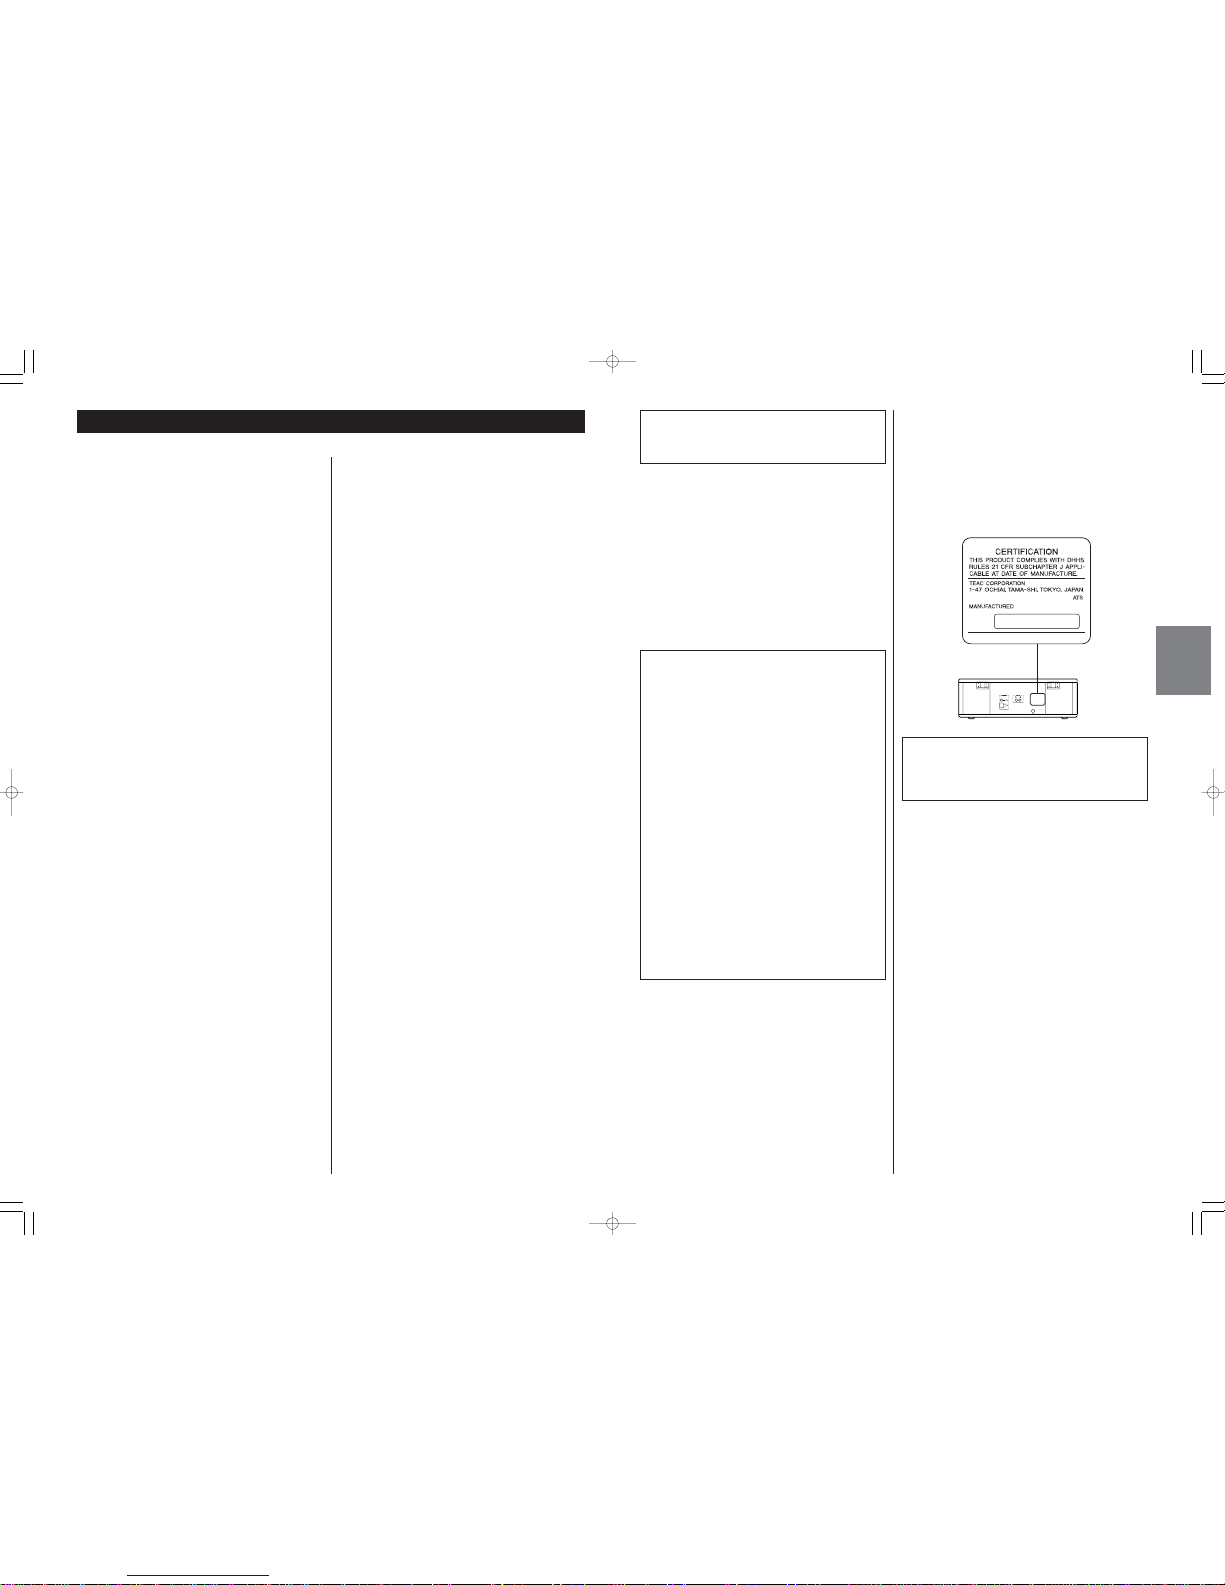
This product has been designed and manufactured according to
FDA regulations “title 21, CFR, chapter 1, subchapter J, based on
the Radiation Control for Health and Safety Act of 1968“, and is
classified as class 1 laser product. There is not hazardous invisible
laser radiation during operation because invisible laser radiation
emitted inside of this product is completely confined in the
protective housings.
The label required in this regulation is shown as follows:
For U.S.A.
LP-U200(EFS)Aspread.qxd08.5.2711:04AMページ5

ESPAÑOL
El elemento del menú que puede establecer varía según la
función.
Los elementos del menú son los siguientes:
“SLEEP” Véase “Desconexión programada” (Pág. 97).
“BIT RATE” Véase “Ajuste de la tasa de bits” (Pág. 89).
“AUTO OFF” Véase “Apagado automático” (Pág. 97).
“FM MODE” Véase “Cómo escuchar la radio” (Pág.79).
“ERASE” Véase “Borrar” (Pág.91).
“FORMAT” Véase “Formatear” (Pág.92).
97
Cómo establecer los elementos del menú
2 4 6
3 51
Gire el botón FUNCTION/REC LEVEL/SELECT para
seleccionar valores, etc.
5
Algunas funciones están en el menú. Los elementos del menú se
establecen en el siguiente método.
Gire el botón FUNCTION/REC LEVEL/SELECT para
seleccionar una función.
1
Pulse el botón MENU.
2
<Para cancelar el modo de ajustes de menú, no utilice la
unidad durante un minuto, o pulse el botón STOP (H).
Gire el botón FUNCTION/REC LEVEL/SELECT para
seleccionar un elemento del menú.
3
Pulse el botón PROGRAM/ENTER.
4
Pulse el botón PROGRAM/ENTER.
6
SLEEP
BIT RATE
AUTO OFF
FM MODE
ERASE
FORMAT
CD
PHONO
TUNER
USB
SD
AUX
4
Contents
Thank you for choosing TEAC. Read this manual carefully
to get the best performance from this unit.
Contents. . . . . . . . . . . . . . . . . . . . . . . . . . . . . . . . . . . . . . . . . . 4
Before using the unit . . . . . . . . . . . . . . . . . . . . . . . . . . . . . . . . 4
Handling Records . . . . . . . . . . . . . . . . . . . . . . . . . . . . . . . . . . . 5
How to Replace the Stylus. . . . . . . . . . . . . . . . . . . . . . . . . . . . . 5
Discs . . . . . . . . . . . . . . . . . . . . . . . . . . . . . . . . . . . . . . . . . . . . . 6
MP3 . . . . . . . . . . . . . . . . . . . . . . . . . . . . . . . . . . . . . . . . . . . . . 7
Remote Control Unit. . . . . . . . . . . . . . . . . . . . . . . . . . . . . . . . . 7
Unit Functions and Remote Control . . . . . . . . . . . . . . . . . . . . . 8
Turntable Cover . . . . . . . . . . . . . . . . . . . . . . . . . . . . . . . . . . . 10
Parts of the Turntable . . . . . . . . . . . . . . . . . . . . . . . . . . . . . . . 11
Connection. . . . . . . . . . . . . . . . . . . . . . . . . . . . . . . . . . . . . . . 12
Basic Operation (Listening to an external source). . . . . . . . . . . 13
Listening to the Radio . . . . . . . . . . . . . . . . . . . . . . . . . . . . . . 14
Preset Tuning . . . . . . . . . . . . . . . . . . . . . . . . . . . . . . . . . . . . . 15
Listening to a Record . . . . . . . . . . . . . . . . . . . . . . . . . . . . . . . 16
Listening to CD/MP3 (discs). . . . . . . . . . . . . . . . . . . . . . . . . . . 18
Listening to MP3 (USB/SD) . . . . . . . . . . . . . . . . . . . . . . . . . . . 19
Listening to CD/MP3 (discs/USB/SD) . . . . . . . . . . . . . . . . . . . . 19
Folder Search . . . . . . . . . . . . . . . . . . . . . . . . . . . . . . . . . . . . . 20
Time Display . . . . . . . . . . . . . . . . . . . . . . . . . . . . . . . . . . . . . . 20
Repeat Playback . . . . . . . . . . . . . . . . . . . . . . . . . . . . . . . . . . . 21
Shuffle Playback . . . . . . . . . . . . . . . . . . . . . . . . . . . . . . . . . . . 21
Programmed Playback. . . . . . . . . . . . . . . . . . . . . . . . . . . . . . . 22
Before Recording . . . . . . . . . . . . . . . . . . . . . . . . . . . . . . . . . . 23
Setting of File Division. . . . . . . . . . . . . . . . . . . . . . . . . . . . . . . 24
Setting of Bit Rate. . . . . . . . . . . . . . . . . . . . . . . . . . . . . . . . . . 24
Recording . . . . . . . . . . . . . . . . . . . . . . . . . . . . . . . . . . . . . . . . 25
Erase. . . . . . . . . . . . . . . . . . . . . . . . . . . . . . . . . . . . . . . . . . . . 26
Format . . . . . . . . . . . . . . . . . . . . . . . . . . . . . . . . . . . . . . . . . . 27
Setting the Clock . . . . . . . . . . . . . . . . . . . . . . . . . . . . . . . . . . 28
Setting the Timer . . . . . . . . . . . . . . . . . . . . . . . . . . . . . . . . . . 29
Auto Power Off . . . . . . . . . . . . . . . . . . . . . . . . . . . . . . . . . . . 32
Sleep Timer. . . . . . . . . . . . . . . . . . . . . . . . . . . . . . . . . . . . . . . 32
How to set Menu Items. . . . . . . . . . . . . . . . . . . . . . . . . . . . . . 33
Troubleshooting . . . . . . . . . . . . . . . . . . . . . . . . . . . . . . . . . . . 34
Messages . . . . . . . . . . . . . . . . . . . . . . . . . . . . . . . . . . . . . . . . 35
Specifications . . . . . . . . . . . . . . . . . . . . . . . . . . . . . . . . . . . . . 35
Before using the unit
Read this before attempting any operations
<As the unit may become warm during operation, always leave
sufficient space around the unit for ventilation.
<The voltage supplied to the unit should match the voltage as
printed on the rear panel. If you are in any doubt regarding
this matter, consult an electrician.
<Choose the installation location of your unit carefully. Avoid
placing it in direct sunlight or close to a source of heat. Also
avoid locations subject to vibrations and excessive dust, heat,
cold or moisture.
<Do not place the unit on an amplifier/receiver.
<Do not open the cabinet as this might result in damage to the
circuitry or electrical shock. If a foreign object should get into
the unit, contact your dealer or service company.
<When removing the power plug from the wall outlet, always
pull directly on the plug, never yank the cord.
<To keep the laser pickup clean, do not touch it, and always
close the disc tray.
<Do not attempt to clean the unit with chemical solvents as
this might damage the finish. Use a clean, dry cloth.
<Keep this manual in a safe place for future reference.
DO NOT MOVE THE UNIT DURING PLAYBACK
During playback, the disc rotates at high speed. Do NOT lift or
move the unit during playback. Doing so may damage the
disc or the unit.
WHEN MOVING THIS UNIT
When changing the unit’s location or packing the unit for
moving, be sure to remove the record or disc. Moving this
unit with the record or disc loaded may result in damage to
this unit. If the unit is to be packed and moved a great
distance, it is also advisable to tighten the turntable transport
locking screw. See Page 11 for instructions.
LP-U200(EFS)Aspread.qxd08.5.2711:04AMページ7

96
Desconexión programada (Sleep Timer)
1 3 5
42
Puede establecer la hora para apagar automáticamente esta unidad.
Pulse el botón MENU.
1
<Para cancelar el modo de ajustes de menú, no utilice la
unidad durante un minuto, o pulse el botón STOP (H).
Gire el botón FUNCTION/REC LEVEL/SELECT para
seleccionar “SLEEP”.
2
Pulse el botón PROGRAM/ENTER.
3
Gire el botón FUNCTION/REC LEVEL/SELECT para
seleccionar la hora.
4
El tiempo (minutos) se cambia tal y como sigue.
Pulse el botón PROGRAM/ENTER.
5
20 30 90
.......
10OFF
Apagado automático
1 3 5
42
Puede establecer la hora para apagar esta unidad una vez
finalizada la reproducción.
<El apagado automático puede establecerse en el modo
PHONO, CD, USB y SD.
Pulse el botón MENU.
1
<Para cancelar el modo de ajustes de menú, no utilice la
unidad durante un minuto, o pulse el botón STOP (H).
Gire el botón FUNCTION/REC LEVEL/SELECT para
seleccionar “AUTO OFF”.
2
Pulse el botón PROGRAM/ENTER.
3
Gire el botón FUNCTION/REC LEVEL/SELECT para
seleccionar la hora.
4
El tiempo (minutos) se cambia tal y como sigue.
155
Pulse el botón PROGRAM/ENTER.
5
Cuando no desee utilizar esta función, seleccione “- -“
<Si la fuente es PHONO, una vez alcanzada la hora se
desactivará el sonido, pero la reproducción de la grabación se
detendrá después de que la reproducción alcance el fin de la
grabación. 5
ENGLISH
Handling Records
<Keep your records away from dust. Keep them in a cool, dry
place.
<To avoid dust and scratches, keep records in their sleeves and
jackets when not in use.
<Store records upright on their edges. Records stored
horizontally will eventually bend and warp.
<Do not expose records to direct sunlight or high humidity and
temperature. Long exposure to high temperatures will warp
the record.
<Do not store your records in the trunk of your car. The
temperature in a closed trunk can ruin your collection.
<Store records in an area with stable temperature and
humidity.
<Should the record become dirty, gently wipe the surface in a
circular motion, using a soft anti-static cloth.
Commercial record cleaning systems are available from many
retailers or on-line. TEAC does not endorse any specific
product but, depending on the condition of your record
collection, it may be advisable to look into one of these
systems. Clean records protect your stylus from undue wear.
<Do not touch the record’s grooves. Only handle records, by
the edges or the label, with clean hands. Skin oils from even
clean hands can leave a residue on the record surface that will
gradually deteriorate the quality of your record.
label grooves
edge
How to Replace the Stylus
The stylus should last about 50 hours under normal use.
However, it is recommended that the stylus be replaced as soon
as you notice a change in sound quality.
Prolonged use of a worn-out stylus may damage the record.
Wear and tear on the stylus will be accelerated when playing 78
RPM records. The higher speed of 78 RPM records wears the
stylus more quickly.
Caution:
<Do not remove or bend the stylus.
<To avoid injury, do not touch the needle.
<Turn off the unit’s power before you replace the stylus.
<Keep out of the reach of children.
<Handle with care, as the stylus is delicate. Use of a bent or
broken stylus may damage the record and cause the turntable
to malfunction.
<Do not expose stylus to extreme heat.
<Contact a qualified repair company if you experience difficulty
in changing the stylus.
Removing old stylus
1. Set a small screwdriver at the tip of the stylus and push down
to the direction “A”.
2. Remove the stylus by pulling it forward and down.
The replacement stylus for this LP-U200 is an STL-103 (3
pieces packed). A SPL-102 (2 pieces packed) for use with SP
records only is also available. Please contact TEAC Parts at
(323) 726-0303, extension 840 to order.
Or call our automated Service Agency Locator at: (800) 447-
TEAC for the closest authorized repair company that can
replace the stylus for you.
Installing a new stylus
1. Hold the tip of the stylus and insert the other edge by
pressing in the direction “B”.
2. Push up in the direction “C” until it locks at the tip.
A
B
C
LP-U200(EFS)Aspread.qxd08.5.2711:04AMページ9

ESPAÑOL
95
Pulse el botón PROGRAM/ENTER.
4
Para encender o apagar el temporizador
Mantenga pulsado el botón durante unos segundos.
Cuando el temporizador está activado, en la pantalla aparece .
Volumen
Establezca el volumen de reproducción.
<No es el volumen de grabación. Si desea establecer el
volumen de grabación, establezca el nivel de grabación
durante la grabación normal.
Pulse varias veces el botón para seleccionar VOLUME
“VOLUME” aparece durante unos pocos segundos.
1
Pulse el botón PROGRAM/ENTER.
El valor “volumen” parpadea.
2
Pulse el botón PROGRAM/ENTER.
4
Establezca el volumen girando el botón FUNCTION/REC
LEVEL/SELECT.
3
<Cuando la fuente está establecida en “TUNER” y la unidad se
enciende, se sintonizará la emisora que seleccionó la última
vez.
Rec Device
Cuando la fuente seleccionada es TUNER, seleccione un
dispositivo de grabación.
Pulse varias veces el botón para seleccionar REC
DEV.
“REC DEV” aparece durante unos pocos segundos.
1
Si no desea grabar, seleccione “NO REC”.
Pulse el botón PROGRAM/ENTER.
4
Seleccione el dispositivo de grabación girando el botón
FUNCTION/REC LEVEL/SELECT.
3
Pulse el botón PROGRAM/ENTER.
El dispositivo de grabación parpadea.
2
6
Discs
Discs which can be played on this unit:
•Conventional audio CDs bearing the CD-DA logo on the
label:
•Properly finalized CD-R and CD-RW discs
Note:
<Depending on the quality of the disc and/or the condition of
the recording, some CD-R/CD-RW discs may not be playable.
<Copy-protected discs and other discs which do not conform
to the CD standard may not play back correctly in this player.
If you use such discs in this unit, TEAC Corporation and its
subsidiaries cannot be responsible for any consequences or
guarantee the quality of reproduction. If you experience
problems with such non-standard discs, you should contact
the producers of the disc.
<Always place the disc on the disc tray with the label side
uppermost. (Compact discs can be played or recorded only on
one side.)
<To remove a disc from its storage case, press down on the
center of the case and lift the disc out, holding it carefully by
the edges.
<Discs should be returned to their cases after use to avoid dust
and scratches that could cause the laser pickup to ‘skip’.
<Do not expose discs to direct sunlight or high humidity and
temperature for extended periods. Long exposure to high
temperatures will warp the disc.
<Do not play any disc that is warped, deformed or damaged.
Playing such discs may cause irreparable harm to the playing
mechanisms.
<CD-R and CD-RW discs are more sensitive to the effects of
heat and ultraviolet rays than ordinary CDs. It is important
that they are not stored in a location where direct sunlight
will fall on them, and which is away from sources of heat
such as radiators or heat-generating electrical devices.
<Printable CD-R and CD-RW discs aren’t recommended, as the
label side might be sticky and damage the unit.
<Do not stick papers or protective sheets on the discs and do
not use any protective coating spray.
<Use a soft oil-based felt-tipped pen to write the information
on the label side. Never use a ball-point or hard-tipped pen,
as this may cause damage to the recorded side.
<Never use a stabilizer. Using commercially available CD
stabilizers with this unit will damage the mechanisms and
cause them to malfunction.
<Do not use irregular shape CDs (octagonal, heart shaped,
business card size, etc.). CDs of this sort can damage the unit:
<If you are in any doubt as to the care and handling of a CD-
R/CD-RW disc, read the precautions supplied with the disc, or
contact the disc manufacturer directly.
How to remove the disc How to hold the disc
<Should the disc become dirty, wipe the surface radially (from
the center hole outward towards the outer edge) with a soft,
dry cloth:
<Never use such chemicals as record sprays, antistatic sprays or
fluid, benzine or thinner to clean the discs. Such chemicals
will do irreparable damage to the disc’s plastic surface.
LP-U200(EFS)Aspread.qxd08.5.2711:04AMページ11

94
Pulse el botón PROGRAM/ENTER.
El valor “minuto” parpadea.
4
Cómo ajustar el temporizador 2
Establezca el tiempo de parada (minuto) girando el
botón FUNCTION/REC LEVEL/SELECT.
5
Pulse el botón PROGRAM/ENTER.
6
Fuente
Establezca la fuente que desea escuchar en la hora establecida.
Pulse varias veces el botón para seleccionar
SOURCE.
“SOURCE” aparece durante unos pocos segundos.
1
Seleccione la fuente girante el botón FUNCTION/REC
LEVEL/SELECT.
3
OFF time
Establezca la hora de parada de la grabación o reproducción.
El tiempo de apagado (OFF) predeterminado es 1 hora más tarde
que el tiempo de encendido (ON).
Pulse varias veces el botón para seleccionar el
tiempo OFF.
“OFF TIME” aparece durante unos pocos segundos.
1
Pulse el botón PROGRAM/ENTER.
El valor “hora” empieza a parpadear.
2
Establezca el tiempo de parada (hora) girando el botón
FUNCTION/REC LEVEL/SELECT.
3
PROGRAM/ENTER
FUNCTION/REC LEVEL/SELECT
Pulse el botón PROGRAM/ENTER.
La fuente actual parpadea.
2
7
ENGLISH
MP3
<This unit can play MP3 files recorded on a CD-R, CD-RW, USB
storage device or SD memory card.
<File names of MP3 should be alphanumeric characters. This
unit cannot display symbols and full-size or double-byte
characters (such as Japanese, Chinese, etc.) correctly. Also, be
sure to use the file extension (.mp3).
<MP3 files are mono or stereo MPEG-1/2/2.5 Audio Layer 3
format. This unit can play MP3 files with sampling frequency
16 to 48 kHz, bit-rate320 kbps or less.
<Folder name, file name and ID3 tag (title, artist and album)
can be displayed up to 30 characters.
<Audio encoded at 128 Kbps should sound close to regular
audio CD quality. Although this player will play lower bit-rate
MP3 tracks, the sound quality becomes noticeably worse at
lower bit-rates.
Discs
<The disc must be finalized in order to play.
<The CD-ROM must be ISO 9660 compatible.
<When more than 255 files are recorded on the disc, the unit
might not be able to play it correctly.
USB/SD
<This unit supports USB 1.1 FULL SPEED (12Mbps).
<This unit can play MP3 files recorded in SD memory card or
various external USB storage devices such as USB flash
memory. But this unit don’t support playback or recording of
MP3 players.
<When more than 1000 files are recorded on the USB memory
or SD memory card, the unit might not be able to play it
correctly.
<The unit might not be able to play over 1GB SD memory card.
<The unit might not be able to play MP3 memory player via the
USB
Remote Control Unit
Remove the battery compartment cover.
Insert a lithium dry battery (CR2025). Make sure that the
battery is inserted with its positive “+” and negative “_”
poles positioned correctly.
Close the cover.
Battery Replacement
If the distance required between the remote control unit and
main unit decreases, the battery is exhausted. In this case,
replace the battery with a new one.
Precautions concerning batteries
<Be sure to insert the battery with correct positive “+” and
negative “_” polarities.
<When the remote control unit is not to be used for a long
time (more than a month), remove the battery from the
remote control unit to prevent it from leaking. If it leaks, wipe
away the liquid inside the battery compartment and replace
the battery with new one.
<Do not heat or disassemble batteries and never dispose of old
batteries by throwing them in a fire.
3
2
1
The provided Remote Control Unit allows the unit to be
operated from a distance.
Before using the remote control unit, pull out protection sheet
from the battery compartment.
When operating the remote control unit, point it towards the
REMOTE SENSOR on the front panel of the unit.
<Even if the remote control unit is operated within the effective
range, remote control operation may be impossible if there
are any obstacles between the unit and the remote control.
<If the remote control unit is operated near other appliances
which generate infrared rays, or if other remote control
devices using infrared rays are used near the unit, it may
operate incorrectly. Conversely, the other appliances may
operate incorrectly.
Battery Installation
LP-U200(EFS)Aspread.qxd08.5.2711:04AMページ13

ESPAÑOL
93
Cómo ajustar el temporizador 1
Ajuste el reloj antes de ajustar el temporizador.
<La unidad puede programarse para encenderse y apagarse a
una hora determinada.
<Ajuste el reloj antes de ajustar el temporizador.
Esta función del temporizador puede establecerse ON TIME, OFF
TIME, SOURCE, REC DEVICE y VOLUME, independientemente.
ON time
Establezca la hora de inicio de la grabación o reproducción.
Pulse varias veces el botón para seleccionar el
tiempo ON.
“ON TIME” aparece durante unos pocos segundos.
El indicador parpadea.
1
PROGRAM/ENTER
FUNCTION/REC LEVEL/SELECT
Pulse el botón PROGRAM/ENTER.
El valor “hora” empieza a parpadear.
2
Establezca el tiempo de inicio (hora) girando el botón
FUNCTION/REC LEVEL/SELECT.
3
Establezca el tiempo de inicio (minuto) girando el botón
FUNCTION/REC LEVEL/SELECT.
5
Pulse el botón PROGRAM/ENTER.
6
<Para cancelar el modo de ajuste del temporizador, no utilice la
unidad durante un minuto, o pulse el botón STOP (H).
Pulse el botón PROGRAM/ENTER.
El valor “minuto” parpadea.
4
8
Unit Functions and Remote Control
Q
ST P NN VU R O
A B I
F KG H
EJL
M
C D
A
W
X
Y
K
C
D
UQ
U
J
F
H
G
O
E
B
L
M
LP-U200(EFS)Aspread.qxd08.5.2711:04AMページ15

92
Pulse el botón para visualizar el reloj.
Si la unidad está apagada, omita este paso.
1
PROGRAM/ENTER
FUNCTION/REC LEVEL/SELECT
DISPLAY
SHUFFLE
<Para cancelar el modo de ajuste del reloj, no utilice la unidad
durante un minuto, o pulse el botón STOP (H).
Pulse el botón PROGRAM/ENTER.
2
Establezca la hora actual girando el botón
FUNCTION/REC LEVEL/SELECT.
3
Pulse el botón PROGRAM/ENTER.
4
Establezca los minutos girando el botón FUNCTION/REC
LEVEL/SELECT.
5
Pulse el botón PROGRAM/ENTER.
El reloj se enciende.
6
Cómo ajustar el reloj
Cómo cambiar el reloj 12H o bien 24H
En el modo de espera, pulse a la vez el botón SHUFFLE y el
botón DISPLAY.
9
ENGLISH
STANDBY/ON
Press this button to turn the unit on or STANDBY.
TRACK INCREMENT
Use this button to display the timer status. During recording,
use this button to divide files.
DISPLAY
In CD, USB, SD mode, use this button to change the display.
MENU
Use this button to enter the menu setting mode.
SHUFFLE/PRESET
In CD, USB, SD mode, use this button for shuffle playback.
In TUNER mode, use this button to select a preset station.
REPEAT/PRESET
In CD, USB, SD mode, use this button to select repeat mode.
In TUNER mode, use this button to select a preset station.
PROGRAM/ENTER/MEMORY
In TUNER mode, use this button to preset stations.
In CD, USB, SD mode, use this button to program tracks or
files.
Also use this button to set the menu items.
FOLDER, FM/AM
While playing an MP3 CD/USB/SD card use this button to
select a folder.
In TUNER mode, use this button to select FM or AM.
Display
Skip (.//), TUNING (‡/°)
In CD, SD, USB mode, use these buttons to skip tracks or files.
Hold down these buttons to search for a part of track or a
file.
In TUNER mode, use these buttons to tune in a station.
RECORD
Use this button to enter record pause mode and start
recording.
PLAY/PAUSE (y/J)
In CD, USB, SD mode, use this button to start or pause
playback.
STOP (H)
In CD, USB, SD mode, use this button to stop playback or
recording, or cancel the menu setting mode.
Speakers (stereo)
OPEN/CLOSE
Use this button to open and close the disc tray.
O
N
M
L
K
J
I
H
G
F
E
D
C
B
ARemote Sensor
When operating the remote control unit, point it towards
here.
VOLUME
Turn this knob to adjust the volume.
Disc Tray
SD memory card slot
USB terminal
This USB terminal supports USB1.1
FUNCTION/REC LEVEL/SELECT
Use this knob to change FUNCTION.
In the menu setting mode, use this knob to select a menu
item.
In record pause mode or while recording, use this knob to
adjust the recording level.
PHONES
For private listening, first reduce the volume level to
minimum. Then insert your headphones’ plug into this jack,
and adjust the volume by turning the VOLUME knob. The
sound from speakers will be cut off while the headphones are
plugged in.
Numeric buttons
In CD, USB, SD mode, use these buttons to select the tracks
or files for program.
DIGIT
While using the numeric buttons use this button to change
digit.
MANUAL/AUTO REC
Use this button to select the mode of file number assignment.
Note:
To simplify explanations, instructions refer to names of
buttons and controls on the front panel, making no mention
of the use of remote control unit.
Y
X
W
V
U
T
S
R
Q
P
LP-U200(EFS)Aspread.qxd08.5.2711:04AMページ17

ESPAÑOL
Si desea borrar un archivo de otra carpeta, seleccione la
carpeta antes de seleccionar un archivo en los pasos siguientes.
1. Pulse el botón ..
2. Gire el botón FUNCTION/REC LEVEL/SELECT para seleccionar
la carpeta.
3. Pulse el botón /.
91
Pulse el botón PROGRAM/ENTER para borrar el archivo
seleccionado.
5
Formatear
Puede formatear una tarjeta de memoria SD.
En el modo USB o SD, pulse el botón MENU.
1
1 3 4 5
2
<Para cancelar el modo de ajustes de menú, no utilice la
unidad durante un minuto, o pulse el botón STOP (H).
Gire el botón FUNCTION/REC LEVEL/SELECT para
seleccionar “FORMAT”.
2
Pulse el botón PROGRAM/ENTER.
3
Pulse el botón PROGRAM/ENTER.
4
Pulse el botón PROGRAM/ENTER.
5
Pulse el botón PROGRAM/ENTER.
6
Pulse el botón PROGRAM/ENTER.
7
10
Turntable Cover
To attach the turntable cover
1. Slide the hinges on both sides of the rear of the turntable into the hinge fittings as far as they will
go.
2. Place the turntable cover hinge fittings over the top portion of the hinges and slide the cover down
into place.
To detach the turntable cover
Hold the cover on both sides and gently pull upward to remove it from the hinges.
How to open/close the turntable cover
To Open:
Lift the turntable cover halfway until it stops.
<Hold the front edge to open the cover.
To Close:
Slowly lower the cover until it touches the turntable base.
Note:
Make sure you grasp the cover by the edges to avoid pinching your fingers as it closes.
LP-U200(EFS)Aspread.qxd08.5.2711:05AMページ19

Para detener la grabación
Pulse el botón STOP (H).
Para suspender temporalmente la grabación
Pulse el botón RECORD (K) durante la grabación.
La unidad pasa al modo de pausa de grabación.
Parpadea el indicador “REC” y “USB” o “SD”. Parpadea el
indicador rojo en el botón RECORD.
<
Para reanudar la grabación, pulse de nuevo el botón RECORD (K).
<Cuando la unidad pasa al modo de pausa de grabación, el
archivo no se dividirá. Si desea insertar una división de
archivo, pulse el botón TRACK INCREMENT antes de que la
unidad pase al modo de pausa de grabación o después de
que la unidad reinicie la grabación.
División manual de archivos
Es posible dividir la grabación en archivos durante la misma.
Durante la grabación, pulse el botón TRACK INCREMENT. El
número de archivo actual se incrementará en uno.
<El botón TRACK INCREMENT funcionará cuando el ajuste
MANUAL/AUTO REC esté establecido en MANUAL.
<Este botón no funciona durante la grabación desde un CD.
<Cuando se pulsa este botón, se mostrará un vacío durante
aprox. 1 segundo.
Durante la grabación desde un CD, cuando se pulsa el botón
PLAY/PAUSE (y/J), la reproducción del CD se detendrá
temporalmente, pero la grabación no se detendrá y no se
dividirá el archivo.
C
B
A
90
Realice estos pasos para seleccionar y borrar archivos guardados
en una tarjeta de memoria USB o en una tarjeta de memoria SD.
Cargue la tarjeta de memoria USB o la tarjeta de memoria SD
que contiene el archivo que desea borrar.
En el modo USB o SD, pulse el botón MENU.
1
<Para cancelar el modo de ajustes de menú, no utilice la
unidad durante un minuto, o pulse el botón STOP (H).
Gire el botón FUNCTION/REC LEVEL/SELECT para
seleccionar “ERASE”.
2
1 3 5
42
6 7
Grabación 2
Pulse el botón PROGRAM/ENTER.
3
A
CB
Gire el botón FUNCTION/REC LEVEL/SELECT para
seleccionar el archivo a borrar.
El nombre del archivo aparece en la pantalla.
4
Borrar
11
ENGLISH
turntable
screw fixing the turntable for transportation
Before use, completely loosen the screw by turning it clockwise with a coin or
screwdriver.
When you transport the unit, turn the screw counterclockwise to secure the turntable.
cue-lever
Use this lever to lift the tone arm.
tone arm holder
speed selector
tone arm
45 RPM adaptor
G
F
E
D
C
B
A
Parts of the Turntable
B
C
E
D
F
A
G
Before use, detach the stylus
guard (white plastic cover)
by pulling it straight off the
front of the cartridge in the
direction of the arrow.
LP-U200(EFS)Aspread.qxd08.5.2711:05AMページ21

ESPAÑOL
89
Grabación 1
Puede grabar una fuente de CD, disco, transmisión de radio y un
dispositivo externo de audio conectado al terminal AUX IN a la
memoria flash USB o tarjeta de memoria SD.
Gire el botón FUNCTION/REC LEVEL/SELECT para
seleccionar una fuente (CD, PHONO, TUNER o AUX) para
grabar.
1
Cuando seleccione una fuente MP3 para grabar, en la
pantalla aparecerá NO REC. El archivo MP3 no puede
grabarse.
<Si desea grabar las pistas de CD en el orden que desee,
programe las pistas antes de grabar.
<La reproducción repetida y aleatoria funciona durante la
grabación. Si desea grabar pistas en un orden normal, cancele
estos modos.
<Si desea grabar una transmisión, sintonice la emisora antes de
grabar.
<Al grabar de una transmisión de FM, puede aumentar el
ruido. Para reducir el ruido no deseado, se precisará una
antena exterior o grábelo con el modo FM conectado a
MONO.
Conecte una tarjeta de memoria USB o una tarjeta de
memoria SD sobre la cual grabar.
2
“READING” parpadea durante unos pocos segundos.
<Si desea grabar en una tarjeta de memoria SD, asegúrese de
que el dispositivo de candado de la tarjeta de memoria SD
está establecido en “unlock” (desbloquear).
34 6
21 5
La unidad pasa al modo de pausa de grabación.
Parpadea el indicador “REC” y “USB” o “SD”. Parpadea el
indicador rojo en el botón RECORD.
<No funcionará ningún botón mientras se muestre “DEV
BUSY” (ocupado). Espere unos segundos hasta que “DEV
BUSY” desaparezca de la pantalla.
<Si la fuente es MP3 CD, USB o SD, en la pantalla aparecerá
“NO REC”. Estas fuentes no pueden grabarse.
Seleccione el dispositivo de grabación.
Cada vez que pulsa el botón MENU, el dispositivo de
grabación cambia a USB o SD.
4
Pulse el botón RECORD (K).
3
Si es necesario, ajuste el nivel de grabación mediante el
botón FUNCTION/REC LEVEL/SELECT.
5
Reproduzca la fuente a grabar y ajuste el nivel de grabación
de forma que el sonido más alto no supere el indicador
“OVER” del medidor de picos (Si la fuente es CD, pulse el
botón PLAY/PAUSE. La reproducción de CD se inicia pero se
mantiene el modo de pause de reproducción.)
El nivel puede ajustarse de MIN, –60 a 17, MAX.
<El ajuste predeterminado es 0 dB. Cuando la unidad se
enciende, o cuando se pulsa el botón STOP, el ajuste se
restablece automáticamente a 0 dB.
Pulse el botón RECORD (K) para iniciar la grabación.
<No desconecte nunca el cable de alimentación durante la
grabación.
Cuando empiece a reproducir un CD, esta unidad empieza a
grabar automáticamente.
<Si no carga una tarjeta de memoria USB o una tarjeta de
memoria SD, se mostrará “NO DEVICE” (ningún dispositivo).
Una vez finalizada la reproducción de la fuente, pulse el
botón STOP para detener la grabación.
Si se selecciona AUX o PHONO en el paso , reproduzca
la fuente a grabar.
17
6
12
Connection
AUDIO OUT
RL
CAUTION:
<Switch off the power to all equipment before making
connections.
<Read the instructions of each component you intend to use
with this unit.
<Be sure to insert each plug securely. To prevent hum and
noise, avoid bundling the signal interconnection cables
together with the AC power cord.
A
B
CD
CD Player, Cassette Tape Deck, etc.
AM loop antenna
The high-performance AM loop antenna provided with this
unit is sufficient for good reception in most areas.
Position the antenna for the best reception.
To stand the loop antenna on a surface, fix the claw to the
slot in the antenna base.
Connect the loop antenna's wires to the AM antenna
terminals.
A
LP-U200(EFS)Aspread.qxd08.5.2711:05AMページ23

88
Cuando se pulsa MANUAL/AUTO REC una vez, se muestra el
modo actual. Pulse repetidamente el botón MANUAL/AUTO
REC para seleccionar cualquier otro modo.
MANUAL
La unidad no divide los archivos de forma automática.
Use el botón TRACK INCREMENT para dividir los archivos.
Se recomienda MANUAL para grabar una fuente analógica
como por ejemplo un disco.
AUTO20dB, AUTO30dB, AUTO40dB
La unidad entrará automáticamente en el modo de pausa e
insertará una división de archivo en el material grabado
cuando el nivel de sonido se sitúe por debajo del umbral
durante más de 4 segundos. Una vez reanudado el sonido, se
reiniciará la grabación.
“AUTO 20dB” emite una señal más alta para activar la
división de archivos.
“AUTO 40dB” significa que una señal relativamente baja
activará la división de archivos. “AUTO 40dB” es adecuado
para grabar una fuente sin ruido como por ejemplo un
reproductor digital.
<AUTO REC puede que no funcione correctamente con fuentes
analógicas que contengan ruidos de bajo nivel.
<El ajuste predeterminado es MANUAL (desactivado). Cuando
se enciende la unidad, el ajuste se restablece
automáticamente a MANUAL (desactivado).
<El botón MANUAL/AUTO REC no funciona durante la
grabación ni en el modo de pausa de grabación.
Cuando grabe de TUNER, PHONO o AUX, puede cambiar un
método de división de archivos pulsando el botón
MANUAL/AUTO REC.
<Esta opción no funciona al grabar de CD o TUNER.
Mientras graba de un CD, la unidad inserta sólo
automáticamente una división de archivos.
Mientras graba de TUNER, se insertará sólo manualmente una
división de archivos.
Ajuste de la tasa de bitsAjuste de la división de archivos
Puede establecer la tasa de bits de grabación de MP3.
En el modo CD, PHONO y AUX, el ajuste predeterminado es 128 kbps.
En el modo TUNER, el ajuste predeterminado es 96 kbps.
Pulse el botón MENU.
1
1 3 5
42
<Para cancelar el modo de ajustes de menú, no utilice la
unidad durante un minuto, o pulse el botón STOP (H).
Gire el botón FUNCTION/REC LEVEL/SELECT para
seleccionar “BIT RATE”.
2
Pulse el botón PROGRAM/ENTER.
3
Gire el botón FUNCTION/REC LEVEL/SELECT para
seleccionar la tasa de bits.
4
La tasa de bits se cambia tal y como sigue.
Pulse el botón PROGRAM/ENTER.
5
160kbps128kbps96kbps
13
ENGLISH
Press the STANDBY/ON button to turn the unit on.
1
Select a source by turning the FUNCTION/REC
LEVEL/SELECT knob.
2
<To listen to an external source connected to AUX jacks, select
AUX by turning the FUNCTION/REC LEVEL/SELECT knob.
Play the source, and adjust the volume by turning the
VOLUME knob.
3
Basic Operation
1 32
The volume is adjustable from MIN to MAX in 30 steps.
FM antenna
While in FM mode, tune in an FM station and extend the
lead to find the best position for the reception. This antenna
may need to be repositioned if you move your unit to a new
location.
FM Outdoor Antenna
In an area where FM signals are weak, it will be necessary to
use an outdoor FM antenna.
Generally, a 3-element antenna will be sufficient; if you live
in an area where the FM signals are particularly weak, it may
be necessary to use one with 5 or more elements.
<Disconnect the FM indoor antenna when using an outdoor
antenna.
B
AUX IN jacks
You can connect a CD player, cassette tape deck, etc. to this
unit.
Connect the component with RCA pin cords. Make sure to
connect the white plug to the white jacks (Left) and the red
plug to the red jacks (Right).
AC Power Cord
Plug this AC power cord into an AC wall socket.
D
C
75 Ωconnector
While recording from FM broadcast, noise may increase. To
reduce unwanted noise, outdoor antenna will be required or
record it with the FM mode switched to MONO.
LP-U200(EFS)Aspread.qxd08.5.2711:05AMページ25

ESPAÑOL
87
Para comprobar el orden programado
En el modo de parada, pulse repetidamente el botón
PROGRAM/ENTER para visualizar los números de pistas que se
han guardado en la memoria.
Para añadir una pista/archivo al final del
programa
En el modo de parada, pulse repetidamente el botón
PROGRAM/ENTER hasta que aparezca el número de
pista/archivo “00” (CD) o bien “000” (MP3).
Seleccione la pista/archivo que desee añadir pulsando el
botón .o /.
Pulse el botón PROGRAM/ENTER.
La pista se añade al final del programa.
Para sobrescribir una pista/archivo en el
programa
En el modo de parada, pulse repetidamente el botón
PROGRAM/ENTER hasta que aparezca el número de P
(programa) que desee sobrescribir.
Seleccione un nuevo archivo/pista que desee sobrescribir.
Pulse el botón PROGRAM/ENTER.
El archivo/pista se sobrescribe con un nuevo archivo/pista.
Para eliminar el programa
Si pulsa uno de los botones siguientes, se borrará el
contenido programado:
OPEN/CLOSE, STANDBY/ON, FUNCTION/REC LEVEL/SELECT,
STOP en modo de parada
3
2
1
3
2
1
Antes de grabar
Esta unidad puede grabar música de CDs, cinta de cassette y
radio, en dispositivos de memoria USB o una tarjeta de memoria
SD como archivos MP3.
PRECAUCIÓN:
<No desconecte el dispositivo de almacenamiento USB ni la
tarjeta de memoria SD durante la reproducción.
No desconecte el cable de alimentación durante la grabación,
puesto que puede causar daños al producto.
<Ajuste el volumen de la fuente externa de audio a un nivel
adecuado antes de grabar. Si no lo hace, la calidad de la
grabación puede ser pésima.
Nota:
<Compruebe la capacidad de memoria restante en su PC antes
de grabar. No es posible determinar la capacidad de memoria
restante con este reproductor.
<En esta unidad puede utilizarse una tarjeta de memoria SD de
hasta 1GB.
<Cuando grabe música de la misma fuente, los archivos
grabados se guardan en la misma carpeta.
El nombre de la carpeta es la siguiente:
En modo TUNER: TUNER
En modo AUX: AUX IN
En modo PHONO: PHONO
En modo CD: CD
<El nombre del archivo se fija automáticamente siguiendo una
secuencia regular tal y como se indica a continuación:
En modo TUNER: TUNER001, TUNER002, ....
En modo AUX: AUX001, AUX002, ...
En modo PHONO: PHONO001, PHONO002, ...
En modo CD: CD001T01, CD001T02, ...
A partir del segundo CD en modo CD: CD002T01,
CD002T02, ...
<El tiempo de grabación de un archivo puede variar levemente
del original.
PROGRAM/ENTER
FM MODE
You can alternate between STEREO mode and MONO mode.
Press MENU button.
1
14
Listening to the Radio
Select FM or AM using the FM/AM button.
2
Select the station you want to listen to (auto selection).
3
1
2
3
3 5
2 4
1
Hold down the TUNING button (‡or °) until the frequency
display begins to change.
<When a station is tuned in, the tuning process will stop
automatically.
<Press the TUNING button (‡or °) to stop the auto
selection.
Selecting stations which cannot be tuned
automatically (manual selection)
When the TUNING button (‡or °) is pressed momentarily,
the frequency changes by a fixed step.
Press the TUNING button (‡or °) repeatedly until the
station you want to listen to is found.
Select TUNER by turning the FUNCTION/REC
LEVEL/SELECT knob.
1Select FM MODE by turning the FUNCTION/REC
LEVEL/SELECT knob.
2
Press the PROGRAM/ENTER button.
3
Select STEREO or MONO by turning the FUNCTION/REC
LEVEL/SELECT knob.
4
STEREO
FM stereo broadcasts are received in stereo and the
“STEREO” indicator lights in the display.
<If the sound is distorted and the “STEREO” indicator flashes,
the signal is not strong enough for good stereo reception. In
this case, change to MONO mode.
MONO
To compensate for weak FM stereo reception, select this
mode. Reception will now be forced to monaural, reducing
unwanted noise.
Press the PROGRAM/ENTER button.
5
<To cancel the menu setting mode, leave the unit idle for a
minute, or press the STOP button (H).
<While recording from FM broadcast, noise may increase. To
reduce uwanted noise, outdoor antenna will be required or
record it with the FM mode switched to MONO.
LP-U200(EFS)Aspread.qxd08.5.2711:05AMページ27

86
Reproducción programada
Se programa la pista/archivo y se visualiza “P-02”.
Repita estos pasos y para programar más pistas.
<Para cancelar el modo de programa, pulse el botón STOP (H).
Una vez finalizada la selección de los números de pistas,
pulse el botón PLAY/PAUSE (y/J) para iniciar la
reproducción de programa.
Para detener la reproducción del programa, presione el botón
STOP.
La reproducción se detiene, pero el programa no se borra.
Cuando vuelva a pulsar el botón PLAY/PAUSE, la
reproducción del programa se inicia desde el principio.
4
32
Pueden programarse hasta 40 pistas en el orden que se desee.
<Use esta función para la reproducción del programa de CDs
así como tarjetas de memoria USB y tarjetas de memoria SD.
<La reproducción aleatoria no funciona durante la
reproducción programada.
Pulse el botón PROGRAM/ENTER en el modo de parada.
1
El indicador “PROGRAM” parpadea, y en la pantalla aparece
“P-01” .
Pulse el botón .o /para seleccionar un archivo o
pista.
2
Pulse el botón PROGRAM/ENTER.
3
1 3 4
2
También puede seleccionar un archivo utilizando los números
del mando a distancia.
Al programar archivos MP3, puede seleccionar una carpeta
pulsando el botón FOLDER y, a continuación, seleccione un
archivo.
número programado
número de pista
15
ENGLISH
Preset Tuning
Press the MEMORY button.
4
To store more stations, repeat steps to .
41
preset channel
Select a preset channel to store the station using the
PRESET button (‡or °).
3
How to select preset stations
Press the AM/FM button to select a band.
1
Press the PRESET button (‡or °) repeatedly until the
desired preset station is found.
2
You can store FM and AM stations into preset channels 1 to 9
respectively.
Tune in a station you want to preset (see steps to
of page 14).
Press the MEMORY button.
2
311
4
32 1
2
<Preset channels can also be selected using the numeric
buttons of the remote control unit.
LP-U200(EFS)Aspread.qxd08.5.2711:05AMページ29

ESPAÑOL
85
Reproducción aleatoria
Use esta función para la reproducción aleatoria de CDs así
como tarjetas de memoria USB y tarjetas de memoria SD.
Los archivos o pistas se reproducirán aleatoriamente. Pulse el
botón SHUFFLE durante la reproducción. (En el modo de
parada, pulse el botón SHUFFLE y el botón PLAY/PAUSE.)
La reproducción aleatoria continúa hasta que se pulsa el
botón STOP o se cancela la reproducción aleatoria.
<Si pulsa el botón /durante la reproducción aleatoria, se
seleccionará y reproducirá aleatoriamente la pista/archivo
siguiente. Si pulsa el botón ., el archivo/pista actualmente
en reproducción se reproducirá desde el principio.
<La reproducción aleatoria no funciona durante la
reproducción programada.
<Si pulsa uno de los siguientes botones, se detendrá la
reproducción y se cancelará el modo aleatorio.
SHUFFLE, OPEN/CLOSE, STANDBY/ON, PROGRAM/ENTER,
REPEAT, FUNCTION
Use esta función para repetir la reproducción de CDs así como
tarjetas de memoria USB y tarjetas de memoria SD.
Cada vez que se pulsa el botón REPEAT, el modo repetición
cambia de la forma siguiente:
CDs de música
Archivos MP3
REPEAT ALL (Repetir todas las pistas)
Todas las pistas o archivos MP3 en el disco/USB/SD se
reproducirán de forma repetida.
REPEAT F (REPETIR CARPETA: Repetir todos los archivos
MP3 de la carpeta) (MP3)
Todos los archivos de la carpeta se reproducirán
repetidamente.
REPEAT (Repetir una pista)
La pista o el archivo en reproducción se reproducirá
repetidamente. Si pulsa el botón .o /y selecciona
otra pista/archivo, la pista/archivo seleccionado se reproducirá
repetidamente.
También es posible seleccionar una pista/archivo para que se
repita en el modo de parada. Seleccione REPEAT (Repetir una
pista) y, a continuación, seleccione la pista/archivo pulsado el
botón .o /. Presione el botón PLAY/PAUSE para iniciar
la reproducción.
<Si pulsa uno de los siguientes botones, se cancelará el modo
repetición.
OPEN/CLOSE, STANDBY/ON, FUNCTION
Repetir reproducción
REPEAT ALLREPEAT
(off)
REPEAT ALLREPEAT FREPEAT
(off)
16
Listening to a Record
<Before use, completely loosen the transportation screw by
turning them clockwise with a coin and remove the stylus
guard.
Select PHONO by turning the FUNCTION/REC
LEVEL/SELECT knob.
1Select the speed.
4
Put the record on the turntable.
When playing a 45 RPM large hole single record, use the
included adaptor.
3
Gently push the clamper to the right to release the tone
arm.
5
Raise the cue lever to lift the tone arm off the tone arm
support.
6
tone arm
cue lever
clamper
1
2
4
5
7
3
6 8
Gently open the dust cover.
Be careful not to pinch your finger.
2
transportation screw
adaptor
<Hold the front edge to open the cover.
LP-U200(EFS)Aspread.qxd08.5.2711:05AMページ31

84
Indicador de tiempo
Durante la reproducción, cada vez que se pulsa el botón
DISPLAY, la información de la pantalla cambia de la siguiente
manera:
Carpeta de búsqueda
1 3
2
Puede seleccionar y reproducir una carpeta o un archivo que
desee en una carpeta.
En el modo de parada, cada vez que pulsa el botón
FOLDER, cambia la carpeta.
1
<Si pulsa el botón FOLDER durante la reproducción, ésta
continuará desde el inicio de la carpeta siguiente.
Si desea seleccionar un archivo, use los botones
//..
2
Presione el botón PLAY/PAUSE (y/J) para iniciar la
reproducción.
3
<Cuando el tiempo transcurrido es superior a 1 hora, se
muestra la siguiente pantalla:
<Cuando el tiempo transcurrido de grabación es superior a 10
horas, se muestra la siguiente pantalla:
El número de pista actual y el tiempo
transcurrido de la pista actual
El número de pista actual y el tiempo
restante de la pista actual
El número de pistas restantes y el tiempo
restante del disco
CD de música
El número de archivo actual y el tiempo
transcurrido del archivo actual
Nombre de la carpeta / nombre
del archivo (desplazamiento)
Nombre del título (desplazamiento)
Nombre del artista (desplazamiento)
Reproducción de archivos MP3 en el disco/USB/SD
Tiempo transcurrido del tiempo actual
de grabación
Tiempo de grabación restante del soporte
(pantalla normal)
Durante la grabación
17
ENGLISH
When the playback has been finished, the tone arm
automatically returns to the tone arm holder and the rotation
stops.
To stop playback manually, slightly lift the tone arm using the
cue lever and return it to the tone arm holder.
Move the tone arm gently to the edge of the record (or
the starting point of a track).
The turntable will begin to turn.
7
Gently lower the tone arm by slowly releasing the cue
lever.
You can lower the tone arm manually if the cue lever has not
been raised.
8
<Playing records with the dust cover down will prevent dust
from settling on the turntable.
<Do not place anything on top of the turntable cover,
especially while playing a record.
tone arm
cue lever
cue lever
LP-U200(EFS)Aspread.qxd08.5.2711:05AMページ33

ESPAÑOL
83
Durante la reproducción, pulse repetidas veces el botón .
o /hasta encontrar la pista que desee. La pista
seleccionada se reproducirá desde el principio.
En el modo de parada, pulse repetidas veces el botón .o
/hasta encontrar la pista que desee escuchar y pulse el
botón PLAY/PAUSE (y/J) para iniciar la reproducción desde
la pista seleccionada.
<Cuando se pulsa el botón .durante la reproducción, la
pista en reproducción se reproducirá desde el principio. Para
regresar al principio de la pista anterior, pulse dos veces el
botón ..
Para suspender temporalmente la reproducción (modo
pausa)
A
Pulse el botón PLAY/PAUSE (y/J) durante la reproducción.
La reproducción se detiene en la posición actual.
Para reanudar la reproducción, pulse de nuevo el botón
PLAY/PAUSE (y/J).
Para detener la reproducción
B
Pulse el botón STOP (H) para detener la reproducción.
Para saltar a la pista siguiente o a la anterior
C
Búsqueda de la parte de una pista
D
Durante la reproducción, mantenga pulsado el botón .o
/y suéltelo cuando encuentre la parte que desee
escuchar.
Escuchar CD/MP3 (discos/USB/SD)
B
A
DC
Escuchar MP3 (USB/SD)
1 2
3
Gire el botón FUNCTION/REC LEVEL/SELECT para
seleccionar USB o SD.
1
Cargue una tajeta de memoria USB o una tarjeta de
memoria SD para reproducir.
“READING” parpadea durante unos pocos segundos.
2
<Si la pantalla no cambia durante unos segundos, extraiga la
tarjeta de memoria USB o la tarjeta de memoria SD de la
ranura y, a continuación, introdúzcala de nuevo.
Pulse el botón PLAY/PAUSE (y/J) para iniciar la
reproducción.
La reproducción se inicia desde el primer archivo y en la
pantalla se ilumina y.
Utilice el procedimiento de reproducción de CD para
reproducir este tipo de soporte.
3
La unidad puede tardar unos segundos en cargar el
dispositivo de memoria USB o la tarjeta de memoria SD. Los
botones no funcionarán durante la carga. Espere a que el
número total de las pistas y el tiempo total de reproducción
del disco se muestren.
número total de archivos
18
Listening to CD/MP3 (discs)
Press the OPEN/CLOSE button (L) to open the tray.
2
Place a disc on the tray with the printed label face up.
3
<Never place more than one disc on the tray.
<The disc must be placed in the center of the disc tray. If the
disc is not correctly loaded, it may not be possible to open the
tray again once it has closed, so you should ensure the disc is
always centered on the tray.
<Do not force the tray by hand during opening and closing
operations.
Press the OPEN/CLOSE button (L) to close the tray.
4
Press the PLAY/PAUSE button (y/J) to start playback.
5
Disc playback starts from the first track, and ylights on the
display.
<If you load the disc, and then press the PLAY/PAUSE button
without having first closed the disc tray, the disc tray closes
and playback starts.
Select CD by turning the FUNCTION/REC LEVEL/SELECT
knob.
This player can playback only music CDs and MP3 files.
1
“READING” blinks for a few seconds.
When no disc is set, “NO DISC” appears on the display.
<It takes a few seconds for the unit to load the disc. No
buttons will work during loading. Wait until the total number
of the tracks and the total play time of the disc are displayed.
Audio CD
5
1 2 4
total number of tracks total play time of the disc
MP3 disc
total number of files
LP-U200(EFS)Aspread.qxd08.5.2711:05AMページ35

82
Escuchar CD/MP3 (discos)
Pulse el botón OPEN/CLOSE (L) para abrir la bandeja.
2
Coloque un disco en la bandeja con la cara de la
etiqueta impresa hacia arriba.
3
<No coloque nunca más de un disco en la bandeja.
<El disco debe estar colocado en el centro de la bandeja del
disco. Si el disco no se carga correctamente, puede que no
sea posible volver a abrir la bandeja una vez cerrada, por lo
tanto, deberá asegurarse de que el disco esté siempre
centrado en la bandeja.
<No aplique fuerza en la bandeja con la mano durante las
operaciones de apertura y cierre.
Pulse el botón OPEN/CLOSE (L) para cerrar la bandeja.
4
Pulse el botón PLAY/PAUSE (y/J) para iniciar la
reproducción.
5
La reproducción de discos empieza a partir de la primera pista
y en la pantalla se ilumina y.
<Si carga el disco y, a continuación, pulsa el botón
PLAY/PAUSE sin haber cerrado en primer lugar la bandeja del
disco, la bandeja del disco se cierra y se inicia la reproducción.
Seleccione CD girando el botón FUNCTION/REC
LEVEL/SELECT.
Este reproductor sólo puede reproducir archivos MP3 y CDs
de música.
1
“READING” parpadea durante unos pocos segundos.
Cuando no hay ningún disco, en la pantalla aparece “NO
DISC”.
<La unidad tarda unos pocos segundos a cargar el disco. Los
botones no funcionarán durante la carga. Espere a que el
número total de las pistas y el tiempo total de reproducción
del disco se muestren.
CD de audio
5
1 2 4
MP3 disc
número total de pistas tiempo total de
reproducción del disco
número total de archivos
19
ENGLISH
During playback, repeatedly press the .or/button
until the desired track is found. The selected track will be
played from the beginning.
In the stop mode, press the .or/button repeatedly
until the track you want to listen to is found, and press the
PLAY/PAUSE button (y/J) to start playback from the
selected track.
<When the .button is pressed during playback, the track
being played will be played from the beginning. To return to
the beginning of the previous track, press the .button
twice.
To suspend playback temporarily (pause mode)
A
Press the PLAY/PAUSE button (y/J) during playback.
Playback stops at the current position.
To resume playback, press the PLAY/PAUSE button (y/J)
again.
To stop playback
B
Press the STOP button (H) to stop playback.
To skip to the next or a previous track
C
Search for a part of a track
D
During playback, hold down the .or/button and
release it when the part you want to listen to is found.
Listening to CD/MP3 (discs/USB/SD)
B
A
DC
Listening to MP3 (USB/SD)
1 2
3
Turn the FUNCTION/REC LEVEL/SELECT knob to select
USB or SD.
1
Slot a USB memory stick or an SD memory card to play.
The “READING” appears for a few seconds.
2
<If the display did not change for over few seconds, move the
USB memory stick or SD memory card from the slot, then slot
it again.
Press the PLAY/PAUSE button (y/J) to start playback.
Playback starts from the first file, and ylights on the display.
Use the CD playback procedure to play this type of media.
3
It takes a few seconds for the unit to load the USB memory
stick or SD memory card. No buttons will work during
loading. Wait until the total number of the tracks and the
total play time are displayed.
total number of files
LP-U200(EFS)Aspread.qxd08.5.2711:05AMページ37

ESPAÑOL
81
Una vez finalizada la reproducción, el brazo de tonos volverá
automáticamente al soporte de brazo de tonos y dejará de girar.
Para detener la reproducción manualmente, levante ligeramente
el brazo de tonos con la palanca de cue y vuelva a colocarlo en el
soporte del brazo de tonos.
Desplace suavemente el brazo de tonos hasta el borde
del disco (o el punto de inicio de una pista).
El giradiscos empezará a girar.
7
Baje suavemente el brazo de tonos soltando lentamente
la palanca de cue.
Puede bajar el brazo de tonos manualmente si la palanca de
cue no se ha levantado.
8
<Reproducir discos con la tapa contra el polvo bajada impedirá
que se deposite polvo en el giradiscos.
<No coloque nada en la parte superior de la cubierta
giradiscos, en especial cuando se está reproduciendo un
disco.
brazo de tonos
palanca de cue
palanca de cue
20
Time Display
While playing each time the DISPLAY button is pressed, the
display information changes as follows:
Current track number and elapsed time
of current track
Current track number and remaining
time of current track
Number of remaining tracks and
remaining time of the disc
Music CD
Folder Search
1 3
2
You can select and playback a desired folder or a desired file in a
folder.
In stop mode every time the FOLDER button is pressed,
the folder is changed.
1
<If you press the FOLDER button while playing, playback
continues from the beginning of the next folder.
If you want to select a file, use the .//buttons.
2
Press the PLAY/PAUSE button (y/J) to start playback.
3
Current file number and elapsed time of
current file
Folder name \ file name (scrolling)
Title name (scrolling)
Artist name (scrolling)
MP3 file playback in the disc/USB/SD
Elapsed time of current recording time
Remaining recordable time of media
(normal display)
While Recording
<When the elapsed time is over 1 hour the display is as follows:
<When the remaining recording time is over 10 hours the
display is as follows:
LP-U200(EFS)Aspread.qxd08.5.2711:05AMページ39
Other manuals for LP-U200
2
Table of contents
Languages:
Other Teac Turntable manuals