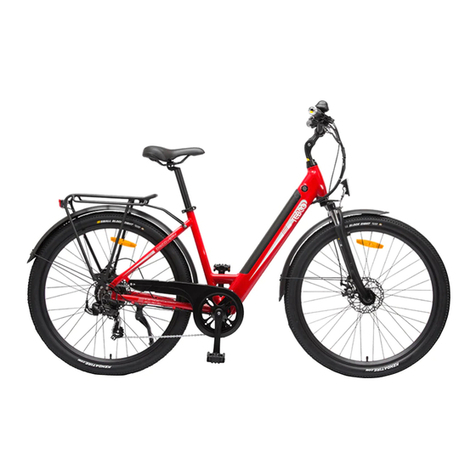
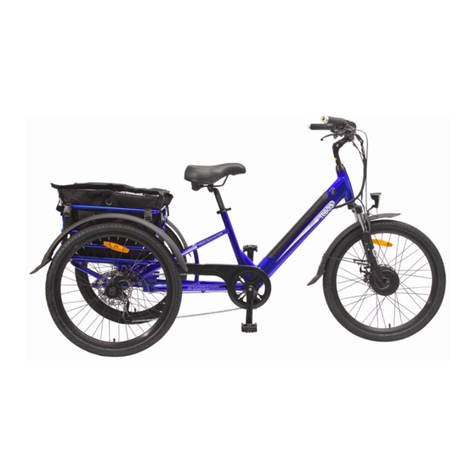
Tebco SUBURBAN User manual


6OWNER’S MANUAL
CONTENTS
TEBCO Models
Introduction
Safety Information
Power ‘Override Switches’
Display Panel / Trip Computer
Battery Charging
Adjustment & Maintenance
Safety Precautions
Register Your Bicycle
General Information
1. Safety Precautions
2. How Things Work
3. Maintaining Your Bicycle
4. Monthly Service Chart
5. Additional Information
Troubleshooting Chart
Warranty Information
04
07
08
09
10
14
16
17
18
19
27
42
74
75
79
86
94

7OWNER’S MANUAL
INTRODUCTION
Thank you for choosing TEBCO
Thank you for choosing your ELECTRIC BICYCLE
or ELECTRIC TRICYCLE from The Electric Bicycle
Co (TEBCO). We have created a stylish and
serviceable bicycle for your personal transport
and enjoyment.
Prior to riding your new ELECTRIC BICYCLE or
ELECTRIC TRICYCLE, please thoroughly read and
understand this manual. It is provided for YOUR
benet. Should you not understand any part of
this manual please consult your retailer.
Our company has developed our ELECTRIC
BICYCLES and ELECTRIC TRICYCLES to strict
quality control systems to IS09001 certication
standard.
Our company’s aim is to provide customers with
high quality, serviceable and affordable personal
electric transportation that will give many years of
trouble free and enjoyable use, whilst at the same
time helping to sustain our fragile environment by
utilising clean, green renewable energy.

8OWNER’S MANUAL
ATTENTION - SAFETY INFORMATION
• Before you use your ELECTRIC BICYCLE
or ELECTRIC TRICYCLE, please thoroughly
read and understand this Owner’s Manual.
• Once you understand the Owner’s Manual
and know that you are familiar with
the bicycle’s operation, you are free to
ride. Please do not lend your ELECTRIC
BICYCLE or ELECTRIC TRICYCLE to others
who are unfamiliar with its operation.
• NEVER RIDE WITHOUT WEARING A
PROPERLY FITTED AND APPROVED
BICYCLE HELMET!
• ALWAYS ENSURE THAT THE POWER IS
TURNED OFF WHEN YOU MOUNT AND
DISMOUNT THE BICYCLE!
• Please be familiar with and observe all local
trafc rules of your city / town.
• The ELECTRIC BICYCLE and ELECTRIC
TRICYCLE is designed for single rider use.
At no time should you ever carry a pillion
passenger as it is illegal to do so.
• Please ride cautiously when riding in wet or
slippery conditions or on uneven surfaces.
• This Owner’s Manual is designed for
use only with the ELECTRIC BICYCLE or
ELECTRIC TRICYCLE supplied by The
Electric Bicycle Co.

9OWNER’S MANUAL
POWER ‘OVERRIDE SWITCHES’
Your ELECTRIC BICYCLE or ELECTRIC TRICYCLE
is equipped with 2 power ‘Override Switches’:
1. These are small micro-switches situated
within each brake lever.
2. By simply pulling either brake lever on
slightly – power is cut to the motor.
3. These are safety switches, which can
prevent your bicycle from accidentally
‘starting’ whilst you are stationary.

10 OWNER’S MANUAL
‘KD718X’ - DISPLAY PANEL / TRIP COMPUTER
PAS UP
SPEEDO
BATTERY STATUS LIGHTS STATUS
PAS DOWN
‘i’ MENU
BUTTON
TRIP
METER
PAS
LEVELS
LIGHTS
ON/OFF
POWER
ON/OFF

11OWNER’S MANUAL
‘KD718X’ - PRIMARY FEATURES / FUNCTIONS‘KD718X’ - DISPLAY PANEL / TRIP COMPUTER
• Power On / OFF Button – Hold down for
2 seconds to Power ON. Hold Down for 2
seconds to Power OFF.
• PAS Up Button – press once to advance
to PAS Level 1 - press again to progress up
through PAS levels to top PAS level 9.
• PAS Down Button - press once to decrease
down through PAS levels from top Level 9
to bottom PAS level 0.
• Battery Status Indicator – indicates
amount of charge in battery.
• PAS Levels – Displays which level of Pedal
Activation is selected.
• Speedometer - shows your speed when
riding.
• Odometer / Trip Meter - shows your
trip distance or cumulative total distance
covered by bicycle.
• Pedestrian ‘Walk’ function – hold down
the –Button and the bicycle will auto
‘walk’ with you at 6kmh.
• Headlight / Tail-light – as a SAFETY feature
the HEADLIGHT / TAIL-LIGHT will auto
ash when the bicycle is powered on. For
constant illumination for night riding, hold
the +button for 2 seconds to turn ON –
hold down +for 2 seconds to turn OFF.
NOTE: To access the full KD718X Manual, visit the TEBCO website & select ‘Download Manual’ from model page.

12 OWNER’S MANUAL
‘KD286U’ - DISPLAY PANEL / TRIP COMPUTER
PAS UP
SPEEDO
BATTERY
STATUS
ODOMETER
PAS
DOWN TRIP
METERPAS LEVELS
USB PHONE
CHARGER
POWER
ON/OFF

13OWNER’S MANUAL
‘KD286U’ - PRIMARY FEATURES / FUNCTIONS‘KD286U’ - DISPLAY PANEL / TRIP COMPUTER
• Power On / OFF Button – Hold down for
2 seconds to Power ON. Hold Down for 2
seconds to Power OFF.
• PAS Up Button – press once to advance
to PAS Level 1 - press again to progress up
through PAS levels to top PAS level 9.
• PAS Down Button - press once to decrease
down through PAS levels from top Level 9
to bottom PAS level 0.
• Battery Status Indicator – indicates
amount of charge in battery.
• PAS Levels – Displays which level of Pedal
Activation is selected.
• Speedometer - shows your speed when
riding.
• Odometer / Trip Meter - shows your
trip distance or cumulative total distance
covered by bicycle.
• Pedestrian ‘Walk’ function – hold down
the – Button and the bicycle will auto
‘walk’ with you at 6kmh.
• Headlight / Tail-light – as a SAFETY feature
the HEADLIGHT / TAIL-LIGHT will auto
ash when the bicycle is powered on. For
constant illumination for night riding, hold
the + button for 2 seconds to turn ON –
hold down + for 2 seconds to turn OFF.
NOTE: To access the full KD286U Manual, visit the TEBCO website & select ‘Download Manual’ from model page.

14 OWNER’S MANUAL
BATTERY CHARGING
1. The battery is the most important part of
your ELECTRIC BICYCLE or ELECTRIC
TRICYCLE. To ensure good performance
- proper usage and maintenance will
maximise battery life.
2. Leaving the batteries discharged for long
periods of time should be avoided at all
times. Batteries should always be charged
ready for riding. If not used for a period of
30 days, batteries should be charged fully.
3. After usage and when bicycle is not in use
always be sure to turn Power off. If bicycle
left unattended with Power ON for 5
minutes then electric system will auto turn
Power OFF.
4. To use battery charger, rst insert the plug
into charging socket on side of battery.
Next plug the charger into a 240V power
supply. After the charger is connected
properly, turn on 240V AC supply. To
disconnect after charging, turn off 240V
AC supply, remove plug from 240V socket
then remove the plug from the battery
socket. REFER TO BATTERY CHARGER
OPERATING INSTRUCTIONS SUPPLIED
WITH YOUR CHARGER
5. When charging the battery, charger status
lamp will glow RED to indicate ‘charging’.
When lamp turns GREEN ‘charging’ is
complete and charger should be turned OFF.

15OWNER’S MANUAL
BATTERY CHARGING
Charging duration depends on the level of
discharge of the battery. Normal charging
duration is 5 to 8 hours from at.
6. Battery performance can be greatly
inuenced by many factors, including the
rider’s weight, type of terrain, prevailing
climatic conditions, style of riding etc. Be
observant of your battery performance
and never try to achieve more than your
batteries are capable of delivering.
7. If battery needs to be taken out of the
Bicycle for charging or bicycle transport
- unlock battery lock and remove battery
assembly from bicycle or tricycle. To replace
battery pack – reverse this operation.
ALWAYS CLOSELY MONITOR BATTERY
RE-CHARGING PROCESS – WHEN
BATTERY IS RE-CHARGED THEN
CHARGER SHOULD BE TURNED OFF.

16 OWNER’S MANUAL
ADJUSTMENT & MAINTENANCE
General Maintenance
1. As a general rule to ensure longevity and
good performance of your bicycle, have
it regularly serviced by a qualied and
experienced bicycle mechanic.
2. There is no specic maintenance required on
your electrical components. Simply charge
your batteries after each ride to ensure
longest possible life.
3. Adjustment of the height of saddle – Loosen
quick release on seat tube and adjust saddle
to a suitable height. The raised height of the
saddle cannot exceed the height marked
with minimum insertion mark on saddle stem.
4. Brakes and their adjustment are standard to
the bicycle industry. Be sure to keep brakes
properly adjusted always.
5. Regular checking of spoke tension and
wheel alignment can also ensure maximum
performance of your bicycle.
Tyre Pressure
1. It is most important for the continued
effective operation of your bicycle that you
maintain the correct tyre ination.
2. Please conrm the correct pressure on the
side wall of your tyre. This will be between
30psi and 65psi.

17OWNER’S MANUAL
SAFETY PRECAUTIONS
1. Always make sure Power is OFF when you
mount or dismount your bicycle. Only
Power ON once you are safely seated on
your bicycle.
2. Never try to RACE your bicycle or ride at
high speeds for long periods of time.
3. Never try to climb hills that are too steep
and that will force the bicycle to slow below
10kms. Best performance is achieved on at
or gently rising terrain.
4. When either the left or right brake lever is
engaged, a micro switch will cut power to
motor. Should either of these switches fail
to work at any time please contact your
supplier immediately.
5. In wet or rainy weather, the bicycle should
be ridden slowly and with much greater
care.

19OWNER’S MANUAL
GENERAL INFORMATION
Note on the Following Sections
Many of the following Sections of this Manual are
indeed irrelevant to your ELECTRIC BICYCLE or
ELECTRIC TRICYCLE.
However this is the format that Australian
Standards mandate that we must follow.
Please read the Manual in its entirety – take
particular note of Sections that are specic to the
ELECTRIC BICYCLE or ELECTRIC TRICYCLE.
Acknowledgments
This Manual has been developed by BIA Ltd.
Illustrations reproduced courtesy of BIA member
Companies.
The information contained in this Manual complies with
relevant Australian Standards at the time of printing.
This Manual may not be reproduced without the
express and written permission of BIA Ltd.
Bicycle Industries Australia Ltd. ABN 84 094 666 538
Bicycle Industry of Australia on the Web:
www.bikeoz.com.au

20 OWNER’S MANUAL
YOU SHOULD READ THIS MANUAL
Your bicycle is legally a vehicle. It can be ridden on roads mixing with other trafc. You
need to know about certain legal and common sense requirements for the enjoyable, safe
and trouble free use of your bicycle.
OWNER’S INFORMATION AND
RESPONSIBILITY
To reduce the risk of serious personal injury,
you should read the instructions in this manual
carefully.
Your bicycle has been supplied fully assembled
and adjusted ready for use. This manual is not an
‘assembly instruction’. If your bicycle has been
supplied in a form not ready for use you must
obtain “assembly instructions” from your supplier.
Return your bicycle for an initial service by your
bicycle retailer to ensure correct functions of
components. The owner or main rider is then
responsible for normal maintenance of the bicycle
to keep it in good operating condition.
Know how to operate all standard and accessory
equipment on the bicycle.
This manual suits for next models
8
Table of contents
Other Tebco Bicycle manuals


