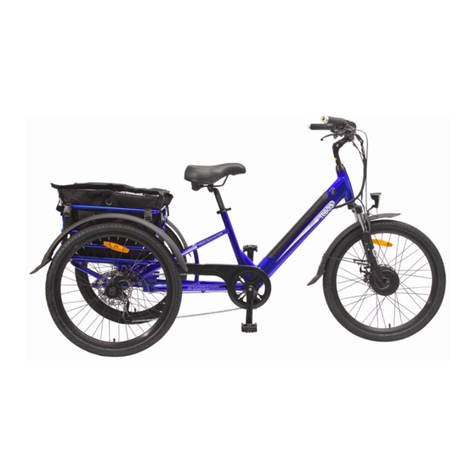
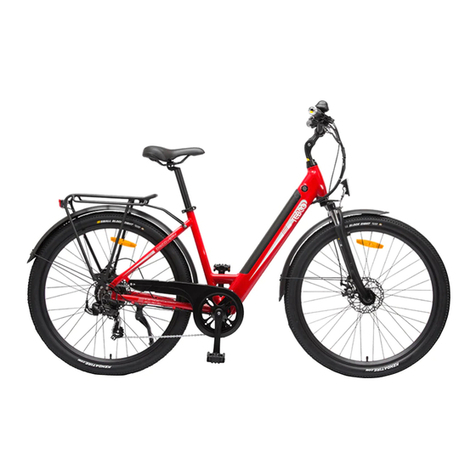
Tebco EXPLORER 2023 User manual

Introduction:
Thank you for you choosing the Explorer from The Electric Bicycle Co. We have created a
stylish and serviceable bicycle for your personal transport and enjoyment. Prior to riding your
new Explorer please thoroughly read and understand this manual it is provided for YOUR
benefit. Should you not understand any part of this manual please consult your supplier.
Our company has developed this Explorer to strict quality control systems to IS09001
certification standard.
Our company’s aim is to provide customers with high quality, serviceable and affordable
personal electric transportation that will give many years of trouble free and enjoyable use,
whilst at the same time helping to sustain our fragile environment by utilizing clean, green
renewable energy.
Attention:
● Before you use this Explorer, please thoroughly read and understand this Owner’s
Manual.
● Once you understand the Owner’s Manual and know that you are familiar with the
bicycles operation you are free to ride. Please do not lend your Explorer to others
who are unfamiliar with its operation.
●NEVER RIDE YOUR EXPLORER UNLESS YOU ARE WEARING A PROPERLY
FITTED AND APPROVED BICYCLE HELMET!
● ALWAYS ENSURE THAT THE POWER IS TURNED OFF WHEN YOU MOUNT AND
DISMOUNT THE BICYCLE
● Please be familiar with and observe all local traffic rules of your city / town.
● The Explorer is designed for single rider use. At no time should you ever carry a
pillion passenger as it is illegal to do so.
● Please ride cautiously when riding in wet or slippery conditions or on uneven
surfaces.
● This Owner’s Manual is designed for use only with the Explorer supplied by The
Electric Bicycle Co.
Please enjoy your ride!
A. J. (Tony) Morgan
The Electric Bicycle Co. P/L

Preface
The Explorer has set precedents in design and performance of electric bicycles.
The aesthetically designed frame styling makes it appealing to look at whilst offering excellent
operating performance and manoeuvrability. There is no other electric bicycle in the world that
offers comparable comfort and safe riding.
Your exceptional insight has allowed you to select a fashionable product that is fun to ride
whilst also being 100% environmentally friendly. Thank you for selecting our product and
congratulations for doing your part to preserve the environment.
To ensure proper usage and extended life of your fabulous Explorer please read this Owners
Manual carefully.
Main Functions and Characteristics
1. Highly efficient rare earth brushless geared DC motor.
2. 36V 15Ah Programmable Digital controller.
3. Proportional twist grip throttle for smooth effortless acceleration and control.
4. Front and rear Disc Brakes with power cutoff switches.
5. Heavy duty side mount prop stand.
6. 10Ah 36v LITHIUM batteries offering stronger starting current and extended distance
between recharges.
7. Front suspension providing a smooth and comfortable ride.
8. State of the art easy to read LCD Trip Computer.
9. Removable battery box making it convenient to charge both in bicycle and in house.
IF EXPLORER IS NOT USED REGULARLY THEN THE
BATTERY MUST BE RE-CHARGED EVERY MONTH.
FAILURE TO RE-CHARGE BATTERY REGULARLY CAN
LEAD TO SEVERE DEGRADATION OF BATTERY.
NEGLIGENCE IN THIS MATTER MAY VOID WARRANTY.

FOR REPLACEMENT BATTERIES –
CONTACT TEBCO DIRECTLY ON 03 9584 3000
Operating Methods
Before operating:
1. Depress Power ON / OFF button to ‘Power ON’ Explorer – LCD Indicator Panel will
activate.
2. If battery status gauge does not show at least half full – recharge before you attempt to
ride. (To extend battery life - re-charge batteries every time you get home.)
3. Check both brakes to see if they are both working effectively. Check ‘Honka Hoota’
operation.
4. Check the pressure of front and rear wheels. Pressure should be Min 40psi – Max 65psi
Riding Technique
1. Position side ‘Prop Stand’ to up position adjacent to chain stay..
2. Seat yourself comfortably on seat. If seat too high or too low - adjust to suit your comfort.
3. Depress Power ON / OFF button to ‘Power ON’ Explorer – LCD Indicator Panel will
activate.
4. The ‘Explorer’ is powered by a 9 Level ‘Pedal Activation System’ – Select desired PAS
level simply by depressing + or – buttons on Left Hand Side Controller Panel and start to
pedal - power will automatically activate the motor.
5. The ‘Explorer’ is also fitted with a ‘Twist Grip Accelerator’ which is speed governed at
max 6kmh – use of this Accelerator can assist at ‘take-off’ for the rider.
6. To decelerate ‘cease pedalling’ and controller will automatically cut power to motor.
7. Slowly pull on both brake levers to ‘brake’ and slow the bicycle to a stop.
Power ‘Override Switches’
Your Explorer is equipped with 2 power ‘Override Switches’
1. These are small micro-switches situated within each brake lever.
2. By simply pulling either brake lever on slightly – power is cut to the motor.
3. These are safety switches, which can prevent your bicycle from accidentally ‘starting’
whilst you are stationary.

Battery charging:
1. The battery is the most important part of your Explorer. To ensure good performance -
proper usage and maintenance will maximise battery life.
2. Overdischarging of batteries should be avoided at all times. Batteries should always be
recharged ready for riding. If not used for a period of 30 days, batteries should be
re-charged fully.
3. After usage and when bicycle is not in use always be sure to turn Power off. If bicycle left
unattended with Power ON for 5 minutes then electric system will auto turn Power OFF.
4. If the ‘Battery Status Gauge’ drops to half way - this means that batteries need to be
immediately recharged. Continuing to ride whilst battery ‘charge’ is low can cause severe
battery damage.
5. To use battery charger, first insert the plug into charging socket on side of bicycle or
battery box. Next insert plug into 240V power supply. After the charger is connected
properly, turn on 240V AC supply. To disconnect after charging, turn off 240V AC supply,
remove plug from 240V socket then pull out plug from Bicycle or battery socket. REFER
TO BATTERY CHARGER OPERATING INSTRUCTIONS SUPPLIED WITH YOUR
CHARGER
6. When charging the battery, charger status lamp will glow RED to indicate ‘charging’.
When lamp turns GREEN ‘charging’ is complete and charger should be turned OFF.
Charging duration depends on the level of discharge of the battery. Normal charging
duration is 56 hours from flat.
7. Battery performances can be greatly influenced by many factors weight of rider, type of
terrain, prevailing climatic conditions, style of riding etc. Be observant of your battery
performance and never try to achieve more than your batteries are capable of delivering.
8. If battery needs to be taken out of the Bicycle for recharging or bicycle transport - unlock
battery lock and slide battery assembly towards you to remove from bicycle. To replace
battery pack – reverse this operation.
ALWAYS CLOSELY MONITOR BATTERY RE-CHARGIUNG PROCESS – WHEN
BATTERY RE-CHARGED THEN CHARGER SHOULD BE TURNED OFF.
Adjustment & Maintenance
1. As a general rule to ensure longevity and good performance of your Explorer, have it
regularly serviced by a qualified and experienced bicycle mechanic.

2. There is no specific maintenance required on your electrical components. Simply
re-charge your batteries after each ride to ensure longest possible life.
3. Adjustment of the height of saddle. Loosen quick release on seat tube and adjust saddle
to a suitable height. The raised height of the saddle cannot exceed the height marked with
minimum insertion mark on saddle stem.
4. Brakes and their adjustment are standard to the bicycle industry. Be sure to keep brakes
properly adjusted at all times.
5. Regular checking of spoke tension and wheel alignment can also ensure maximum
performance of your Bicycle.
Tyre Pressure:
1. It is most important for continued effective operation of your Explorer that you maintain
the correct tyre inflation.
2. Both front and rear tyres should be maintained at Min 40psi and Max 65psi inflation.
Safety Precautions
1. Always make sure key or remote device is in OFF position when you mount or dismount
your bicycle. Only turn power ON once you are safely seated on your bicycle.
2. When starting the bicycle, the twist grip throttle should be turned slowly and evenly to
ensure smooth gentle acceleration.
3. Never try to RACE your bicycle or ride at high speeds for long periods of time.
4. Never try to climb hills that are too steep and that will force the bicycle to slow below
10kms. Best performance is achieved on flat or gently rising terrain.
5. When either the left or right brake lever is engaged, a micro switch will cut power to motor.
Should either of these switches fail to work at any time please contact your supplier
immediately.
6. In wet or rainy weather, the bicycle should be ridden slowly and with much greater care.
Main technical parameter
1 Dimensions – L 1780mm x H 1100mm x W 650mm
2 Wheelbase ~ 1060mm
3 Weight 22kg
4 Carrying Capacity ~ 120kgs
5 Max Speed 26kmh
6 Maximum Range 40km Electric Power – 80km Pedal Assist Mode
7 Minimum Ground Clearance 160mm
8 Lithium Battery 1pc x 36v 10Ah
9 Motor ~ Brushless geared
10 Rated Continuous Output 200W / 250W

11 Input of Charger 240V
12 Output of Charger – 2A 36V DC
13 Charging Duration – 4 to 5 hours
Indicator Panel
Your new Explorer comes fitted
with a ‘State of the Art’ LCD Trip
Computer with the following
functions:
• Trip Computer Display
• Handlebar Control
Buttons
• Backlit Display
• Smart Battery Indicator
• Power Draw Indicator
• Pedestrian Function
• Front / Rear Light Control
Power ON / OFF
To switch ON the Explorer, hold the power button for 2 (two) seconds.
To switch OFF the Explorer, hold the power button again for 2 (two) seconds.
If the bike is stationary for more than 10 minutes, it will switch off automatically.
Top Level Menu
NOTE: The menus are disabled whilst the bike is not stationary.
Home Screen
At power on, the display shows current speed and the total distance the bike has
travelled. Use the ‘i‘ button to rotate through the various display functions below:
• Current Speed (km/h)
• Average Speed (km/h)
• Maximum Speed (km/h)
• Trip Distance (km)
• Total Distance (km)
• Trip Time (hours)

The battery charge status is displayed in the top right corner of the
display. When the battery is discharged, the battery frame will flash
to indicate the battery needs to be recharged immediately.
The power draw from the battery by the electric bicycle can be read
under the battery charge status indicator in real time.
If there are any faults with the electrical system, an error code will
be displayed at the bottom of the display. Consult TEBCO or your
retailer for assistance.
Pedestrian Function
The Explorer has an in built 6 km/h pedestrian function so that
the bike can be safely wheeled under power whilst walking beside
it. To activate, hold down the ‘-‘ button for as long as you wish to
walk the bicycle.
Headlights and Taillights
To switch ON the headlight and taillight, press the ‘headlight’
button. To switch OFF the headlight and taillight, press the
‘headlight’ button again.
NOTE: The display backlight will dim when the headlight and
taillight are illuminated.
PAS Setting
The pedal assist function sets the amount of assistance from the
motor when pedaling. This is adjusted with the ‘-‘ and ‘+’ buttons.
The default level is 0 (zero) - no output power. This can be
adjusted between 0 (zero) and 9 (nine) as desired by the user.

General Settings Menu
With the bicycle switched on, the general settings menu is accessed by holding both
the ‘+’ and ‘-‘ buttons for two seconds.
To exit the menu, hold the ‘i’ button for 2 (two) seconds. Any menu will timeout after
approximately 2 (two) minutes and return to the home screen.
tC - Trip Distance Clearance
To clear the trip distance, press the ‘+’ or ‘-‘ buttons until Y (yes) is displayed.
Press the ‘i’ button confirm and proceed to the next screen in the menu.
bL - Backlight Contrast
The backlight contrast setting can be adjusted between 1 (one) and 3 (three)
with the ‘+’ and ‘-‘ buttons. To store the setting, press the ‘i’ button and
proceed to the next screen in the menu.
U - Unit of Measurement
This allows the user to select between miles and kilometres.
The default value is 2 - kilometres. The value 1 represents miles. The units
are also shown on the display.

General Parameter Setting Menu
From the general settings menu, the general parameter settings menu can be
accessed by pressing the ‘-‘ and ‘i’ buttons for two seconds.
NOTE: This menu can only be accessed whilst already in the general settings menu.
To advance a screen in the menu, use the ‘+’ or ‘-‘ buttons whilst the black text is
flashing. To advance a screen in the menu use the ‘i’ button when the white text is
flashing.
To exit the menu, hold the ‘i’ button for 2 (two) seconds.
Ld - Wheel Diameter
The bicycle wheel diameter can be adjusted by pressing ‘i’
whilst ‘Ld’ is flashing on screen. The wheel diameter will
begin to flash, and can be adjusted with the ‘+’ and ‘-‘
buttons as desired. If the wheel diameter is already
flashing, it can be adjusted immediately with the ‘+’ and ‘-‘
buttons.
LS - Speed Limit
The maximum speed of the electrical system (only) of
the bicycle can be adjusted by pressing ‘i’ whilst ‘LS’ is
flashing on screen. The speed limit setting will being to
flash, and can be adjusted with the ‘+’ and ‘-‘ buttons as
desired. If the speed limit setting is already flashing, it can
be adjusted immediately with the ‘+’ and ‘-‘ buttons.

Many Sections of this Manual are indeed irrelevant to your
Explorer Electric Bicycle.
However this is the format that Australian Standards mandate
that we must follow.
Please read the Manual in its entirety – take particular note of
Sections that are specific to The Explorer.
Acknowledgments
This Manual has been developed by BIA Ltd.
Illustrations reproduced courtesy of BIA member Companies.
The information contained in this Manual complies with relevant Australian
Standards at the time of printing. This Manual may not be reproduced without the
express and written permission of BIA Ltd.
Bicycle Industries Australia Ltd. ABN 84 094 666 538
Bicycle Industry of Australia on the Web: www.bikeoz.com.au

YOU SHOULD READ THIS MANUAL
Your bicycle is legally a vehicle. It can be ridden on roads mixing with
other traffic. You need to know about certain legal and common
sense requirements for the enjoyable, safe
and trouble free use of your bicycle.
OWNER’S INFORMATION AND RESPONSIBILITY
To reduce the risk of serious personal injury, you should read the instructions in this manual
carefully.
There are warnings throughout this manual. Follow
all warning instructions. Don’t risk injury,
mechanical failure or damage.
Your bicycle has been supplied fully assembled and adjusted ready for use. This
manual is not an ‘assembly instruction’. If your bicycle has been supplied in a form
not ready for use you must obtain “assembly instructions” from your supplier.
Return your bicycle for an initial service by your bicycle retailer to ensure correct functions of
components. The owner or main rider is then responsible for normal maintenance of the
bicycle to keep it in good operating condition.
Know how to operate all standard and accessory equipment on the bicycle.
Ensure that anyone who uses the bicycle has been fully instructed in the operation of bicycle
functions.
Your bicycle conforms to relevant Australian Standards. Other local regulations may apply.
Check with your bicycle retailer.
Many bicycle product manufacturers and suppliers provide additional information on Web
sites. The Bicycle Industry in Australia Web site includes many useful links and other
information at: www.bikeoz.com.au

The Cycling Promotion Fund offers helpful hints and links at:

WHAT KIND OF BICYCLE IS IT?
Bicycles can be broadly categorised into four types:
●Road or Touring
●Mountain or Off Road
●Cross, Hybrid, City or Comfort
●BMX
●Freestyle
Bicycles for younger riders use are generally scaled down
versions of adult bicycles including the step through
design. Other bicycles include tandems, recumbents and
folding bicycles. Which type is your new bicycle?
ROAD OR TOURING
Typically has narrow tyres and drop handlebar.
Variations include bicycles suited for touring, commuting,
sports, and recreational riding.
MOUNTAIN OR OFF ROAD
The Mountain Bicycle is designed to give the rider
maximum control and durability on a wide variety of harsh
terrain. Everything about the Mountain Bicycle is more
rugged. Its frame geometry provides maximum ground
clearance and allows you to quickly and easily shift your
weight to change the balance of the bicycle as terrain
conditions demand.
WARNING: Not all Mountain type bicycles are
intended for off road or competition use. Check
specifications and technical advice from your
bicycle retailer before use.
CROSS, HYBRID, CITY OR COMFORT
Usually something of a mixture of characteristics of the
Road and Mountain types but may include evolving frame
shapes and components. Suited for general purpose
riding.

BM
X
BMX, are general purpose bicycles for younger riders.
The BMX type Bicycle is a versatile machine usually of
20”(510mm) or less sized wheels with wide section
tyres,ideal for general purpose use by younger riders.
WARNING: General purpose Freestyle and BMX
bicycles are not designed for stunting, racing or
competition use.
FREESTYLE
Modelled on a trick riding style machine, featuring 360
degree revolving handlebar/fork assembly, axle pegs
and wide profile tyres. Using a freestyle type bicycle
for trick or competition riding may void warranty.
POWER ASSISTED BICYCLES
Have characteristics and equipment which may
require special instruction, adjustment, care and
maintenance. Read carefully all instruction manuals.
Ask your bicycle retailer for advice on maintenance,
adjustments and repair.
Unauthorised work may limit or void the warranty.
FOLDING BICYCLES
Designed for easy storage. May require special
instruction before use. Ensure that all locking devices
are correctly secured before riding a Folding bicycle.

WHAT IS IT CALLED?
Although bicycle components vary in design, weight and
method of use, basically all bicycles are the same.
A bicycle is made up of a frame, wheels, drive train,
brakes, stem, handle bars and saddle. Frames must show
a makers ID label.
Familiarise yourself with the bicycle’s terminology; it will
make basic maintenance instructions much easier to
follow.
TYPICAL PARTS OF A BICYCLE
NOTE: Not all components nor all bicycle types are
shown.
WARNING: Handlebar handgrips or tube-end plugs
should be replaced if damaged. Unprotected
tube-ends can cause injury. Bicycles used by
children should especially be checked to ensure bar
end handgrips are in good condition.

FOR ALL TYPES
Where a suspension unit, disk and / or hydraulic brake
units, multi-gear hub, electric gear changing system,
etc, are fitted, consult manufacturers specification and
warranty documents. For correct selection and repair
advice, ask your bicycle retailer. Unauthorised work
may limit or void a product warranty.
1. SAFETY PRECAUTIONS
1.1 FITTING YOUR BICYCLE FOR A SAFE
RIDE
To ride safely and comfortably a bicycle and its
equipment must be matched properly to the size and
skills of the rider.
FITTING FOR LEG LENGTH
FRAME SIZE RIDER LEG LENGTH
14.5” 25 - 26”
15” 26 - 27”
16” 27 - 28”
17” 28 - 30”
18” 29 - 31”
19” 30 - 32”
20” 31 - 33”
21” 32 - 34”
22” 33 - 35”
23” 34 - 36”
24” 35 - 37”
25” 36 - 38”
MAKE SURE THE BICYCLE FITS
A bicycle that is too big or too small for the rider is hard
to control and can be uncomfortable. If your bicycle
does not fit properly, you may lose control and fall.

SADDLE HEIGHT
To ride comfortably and pedal efficiently, it’s very
important to have the saddle at the correct height. Your
leg length determines the correct saddle height. The
saddle is at the correct height for you when, while
seated on the saddle, your knee is slightly bent when
the crank is at the maximum down stroke (pedal is
closest to the ground).
To adjust the saddle height, loosen the seat binder bolt
(A) or the quick release (B) and move the seat post up
or down as required. Make sure that the saddle is
parallel to the top tube of the bicycle. Retighten the seat
post tight enough so that you cannot twist the saddle out
of alignment.
A loose seat post will allow the saddle to turn or slip and
may cause you to lose control and fall. Therefore:
1. Ask your bicycle retailer to help you make sure you
know how to correctly clamp your seat post.
2. Before you ride the bicycle, first check that the seat
post is securely clamped.
Under no circumstances should the seat post
project from the frame beyond its ‘Minimum
Insertion’ or ‘Maximum Extension’ mark.
WARNING: do not replace the seat post with
a post which is: A) not of the same diameter or
B) longer than the original. Either will void the
warranty and could lead to seat post failure,
loss of rider control and injury.
HANDLEBAR HEIGHT AND ANGLE
After you have set the saddle height and tilt, adjust the
handlebar for a safe and comfortable ride.
Ask your bicycle retailer for advice.

WARNING: Under no circumstances should the head stem
be retightened with its ‘Minimum Insertion’ or ‘Maximum
Extension’ mark visible.
‘Threadless’ headset. DO NOT over tighten the
two securing bolts. If unsure, consult your
bicycle retailers.
If the front brake cable is attached to the handlebar
stem moving the stem up or down will require a
readjustment of the brake. If in doubt, ask your bicycle
retailer to make the adjustment.
CONTROLS POSITION ADJUSTMENT
The brake and shifting controls on your bicycle are
positioned where they work best for most riders. The
angle of the controls and the position on the
handlebars can be changed. Ask your bicycle retailer to
make the adjustments for you.
WARNING: Front wheel brake lever must be
mounted on the right hand side; rear brake
lever on the left hand side.
HAND BRAKE LEVER ‘REACH’
Many bicycles have brake levers which can be
adjusted for ‘reach’. If you have small hands and find it
difficult to squeeze the brake levers, your bicycle
retailer can either adjust the reach or fit shorter reach
brake levers.

1.2 SAFETY CHECK BEFORE RIDING YOUR
BICYCLE
Check and tighten any loose nuts, bolts and
straps. If you’re not sure, ask your bicycle retailer
to check.
Tyres correctly inflated? Check by pushing down
with your thumb on the top of the tyre. The tyre
should depress slightly. Compare to how it feels
when you know the tyres are correctly inflated.
Replace damaged tyres before they puncture.
Wheels true? Spin each wheel and check for
brake clearance and side-to-side wobble. If a
wheel wobbles or hits the brake pads, take the
bicycle to your bicycle retailer.
Brakes: Check that the brakes operate effectively.
QUICK RELEASES
Are the front wheel, rear wheel and seat post quick
releases properly adjusted and in the locked
position? Check all quick release mechanisms are
correctly and securely closed.
CHECK LIGHTS AND REFLECTORS
Working
Correctly aligned
HANDLEBAR AND SADDLE
Are the handlebar and saddle system: horizontal?
tight enough so they won’t twist? handlebars
secure, good condition? handle bar ends plugged?
Is a bell fitted and working?
Any broken or worn parts should be replaced before the
bicycle is used.
Table of contents
Other Tebco Bicycle manuals

