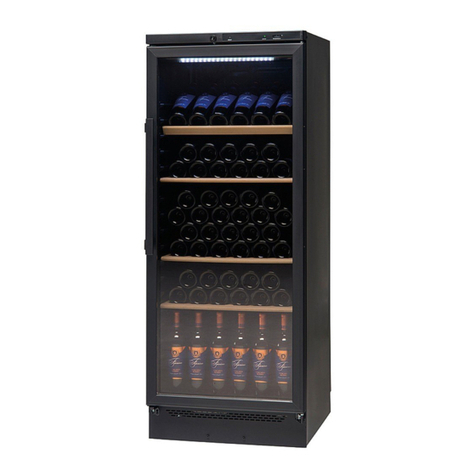
Tecfrigo LAMPO Quick start guide

INSTALLAZIONE USO
E MANUTENZIONE
INSTALLATION USE
AND MAINTENANCE
INSTALLATION MODE
D'EMPLOI ET ENTRETIEN
ZUSAMMENBAU BETRIEB
UND INSTANDHALTUNG
Italiano
English
Français
Deutsch
LAMPO
Manuale Originale
in ITALIANO

FIG. 1
Italiano English Fran Deutschçais
2
!
FIG. 2
If the supply cord is damaged, it must be replaced
by the manufacturer, its service agent,
or similarly qualified persons in order to avoid a
hazard.
Se il cavo di alimentazione è danneggiato,
deve essere sostituito dal produttore, dal suo
centro di assistenza o da personale qualificato
per evitare rischi
Wenn die Anschlussleitung beschädigt ist, darf sie
nur von einem autorisierten Kundendienst
ausgewechselt werden, um Gefahr zu vermeiden.
Si le câble d'alimentation est endommagé, il doit
être remplacé par le fabricant, des représentants
ou des professionnels agréés afin d'éviter
les dangers.
Si el cable de alimentación está dañado,
debe ser reemplazado por el fabricante, por su
Centro de servicio o personal calificado.
para evitar riesgos

3
Italiano English Fran Deutschçais
Fig. 3
!!
!
!
!
!
!
!
Il buon funzionamento della macchina causato da inosservanza di quanto spiegato e/o mostrato in questonon
manuale, declina ogni tipo di responsabilità.
We decline any responsibility if the bad performance of the equipment is caused by non compliance to what is shown
and/or explained in this manual.
Das nicht reibungslose Betrieb des Geraetes, verursacht durch Nichtbeachtung wie in diesem Handbuch dargestellt
ist, übernimmt keine Haftung.
Le mauvais fonctionnement de la machine causés par le non-respect comme expliqué et / ou illustrés dans ce manuel,
décline toute la responsabilité
Esta compañía declina toda responsabilidad si el mal funcionamiento del equipo es causado por el incumplimiento de
lo que se muestra y/o se explica en este manual.

Italiano English Fran Deutschçais
4
IMPORTANTE (AL MOMENTO DELLA RICEZIONE) (Fig.2)
ATTENDERE UN'ORA PRIMA DI ACCENDERE L'INTERRUTTORE DEL REFRIGERATORE.
1. Collocare “Lampo” nella posizione richiesta. Assicurarsi che ci siano 15cm di spazio in
entrambi i lati poiché “Lampo” necessita di una buona aerazione per funzionare.
2. Assicurarsi che le spine abbiano il giusto voltaggio ma NON ATTIVARLO!
3. Versare il quantitativo consigliato di glicole nella vasca, (3 taniche per il Lampo 3 e 2 taniche
per il Lampo 2) rimuovendo il coperchio anteriore (quello con le tasche).
4. Aggiungere l'acqua sino a che il liquido raggiunga l'adesivo del LIVELLO MASSIMO DI
RIEMPIMENTO DELLA VASCA. Ripristinare il coperchio.
5. Assicurarsi che il livello della vasca non sia superato.
6. Aspettare che sia acceso da 6-7 ore prima di iniziare ad usarlo, in modo che si permetta al
liquido di essere raffreddato alla temperatura necessaria per lavorare. (approssimativamente -
30°C -35°C). Il periodo potrebbe variare se il termostato viene interrotto.
USO DEL LAMPO
Il Lampo comprende un dispositivo a tempo.
IL TIMER NON ACCENDE/SPEGNE L'APPARECCHIO IL TIMER INDICA SEMPLICEMENTE
IL TEMPO IN CUI LA BOTTIGLIA E' SOMMERSA NEL LIQUIDO REFRIGERANTE.
ATTENZIONE: usare Lampo senza attivare il timer potrebbe congelare il contenuto della
bottiglia o rompere la stessa.
1. Inserire la bottiglia.
2. Premere l'appropriato pulsante per selezionare il tempo. Il pulsante si illuminerà e
lampeggerà. Il ciclo di funzionamento di 4, 6, 8 minuti dipende dal pulsante selezionato.
3. Quando il ciclo è finito, un segnale acustico suona. Premere il pulsante RESET per
disattivare la luce ed il segnale acustico. Rimuovere la bottiglia.
4. La bottiglia sarà stata raffreddata alla temperatura desiderata ad una velocità di 2°C al
minuto. (impiegherà più tempo se la temperatura ambiente supera i 18°C)
NOTE IMPORTANTI
1. Non lasciare la bottiglia nel “Lampo”dopo il suono del segnale acustico poiché la bottiglia
potrebbe gelare.
2. Non immergere le mani nella vasca. (La temperatura di funzionamento è -30°C)
3. Se avete necessità di spostare il “Lampo”, sarà necessario spegnerlo per 4-6 ore e svuotare
il contenuto in un contenitore infrangibile, ad es. un contenitore di plastica.
ATTENZIONE
QUESTO APPARECCHIO NON DOVREBBE ESSERE USATO DAI BAMBINI IN MANCANZA
DEL CONTROLLO DI PERSONE ADULTE. E' IMPORTANTE EVITARE IL CONTATTO CON IL
GLICOLE DURANTE L'USO DELL'APPARECCHIO POICHÉ RAGGIUNGE E MANTIENE UNA
TEMPERATURA ESTREMAMENTE BASSA.
NORME GENERALI
1. CONTROLLARE REGOLARMENTE IL LIQUIDO
Se congela intorno alla serpentina, sarà necessario aggiungere del glicole puro. Potrebbe
essere necessario anche rimuovere una parte del liquido prima di aggiungere il glicole puro.
2. CONTROLLARE REGOLARMENTE LE TASCHE
Controllare le tasche regolarmente assicura che non ci siano fuoriuscite. Se qualche tasca è
danneggiata, deve essere sostituita immediatamente.

5
Italiano English Fran Deutschçais
Vedi la sezione “installazione tasche”alla fine di questo manuale di istruzioni.
3. PULIRE L'ESTERNO DEL REFRIGERATORE CON UNO STRACCIO UMIDO - NON
USARE SOSTANZE DETERGENTI ABRASIVE. Pulire accuratamente intorno ai timers ed agli
indicatori, non usare una dose eccessiva di liquido pulente, poiché potrebbe danneggiare il
sistema dei timers.
4. NON OSTRUIRE I PASSAGGI DELL'ARIA DEL REFRIGERATORE PER PERMETTERE
ALL'ARIA DI CIRCOLARE INTORNO A “ ”LAMPO
5. LE PRESTAZIONI POTREBBERO DIMINUIRE IN PRESENZA DI TEMPERATURE MOLTO
ALTE.
6. PULIZIA DEL RADIATORE
Il condensatore è posizionato nella parte sinistra di “Lampo”. Questo deve essere pulito e
ripulito da ogni tipo di sporcizia che potrebbe ridurre il circolo dell'aria. La pulizia potrebbe
essere fatta con una spazzola sottile o con l'aspirapolvere.
7. PULIZIA DELLE TASCHE
Durante il periodo di inutilizzo, le tasche potrebbero accumulare ghiaccio; basterà rimuoverlo di
tanto in tanto.
INSTALLAZIONE DELLE TASCHE (Fig.1)
RIMOZIONE DELL'ANELLO.
COME USARE L'APERTURA A SCATTO
1. L'anello di plastica è assemblato da entrambi i lati da due viti, con un'apertura a scatto.
Impugnare uno di questi lati e spingere l'anello verso l'alto in maniera decisa. Dovrebbe udirsi
uno scatto e un lato dovrebbe risultare libero.
2. Ripetere la stessa cosa dall'altro lato
3. N.B. se c'è del glicole all'interno di “Lampo”, rimuovendo la tasca potrebbe sgocciolare sul
refrigeratore stesso o sul pavimento. Il glicole è scivoloso e deve essere asciugato
immediatamente con uno straccio asciutto.
RIMOZIONE DELLE TASCHE
COMPONENTI
--- Tasche
--- Set di anelli in plastica (2 pezzi). L'anello più piccolo è incastrato all' esterno del più grande,
mantenendo così salda la tasca.
--- Ferretto di supporto alla tasca.
ISTRUZIONI:
1. Sulla sommità dell'anello c'è una piccola rientranza. Utilizzare un oggetto piatto nella
rientranza tra i 2 anelli e separare la tasca dall'anello.
2. Prendere la nuova tasca e l'anello più piccolo; mettere l'anello nella tasca e sistemarla in
modo che la tasca sia ripiegata circa di 10 cm. sull'anello.
3. Sistemare l'anello piccolo e la tasca sul ferretto e farlo scivolare lungo l'anello più grande.
Attenzione a non spostare la tasca; premere con decisione l'anello piccolo sul grande usando il
palmo della mano sino a quando si udirà lo scatto. NB: gli anelli devono incastrarsi insieme per
un uso corretto.
PROBLEMI
1. PRESENZA DI GLICOLE NELLE TASCHE
La tasca deve essere sostituita. Vedi la sezione dedicata alla rimozione delle tasche.
2. IL GLICOLE CONGELA
Troppa acqua rispetto a quella consigliata rischia di congelare il glicole. E' consigliabile
diminuire la miscela di acqua e glicole e aggiungere più glicole puro.

Italiano English Fran Deutschçais
6
3. LAMPO NON FUNZIONA
Assicurasi che il refrigeratore sia collegato alla presa; controllare che ci sia corrente;
controllare il fusibile nella presa; controllare che il termostato sia posizionato su -30/-35°C.
4. LAMPO NON RAFFREDDA CORRETTAMENTE
Potrebbe essere dovuto ad accumulo di polvere nel condensatore o al posizionamento del
termostato inferiore a -30/-35°C.
5. SBRINAMENTO
Sbrinare il frigo mensilmente in modo da rimuovere il ghiaccio che si forma.
EFFETTI DEL GLICOLE SULLA SALUTE
1. Inalazione: vapori e inalazioni non provocano solitamente effetti negativi sulla salute.
2. Contatto con la pelle: può causare irritazione
3. Contatto con gli occhi: può causare una leggera irritazione
4. Ingestione: può causare irritazione allo stomaco.
PRIMO SOCCORSO
1. Inalazione: spostare la persona colpita all'aria aperta. Se respira a fatica, somministrarle
ossigeno. Prestare immediatamente delle cure mediche.
2. Contatto con la pelle: risciacquare immediatamente la parte intaccata con dell'acqua tiepida.
Se l'irritazione persiste, chiamare il personale medico.
3. Contatto con gli occhi: risciacquare immediatamente sotto acqua corrente per almeno 5
minuti tenendo le palpebre aperte. Prestare immediatamente delle cure mediche.
4. Ingestione: risciacquare accuratamente con acqua. Prestare immediatamente cure mediche.
L'esposizione ai vapori difficilmente mette in pericolo la salute. Il glicole propilenico è usato
clinicamente come solvente per la somministrazione di medicinali.
MISURE DIFFUSE IN CIRCOSTANZE ACCIDENTALI
Precauzioni:
1. Accesso ristretto all'area durante le operazioni di pulizia.
2. Ventilare l'area in caso di fuoriuscita o versamento del liquido
3. Estinguere o rimuovere tutte le fonti di combustione (calore, scintille, fiamme)
4. Indossare indumenti protettivi adeguati.
Procedure per la pulizia in caso di versamento:
non toccare il liquido versato. Fermare o ridurre la fuoriuscita se è necessario. Contenere il
liquido versato con sabbia o materiale assorbente che non faccia reazione con il liquido
versato. Collocare il liquido in contenitori adatti, chiusi e contrassegnati. Gettare acqua
sull'area in cui è stato versato il liquido.
ATTREZZATURA PROTETTIVA ADEGUATA
Protezioni respiratorie: siccome le proprietà dell'MPG non sono tossiche, non sono disponibili
guide per il normale uso del prodotto. In caso di alte concentrazioni di vapore usare respiratori
chimici. In caso di incendio usare apparecchi di respirazione pressurizzati.
Protezioni per occhi / viso: usare occhiali di protezione e/o protezioni per il viso se c'è
possibilità di spruzzi.
SVUOTAMENTO DELLA VASCA (Fig.3)
Per svuotare la vasca dal liquido di refrigerazione togliere il coperchio posteriore posto sopra le
tasche e inserire la pompa fornita in dotazione fino ad arrivare sul fondo della vasca. Collocare
il tubo di svuotamento all'interno di una tanica ed inserire la spina. Attendere fino al completo
svuotamento del liquido.

7
Italiano English Fran Deutschçais
ATTENZIONE
IL TIMER NON ACCENDE/SPEGNE L’APPARECCHIO –IL TIMER INDICA
SEMPLICEMENTE IL TEMPO IN CUI LA BOTTIGLIA E’SOMMERSA NEL LIQUIDO
REFRIGERANTE.
1. Inserire la bottiglia.
2. Premere l’appropriato pulsante per selezionare il tempo necessario e premere START.
3. Quando il ciclo è finito, un segnale acustico suona. Premere il pulsante START/STOP per
interromperlo e premere contemporaneamente MIN e SET per resettare. Rimuovere
la bottiglia.
4. La bottiglia sarà raffreddata ad una velocità di circa 1,5°C al minuto.
1 - Tasto P/SET : Utilizzato per l'impostazione del Set point e per la programmazione dei
parametri di funzionamento
2 - Tasto DOWN : Utilizzato per il decremento dei valori da impostare e per la selezione dei
parametri. Può essere inoltre programmato tramite il par. “Fb”per eseguire la funzione di
ON/OFF(Standby).
3 - Tasto UP/DEFROST : Utilizzato per l'incremento dei valori da impostare, per la selezione
dei parametri e per attivare sbrinamenti manuali.
4 - Led OUT : Indica lo stato dell'uscita compressore (o del dispositivo di controllo della
temperatura) on (acceso), off (spento) o inibita (lampeggiante)
5 - Led AL : Indica uno stato di allarme in corso
6 - Led DEF : Indica lo stato dello sbrinamento in corso.
7 - Led SET : Indica l’ingresso nella modalità di programmazione e il livello di programmazione
dei parametri. Inoltre serve ad indicare lo stato di Stand-by.
PROGRAMMAZIONE DEI PARAMETRI
Per avere accesso ai parametri di funzionamento dello strumento occorre premere il tasto P e
mantenerlo premuto per circa 5 secondi, trascorsi i quali si accenderà il led SET, il display
visualizzerà il codice che identifica il primo parametro e con i tasti UP e DOWN sarà possibile
selezionare il parametro che si intende editare. Una volta selezionato il parametro desiderato
premere il tasto P, il display visualizzerà alternativamente il codice del parametro e la sua
impostazione che potrà essere modificata con i tasti UP o DOWN. Impostato il valore
desiderato premere nuovamente il tasto P: il nuovo valore verrà memorizzato e il display
mostrerà nuovamente solo la sigla del parametro selezionato. Agendo sui tasti UP o DOWN è
quindi possibile selezionarne un altro parametro e modificarlo come descritto. Per uscire dal
modo di programmazione non agire su alcun tasto per circa 20 secondi, oppure mantenere
premuto il tasto UP o DOWN sino ad uscire dalla modali tà di programmazione.
- - ATTENZIONE: La macchina raffredda ad una media di 2°C al minuto, alcuni vini possono
raffreddarsi più velocemente di altri dovuto allo spessore del vetro della bottiglia. Lo
champagne impiega più tempo a raffreddarsi perché solitamente il vetro della bottiglia è più
spesso delle normali bottiglie di vino.

Italiano English Fran Deutschçais
8
IMPORTANT (Fig.2)
UNIT SHOULD STAND FOR AT LEAST 1 HOUR BEFORE SWITCHING ON.
1. Set LAMPO in position required. Ensure vents have 15cm space on both sides as LAMPO
needs good airflow circulation to operate.
2. Ensure plug reaches power point but DO NOT SWITCH ON!
3. Pour the recommended amount of glycol in the basin, (3 parts for Lampo 3 - and 2 parts for
Lampo 2) by removing the front lid (which is the one with the bottle holders)..
4. Ensure BATH FILL LEVEL is not exceeded.
5. Plug unit into 13 amp power point and switch on.
6. Allow to run for 4 hours before initial use, as this allows the fluid to be chilled to the required
operating temperature (approx. -30 - 35ºC). However, this may vary when the thermostat cuts
in and out depending on ambient temperature.
HOW TO USE LAMPO
LAMPO incorporates a timing device.
THE TIMER DOES NOT SWITCH THE UNIT ON AND OFF THE TIMER IS PURELY TO
INDICATE THE TIME THE BOTTLE IS SUBMERGED IN THE FREEZING FLUID.
WARNING:-using the LAMPO without activating the timer reminder could lead to the contents
of the bottle freezing and/or breaking.
1. Place bottle in LAMPO.
2. Press the appropriate button to start the timer. It flashes during operation. If you want to
cancel or start again, press RESET Button
3. When the cycle has ended, an audible buzzer will sound. Press RESET button to de-activate
the flashing light and buzzer. You must now remove the bottle.
4. The bottle will have cooled to the desired temperature at the rate of 2 degrees per minute (it
will take longer if the ambient temperature exceeds 18 °C).
IMPORTANT NOTES AND RECOMMENDATIONS FOR CHILLA USE
1. Do not leave bottles in the Lampo unit after the buzzer has sounded as the bottles will
freeze.
2. Do not submerse your hands in the bath. (Operating temperature is -30ºC)
3. If you need to move LAMPO, it will be necessary to turn off for 4-6 hours and to drain the
contents first into a shatterproof container, i.e., plastic container such as a bucket using a jug or
similar to scoop out contents.
WARNING
THIS UNIT SHOULD NOT BE USED BY CHILDREN. IT IS IMPORTANT TO AVOID CONTACT
WITH THE GLYCOL MIXTURE DURING OPERATION OF THE UNIT DUE TO THE
EXTREMELY LOW TEMPERATURES MAINTAINED DURING NORMAL OPERATION.
GENERAL GUIDANCE
1. CHECK LEVEL OF FLUID REGULARLY.
If freezing occurs around the bars, then it will be necessary to add pure glycol. It may also be
necessary to remove some of the fluid before topping up with pure glycol.
2. CHECK BAGS REGULARLY.
Check bags to ensure that no leaks have been sustained. If any bags are torn, these must be
replaced immediately.
3. KEEP THE MACHINE EXTERIOR CLEAN WITH A WARM DAMP CLOTH DO NOT USE
ABRASIVE CLEANERS. Care must be taken when cleaning around the timing device and
indicators, not to use excessive amounts of running fluids, as this may damage the timing
device.

9
Italiano English Fran Deutschçais
4. KEEP ALL THE AIR VENTS FREE OF OBSTRUCTIONS AND ALLOW FREE AIR FLOW
AROUND YOUR LAMPO UNIT.
5. UNIT PERFORMANCE COULD DEGRADE IN EXTREME HIGH TEMPERATURES.
6. CLEAN RADIATOR.
The condenser is situated on the right side of LAMPO. This must be cleaned and be kept free
of any debris that may reduce the air flow. Cleaning can be carried out by using a stiff wire
brush or the head of a vacuum cleaner.
7. CLEAN BAGS.
During periods of non-use the bags may collect ice, this just needs to be scooped out from time
to time. There are no customer serviceable components within your LAMPO.
BAG INSTALLATION (Fig.1)
RING REMOVAL
HOW TO USE THE SNAP-LOCK
1. The ring/sleeve assembly is held in position by a twist lock. Twist the ring and pull upwards.
2. Repeat for the other side.
3. Please note that when glycol is in the unit removing the bag will result in some glycol being
dripped onto the top of the unit and possibly onto the floor. Glycol is slippy and should be wiped
up with a dry cloth.
BAG REMOVAL
COMPONENTS
--- Sleeve
--- Ring Set (2 piece). The smaller ring clips over the outside of the larger, holding the sleeve in
place.
--- Bottle Support Wire.
INSTRUCTIONS
1. Along the top of smaller ring (B) is a small indentation. Place something flat and blunt in the
indentation between the 2 rings and gently prise the outside ring & bag off.
2. Take the new sleeve and the smaller ring; put the ring in the sleeve and level it so that
approx. 10mm folds over the top of the ring (B).
3. Place the wire into holes of the larger ring (A) and slide them into the sleeve and smaller
ring. A into B..
BE CAREFUL not to dislodge the sleeve; firmly press the small ring (B) over the large ring (A)
using the flat palm of your hand until you hear a 'click'. NB: The rings must lock together to be
fitted correctly.
TROUBLE SHOOTING
1. GLYCOL SOLUTION IN BAGS:
The bags must be replaced. Please refer to the 'BAG INSTALLATION' above.
2. GLYCOL SOLUTION FREEZING OVER:
Too much water in the mixture will cause this to happen. There needs to be over 55% glycol in
the mixture. If in doubt empty and replace with 2 x 5litre or 3 x 5 litre containers of glycol and
fill up to the mark with tap water.
3. UNIT WILL NOT WORK:
Check unit is plugged in; check the power point is operating; check the fuse in the plug; check
the thermostat setting is set to -30/-35ºC.

Italiano English Fran Deutschçais
10
4. UNIT NOT CHILLING PROPERLY:
This may be due to the condenser requiring cleaning or the thermostat being set to lower than -
30/-35ºC.
5. CONDENSATION:
Check the unit for condensation and ice build ups and remove monthly.
MONOPROPYLENE GLYCOL EFFECTS
ONLY USE THIS TYPE OF GLYCOL AS IT IS NON TOXIC
1. Inhalation: Vapour and mist are unlikely to cause health effects.
2. Skin contact: Can cause irritation.
3. Eye contact: Can cause mild irritation.
4. Ingestion: May cause irritation of the lining of the stomach.
FIRST AID MEASURES
1. Inhalation: Remove victim to fresh air. If breathing is difficult give oxygen. Get medical
attention immediately.
2. Skin contact: Immediately rinse contaminated area with lukewarm water. If irritation persists,
seek medical attention.
3. Eye contact: Immediately flush the contaminated eye(s) with lukewarm, gently flowing water
for at least five minutes while holding the eyelid(s) open. Get medical attention immediately.
4. Ingestion: Rinse mouth thoroughly with water. Get medical attention immediately.
Exposure to vapour and mist is unlikely to pose a health hazard. Monopropylene Glycol is used
clinically as a solvent for the administration of medicine.
ACCIDENTAL RELEASE MEASURES
Precautions:
1. restrict access to area until completion of clean-up.
2. ventilate area of leak or spill.
3. extinguish or remove all ignition sources (heat, sparks, flames).
4. wear adequate personal protective equipment.
Clean-up procedures:
Do not touch spilled material. Prevent material from entering sewers or waterways. Stop or
reduce leak if safe to do so. Contain spill with sand or absorbent material which does not react
with spilled material. Put material in suitable, covered, labelled containers. Flush area with
water.
PERSONAL PROTECTIVE EQUIPMENT:
Respiratory protection: Due to the non-toxic properties of MPG, no specific guidelines are
available for the normal handling of the product. In high vapour concentrations use chemical
cartridge respirator. In fires, use positive pressure self-contained breathing apparatus.
Eye/face protection: Use chemical safety goggles and/or a full face shield where splashing is
possible.
EMPTYING THE TANK (Fig. 3)
To empty the coolant from the tank, remove the rear cover placed over the pockets and insert
the pump supplied until you reach the bottom of the tank. Place the drain hose inside a tank
and insert the plug. Wait until the liquid is completely empty.

11
Italiano English Fran Deutschçais
CAUTION
THE TIMER DOES NOT TURN THE APPLIANCE ON / OFF - THE TIMER SIMPLY
INDICATES THE TIME IN WHICH THE BOTTLE IS SUBMERGED IN THE REFRIGERANT
LIQUID.
1. Insert the bottle.
2. Press the appropriate button to select the necessary time and press START.
3. When the cycle is finished, a beep sounds. Press the START / STOP button to stop it and
press MIN and SET simultaneously to reset. Remove the bottle.
4. The bottle will be cooled at a rate of approximately 1.5 °C/minute.
1 - Key P/SET : Used for setting the Set point and for programming the function parameters
2 - Key DOWN : Used for decreasing the values to be set and for selecting the parameters. It
can be programmed via the parameter “Fb”to turning on and off (stand-by) the device.
3 - Key UP/DEFROST : Used for increasing the value to be set, for selecting the parameters
and for activating manual defrosting.
4 - Led OUT : Indicates the compressor output status (or the temperature control device) on
(on), off (off) or inhibited (flashing).
5 - Led AL : Indicates the alarm status (on), off (off) or silenced (flashing).
6 - Led DEF : Indicates defrosting in progress.
7 - Led SET : Indicates the input in programming mode and the programming level of the
parameters. It also serves to indicate the Stand-by status.
PARAMETERS PROGRAMMING
To access the instrument’s function parameters, press the key P and keep it pressed for about
5 seconds, after which the SET led will light up, the display will visualised the code that
identifies the first parameter. Using the UP and DOWN keys, the desired parameter can be
selected and pressing the P key, the display will alternately show the parameter code and its
setting that can be changed with the UP and DOWN keys. Once the desired value has been
set, press the key P again: the new value will be memorised and the display will show only the
code of the selected parameter. Pressing the UP and DOWN keys, it is possible to select
another parameter and change it as described. To exit the programming mode, do not press
any key for about 20 seconds, or keep the UP or DOWN key pressed until it exits the
programming mode.
- - WARNING: The machine cools to an average of 2 ° C per minute, some wines may cool
faster than other due to the thickness of the glass of the bottle. The champagne takes longer to
cool because usually the glass of the bottle is thicker than the normal bottles of wine.

Italiano English Fran Deutschçais
12
IMPORTANT (AU MOMENT DE LA RÉCEPTION DU MATERIEL) (Fig.2)
ATTENDRE UNE HEURE AVANT DE METTRE EN FONCTION LE RÉFRIGÉRATEUR.
1. Placer "LAMPO" dans la position souhaitée. Assurez-vous qu'il y ait 15cm d'espace sur les
deux côtés de l'appareil afin de garantir une bonne ventilation et performances .
2. Assurez-vous que les fiches ayent la tension correcte mais ne PAS l'ACTIVER!
3. Ajouter la quantité recommandée de glycol dans la cuve, (2 poches et ½ pour le mod.
LAMPO 3 et 1 poche et ½ pour le mod. LAMPO 2) en enlevant le couvercle antèrieur (celui
avec des poches).
4. Ajouter de l'eau jusqu'à ce que le liquide atteigne le niveau maximal indiqué par l'adhésif de
remplissage du reservoir (NIVEAU MAXIMAL DE REMPLISSAGE DE LA CUVE). Replacer le
couvercle.
5. Assurez-vous que le niveau de la cuve ne soit pas dépassée.
6. Attendez que l'appareil soit en fonction depuis 6-7 heures avant de commencer à l'utiliser, de
sorte qu'on permet au liquide de se refroidir à la température nécessaire pour travailler.
(Environ -30 ° C / -35 ° C). La période pourrait varier si le thermostat vient interrompu.
UTILISATION DU “LAMPO”
Le “Lampo”comprend un dispositif à temps.
Le TIMER NE TOURNE PAS NI ÉGALEMENT N' ÉTEINDRE PAS L'APPAREIL, MAIS IL
MONTRE JUSTE LE TEMPS PENDANT LE QUEL LA BOUTEILLE EST PLONG DANS LEÉE
LIQUIDE R .ÉFRIGÉRANT
ATTENTION: L'utilisation du “Lampo”sans activer le timer pourrait geler le contenu de la
bouteille ou casser la même.
1. Insérez la bouteille.
2. Pressez le bouton approprié pour sélectionner le temps. Le bouton s'allume et clignote. Le
cycle de fonctionnement de 4, 6, 8 minutes dépend de la touche sélectionnée.
3. Lorsque le cycle est terminé, un signal sonore retentit. Pressez le bouton RESET pour
éteindre l'éclairage et le signal sonore. Retirez la bouteille.
4. La bouteille a été refroidi à la température désirée à une vitesse de 2 ° C par minute. (Il faut
plus de temps si la température ambiante est supérieure à 18 ° C)
IMPORTANT
1. Ne laissez pas la bouteille dans le "Lampo" après le signal sonore car la bouteille pourrait
geler.
2. Ne pas tremper vos mains dans la cuve. (La température de fonctionnement est comprise
entre -30 ° C)
3. Si vous avez besoin de déplacer le "Lampo", vous devrez l'arrêter pendant 4-6 heures et
vider le contenu dans un récipient incassable, par exemple un récipient en plastique.
ATTENTION
CE PRODUIT NE DOIT PAS ETRE UTILIS PAR DES ENFANTS EN L'ABSENCE DEÉ
CONTRÔLE DES ADULTES. C'EST IMPORTANT D'ÉVITER LE CONTACT AVEC LE
GLYCOL LORS DE L'UTILISATION DE LA MACHINE PUISQUE ELLE ATTEINDRE ET
MAINTIENT UNE TEMPÉRATURE EXTRÊMEMENT BASSE.
RÈGLES GÉNÉRALES
1. VÉRIFIER RÉGULI LE LIQUIDEÈREMENT
Dans le cas il se forme de la givre autour de la serpentine, il sera nécessaire d'ajouter du glycol
pur. Vous pouvez aussi avoir besoin d'enlever une partie du liquide avant d'ajouter le glycol pur
(vous devriez avoir avancé ½ bouteille de glycol de la première installation).
2. VÉRIFIER RÉGULI LES POCHESÈREMENT
Vérifiez les poches régulièrement assure qu'il n'y ait pas de fuites. Si la poche est endommagé,
elle doit être remplacée immédiatement.

13
Italiano English Fran Deutschçais
Voir la section «installation poches» à la fin de ce manuel d'instruction.
3. NETTOYER L'EXTERIEUR DU RÉFRIGÉRATEUR AVEC UN CHIFFON MOUILLÉ - NE
PAS UTILISER DES NETTOYANTS ABRASIVS. Nettoyer soigneusement autour des timers et
des indicateurs, ne pas utiliser une surdose de liquide de nettoyage, car cela pourrait
endommager le système des timers.
4. NE PAS OBSTRUER LES ÉTAPES DE L' AIR DU RÉFRIGÉRATEUR POUR LUI
PERMETTRE DE CIRCULAIRE AUTOUR DU "LAMPO”
5. LES PERFORMANCES PEUVENT DIMINUER EN PRÉSENCE DE TEMPÉRATURES
TRÈS ÉLEVÉES.
6. NETTOYAGE DU RADIATEUR
Le condenseur est situé dans la partie gauche du "Lampo". Il doit être propre et débarrassé de
tous les débris qui pourraient réduire la circulation de l'air. Le nettoyage peut être fait avec une
brosse fine ou un aspirateur.
7. NETTOYAGE DES POCHES
Au cours de la période de stockage, les poches peuvent accumuler de la glace; il suffit de
l'enlever de temps en temps.
INSTALLATION DES POCHES - RETRAIT DU COLLIER.
COMMENT UTILISER L'OUVERTURE PRESSSIONÀ (Fig.1)
1. Le collier en plastique est assemblé à partir des deux côtés par deux vis, avec un'ouverture
d'encliquetage. Attrapez un de ces côtés et pousser l'anneau vers le haut d'une manière
décisive. Un déclic devrait être entendu et de cette façon une part devrait être libre.
2. Répétez la même chose de l'autre côté
3. N.B. s'il y a du glycol dans "Lampo", en enlevant la poche il pourrait goutter sur le
refroidisseur lui-même ou sur le sol. Le glycol est glissante et par la suite il doit être essuyé
immédiatement avec un chiffon sec.
RETRAIT DES POCHES
COMPOSANTS
--- poches
--- Ensemble de colliers en plastique (2 pièces). L' anneau le plus petit est encastré à 'extérieur
du plus grand, en gardant ainsi la poche ferme.
--- soutien de la poche.
INSTRUCTIONS:
1. Sur le dessus du collier il y a un petit retrait. Utilisez un objet plat dans cette cavité entre les
deux anneaux et séparer la poche de son collier.
2. Prendre la nouvelle poche et l'anneau plus petit; mettre l'anneau dans la poche et la fixer de
sorte que la poche soit repliée d'environ 10 cm. sur l'anneau.
3. Placez le petit collier et la poche sur le soutien et le faire glisser le long du grande collier.
Attention à ne pas déplacer la poche; presser fermement le petit anneau sur le grand avec la
paume de votre main jusqu'à ce que vous entendiez le clic. NB: les anneaux doivent
s'encastrer ensemble pour une utilisation correcte.
PROBLÈMES
1. PRÉSENCE DE GLYCOL DANS LES POCHES
La poche doit être remplacée. Voir la section dediée à l'élimination des poches.
2. LE GLYCOL GÈLE
Trop d'eau par rapport à cela recommandée est susceptible de geler le glycol. Il est conseillé
de réduire le mélange d'eau et de glycol et d'ajouter plus de glycol pur.

Italiano English Fran Deutschçais
14
3. “LAMPO”NE FONCTIONNE PAS
Assurez-vous que le réfrigérateur soit branché; vérifier qu'il y ait la courant; vérifier le fusible dans la
prise; vérifier que le thermostat soit réglé à -30 / -35 ° C
4. “LAMPO”NE REFROIDIT PAS CORRECTEMENT
ça pourrait être dû à une accumulation de poussière dans le condenseur ou de la régulation du
thermostat au-dessous de -30 / -35 ° C,
5. DEGIVRAGE
Dégivrer le réfrigérateur mensuel afin d'éliminer la glace qui se forme.
EFFETS DU GLYCOL SUR LA SANTÉ
1. Inhalation: l'inhalation de vapeurs ne cause pas généralement des effets négatifs sur la santé.
2. Contact avec la peau: peut causer des irritations
3. Contact avec les yeux: peut provoquer une légère irritation
4. Ingestion: Peut causer une irritation de l'estomac.
PREMIERS SOINS
1. Inhalation: Amener la personne en plein air. Si la respiration se passe avec difficulté, administrer de
l'oxygène. Fournir des soins médicaux immédiats.
2. Contact avec la peau: rincer immédiatement la partie affectée avec de l'eau tiède. Si l'irritation
persiste, appeler le personnel médical.
3. Contact avec les yeux: rincer immédiatement à l'eau courante pendant au moins 5 minutes en
maintenant les paupières ouvertes. Fournir des soins médicaux immédiats.
4. Ingestion: rincer abondamment à l'eau. Fournir des soins médicaux immédiats.
L'exposition aux vapeurs met en danger la santé à peine. Le glycol propylène est cliniquement utilisé
comme solvant pour l'administration des médicaments.
MESUSURES GENERALISEE DANS DES CIRCONSTANCES ACCIDENTELLES
Précautions:
1. Accès restreint à la zone au cours des opérations de nettoyage.
2. Aérer la zone en cas de fuite ou de déversement du liquide
3. Eteindre ou supprimer toutes les sources d'inflammation (chaleur, des étincelles, des flammes)
4. Porter un vêtement de protection approprié.
Procédures de nettoyage en cas le liquide se répande:
ne pas toucher le liquide répandu. Arrêter ou réduire le déversement si cela est nécessaire. Contenir le
liquide répandu avec du sable ou autre matériau absorbant qui ne fait pas de réactions avec le liquide
déversé. Placer le liquide dans un récipient approprié, scellé et marqué. Jeter de l'eau sur la zone dans
laquelle il a été versé le liquide.
ÉQUIPEMENT DE PROTECTION APPROPRIÉ
Protections respiratoires: parce que les propriétés du MPG ne sont pas toxiques, il n' y a pas des
guides disponibles pour l'utilisation normale du produit. En cas de forte concentrations de vapeur utiliser
des respirateurs chimiques. En cas d'incendie, utiliser un appareil respiratoire sous pression.
Protections yeux / visage: Porter des lunettes de protection et / ou de protection du visage s'il y a la
possibilité d'éclaboussures.
VIDER LE RÉSERVOIR (Fig.3)
Pour vider le liquide de refroidissement du réservoir, retirez le couvercle arrière placé sur les poches et
insérez la pompe fournie jusqu'à ce que vous atteigniez le fond du réservoir. Placez le tuyau de vidange
dans un réservoir et insérez le bouchon. Attendez que le liquide soit complètement vide.

15
Italiano English Fran Deutschçais
MISE EN GARDE
LA MINUTERIE NE MET PAS L'APPAREIL SOUS / HORS TENSION - LA MINUTERIE
INDIQUE SIMPLEMENT LE TEMPS AUQUEL LA BOUTEILLE EST IMMERGÉE DANS LE
LIQUIDE RÉFRIGÉRANT.
1. Insérez la bouteille.
2. Appuyez sur le bouton approprié pour sélectionner l'heure nécessaire et appuyez sur
START.
3. Lorsque le cycle est terminé, un bip retentit. Appuyez sur le bouton START / STOP pour
l'arrêter et appuyez simultanément sur MIN et SET pour réinitialiser. Retirez la bouteille.
4. La bouteille sera refroidie à une vitesse d'environ 1,5 °C / minute.
1 - Touche P : Utilisée pour l’établissement du Set point et pour la programmation des
paramètres de fonctionnement
2 - Touche DOWN : Utilisée pour le décroissement des valeurs à établir et pour la
sélection des paramètres. Il peut en outre être programmé par le par. "Fb" pour
exécuter la fonction d'ON/OFF (Stand-by.)
3 - Touche UP/DEFROST : Utilisée pour l’accroissement des valeurs à établir, pour la
sélection des paramètres et pour activer les dégivrages manuels.
4 - Led OUT : Il indique l’état de la sortie du compresseur (ou du dispositif de contrôle
de la température) on (allumé), off (éteint) ou interdit (clignotant).
5 - Led AL Il indique un état d'alarme en cours.
6 - Led DEF : Il indique l’état du dégivrage en cours.
7 - Led SET : Il indique l’entrée dans la modalité de programmation et le niveau
de programmation des paramètres. En outre, il sert pour indiquer l’état de Stand-by
PROGRAMMATION DES PARAMETRES
Pour avoir accès aux paramètres de fonctionnement de l’instrument, il faut
appuyer sur la touche P et la laisser appuyer pour 5 secondes environ, après ce temps le
led SET s’allumera, le display visualisera le code qui identifie le premier paramètre et
avec les touches UP et DOWN, on pourra sélectionner le paramètre que l’on veut
éditer. Une fois que l’on a sélectionné le paramètre désiré, il faut appuyer sur la touche P, le
display visualisera alternativement le code du paramètre et son établissement qui
pourra être modifié avec les touches UP ou DOWN. Après avoir établi la valeur désirée, il
faut appuyer de nouveau sur la touche P: la nouvelle valeur sera mémorisée et le display
montrera de nouveau seulement le sigle du paramètre sélectionné. En agissant sur les touches
UP ou DOWN, on peut sélectionner un autre paramètre et le modifier selon la description.
Pour sortir du mode de programmation, il ne faut agir sur aucune touche pour 20
secondes environ, ou bien laisser appuyer la touche UP ou DOWN jusqu’à sortir
de la modalité de programmation.
- - ATTENTION: La machine refroidit à une moyenne de 2 ° C par minute, certains vins
peuvent se refroidir plus rapidement que d'autres en raison de l'épaisseur de la bouteille en
verre. Le champagne prend plus de temps pour se refroidir parce que généralement le verre
de la bouteille est plus épais comparé au bouteilles normales de vin.

Italiano English Fran Deutschçais
16
WICHTIG (BEI EMPFANG) (Fig.2)
Warten Sie eine Stunde, bevor Sie den Schalter des Kühlschranks anschalten.
1. Stellen sie die Lampo in die gewünschte Position. Vergewißern Sie sicher, dass 15 cm Platz an
beiden Seiten sind um eine gute Belüftung zu haben.
2. Stellen Sie sicher, dass die Stecker die richtige Spannung haben, aber NOCH NICHT ANSTECKEN!
3. Fügen Sie die empfohlene Menge von Glykol in der Wanne, (2 Kanister und ½ für den Lampo 3 und
01 Kanister und ½ für den Lampo 2) bei Entfernung von vordere Abdeckung (die mit den Taschen).
4. Fügen Sie Wasser ein , bis die Flüssigkeit den Klebstoff von Maximale Füllung erreicht .
Stellen Sie den Deckel wieder darauf.
5. Vergewießern Sie sicher, dass der Füllstand der Wanne nicht überschritten wird.
6. Warten Sie, 6-7 Stunden bevor Sie es benutzen, so dass die Flüssigkeit auf die Temperatur gekühlt
wird, die man benötigt, um zu arbeiten. (Ungefähr -30 °C -35 °C). Die Dauer kann variieren, wenn der
Thermostat unterbrochen wird.
VERWENDUNG VON LAMPO
Die Lampo enthält einen Timer.
DER TIMER SCHALTET NICHT EIN AUS DAS GERAET, SONDER ZEIGT, DIE ZEIT, WIELANGE DIE
FLASCHE IN DER GEKUEHLTEN FLUESSIGKEIT DRIN IST.
ACHTUNG: bei Verwendung von Lampo, ohne den Timer aktivieren, kann entweder der Inhalt der
Flasche einfrieren oder die Flasche brechen.
1. Stellen Sie die Flasche ein.
2. Drücken Sie die entsprechende Taste, um die Zeit zu wählen. Die Taste leuchtet und blinkt. Der
Betriebszyklus von 4, 6, 8 Minuten, ist abhängig von der gewählten Taste.
3. Wenn der Zyklus abgeschlossen ist, ertönt ein Piepton. Drücken Sie die RESET-Taste, um das Licht
und den Piepton auszuschalten. Entfernen Sie die Flasche.
4. Die Flasche wurde zu einer Geschwindigkeit von 2 ° C pro Minute auf die gewünschte Temperatur
abgekühlt. (Es dauert länger, wenn die Umgebungstemperatur 18 °C übersteigt).
WICHTIG
1. Laßen Sie nie die Flasche nach dem Piepton in der Lampo drin, denn die Flasche kann einfrieren.
2. Setzen Sie NIE Ihre Hände in der Wanne drin. (Die Arbeitstemperatur liegt zwischen -30 ° C)
3. Wenn Sie die Lampo bewegen müssen und es woanders stellen wollen, müssen Sie es für 4-6
Stunden ausschalten und den Inhalt in einem unzerbrechlichen Behälter eingeben, zum Beispiel
Plastikbehälter.
VORSICHT
DIESES PRODUKT DARF NICHT VON KINDERN OHNE KONTROLLE VON ERWACHSENE
UTILISIERT WERDEN. VERMEIDEN SIE KONTAKT MIT GLYKOL WAEHREND DER
VERWENDUNG DES GERAETES DENN ES ERREICHT UND HÄLT EINE EXTREM NIEDRIGE
TEMPERATUR.
ALLGEMEINE REGELN
1. ÜBERPRÜFEN SIE REGELMÄßIG DIE FLUESSIGKEIT
Wenn es einfriert bei der Serpentine , wird es notwendig Glykol hinzuzufügen. Bevor der Zugabe von
reinem Glykol wird es nötig sein ein Teil der Flüssigkeit zu entfernen (es müßte ein ½ Glykol Kanister
von der ersten In Betriebnahme geblieben sein.
2. ÜBERPRÜFEN SIE REGELMÄßIG DIE TASCHEN
Eine gute Überprüfung der Taschen sorgt dafür, regelmäßig, dass kein Flüßigkeitverlust vorhanden ist.
Wenn eine Tasche beschädigt ist, muss diese sofort ersetzt werden.
Siehe Abschnitt "Installation-Taschen" am Ende dieser Anleitung.
3. REINIGEN SIE DIE AUßENSEITE DES KÜHLERS MIT EINEM FEUCHTEN TUCH- UTILISIEREN
SIE KEINE ABRASIVE PUTZMITTEL . Reinigen Sie gründlich um den Timer und Lichtschalter, tätigen
Sie keine Überdosierung von Reinigungsflüssigkeit, da dies das System der Timer beschädigen
könnte.
4. BLOCKIEREN SIE BITTE NICHT DIE LUFTSCHLITZE, DAMIT DIE LUFT KORREKT RUNDUM DIE
LAMPO ZYRKULIEREN KANN.

17
Italiano English Fran Deutschçais
5. DIE LEISTUNG KANN DURCH SEHR HOHEN TEMPERATUREN VERRINGERN.
6. REINIGUNG DES KONDENSATORS
Der Kondensator befindet sich auf der linken Seite des Gerätes. Dieser muß von jeglichem
Schmutz gereinigt werden, dass die Luftzirkulation verringern könnte. Die Reinigung kann mit
einem dünnen Pinsel oder einem Staubsauger erfolgen.
7. REINIGUNG DER TASCHEN
Wenn man das Gerät nicht utilisiert, könnten die Taschen Eis ansammeln; entfernen Sie es
einfach von Zeit zu Zeit.
INSTALLATION VON TASCHEN
ENTFERNUNG VOM RING.
AUSLOESEOEFFNUNG (Fig.1)
1. Der Kunststoffring wird von beiden Seiten durch zwei Schrauben montiert, mit
Schnappöffnung. Fassen Sie eine dieser Seiten und drücken Sie den Ring nach oben in
entscheidender Weise. Man sollte ein Klick hören und eine Seite sollte frei sein.
2. Wiederholen Sie die gleiche Sache auf der anderen Seite
3. PS Falls bei Entfernung von der Tasche das Glykol in Lampo drin ist, kann es auf dem
Kühler selbst oder auf dem Boden leicht tropfen. Das Glykol ist rutschig und muss sofort mit
einem trockenen Tuch getrocknet werden.
ENTFERNUNG DER TASCHE
BESTANDTEILE
--- Taschen
--- Satz von Kunststoffringe (2 Stück). Der kleinere Ring ist 'außerhalb des größeren Ringes
eingespannt, somit ist die Tasche stabil.
--- Eisen Unterstützung der Tasche.
HINWEISE:
1. Auf der Oberseite des Rings befindet sich eine kleine Vertiefung. Verwenden Sie einen
flachen Gegenstand in die Vertiefung zwischen den beiden Ringen und trennen Sie den Ring
von der Tasche.
2. Nehmen Sie die neue Tasche und den kleineren Ring; stecken Sie den Ring in der Tasche
und befestigen Sie es so, dass die Tasche ca. 10 cm gefaltet wird. auf dem Ring.
3. Legen Sie den kleinen Ring und die Tasche auf das Eisenstück und schieben Sie sie es
entlang des größeren Ring.
Bewegen Sie die Tasche nicht; drücken Sie fest der kleine Ring auf dem großen, utilisieren Sie
die Handfläche, bis Sie das Klicken hören. PS: die Ringe müßen für eine ordnungsgemäße
Verwendung zusammenklemmen.
PROBLEME
ANWESENHEIT VON GLYKOL IN DEN TASCHEN
Die Tasche muss ersetzt werden. Siehe den Abschnitt gewidmet zur Entfernung der Taschen.
2. DAS GLYKOL GEFRIERT
Zu viel Wasser als empfohlen riskiert das Glykol einzufrieren. Es ist empfohlen, die Mischung
aus Wasser und Glykol zu reduzieren und mehr reines Glykol einzufügen .
3. LAMPO FUNKTIONIERT NICHT
Vergewißern Sie sich , dass der Kühlschrank am Stecker angeschlossen ist; überprüfen Sie die
Sicherung in der Steckdose; prüfen Sie ob der Thermostat auf -30 / -35 ° C eingestellt ist.
4. LAMPO KUEHLT NICHT KORREKT.
Es könnte EINE Ansammlung von Staub in den Kondensator oder aufgrund einer
Programmierung des Thermostats niedriger als - 30 / -35 ° C
5. ABTAUUNG
Tauen Sie den Kühlschrank monatlich ab um damit das Eis zu entfernen, das sich eventuel
bildet.

Italiano English Fran Deutschçais
18
GESUNDHEITLICHE AUSWIRKUNGEN VON GLYKOL
1. Inhalation: Einatmen von Dämpfen in der Regel verursachen keine negativen Auswirkungen auf die
Gesundheit.
2. Hautkontakt: kann zu Reizungen führen
3. Augenkontakt: Kann leichte Reizungen verursachen
4. Verschlucken: Kann eine Reizung des Magens verursachen.
ERSTE HILFE
1. Inhalation: begleiten Sie die Person, an die frische Luft. Wenn es Atemschwierigkeiten hat ,
verabreichen Sie Sauerstoff .Geben Sie sofortige medizinische Versorgung.
2. Hautkontakt: sofort den betroffenen Hautteil mit lauwarmem Wasser abspülen. Bei andauernder
Reizung, kontaktieren Sie den Artz.
3. Augenkontakt: sofort gründlich unter Wasser für mindestens 5 Minuten und die Augenlider offen
halten. Rufen Sie sofort den Arzt an.
4. Verschlucken: gründlich mit Wasser abspülen. Rufen Sie sofort den Arzt an.
Wiederholte Exposition gefährdet kaum die Gesundheit. Propylenglykol wird klinisch als ein
Lösungsmittel für die Verabreichung von Medikamenten utilisiert.
VERBREITETE MASSNAHMEN FUER UNVORGESEHENEN UMSTÄNDEN
Vorsichtsmaßnahmen:
1. während der Reinigungsarbeiten eingeschränkter Zugriff auf der Arbeitsfläche.
2. Arbeitsfläche belüften im Falle einer Leckage oder Verschüttung der Flüssigkeit
3. Löschen oder entfernen Sie alle Zündquellen (Hitze, Funken, Flammen)
4. Ziehen Sie geeignete Schutzkleidung an.
Verfahren in Fall von Verschüttung von Flüßigkeit:
berühren Sie nicht die verschüttete Flüssigkeit. Stoppen oder reduzieren wenn es notwendig ist, die
Flüßigkeit . Enthalten Sie die verschüttete Flüssigkeit mit Sand oder saugfähigem Material, das nicht die
Reaktion von verschütteter Flüssigkeit zugewandt ist. Stellen Sie die Flüssigkeit in einen geeigneten,
verschlossen und gekennzeichneten Behälter rein. Gießen Sie Wasser auf den Bereich wo die
Flüßigkeit verschüttet wurde.
GEEIGNETE SCHUTZAUSRÜSTUNG
Atemschutz: dadurch dass die MPG Eigenschaften nicht toxisch sind, gibt es auch nicht eine
Gebrauchsanweisung zur Verfügung für den normalen Gebrauch des Produktes. Bei hohen Dampf
Konzentrationen verwenden Sie chemische Beatmungsgeräte. Im Brandfall utilisieren Sie Druckfeste
Atemausrüstungen.
Augen / Gesicht: tragen Sie eine Schutzbrille und / oder Gesichtsschutz, im Falle von Waßerstrahlen.
TANK LEEREN (Abb. 3)
Um das Kühlmittel aus dem Tank zu entleeren, entfernen Sie die hintere Abdeckung über den Taschen
und setzen Sie die mitgelieferte Pumpe ein, bis Sie den Boden des Tanks erreichen. Legen Sie den
Ablaufschlauch in einen Tank und stecken Sie den Stopfen ein. Warten Sie, bis die Flüssigkeit
vollständig leer ist.

19
Italiano English Fran Deutschçais
VORSICHT
Der Timer schaltet das Gerät nicht ein / aus - der Timer zeigt einfach die Zeit an, in der die
Flasche in die Kältemittelflüssigkeit getaucht ist.
1. Setzen Sie die Flasche ein.
2. Drücken Sie die entsprechende Taste, um die gewünschte Zeit auszuwählen, und drücken
Sie START.
3. Wenn der Zyklus beendet ist, ertönt ein Piepton. Drücken Sie die START / STOP-Taste, um
sie zu stoppen, und drücken Sie gleichzeitig MIN und SET, um sie zurückzusetzen. Entfernen
Sie die Flasche.
4. Die Flasche wird mit einer Geschwindigkeit von ca. 1,5 °C / Minute abgekühlt.
1 - P / SET-Taste: Wird für die Sollwerteinstellung und für die Programmierung der
Betriebsparameter utilisiert
2 - Taste DOWN: Wird für die Abnahme Werte eingestellt und für die Auswahl der Parameter.
Es kann auch über den Parameter "Fb", programmiert werden um die ON / OFF-Funktion
(Standby) durchführen.
3 - Taste UP / DEFROST: Verwendet, um die Werte zu erhöhen, für die Auswahl der
Parameter und für die Aktivierung von manueller Abtauung.
4 - Led OUT: Gibt den Kompressor Ausgangszustand (oder die
Temperaturüberwachungseinrichtung) auf (on), aus (off) oder gesperrt (blinkend)
5 - Led AL: Gibt einen Alarm im Gange
6 - Led DEF: Zeigt die Abtauung im Gange.
7 - Led SET: Zeigt den Eingang im Programmiermodus und die Programmierebene der
Parameter. Es dient auch den Stand-by Status anzuzeigen.
PARAMETERPROGRAMMIERUNG
Für den Zugriff auf die Funktionsparameter des Gerätes, drücken Sie die Taste P, und halten
Sie für etwa 5 Sekunden lang, wonach die SET LED leuchtet, das Display zeigt den Code von
dem ersten Parameter und mit den Tasten UP und DOWN können Sie den Parameter
auswählen . Sobald der gewünschte Parameter ausgewählt wird, drücken Sie die Taste P, das
Display visualisiert abwechselnd der Parametercode und seine Einstellung, die mit den Tasten
UP oder DOWN geändert werden kann. Sobald der gewünschte Wert eingestellt wird, drücken
Sie wieder die Taste P : der neue Wert wird gespeichert, und auf dem Display erscheint nur
das Kennzeichen des gewählten Parameters. Durch die Tasten UP und DOWN, ist es möglich,
einen anderen Parameter auswählen und ändern, wie beschrieben. Um den
Programmiermodus zu verlassen, drücken Sie keine Taste für etwa 20 Sekunden, oder die UP
oder DOWN Taste halten bis zur Ausgabe aus dem Programmiermodus.
- - ACHTUNG: Die Maschine kühlt bei einem Durchschnitt von 2 ° C pro Minute, einige Weine
können schneller als andere aufgrund der Dicke der Glasflasche kühlen.
Der Champagner gebraucht mehr Zeit zum abkühlen, weil in generell das Glas der Flasche
häufiger dicker ist als die normalen Wein Flaschen .

Italiano English Fran Deutschçais
20
Table of contents
Languages:
Other Tecfrigo Kitchen Appliance manuals