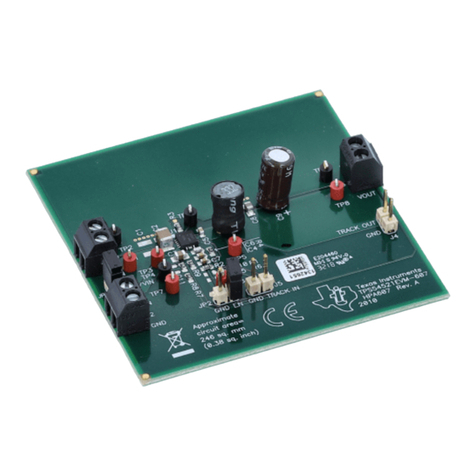
Technica CM 100 High User manual

Manual-Version: 0.991
Hardware: v1.1 up to v3.1
USER MANUAL
January 2020
IVN2Eth
Capture Module:
CM 100 High
Firmware: v009.005.060

CM 100 High User Manual
2
CONTENT
1GENERAL INFORMATION........................................................................................... 5
1.1 Functionality and Features of the CM_100_High............................................... 5
1.2 Warranty and Safety Information ........................................................................ 7
1.3 Declaration of Conformity.................................................................................... 8
1.4 Scope of Delivery .................................................................................................. 8
2HARDWARE INTERFACES .......................................................................................... 9
2.1 Connectors............................................................................................................ 9
2.1.1 Power Connector - Black MQS Connector Frontside (10 pins one row) .10
2.1.2 RJ45 Ethernet connectors ..........................................................................11
2.1.3 White MQS Connector Backside (12 pins, 2 rows) ...................................11
2.1.4 Micro HDMI connector ................................................................................ 13
2.2 Other Interfaces ..................................................................................................13
2.2.1 Rotary-Switch ...............................................................................................13
2.2.1.1 Rotary-Switch in status 0 to D ............................................................. 13
2.2.1.2 Rotary-Switch in status E .....................................................................14
2.2.1.3 Rotary-Switch in status F .....................................................................14
2.2.2 Status LEDs..................................................................................................14
3ACCESS BY WEBSERVER ......................................................................................... 16
4CONFIGURATION OF THE CM_100_High................................................................ 17
4.1 Save Changes .....................................................................................................17
4.2 Home Screen....................................................................................................... 17
4.3 System Information tab...................................................................................... 18
4.3.1 General Information..................................................................................... 18
4.3.2 IP addresses ................................................................................................ 20
4.4 Control Panel tab ................................................................................................ 21
4.4.1 Restart target ...............................................................................................22
4.4.2 Configuration ...............................................................................................22
4.4.3 Prevent sleep ...............................................................................................24
4.4.3.1 Staying alive conditions .......................................................................24
4.4.3.2 Wake up conditions ..............................................................................24
4.4.4 WakeUp Lines and Actuator ....................................................................... 25

CM 100 High User Manual
3
4.4.5 WUP time to LOW ........................................................................................ 26
4.4.6 Sleep Timeout .............................................................................................. 26
4.4.7 Date and Time.............................................................................................. 27
4.5 Switch Status tab................................................................................................ 28
4.5.1 Spy multiplexer ............................................................................................29
4.5.1.1 Use PLP Header.................................................................................... 29
4.5.1.2 Enable Traffic Shaping and Traffic Bandwidth .................................. 29
4.5.1.3 Keep original VLANs in Header ...........................................................30
4.5.1.4 Use OuterVlans .....................................................................................30
4.5.1.5 Destination MAC...................................................................................30
4.5.1.6 Enable packetization, Timeout for packetization............................... 30
4.5.1.7 Logging Ports for packetization ..........................................................30
4.5.1.8 Delay for Logging.................................................................................. 31
4.5.1.9 Filters Table........................................................................................... 32
4.5.1.10 Edit Basic Filter .................................................................................... 32
4.5.1.11 Edit Advance Filter ............................................................................... 34
4.5.2 Host Port ......................................................................................................37
4.5.3 GB Ports........................................................................................................38
4.5.4 100BASE-T1 Ports ....................................................................................... 40
4.6 Synchronisation of several devices by PTP (802.1AS) ................................... 42
4.6.1 Transport of time-synchronization information........................................ 42
4.6.2 Propagation delay measurement ............................................................... 43
4.6.3 How to setup a synchronized network with CaptureModules .................44
4.7 Advance Filter ..................................................................................................... 44
4.7.1 General information..................................................................................... 44
4.7.2 Example for dropping a frame with outerVLAN (0x123) and IP-destination
address 160.48.199.125 on one port ......................................................................44
4.8 Inject ....................................................................................................................45
5APPLICATION AND FIRMWARE UPDATE ...............................................................47
5.1 Preconditions and important information ........................................................47
5.2 Update via GB-A Port.......................................................................................... 48
5.3 Update via 100BASE-T1 Port on the frontside (power connector)................. 49
6ADDITIONAL INFORMATION....................................................................................50
7LIST OF FIGURES....................................................................................................... 51

CM 100 High User Manual
5
1GENERAL INFORMATION
1.1 Functionality and Features of the CM_100_High
Figure 1-1: Chapture_Module_100_High
The Technica Engineering Capture_Module_100_High from Technica Engineering
GmbH is used to capture the traffic from 1 x 1000BASE-T1 line (between two DUTs)
and 2 x 100BASE-T1 lines, correspondingly. The traffic is captured without causing
interference on the network and delivered with a 40 ns resolution hardware time stamp,
thus making the analysis of AVB/TSN traffic possible.
Several devices can be used on the same setup, whenever more T1 ports are needed,
and when other IVN technologies are present, the in-built-synchronization using
802.1AS allows for simultaneous use with the other “IVN2Eth Capture Modules”.
Figure 1-2: Capture_Module_100_High

CM 100 High User Manual
6
Features:
6 Link Line 100BASE-T1 (12 Ports)
Configure easily via Webserver
Network Time Synchronization (802.1AS) –allows to synchronize multiple Eth
Combos or any other “Capture Module”
Source Timestamping with 40 ns resolution
Rotary Switch for manual configuration of the device’s IP-Addresses
(Gbit –RJ-45)
Wakeup capable
Robust stainless-steel case
General Information:
Power requirement:
8 to 16 Volt DC (nominal 12 Volt DC)
Power consumption:
5,7 to 7,8 Watt
Size:
167 x 143 x 32 mm
Weight:
1,0 kg
International Protection:
IP 2 0
Operating temperature:
-30°Celsius to 50°Celsius (prototype)
LINKS:
The User can download the latest firmware and documentation for the CM_100_High
here:
https://technica-engineering.de/en/produkt/capture-module-100-high/

CM 100 High User Manual
7
1.2 Warranty and Safety Information
Before operating the device, read this manual thoroughly and retain
it for your reference.
The latest documentation for the CM_Eth_Combo can be
downloaded here:
https://technica-engineering.de/produkt/capture-module-100-high/
Use the device only as described in this manual.
Use only in dry conditions.
Do not apply power to a damaged device.
Do not open the device. Otherwise warranty will be lost.
This device is designed for engineering purpose only.
Special care has to be taken for operation.
Do not use this device in a series production car.
As this device is likely to be used under rough conditions, warranty is
limited to 1 year.
Manufacturer liability for damage caused by using the device is
excluded.
Caution: The device can get hot.
Do not cover the device due to fire danger.
Do not place the device near to highly flammable materials due to fire
danger.
If you wish to discard a CM_CAN_Combo from Technica Engineering
GmbH, please contact your dealer or supplier for further information.
This symbol is only valid in the European Union. If you wish to discard
this product, please contact your local authorities or dealer and ask
for the correct method of disposal.

CM 100 High User Manual
8
1.3 Declaration of Conformity
Figure 1-3: Copy of Declaration of conformity
1.4 Scope of Delivery
The delivery includes:
1x CM_100_High
Cable-set can be ordered separately.
1x Cable-set
o1m Ethernet Cable,
oconnectors,
ocrimp contacts,
ocables,
obanana plugs

CM 100 High User Manual
9
2HARDWARE INTERFACES
2.1 Connectors
On the label on top of the device you can see an overview about all HW-Interfaces of
the CM_100_High:
Figure 2-1: Label of CM_100_High with pinning information

CM 100 High User Manual
10
2.1.1 Power Connector - Black MQS Connector Frontside (10
pins one row)
Figure 2-2: Power Connector
Power supply for the device is supplied by Pin 1 (12Volt) and Pin 2 (Ground)
Requirements for the device itself: 12 Volt DC up to 1 Ampere (typical 600mA).
Warning: If you apply a voltage higher than 16 Volt, the device will be damaged!
In this connector there are also two wakeup lines:
As a digital input, each wake-up line consumes approx. 0.7 mA.
As digital output, each wake-up line supplies max. approx. 60 mA.
The Tyco Electronics (TE) Micro Quad Lock System (MQS) is used.
Name
Picture
Part Number
Tyco, MQS Buchsengehäuse 10 Pol Black
1-929423-2
Tyco crimp contact
928999-1
Table 2-1: Parts of black MQS connector
Note: You can use the official Tyco tool for these crimp contacts. A cheap variant is
the crimp tool for “PSK” contacts.

CM 100 High User Manual
11
Pin
Function
Pin
Function
1
Battery +12 Volt Input
6
n.c.
2
Power Ground
7
n.c.
3
WakeUP 1
8
n.c.
4
WakeUP 2
9
100 BASE-T1 Plus
5
n.c.
10
100 BASE-T1 Minus
Table 2-2: Pinning of black MQS connector
By the 100BASE-T1 port in this connector, you get access to the webserver by the
default IP-address (192.168.0.49 if not changed). To configure the default IP-address,
please see CHAPTER 4.3.2.
2.1.2 RJ45 Ethernet connectors
Figure 2-3: RJ45 Connectors
There are three RJ45 Standard Ethernet connectors for Gigabit Ethernet on the front
side (GB-A to GB-C). Here you can log and configure the device. And these ports are
for time synchronization between different CaptureModules from Technica. For details
please see CHAPTER 4.5.3.
2.1.3 White MQS Connector Backside (12 pins, 2 rows)
Figure 2-4: 3x White MQS Connectors backside
The user has to connect the (P) pin to the (P) pin of the periphery device.
The user has to connect the (M) pin to the (M) pin of the periphery device.
Note: If these two pins are swapped, the link LED may be lit on the slave side, but no
data transmission will be possible.

CM 100 High User Manual
12
Name
Picture
Part Number
Tyco, MQS Abdeckkappe 2x6 Pol,
White
2-967415-1
Tyco, MQS Buchsengehäuse 2x6 Pol,
Black
965776-1
Tyco crimp contact
928999-1
Table 2-3: Parts of Tyco MQS Connector
Note: You can use the official Tyco tool for these crimp contacts. A cheap variant is
the crimp tool for “PSK” contacts.
Pin
Function
Pin
Function
1
100 BASE-T1 2B Minus
7
100 BASE-T1 2A Plus
2
100 BASE-T1 2B Plus
8
100 BASE-T1 2A Minus
3
n.c.
9
n.c.
4
n.c.
10
n.c.
5
100 BASE-T1 1A Minus
11
100 BASE-T1 1B Plus
6
100 BASE-T1 1A Plus
12
100 BASE-T1 1B Minus
Table 2-4: Pinning of Tyco MQS Connector left
Pin
Function
Pin
Function
1
100 BASE-T1 4B Minus
7
100 BASE-T1 4A Plus
2
100 BASE-T1 4B Plus
8
100 BASE-T1 4A Minus
3
n.c.
9
n.c.
4
n.c.
10
n.c.
5
100 BASE-T1 3A Minus
11
100 BASE-T1 3B Plus
6
100 BASE-T1 3A Plus
12
100 BASE-T1 3B Minus
Table 2-5: Pinning of Tyco MQS Connector middle

CM 100 High User Manual
13
Pin
Function
Pin
Function
1
100 BASE-T1 6B Minus
7
100 BASE-T1 6A Plus
2
100 BASE-T1 6B Plus
8
100 BASE-T1 6A Minus
3
n.c.
9
n.c.
4
n.c.
10
n.c.
5
100 BASE-T1 5A Minus
11
100 BASE-T1 5B Plus
6
100 BASE-T1 5A Plus
12
100 BASE-T1 5B Minus
Table 2-6: Pinning of Tyco MQS Connector right
2.1.4 Micro HDMI connector
Figure 2-5: Debug Connector
This is an interface for programming and debugging (only for development.)
2.2 Other Interfaces
2.2.1 Rotary-Switch
The following IPs will be set for our device:
Out of the box GB A Port is set as the configuration port.
Rotary switch on 0 -> IP: 10.104.3.96
Rotary switch on 1 -> IP: 10.104.3.97
...
Rotary switch on E -> IP: 10.104.3.110
Rotary switch on F -> IP: 10.104.3.111 / Reset
2.2.1.1 Rotary-Switch in status 0 to D
The IP-addresses are not configurable by software or by any user interface and can
only be changed by using the rotary switch. It is overtaken after 500ms by a software
reset. The current IP-address is shown on the System Information tab. Access to the
CM_100_High is given through the defined configuration port or 100BASE-T1 Port on
the Frontside (Host).

CM 100 High User Manual
14
The set IP-address is part of the PLP header if PLP is activated.
2.2.1.2 Rotary-Switch in status E
The IP address 10.104.3.110 is the default IP-address. In this Rotary-Switch status the
IP-address is configurable on the System Information tab. The configured IP-address
is valid even there is a power reset, or the Rotary-Switch has been changed and is
switched back to “E”. The valid IP-address in this Rotary-Switch position is part of the
PLP header if PLP is activated.
2.2.1.3 Rotary-Switch in status F
The IP address 10.104.3.111 is the default IP-address. It is not configurable. The IP-
address is not overtaken after changing the rotary switch from any position to position
“F”. There will be no software reset. A power reset is needed. But if there is a power
reset in this Rotary-Switch status, the CM_100_High will be reset to out of the box
status. Complete configuration will be lost and set to default.
To get access again by another IP-address, once a power reset is needed in another
Rotary Switch position than “F”.
2.2.2 Status LEDs
The CM_100_High has several status LEDs at the front side of the case.
Figure 2-6: LED allotment on front of the device
Left side (1):
LED 1:
The “100BT1” shows the linkup on the 100BASE-T1-Port to the microcontroller
LED 2:
The “FPGA” LED toggles (approx. 2 sec) during normal operation. If it is not
blinking or blinking faster, FPGA is damaged and must be repaired
LED 3:
The “Host” LED can toggle at two different speeds:
oSlow toggle (approx. 1 sec) during normal operation
oFast toggle (approx. 0.2 sec) if device is in Bootloader mode

CM 100 High User Manual
15
In the middle (2):
These LEDs show the status of the connected devices to each 100BASE-T1-Port (1A
to 6B)
LED “on” (static) indicates LinkUp
LED blinking means communication on 100BASE-T1 Port

CM 100 High User Manual
16
3ACCESS BY WEBSERVER
You can get access to the Webserver by connecting the device via the GB A Port (RJ-
45) to your PC. Here the IP-address of the device is dependent on the status of the
rotary switch (see CHAPTER 2.2.1)
Or you get access to the Webserver by the 100BASE-T1 Port to the Microcontroller and
the default IP address 192.168.0.49. This port is configured as 100BASE-T1-slave as
default.
1. Please go to the network adapter settings and adjust the IP in the same range of
your CM_100_High, dependent on which port you are connected to.
Note: Please make sure that the Internet Protocol Version 6 (TCP/IPv6) option is
disabled.
2. Enter the IP Address in your standard web browser. For details see CHAPTER 2.2.1
and CHAPTER 4.3.
Note: Firefox is the recommended browser.
3. The following website should appear.
Figure 3-1: Home Screen CM_100_High

CM 100 High User Manual
17
4CONFIGURATION OF THE CM_100_High
4.1 Save Changes
If you changed anything in the configuration the following hint appears:
Figure 4-1: Save Configuration
You don’t have to save every time when this hint appears. You can make all wished
changes and save the configuration at the end. Please check the box “restart after
saving” and then press the “Save configuration” button.
After the restart, all changes are applied.
4.2 Home Screen
Figure 4-2: CM_100_High Home Screen
With the first access to the website you will get displayed the home screen. Please
select one of the tabs for further configuration.

CM 100 High User Manual
18
4.3 System Information tab
4.3.1 General Information
Figure 4-3: System Information tab
On the “System Information“ tab some status information about the device is
displayed. You can check the version number of the application firmware and the
bootloader. The version number registers of the switch and PHY chips are displayed
for information. If these registers are displayed as “FFFFFFFF”, this port/PHY is defect.
Rotary Switch: The configuration of the Rotary switch is displayed here.
Hardware version: The version of your Hardware is displayed here.
MAX10 Version: The Current Version of the MAX10 Chip is displayed here.

CM 100 High User Manual
19
Application Software version: The current firmware version of your CM_100_High is
displayed here.
Bootloader version: The current bootloader version of your CM_100_High is displayed
here.
Controller IP address: The current configured IP-address of the 100BASE-T1 port on
the Frontside is displayed here.
HW-IP address: The current IP-address of the configuration port (RJ-45 Port) is
displayed here.
Serial number: The Serial number of the CM_100_High is displayed here.

CM 100 High User Manual
20
4.3.2 IP addresses
The IP address can be changed in the field as shown in FIGURE 4-4:
Figure 4-4: IP-addresses
There are two possibilities to get access to the device:
•Access by 100BASE-T1 port of the power connector at the frontside
•Access by the GB-Port which is activated as configuration port. By default, it is
GB-A
Controller IP address: This is the IP address you get access to the Webserver by the
100BASE-T1 port. This IP-address can be changed here. Please type the new IP-
address in the field. After leaving the focus of this field or pressing “Enter” you can
save the changes.
Table of contents
Other Technica Control Unit manuals
Popular Control Unit manuals by other brands
Sensitron
Sensitron STG/OUT16-S2 instruction manual
Monacor
Monacor ATT-1950 instructions

Camco
Camco VARI-PAK Installation and operating instructions

CML Microcircuits
CML Microcircuits VDES 1000 quick start guide
ICP DAS USA
ICP DAS USA EIP-2060 quick start guide

Galvin Engineering
Galvin Engineering galvinspecialised Flowmatic TZ-FLOWTAPC24 quick start guide

